Third party

This chapter provides information on third-party integrations.

Google Calendar Integration

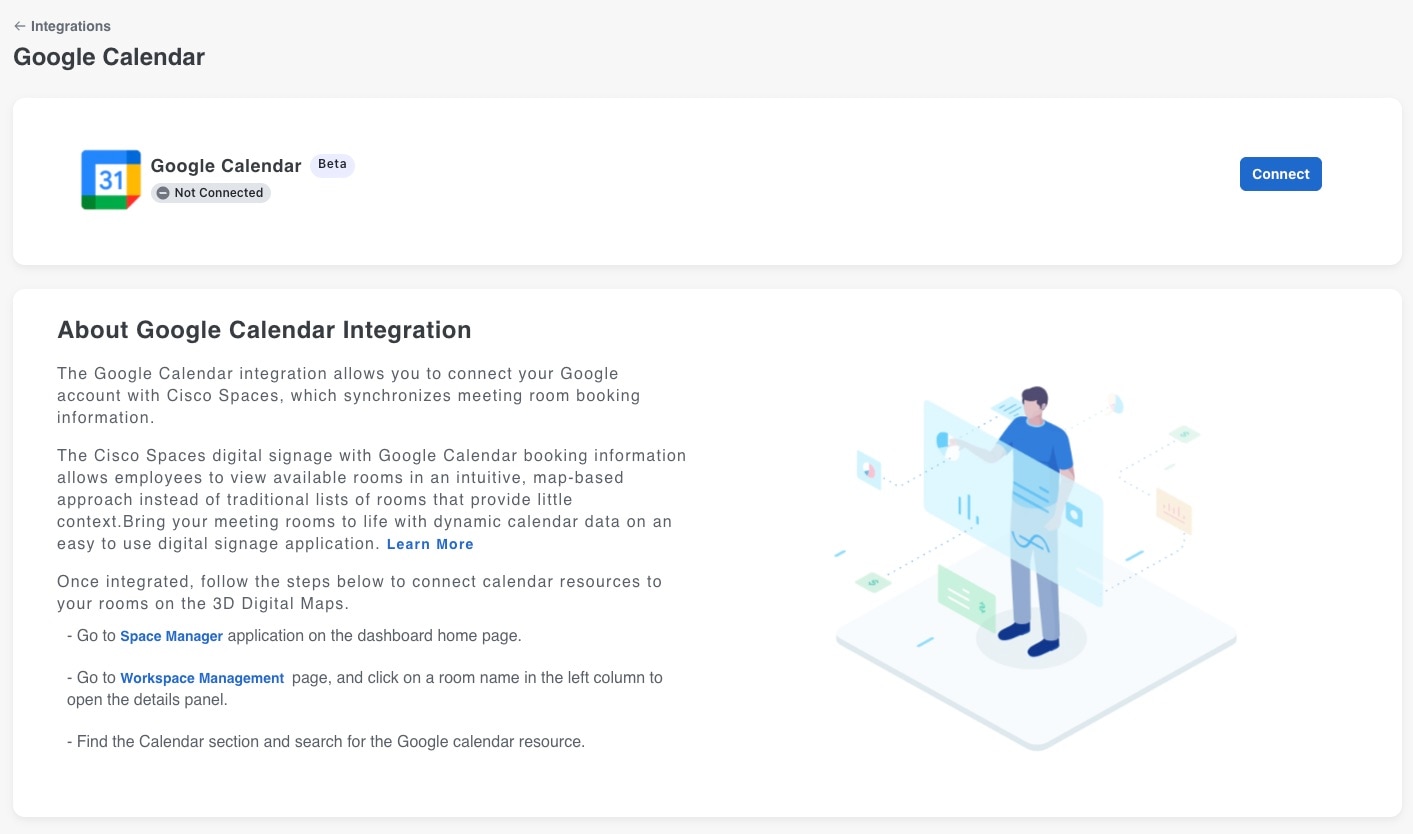
The Google Calendar integration enables you to connect your Google account with Cisco Spaces. This synchronizes meeting room booking information. The Cisco Spaces digital signage, with Google Calendar booking information, allows you to view available rooms in an intuitive, map-based approach instead of traditional lists of rooms that provide little context.

Office 365 Calendar Integration

The Office 365 calendar integration enables you to connect your Microsoft account with Cisco Spaces, which synchronizes meeting room booking information. The Cisco Spaces digital signage, equipped with Office 365 calendar booking information, enables you to easily access and visualize available rooms using an intuitive, map-based interface. This approach offers a more contextual and user-friendly experience compared to the traditional room lists.

Calendar GUI Integrations

The Microsoft 365 calendar integration feature is introduced in Cisco Spaces. Use this feature to connect your Microsoft 365 calendar account with the Cisco Spaces application and view the integrated calendar details in the Cisco Spaces dashboard Menu > Integrations.

The imported calendars are displayed in the Cisco Spaces: Space Manager application.

Integrate Google Calendar

The Google Calendar integration enables you to connect your Google account with Cisco Spaces, which synchronizes meeting room booking information. With the Cisco Spaces digital signage, you can easily view available rooms in an intuitive, map-based approach instead of traditional lists that lack context. This integration brings your meeting rooms to life by displaying dynamic calendar data on a user-friendly digital signage application.

Procedure


Step 1

Log in to Cisco Spaces.

The Cisco Spaces Home window is displayed.

Step 2

From the top-left corner, click the Menu icon () and choose Integrations > Third party > Google Calendar Integrations.

Step 3

Click Connect.

The Google Calendar Integrations window is displayed.

Figure 1. Google Calendar Integrations

Step 4

Click Connect.

Step 5

If the account is already connected, click Manage.

To disconnect, click Disconnect.

Step 6

In the Sign in - Google Accounts pop-up window, enter your Google account credentials.

Verfiy that you select a valid google account where the calendar bookings are available from the listed Sign in - Google Accounts pop-up window.

Step 7

After the account is verified, click Proceed.

Step 8

Click Go to dnaspaces.io > Continue to integrate the Google account with Cisco Spaces.

A success message Calendar integration is successfull is displayed.

Step 9

View the integrated Google calendar details in the My Integrations area along with the number of connected resources. A green tick mark indicates that the integration is successful.

The integrated calendars are available in the Cisco Spaces: Smart Workspaces app for use.

  • To remove the Google Calendar Integrations, click Remove in the tile view.

  • To disconnect the current account integration, click Disconnect and follow the instructions.


What to do next

To successfully connect calendar resources to your rooms on the 3D Digital Maps:

  1. Navigate to Cisco Smart Workspaces application.

  2. Proceed to the Workspace Management window and select a room name from the left column to access the Details panel.

  3. From the Details panel, locate the Calendar area and search for the Google calendar resource.

Integrate Office 365 Calendar

The Office 365 calendar integration enables you to seamlessly connect your Microsoft account with Cisco Spaces, resulting in the synchronization of meeting room booking information. The Cisco Spaces digital signage, combined with Office 365 calendar booking information, provides you with a user-friendly and intuitive map-based approach to view available rooms. This approach is far more effective than traditional lists of rooms, which often lack context. By utilizing this easy-to-use digital signage application, you can bring your meeting rooms to life with dynamic calendar data.

Procedure


Step 1

Log in to Cisco Spaces.

The Cisco Spaces Home window is displayed.

Step 2

From the top-left corner, click the Menu icon () and choose Integrations > Third party > Office 365.

Step 3

Click Connect.

The Integrations Office 365 window is displayed.

Figure 2. Office 365 Integrations

Step 4

Click Connect.

Step 5

If the account is already connected, click Manage.

To disconnect, click Disconnect.

Step 6

Follow the on-screen instructions and enter your Office 365 account credentials to integrate Office 365 calendar.

Step 7

After the account is validated, click Proceed.

Step 8

Click Go to dnaspaces.io > Continue to integrate the Office 365 account with Cisco Spaces.

A success message Calendar integration is successfull is displayed.

Step 9

View the integrated Office 365 calendar details in the My Integrations area along with the number of connected resources. A green tick mark indicates that the integration is successful.

The integrated calendars are available in the Cisco Spaces: Smart Workspaces app for use.

  • To remove the Office 365 calendar, click Remove in the tile view.

  • To disconnect the current account integration, click Disconnect and follow the instructions.


What to do next

To successfully connect calendar resources to your rooms on the 3D Digital Maps:

  1. Navigate to Cisco Smart Workspaces application.

  2. Proceed to the Workspace Management window and select a room name from the left column to access the Details panel.

  3. From the Details panel, locate the Calendar area and search for the Google calendar resource.

Hamina integration

Cisco Spaces enables you to integrate with Hamina so that Hamina-origin mapping data can be reviewed in the Cisco Spaces Location Maps workflow.

The Hamina integration adds a dedicated third-party integration entry in Cisco Spaces, a token-based onboarding flow, and token lifecycle management from the Cisco Spaces dashboard. After the token is used in Hamina, Hamina-sourced location and floor data can be reviewed in Location Maps so that teams can validate imported mapping content before continuing the digital mapping workflow.

The setup starts in Cisco Spaces and is completed in Hamina by using the token generated from the Cisco Spaces dashboard.

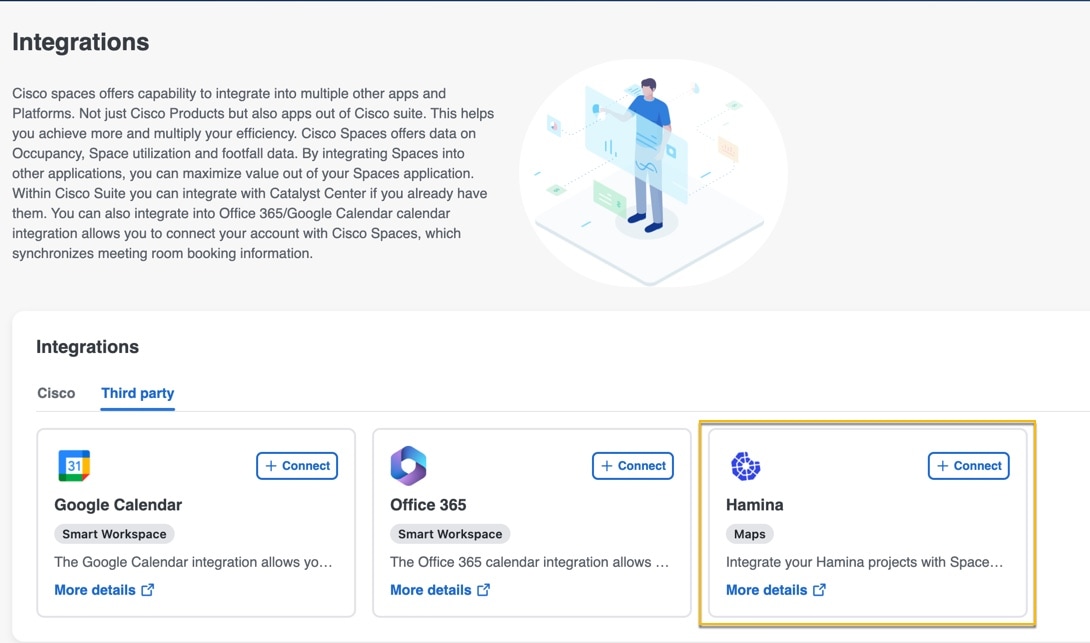
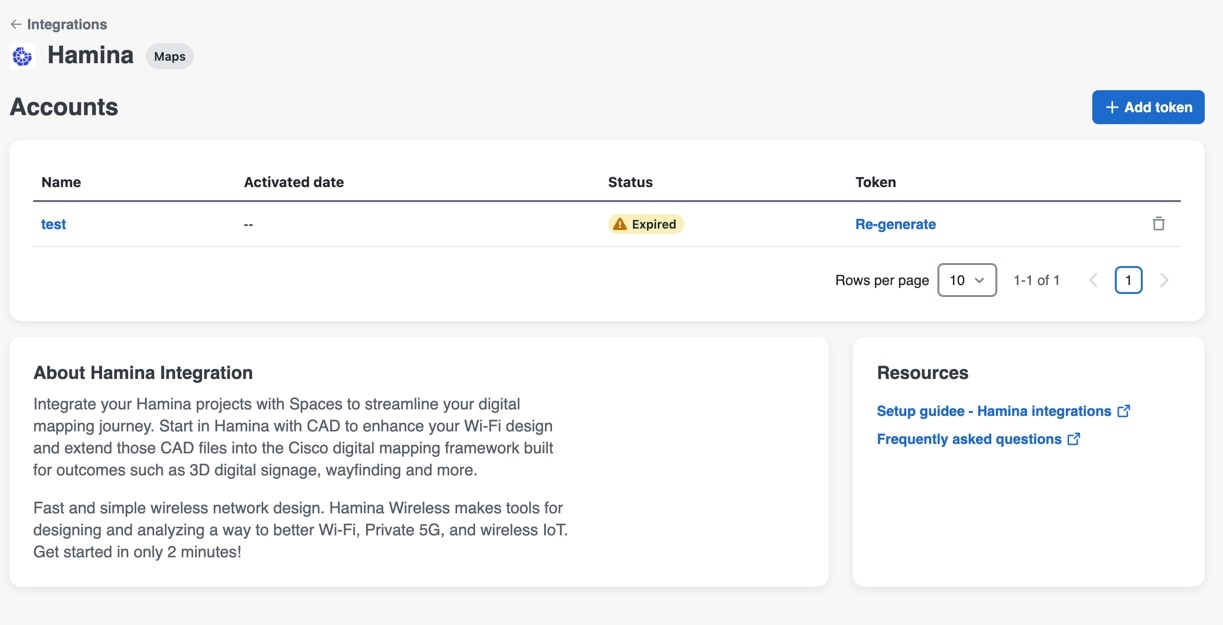
The Hamina integration is available from the Cisco Spaces dashboard under Integrations > Third Party > Hamina. In the Hamina tile, click + Connect open the Accouts page.

The Hamina integration setup starts in Cisco Spaces and is completed in Hamina by using the token generated from the Cisco Spaces dashboard.

From the Hamina integration page, you can generate a one-time activation token, copy the token into Hamina, and manage the token lifecycle from Cisco Spaces.
Figure 3. Hamina tile in the Third Party integrations area
Third Party Integrations window showing the Hamina tile

Prerequisites for Hamina integration

Use these requirements before you integrate Cisco Spaces with Hamina or review imported Hamina mapping data in Location Maps.

  • You must be able to log in to the Cisco Spaces dashboard.

  • You must have access to the Hamina account or interface where the Cisco Spaces token is entered.

  • You must have permission to manage third-party integrations in Cisco Spaces.

  • To review imported mapping data, Location Maps must be available for the Cisco Spaces account.

Integrate Cisco Spaces with Hamina

To integrate Cisco Spaces with Hamina, generate a one-time activation token in Cisco Spaces and enter the token in the Hamina integration setup flow.

Procedure


Step 1

Log in to Cisco Spaces.

Step 2

In the left navigation panel, choose Integrations > Third Party > Hamina.

The Accounts window is displayed.

Step 3

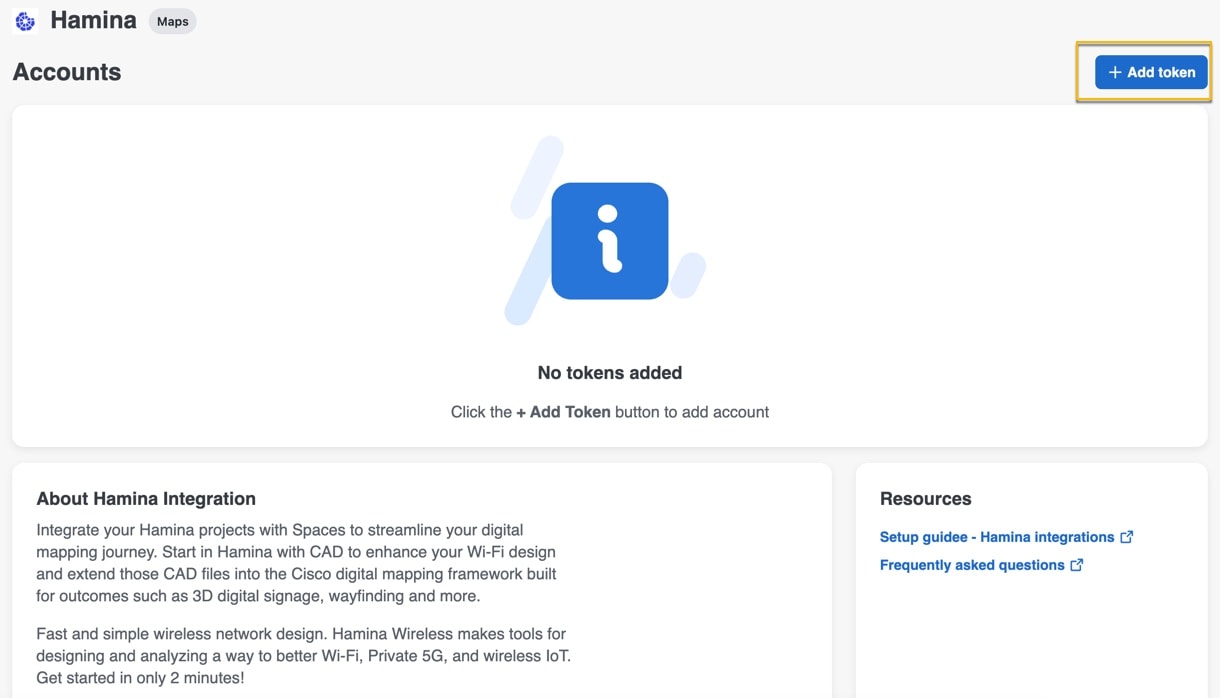
Click + Add token.

Figure 4. Hamina
Third Party Integrations window showing the Hamina tile

Step 4

In the Add Token pop-up window, enter a token instance name.

Use a name that helps identify the Hamina connection, location, or account where the token will be used.

Step 5

Click Generate.

A one-time token is generated.

Step 6

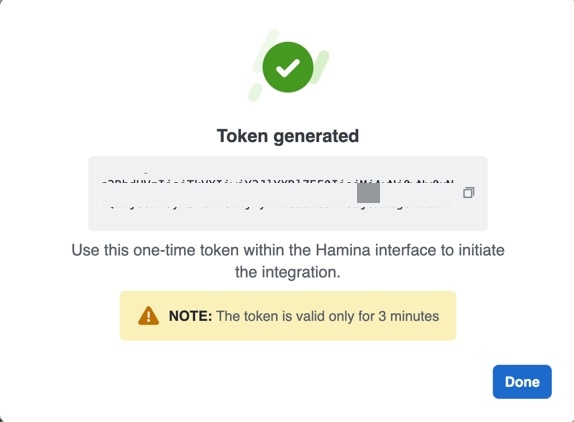
Copy the generated token. Use this one-time token within the Hamina interface to initiate the integration. The token is valid only for four minutes.

Figure 5. Token
Third Party Integrations window showing the Hamina tile

Step 7

Log in to Hamina.

Step 8

Paste the Cisco Spaces token into the Hamina integration setup flow, and complete the setup in Hamina.

After the token is accepted in Hamina, the integration can begin sending Hamina-origin mapping data into the Cisco Spaces Location Maps workflow.


Manage Hamina tokens

After a Hamina token is created, you can use the Hamina integration page in Cisco Spaces to review token status and manage tokens.

Procedure


Step 1

Log in to Cisco Spaces.

Step 2

Choose Integrations > Third Party > Hamina > Manage.

Step 3

In the Accounts area, review the listed Hamina tokens and their status.

Step 4

To create another token, click Add token and generate a new one-time token.

Figure 6. Add token
Third Party Integrations window showing the Hamina tile

Step 5

To replace an expired token, use the regenerate option for the expired token.

Step 6

To remove a token that is no longer required, delete the inactive token from the Hamina integration page.


Review Hamina locations in Location Maps

After Hamina data reaches Cisco Spaces, dashboard users can review Hamina-origin locations in Location Maps when validation is required. The review queue identifies the location, source, status, and available action for each item.

Procedure


Step 1

Log in to Cisco Spaces.

Step 2

Open Location Maps.

Step 3

Open the Review area.

The review queue is displayed.

Step 4

Locate review items where the source is Hamina.

Step 5

Review the location name, source, status, and available action.

Step 6

Select the recommended action for the Hamina-sourced review item.

Step 7

Validate the building or floor details shown in the review flow.

After the review is completed, continue with the next Location Maps action for the item.


Review floor order for Hamina-imported buildings

When a Hamina-imported building requires floor review, Location Maps displays a floor order review step before the workflow continues.

Procedure


Step 1

In Location Maps > Review, open the Hamina-sourced item that requires floor review.

The Review Floor Order window is displayed.

Step 2

Review the imported floors for the building.

Step 3

Verify that the floor names and order are correct.

Step 4

If required, adjust the floor order.

Step 5

Confirm the imported order and proceed.

After the floor order is confirmed, Location Maps continues the digital mapping workflow for the Hamina-imported building.