Recycling The Front Mezzanine Module

This chapter contains the following topics:

Front Mezzanine Recycling Overview

This chapter documents the procedures to disassemble key module components for recycling and e-waste. When recycling your Cisco UCS hardware, always make sure to follow local e-waste and recycling regulations.


Note


For Recyclers Only! The procedures in this chapter are not standard field-service options. These procedures are for recyclers who will be reclaiming the electronics for proper disposal to comply with local eco design and e-waste regulations.


To disassemble the module component parts, see the following topic:
Recycling the Component PCB Assemblies

In addition to the main motherboard PCBA, some key components also contain PCBAs that need to be recycled. Always comply with your local regulations governing recycling and e-waste.

Use the following procedures to recycle the appropriate components.

Recycling the Front Mezzanine Module PCBA

The front mezzanine module contains three PCBAs, which sit horizontally and connects the drive backplane to the main motherboard. The PCBA is attached to the front mezzanine module's sheetmetal by five T10 screws.

You must disconnect the PCBAs from the sheetmetal before recycling them.

Before you begin


Note


For Recyclers Only! This procedure is not a standard field-service option. This procedure is for recyclers who will be reclaiming the electronics for proper disposal to comply with local eco design and e-waste regulations.


To remove the printed circuit board assembly (PCBA), the following requirements must be met:

  • The compute node must be removed from the chassis.

  • The compute node's top cover must be removed.

Gather the following tools:

  • A T10 screwdriver

  • A Hex nut driver

Procedure


Step 1

Remove the front mezzanine module from the compute node.

  1. Go to Removing the Front Mezzanine Module.

  2. Place the front mezzanine module upside down on a rubberized mat or other ESD-safe work surface.

Step 2

Disconnect the bottom PCBA.

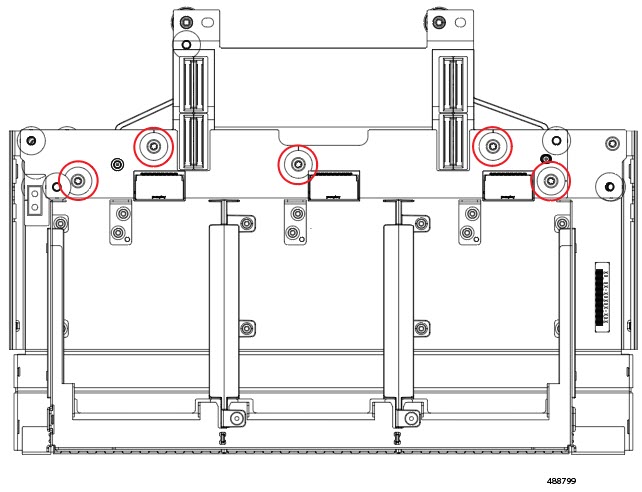
  1. Using a T10 screwdriver, remove the five M3 screws on the bottom of the PCBA.

Step 3

Disconnect the middle PCBA.

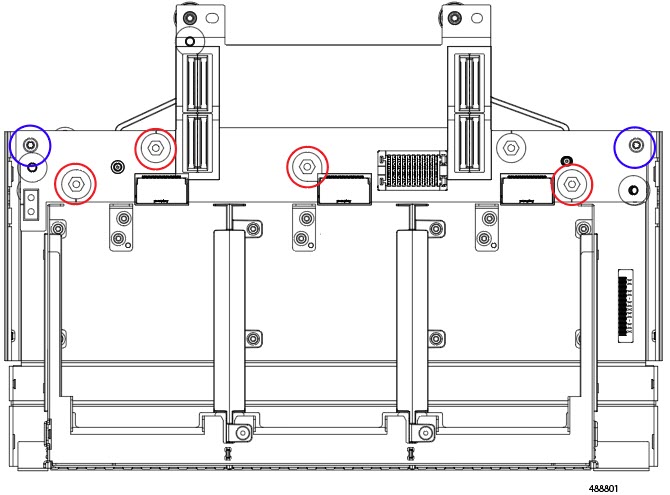
  1. Using a T10 screwdriver, remove two M3 screws.

  2. Using the hex nut driver , remove the five 6mm hex standoffs.

Step 4

Disconnect the top PCBA.

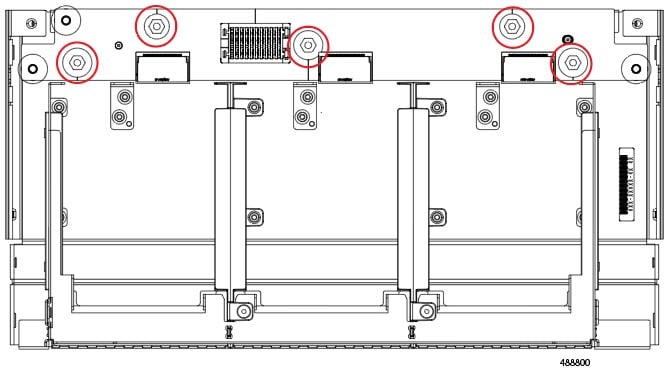
  1. Use the hex nut driver to remove five 6mm hex standoffs from the top PCBA.

Step 5

Dispose of the PCBAs properly in accordance with your local recycling and e-waste laws.