Virtual Interface Card

Virtual interface cards

A virtual interface card is a network adapter that

  • creates multiple Virtual Network Interface Card (vNICs) on a single physical card

  • handles both Ethernet and Fibre Channel over Ethernet (FCoE) traffic, combining network and storage traffic onto a single adapter, and

  • uses a PCIe interface to connect to the server's motherboard, ensuring high-speed data transfer.

A vNIC is a logical interface that is assigned to virtual machines or service profiles in the UCS environment.

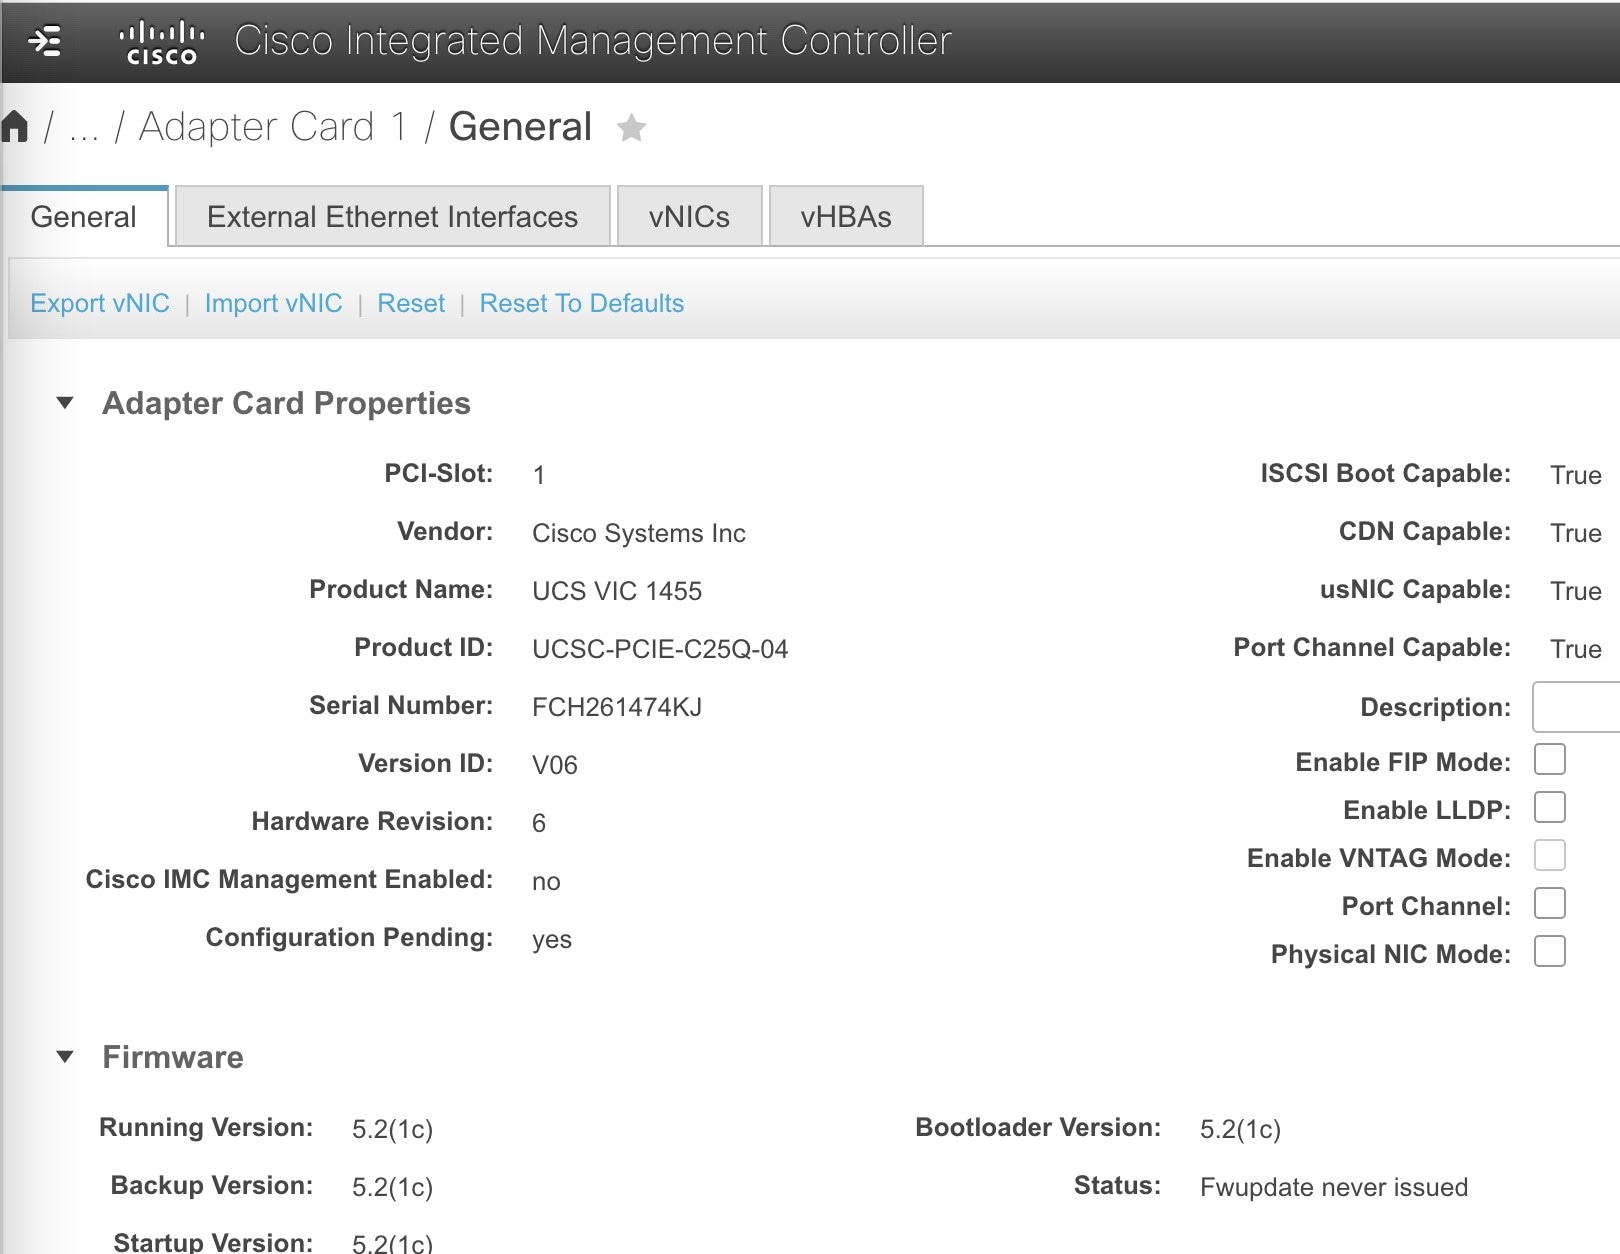
VIC 1455 specifications

Cisco UCS Virtual Interface Card (VIC) 1455 is a Quad Port 10/25G SFP28 Converged Network Adapter (CNA) Peripheral Component Interconnect Express (PCIe) card that is designed for UCS C-Series M5 and M6 rack servers. From IEC6400 Release 1.1.0, use the Cisco Integrated Management Controller (CIMC) to configure the VIC 1455 adapter card.

The VIC 1455 has the following specifications:

  • Quad Port: The VIC 1455 has four ports, allowing multiple network connections.

  • 10/25G SFP28: The VIC ports support both 10 and 25 Gigabit Ethernet speeds using SFP28 transceivers.

  • CNA: The VIC handles both Ethernet and Fibre Channel over Ethernet (FCoE) traffic, combining network and storage traffic onto a single adapter.

  • PCIe: The VIC uses a PCIe interface to connect to the server's motherboard, ensuring high-speed data transfer.

VIC status verification using gateway CLI

Use the ethernet command to view the VIC status in the gateway.

Device#ethernet
Ethernet port status:
eth0/0 UP Full-duplex 1000
eth0/1 DOWN
SFP+ port status:
sfp1/0 DOWN
sfp1/1 DOWN
sfp1/2 DOWN
sfp1/3 DOWN

link aggregation: backup
Ethernet interface MTU:  1530

If the ethernet command output does not show the SFP+ port status section, assume that the gateway either does not recognize the VIC or is not configured with the VIC. To configure vNIC, refer either Configure the vNIC using CIMC GUI or Configure the vNIC using CIMC CLI.

Configure the vnic using the CIMC GUI

Follow this procedure if any of the following conditions apply:

  • If the VIC is installed after the product delivery.

  • If the URWB software does not recognize the card.

vNIC Configuration Reference Information


Note


Ensure the gateway is powered on before starting the configuration.


Repeat these configuration procedures to configure the vNIC properties for eth1, eth2, and eth3.

Configure the adapter card general settings using GUI

Procedure


Step 1

Log into the CIMC web application using your credentials.

Step 2

On the home page, click at the top left to open the Networking menu.

Step 3

Click Networking > Adapter Card 1.

General tab appears.

Step 4

From the General tab, expand Adapter Card Properties to update these fields:

  1. Uncheck the Enable FIP Mode check box.

  2. Uncheck the Enable LLDP check box.

  3. Uncheck the Port Channel check box.

Note


All other settings in Adapter Card Properties and Firmware section should be same as in the screenshot.

Step 5

Click Save Changes.


Configure the vNIC using CIMC GUI

Ensure the gateway is powered on.

Follow this procedure if any of the following conditions apply:

  • If the VIC is installed after the product delivery.

  • If the URWB software does not recognize the card.


Note


Repeat these two configuration procedures to configure the vNIC properties for eth1, eth2, and eth3.


Configure the vNIC using the CIMC CLI

  • Configure vNIC properties for eth1, eth2, and eth3 interfaces when the VIC is installed after product delivery.

  • Configure vNIC properties when the URWB software does not recognize the card.

When to Configure the vNIC Using the CIMC CLI

Follow this procedure if any of the following conditions apply:

  • If the VIC is installed after the product delivery.

  • If the URWB software does not recognize the card.


Note


Repeat these two CLI configuration procedures to configure the vNIC properties for eth1, eth2, and eth3.


Example: Prerequisite for vNIC Configuration

Ensure the gateway is powered on before configuring the vNIC using the CIMC CLI.

Configure the adapter card general settings using CLI

Before you begin

Follow these steps to configure the adapter card general settings using CLI:

Procedure


Step 1

Use the scope chassis command to enter the gateway.

Device# scope chassis

Step 2

Use the scope adapter 1 command to enter the gateway's adapter.

Device /chassis# scope adapter 1

Step 3

Use the set fip-mode disabled command to disable FCoE initialization protocol (FIP) mode.

Device /chassis/adapter# set fip-mode disabled

Step 4

Use the set lldp disabled command to disable Link layer discovery protocol (LLDP) mode.

Device /chassis/adapter *# set lldp disabled

Step 5

Use the set portchannel disabled command to disable the port channel.

Device /chassis/adapter *# set portchannel disabled

Step 6

Use the commit command to update the changes.

Device /chassis/adapter *# commit

Configure the adapter card vnic settings using CLI

If the gateway either does not recognize the VIC or is not configured with the VIC, update the following settings of vNIC Properties:

Procedure


Step 1

Configure the general settings using CLI

Step 2

Configure the ethernet receive queue settings using CLI

Step 3

Configure the ethernet transmit queue settings using CLI

Step 4

Configure the completion queue settings using CLI

Step 5

Configure the ethernet interrupt settings using CLI


Configure the general settings using CLI

Before you begin

Perform steps 1 and 2 of the Configure the adapter card general settings using CLI to reach the Adapter card 1 settings.

Follow these steps to configure the general ethernet interface settings using CLI:

Procedure

Step 1

Use the scope host-eth-if eth0 command to enter the eth0 mode.

Device /chassis/adapter *# scope host-eth-if eth0

Step 2

Use the set mtu 1600 command to configure the MTU value as 1600.

Device /chassis/adapter/host-eth-if *# set mtu 1600

Step 3

Use the set trust-host-cos enable command to enable the Trust Host CoS.

Device /chassis/adapter/host-eth-if *# set trust-host-cos enable

Configure the ethernet receive queue settings using CLI

Before you begin

Perform steps 1 and 2 of the Configure the adapter card general settings using CLI to reach the Adapter card 1 settings.

Follow these steps to configure the ethernet receive queue settings using CLI:

Procedure

Step 1

Use the scope recv-queue command to enter the ethernet receive queue mode.

Device /chassis/adapter/host-eth-if *# scope recv-queue

Step 2

Use the set rq-count 40 command to configure the ethernet receive queue count value as 40.

Device /chassis/adapter/host-eth-if/recv-queue *# set rq-count 40

Step 3

Use the set rq-ring-size 512 command to configure the ethernet receive queue ring size as 512.

Device /chassis/adapter/host-eth-if/recv-queue *# set rq-ring-size 512

Step 4

Use the exit command to exit from the ethernet receive queue.

Device /chassis/adapter/host-eth-if/recv-queue *# exit

Configure the ethernet transmit queue settings using CLI

Before you begin

Perform steps 1 and 2 of the Configure the adapter card general settings using CLI to reach the Adapter card 1 settings.

Procedure

Step 1

Use the scope trans-queue command to enter the ethernet transmit queue mode.

Device /chassis/adapter/host-eth-if *# scope trans-queue

Step 2

Use the set wq-count 20 command to configure the ethernet transmit queue count value as 20.

Device /chassis/adapter/host-eth-if/trans-queue *# set wq-count 20

Step 3

Use the set wq-ring-size 256 command to configure the ethernet transmit queue ring size as 256.

Device /chassis/adapter/host-eth-if/trans-queue *# set wq-ring-size 256

Step 4

Use the exit command to exit from the ethernet transmit queue.

Device /chassis/adapter/host-eth-if/trans-queue *# exit

Configure the completion queue settings using CLI

Before you begin

Perform steps 1 and 2 of the Configure the adapter card general settings using CLI to reach the Adapter card 1 settings.

Follow these steps to configure the completion queue settings using CLI:

Procedure

Step 1

Use the scope comp-queue command to enter the completion queue mode.

Example:
Device /chassis/adapter/host-eth-if *# scope comp-queue

Step 2

Use the set cq-count 40 command to configure the completion queue count value as 40.

Example:
Device /chassis/adapter/host-eth-if/comp-queue *# set cq-count 40

Step 3

Use the exit command to exit from the completion queue.

Example:
Device /chassis/adapter/host-eth-if/comp-queue *# exit

Configure the ethernet interrupt settings using CLI

Before you begin

Perform steps 1 and 2 of the Configure the adapter card general settings using CLI to reach the Adapter card 1 settings.

Follow these steps to configure the ethernet interrupt settings using CLI:

Procedure

Step 1

Use the scope interrupt command to enter the ethernet interrupt mode.

Example:
Device /chassis/adapter/host-eth-if # scope interrupt

Step 2

Use the set interrupt-count 20 command to configure the ethernet interrupt count value as 20.

Example:
Device /chassis/adapter/host-eth-if/interrupt # set interrupt-count 20

Step 3

Use the exit command to exit from the ethernet interrupt mode.

Example:
Device /chassis/adapter/host-eth-if/interrupt *# exit

Step 4

Use the exit command to exit from the eth0 mode.

Example:
Device /chassis/adapter/host-eth-if *# exit

Note


Repeat the steps as mentioned in the Configure the vNIC using the CIMC CLI to modify the vNIC properties for eth1, eth2, and eth3.

Step 5

Use the commit command to reflect the updates.

Example:
Device /chassis/adapter *# commit

Step 6

Use the exit command to exit from the adapter properties.

Example:
Device /chassis/adapter # exit

Step 7

Use the exit command to exit from the gateway.

Example:
Device /chassis # exit

Step 8

Upon successful configuration, use the power cycle command to reboot the gateway.

Example:
Device /chassis # power cycle