Overview
How to configure interfaces, security zones, DHCP, and security policies in Secure Firewall Device Manager so your Secure Firewall 3100 matches your network design and traffic requirements.
Configure additional interfaces, a DHCP server, and customize the security policy.
Procedure
| 1. | To create breakout interfaces from a 40-Gb or higher interface (available on some models), choose Device, and then click the link in the Interfaces summary. Then click the breakout icon for the interface. |
|
| 2. | If you wired other interfaces, choose Device, and then click the link in the Interfaces summary. Click the edit icon ( The following example configures an interface to be used as a “demilitarized zone” (DMZ), where you place publicly-accessible assets such as your web server. 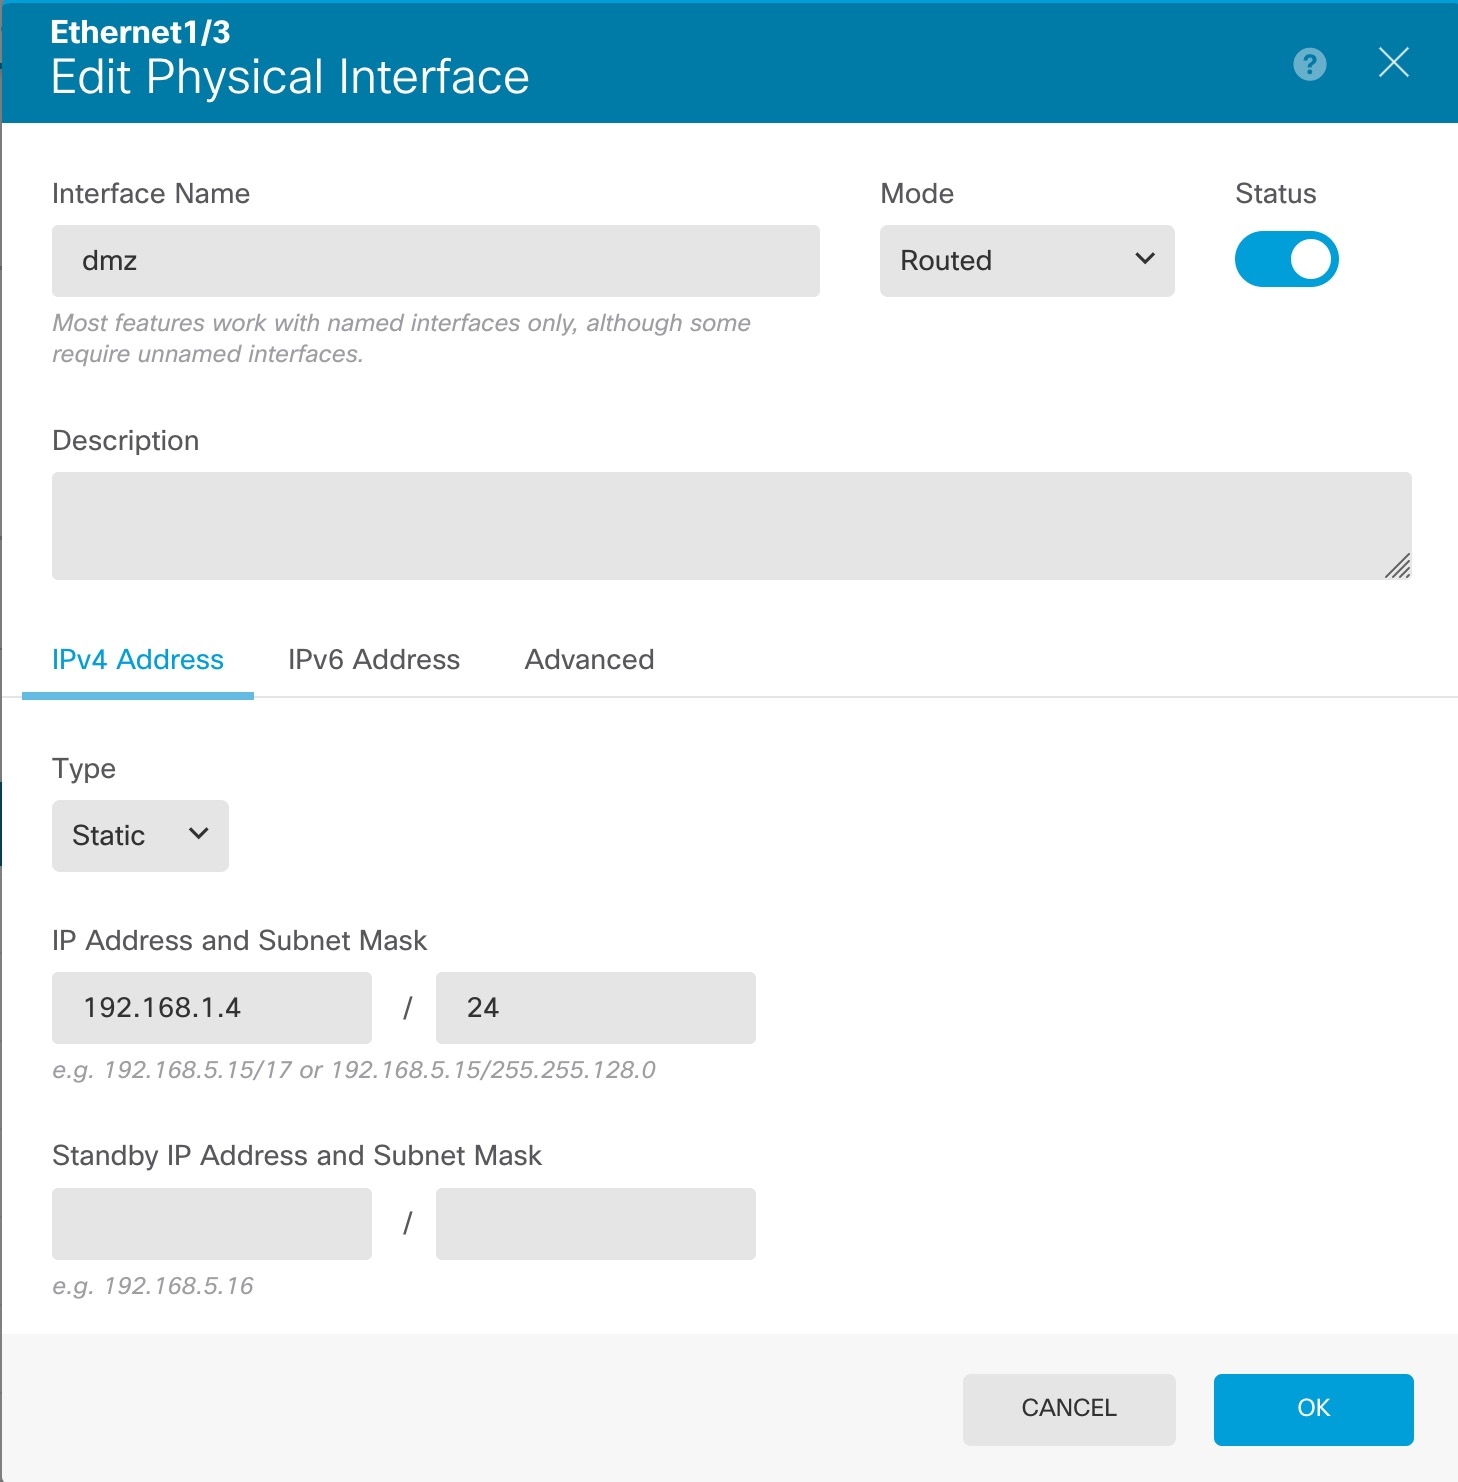
|
|
| 3. | If you configured new firewall interfaces, choose Objects, then select Security Zones. Edit or create new zones as appropriate and assign the interface to the zone. Each interface must belong to a zone for which you configure policies. The following example creates a new dmz_zone and then assigns the dmz interface to it. 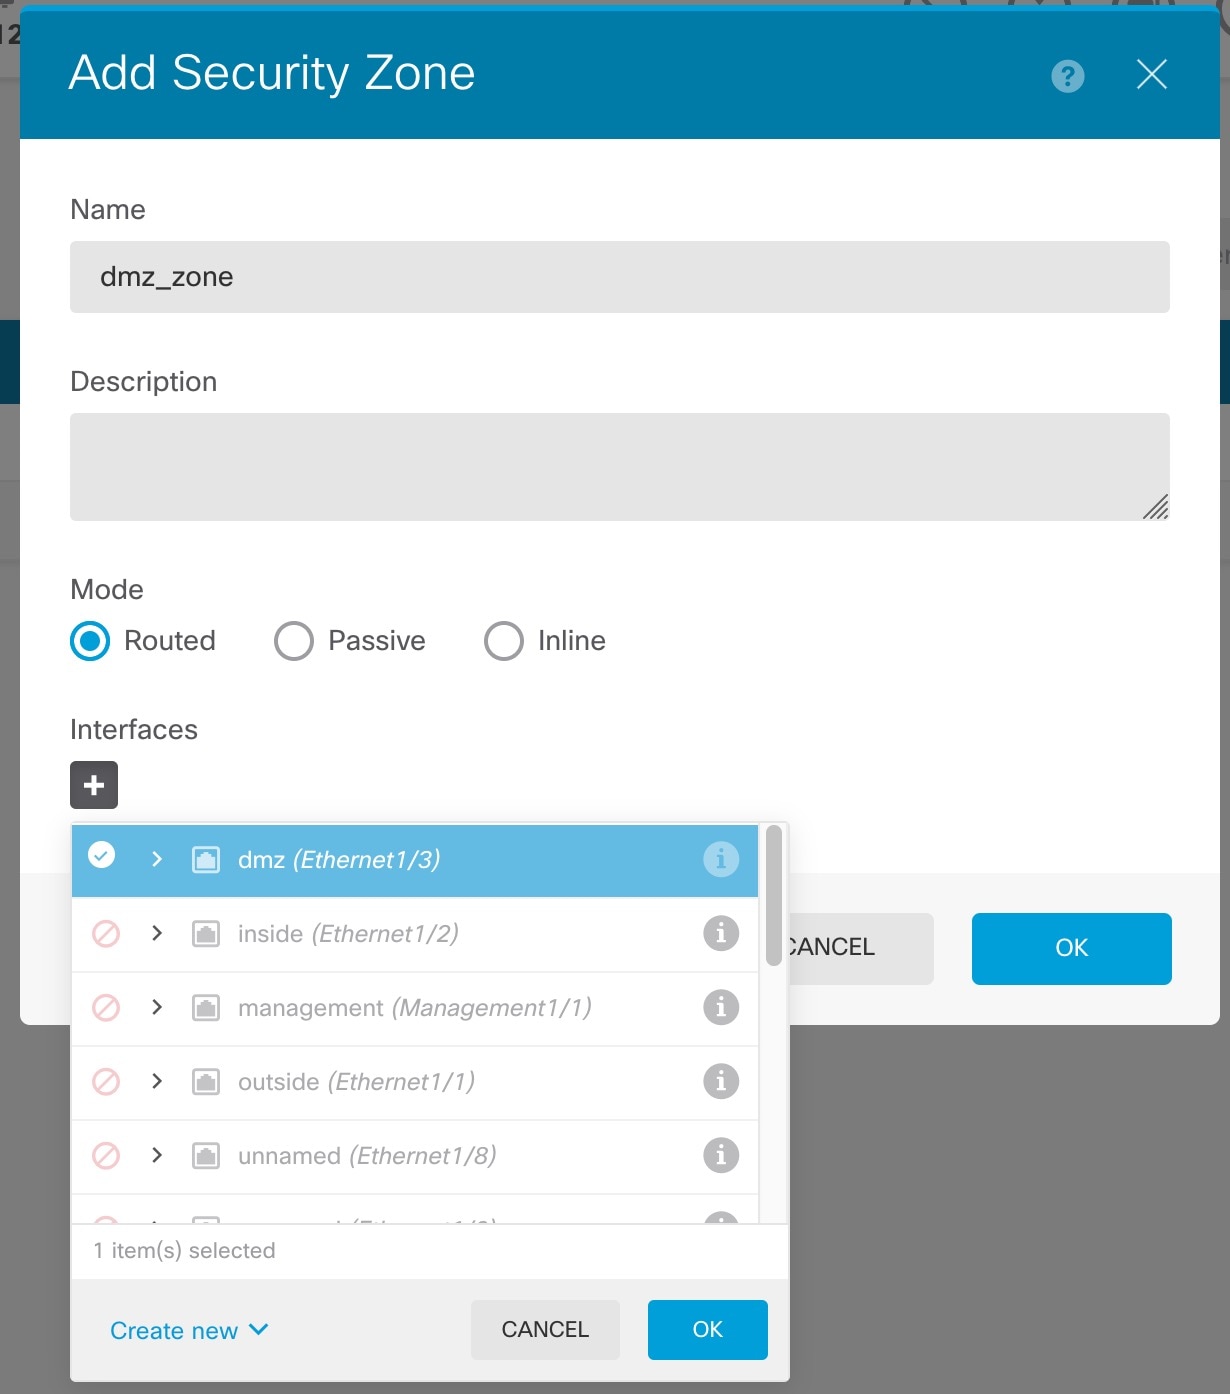
|
|
| 4. | If you want internal clients to use DHCP to obtain an IP address from the device, choose , then select the DHCP Servers tab. There is already a DHCP server configured for the inside interface. 
|
|
| 5. | Choose Policies and configure the security policies for the network. The device setup wizard enables traffic flow between the inside_zone and outside_zone using a Trust rule. A Trust rule does not apply an intrusion policy. To use intrusion, specify the Allow action for the rule. The policy also includes interface PAT for all interfaces when going to the outside interface. 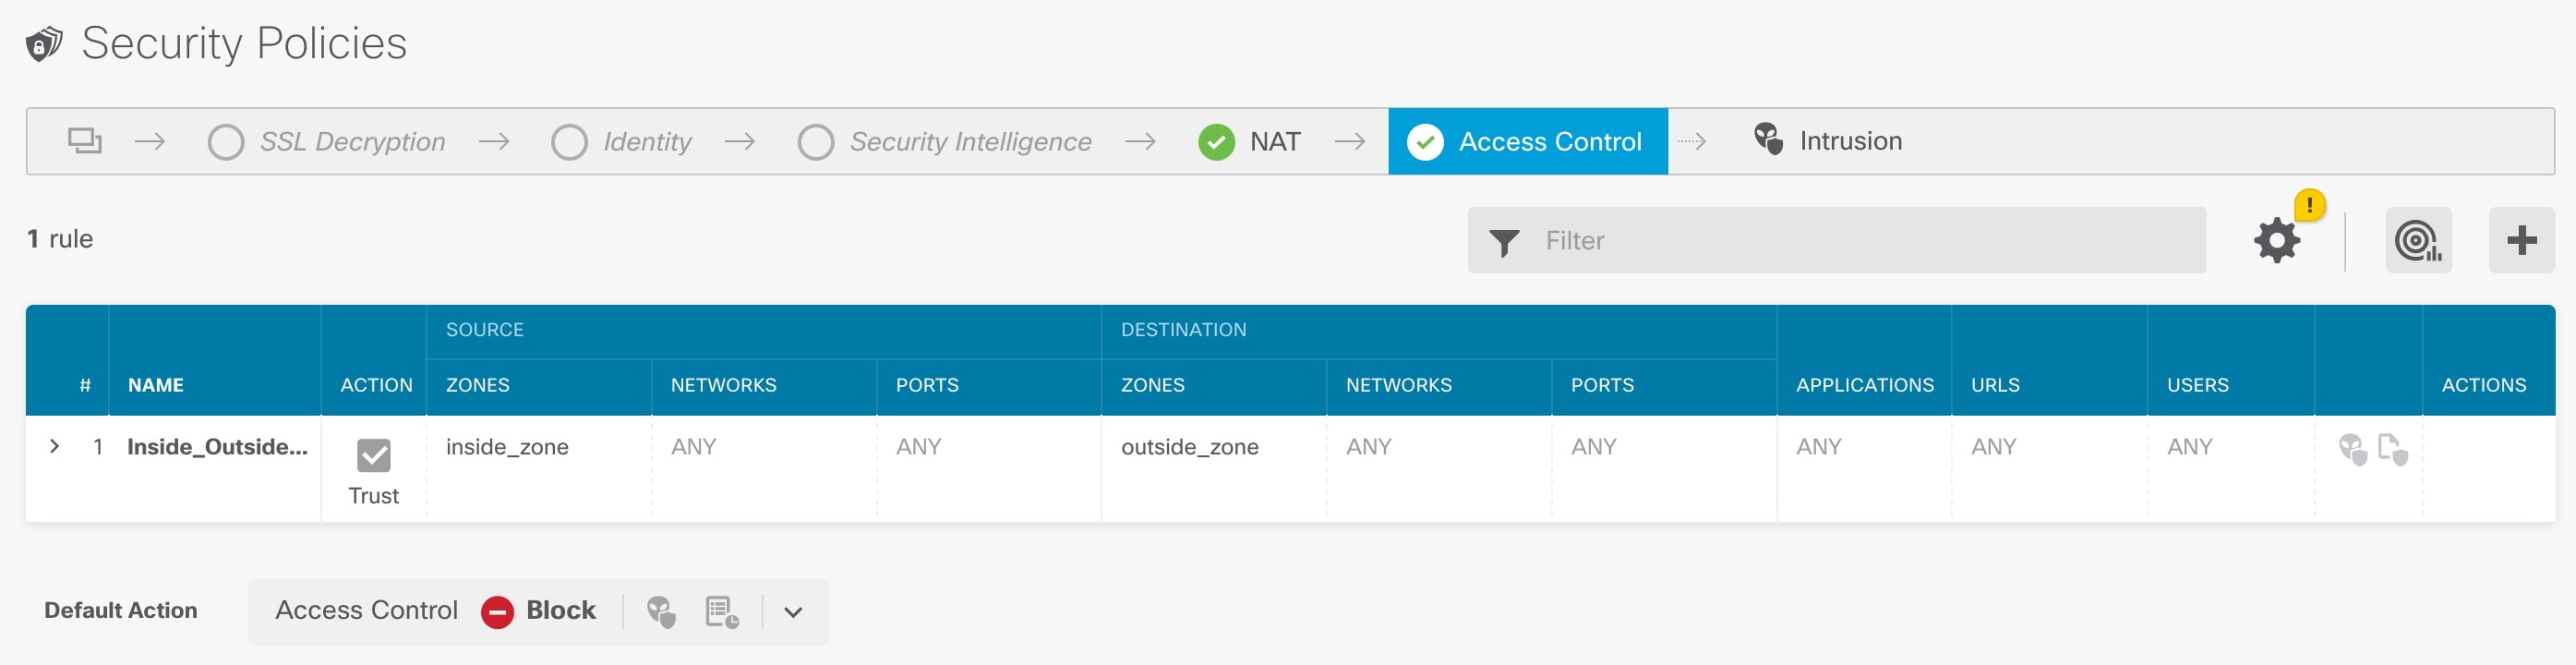
However, if you have interfaces in different zones, you need access control rules to allow traffic to and from those zones. In addition, you can configure other policies to provide additional services and fine-tune NAT and access rules to get the results that your organization requires. You can configure the following policies by clicking the policy type in the toolbar:
The following example shows how to allow traffic between the inside_zone and dmz_zone in the access control policy. In this example, no options are set on any of the other tabs except for Logging, where At End of Connection is selected. 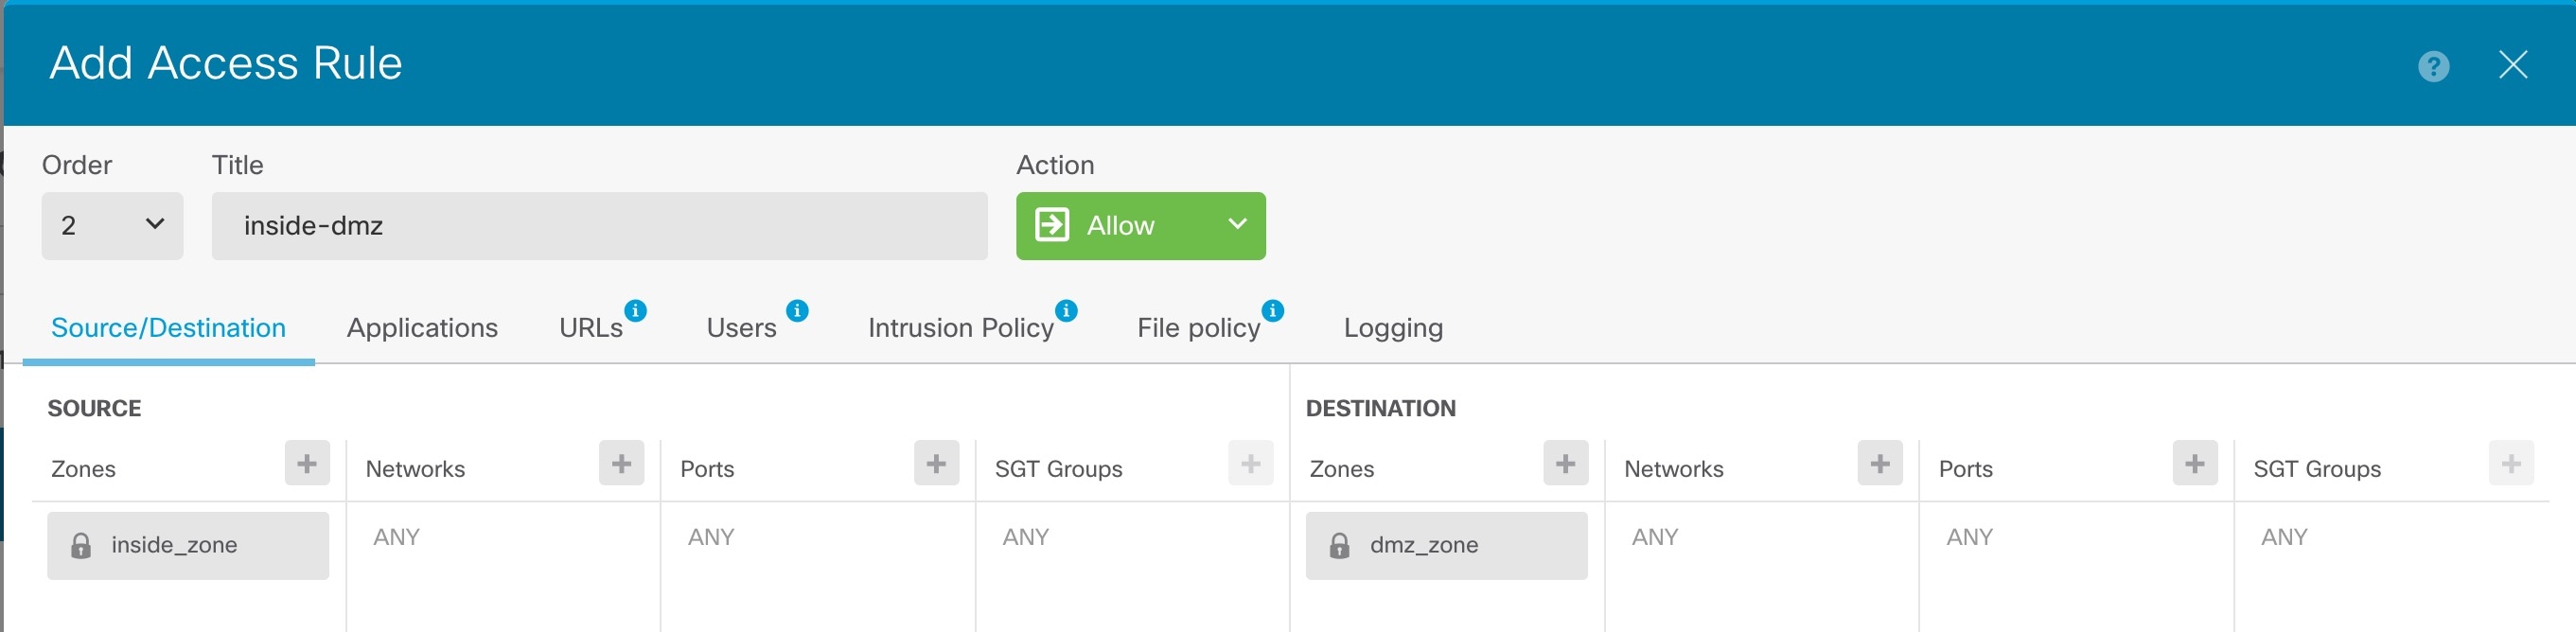
|
|
| 6. | Choose Device, then click View Configuration in the Updates group and configure the update schedules for the system databases. If you are using intrusion policies, set up regular updates for the Rules and VDB databases. If you use Security Intelligence feeds, set an update schedule for them. If you use geolocation in any security policies as matching criteria, set an update schedule for that database. |
|
| 7. | Click the Deploy button in the menu, then click the Deploy Now button ( Changes are not active on the device until you deploy them. |
 ) for each interface to define the name, IP address, and other settings.