Cisco Identity Services Engine Installation Guide, Release 3.5

PDF

VMware virtual machine

Want to summarize with AI?

Log in

Overview

Provides instructions on how to deploy Cisco ISE on VMware by following the comprehensive configuration and resource management steps. This includes procedures for verifying VMware Tools, managing virtual machine performance, and cloning existing instances.

Note

The VMware form factor instructions provided in this document are also applicable for Cisco ISE installed on Hyperflex.


Virtual machine resource and performance checks

Before installing Cisco ISE on a virtual machine, the installer performs hardware integrity checks by comparing the available hardware resources on the virtual machine with the recommended specifications.

During a virtual machine (VM) resource check, the installer verifies the hard disk space, number of CPU cores, CPU clock speed, and RAM allocated to the VM. If the VM resources do not meet the basic evaluation specifications, the installation terminates. This check applies only to ISO-based installations.

When you run the Setup program, the installer performs a VM performance check for disk I/O. If disk I/O performance does not meet the recommended specifications, the installer displays a warning, but you can continue with installation.

The VM performance check runs periodically every hour. The installer averages the results over one day. If disk I/O performance does not meet the recommended specification, the installer generates an alarm.

You can also perform the VM performance check on demand from the Cisco ISE CLI using the show tech-support command.

You can run VM resource and performance checks outside Cisco ISE installation. Use the Cisco ISE boot menu to perform these tests.


Install Cisco ISE on VMware virtual machine using the ISO file

This section describes how to install Cisco ISE on a VMware virtual machine using the ISO file.


Prerequisites to configure a VMware ESXi server

Review these configuration prerequisites in this section before you attempt to configure a VMware ESXi server.

  • Remember to log in to the ESXi server as a user with administrative privileges (root user).

  • Cisco ISE is a 64-bit system. Before you install a 64-bit system, ensure that Virtualization Technology (VT) is enabled on the ESXi server.

  • Ensure that you allocate the recommended amount of disk space on the VMware virtual machine.

  • If you have not created a VMware Virtual Machine File System (VMFS), create one to support the Cisco ISE virtual appliance. The VMFS is configured for each storage volume on the VMware host. For VMFS5, the 1 MB block size supports up to 1.999 TB virtual disk size.


Virtualization technology check

If you already have an ESXi server installed, you can check whether Virtualization Technology (VT) is enabled without rebooting the machine. Use the esxcfg-info command to perform this check.


~ # esxcfg-info |grep "HV Support"
|----HV Support............................................3
|----World Command Line.................................grep HV Support

If HV Support has a value of 3, VT is enabled on the ESXi server. You can proceed with the installation.

If HV Support has a value of 2, VT is supported, but not enabled on the ESXi server. Edit the BIOS settings and enable VT on the server.


Enable virtualization technology on an ESXi server

You can reuse the same hardware that hosted a previous version of the Cisco ISE virtual machine. However, you must enable Virtualization Technology (VT) on the ESXi server before installing the latest release.

Procedure

1.

Reboot the appliance.

2.

Press F2 to enter setup.

3.

Choose Advanced > Processor Configuration.

4.

Select Intel(R) VT and enable it.

5.

Press F10 to save your changes and exit.


Configure VMware server interfaces for the Cisco ISE profiler service

Configure VMware server interfaces so that SPAN or mirrored traffic is collected on a dedicated probe interface. This configuration supports the Cisco ISE profiler service.

Procedure

1.

Choose Configuration > Networking > Properties > VMNetwork (the name of your VMware server instance) VMswitch0 (one of your VMware ESXi server interfaces) Properties Security.

2.

In the Policy Exceptions pane on the Security tab, check the Promiscuous Mode check box.

3.

In the Promiscuous Mode drop-down list, choose Accept and click OK.

Perform these steps on any other VMware ESXi server interface that collects SPAN or mirrored profiler traffic.


Connect to the VMware server using the serial console

Procedure

1.

Power off the specific VMware server (for example, ISE-120).

2.

Right-click the VMware server and choose Edit.

3.

Click Add on the hardware tab.

4.

Choose Serial Port and click Next.

5.

In the Serial Port Output area, select the Use physical serial port on the host radio button or the Connect via Network radio button and then click Next.

  • If you choose the Connect via Network option, you must open the firewall ports over the ESXi server.

  • If you select the Use physical serial port on the host, you must choose the port. There are two options available:

    • /dev/ttyS0 (In the DOS or Windows operating system, this appears as COM1).

    • /dev/ttyS1 (In the DOS or Windows operating system, this appears as COM2).

6.

Click Next.

7.

Check the appropriate check box in the Device Status area. By default, Connected is selected.

8.

Click OK to connect to the VMware server.


Configure a VMware server

Before you begin

Ensure that you have read the Prerequisites for configuring a VMware Server.

Procedure

1.

Log in to the ESXi server.

2.

In the VMware vSphere client, in the left pane, right-click your host container and choose New Virtual Machine.

3.

In the Select a Creation Type area, click Create a new virtual machine and click Next.

4.

In the Select a Name and Folder area, enter a name for the VMware system, select a location from the displayed list, and click Next.

Tip

Use the hostname that you want to use for your VMware host.

5.

In the Select a compute resource area, choose a destination compute resource and click Next.

6.

In the Select storage area, choose a datastore that has the recommended amount of space available and click Next.

7.

In the Select compatibility area, from the Compatible with drop-down list, choose an ESXi version that is compatible with your Cisco ISE version and click Next.

For information about the ESXi versions compatible with your Cisco ISE release, refer to "Supported Virtual Environments" in the Release Notes for Cisco Identity Services Engine for your release.


Configure OS, hardware, and finalize installation

Procedure

1.

In the Select a guest OS area, complete these steps and then click Next

  1. From the Guest OS Family drop-down list, choose Linux.

  2. From the Guest OS Version drop-down list, choose the supported Red Hat Enterprise Linux (RHEL) version. For Cisco ISE release 3.1 and later use RHEL 8.

2.

In the Customize hardware area, in the Virtual Hardware tab, carry out these configurations and then click Next.

  1. Choose the required values from the CPU and Memory drop-down lists based on the SNS series appliance.

    This table shows the hardware specifications for each SNS appliance series.

    Table 1. SNS appliance hardware specifications
    Appliance series Small Medium Large

    Allocation details

    SNS 3600

    16 vCPU, 32 GB

    24 vCPU, 96 GB

    24 vCPU, 256 GB

    Allocates cores to meet SNS 3615 specifications.

    (8 physical cores/16 threads).

    SNS 3700

    24 vCPU, 32 GB

    40 vCPU, 96 GB

    40 vCPU, 256 GB

    Allocates cores to meet SNS 3715 specifications.

    (12 physical cores/24 threads).

    SNS 3800

    32 vCPU, 64 GB

    48 vCPU, 128 GB

    48 vCPU, 256 GB

    Allocates cores to meet SNS 3815 specifications.

    (16 physical cores/32 threads).

    Note

    The number of vCPU cores to allocate is twice the number of physical cores present in the equivalent physical Cisco Secure Network Server due to hyperthreading.

    Reserve vCPU and memory resources equal to the configured vCPU cores and memory allocations. If you do not reserve vCPU and memory resources, Cisco ISE performance and stability can be significantly impacted. Open the CPU and Memory collapsible areas and update the reservation fields for each setting.

  2. From the New SCSI Controller drop-down list, choose Paravirtual.

  3. From the New Network and New CD/DVD Drive drop-down lists, choose the required network and ISO files.

3.

Choose the NIC driver from the Adapter drop-down list and click Next.

4.

Choose Create a new virtual disk and click Next.

5.

In the Disk Provisioning dialog box, click Thick provisioned, eagerly zeroed radio button, and click Next to continue.

Cisco ISE supports both thick and thin provisioning. Choose thick provisioned, eagerly zeroed for better performance, especially for monitoring nodes. If you use thin provisioning, upgrades, backup and restore operations, and debug logging that require more disk space might be affected during initial disk expansion.

6.

Uncheck the Support clustering features such as Fault Tolerance check box.

7.

In the Ready to complete area, verify the configuration details, such as name, guest OS, CPUs, memory, and disk size of the newly created VMware system.

8.

Click Finish.

The VMware system is now installed.

What to do next

To activate the newly created VMware system, right-click VM in the left pane of your VMware client user interface and choose Power > Power On.


Increase virtual machine power-on boot delay configuration

On a VMware virtual machine, the boot delay is set to 0 by default. You can change the boot delay to make it easier to choose boot options when resetting the administrator password.

Procedure

1.

In the VSphere client, right click the virtual machine and choose Edit Settings.

2.

Click the Options tab.

3.

Choose Advanced > Boot Options.

4.

In the Power on Boot Delay area, select the time in milliseconds to delay the boot operation.

5.

Check the check box in the Force BIOS Setup area to enter the BIOS setup screen when the VM boots the next time.

6.

Click OK to save your changes.


Install Cisco ISE software on a VMware system

Before you begin

  • After installation, if you do not install a permanent license, Cisco ISE automatically installs a 90-day evaluation license that supports a maximum of 100 endpoints.

  • Download the Cisco ISE software from the Cisco software download site at http://www.cisco.com/en/US/products/ps11640/index.html . Then, burn the software on a DVD. You must provide your Cisco.com site credentials.

  • (Optional; applicable only if you are installing Cisco ISE on VMware Cloud) The process of installing Cisco ISE on VMware Cloud is identical to the process for installing Cisco ISE on a VMware virtual machine.

    • Cisco ISE virtual machine deployed on VMware cloud in Amazon Web Services (AWS): Cisco ISE can be hosted on Software-Defined Data Center (SDDC) provided by VMware Cloud on AWS. Ensure that appropriate security group policies are configured on VMware Cloud (under Networking and Security > Security > Gateway Firewall Settings) to enable access to the on-premises deployment, required devices, and services.

    • Cisco ISE virtual machine deployed on Azure VMware Solution (AVS): AVS runs VMware workloads natively on Microsoft Azure, where Cisco ISE can be hosted as a VMware virtual machine.

Procedure

1.

Log in to the VMware client.

2.

For the VM to enter the BIOS setup mode, right-click the VM and select Edit Settings.

3.

Click the Options tab.

4.

Click Boot Options, and in the Force BIOS Setup area, check the BIOS check box to enter the BIOS setup screen when the VM boots.

Note

You must change the firmware from BIOS to EFI in the boot mode of VM settings to boot GPT partitions with 2 TB or more capacity.

If you have selected Guest OS RHEL 8 and EFI boot mode, disable the Enable UEFI Secure Boot option. This option is enabled by default for guest operating system RHEL 8 VM.

5.

Click OK.

6.

Set the Coordinated Universal Time (UTC) and the correct boot order in BIOS.

  1. If the VM is turned on, turn off the system.

  2. Turn on the VM.

    The system enters BIOS setup mode.

  3. In the Main BIOS menu, using the arrow keys, navigate to the Date and Time field and press Enter.

  4. Enter the UTC/Greenwich Mean Time (GMT) time zone.

    This time zone setting ensures that the reports, logs, and posture-agent log files from the various nodes in your deployment are always synchronized with regard to the time stamps.

  5. Using the arrow keys, navigate to the Boot menu and press Enter.

  6. Using the arrow keys, select CD-ROM drive and press + to move the CD-ROM drive up the order.

  7. Using the arrow keys, navigate to the Exit menu and choose Exit Saving Changes.

  8. Choose Yes to save the changes and exit.

7.

Insert the Cisco ISE software DVD into the VMware ESXi host CD/DVD drive and turn on the virtual machine.

When the DVD boots, the console displays:


Automatic installation starts in 150 seconds.
Available boot options:
[1] Cisco ISE Installation (Keyboard/Monitor)
[2] Cisco ISE Installation (Serial Console)
[3] System Utilities (Keyboard/Monitor)
[4] System Utilities (Serial Console)
[5] Hard Disk
Enter boot option and press <Enter>.
boot: 
8.

Use the arrow keys to select Cisco ISE Installation (Serial Console) or Cisco ISE Installation (Keyboard/Monitor) and press Enter. If you choose the serial console option, you should have a serial console set up on your virtual machine. See the VMware vSphere Documentation for information on how to create a console.

The installer starts the installation of the Cisco ISE software on the VMware system. Allow 20 minutes for the installation process to complete. When the installation process finishes, the virtual machine reboots automatically. When the VM reboots, the console displays:
Type 'setup' to configure your appliance
localhost:
9.

At the system prompt, type setup and press Enter.

The setup wizard appears and guides you through the initial configuration.

VMware tools installation verification


Verify VMWare tools installation using the summary tab in the vSphere Client

Click the Summary tab of the specified VMware host in the vSphere Client. Verify that the value in the VMware Tools field displays "OK".

Figure 1. Verifying VMware tools in the vSphere Client
This image shows how to verify whether VMware tools are installed using the vSphere

Verify VMware tools installation using the CLI

To determine whether VMware tools are installed, run the show inventory command. The output includes NIC driver information. If VMware tools are present, "VMware Virtual Ethernet driver" appears in the driver description field.
NAME: "ISE-VM-K9 chassis", DESCR: "ISE-VM-K9 chassis"
PID: ISE-VM-K9       , VID: A0  , SN: FCH184X9XXX
Total RAM Memory: 65700380 kB
CPU Core Count: 16
CPU 0: Model Info: Intel(R) Xeon(R) CPU E5-2640 v3 @ 2.60GHz
CPU 1: Model Info: Intel(R) Xeon(R) CPU E5-2640 v3 @ 2.60GHz
CPU 2: Model Info: Intel(R) Xeon(R) CPU E5-2640 v3 @ 2.60GHz
CPU 3: Model Info: Intel(R) Xeon(R) CPU E5-2640 v3 @ 2.60GHz
CPU 4: Model Info: Intel(R) Xeon(R) CPU E5-2640 v3 @ 2.60GHz
CPU 5: Model Info: Intel(R) Xeon(R) CPU E5-2640 v3 @ 2.60GHz
CPU 6: Model Info: Intel(R) Xeon(R) CPU E5-2640 v3 @ 2.60GHz
CPU 7: Model Info: Intel(R) Xeon(R) CPU E5-2640 v3 @ 2.60GHz
CPU 8: Model Info: Intel(R) Xeon(R) CPU E5-2640 v3 @ 2.60GHz
CPU 9: Model Info: Intel(R) Xeon(R) CPU E5-2640 v3 @ 2.60GHz
CPU 10: Model Info: Intel(R) Xeon(R) CPU E5-2640 v3 @ 2.60GHz
CPU 11: Model Info: Intel(R) Xeon(R) CPU E5-2640 v3 @ 2.60GHz
CPU 12: Model Info: Intel(R) Xeon(R) CPU E5-2640 v3 @ 2.60GHz
CPU 13: Model Info: Intel(R) Xeon(R) CPU E5-2640 v3 @ 2.60GHz
CPU 14: Model Info: Intel(R) Xeon(R) CPU E5-2640 v3 @ 2.60GHz
CPU 15: Model Info: Intel(R) Xeon(R) CPU E5-2640 v3 @ 2.60GHz
Hard Disk Count(*): 1
Disk 0: Device Name: /xxx/abc
Disk 0: Capacity: 1198.00 GB
NIC Count: 6
NIC 0: Device Name: eth0:
NIC 0: HW Address: xx:xx:xx:xx:xx:xx
NIC 0: Driver Descr: Intel(R) Gigabit Ethernet Network Driver
NIC 1: Device Name: eth1:
NIC 1: HW Address: xx:xx:xx:xx:xx:xx
NIC 1: Driver Descr: Intel(R) Gigabit Ethernet Network Driver
NIC 2: Device Name: eth2:
NIC 2: HW Address: xx:xx:xx:xx:xx:xx
NIC 2: Driver Descr: Intel(R) Gigabit Ethernet Network Driver
NIC 3: Device Name: eth3:
NIC 3: HW Address: xx:xx:xx:xx:xx:xx
NIC 3: Driver Descr: Intel(R) Gigabit Ethernet Network Driver
NIC 4: Device Name: eth4:
NIC 4: HW Address: xx:xx:xx:xx:xx:xx
NIC 4: Driver Descr: Intel(R) Gigabit Ethernet Network Driver
NIC 5: Device Name: eth5:
NIC 5: HW Address: xx:xx:xx:xx:xx:xx
NIC 5: Driver Descr: Intel(R) Gigabit Ethernet Network Driver

(*) Hard Disk Count may be Logical.

Support for upgrading VMware tools

The Cisco ISE ISO image contains the supported VMware tools. You cannot upgrade VMware tools using the VMware client user interface. To use a newer version of VMware tools, upgrade Cisco ISE to a newer version.


Clone a Cisco ISE virtual machine

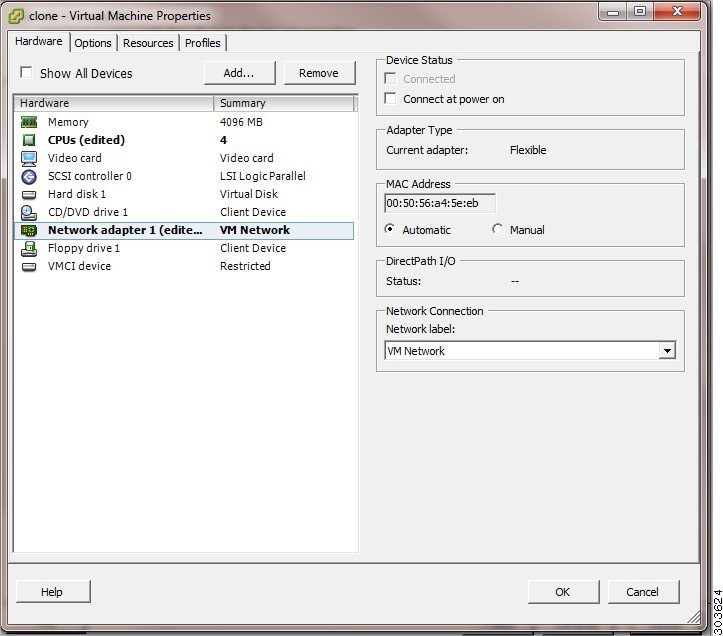
You can clone a Cisco ISE VMware virtual machine (VM) to create an exact replica of a Cisco ISE node. For example, in a distributed deployment with multiple Policy Service nodes (PSNs), VM cloning helps you deploy the PSNs quickly and effectively. You do not have to install and configure the PSNs individually.

You can also clone a Cisco ISE VM using a template.

Note

For cloning, you need VMware vCenter. Cloning must be done before you run the setup program. When you power on the cloned VM for the first time, if VMware prompts you to choose between I Copied It and I Moved It, you must choose I Copied It. This ensures the VM is assigned a new MAC address and UUID, resulting in a unique UDI. Choosing I Moved It causes duplicate UDI and registration or licensing issues in Cisco ISE deployments.

Before you begin

  • Shut down the Cisco ISE VM that you plan to clone. In the vSphere client, right-click the Cisco ISE VM and choose Power > Shut Down Guest.

  • Do not change the IP address or hostname before powering on the cloned VM. Complete the cloning process. Power on the VM and choose I Copied It when prompted. Configure the IP address and hostname during the initial setup.

Procedure

1.

Log in to the ESXi server as a user with administrative privileges (root user).

VMware vCenter is required to perform this step.

2.

Right-click the Cisco ISE VM you want to clone, and click Clone.

3.

In the Name and Location dialog box, enter a name for the new machine and click Next.

This is not the hostname of the new Cisco ISE VM that you are creating, but a descriptive name for your reference.

4.

Select a host or cluster to run the new Cisco ISE VM, and click Next.

5.

Select a datastore for the new Cisco ISE VM and click Next.

The datastore may be the local option on the ESXi server, or remote storage. Ensure the datastore has sufficient disk space.

6.

In the Disk Format dialog box, select the Same format as source radio button, and click Next.

This option copies the format used in the Cisco ISE VM that you are cloning.

7.

In the Guest Customization dialog box, select the Do not customize radio button and click Next.

8.

Click Finish.

What to do next


Clone a Cisco ISE virtual machine using a template

If you use vCenter, you can use a VMware template to clone a Cisco ISE VM. You can create a template by cloning a Cisco ISE node, then use the template to create multiple Cisco ISE nodes. Cloning a virtual machine using a template requires completing two steps.

Before you begin

Note

For cloning, you need VMware vCenter. Complete the cloning process prior to running the setup program.

Procedure

1.

Create a virtual machine template

2.

Deploy a virtual machine template


Create a virtual machine template

Before you begin

  • Shut down the Cisco ISE VM that you intend to clone. In the vSphere client, right-click the VM and choose Power > Shut Down Guest.

  • Create a template from a newly installed Cisco ISE VM before running the setup program. After creating the Cisco ISE nodes, run the setup program on each one and configure their IP address and hostname individually.

Procedure

1.

Log in to the ESXi server as a user with administrative privileges (root user).

VMware vCenter is required to perform this step.

2.

Right-click the Cisco ISE VM that you want to clone and choose Clone > Clone to Template.

3.

Enter a name for the template, choose a location to save the template in the Name and Location dialog box, and click Next.

4.

Choose the ESXi host that you want to store the template on and click Next.

5.

Choose the datastore that you want to use to store the template and click Next.

Ensure that this datastore has the required amount of disk space.

6.

Click the Same format as source radio button in the Disk Format dialog box and click Next.

The Ready to Complete dialog box appears.

7.

Click Finish.


Deploy a virtual machine template

After you create a virtual machine template, you can deploy it on other virtual machines (VMs).

Procedure

1.

Right-click the Cisco ISE VM template that you have created and choose Deploy Virtual Machine from this template.

2.

Enter a name for the new Cisco ISE node. Choose a location for the node in the Name and Location dialog box, and click Next.

3.

Choose the ESXi host where you want to store the new Cisco ISE node and click Next.

4.

Choose the datastore that you want to use for the new Cisco ISE node and click Next.

Verify that the datastore has enough disk space.

5.

Click the Same format as source radio button in the Disk Format dialog box and click Next.

6.

Click the Do not customize radio button in the Guest Customization dialog box.

The Ready to Complete dialog box is displayed.

7.

Check the Edit Virtual Hardware check box and click Continue.

The Virtual Machine Properties page is displayed.

8.

Choose Network adapter, uncheck the Connected and Connect at power on check boxes, and click OK.

9.

Click Finish.

Power on the Cisco ISE node, configure its IP address and hostname, and connect it to the network.

What to do next


Change the IP address and hostname of a cloned virtual machine

After cloning a Cisco ISE VM, power it on and change its IP address and hostname.

Before you begin

  • Make sure your Cisco ISE node is in the standalone state.

  • Before you power on the newly cloned Cisco ISE VM, make sure its network adapter is not connected. Uncheck the Connected and Connect at power on check boxes. This prevents the node from using the same IP address as the original source machine.

    Caution

    Cloning a Cisco ISE virtual machine will result in the hypervisor assigning a new MAC address to the primary network interface (eth0). Because Cisco ISE licenses are tied to the Unique Device Identifier (UDI) generated from this MAC address, cloning an already-registered node will invalidate its licenses. You must re-host your licenses in the Cisco Smart Software Manager for the new UDI.

    Figure 2. Disconnecting the network adapter
    This image shows how to disconnect the network adaptor.
  • Before powering on the newly cloned VM, decide on the IP address and hostname to assign. Add both to the DNS server. Use a unique hostname; do not use "localhost".

  • Obtain certificates for the Cisco ISE nodes using the new IP address or hostname.

Procedure

1.

Right-click the newly cloned Cisco ISE VM and choose Power > Power On.

2.

Select the newly cloned Cisco ISE VM and click the Console tab.

3.

Enter these commands on the Cisco ISE CLI.

configure terminal
hostname hostname

Enter the new hostname you want to configure. Cisco ISE services restart after this step.

4.

Enter these commands.

interface gigabit 0
ip address ip_address netmask

Assign an IP address that matches the configured hostname. Enter the correct netmask for this IP address. When the configuration is complete, Cisco ISE prompts you to restart services. For detailed information about the ip address and hostname commands, refer to the Cisco Identity Services Engine CLI Reference Guide.

5.

Enter Y to restart Cisco ISE services.


Connect a cloned Cisco virtual machine to the network

After you power on the system and change the IP address and hostname, connect the Cisco ISE node to the network.

Procedure

1.

Right-click the newly cloned Cisco ISE VM and click Edit Settings.

2.

Click Network adapter in the virtual machine properties dialog box.

3.

In the Device Status area, check the Connected and Connect at power on check boxes.

4.

Click OK.


Migrate Cisco ISE virtual machine from evaluation to production

After evaluating the Cisco ISE release, you can migrate the system from an evaluation environment to a fully licensed production environment.

Before you begin

  • When you move the VMware server to a production environment that supports a larger number of users, be sure to reconfigure the Cisco ISE installation to the recommended minimum disk size or higher (up to the allowed maximum of 2.4 TB).

  • You cannot migrate data to a production VM from a VM created with less than 300 GB of disk space. Data can only be migrated from VMs created with 300 GB or more disk space to a production environment.

Procedure

1.

Back up the configuration of the evaluation version.

2.

Ensure that your production VM has the required amount of disk space.

3.

Install a production deployment license.

4.

Restore the configuration to the production system.


Check virtual machine performance on demand

You can run the show tech-support command from the CLI to check VM performance at any time. The command output resembles this example:

ise-vm123/admin# show tech | begin "disk IO perf"
Measuring disk IO performance
*****************************************
Average I/O bandwidth writing to disk device: 48 MB/second 
Average I/O bandwidth reading from disk device: 193 MB/second 
WARNING: VM I/O PERFORMANCE TESTS FAILED!
WARNING: The bandwidth writing to disk must be at least 50 MB/second,
WARNING: and bandwidth reading from disk must be at least 300 MB/second.
WARNING: This VM should not be used for production use until disk 
WARNING: performance issue is addressed. 
Disk I/O bandwidth filesystem test, writing 300 MB to /opt: 
314572800 bytes (315 MB) copied, 7.81502 s, 40.3 MB/s
Disk I/O bandwidth filesystem read test, reading 300 MB from /opt: 
314572800 bytes (315 MB) copied, 0.416897 s, 755 MB/s


Virtual machine resource check from the Cisco ISE boot menu

You can check virtual machine resources from the boot menu without installing Cisco ISE.

The CLI transcript appears in this example:


  Cisco ISE Installation (Serial Console)
  Cisco ISE Installation (Keyboard/Monitor)
  System Utilities (Serial Console)
  System Utilities (Keyboard/Monitor)

Use the arrow keys to select System Utilities (Serial Console) or System Utilities (Keyboard/Monitor) and press Enter. The next screen appears.


Available System Utilities:

  [1] Recover administrator password
  [2] Virtual Machine Resource Check
  [3] Perform System Erase
  [q] Quit and reload

Enter option [1 - 3] q to Quit

Enter 2 to check for VM resources. The output will resemble this example:

*****
***** Virtual Machine host detected…
***** Hard disk(s) total size detected: 600 Gigabyte
***** Physical RAM size detected: 16267516 Kbytes
***** Number of network interfaces detected: 6
***** Number of CPU cores: 12
***** CPU Mhz: 2300.00
***** Verifying CPU requirement…
***** Verifying RAM requirement…
***** Writing disk partition table…