Install Crosswork on VMware using vSphere
Follow these steps to deploy Crosswork on a single VM using the VMware vSphere user interface.
Before you begin
Ensure that:
-
You are familiar with the workflow and deployment decisions explained in Plan your installation.
-
The VMware host you have selected meets the requirements specified in Hardware requirements and VMware installation requirements.
-
The network is configured to meet all the requirements specified in Network requirements
-
The ports on the host and your devices are configured to meet the requirements specified in Management port requirements and Device port requirements.
-
You have assembled all of the installation values you will need, as specified in Gather installation parameter values.
 Attention |
The download file names given in this topic are subject to change. You can always find the latest versions by pointing your browser to https://software.cisco.com/download/home and searching for . |
Procedure
|
Step 1 |
Install a supported version of VMware ESXi on the machine you plan to use as the Crosswork server. |
||
|
Step 2 |
With VMware ESXi running, log into the VMware vSphere Web Client. On the left navigation pane, choose the ESXi host where you want to deploy the VM. |
||
|
Step 3 |
In the vSphere UI, go to and select the virtual switch for the Management Network that will be used to access the UI of the VM. In the virtual switch, select , and configure the following DVS port group properties:
Confirm the settings and repeat the process for the virtual switch that will be used for the Data Network. |
||
|
Step 4 |
Review and confirm that your network settings meet the requirements. Ensure that the networks that you plan to use for Management Network and Data network are connected to the host. Contact your Cisco Experience team for assistance. |
||
|
Step 5 |
From Cisco Software Central, download the latest version of the Cisco Crosswork platform image file to a storage location on the same system: CW-CWM-Solutions-Advantage-2.1.0-20-SVM-7.2.0-45-ova.signed.bin. |
||
|
Step 6 |
Choose .
|
||
|
Step 7 |
The VMware Deploy OVF Template window appears, with the first step, 1 - Select an OVF template, highlighted. Click Choose Files to navigate to the location where you downloaded the OVA image file and select it. Once selected, the file name is displayed in the window. |
||
|
Step 8 |
Click Next. The Deploy OVF Template window is refreshed, with 2 - Select a name and folder now highlighted. Enter a name and select the respective data center for the Cisco Crosswork VM you are creating. We recommend that you include the Cisco Crosswork version and build number in the name, for example: Cisco Crosswork 7.2 Build 48. |
||
|
Step 9 |
Click Next. The Deploy OVF Template window is refreshed, with 3 - Select a compute resource highlighted. Select the host for your Cisco Crosswork VM. |
||
|
Step 10 |
Click Next. The VMware vCenter Server validates the OVA. Network speed will determine how long validation takes. After the validation is complete, the Deploy OVF Template window is refreshed, with 4 - Review details highlighted. |
||
|
Step 11 |
Review the OVF template that you are deploying. This information is gathered from the OVF, and cannot be modified.
|
||
|
Step 12 |
Click Next. The Deploy OVF Template window is refreshed, with 5 - License agreements highlighted. Review the End User License Agreement and if you agree, click the I accept all license agreements checkbox. Otherwise, contact your Cisco Experience team for assistance. |
||
|
Step 13 |
Click Next The Deploy OVF Template window is refreshed, with 6 - Configuration highlighted. Choose the desired deployment configuration. 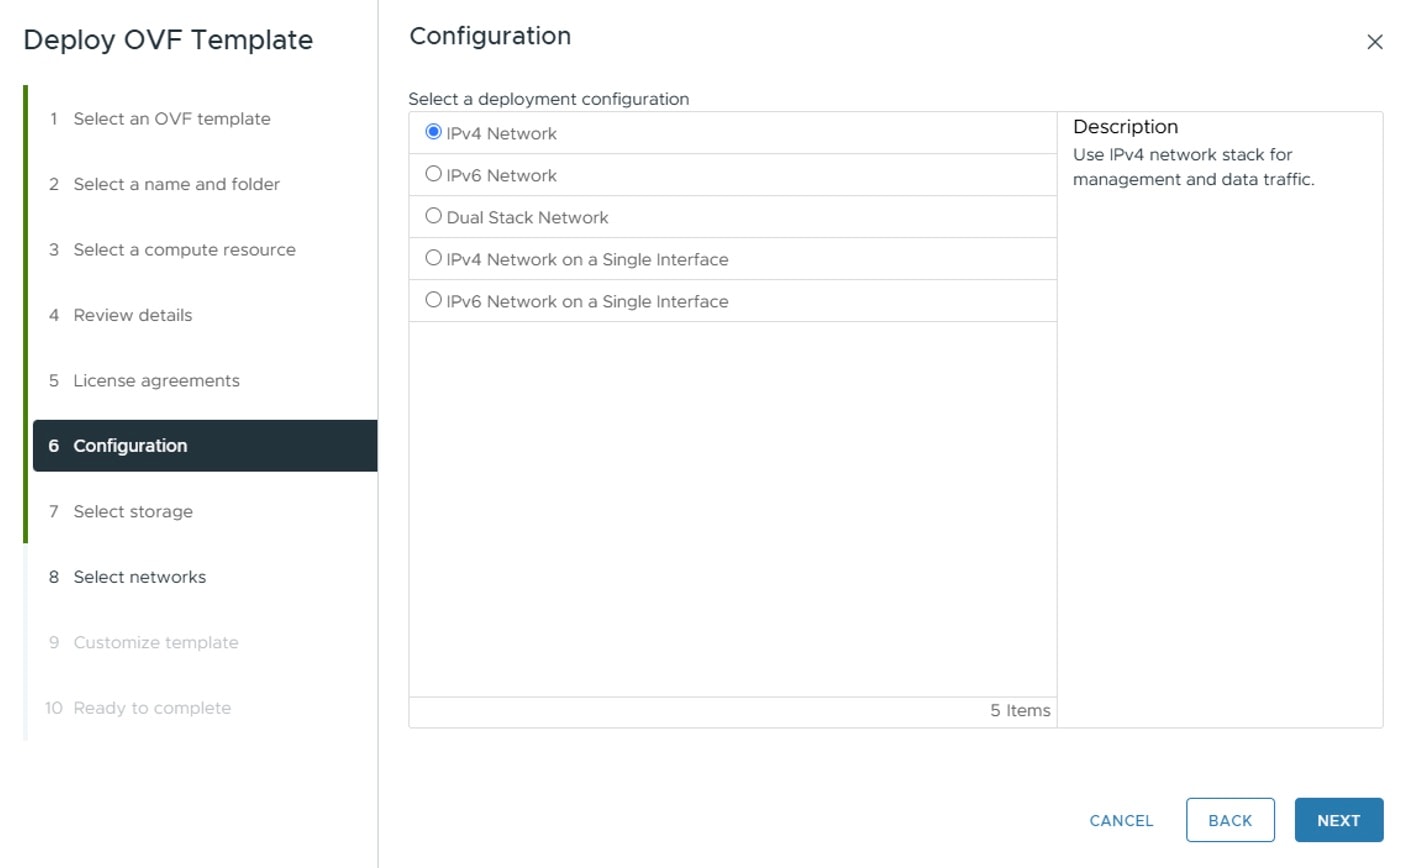
|
||
|
Step 14 |
Click Next. The Deploy OVF Template window is refreshed, with 7 - Select Storage highlighted. Choose the relevant option from the Select virtual disk format drop-down list. From the table, choose the datastore you want to use, and review its properties to ensure there is enough available storage. 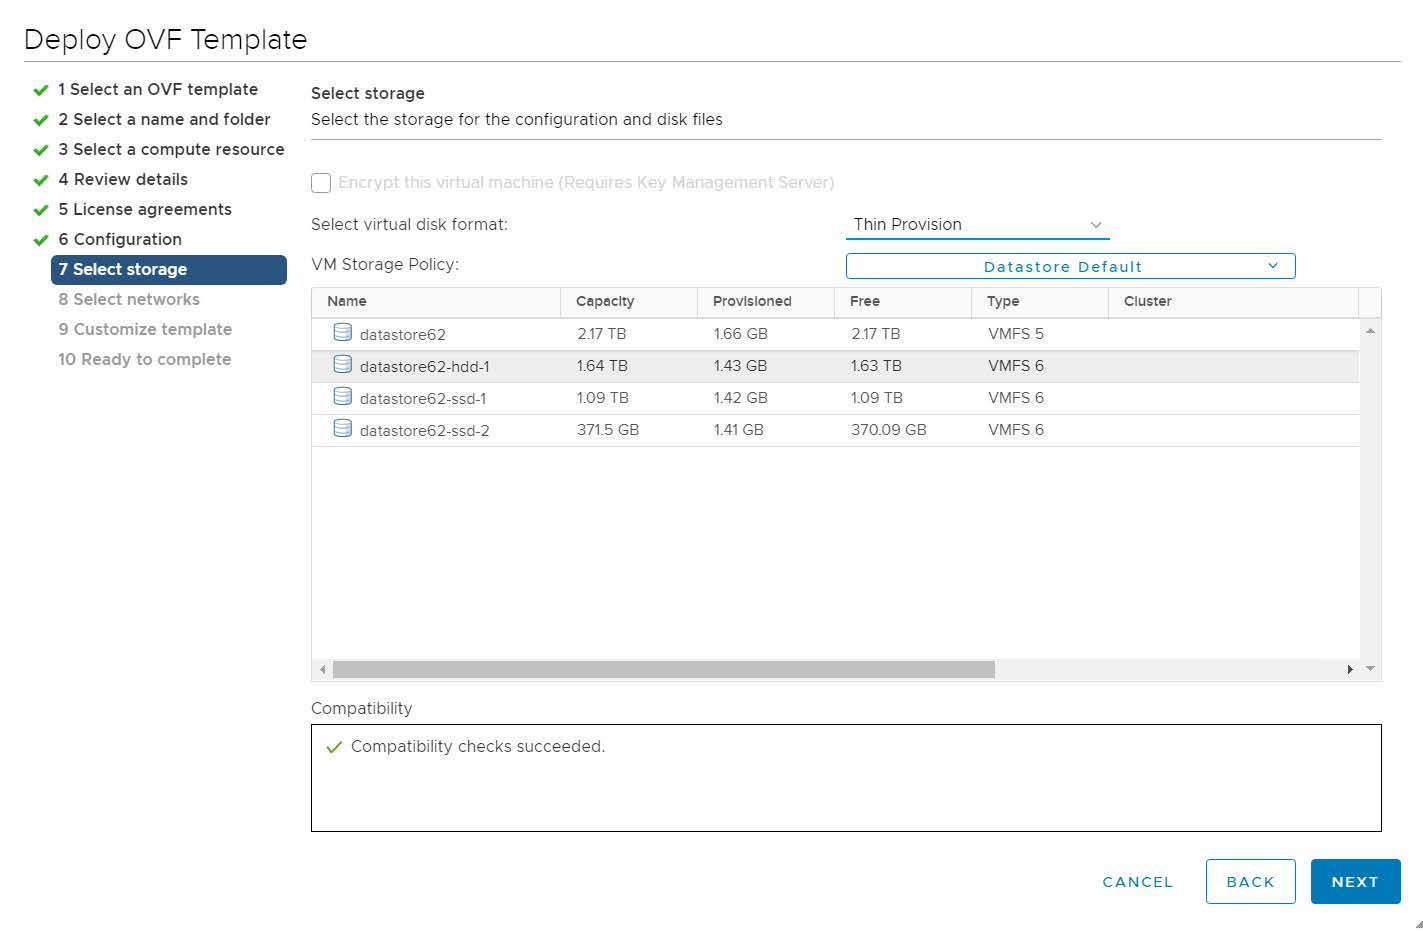
|
||
|
Step 15 |
Click Next. The Deploy OVF Template window is refreshed, with 8 - Select networks highlighted. From the Destination Network drop-down list, select the proper networks for the Management Network and the Data Network. 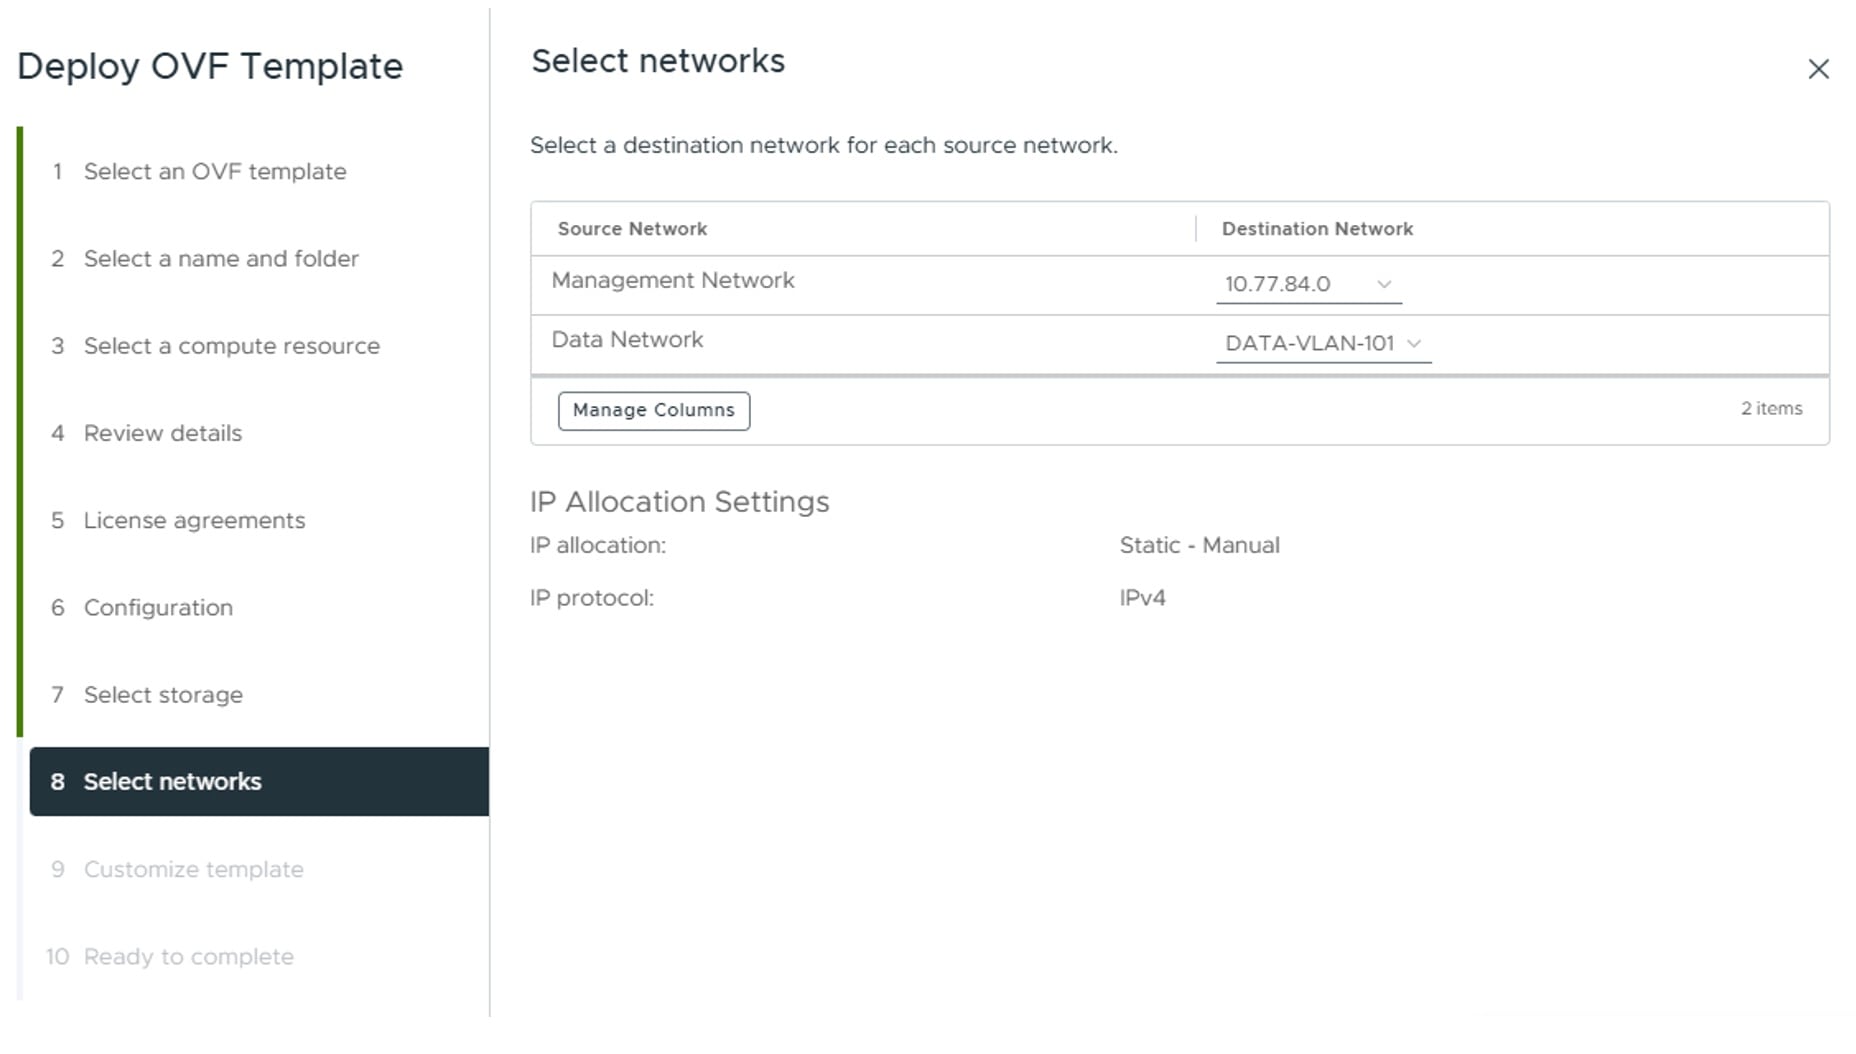
|
||
|
Step 16 |
Click Next. The Deploy OVF Template window is refreshed, with 9 - Customize template highlighted. |
||
|
Step 17 |
Click Next. The Deploy OVF Template window is refreshed, with 10 - Ready to Complete highlighted. |
||
|
Step 18 |
Review your settings and then click Finish if you are ready to begin deployment. Wait for the deployment to finish before continuing. To check the deployment status:
|
||
|
Step 19 |
Once the deployment is completed, right-click on the VM and select Edit Settings. The Edit Settings dialog box is displayed. Under the Virtual Hardware tab, update these attributes:
Click OK to save the changes. |
||
|
Step 20 |
Power on the Crosswork VM. To power on, expand the host’s entry, click the Cisco Crosswork VM, and then choose . The time taken to create the VM can vary based on the size of your deployment profile and the performance characteristics of your hardware. To track creation of the VM and success of the installation, follow the steps in Monitor Crosswork Server Activation. |
 Feedback