Switch Mounting
This chapter describes how to mount the switch.
Mounting the Switch
 Caution |
To prevent the switch from overheating, ensure these minimum clearances:– Top and bottom: 1.0 in. (25 mm)– Exposed side (not connected to the module): 1.0 in. (25 mm) – Front: 1.0 in. (25 mm) |
Installing the Switch on the Wall
 Warning |
Statement 1094—Read Wall-Mounting Instructions Before Installation Read the wall-mounting instructions carefully before beginning installation. Failure to use the correct hardware or to follow the correct procedures could result in a hazardous situation to people and damage to the system. |
Procedure
|
Step 1 |
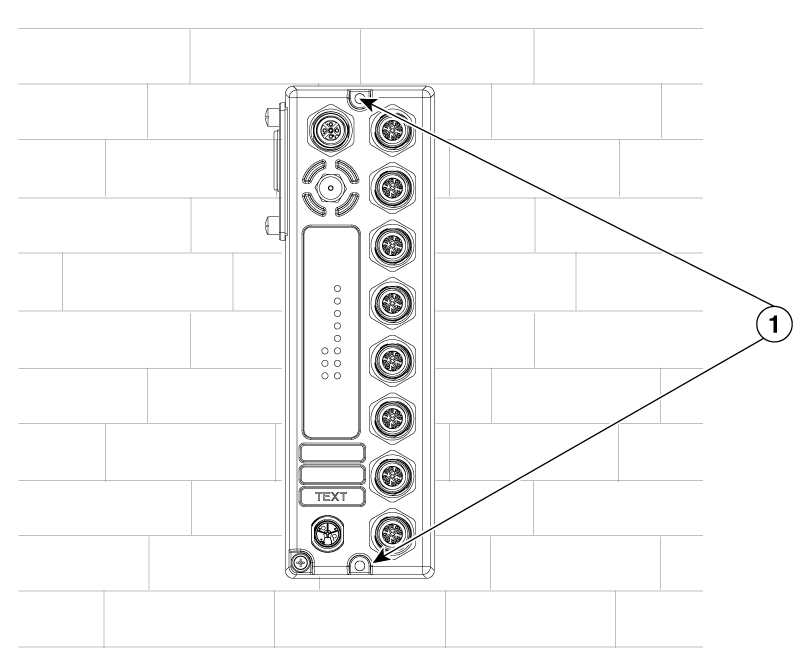
Position the switch against the wall or a panel in the desired location. See the following figure. Attach the device to the wall with the Philips screws. 
|
||||
|
Step 2 |
After the switch is mounted on the wall or panel, connect the power and Ethernet cables. |
 Feedback