Configure Wireless Network

Configure Wireless Network

Select the procedure that matches the wireless platform to associate the OpenRoaming profile with the controller-based network or Meraki network.


Note


If the selected OpenRoaming profile includes carrier offload, complete the required partner app activation before associating the profile with a newly onboarded controller or Meraki network.

Partner App activation support in OpenRoaming is available for AT&T and T-Mobile. Partner App activation is required before associating a carrier-enabled OpenRoaming profile to a newly onboarded controller or Meraki network.

If the required Partner App is not activated, Cisco Spaces does not allow the carrier-enabled profile to be configured on the newly onboarded network.


Controller-Based Deployments: Configure Catalyst 9800 and AireOS

Before you begin

Before configuring the Catalyst 9800 or AireOS wireless network, configure the SSID and AAA policy.

  • Confirm that the controller appears under Network configuration > Cisco Wireless controllers with the expected controller status and associated connector.

  • Confirm the Connector IP Address is available. If the value is not automatically populated in the Configure Controller window, enter the Cisco Spaces Connector IP address manually.

  • For Catalyst 9800, identify the IOS XE version before generating configuration. Cisco Spaces provides separate Catalyst configuration options for IOS XE 17.2.1 or later and for 16.12.1/17.1.1.

  • If a non-default policy profile or policy tag is used, copy only the ANQP server settings from the generated configuration and apply them to the correct wireless policy profile.

Procedure


Step 1

On the OpenRoaming window, choose Setup.

Step 2

Under Network configuration > Cisco Wireless controllers , click the three-dot icon for the target controller, then click Configure Controller.

Step 3

In the Configure Controller window, choose the required OpenRoaming profile for this controller and click Continue.

Step 4

Choose the controller type: AireOS or Catalyst 9800.

Step 5

Confirm the Connector IP Address. If it is not automatically filled, enter the Cisco Spaces Connector IP address.

Step 6

Confirm the WLAN Name. For Catalyst and AireOS, this value is automatically populated from the SSID name in the selected OpenRoaming profile. To change it, edit the OpenRoaming profile.

Step 7

Click Show Configuration.

Step 8

For Catalyst 9800, select the Catalyst version option that matches the controller IOS XE release: Catalyst (17.2.1/17.3.1) for IOS XE 17.2.1 or later, or Catalyst (16.12.1/17.1.1) for IOS XE releases earlier than 17.2.1.


Apply Catalyst 9800 and AireOS CLI configuration

Continue this task after selecting the Catalyst version option that matches the controller IOS XE release.

Procedure


Step 1

Review the generated CLI configuration. The generated configuration is for the Hotspot OpenRoaming ANQP server.

Step 2

Copy the generated configuration and paste it into the Catalyst 9800 or AireOS controller CLI.

Step 3

After applying the CLI configuration on the controller, click Close in Cisco Spaces.

The OpenRoaming Setup window is displayed.

Step 4

Confirm that the WLAN/SSID, AAA policy, ANQP/Hotspot settings, connector IP, wireless policy profile, policy tag, and controller association match the intended profile. For Catalyst 9800, confirm that the IOS XE version option used to generate the CLI matches the controller release.


Note


  • Only CLI-based configuration is supported for Cisco AireOS and Cisco Catalyst controllers.

  • Review the generated commands before applying them.

  • The generated CLI assumes that the default wireless policy profile and policy tag are used.

  • If the deployment uses a different wireless policy profile or policy tag, copy only the OpenRoaming Hotspot ANQP server settings from the generated configuration and apply them to the correct policy profile and policy tag.

  • Ensure that the policy tag uses the WLAN configured for OpenRoaming and maps to the intended wireless policy profile.


Configure Cisco Meraki Network

Before you begin

  • For Wi-Fi 7, Wi-Fi 6E, and Wi-Fi 6 APs, use R31.1.6 and above.

  • For Wi-Fi 5, Wave 2 APs, use R30.7.2 and above.

  • The Meraki account must have administrator access to activate the OpenRoaming SSID.

  • At least one unconfigured SSID in Meraki Dashboard must be available in Disabled state.

  • Supported Meraki APs include all MR Wi-Fi 5 Wave 2 APs that can be upgraded to at least MR 31.1.6, Wi-Fi 6 APs, and Wi-Fi 6E APs.

  • Confirm Meraki API integration and Cisco Spaces permissions.

  • Confirm Meraki AP outbound connectivity to the OpenRoaming RadSec endpoint over TCP 2083 as described in OpenRoaming Firewall Rules.

Procedure


Step 1

On the OpenRoaming window, choose Setup.

Step 2

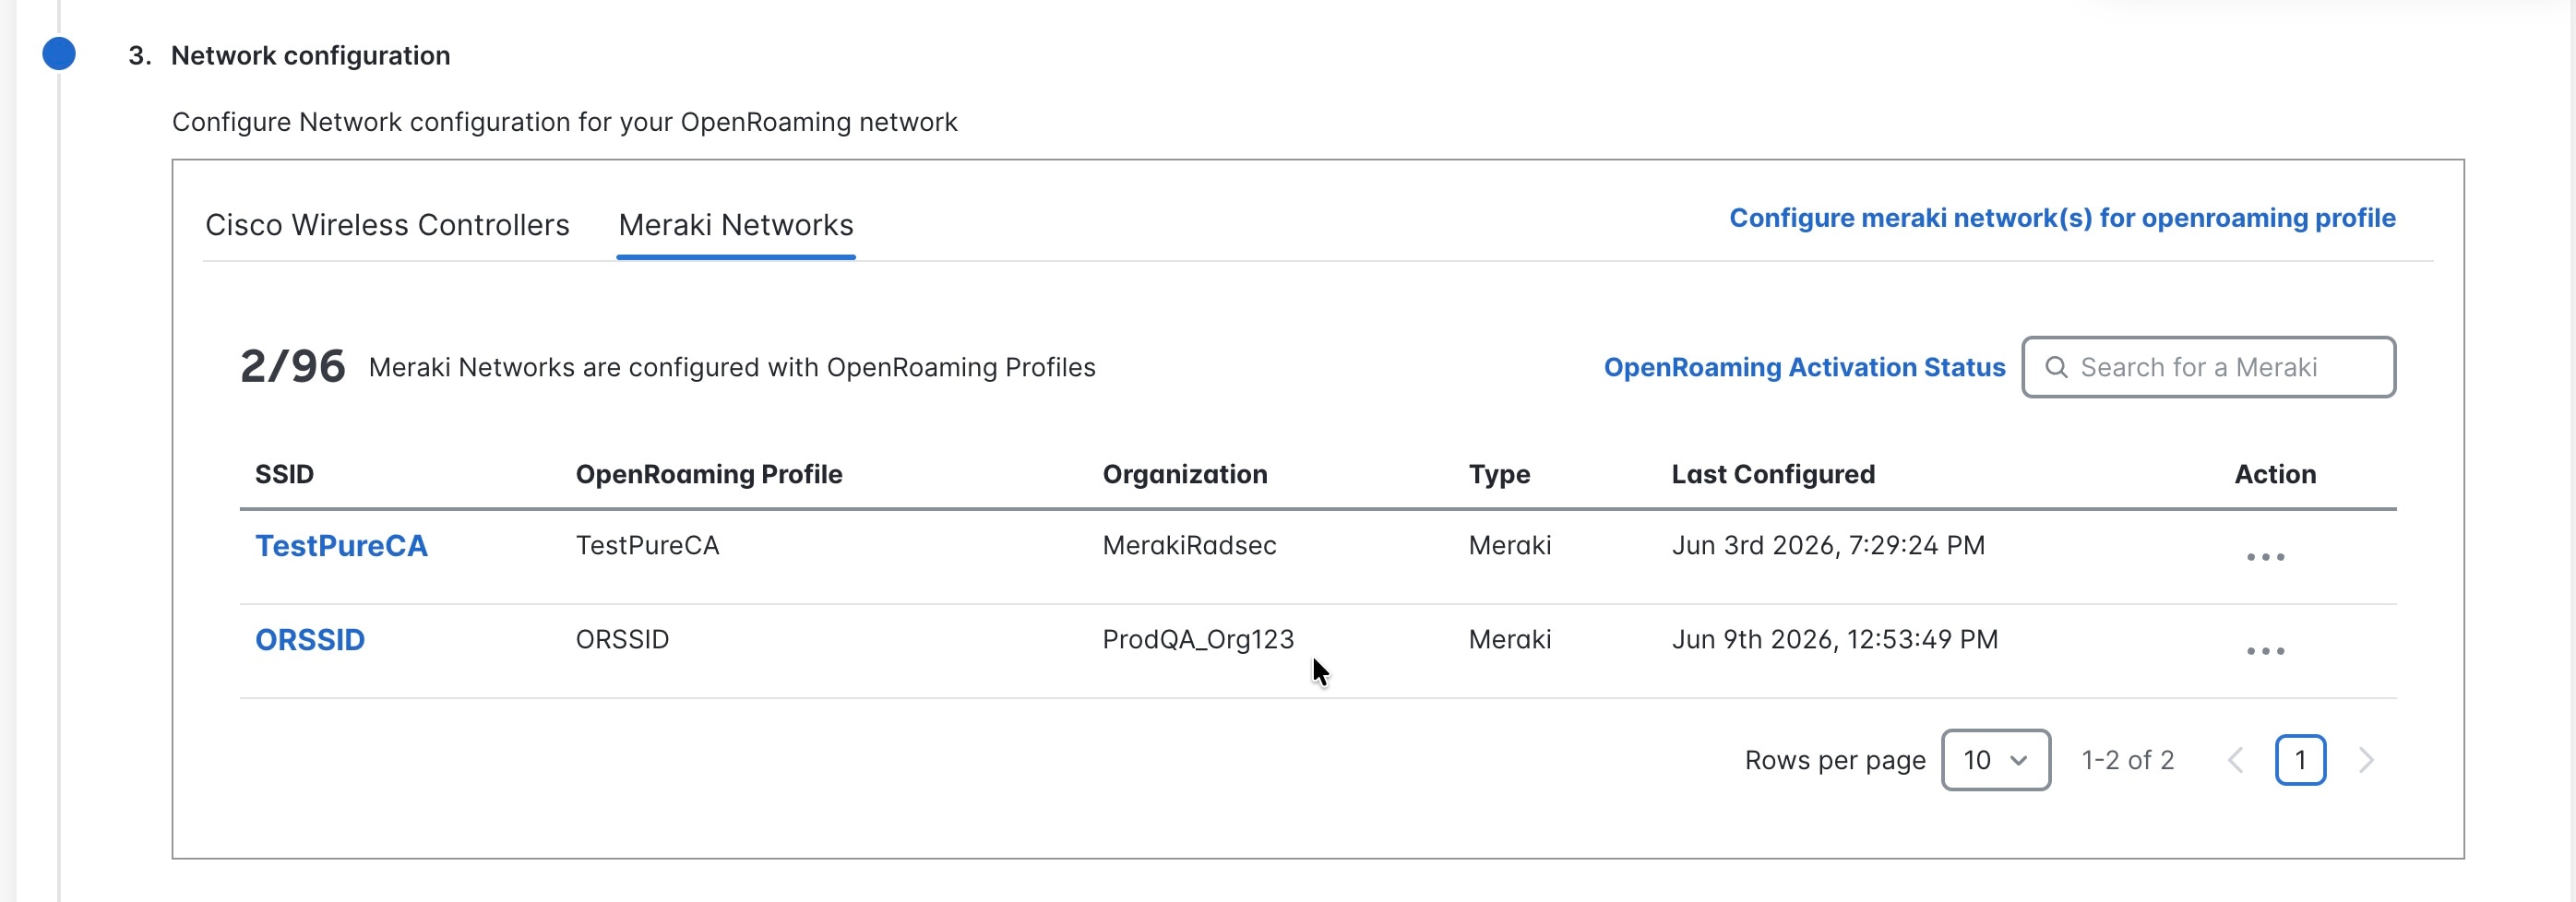
In the Network configuration section, click the Meraki Networks tab.

Figure 1. Meraki Networks

Step 3

Click Set Up.

Step 4

Choose an organization from the drop-down list.

Step 5

Click Next.

Step 6

Choose one or more Cisco Meraki networks for which you want to enable OpenRoaming. This step does not modify existing SSIDs.

Step 7

Click Next.


Review Cisco Meraki network configuration

Continue this task after choosing one or more Cisco Meraki networks for which you want to enable OpenRoaming.

Procedure


Step 1

From the drop-down list, select the OpenRoaming profile to apply to the Cisco Meraki network.

Step 2

Click Next.

Step 3

Review the Configuration Summary.

Step 4

Click Configure. Cisco Spaces configures the selected Meraki networks with a new SSID based on the OpenRoaming profile.

Step 5

In Meraki Dashboard, go to Wireless > Configure > SSIDs and confirm that the SSID created from the OpenRoaming profile is enabled. In the SSID settings, confirm Security is Enterprise with my RADIUS server, Encryption is WPA2 or WPA3, Splash Page is None (direct access), and RADIUS servers are configured. Navigate to Wireless > Hotspot 2.0 and confirm Hotspot 2.0 is enabled. After client testing, client records appear in Network-wide > Clients, and Cisco Spaces API changes appear under Organization > Monitor > Change Log.


Note


  • Configuration of Cisco Meraki networks that use templates is not supported.

  • If one or more Meraki prerequisites are not met, OpenRoaming can be manually activated by installing a Cisco Spaces Connector. In this scenario, raise a support case for deployment support and describe the scenario. Support case reference: https://activate.dnaspaces.io/hubfs/Assets/CiscoSpaces-SupportUpdate.pdf

  • Avoid weak encryption settings such as WPA1 or WPA1 and WPA2. Some clients may refuse to connect to OpenRoaming SSIDs configured with weak encryption.

  • Use WPA2 Only or WPA3 under Wireless > Configure > Access Control.

  • If required by the customer network design, configure VLAN tagging in the Meraki Client IP and VLAN settings after confirming the OpenRoaming SSID is created.


Edit Cisco Meraki network

Procedure


Step 1

On the OpenRoaming window, choose Setup.

Step 2

In the Network configuration section, click the Meraki Networks tab.

Step 3

Click the SSID for the Cisco Meraki network to update.

Step 4

Click Update after making the needed updates.