Installing the Router Node

This chapter contains the following topics:

Installation Prerequisites

To install the Cisco 8200 Secure Router Node, be aware of the following prerequisites.


Note


For indoor use only. Connect PoE ports only to PoE networks that are not routed to outside plant. Per IEC TR 62101, PoE is considered Network Environment 0; interconnected ITE circuits may therefore be considered SELV.


General Safety Warnings

Take note of the following general safety warnings.


Warning


IMPORTANT SAFETY INSTRUCTIONS

Before you work on any equipment, be aware of the hazards involved with electrical circuitry and be familiar with standard practices for preventing accidents. Read the installation instructions before using, installing, or connecting the system to the power source. Use the statement number at the beginning of each warning statement to locate its translation in the translated safety warnings for this device.

SAVE THESE INSTRUCTIONS



Note


You are strongly advised to read the safety instruction before using the product.

https://www.cisco.com/web/JP/techdoc/pldoc/pldoc.html

When installing the product, use the provided or designated connection cables/power cables/AC adapters.

〈製品使用における安全上の注意〉

www.cisco.com/web/JP/techdoc/index.html

接続ケーブル、電源コードセット、ACアダプタ、バッテリなどの部品は、必ず添付品または

指定品をご使用ください。添付品・指定品以外をご使用になると故障や動作不良、火災の

原因となります。また、電源コードセットは弊社が指定する製品以外の電気機器には使用

できないためご注意ください。

Warning


Statement 1015—Battery Handling

To reduce risk of fire, explosion or leakage of flammable liquid or gas:

  • Replace the battery only with the same or equivalent type recommended by the manufacturer.

  • Do not dismantle, crush, puncture, use sharp tool to remove, short external contacts, or dispose of in fire.

  • Do not use if battery is warped or swollen.


Warning


To reduce risk of electric shock or fire, installation of the equipment must comply with local and national electrical codes.


Note


An instructed person is someone who has been instructed and trained by a skilled person and takes the necessary precautions when working with equipment.

A skilled person or qualified personnel is someone who has training or experience in the equipment technology and understands potential hazards when working with equipment.


Warning


Ultimate disposal of this product should be handled according to all national laws and regulations.


Equipment Installation to Power Warnings

Take note of the following power safety warnings.


Warning


To reduce risk of electric shock or personal injury, disconnect DC power before removing or replacing components or performing upgrades.


Warning


This unit is intended for installation in restricted access areas. Only skilled, instructed, or qualified personnel can access a restricted access area.


Warning


To reduce the risk of electric shock and fire, a readily accessible disconnect device must be incorporated in the fixed wiring.


Warning


To reduce risk of electric shock, when installing or replacing the unit, the ground connection must always be made first and disconnected last.

If your unit has modules, secure them with the provided screws.


Ground Connection Warnings

Take note of the following ground connection warnings.


Warning


This equipment must be grounded. To reduce the risk of electric shock, never defeat the ground conductor or operate the equipment in the absence of a suitably installed ground conductor. Contact the appropriate electrical inspection authority or an electrician if you are uncertain that suitable grounding is available.


Warning


In the Scandinavian countries (Denmark, Finland, Iceland, Norway, and Sweden) the appliance must be connected to a grounded outlet.


Optical Connection Warnings

Take note of the following optical connection warnings.


Warning


Invisible laser radiation may be emitted from disconnected fibers or connectors. Do not stare into beams or view directly with optical instruments.


Warning


Invisible laser radiation is present. Do not expose to users of telescopic optics. This applies to Class 1/1M laser products.
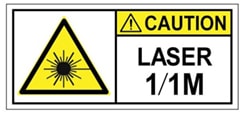


Warning


Laser Safety: Ensure all unused ports are capped to maintain eye safety and prevent signal contamination.


General Node and Component Replacement Warnings

Take note of the following component replacement warning.


Warning


Electrostatic Discharge (ESD): The Cisco 8200 Secure Router Node contains high-density integrated circuits. Always utilize an ESD-preventive wrist strap during handling to avoid permanent hardware damage.


Additional Information

The router node installs into the Cisco UCS XE9305 Chassis. Installation information for the secure router node is contained in this installation and service guide. However, to get complete information about the secure router node and the chassis that contains it, consult the following documents.

Document

Topics

Link

Cisco Unified Edge XE9305 Chassis Installation and Service Guide

Cisco Unified Edge XE9305 Chassis Installation and Service Guide

Regulatory Compliance and Safety Information (downloadable PDF)

--

Regulatory Compliance and Safety Information – Cisco UCS XE9305 Modular System

Node Installation and Removal

Installing a Router Node

Use this procedure to install a Cisco UCS 8200 Secure Router Node into the chassis.

Before you begin

The Cisco 8200 Secure Router Node installs into a node slot on the front of the Cisco UCS XE9305 Chassis.

The router node features a captive thumbscrew that you can manipulate with your fingers or a #2 Phillips screwdriver. If you want to use the screwdriver, gather it now.

Procedure


Step 1

Prepare the node for installation.

  1. If needed, remove any blank (filler panel) that covers the chassis slot, or remove any existing node that is in the slot.

  2. Ensure the node’s ejector lever is in the open position (approximately a 45-degree angle).

  3. Align the router node with the chassis slot, ensuring the top cover is facing up.

The ejector lever must not be flush with the faceplate prior to inserting the node into the chassis.

Step 2

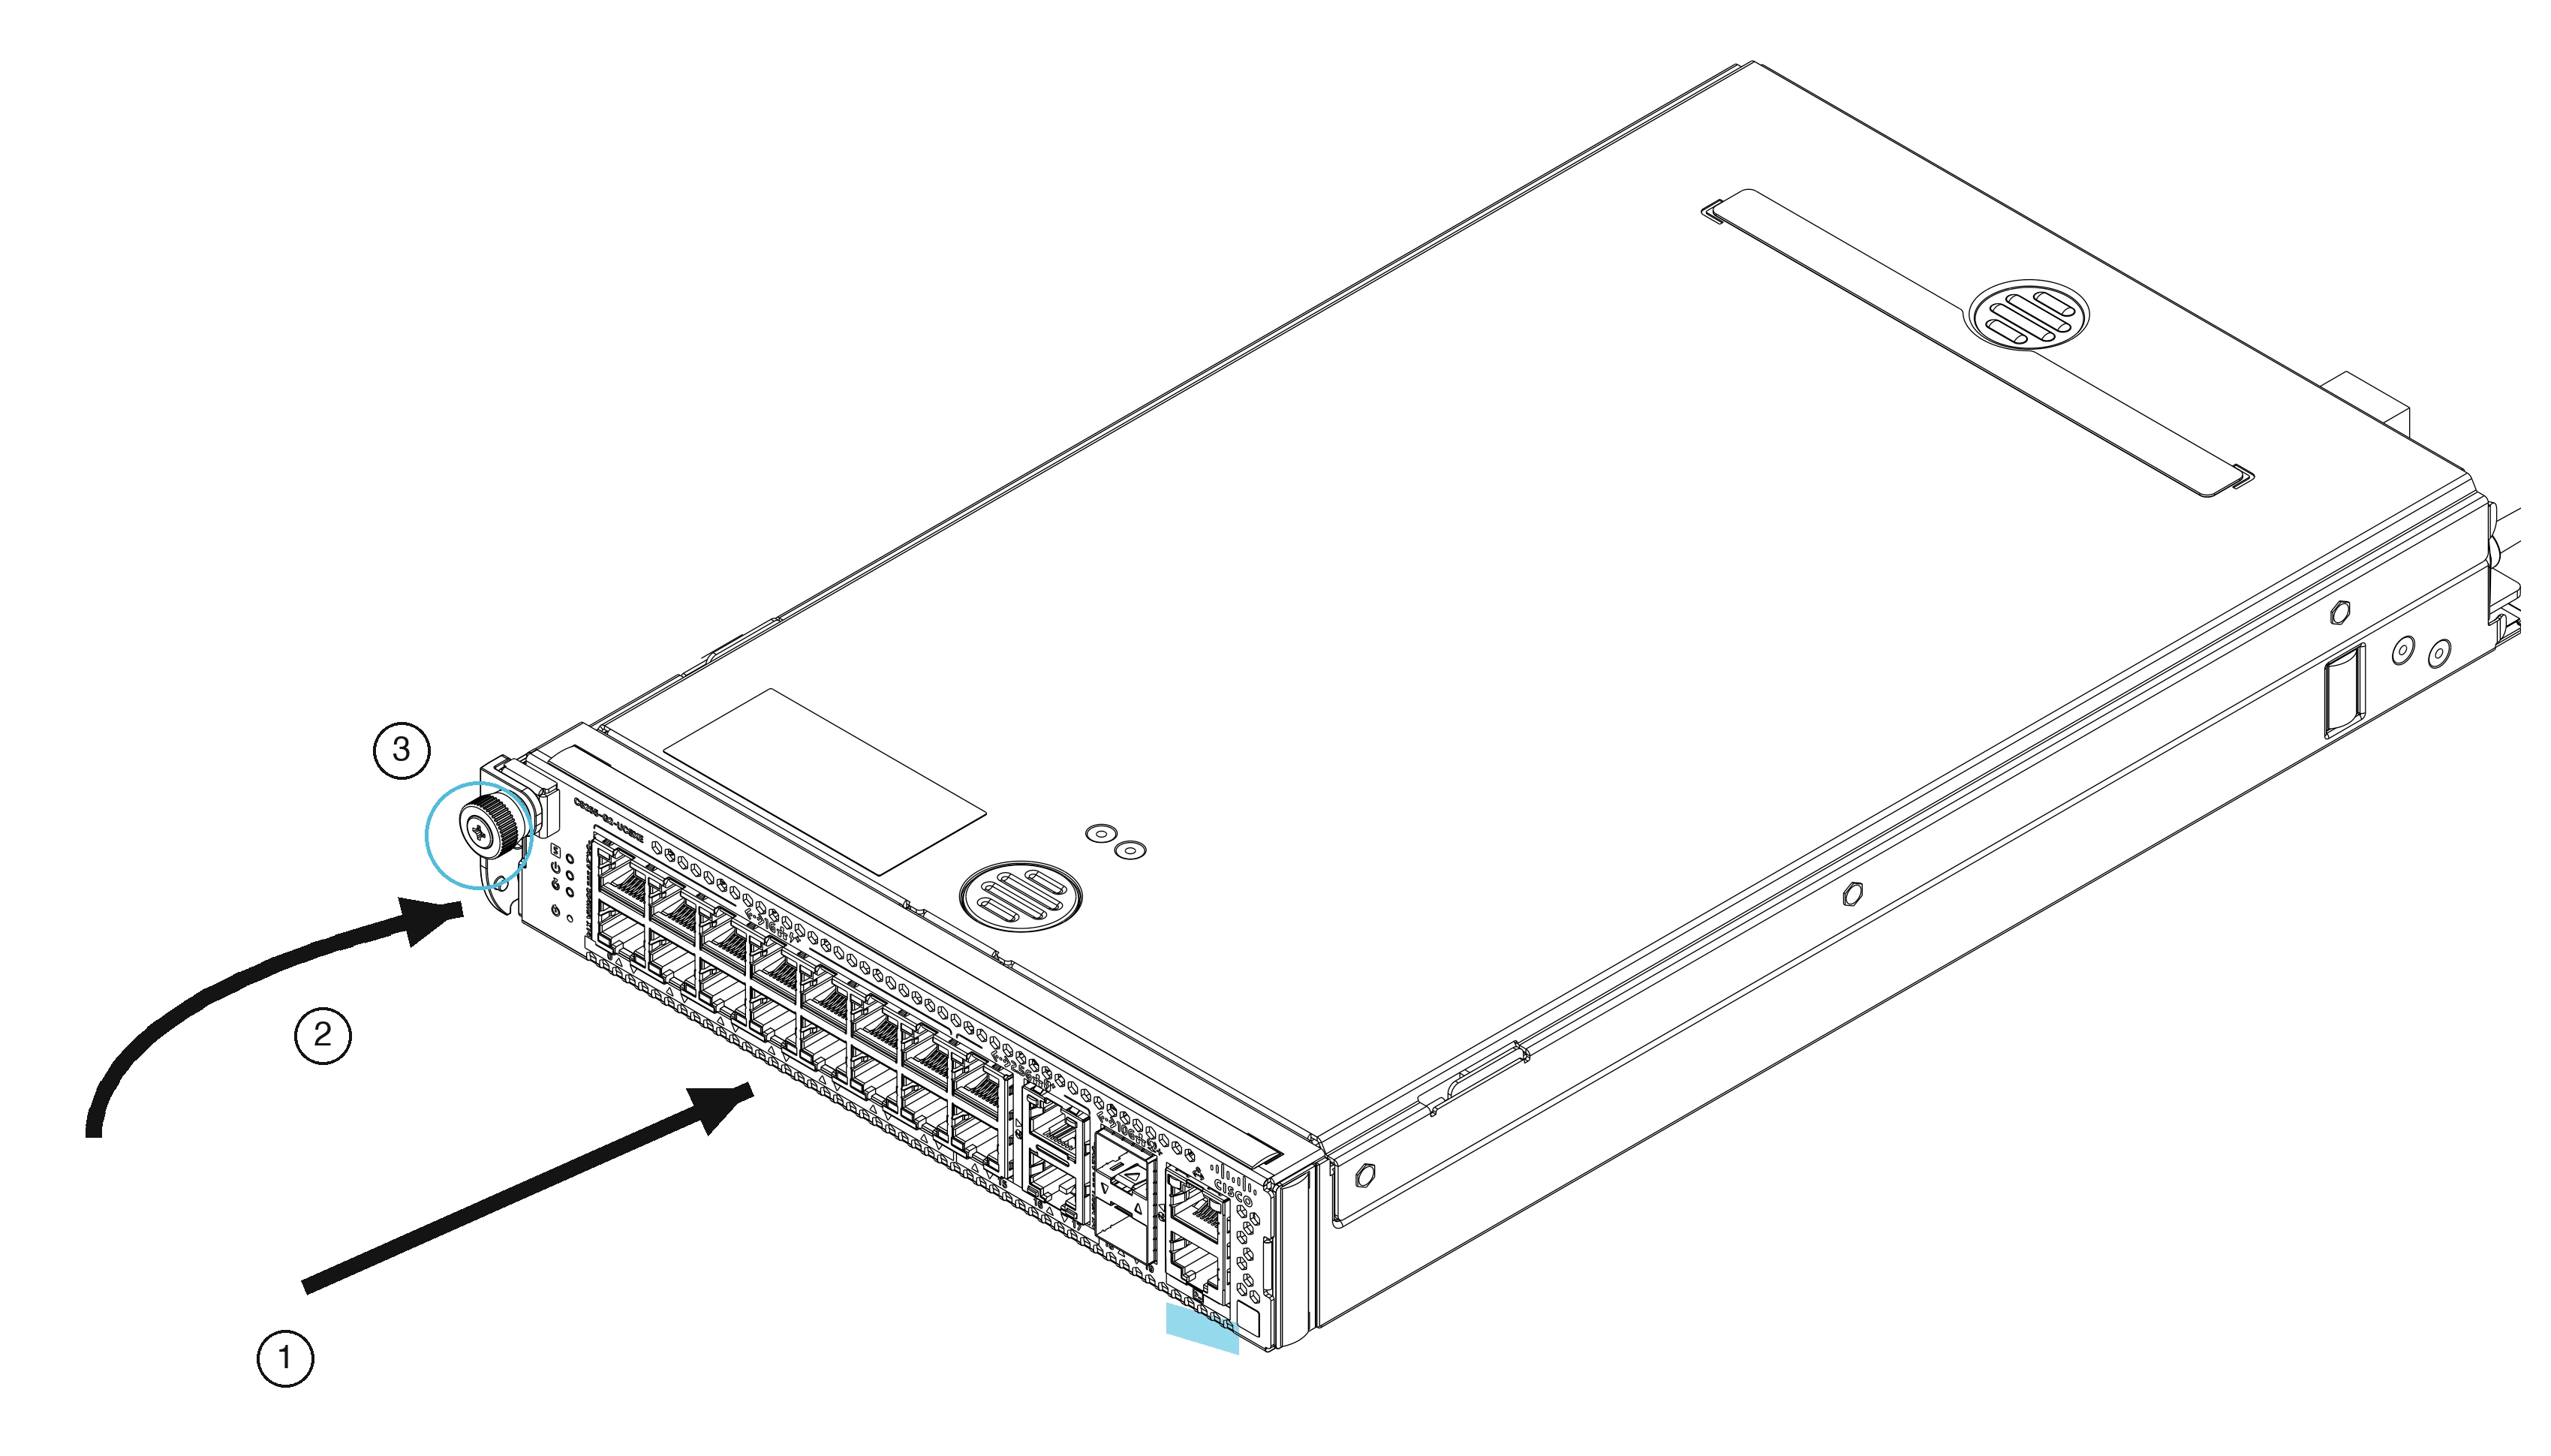
Support the underside of the node and slide it into the slot.

Expect some resistance as the rear connector engages with the chassis socket.

Step 3

Secure the node into the chassis.

Gently swing the ejector lever in an upward arc (to the closed position) until it clicks. Start threading the captive thumbscrew by hand, then use the screwdriver to tighten it to between 4.2 in-lbs and 5.9 in-lbs (5.1 kg-cm to 6.9 kg-cm).


Note


Once installed, the node will automatically power on after connecting to the power backplane.


Step 4

Complete post-installation tasks:

  1. If needed, use a Cisco management tool, such as Cisco IOS, to configure the router node.

  2. Connect, or reconnect, network and management cables as needed.


    Note


    For PoE connections, connect only to PoE networks that are not routed to outside plant.


Removing a Router Node

Use this procedure to remove a Cisco UCS 8200 Secure Router Node from the chassis.


Caution


Do not operate the Cisco UCS XE9305 Chassis with any uncovered or open node slots. If you remove a router node, you must insert another node or a node blank.


Before you begin

The Cisco 8200 Secure Router Node is located in one of the chassis slots on the front of the Cisco UCS XE9305 Chassis.

The router node features a captive thumbscrew that you can manipulate with your fingers or a #2 Phillips screwdriver. If you want to use the screwdriver, gather it now.

In normal runtime operation, the router node is connected to peer devices, such as top of rack (ToR) switches. Before removing a router node, you will find it helpful to note how the cables are connected so that, when needed, you can reconnect the router node to the same physical topology that it had before you removed the router node.


Caution


When handling the router node, make sure to follow all appropriate ESD safety guidelines, such as wearing an ESD wristband and using grounded or rubberized mats.


Procedure


Step 1

Using a Cisco management tool, such as Cisco IOS, gracefully power down the router node.

Step 2

Disconnect any cables from the router node.

If you will be reinserting a router node, you can leave the other end of the cables attached to the peer devices.

Step 3

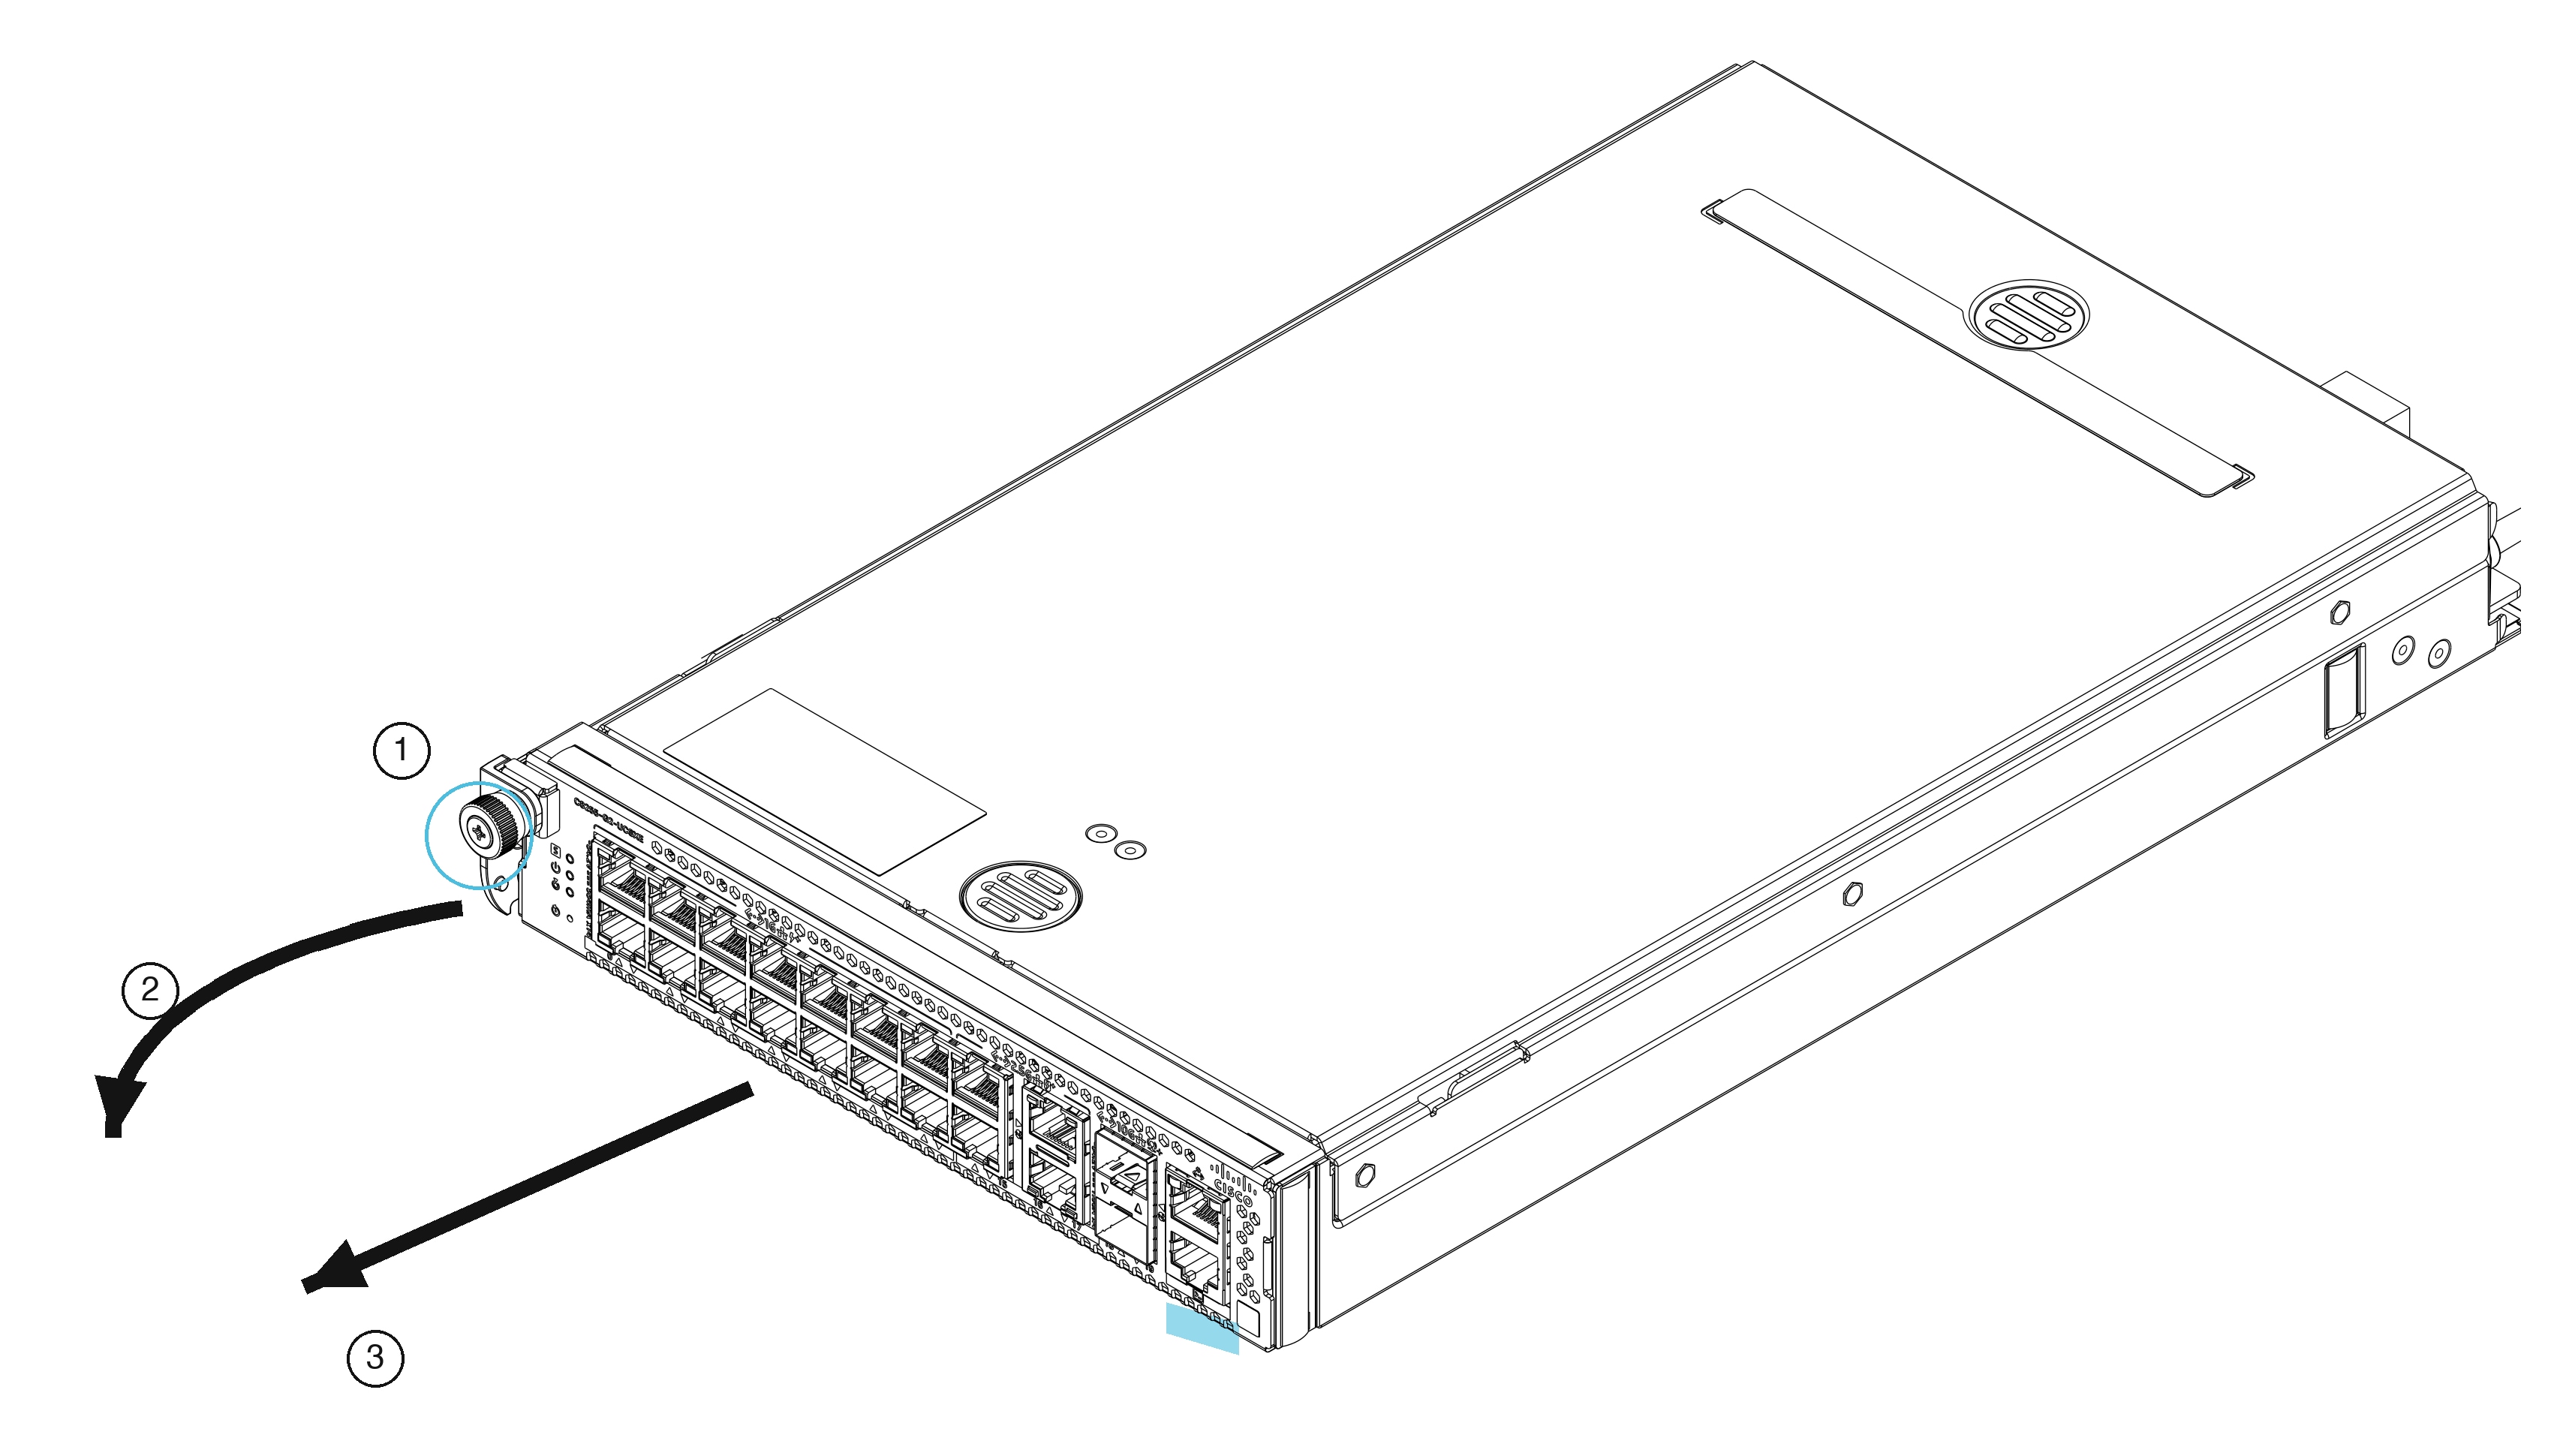
Using your fingers or a #2 Phillips screwdriver, loosen the captive thumbscrew on the front panel of the router node.

Step 4

Pull the release handle in a downward arc (to the open position) to disengage the node from the backplane, then slide the router node out of the chassis.


Note


Make sure to support the underside of the router node while you are sliding it out of the chassis.


What to do next

Choose the appropriate option:

  • If you are reseating the same router node, or installing a new router node, go to Installing a Router Node.

  • If you will be servicing the router node, go to Servicing the Router Node.

  • If you will not be reinstalling any node, cover the empty chassis slot with a blank filler panel.

Console Port Connection Parameters

Console Port Configuration

The Console port (CONSOLE) on the Cisco 8200 Secure Router Node provides a direct serial interface for local management.

Use the following recommended settings for initial connection to the Console port:

  • Baud Rate: 9600 bps (default hardware setting).

  • Data Bits: 8

  • Parity: None

  • Stop Bits: 1

  • Flow Control: None


Note


These parameters reflect the default hardware configuration. Please refer to the appropriate Cisco IOS Configuration Guide for your specific software version to confirm the operational settings or to modify the port configuration for your environment.

Router Node Configuration

The Cisco 8200 Secure Router Node boots from a Cisco IOS image stored in the router node's flash memory.

After the router node is installed and the initial bootup is complete, the router node can be configured through the Cisco IOS Routing management platform.

For additional information, see the appropriate Cisco IOS Configuration Guide for your software version.