- Preface
- Overview
- Installing the Server Operating System or Hypervisor
- Managing the Server
- Viewing Server Properties
- Viewing Server Sensors
- Managing Remote Presence
- Managing User Accounts
- Configuring Network-Related Settings
- Configuring Communication Services
- Managing Certificates
- Configuring Platform Event Filters
- CIMC Firmware Management
- Viewing Logs
- Server Utilities
- Diagnostic Tests
- Index
Managing User Accounts
This chapter includes the following sections:
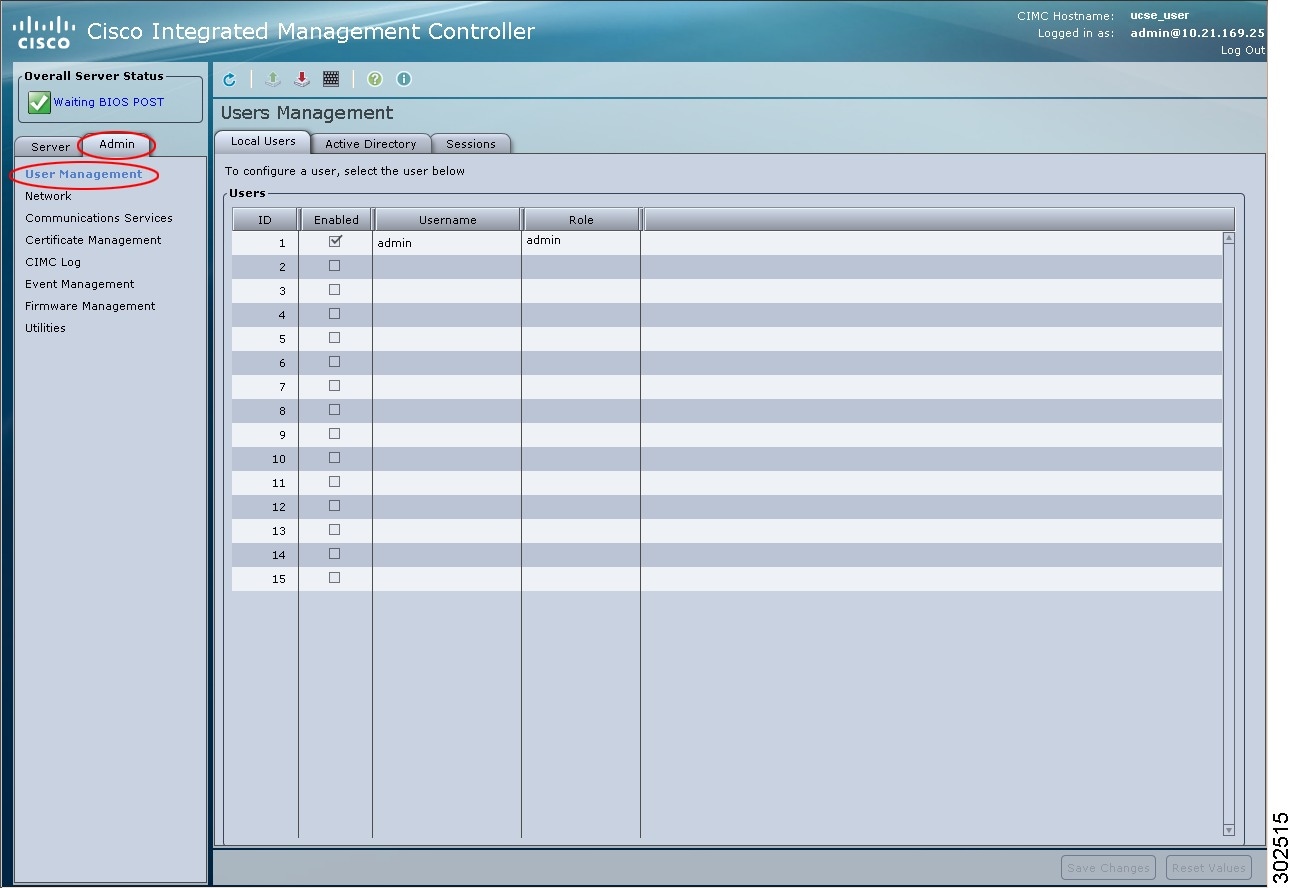
Configuring Local Users
You must log in as a user with admin privileges to configure or modify local user accounts.
Active Directory
Active Directory is a technology that provides a variety of network services including LDAP-like directory services, Kerberos-based authentication, and DNS-based naming. The CIMC utilizes the Kerberos-based authentication service of Active Directory.
When Active Directory is enabled in the CIMC, user authentication and role authorization is performed by Active Directory for user accounts not found in the local user database.
By checking the Enable Encryption check box in the Active Directory Properties area, you can require the server to encrypt data sent to Active Directory.
Configuring the Active Directory Server
The CIMC can be configured to use Active Directory for user authentication and authorization. To use Active Directory, configure users with an attribute that holds the user role and locale information for the CIMC. You can use an existing LDAP attribute that is mapped to the CIMC user roles and locales or you can modify the Active Directory schema to add a new custom attribute, such as the CiscoAVPair attribute, which has an attribute ID of 1.3.6.1.4.1.9.287247.1. For more information about altering the Active Directory schema, see http://technet.microsoft.com/en-us/library/bb727064.aspx.
Use this procedure to create a custom attribute on the Active Directory server.
 Note |
This example creates a custom attribute named CiscoAVPair, but you can also use an existing LDAP attribute that is mapped to the CIMC user roles and locales. |
| Step 1 | Ensure that the Active Directory schema snap-in is installed. | ||||||||||||
| Step 2 |
Using the Active Directory schema snap-in, add a new attribute with the following properties:
|
||||||||||||
| Step 3 | Add the CiscoAVPair attribute to the user class using the Active Directory snap-in: | ||||||||||||
| Step 4 |
Add the following user role values to the CiscoAVPair attribute, for the users that you want to have access to CIMC:
|
What to Do Next
Use the CIMC to configure Active Directory.
Configuring Active Directory in CIMC
You must log in as a user with admin privileges to perform this task.
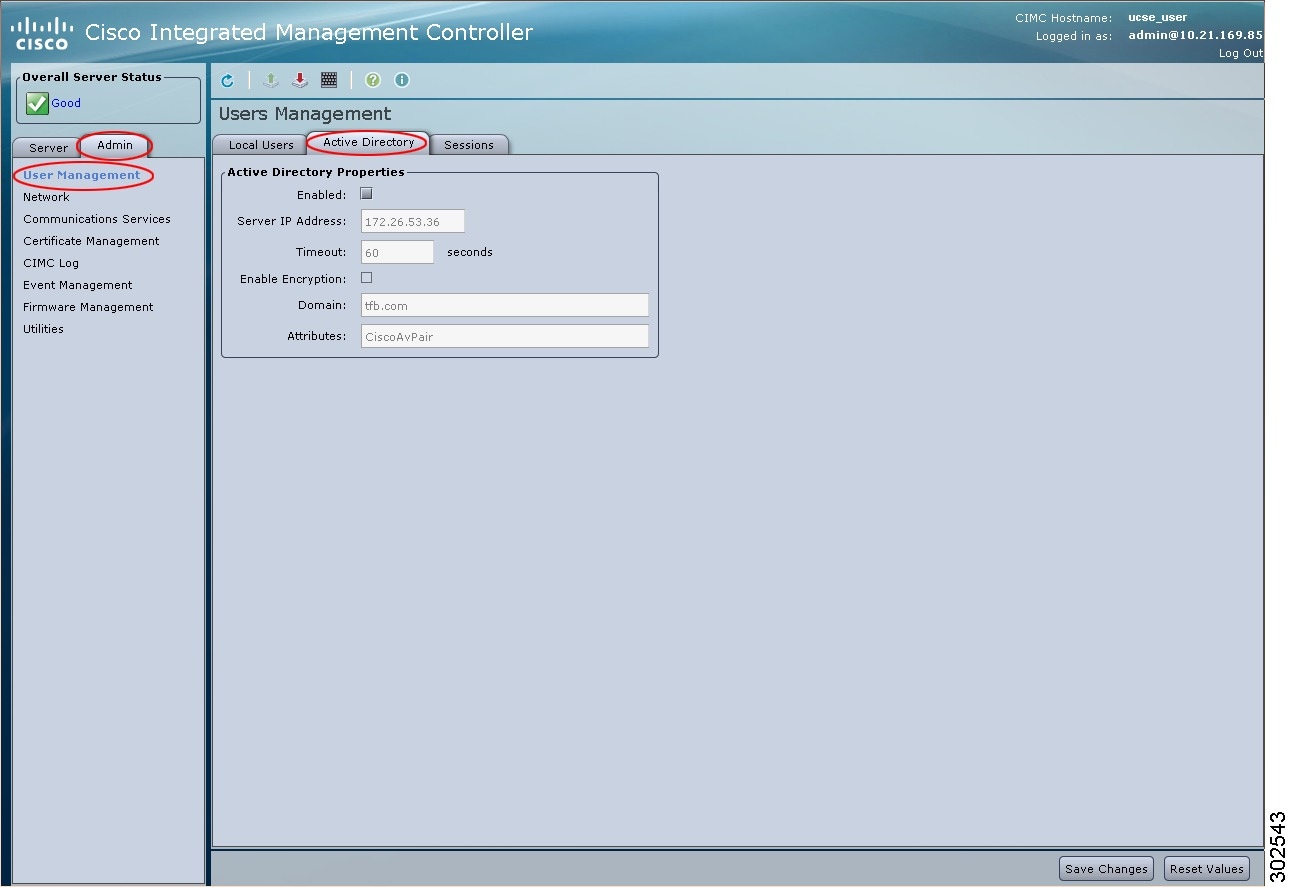
| Step 1 | In the Navigation pane, click the Admin tab. | ||||||||||||||||
| Step 2 | On the Admin tab, click User Management. | ||||||||||||||||
| Step 3 |
In the User Management pane, click the Active Directory tab.
|
||||||||||||||||
| Step 4 |
In the Active Directory Properties area, update the following properties:
|
||||||||||||||||
| Step 5 | Click Save Changes. | ||||||||||||||||
| Step 6 |
To log into the Active Directory server, enter the domain name, back slash (\), and the Active Directory username. For example, if the domain name is mydomain.com and the Active Directory username is admin, then the login name would be mydomain.com\admin. |
Viewing User Sessions
| Step 1 | In the Navigation pane, click the Admin tab. | ||||||||||||||||
| Step 2 | On the Admin tab, click User Management. | ||||||||||||||||
| Step 3 | In the User Management pane, click the Sessions tab. | ||||||||||||||||
| Step 4 |
View the following information about current user sessions:
|
 Feedback