- Preface
- Overview
- Installing the Server Operating System or Hypervisor
- Managing the Server
- Viewing Server Properties
- Viewing Server Sensors
- Managing Remote Presence
- Managing User Accounts
- Configuring Network-Related Settings
- Configuring Communication Services
- Managing Certificates
- Configuring Platform Event Filters
- CIMC Firmware Management
- Viewing Logs
- Server Utilities
- Diagnostic Tests
- Index
Configuring Network-Related Settings
This chapter includes the following sections:
- CIMC NIC Configuration
- Configuring Common Properties
- Configuring IPv4
- Connecting to a VLAN
- Network Security Configuration
CIMC NIC Configuration
CIMC NICs
Two NIC modes are available for connection to the CIMC.
NIC Mode
The NIC Mode drop-down list in the NIC Properties area determines which ports can reach the CIMC. The following mode options are available, depending on your platform:
- Dedicated—A connection to the CIMC is available through the management Ethernet port or ports.
-
Shared LOM—A connection to the CIMC is available through the LAN On Motherboard (LOM) Ethernet host ports and through the router's PCIe and MGF interfaces. 
Note
In shared LOM mode, all host ports must belong to the same subnet.
NIC Redundancy
The NIC Redundancy drop-down list in the NIC Properties area determines how NIC redundancy is handled:
The available redundancy modes vary depending on the selected network mode and your platform.
Configuring CIMC NICs
Use this procedure to set the NIC mode and NIC redundancy.
You must log in as a user with admin privileges to configure the NIC.
Configuring Common Properties
Use common properties to describe your server.
You must log in as a user with admin privileges to configure common properties.
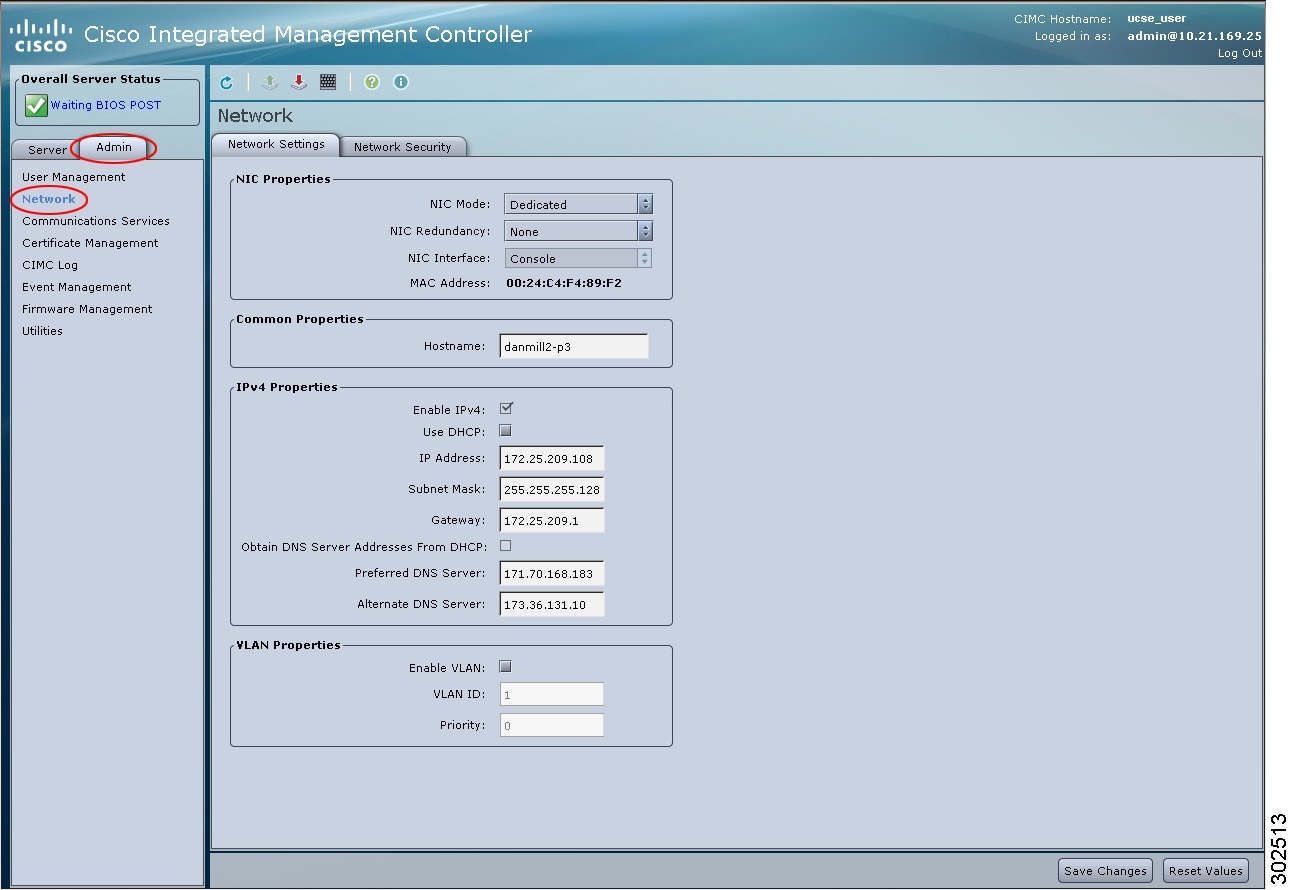
| Step 1 | In the Navigation pane, click the Admin tab. |
| Step 2 | On the Admin tab, click Network. |
| Step 3 |
In the Network pane, click the Network Settings tab.
|
| Step 4 | In the Hostname field, enter the name of the host. |
| Step 5 | Click Save Changes. |
Configuring IPv4
You must log in as a user with admin privileges to configure IPv4.
| Step 1 | In the Navigation pane, click the Admin tab. | ||||||||||||||||||
| Step 2 | On the Admin tab, click Network. | ||||||||||||||||||
| Step 3 |
In the Network pane, click the Network Settings tab.
|
||||||||||||||||||
| Step 4 |
In the IPv4 Properties area, update the following properties:
|
||||||||||||||||||
| Step 5 | Click Save Changes. |
Connecting to a VLAN
You must be logged in as admin to connect to a VLAN.
| Step 1 | In the Navigation pane, click the Admin tab. | ||||||||
| Step 2 | On the Admin tab, click Network. | ||||||||
| Step 3 |
In the Network pane, click the Network Settings tab.
|
||||||||
| Step 4 |
In the VLAN Properties area, update the following properties:
|
||||||||
| Step 5 | Click Save Changes. |
Network Security Configuration
Network Security
The CIMC uses IP blocking as network security. IP blocking prevents the connection between a server or website and certain IP addresses or ranges of addresses. IP blocking effectively bans undesired connections from those computers to a website, mail server, or other Internet servers.
IP banning is commonly used to protect against denial of service (DoS) attacks. CIMC bans IP addresses by setting up an IP blocking fail count.
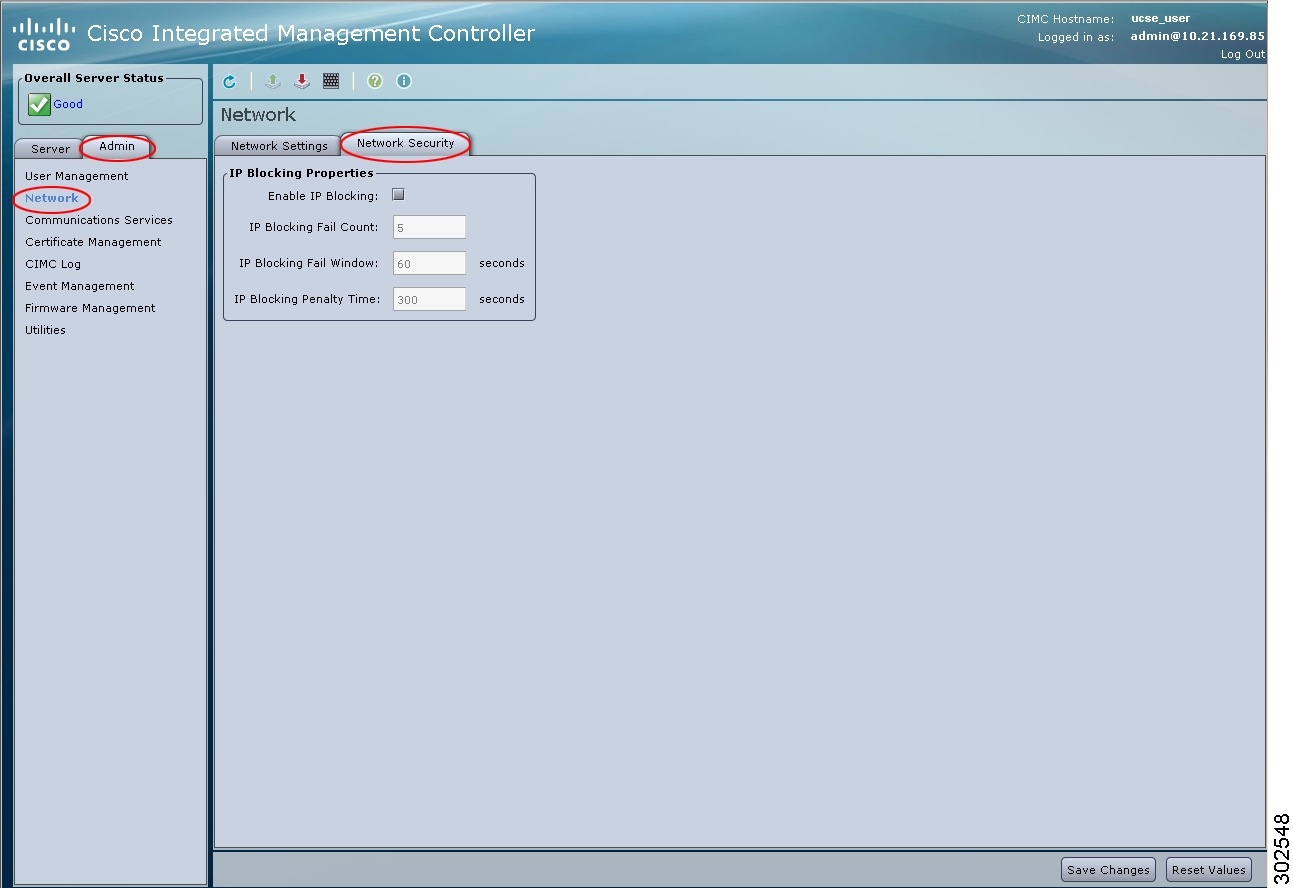
Configuring Network Security
Configure network security if you want to set up an IP blocking fail count.
You must log in as a user with admin privileges to configure network security.
| Step 1 | In the Navigation pane, click the Admin tab. | ||||||||||
| Step 2 | On the Admin tab, click Network. | ||||||||||
| Step 3 |
In the Network pane, click the Network Security tab.
|
||||||||||
| Step 4 |
In the IP Blocking Properties area, update the following properties:
|
||||||||||
| Step 5 | Click Save Changes. |
 Feedback