- Preface
- Overview
- Installing the Server Operating System or Hypervisor
- Managing the Server
- Viewing Server Properties
- Viewing Server Sensors
- Managing Remote Presence
- Managing User Accounts
- Configuring Network-Related Settings
- Configuring Communication Services
- Managing Certificates
- Configuring Platform Event Filters
- CIMC Firmware Management
- Viewing Logs
- Server Utilities
- Diagnostic Tests
- Index
Diagnostic Tests
This chapter includes the following sections:
Diagnostic Tests Overview
Diagnostics is a standalone utility that runs on the E-Series Server independent of the operating system or applications running on the server. If you experience problems with the E-Series Server, you can use diagnostics tests to run a preliminary check and isolate the problem. Diagnostic tests can be executed on the server CPU, memory, and block devices. Block devices include hard drive, USB drive, and SD cards.
If the diagnostic tests pass successfully, it indicates that there is no problem with the server CPU, memory, or block devices. The problem could be with some other hardware component or with the software configuration. Open a service request with Cisco Technical Assistance Center (TAC) at: http://www.cisco.com/cisco/web/support/index.html to isolate the problem.
If the diagnostic tests fail, open a service request with Cisco TAC for further assistance.
 Caution |
Diagnostic tests are non-destructive, but if there is a power or equipment failure when the tests are running, there is a possibility that the disk data might get corrupted. We highly recommend that you backup the data before running these tests. |
Basic Workflow for Executing Diagnostic Tests
- Backup data.
- The diagnostics image is pre-installed on the E-Series Server at the time of purchase. You can also choose to download the most current diagnostics image from a specified FTP, FTPS, HTTP, or HTTPS server onto the CIMC internal repository.
- Mount the diagnostics image onto the HDD virtual drive of a USB controller.
- Set the boot order to make EFI Shell as the first boot device.
- Reboot the server.
- Run diagnostic tests from the EFI Shell.
- Reset the virtual media boot order to its original setting.
Mapping the Diagnostics Image to the Host
- Backup data.
- Log into CIMC as a user with admin privileges.
- The diagnostics image is pre-installed on the E-Series Server at the time of purchase. You can also choose to download the most current diagnostics image from a specified FTP, FTPS, HTTP, or HTTPS server onto the CIMC internal repository. See Obtaining Software from Cisco Systems.
 Note |
If you start an image update while an update is already in process, both updates will fail. |
| Step 1 | In the Navigation pane, click the Server tab. | ||||||
| Step 2 |
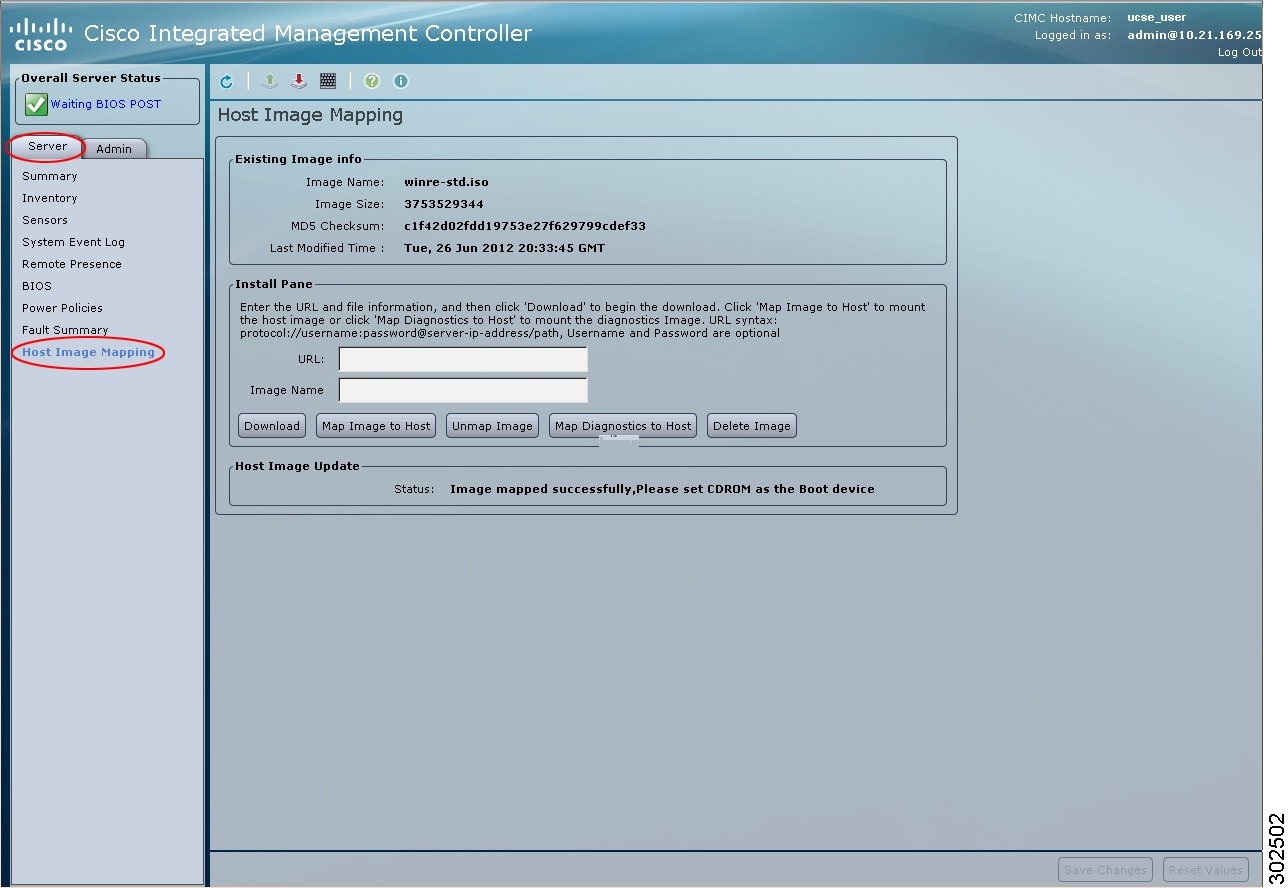
On the Server tab, click Host Image Mapping.
|
||||||
| Step 3 |
In the Install Pane, complete the following fields:
|
||||||
| Step 4 |
Click Download. The diagnostics file is downloaded from the specified FTP, FTPS, HTTP, or HTTPS server onto the CIMC internal repository. |
||||||
| Step 5 |
Click Map Diagnostics to Host. The diagnostics image is mounted on the HDD virtual drive of the USB controller. |
||||||
| Step 6 |
Set the boot order to make EFI Shell as the first boot device. To set the boot order, see Configuring the Server Boot Order. |
||||||
| Step 7 |
Reboot the server. The EFI Shell appears. |
What to Do Next
Run diagnostic tests.
Running Diagnostic Tests
From the EFI Shell, use the following procedure to run diagnostic tests.
- Backup data. All tests are non-destructive, but if there is power or equipment failure when the tests are running, there is a possibility that the disk data might get corrupted. We highly recommend that you backup data before executing these tests.
- Use the CIMC CLI or the CIMC GUI to download and map the diagnostics image onto the HDD virtual drive of the USB controller.
- Reboot the server. The EFI Shell displays.
This example runs all diagnostic tests:
Shell > dir fs1:
		06/27/12  07:48p            1,435,424  Dsh.efi
  06/27/12  08:03p               10,036  dsh-e140d.pkg
  06/25/12  06:00p               10,140  dsh-e140s.pkg
  06/27/12  08:04p               10,042  dsh-e160d.pkg
          4 File(s)   1,465,642 bytes
Shell > fs1:
fs1:\> cp dsh-e140d.pkg dsh.pkg
copying fs0:\OBD\dsh-e140d.pkg -> fs0:\OBD\dsh.pkg
- [ok]
fs1:\> dsh
Diagnostics is a standalone utility that runs on the server module independent
of the operating system or applications running on the module.All tests are
non-destructive, but there is a possibility of disk datacorruption during
power or equipment failure when the tests are in progress. Therefore, before
executing these tests, we highly recommend that you backup the data.


For questions or concerns with this utility, please open a Service Request
with Cisco TAC at http://www.cisco.com/cisco/web/support/index.html

(Y)es to continue test. (N)o to exit(y/n): Y
Cisco Diagnostics  Shell 1.03(0.3) Thu 06/28/-16:35:08.95-canis-diag@cisco.com
UCS-E140D-M1/K9:SRV>

Server: SRV > run all
Server: SRV > results
Test Name          : all
Test Status        : Passed
Failed/Run History : 0/17
Start Time         : 06/27/12 14:38:19
End Time           : 06/27/12 14:43:36
Diag Version       : 1.03(0.3) Mon 04/02/-17:07:57.19-canis-diag@cisco.com
Board S/N          : FOC160724BY

Server: SRV > show
Server: SRV > exit
Reset the virtual media boot order to its original setting.
 Feedback