Install Cisco ISE

Install Cisco ISE using Cisco Integrated Management Interface

Use these high-level steps to install Cisco ISE.

Before you begin

Procedure


Step 1

Installation Overview

  • For Cisco SNS Appliances

    1. Install the hardware appliance.

    2. Connect to Cisco IMC for server management.

  • For Virtual Machines

    1. Confirm your VM configuration matches the requirements.

Step 2

Download Software: Download the Cisco ISE ISO image.

  1. Go to http://www.cisco.com/go/ise. You need valid Cisco.com login credentials to access the site.

  2. Click Download Software for this Product.

    The Cisco ISE image includes a pre-installed 90-day evaluation license, which enables you to test all Cisco ISE services after completing installation and initial configuration.

Step 3

Booting the appliance or VM
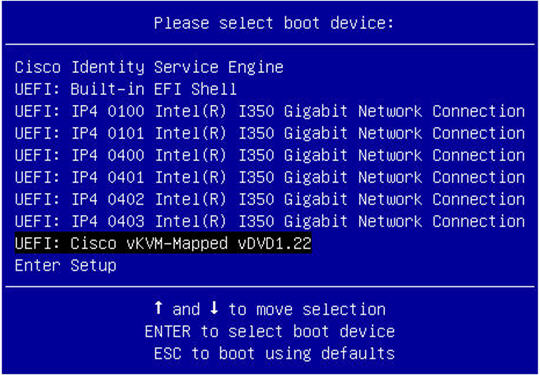
  • Cisco SNS appliance:
    1. Connect to Cisco IMC and log in using the Cisco IMC credentials.

    2. Launch the KVM console.

    3. Select Virtual Media > Activate Virtual Devices.

    4. Select Virtual Media > Map CD/DVD, select the Cisco ISE ISO image, and click Map Device.

    5. Select Macros > Static Macros > Ctrl-Alt-Del to boot the appliance with the Cisco ISE ISO image.

    6. Press F6 to open the boot menu. A similar screen appears:

      Figure 1. Selection of boot device
      Selection of boot device for Cisco ISE installation

      Note


      For remote SNS appliances without physical access, installation through Cisco IMC may take several hours. To speed up installation, copy the ISO file to a USB drive and use it during installation.

      Installation time may vary (approximately 30 minutes) depending on network speed, stability, TCP segmentation, and operating system factors.

      If the system enters an emergency shell during initial boot due to incomplete hardware initialization, reboot to allow initialization to complete and continue installation.

  • Virtual Machine:
    1. Map the CD/DVD to an ISO image. A similar screen appears. The installation menu appears with the message.

      Welcome to the Cisco Identity Services Engine Installer
      Cisco ISE Version: 3.x.x.xxx
      
      
      Available boot options:
      
      Cisco ISE Installation (Serial Console)
      Cisco ISE Installation (Keyboard/Monitor)
      System Utilities (Serial Console)
      System Utilities (Keyboard/Monitor)
      

Step 4

At the boot prompt, press 1 and Enter to install Cisco ISE using a serial console.

If you want to use a keyboard and monitor, use the arrow key to select the Cisco ISE Installation (Keyboard/Monitor) option. The message appears.

**********************************************
Please type 'setup' to configure the appliance
**********************************************

Step 5

Setup program: At the prompt, type setup to start the setup program. See Run the setup program of Cisco ISE for details about the parameters that the setup program uses.

Step 6

After you enter the network configuration parameters in the setup mode, the appliance automatically reboots, and returns to the shell prompt mode.

Step 7

Exit shell prompt mode. The appliance starts.

Step 8

Proceed to Verify the Cisco ISE installation process.


Installation metrics for Cisco ISE

The table outlines the installation duration and network latency metrics for various mount types for Cisco ISE.

Table 1. Latency and installation metrics for Cisco ISE

Mount type

Time taken for installation

Approximate latency

NFS-CIMC Mount

7 hours

Average round-trip time is less than 1 millisecond

CD or DVD - KVM Mount

4 hours

-

USB

1 hour

-

Run the setup program of Cisco ISE

This section explains how to configure the Cisco ISE server. The interactive command-line interface (CLI) helps you configure network settings, administrator credentials, and management interfaces. It supports IPv4, IPv6, and dual-stack configurations and covers integration with Active Directory (AD) and essential parameters such as hostname, IP addresses, DNS, NTP servers, and system time zone.

The setup program launches an interactive CLI that prompts you for required parameters. Use the console or a dumb terminal to configure the initial network settings and administrator credentials for the Cisco ISE server. You only need to perform this setup process once. For AD integration, use IP and subnet addresses from a dedicated site created for Cisco ISE. Contact your organization's AD staff to obtain the IP and subnet addresses for your Cisco ISE nodes before installation and configuration.

Follow these steps to run the setup program.

Procedure


Step 1

Power on the appliance designated for the installation.

The setup prompt appears:

Type 'setup' to configure the appliance
localhost login:

Step 2

At the setup prompt, enter setup and press Enter.

The console displays a set of parameters. Enter the parameter values for each prompt in the table.

Note


The eth0 interface of Cisco ISE must be statically configured with an IPv6 address if you want to add a Domain Name Server or an NTP Server with an IPv6 address.

Table 2. Cisco ISE setup program parameters

Prompt

Description

Example

Hostname

Up to 19 characters; alphanumeric and hyphen only; first character must be a letter.

Note


Use lowercase to avoid certificate issues. Do not use "localhost" as hostname for a node.

isebeta1

(eth0) Ethernet interface address

Valid IPv4 or global IPv6 for the Gigabit Ethernet 0 (eth0) interface.

10.12.13.14/ 2001:420:54ff:4::458:121:119

Netmask

Valid IPv4 or IPv6 netmask.

255.255.255.0/ 2001:420:54ff:4::458:121:119/122

Default gateway

Valid IPv4 or global IPv6 address for the default gateway.

10.12.13.1/ 2001:420:54ff:4::458:1

DNS domain name

Must not be an IP address. Valid characters include ASCII characters, any numerals, the hyphen (-), and the period (.).

Note


The top-level domain name must not exceed 6 characters in length. If the TLD length exceeds six characters, Cisco ISE will become unusable.

example.com

Primary name server

Valid IPv4 or global IPv6 address for the primary name server.

10.15.20.25 / 2001:420:54ff:4::458:118

Add/Edit another name server

Valid IPv4 or global IPv6 address for the primary name server.

(Optional) Allows you to configure multiple name servers. To configure multiple name servers, enter y to continue.

Primary NTP server

Valid IPv4 or global IPv6 address or hostname of a Network Time Protocol (NTP) server.

Note


Ensure that the primary NTP server is reachable.

clock.nist.gov / 10.15.20.25 / 2001:420:54ff:4::458:117

Add/Edit another NTP server

Must be a valid NTP domain.

(Optional) Allows you to configure multiple NTP servers. To do so, enter y to continue.

System Time Zone

Must be a valid time zone. For example, for Pacific Standard Time (PST), the System Time Zone is PST8PDT, which is Coordinated Universal Time (UTC) minus 8 hours (UTC–08:00 or 16:00).

Note


Ensure that the system time and time zone match the CIMC or Hypervisor Host OS time and time zone. If there is any mismatch between the time zones, system performance might be affected.

Note


Set all Cisco ISE nodes to the UTC time zone. This setting ensures that reports, logs, and posture agent log files from the nodes in your deployment are always synchronized by timestamp.

UTC (default)

Username

Identifies the administrative username used for CLI access to the Cisco ISE system. If you choose not to use the default (admin), you must create a new username. The Username must be 3 to 8 characters in length and consist of valid alphanumeric characters (A–Z, a–z, or 0–9).

admin (default)

Password

Identifies the administrative password that is used for CLI access to the Cisco ISE system. You must create this password in order to continue because there is no default password. The password must be a minimum of six characters in length and include at least one lowercase letter (a–z), one uppercase letter (A–Z), and one numeral (0–9).

MyIseYPass2

Note

 
  • If you create a password that includes the $ character anywhere except as the last character, the system accepts the password, but you cannot log in to the CLI with it.

  • To reset such a password, log into the console and use CLI commands or reset using an ISE CD or ISO file. Refer to the Cisco ISE password reset documentation for instructions.

After the setup
  • The system reboots automatically after completing the setup.

  • Log in to Cisco ISE using the configured username and password.


Verify the Cisco ISE installation process

Use this procedure to confirm successful installation.

Procedure


Step 1

When the system reboots and the login prompt appears, enter the username you configured during setup. Then press Enter.

Step 2

Enter a new password.

Step 3

To verify that the application has been installed properly, enter the show application command. Then press Enter.

The console displays:
ise/admin# show application
<name>          <Description> 
ise             Cisco Identity Services Engine

Note


The version and date might change for different versions of this release.

Step 4

To check the status of the ISE processes, enter the show application status ise command, and press Enter.

The console displays:
ise/admin# show application status ise

ISE PROCESS NAME                       STATE            PROCESS ID  
--------------------------------------------------------------------
Database Listener                      running          14890       
Database Server                        running          70 PROCESSES
Application Server                     running          19158       
Profiler Database                      running          16293       
ISE Indexing Engine                    running          20773       
AD Connector                           running          22466       
M&T Session Database                   running          16195       
M&T Log Collector                      running          19294       
M&T Log Processor                      running          19207       
Certificate Authority Service          running          22237       
EST Service                            running          29847       
SXP Engine Service                     disabled                     
Docker Daemon                          running          21197       
TC-NAC Service                         disabled        
pxGrid Infrastructure Service          disabled                     
pxGrid Publisher Subscriber Service    disabled                     
pxGrid Connection Manager              disabled                     
pxGrid Controller                      disabled                     
PassiveID WMI Service                  disabled                     
PassiveID Syslog Service               disabled                     
PassiveID API Service                  disabled                     
PassiveID Agent Service                disabled                     
PassiveID Endpoint Service             disabled                     
PassiveID SPAN Service                 disabled                     
DHCP Server (dhcpd)                    disabled                     
DNS Server (named)                     disabled                     

ise/admin# 

Install Cisco ISE from an ISO on OpenStack

You can install Cisco ISE release 3.4 patch 4 and later releases in an OpenStack environment using these methods:

  • OpenStack Dashboard (for example, Horizon): A web-based interface that allows administrators to manage OpenStack resources and services, including the deployment of Cisco ISE instances.

  • OpenStack Orchestration Tools (for example, HEAT): Templates that define the network, compute, and storage topology for automated deployment and management of Cisco ISE virtual machines.

  • OpenStack Command Line Interfaces (CLI): Command-line tools that provide granular control over deploying and managing Cisco ISE instances within OpenStack.

This section provides a sample CLI-based Cisco ISE installation procedure in an OpenStack environment.

Follow these steps to install Cisco ISE using OpenStack CLI.

Procedure


Step 1

Create a custom flavor in OpenStack that matches the Cisco ISE appliance size requirements.

Here is a sample command for Cisco SNS 3715 to create a flavor named "sns3715-openstack" with 32 GB RAM, 300 GB disk, and 24 virtual CPUs, with an automatically assigned ID.

openstack flavor create sns3715-openstack --id auto --ram 32768 --disk 300 --vcpus 24

For information about the Cisco SNS appliance size requirements, refer to Cisco SNS Appliance Hardware Installation Guide.

This process takes about 5 to 10 minutes.

You need this flavor name when creating the bootable VM instance.

Step 2

Create the Glance image for Cisco ISE installation.

  • Follow these steps to create the Glance image using the ISO file:

    1. Create a blank Cinder volume for the VM's main hard drive using this command:

      openstack volume create --size <volume_size_in_GB> <volume_name>

      Ensure that the volume size meets Cisco ISE specifications.

    2. Create a temporary VM to copy the Cisco ISE filesystem onto the blank volume using this command:

      openstack server create --image <iso-image-name-or-id> --volume <volume_name> --flavor <custom-flavor-name> --network <network-name> <temp-ise-install-vm-name>

      Attach both the blank Cinder volume and the installation ISO to the VM.

      This process takes about 5 minutes.

    3. Install the operating system through the VM console.

      1. Access the VM console using this command:

        openstack console url show <temp-ise-install-vm-name>

      2. When the boot menu appears, select [1] Cisco ISE Installation (Keyboard/Monitor) to begin the installation.

        The installer writes the operating system to the blank volume. Wait 20 to 30 minutes for installation to complete.

        After installation completes, the console returns to the boot prompt. The volume now contains a bootable operating system.

    4. Set the volume as bootable.

      1. Delete the temporary VM to release the volume using this command:

        openstack server delete <temp-ise-install-vm-name>

      2. Verify that the volume status is "available" using this command:

        watch openstack volume show <volume_name>

      3. Mark the volume as bootable using this command:

        openstack volume set --bootable <volume_name>

  • Follow these steps to create a QCOW2 image, install Cisco ISE using the ISO, and upload the image to OpenStack.

    1. Create the QCOW2 image using this command:

      qemu-img create -f qcow2 <image_name>.qcow2 <size>

    2. Install the Cisco ISE ISO on the QCOW2 image. Run this command to boot the ISO and begin the installation on the disk image.

      /usr/libexec/qemu-kvm -enable-kvm -m <memory_size> -smp <cpu_cores> -cpu host \ -drive file=<image_name>.qcow2,format=qcow2 \ -cdrom <iso_file_path> \ -boot d -net nic,model=virtio -net user \ -nographic -serial mon:stdio
    3. Perform the installation via the serial console. When the installation menu appears, select 2 to proceed with the installation using the serial console. Follow the on-screen prompts to complete the setup.

    4. Upload the QCOW2 image to OpenStack. After the installation is complete and the image is prepared, use the OpenStack CLI to create a new image in your environment.

      openstack image create --disk-format qcow2 --container-format bare --file <image_file_name> --private <image_name>

Note


You must use this ISO file for OpenStack support:

ise-3.4.0.608b.SPA.x86_64.iso

Step 3

Create and launch the Cisco ISE server VM with the prepared bootable volume by using this command:

openstack server create --volume <volume_name> --flavor <custom-flavor-name> --network <network-name> <vm-name>

This process takes approximately 5 minutes.

Step 4

Configure the network settings for the VM.

  1. Access the VM console and enter this command at the setup prompt:

    setup

  2. Follow the prompts to configure the hostname, IP address, and network details.

    After you complete the configuration, access the VM using the assigned IP address.


Run these commands to verify the Cisco ISE VM configuration.

  • To check inventory, use this command:

    show inventory

  • To check the profiles, use this command:

    show tech | inc profile

Install Cisco ISE on a Cisco SNS appliance using NFS

This section explains how to install Cisco ISE on a Cisco SNS appliance by using a Network File System (NFS) server.

Before you begin

Procedure


Step 1

Download the Cisco ISE ISO image from http://www.cisco.com/go/ise.

Step 2

Connect to CIMC and log in using the CIMC credentials.

Step 3

Choose Compute > Remote Management > Virtual Media > Add New Mapping, enter the NFS server details in the Add New Mapping window, and then click Save.

Step 4

Verify that the mapping status shows OK in the Current Mappings window.

Step 5

Launch the KVM console.

Step 6

Choose Power > Power Cycle System and click Confirm to reboot the appliance.

Step 7

Press F6 to enter the boot menu.

Step 8

In the Select Boot Device window, choose UEFI: Cisco CIMC-Mapped vDVD2.00, and press Enter.

The Cisco ISE installation menu appears after the server completes the booting process.

Step 9

Choose Cisco ISE Installation (Keyboard/Monitor) to continue with the installation.


Localized ISE installation

While reinstalling Cisco ISE, you can use the Localized ISE Install option in the application configure ise command to reduce the installation time. This option reduces the reinstallation time from an average of 5 to 7 hours to approximately 1 to 2 hours. This option can be used for both Secure Network Servers (SNS) and virtual appliances. However, it significantly reduces the reinstallation time only for SNS.


Note


  • Localized ISE Install option is supported for Cisco ISE release 3.1 patch 9 and later, Cisco ISE release 3.2 patch 5 and later, Cisco ISE release 3.3 patch 2 and later, and Cisco ISE release 3.4 and later releases.

  • You can use this option to reinstall the current version and higher versions. You cannot install a version that is older than the current version.


For more information, see "Localized ISE Installation" in the Chapter "Cisco ISE CLI Commands in EXEC Mode" in the Cisco Identity Services Engine CLI Reference Guide.