Use the Command Line Interface on a Single Device
When you select a single device, you can enter one or more commands. You can also view and use command history to rerun a set of commands. To enter commands on multiple devices, refer to .
Procedure
|
Step 1 |
Choose . |
||
|
Step 2 |
Click the Devices tab. |
||
|
Step 3 |
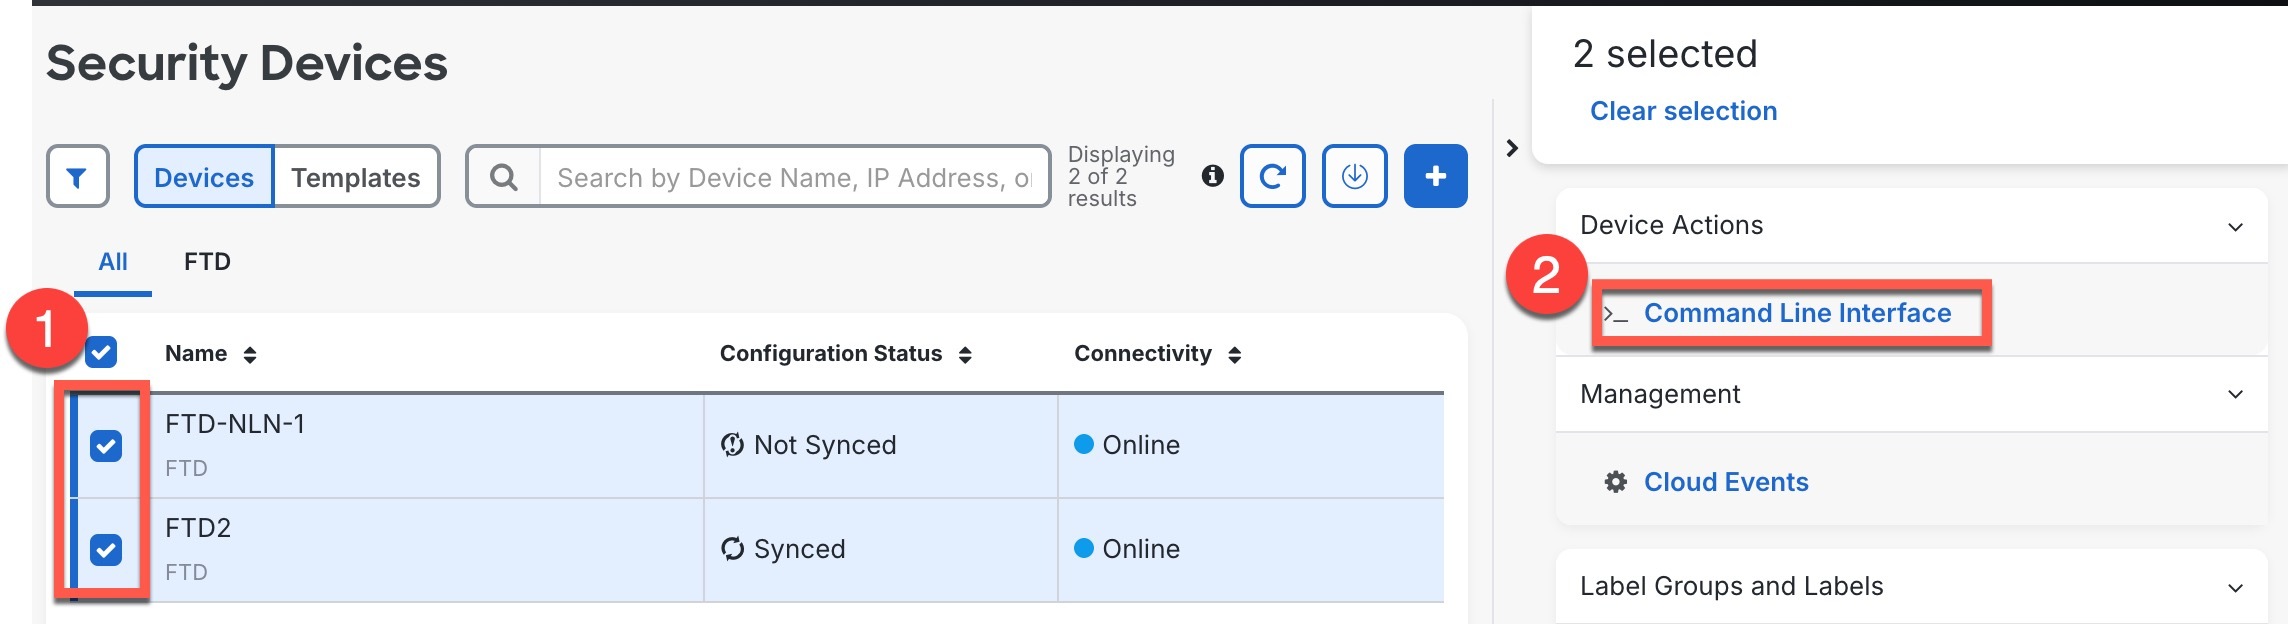
Select the device, and in the Device Actions pane, click >_Command Line Interface. 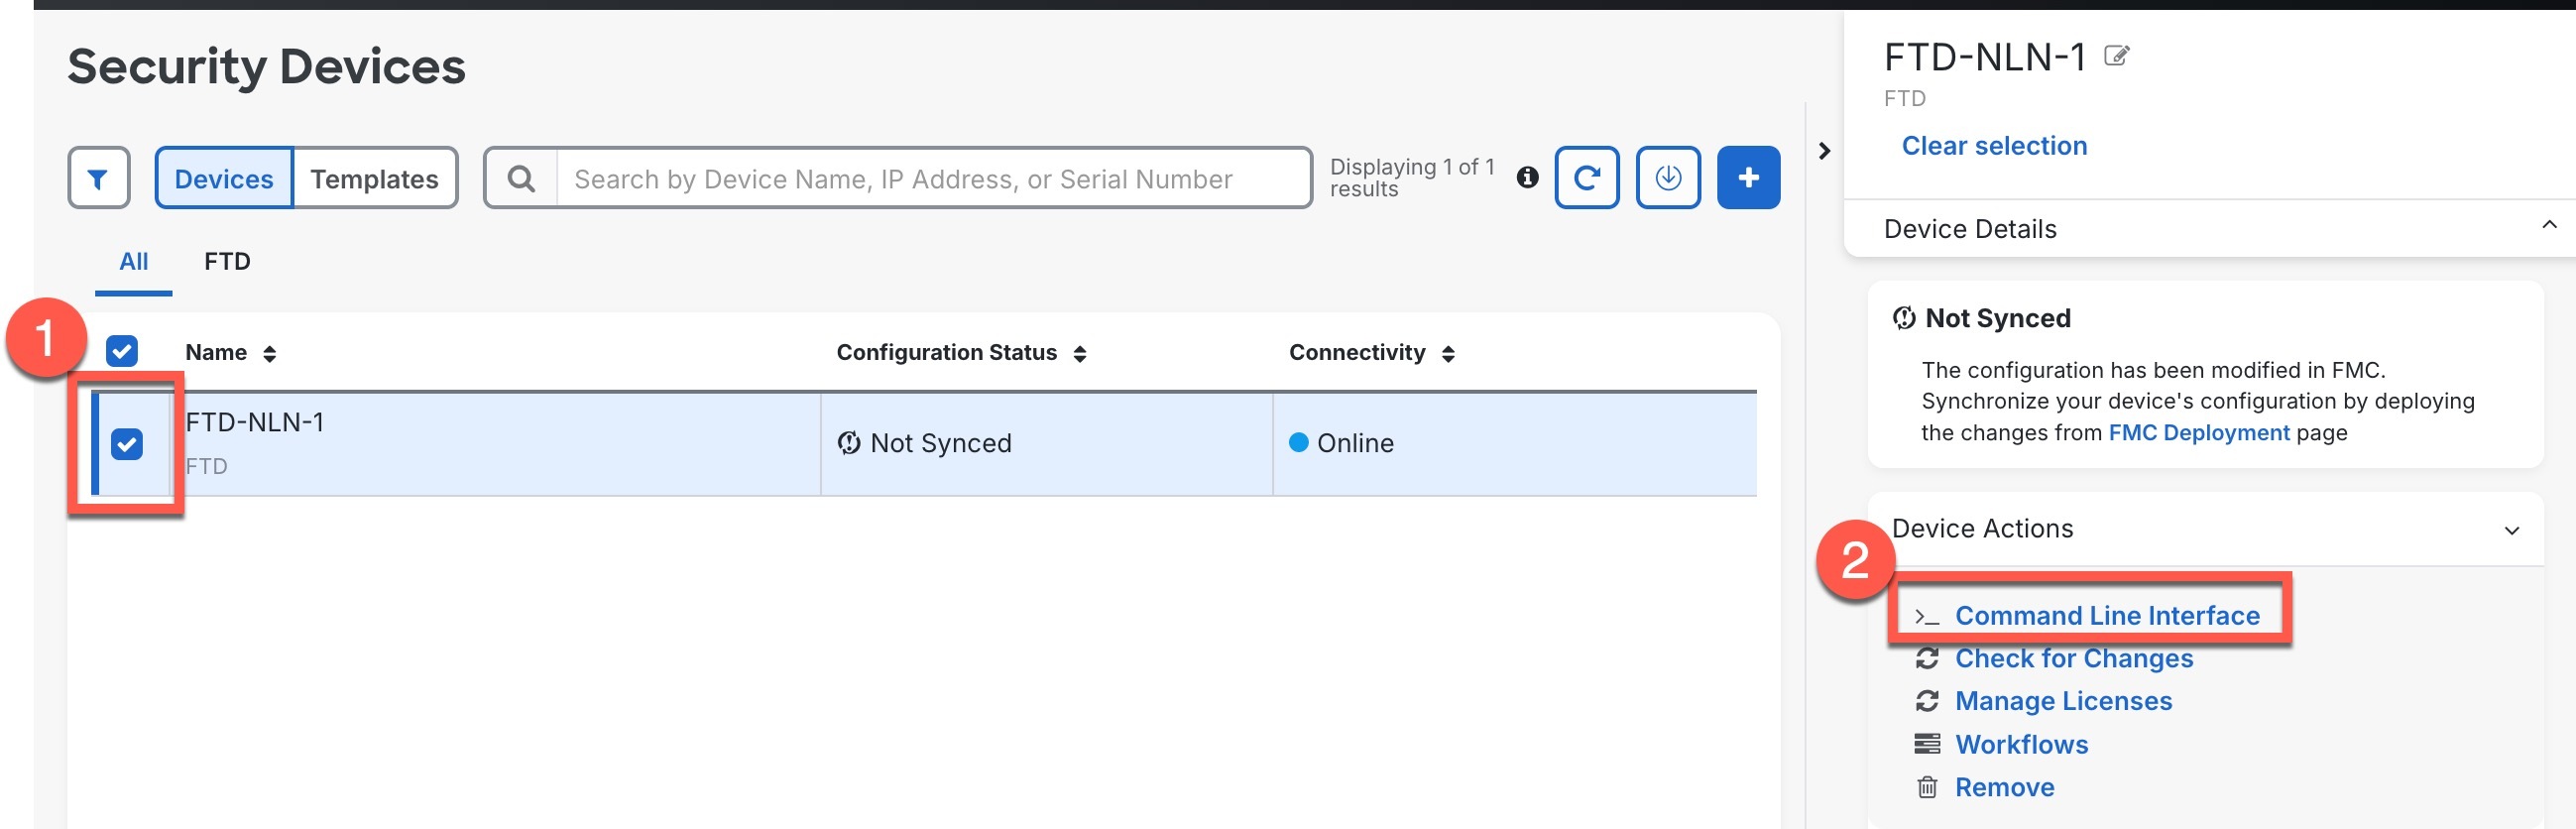 |
||
|
Step 4 |
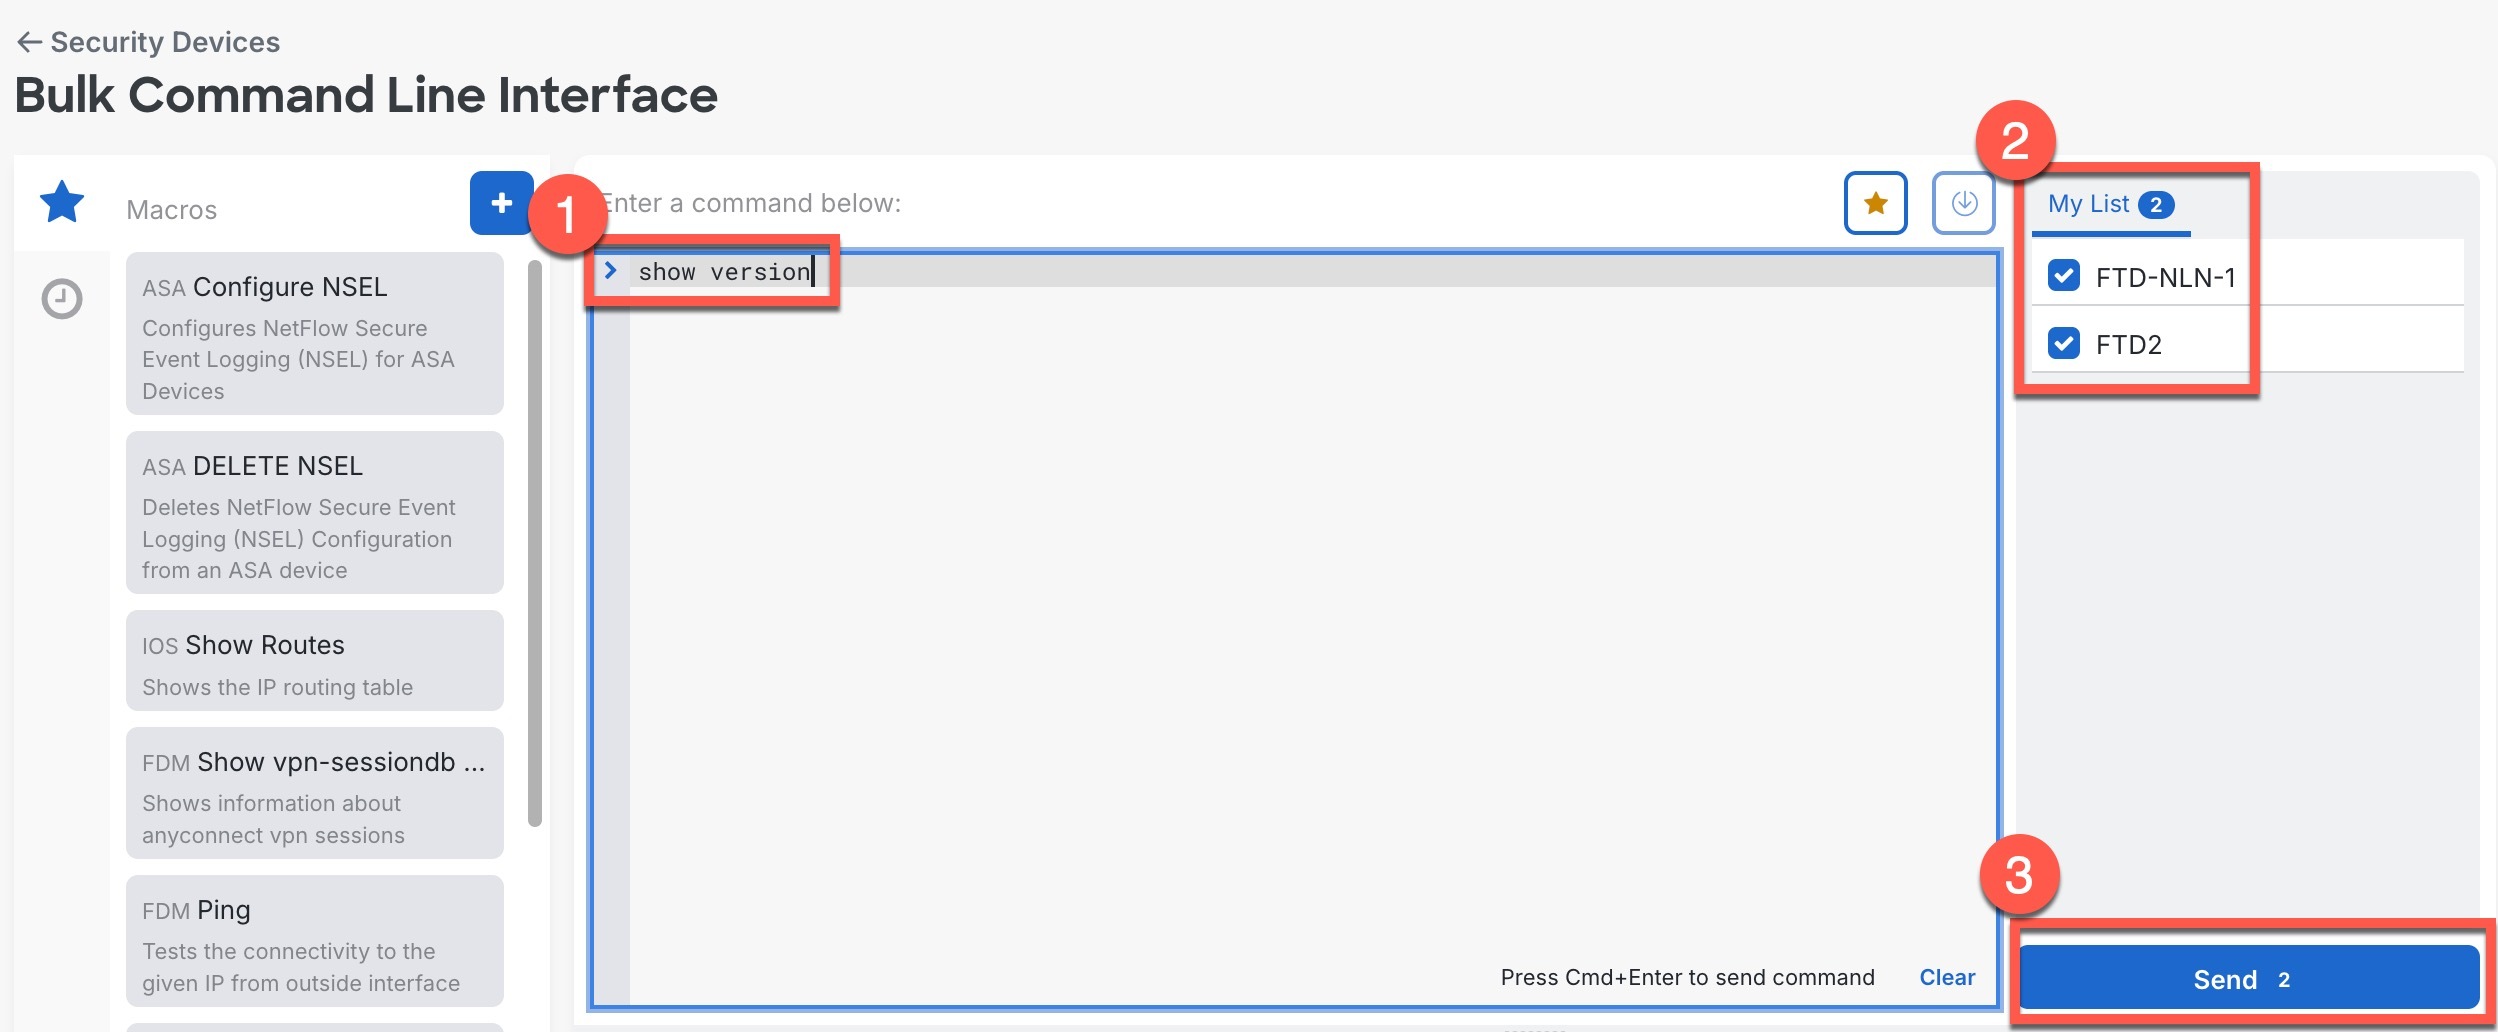
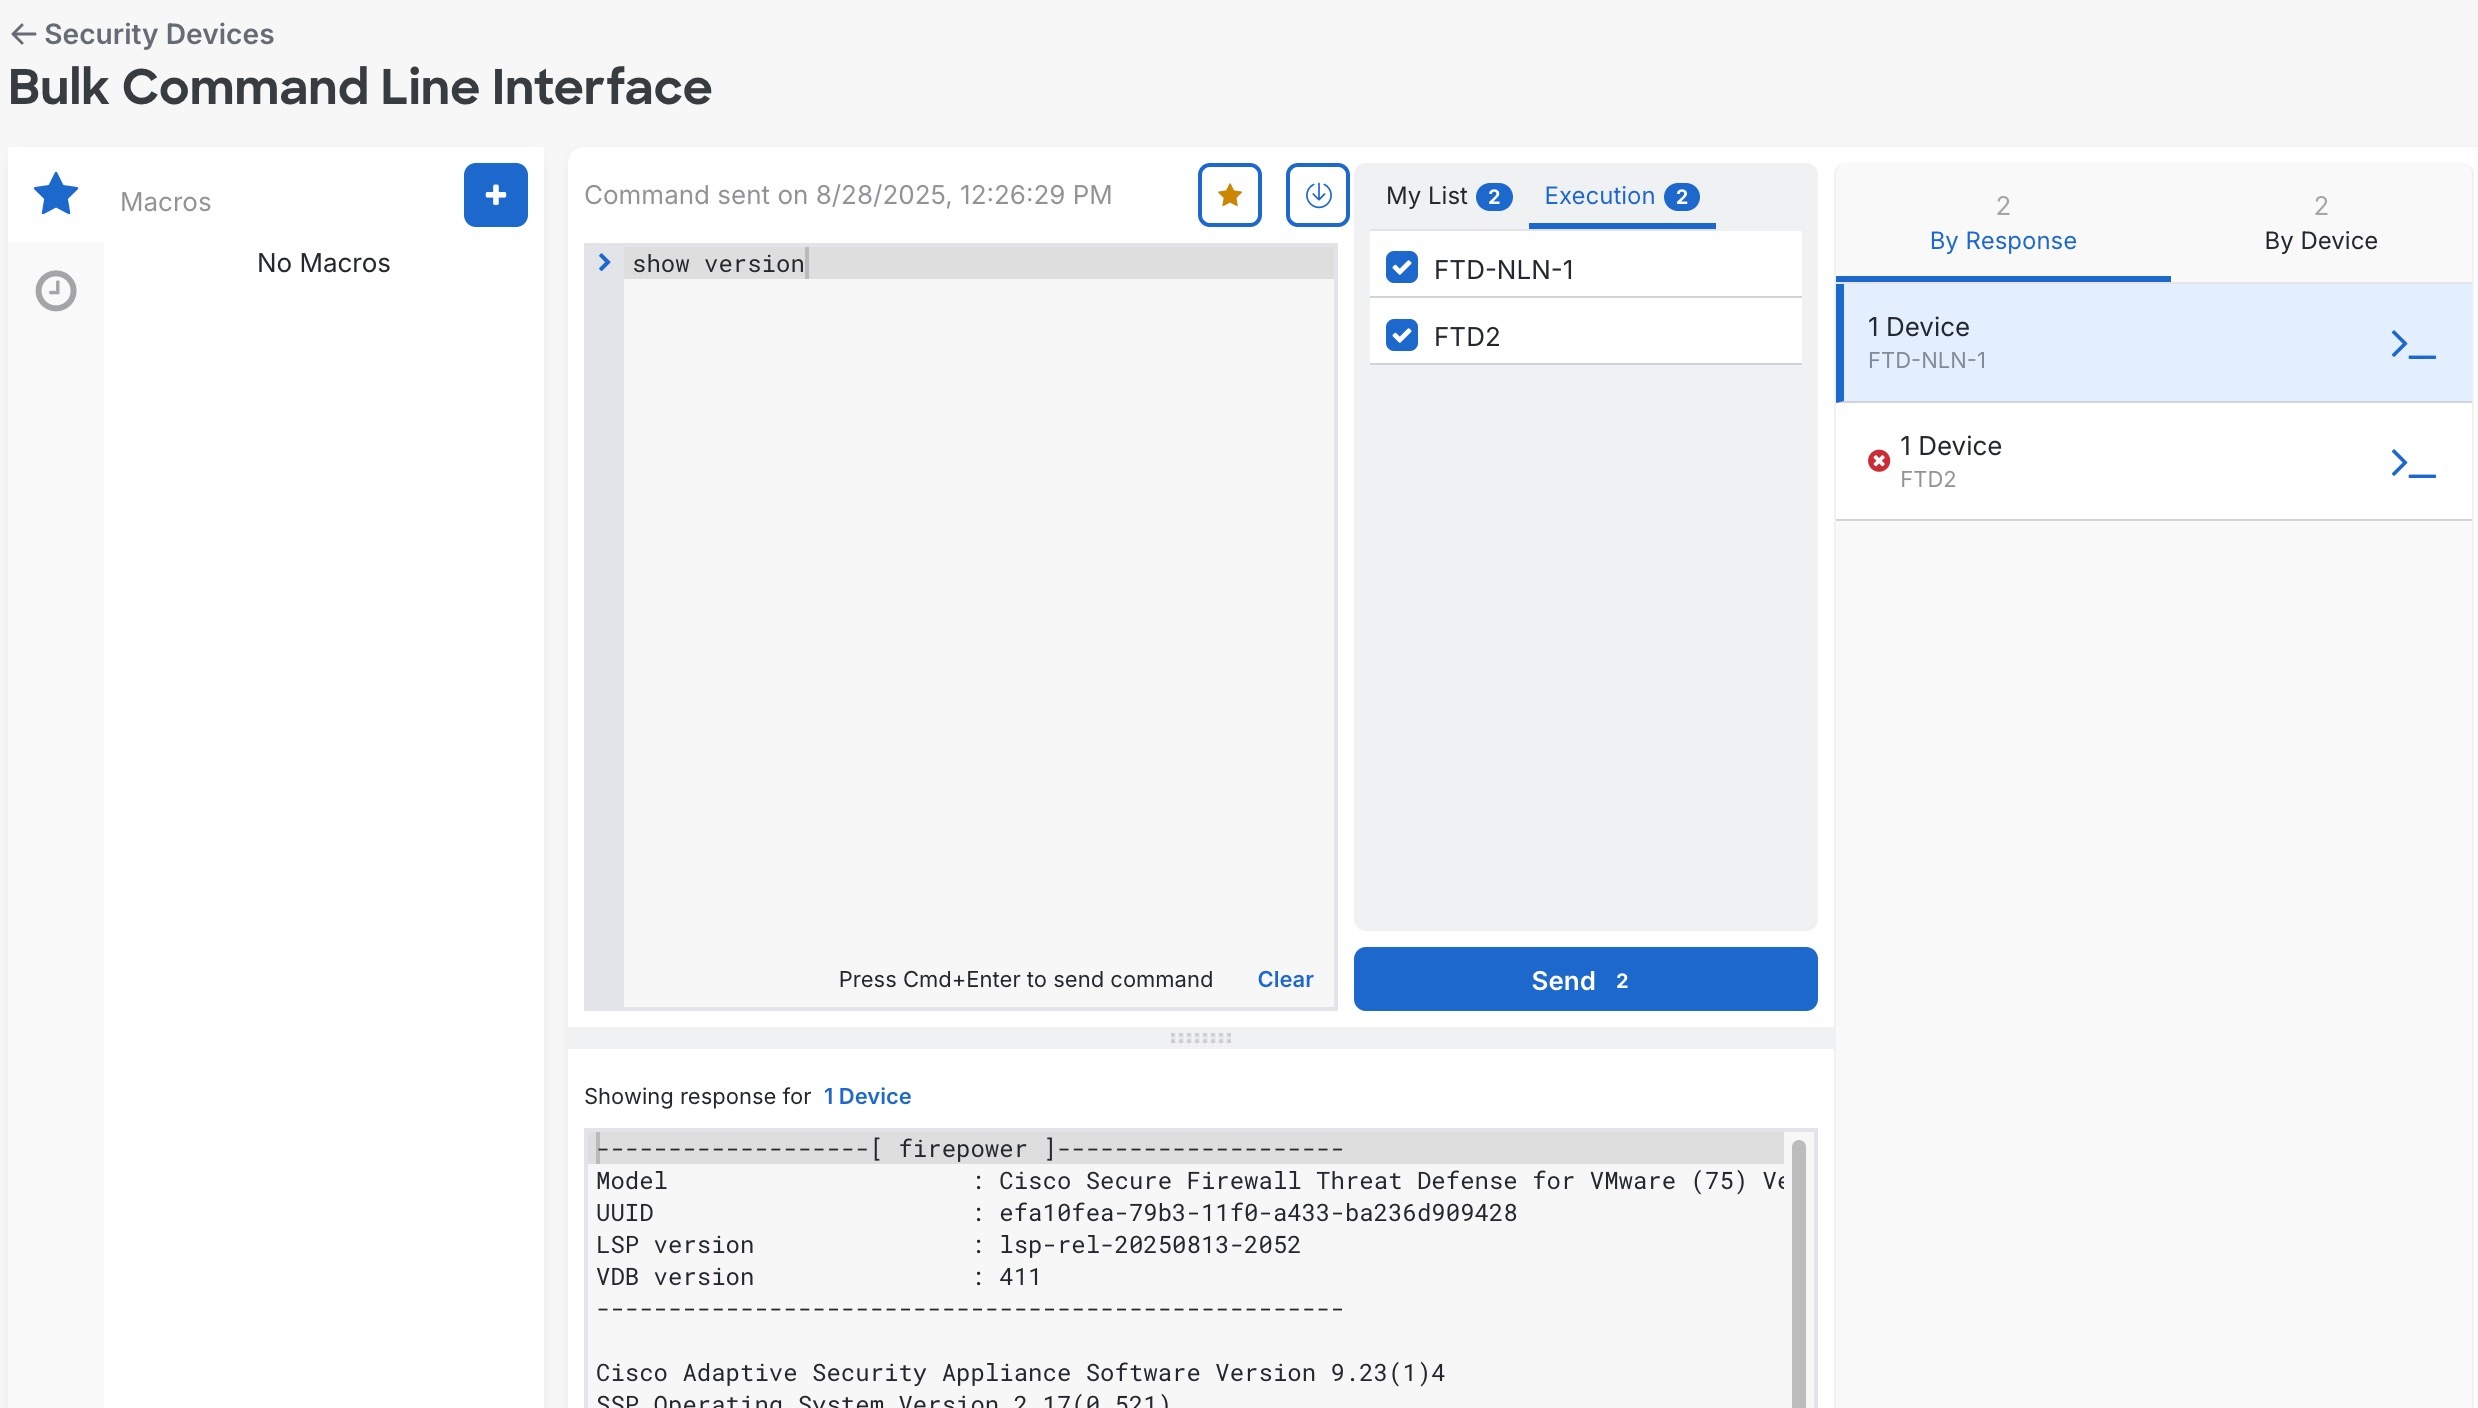
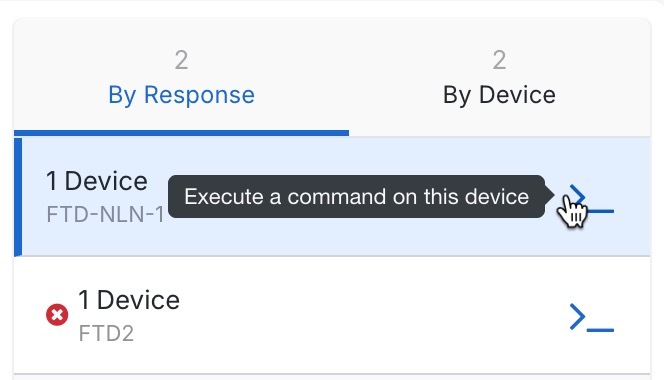
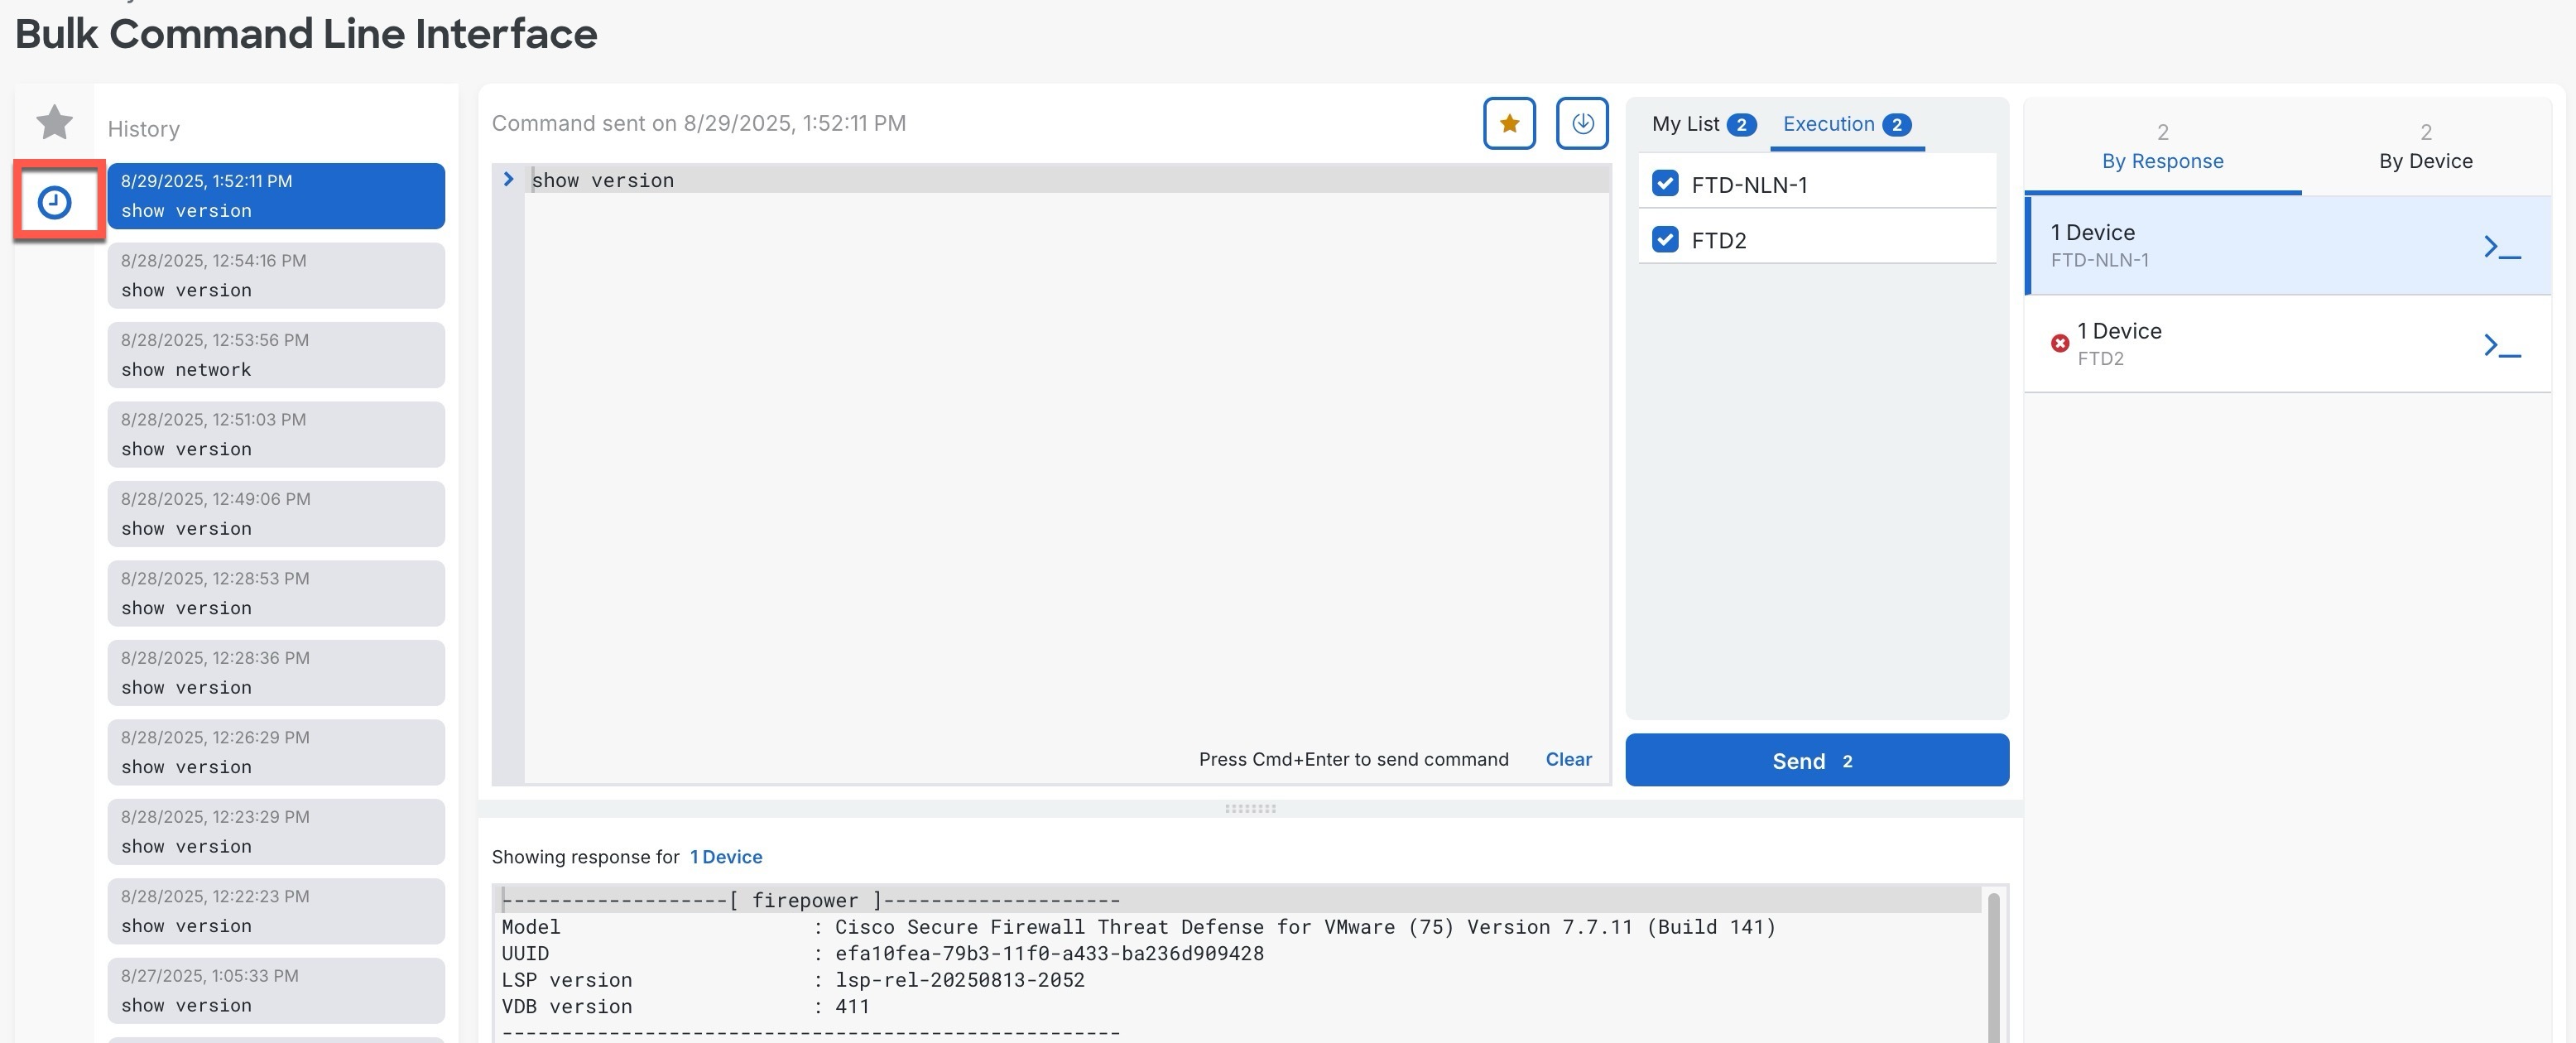
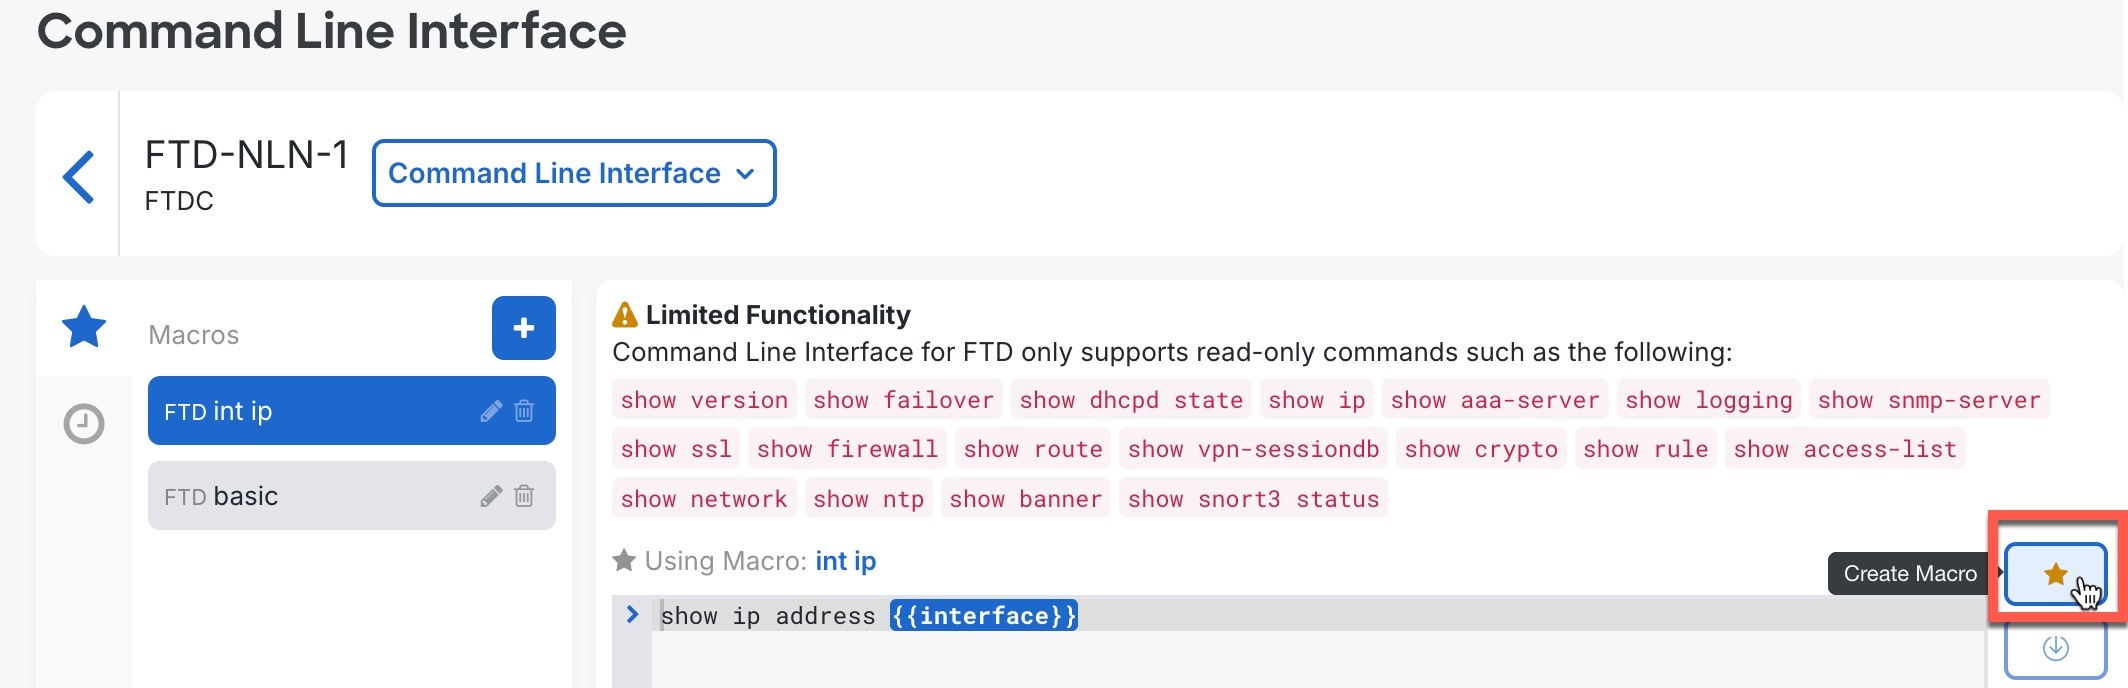
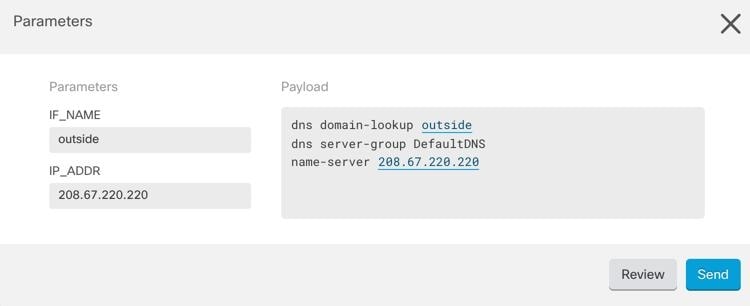
Enter one or more commands in the command pane, and click Send. 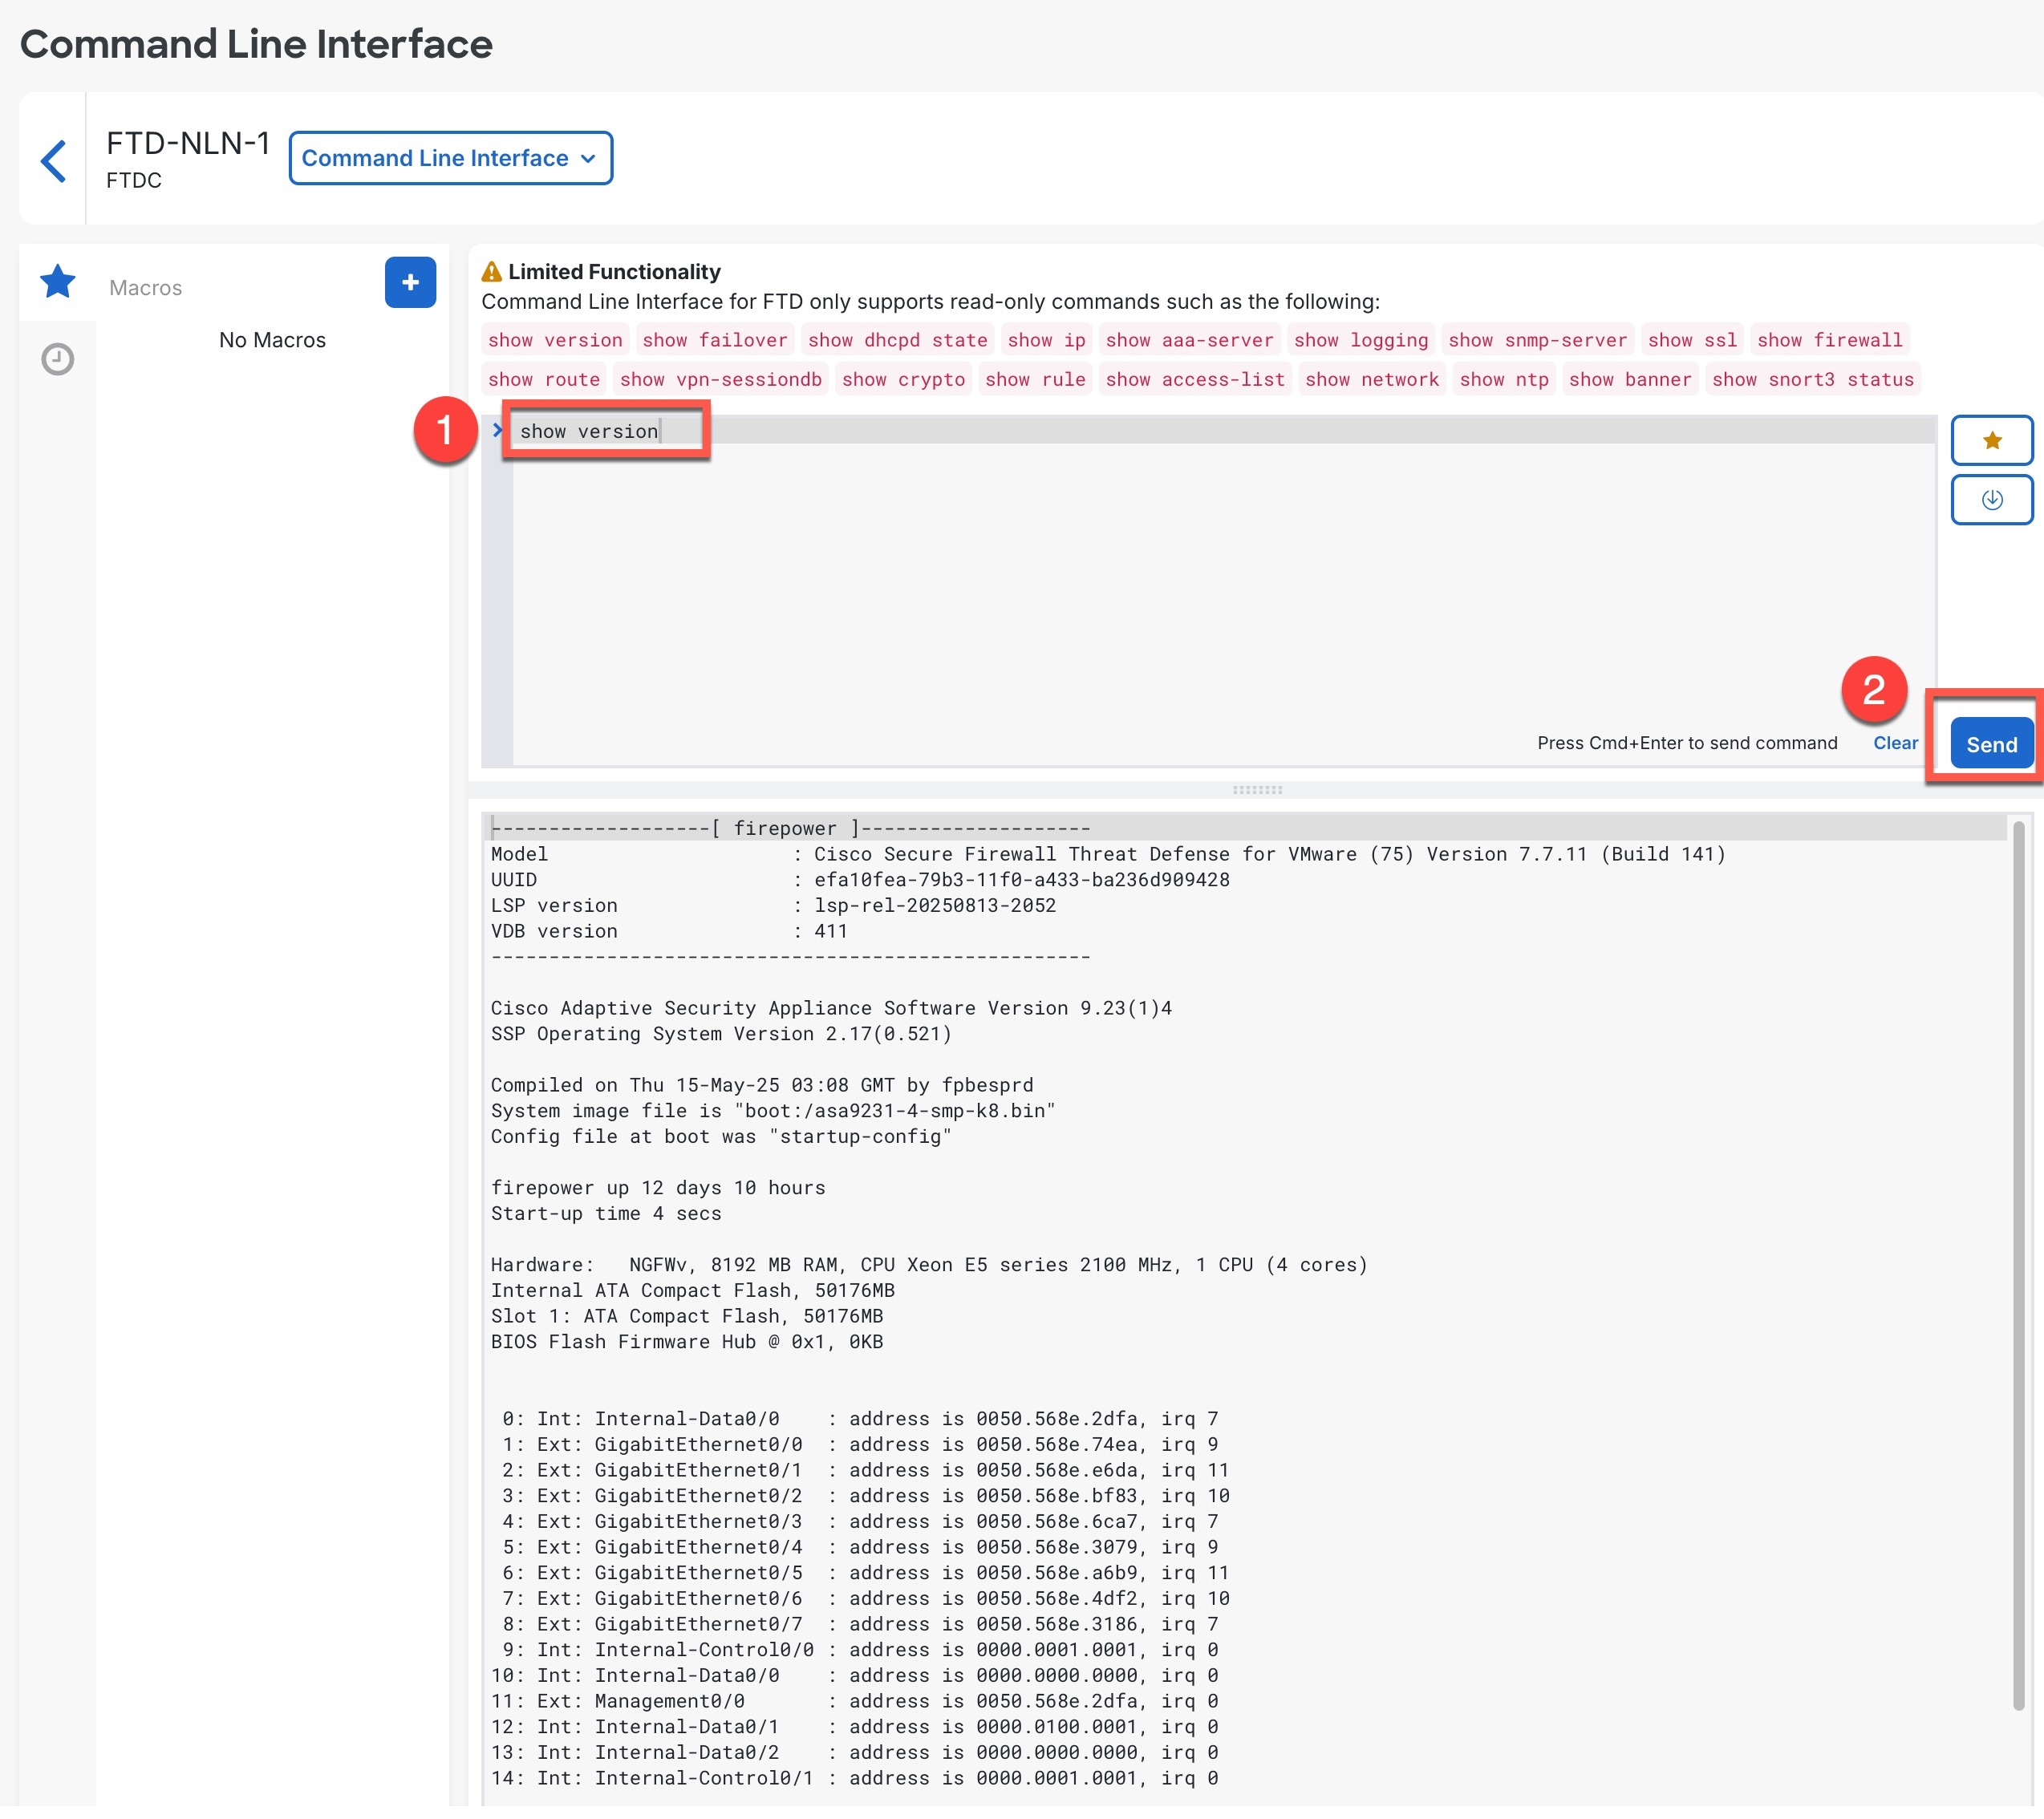 If there are limitations on the commands you can run, they appear in the area above the command pane. The response to your commands is displayed in the response pane. If there is no output for a command (either it was executed
successfully, or there was no output to show), you will see
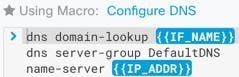
Example:The following ASA example sends a batch of commands that creates three network objects and a network object group that contains those network objects. 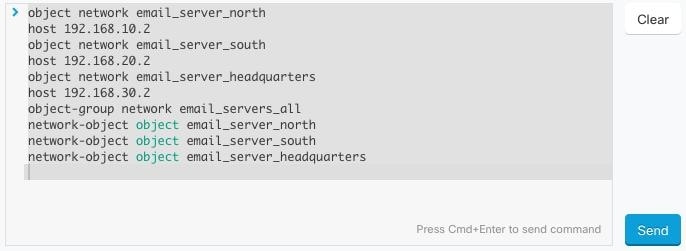 |
||
|
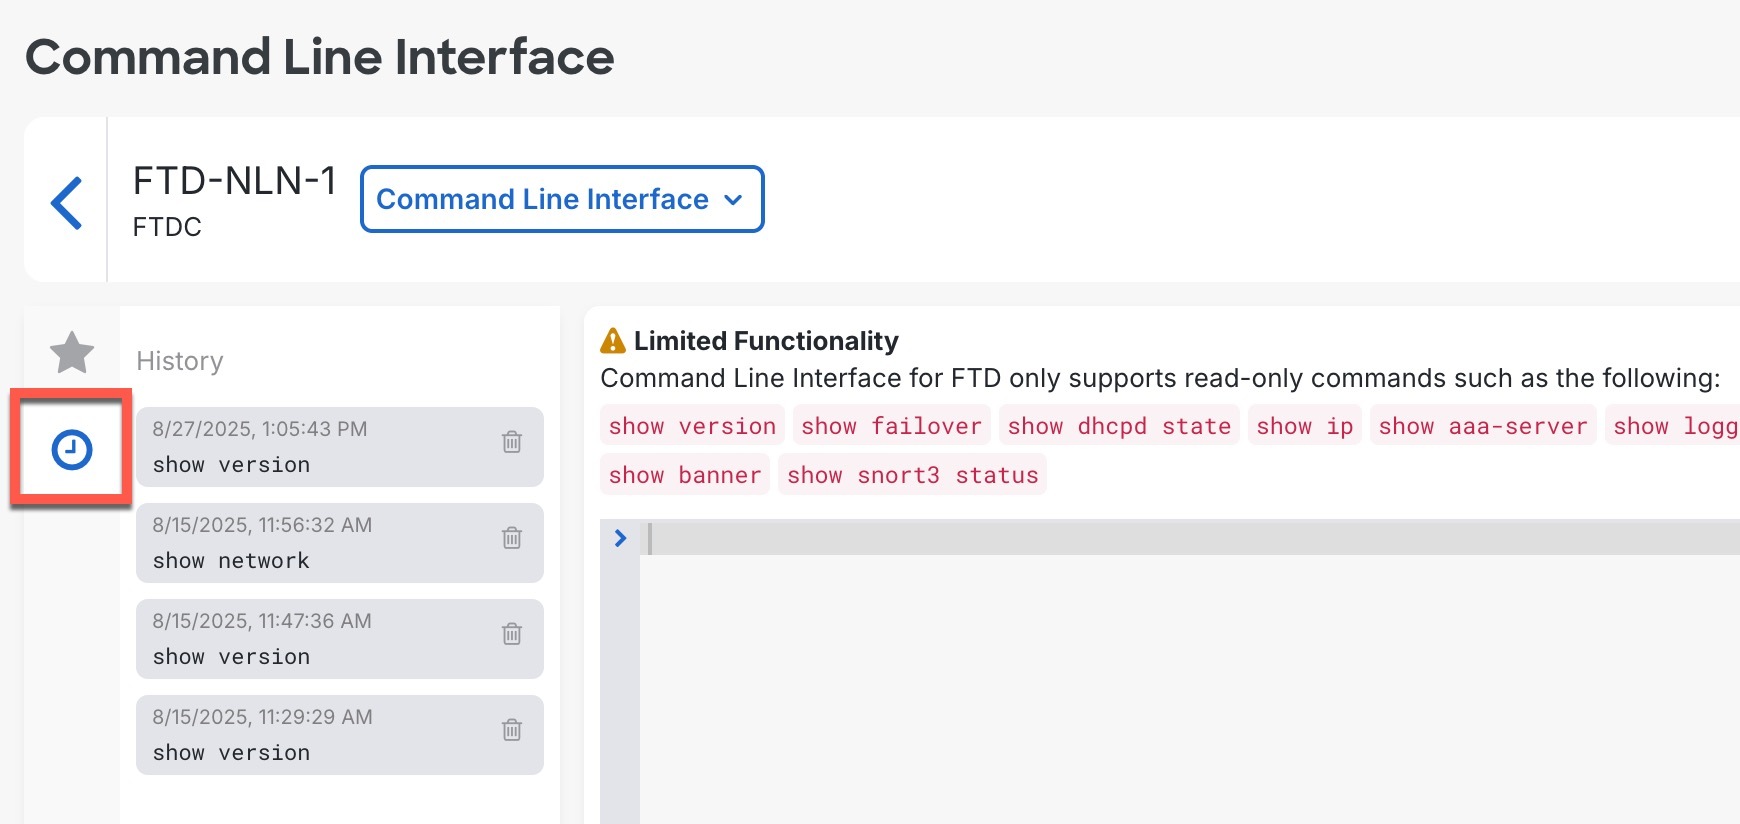
Step 5 |
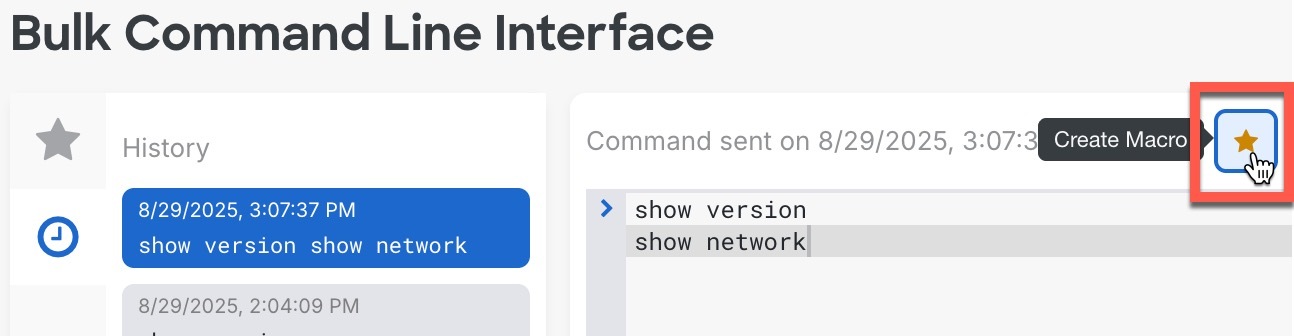
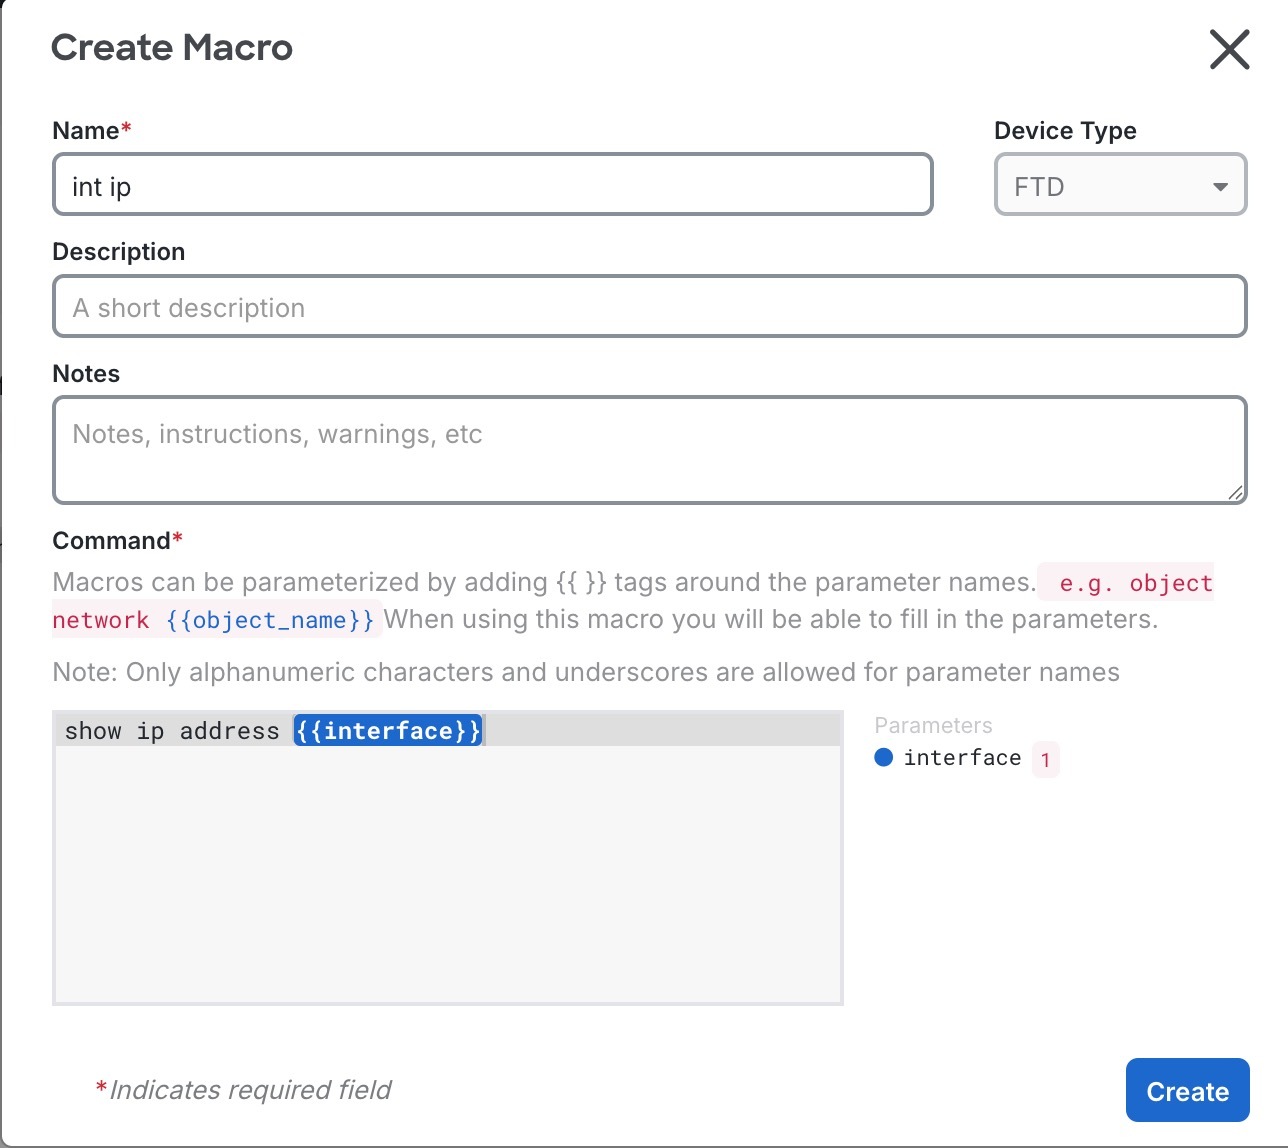
After you send commands, Security Cloud Control records that command in the History pane. You can rerun the commands saved in the History pane or use the commands as a macro.
|


 Feedback