About the Dashboard
To access the Cisco Secure Dynamic Attributes Connector Dashboard, log in to CDO and click at the top of the page.
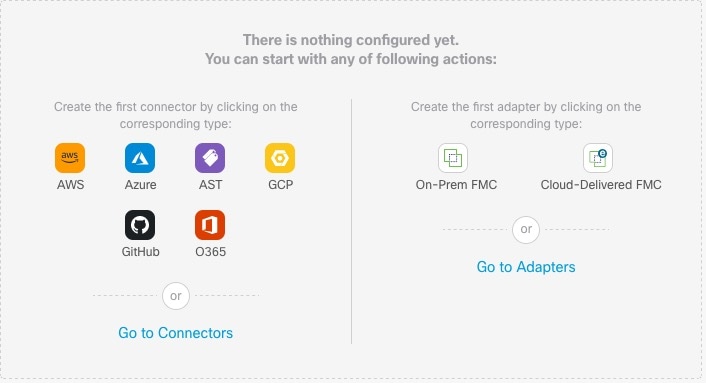
The Cisco Secure Dynamic Attributes Connector Dashboard page displays the status of your connectors, adapters, and filters at a glance. Following is an example of the Dashboard of an unconfigured system:
Among the things you can do with the Dashboard are:
-
Add, edit, and delete connectors,dynamic attributes filters, and adapters.
-
See how connectors,dynamic attributes filters, and adapters are related to each other.
-
View warnings and errors.
Related Topics
Dashboard of an Unconfigured System
Sample Cisco Secure Dynamic Attributes Connector Dashboard page of an unconfigured system:
The Dashboard initially displays all the types of connectors and adapters you can configure for your system. You can do any of the following:
-
Hover the mouse pointer over a connector or adapter and click
 to create a new one.
-
Click Go to Connectors to add, edit, or delete connectors (good for creating, editing, or deleting multiple connectors at the same time).
For more information, see Create a Connector.
-
Click Go to Adapters to add, edit, or delete adapters (good for creating, editing, or deleting multiple adapters at the same time).
For more information, see Create an Adapter.
Related Topics:
Dashboard of a Configured System
Sample Cisco Secure Dynamic Attributes Connector Dashboard page of a configured system:
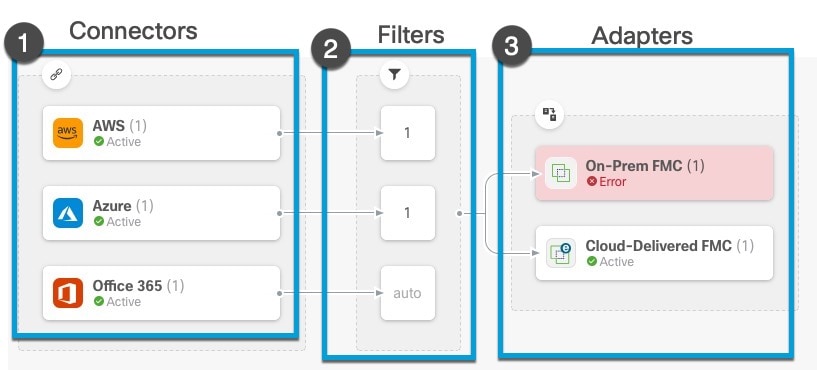
The Dashboard shows the following (from left to right):
|
Connectors column |
Filters column |
Adapters column |
|---|---|---|
|
List of connectors with a number indicating how many of each type are configured. Connectors collect dynamic attributes that could be sent to the configured adapter. Dynamic attributes filters specify what data is sent. Click |
List of dynamic attributes filters associated with each connector with a number indicating how many of each filter are associated with a connector. Click |
List of adapters. Adapters receive dynamic objects from configured connectors using configured dynamic attributes filters; these dynamic objects can be used in access control policies without the need to deploy them. Click |
 Note |
Some connectors, such as Outlook 365 and Azure Service tags, automatically pull available dynamic objects without the need
for a dynamic attributes filters. Those connectors display Auto in the |
The Dashboard indicates whether or not an object is available. The Dashboard page is refreshed every 15 seconds but you can
click Refresh (![]() ) at the top of the page at any time to refresh immediately. If issues persist, check your network connection.
) at the top of the page at any time to refresh immediately. If issues persist, check your network connection.
Related Topics:
Add, Edit, or Delete Connectors
The Dashboard enables you to view or edit connectors. You can click the name of a connector to view all instances of that
connector or you can click ![]() for the following additional options:
for the following additional options:
-
Go to Connectors to view all connectors at the same time; you can add, edit, and delete connectors from there.
-
to add a connector of the indicated type.
Click any connector in the connectors column (![]() ) to display more information about it; an example follows:
) to display more information about it; an example follows:
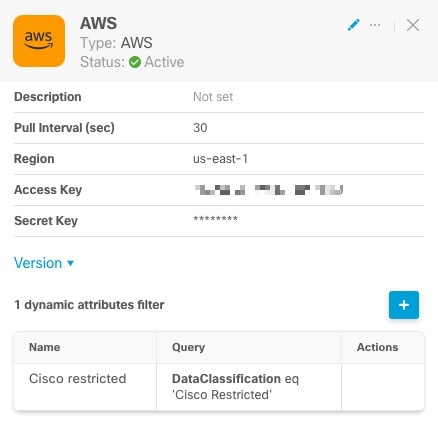
You have the following options:
-
Click the Edit icon (
 ) to edit this connector.
-
Click the More icon (
 ) for additional options.
-
Click
 to close the panel.
-
Click Version to display the version of the dynamic attributes connector. You can optionally copy the version to the clipboard if necessary for Cisco TAC.
The table at the bottom of the panel enables you to add dynamic attributes filters; or to edit or delete connectors. A sample follows:
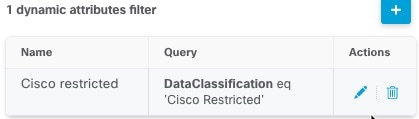
Click the Add icon (![]() ) to add a dynamic attributes filter for this connector. For more information, see Create Dynamic Attributes Filters.
) to add a dynamic attributes filter for this connector. For more information, see Create Dynamic Attributes Filters.
Hover the mouse pointer over the Actions column to either edit or delete the indicated connector.
View error information
To view error information for a connector:
-
On the Dashboard, click the name of the connector that is displaying the error.
-
In the right pane, click Information (
 ).
).
An example follows.
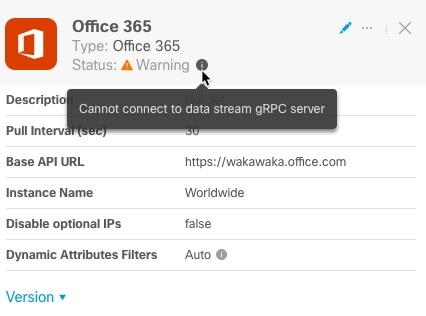
-
To resolve this issue, edit the connector settings as discussed in Create an Office 365 Connector.
-
If you cannot resolve the issue, click Version and copy the version to a text file.
-
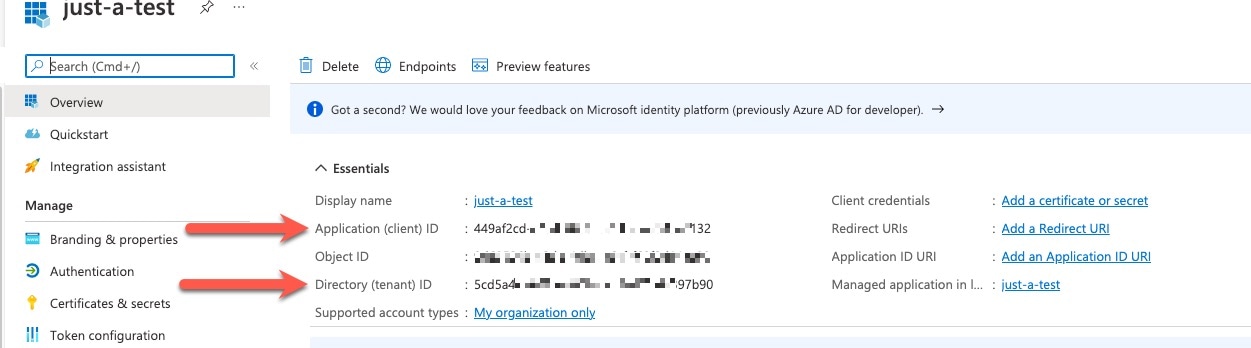
Get your CDO tenant ID as discussed in Get Your Tenant ID
-
Provide all of this information to Cisco TAC.
Add, Edit, or Delete Dynamic Attributes Filters
The Dashboard enables you to add, edit, or delete dynamic attributes filters. You can click the name of a filter to view all
instances of that filter or you can click ![]() for the following additional optons:
for the following additional optons:
-
Go to Dynamic Attributes Filters to view all configured dynamic attributes filters.You can add, edit, or delete dynamic attributes filters from there.
-
Add Dynamic Attributes Filters to add a filter.
For more information about adding dynamic attributes filters, see Create Dynamic Attributes Filters.
Click any adapter in the filters column (![]() ) to display more information about it; an example follows:
) to display more information about it; an example follows:
Note |
Some connectors, such as Outlook 365 and Azure Service tags, automatically pull available dynamic objects without the need
for a dynamic attributes filters. Those connectors display Auto in the |
You have the following options:
-
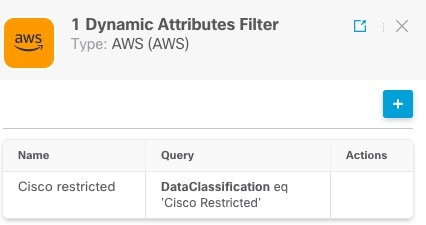
Click a filter instance to view summary information about dynamic attributes filters associated with a connector.
-
Click the Add icon (
 ) to add a new dynamic attributes filter.
For more information, see Create Dynamic Attributes Filters.
-
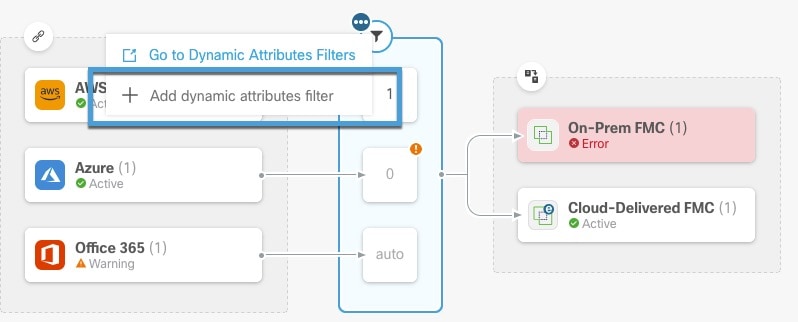
Click
 in the filters column (
 ) indicates the indicated connector has no associated dynamic attributes filters. Without associated filters, the connector
can send nothing to management center.
) indicates the indicated connector has no associated dynamic attributes filters. Without associated filters, the connector
can send nothing to management center.
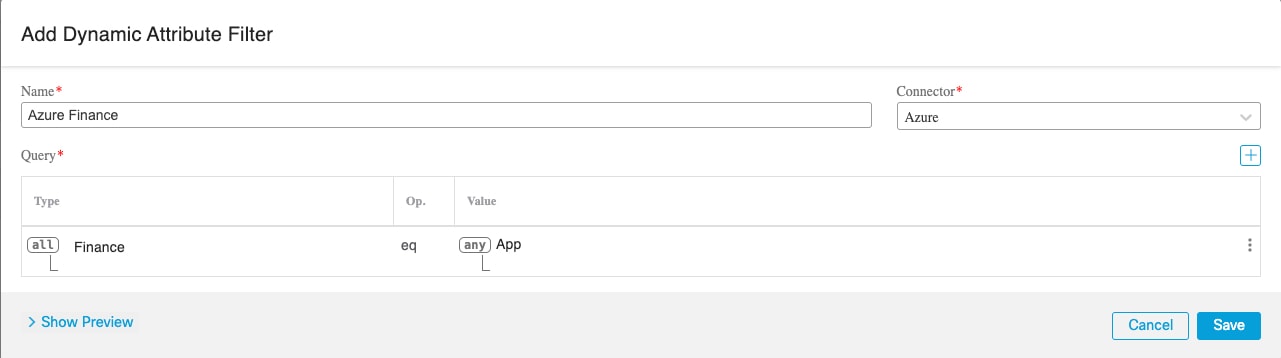
One way to resolve the issue is to click
 in the filters column and click Add Dynamic Attributes Filter. A sample follows.
-
Click
 to add, edit, or delete filters.
-
Click
to close the panel.
Add, Edit, or Delete Adapters
The Dashboard enables you to view or edit adapters. You can click the name of an adapter to view all instances of that adapter
or you can click ![]() for the following additional options:
for the following additional options:
-
Go to Adapters to view all adapters at the same time; you can add, edit, and delete adapters from there.
-
to add an adapter of the indicated type.
Click any adapter in the adapters column (![]() ) to display more information about it; an example follows:
) to display more information about it; an example follows:

You have the following options:
-
Click the Edit icon (
) to edit this connector.
-
Click the More icon (
) for additional options.
-
Click Version to display the version of the dynamic attributes connector. You can optionally copy the version to the clipboard if necessary for Cisco TAC.
-
Click
to add, edit, or delete adapters. You can also view error details on the resulting page.
-
Click
to close the panel.
View error information
To view error information for an adapter:
-
On the Dashboard, click the name of the adapter that is displaying the error.
-
In the right pane, click Information (
) .
An example follows.
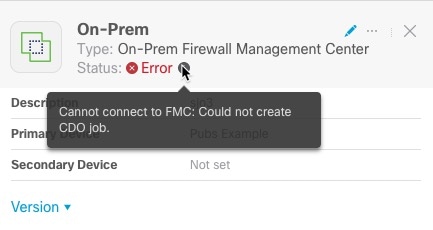
-
To resolve this error, make sure the On-Prem Firewall Management Center is onboarded correctly. For more information, see Onboard an FMC in Managing FMC with Cisco Defense Orchestrator (link to topic).
-
If you cannot resolve the issue, click Version and copy the version to a text file.
-
Get your CDO tenant ID as discussed in Get Your Tenant ID
-
Provide all of this information to Cisco TAC.
Related Topics
 )
) )
)

 )
)

 Feedback