Cisco Catalyst Center 3.1.x on Azure Deployment Guide

PDF

Deploy your Catalyst Center VA using an ARM template

Want to summarize with AI?

Log in

Overview

Provides step-by-step instructions for deploying a Catalyst Center VA on Azure using a custom ARM template and the Azure portal.

Use this procedure to manually deploy Catalyst Center on Azure using a custom ARM template. The ARM template contains the relevant details for all required parameters.

Before you begin

If you want to use a custom NTP server instead of the default Azure cloud NTP server, configure a custom NTP server in the ARM template before following this procedure. For instructions, see Configure a custom NTP server.

Procedure

1.

Log in to the Azure portal.

2.

In the Search field, enter Deploy a custom template and press Enter.

3.

In the Custom deployment window, click Build your own template in the editor.

4.

In the Edit template window, create the custom template and then click Save.

You can create the custom template by either
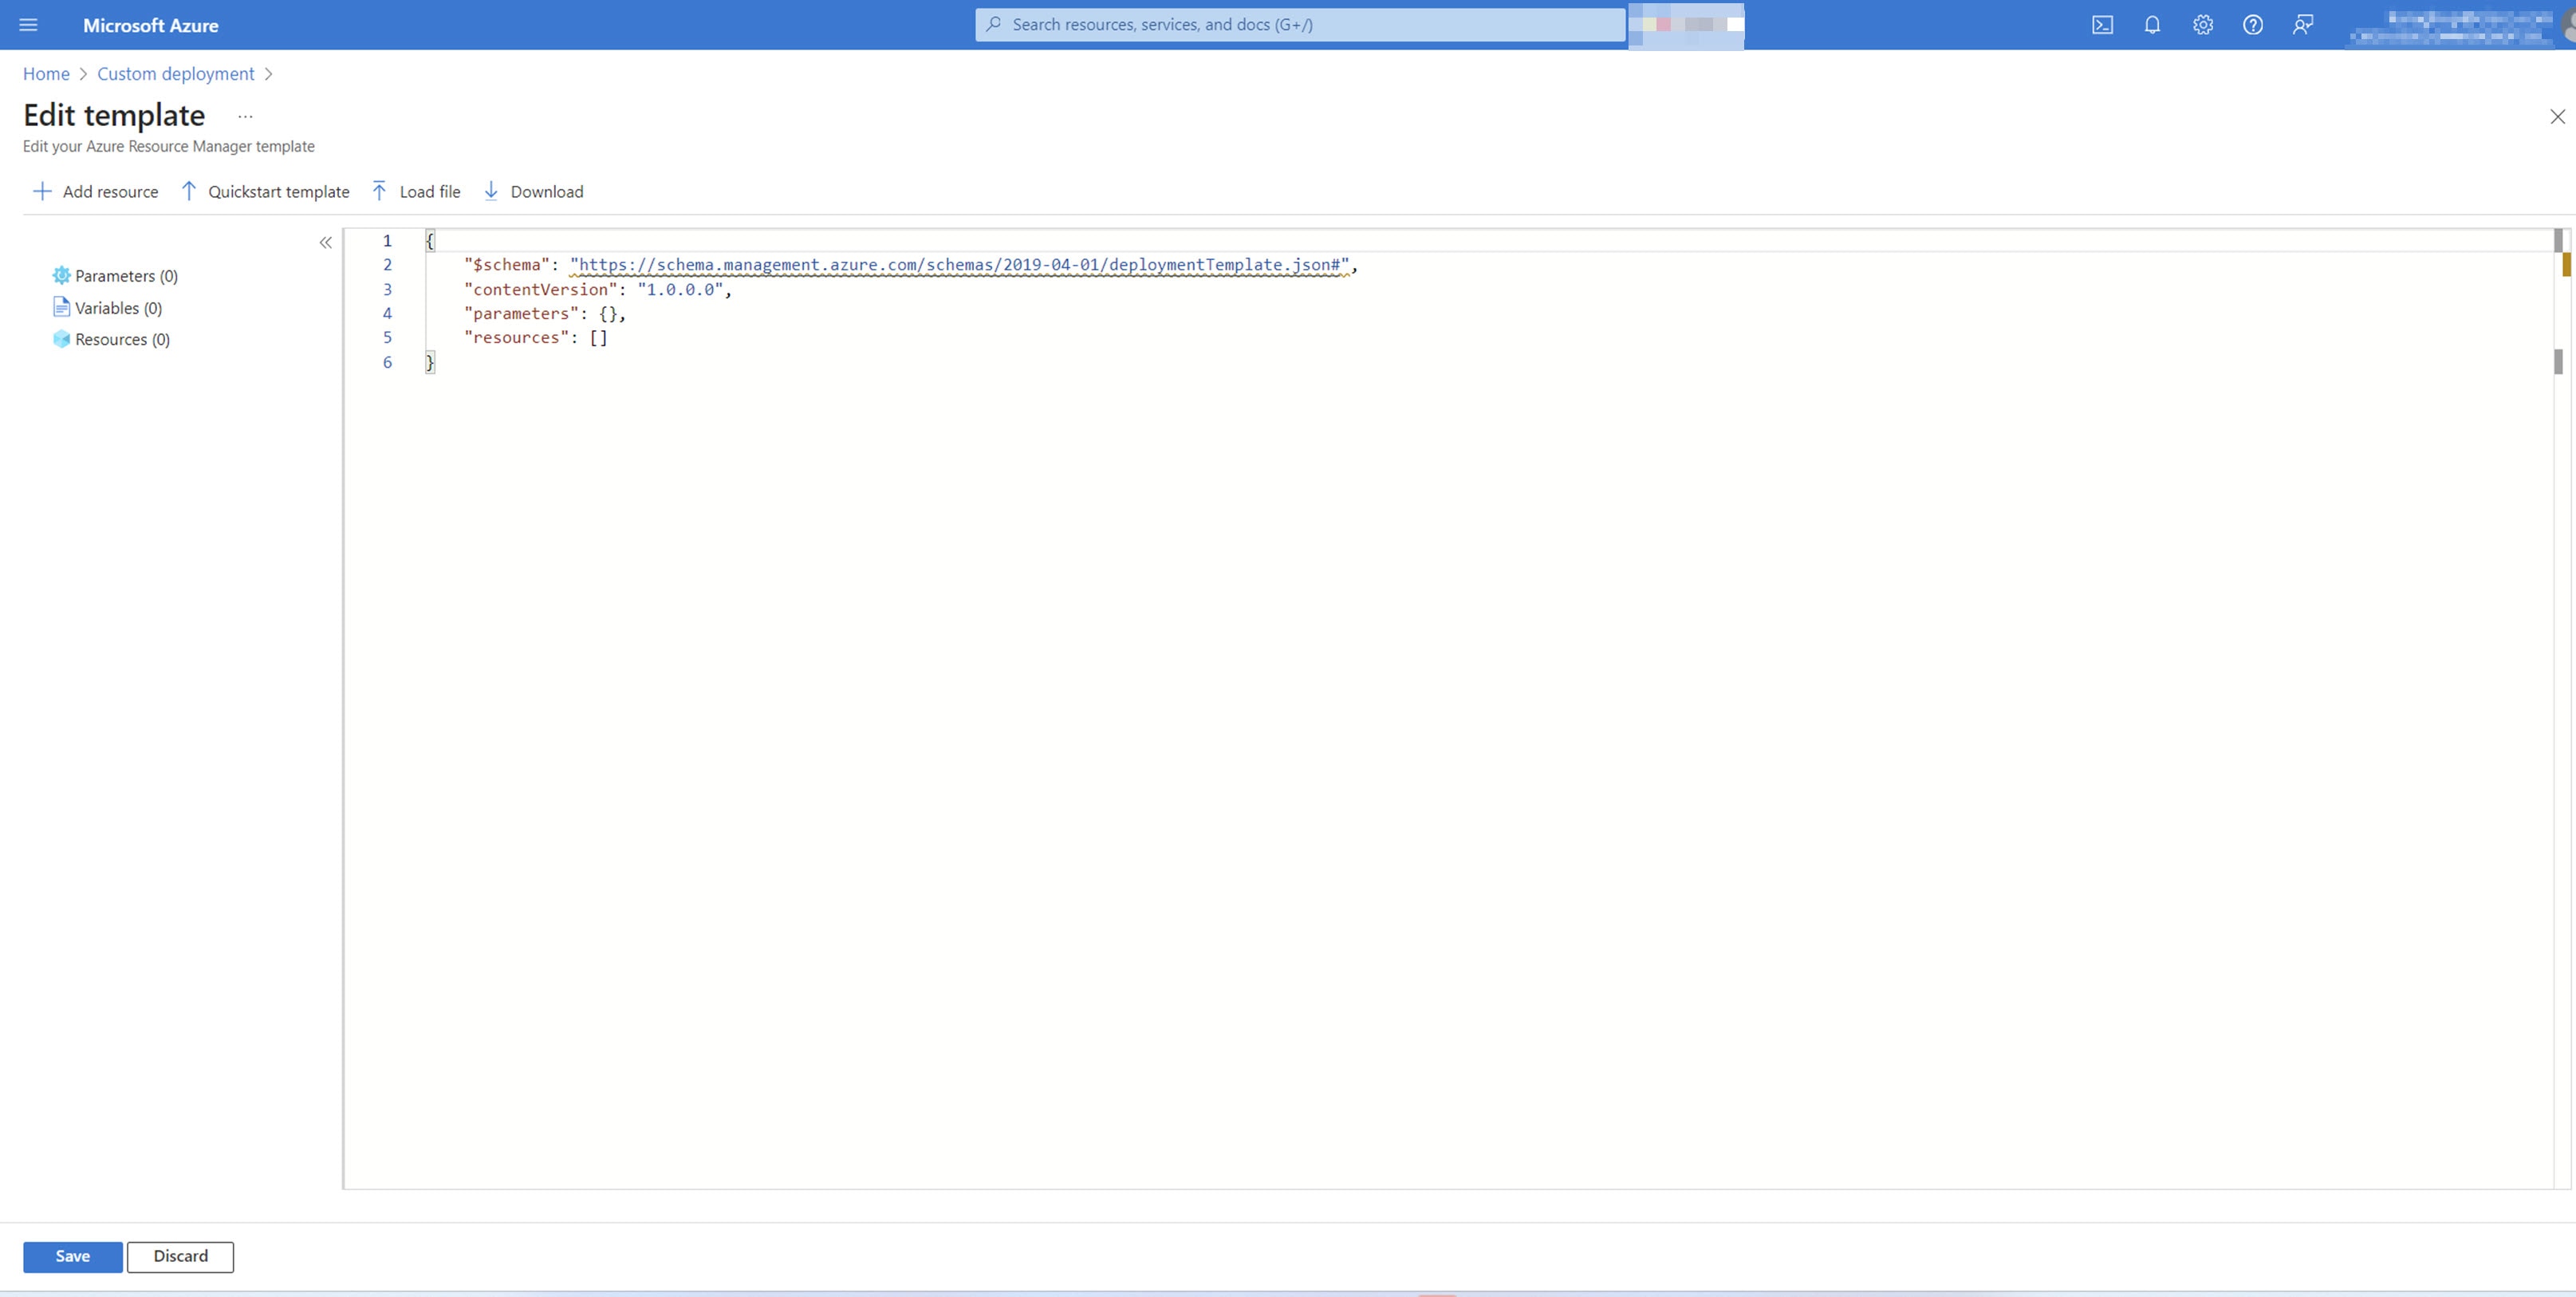
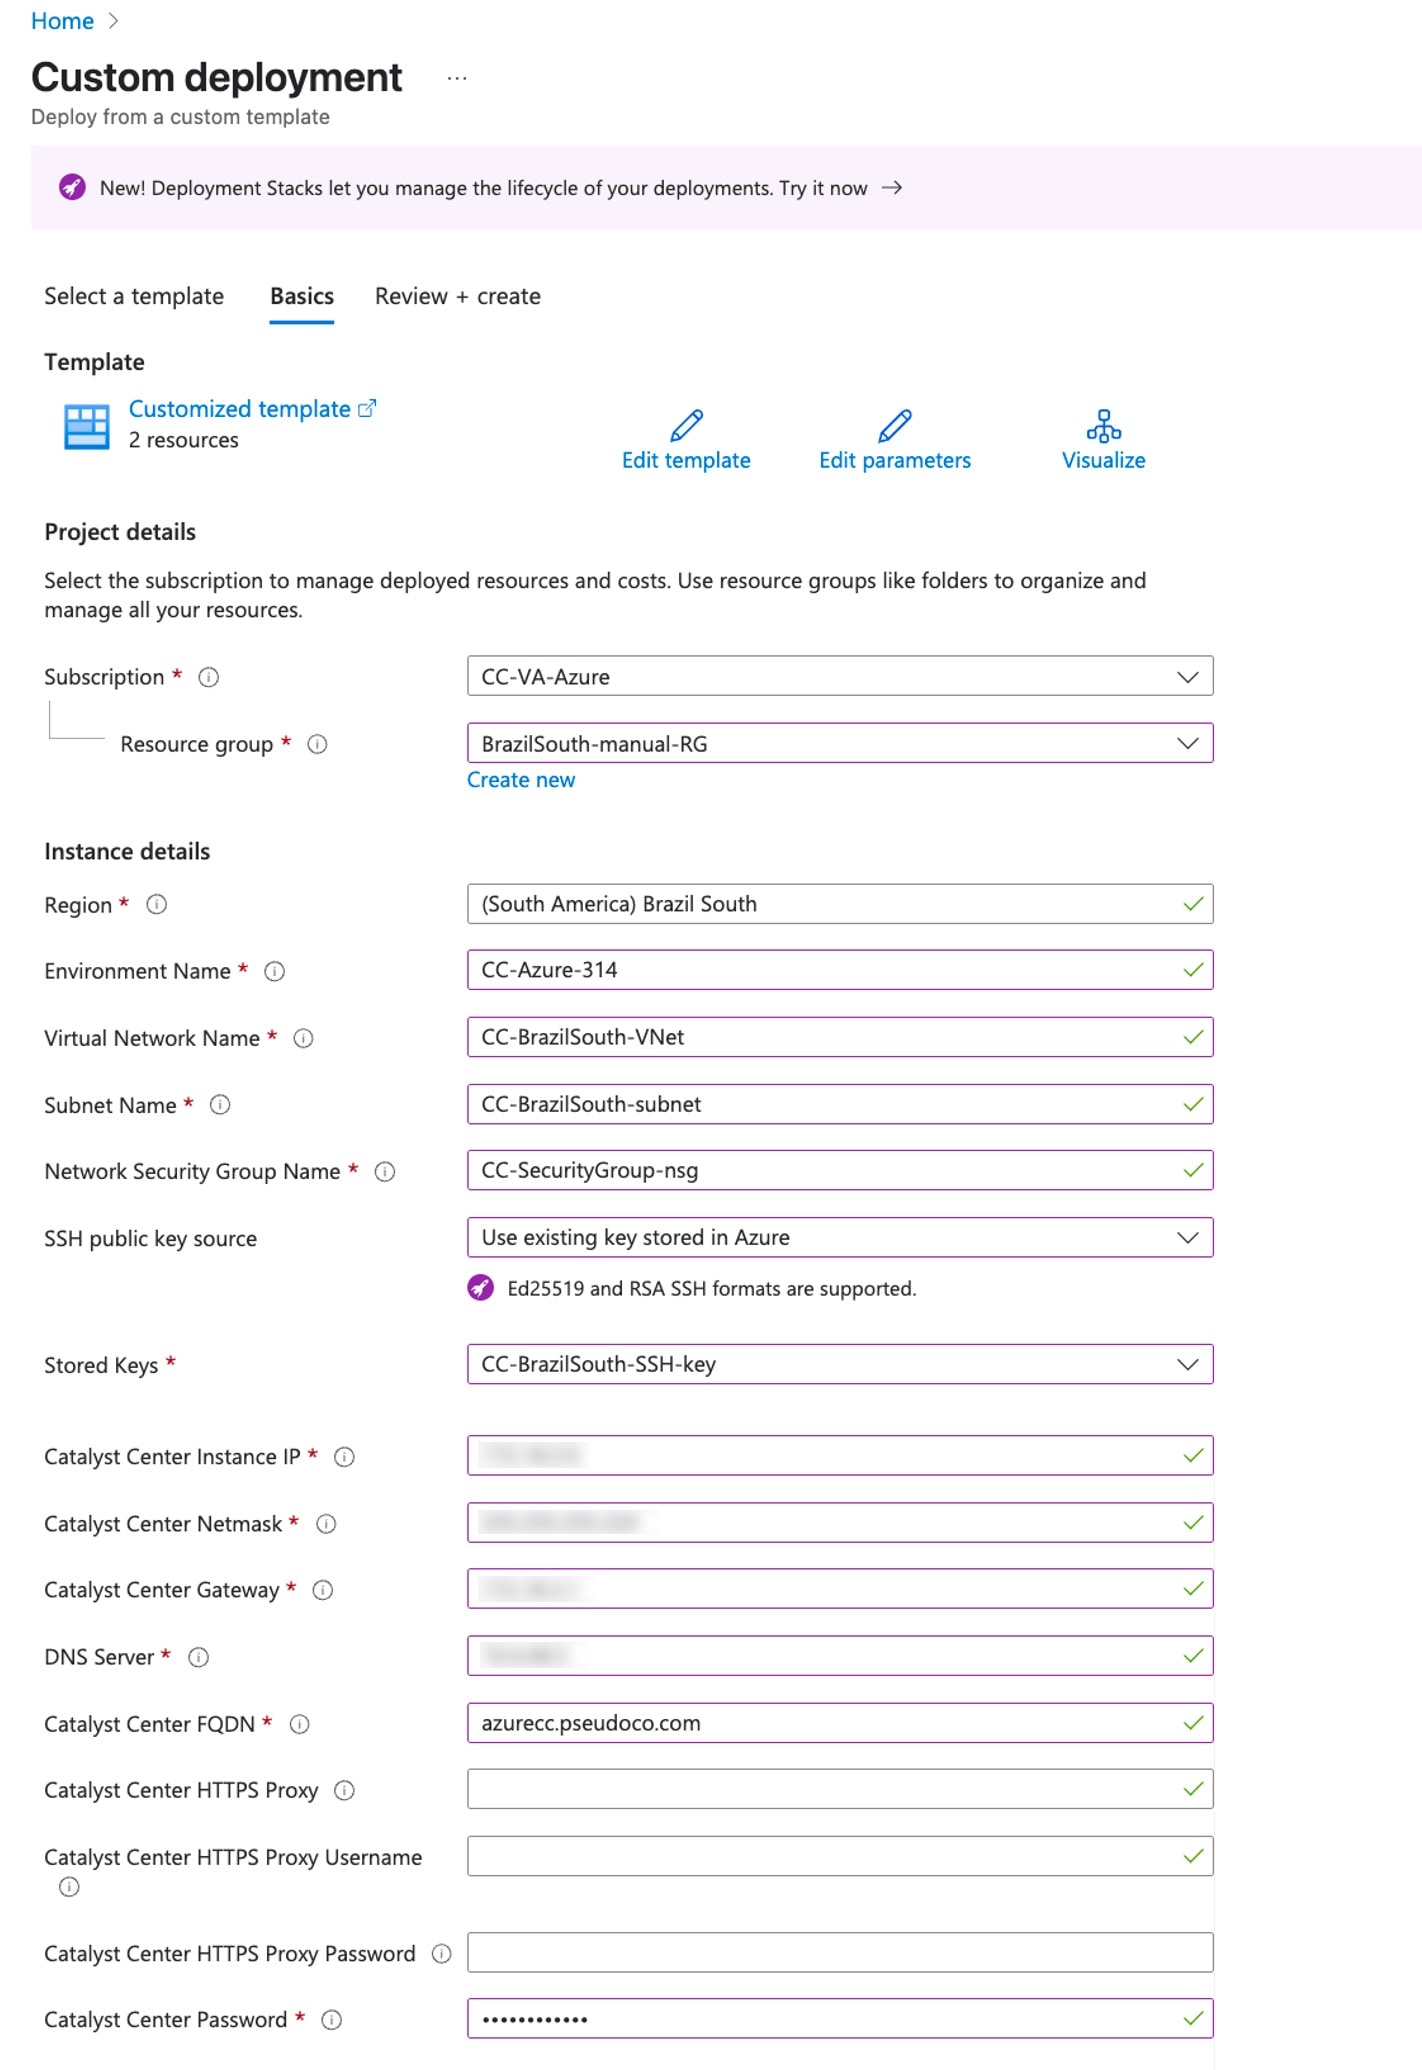
  • copying and pasting the contents of the template file into the open editor, or

  • clicking Load file and uploading the file.

Note

If you configured a custom NTP server in the custom ARM template, make sure that you provide this updated version of the template.

On the Edit template window, the right pane displays a blank template.
5.

In the Custom deployment window, under Basics, configure the template for the Catalyst Center on Azure deployment.

  1. Under Project details, provide the required details.

    • From the Subscription drop-down list, choose the subscription.

    • From the Resource group drop-down list, choose the resource group.

  2. Under Instance details, provide the required details using this table.

    Note

    Choose the appropriate network and network security group (NSG) configurations for enabling secure access to your on-premises server. This process includes verifying the subnet routing and implementing the NSG rules to establish connectivity between Azure resources and the on-premises infrastructure.

    Parameter

    Description

    Region

    From this drop-down list, choose a region for the deployment.

    Environment Name

    Enter an environment name for the deployment.

    Virtual Network Name

    Enter the name of the virtual network where you want to deploy Catalyst Center.

    Subnet Name

    Enter the subnet name for Catalyst Center.

    Network Security Group Name

    Enter the name of the network security group for Catalyst Center.

    SSH public key source

    From this drop-down list, choose the key that the enterprise network uses to establish an SSH connection with Catalyst Center on Azure.

    Stored Keys

    From this drop-down list, choose the key that the enterprise network uses to establish an SSH connection with Catalyst Center on Azure.

    Catalyst Center Instance IP

    Enter an unused Catalyst Center instance IP address from the subnet that's being used for Catalyst Center.

    Catalyst Center Netmask

    Enter the netmask for the subnet that's being used for Catalyst Center.

    Catalyst Center Gateway

    Enter the gateway IP address for the subnet that's being used for Catalyst Center.

    DNS Server

    Enter the enterprise DNS server IP address that you want configured on Catalyst Center.

    Catalyst Center FQDN

    Enter the FQDN that you want configured on Catalyst Center.

    (Optional) Catalyst Center HTTPS Proxy

    Enter the enterprise proxy if needed.

    (Optional) Catalyst Center HTTPS Proxy Username

    Enter the enterprise proxy username if needed.

    (Optional) Catalyst Center HTTPS Proxy Password

    Enter the enterprise proxy password if needed.

    Catalyst Center Password

    Enter the Catalyst Center password that the Azure console uses to connect to the Catalyst Center CLI.

    Note

    The password must

    • be 9 to 64 characters long, and

    • contain at least three of these categories:

      • Uppercase letters (A through Z)

      • Lowercase letters (a through z)

      • Numbers (0 to 9)

      • Special characters (for example, !, $, and #)

    The password must not include

    • the username or any two consecutive characters of the username

    • context-specific words, such as the service name, username, derivatives, Cisco, and maglev

    • four consecutive characters, except for special characters, and

    • any tabs or line breaks.

    For the custom deployment, the Basics tab lists the required template parameters, such as the subscription and instance details.
  3. Click Next or Review + Create.

    Azure performs a basic validation check of the template and displays any warnings or errors.

6.

On the Custom deployment window, review the configuration and then click Create to approve the configuration and start the deployment.

The Custom Deployment window displays the Azure Marketplace terms and a summary of the configured basic parameters.

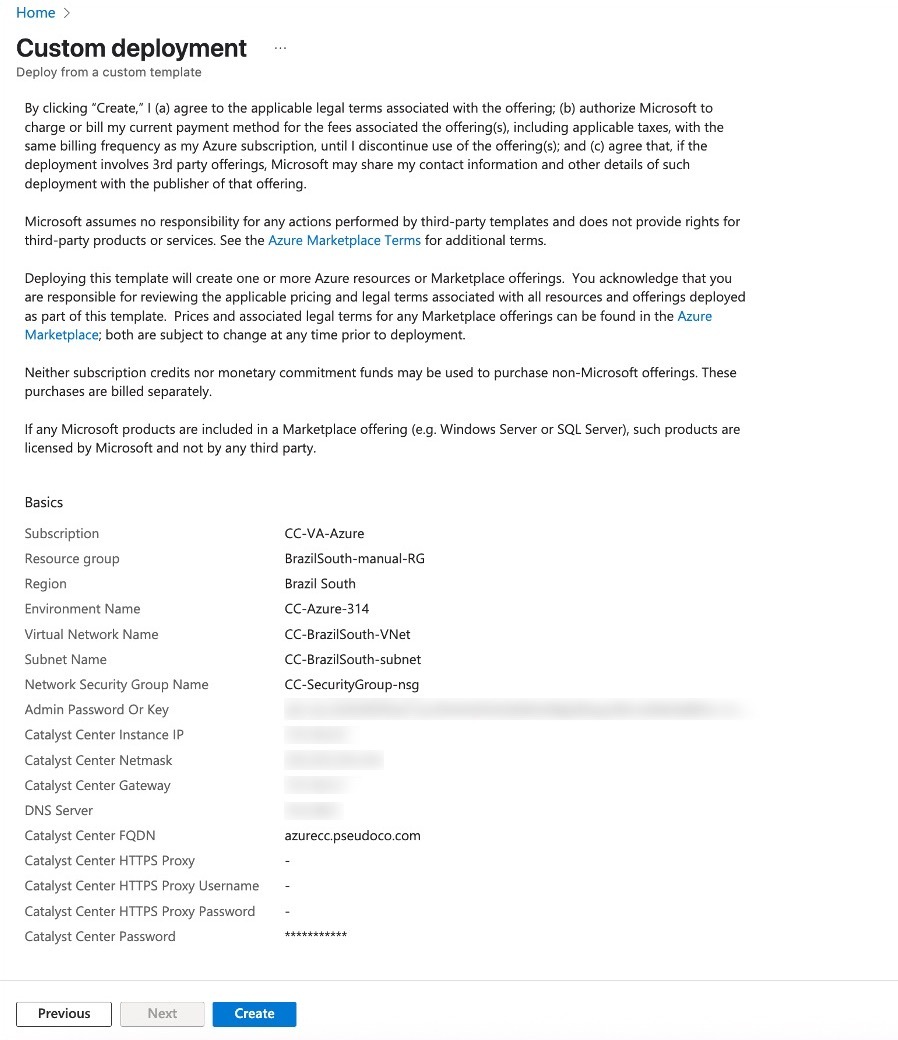
When the deployment successfully completes, the resources display in the corresponding deployed resource group.
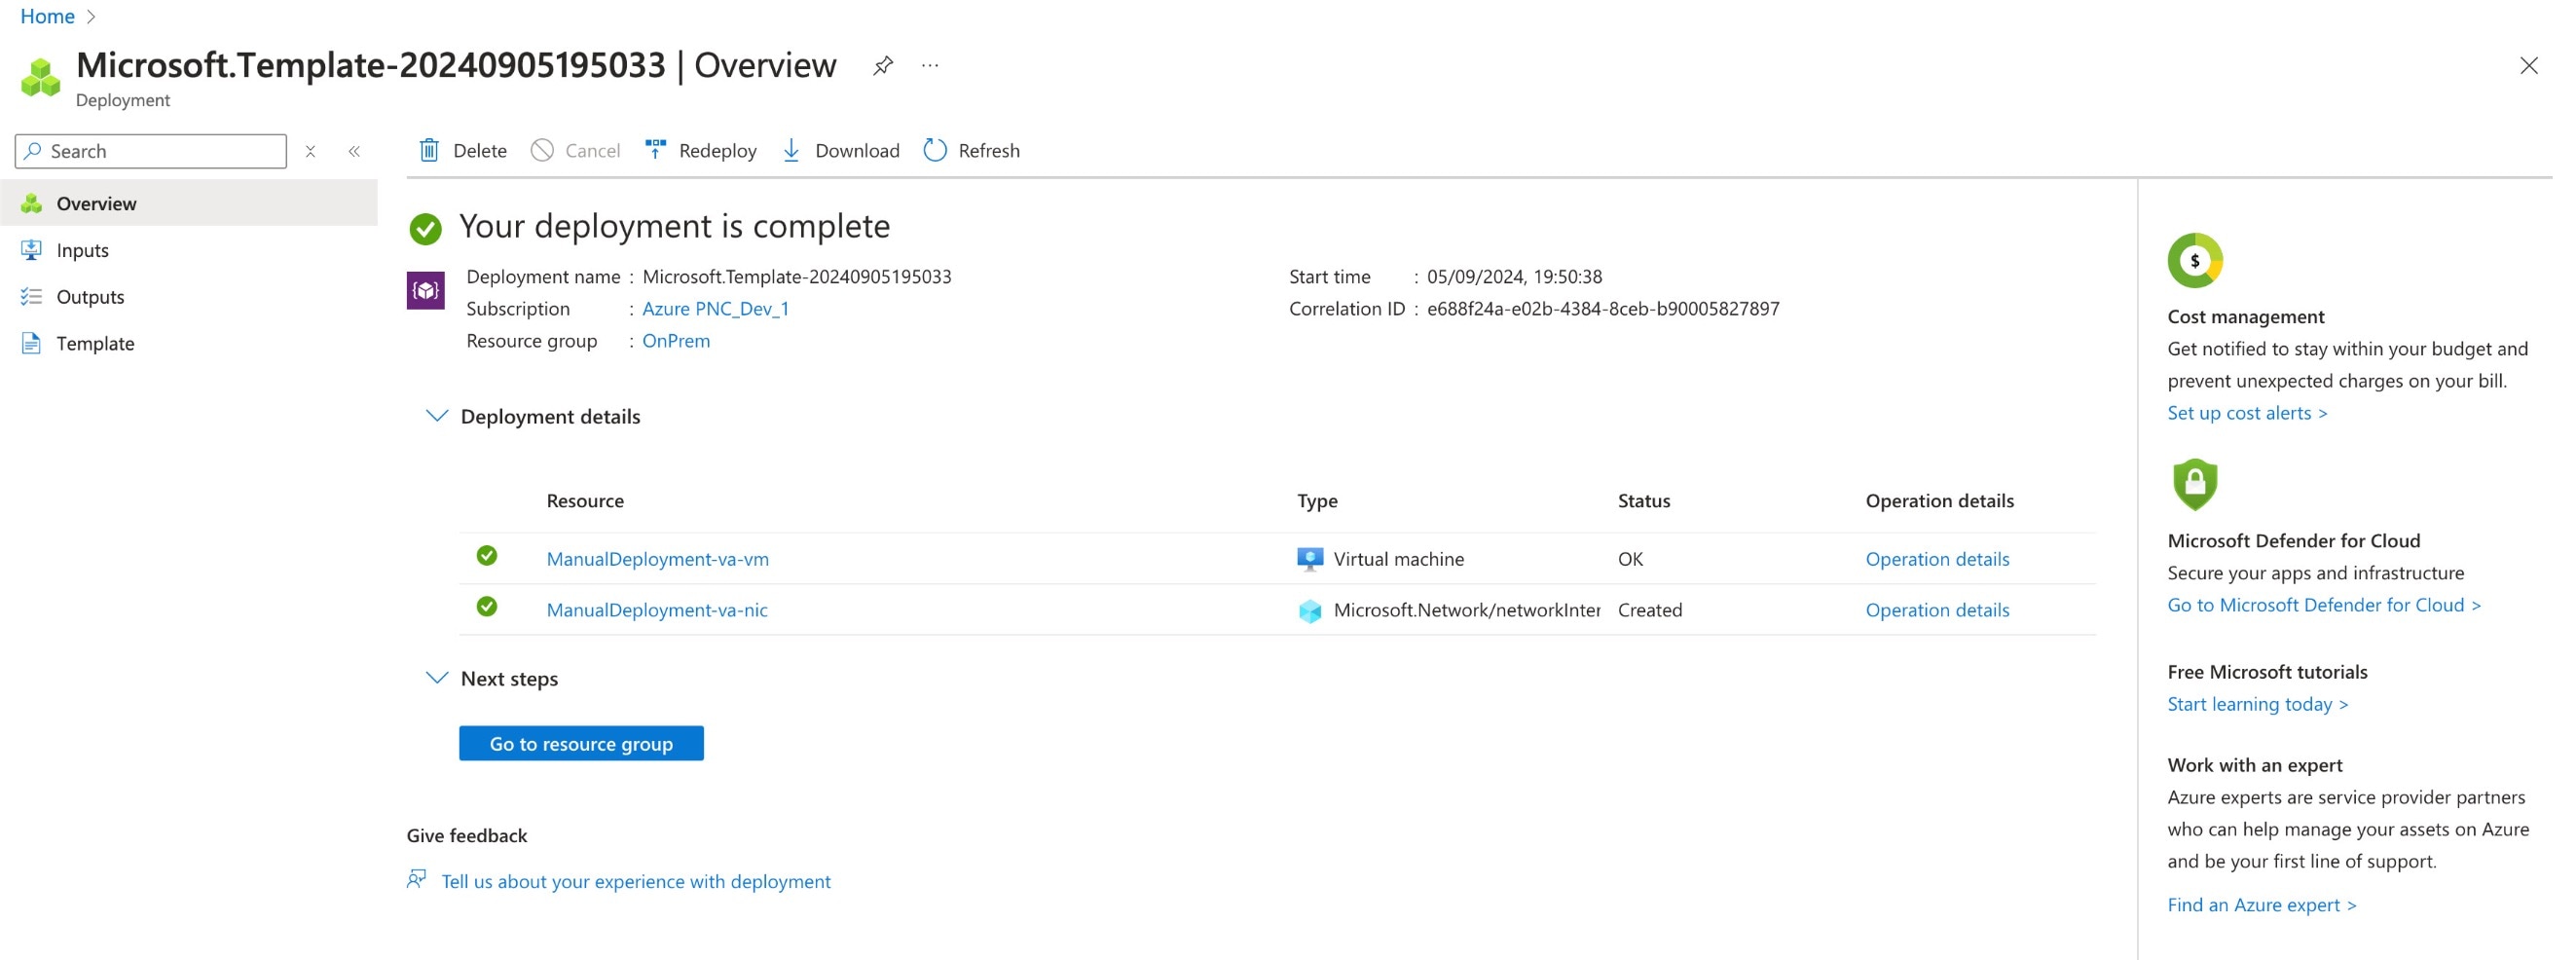