Backup and Restore

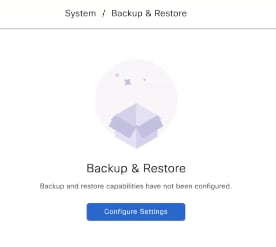
About backup and restore

The backup and restore functions enable you to create backup files and restore them on a different appliance if necessary for your network configuration.

Backup

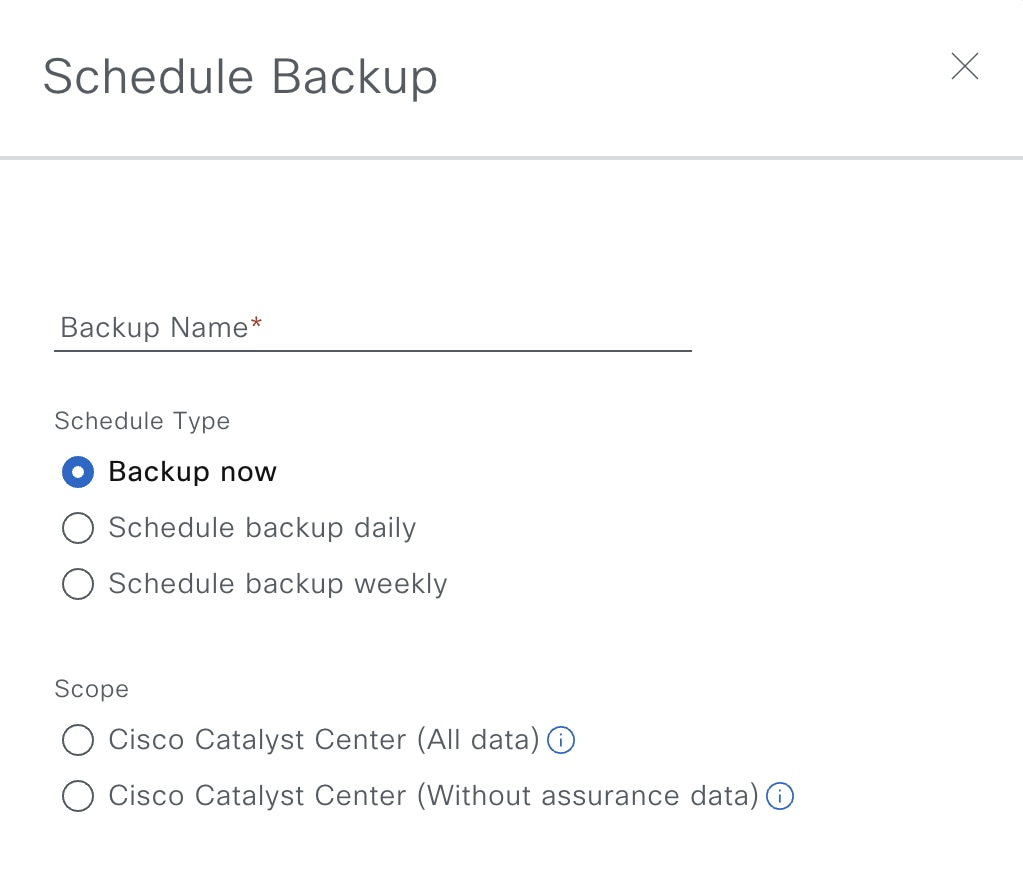
  • You can back up automation data only or both automation and Assurance data.


    Important


    NetFlow data is not backed up when you back up Catalyst Center's automation and Assurance data.


  • Automation data consists of Catalyst Center databases, credentials, file systems, and files. The automation backup is a backup of all data.

  • The Assurance data consists of network assurance and analytics data. The first backup of Assurance data is a backup of all data. After that, backups are incremental.


    Important


    • Do not modify or delete the backup files. If you do, you might not be able to restore the backup files to Catalyst Center.

    • A backup can only be restored on a Catalyst Center cluster that has the same FIPS mode setting configured as the source cluster. Backup and restore operations involving clusters with different FIPS mode settings will fail (since Catalyst Center will label backups as incompatible).


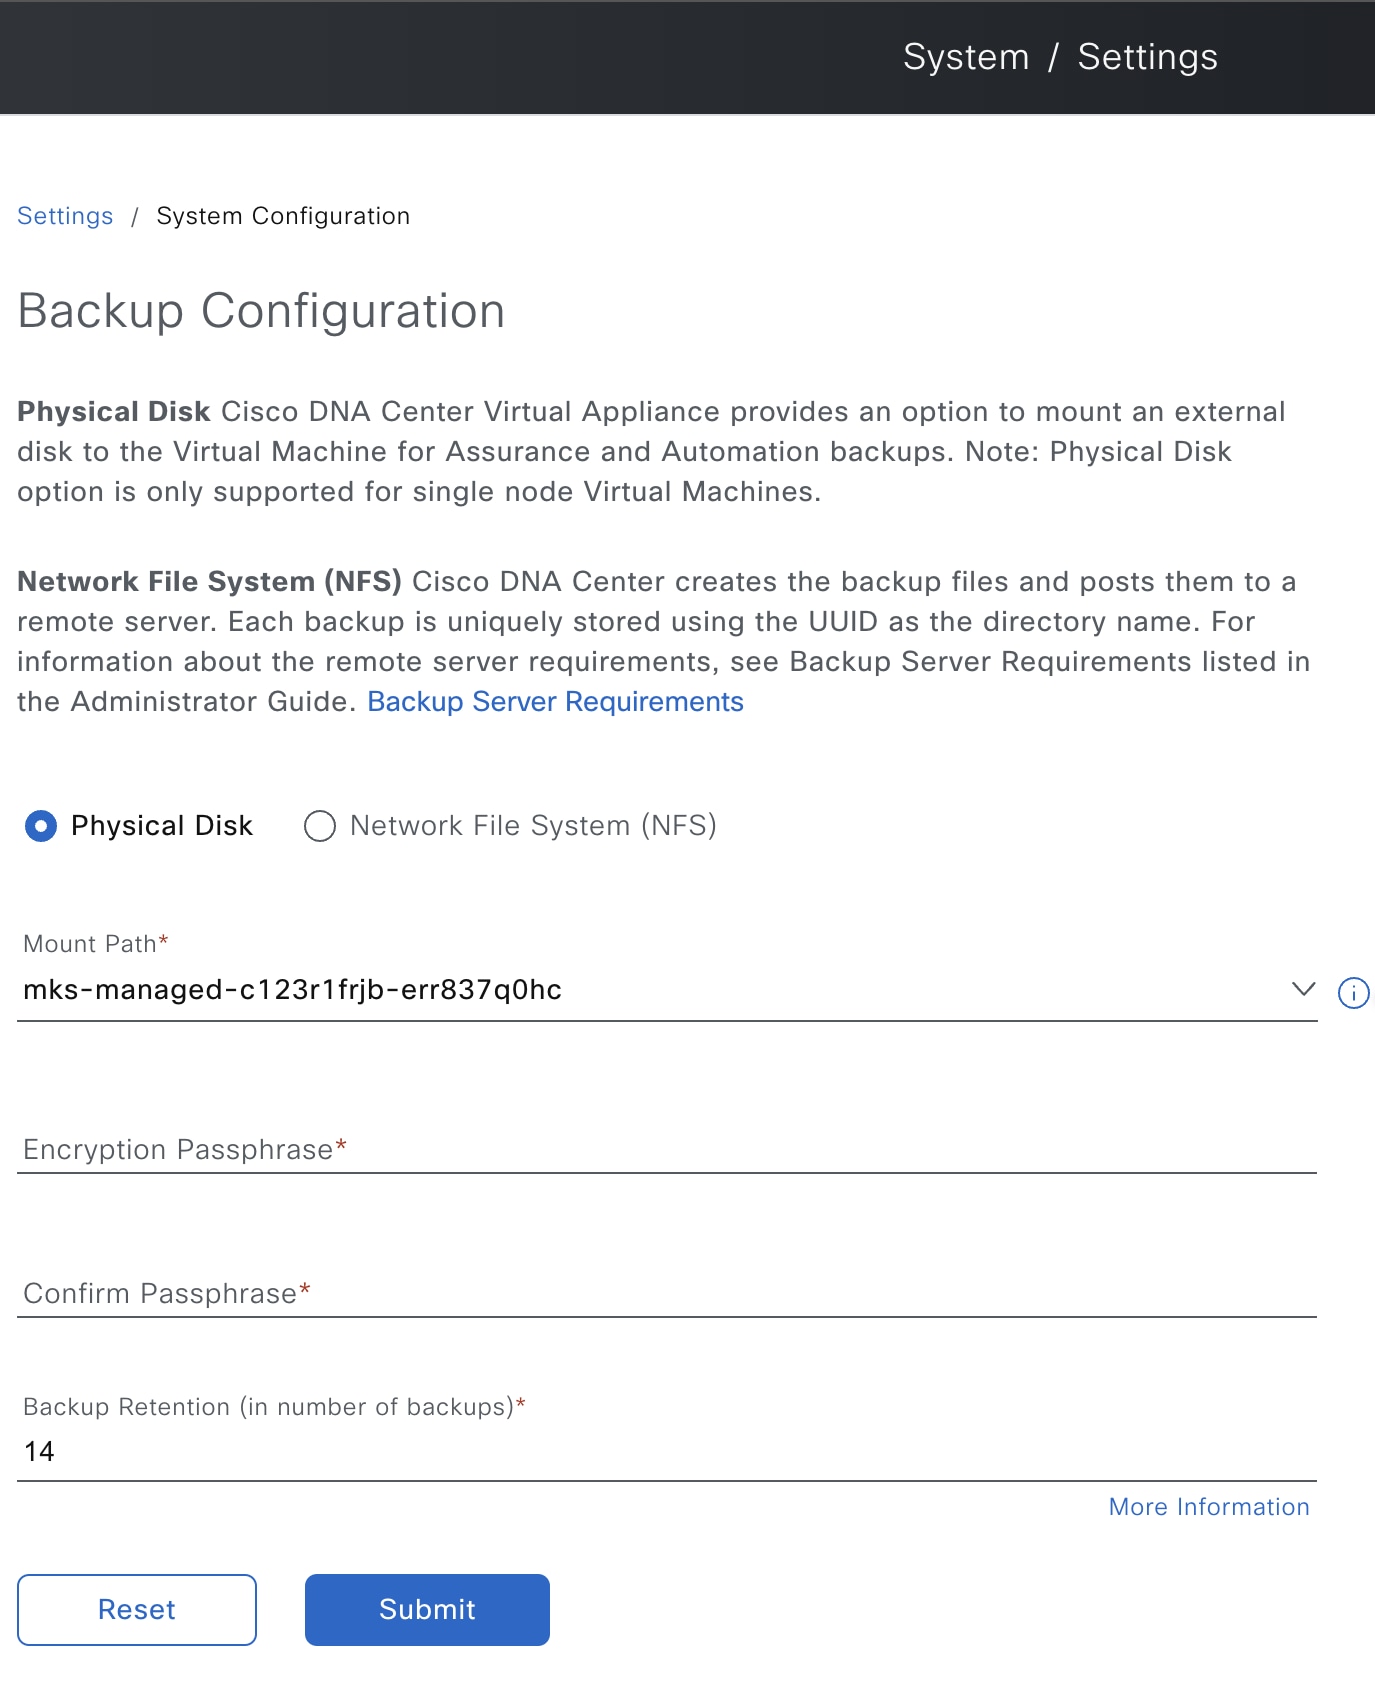
  • Catalyst Center creates the backup files and posts them to a remote server. Each backup is uniquely stored using the UUID as the directory name. For information about the remote server requirements, see Backup server requirements.

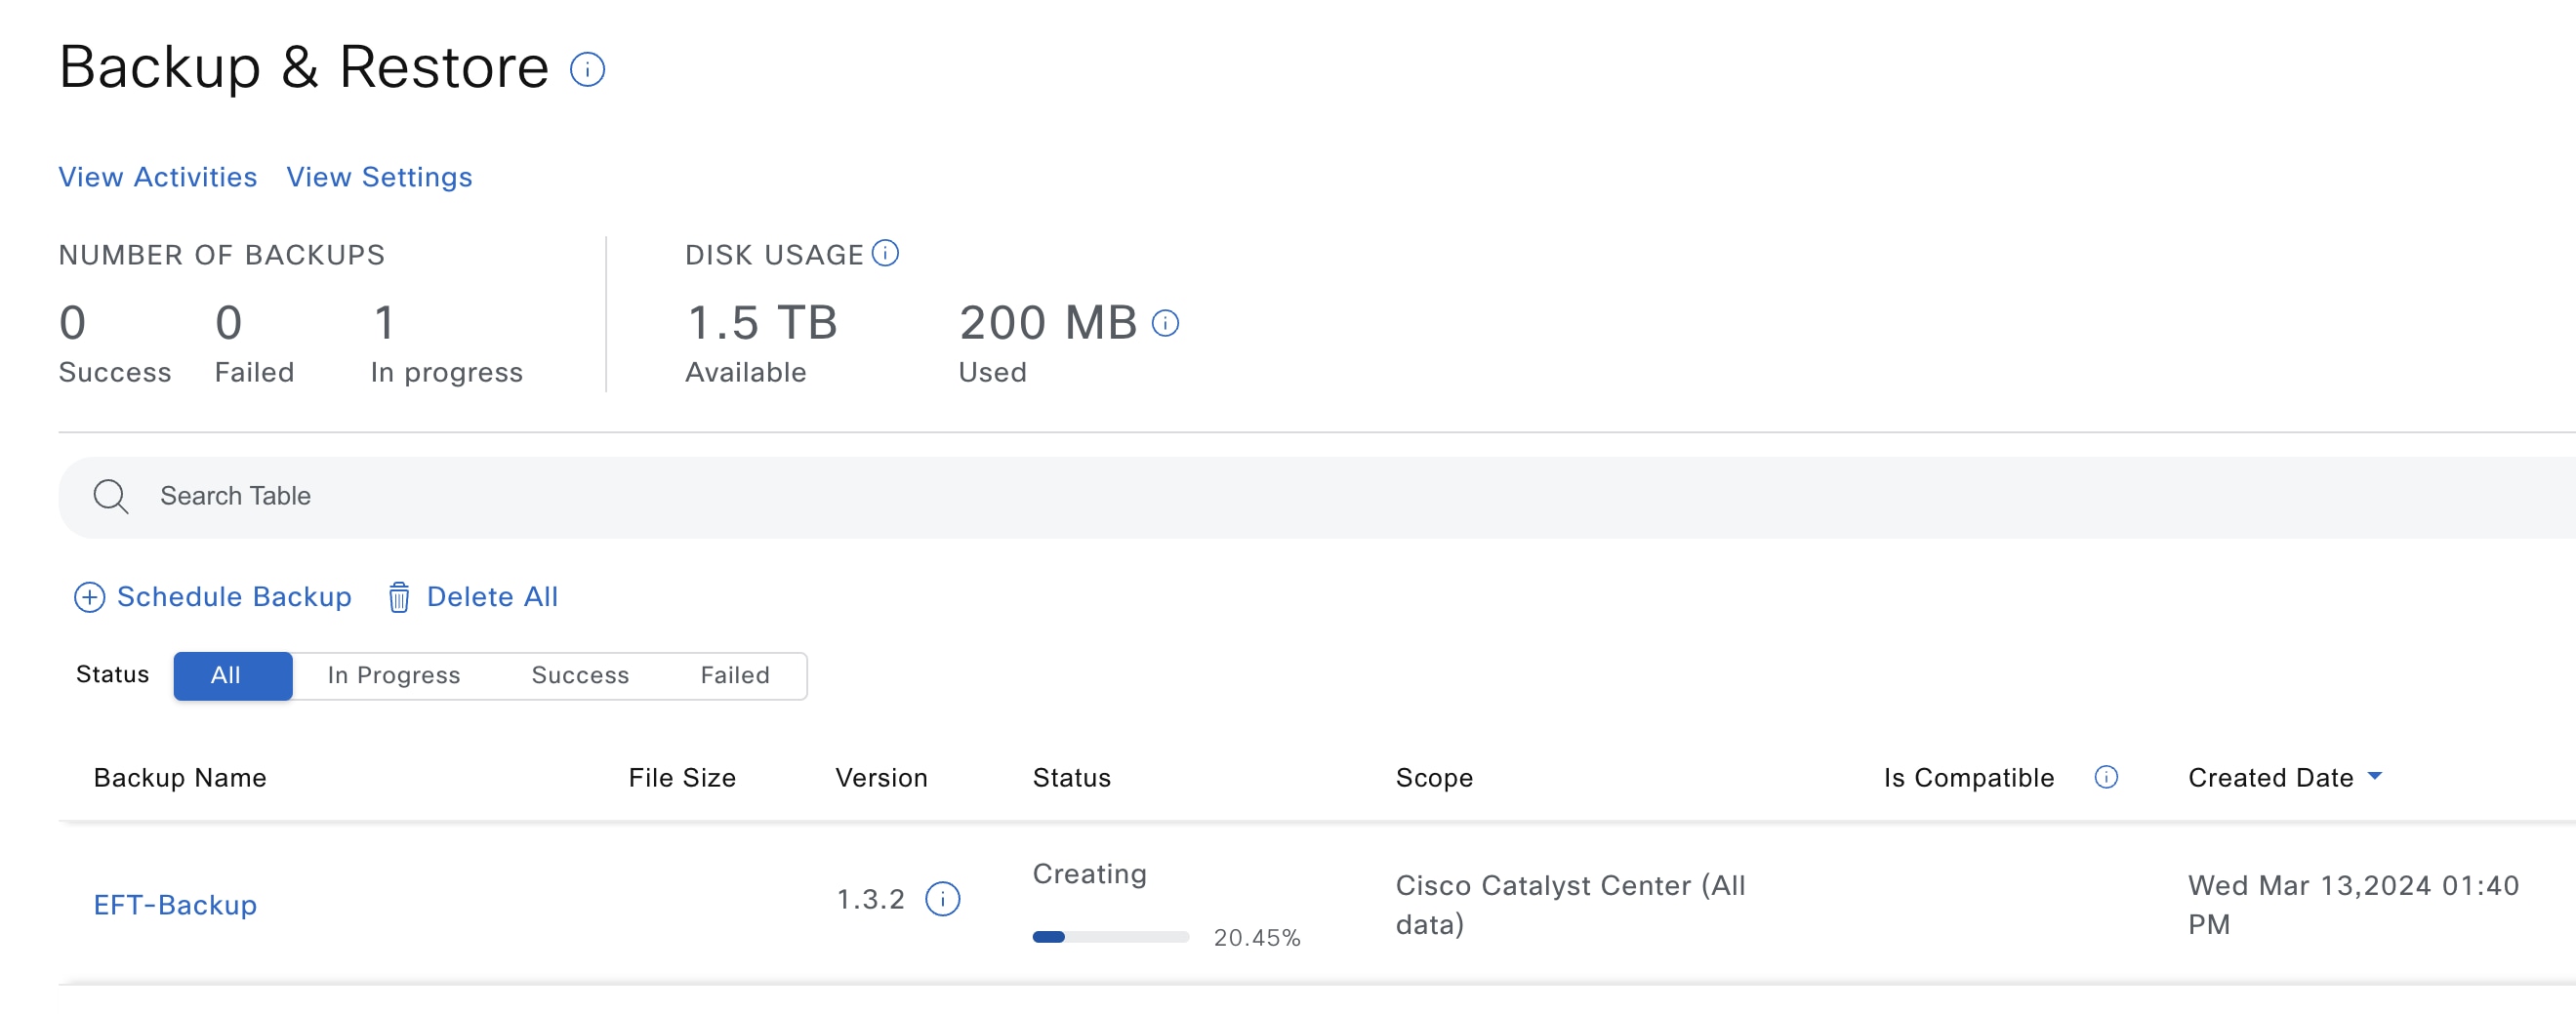
  • Only a single backup can be performed at a time. Performing multiple backups at once is not supported.

  • When a backup is being performed, you cannot delete the files that have been uploaded to the file service, and changes that you make to these files might not be captured by the backup process.

  • We recommend:

    • Perform a daily backup to maintain a current version of your database and files.

    • Perform a backup after making changes to your configuration. For example, when changing or creating a new policy on a device.

    • Perform a backup only during a low-impact or maintenance period.

  • You can schedule weekly backups on a specific day of the week and time.

Restore

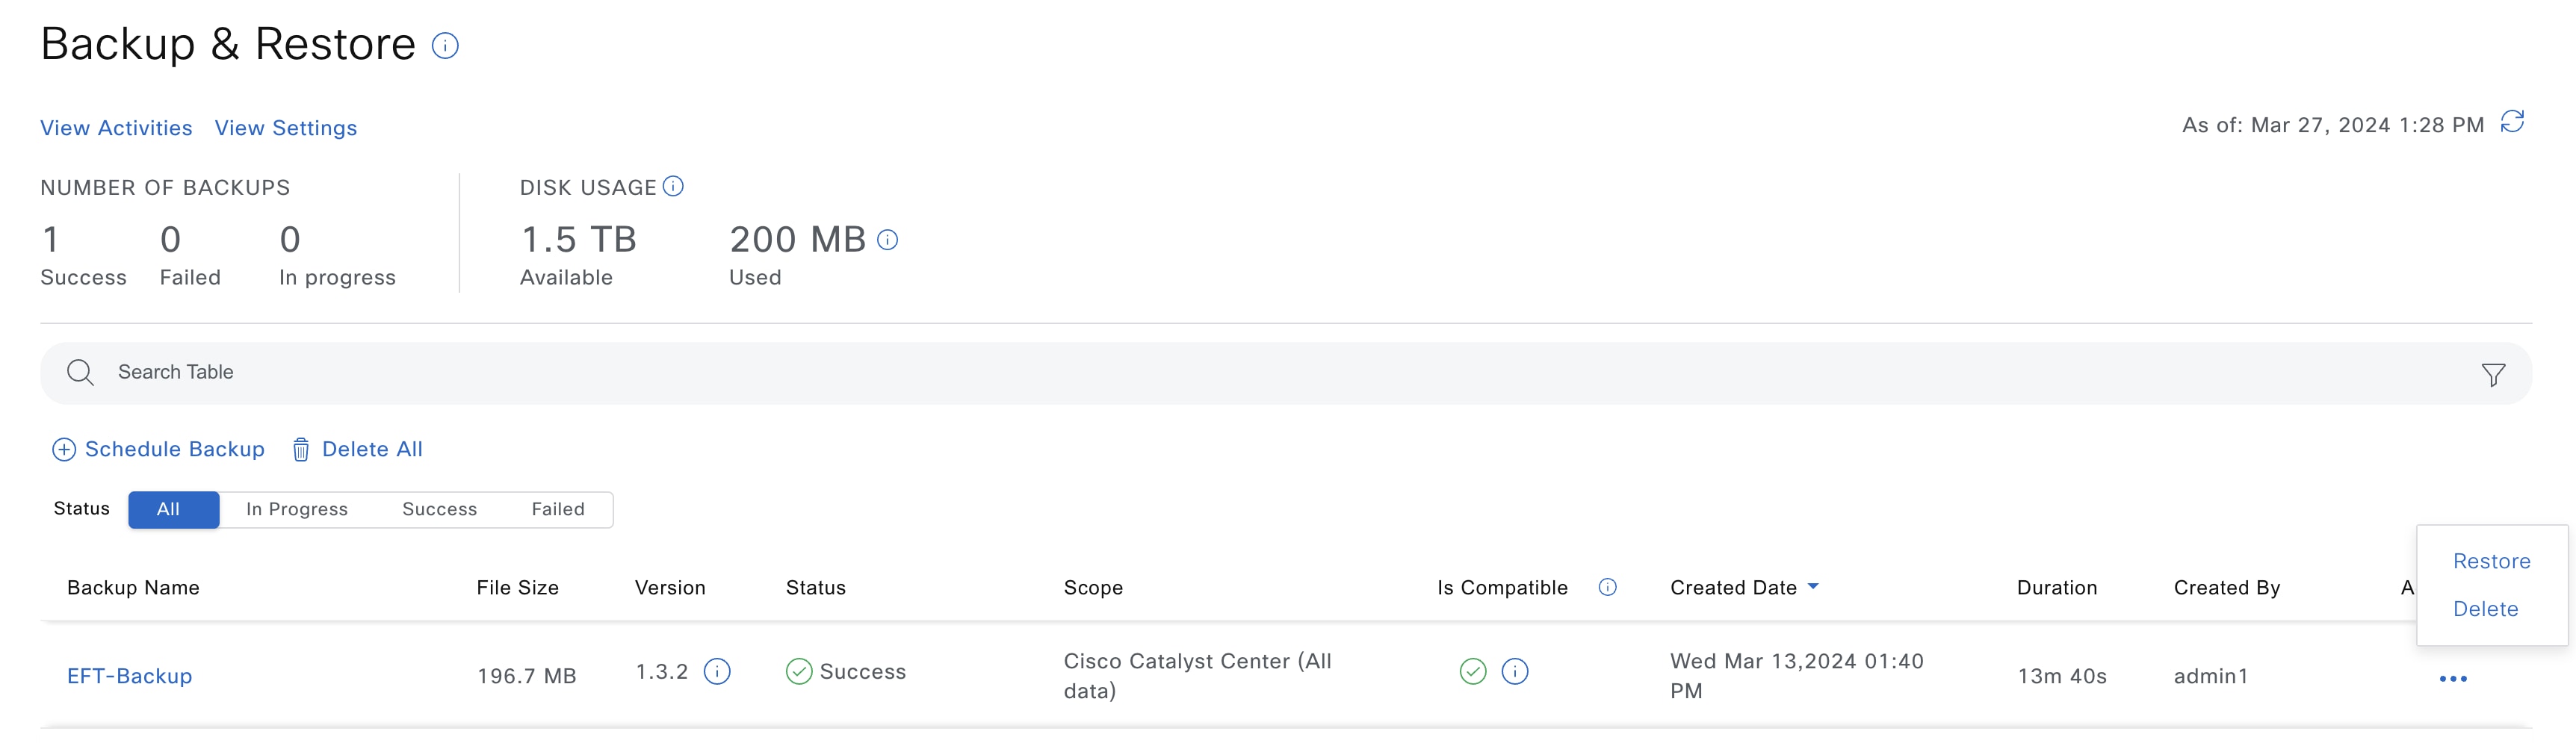
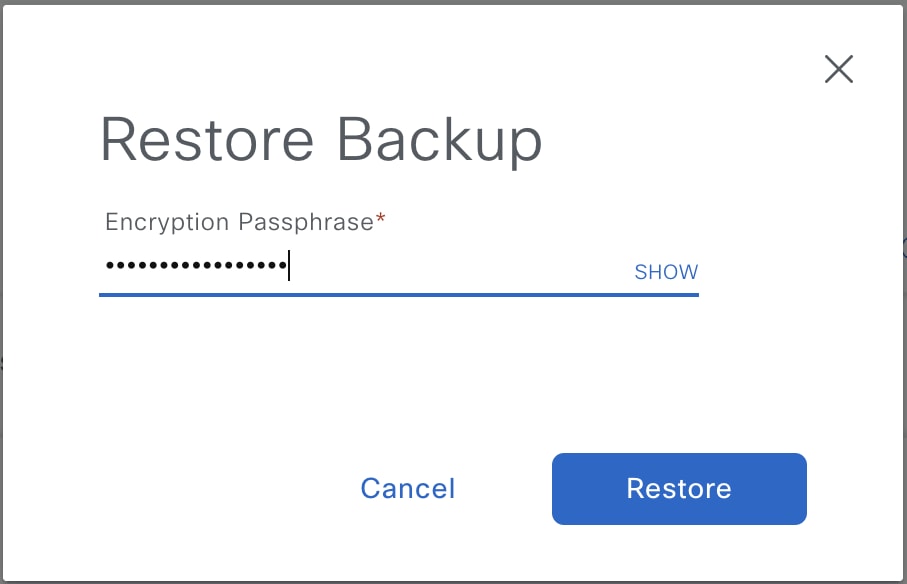
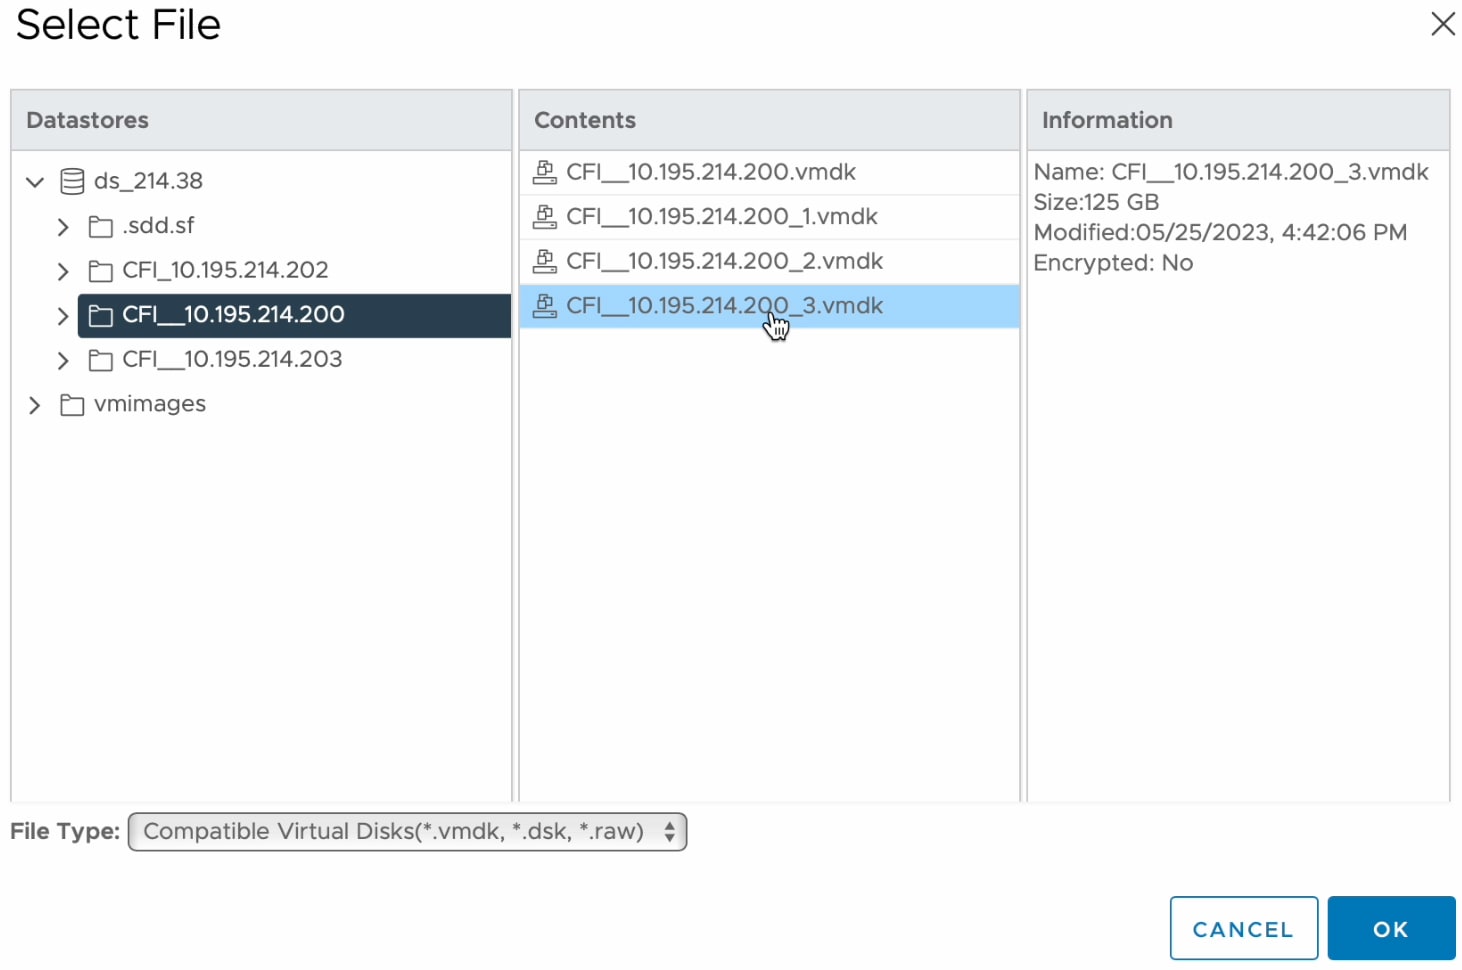
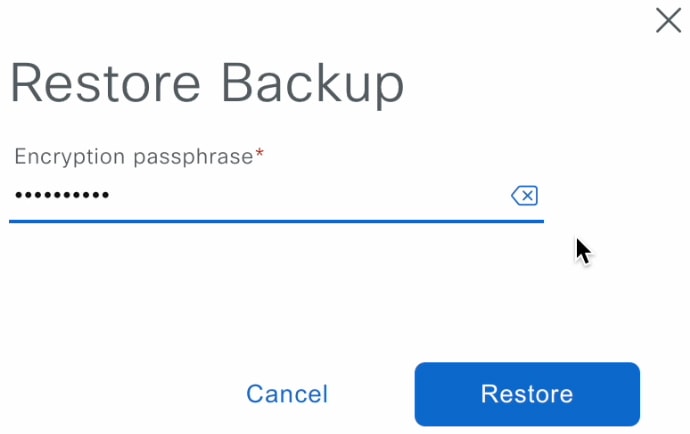
  • You can restore the backup files from the remote server using Catalyst Center.

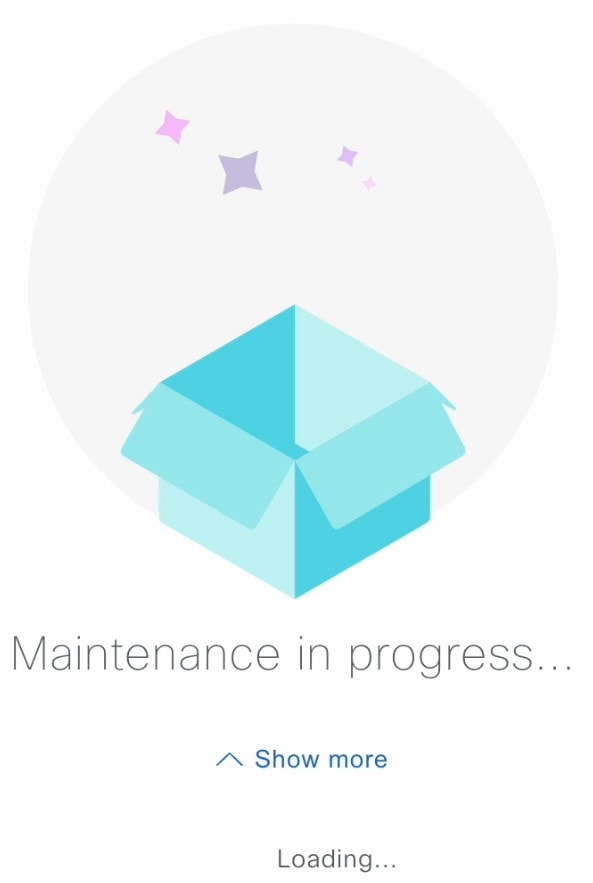
  • When you restore the backup files, Catalyst Center removes and replaces the existing database and files with the backup database and files. While a restore is being performed, Catalyst Center is unavailable.

  • Catalyst Center supports cross-version backup and restore. That is, you can create a backup from either of the two previous versions of Catalyst Center and restore it to the latest version of Catalyst Center. For example, a backup on Catalyst Center 3.1.3-75710 version or Catalyst Center 3.1.5-75246 version can be restored to Catalyst Center 3.1.6-75205 version. The same applies to the later releases of Catalyst Center. For more information, see the Release Notes for Cisco Catalyst Center.

  • Refer to these topics in the Cisco Catalyst Center Data Migration article:

    • The procedure for migration scenarios 2, 3, 5, and 8 describe how to restore a backup to a Catalyst Center appliance with a different IP address. This situation could happen if the IP address is changed on Catalyst Center and you need to restore from an older system.


      Important


      After a backup and restore of Catalyst Center:

      • You must access the Integration Settings window and update (if necessary) the Callback URL Host Name or IP Address. For more information, see Configure integration settings.

      • Integration with Cisco Spaces is interrupted if the Catalyst Center member ID changes. This occurs, for example, when restoring on a different hardware appliance, or migrating from a hardware appliance to a virtual appliance. For more information, see "Integrate Cisco Spaces with Catalyst Center" in the Cisco Spaces Configuration Guide.


    • The "Conversion and appliance upgrade considerations" topic describes additional points to keep in mind when restoring a backup file and upgrading to a higher-end Catalyst Center appliance.

Backup and restore event notifications

You can receive a notification whenever a backup or restore event takes place. To configure and subscribe to these notifications, complete the steps described in the "Work with event notifications" topic of the Cisco Catalyst Center Platform User Guide. When completing this procedure, ensure that you select and subscribe to the SYSTEM-BACKUP-v2 and SYSTEM-RESTORE-v2 events.

A notification is generated and sent whenever an event listed in this table occurs:

Operation Event

Backup

The process to create a backup file for your system has started.

A backup file could not be created for your system. This event typically happens because:

  • The necessary disk space is not available on remote storage.

  • You can't retrieve the status of your system's server, which is a precheck for the backup operation.

  • You encountered connectivity issues or latency while creating a backup file on your system.

Restore

The process to restore a backup file has started.

The restoration of a backup file failed. This event typically happens because:

  • The backup file is corrupted.

  • You encountered connectivity issues or latency while creating a backup file from your system.

Backup server requirements

The backup server must run one of the supported operating systems:

  • Red Hat Enterprise 8 or later

  • Ubuntu 16.04 (or Mint, and so on) or later

Server requirements for Assurance backup

To support Assurance data backups, the server can be a Linux- or Windows-based NFS server, or an NFS provided by a storage vendor (such as NetApp, Isilon, and so on) that meets these requirements:

  • Support NFS v4 and NFS v3. (To verify this support, from the server, enter nfsstat -s.)

  • Have read and write permissions on the NFS export directory.

  • Have a stable network connection between Catalyst Center and the NFS server.

  • Have sufficient network speed between Catalyst Center and the NFS server.


Note


You cannot use an NFS-mounted directory as the Catalyst Center backup server. A cascaded NFS mount adds a layer of latency and is therefore not supported.


Requirements for multiple Catalyst Center deployments

If your network includes multiple Catalyst Center clusters, this example configuration shows how to name your NFS server backup directory structure.

Resource Example configuration

Catalyst Center clusters

  1. cluster1

  2. cluster2

Backup server hosting automation and Assurance backups

The example directory is /data/, which has ample space to host both types of backups.

NFS export configuration

The content of the /etc/exports file:

/data/cluster1 *(rw,sync,no_subtree_check,all_squash)
/data/cluster2 *(rw,sync,no_subtree_check,all_squash)

Backup server directory layout

To simplify backups, we recommend that you use this directory layout for your backup server:

Single Catalyst Center cluster deployment

cluster1: /data/automation/cluster1

Multiple Catalyst Center cluster deployment

  • cluster1: /data/automation/cluster1

  • cluster2: /data/automation/cluster2

Backup storage requirements

Catalyst Center stores backup copies of Assurance and automation data on an external NFS location. You must allocate enough external storage for your backups to cover the required retention. We recommend this storage:

Machine profile

Machine profile alias

Cisco part number NFS storage (14 days incremental)

Automation storage on NFS server (daily full)

medium

medium

Second-generation appliance:

  • DN2-HW-APL

  • DN2-HW-APL-U (promotional)

1.7 TB

50 GB

Third-generation appliance: DN3-HW-APL

t2_large

large

Second-generation appliance:

  • DN2-HW-APL-L

  • DN2-HW-APL-L-U (promotional)

3 TB

100 GB

Third-generation appliance: DN3-HW-APL-L

t2_2xlarge

extra large

Second-generation appliance:

  • DN2-HW-APL-XL

  • DN2-HW-APL-XL-U (promotional)

8.4 TB

300 GB

Third-generation appliance: DN3-HW-APL-XL

Bandwidth and latency requirements

Catalyst Center requires specific bandwidth and latency for backing up your server. Use these tables to estimate the time needed to transfer backups for each appliance profile, excluding the time taken to generate the backup. The estimates show times for initial backup of all data. Subsequent incremental backups take less time.

To check the "NFS mount write" speed, enter magctl disk check -d /data/nfs -c 4096 in the Catalyst Center shell. If you have a three-node HA cluster, enter the command on each node after you configure the NFS in Catalyst Center.

Automation-only backup

Appliance profile

Database size

NFS mount write speed

Bandwidth

Transfer time

Medium

50 GB

100–125 MB/s

1 Gbps

7 minutes

Medium

50 GB

1000–1250 MB/s

10 Gbps

1 minute

Large

100 GB

100–125 MB/s

1 Gbps

13 minutes

Large

100 GB

1000–1250 MB/s

10 Gbps

2 minutes

Extra large

300 GB

100–125 MB/s

1 Gbps

42 minutes

Extra large

300 GB

1000–1250 MB/s

10 Gbps

4 minutes

All data backup

Appliance profile

All data backup size

NFS mount write speed

Bandwidth

Transfer time

Medium

1.75 TB

100–125 MB/s

1 Gbps

4 hours

Medium

1.75 TB

1000–1250 MB/s

10 Gbps

25 minutes

Large

3.1 TB

100–125 MB/s

1 Gbps

7 hours

Large

3.1 TB

1000–1250 MB/s

10 Gbps

43 minutes

Extra large

8.69 TB

100–125 MB/s

1 Gbps

20 hours

Extra large

8.69 TB

1000–1250 MB/s

10 Gbps

2 hours

Set up a file share

There are a few use cases that require the use of a file share, such as

  • completing backup and restore operations

  • installing Catalyst Center remotely, and

  • creating a repository to store RCA log bundles.

The topics in this section describe how to set up both Linux- and Windows-based NFS.

Configure a Linux-based NFS file share

This section describes how to configure an NFS file share in Ubuntu and Red Hat Linux distributions.


Note


If you are configuring a VMware VM, we recommend that you use the vmxnet driver, which provides 10G support and low overhead.


Configure a file share in an Ubuntu distribution

To configure a file share in an Ubuntu distribution, complete the steps that are detailed here.
Procedure

Step 1

Install the NFS package: apt-get install -y nfs-kernel-server

Step 2

Enable and start the NFS service:

systemctl enable nfs-server
systemctl start nfs-server

Step 3

Verify that the NFS service is enabled and has started (this should happen by default): systemctl status nfs-kernel-server

The resulting output should resemble this example:

nfs-server.service - NFS server and services
Loaded: loaded (/lib/systemd/system/nfs-server.service; enabled; vendor preset: enabled)
Active: active (exited) since Sun 2020-03-22 15:35:12 UTC; 18min ago
Main PID: 19253 (code=exited, status=0/SUCCESS)
Tasks: 0 (limit: 4915)
CGroup: /system.slice/nfs-server.service
Mar 22 15:35:12 k8smaster systemd[1]: Starting NFS server and services...
Mar 22 15:35:12 k8smaster systemd[1]: Started NFS server and services.

Step 4

Configure NFS export by completing these tasks.

  1. Set up the NFS file share directory:

    sudo mkdir -p /srv/nfs
    sudo chmod 755 -R /srv/nfs/
    sudo chown -R nobody:nobody /srv/nfs/
  2. Add the NFS file share entry to the /etc/exports file.

    • Open the file: sudo vim /etc/exports

    • Add this line: /srv/nfs *(rw,sync,no_subtree_check,all_squash)

  3. Export the NFS file share: sudo exportfs -rv

    You should see this message: exporting *:/srv/nfs

  4. Verify the NFS export.

    To check the availability of NFS file share, enter the showmount -e NFS-server-IP-address command from a different Linux machine. The resulting output should resemble this example.

    Export list for NFS-server-IP-address:
    /srv/nfs *

Step 5

Configure the firewall rules to allow NFS.

  1. Confirm whether a firewall is enabled (its status is active): sudo ufw status

    By default, a firewall is disabled in Ubuntu/Debian distributions. If necessary, enable a firewall before completing this step.

  2. Set the static port for mountd:

    • Open the /etc/default/nfs-kernel-server file.

    • Find the RPCMOUNTDOPTS="--manage-gids line.

    • Add a space and --port 32767 to the end of this line.

  3. Add the mountd port by adding these lines to the /etc/services file:

    mountd 32767/tcp
    mountd 32767/udp
  4. Restart NFS services: sudo systemctl restart nfs-kernel-server nfs-mountd portmap

  5. Add the firewall rules to allow NFS:

    sudo ufw allow portmapper
    sudo ufw allow nfs
    sudo ufw allow mountd

Configure a file share in a Red Hat or CentOS distribution

To configure a file share in Red Hat or CentOS distribution, complete the steps that are detailed here.
Procedure

Step 1

Install the NFS package: yum install -y nfs-utils

Step 2

Enable and start the NFS service:

systemctl enable nfs-server
systemctl start nfs-server

Step 3

Check the service's status: systemctl status nfs-server

The resulting output will resemble this example.

nfs-server.service - NFS server and services
Loaded: loaded (/usr/lib/systemd/system/nfs-server.service; enabled; vendor preset: disabled)
Active: active (exited) since Sun 2020-03-22 12:14:30 EDT; 2s ago
Process: 10418 ExecStart=/bin/sh -c if systemctl -q is-active gssproxy; then systemctl reload gssproxy ; fi (code=exited, status=0/SUCCESS)
Process: 10404 ExecStart=/usr/sbin/rpc.nfsd (code=exited, status=0/SUCCESS)
Process: 10402 ExecStartPre=/usr/sbin/exportfs -r (code=exited, status=0/SUCCESS)
Main PID: 10418 (code=exited, status=0/SUCCESS)
Mar 22 12:14:30 cene8.ecrt.local systemd[1]: Starting NFS server and services...
Mar 22 12:14:30 cene8.ecrt.local systemd[1]: Started NFS server and services.

Step 4

Configure the NFS export by completing these tasks.

  1. Set up the NFS file share directory:

    sudo mkdir -p /srv/nfs
    sudo chmod 755 -R /srv/nfs/
    sudo chown -R nobody:nobody /srv/nfs/
  2. Add the NFS file share entry to the /etc/exports file.

    • Open the file: sudo vim /etc/exports

    • Add this line: /srv/nfs *(rw,sync,no_subtree_check,all_squash)

  3. Export the NFS file share: sudo exportfs -rv

    You should see this message: exporting *:/srv/nfs

  4. Verify the NFS export.

    To check the availability of NFS file share, enter the showmount -e NFS-server-IP-address command from a different Linux machine. The resulting output should resemble this example.

    Export list for NFS-server-IP-address:
    /srv/nfs *
  5. Check whether a mountd port has been configured in the nfs.conf file: grep -A2 mountd /etc/nfs.conf

    If the resulting output looks like this, it indicates that you need to configure the mountd port.

    #[mountd]
    # debug=0
    # manage-gids=n 

    In this is the case, add these lines to the nfs.conf file:

    [mountd]
    manage-gids = 1
    port = 20048
  6. Restart NFS services: sudo systemctl restart nfs-server rpcbind nfs-mountd

    By default, a firewall (managed by the firewalld service) is enabled in Red Hat/CentOS version 7 and later (earlier versions use iptables). When NFS is running on the server, this will prevent file share access. From an external client, enter the showmount -e NFS-server-IP-address command. The resulting output should resemble this example.

    clnt_create: RPC: Port mapper failure - Unable to receive: errno 113 (No route to host)

Step 5

Add the firewall rules to allow NFS:

firewall-cmd --permanent --add-service={nfs,rpc-bind,mountd}
firewall-cmd --reload

Step 6

Configure SELinux for NFS.

Note


SELinux is enabled by default in Red Hat and CentOS distributions.

  1. Enable NFS read/write boolean options.

    If you want to ... Then ...

    enable read-only NFS exports,

    enter the setsebool -P nfs_export_all_ro 1 command.

    enable read/write NFS exports,

    enter these commands:

    • setsebool nfsd_anon_write on

    • setsebool -P nfs_export_all_rw 0

  2. Verify booleans are set:
    getsebool -a |grep nfs_expo
    nfs_export_all_ro --> on
    nfs_export_all_rw --> off
  3. Set the SELinux context on the NFS directory:

    semanage fcontext -a -t public_content_rw_t "/srv/nfs(/.*)?"
    restorecon -Rv /srv/nfs/

Configure a Windows-based NFS file share

Complete these steps to configure a Windows-based NFS file share for your Catalyst Center deployment.

Procedure


Step 1

Start Server Manager.

Step 2

Install the NFS service:

  1. Choose Manage > Add Roles and Features to start the Add Roles and Features wizard.

  2. Click Next three times to skip the Before You Begin, Installation Type, and Server Selection wizard screens.

  3. In the Server Roles wizard screen, check the Server for NFS check box, and then click Next.

  4. In the Features wizard screen, check the Services for Network File System Management check box, and then click Next.

  5. In the Confirmation wizard screen, verify that the options you selected are listed.

  6. Click Install.

Step 3

Start the New Share wizard:

  1. In Server Manager's navigation pane, click File and Storage Services.

    The File and Storage Services page opens.

  2. In this page's navigation pane, click Shares.

  3. Click Tasks, then choose New Share.

    The New Share wizard opens.

Step 4

Complete the New Share wizard:

  1. In the Select the profile for this share wizard screen, click the NFS Share - Advanced profile, and then click Next.

  2. In the Select the server and path for this share wizard screen, specify where the file share will reside, and then click Next.

    If... Then...

    you want the share to reside on a dedicated disk or partition within a folder in the Shares directory,

    1. Click the Select by volume radio button.

    2. Click the disk or partition you want to use.

    you want to navigate to the location where the share will reside,

    1. Click the Type a custom path radio button.

    2. Click the text field to open the Select Folder dialog box.

    3. Navigate to the folder where you want the share to reside.

    4. Click Select Folder.

  3. In the Specify share name wizard screen, enter the share's name and then click Next.

  4. In the Specify authentication methods wizard screen, choose these options and then click Next:

    • No server authentication (AUTH/SYS)

    • Enable unmapped user access

    • Allow unmapped user access by UID/GID

  5. In the Specify the share permissions wizard screen, click Add.

  6. Complete these tasks in the Add Permissions dialog box, then click Next:

    1. Click Add.

    2. Set the host, client group, or netgroup that can access this share.

    3. In the Share permissions drop-down list, choose Read/Write.

    4. Leave the Allow root access (not recommended) check box unchecked.

  7. Complete these tasks in the Permissions wizard screen, then click Next:

    1. Click Customize permissions to open the Advanced Security Settings for share-name dialog box.

    2. Click Add to open the Permission Entry for share-name dialog box.

    3. Click the Select a principal link to open the Select User, Computer, Service Account, or Group dialog box.

    4. In the last text box, enter Everyone and then click Check Names. When Everyone is displayed, click OK.

    5. In the Basic permissions area, select all available options (including Full control) and then click OK.

    6. Repeat the previous two steps for the Anonymous LOGON user.

  8. Click Next twice to skip the Management Properties and Quota wizard screens.

  9. In the Confirmation wizard screen, click Create.

Step 5

Secure the Windows NFS server:

  1. In Server Manager's main menu, choose Tools > Windows Firewall with Advanced Security.

  2. In the Inbound Rules table, there are two Server for NFS services (NFS-TCP-in and NFS-UDP-in). Complete these tasks for both services:

    1. Double-click a service to open its Properties dialog box.

    2. Click the Scope tab.

    3. In the Remote IP address section, restrict host access by entering the IP addresses configured for Catalyst Center (including the VIP for the NIC that interfaces with the Windows NFS server).

    4. Click OK.


Add the NFS server

Use this procedure to add an NFS server that can be used for the backup operation.

Procedure


Step 1

From the main menu, choose System > Settings > Backup Configuration.

Step 2

Click Add NFS.

Step 3

In the Add NFS slide-in pane, complete these steps:

  1. Enter the Server Host and Source Path in the respective fields.

  2. Choose NFS Version from the drop-down list.

  3. The Port is added by default. You can leave the field empty.

  4. (Optional) Enter the Port Mapper number.

  5. Click Save.

Step 4

Click View NFS List to view the available NFS servers.

The NFS slide-in pane displays the list of NFS servers, along with details.

Step 5

In the NFS slide-in pane, click the ellipsis under Actions to Delete the NFS server.

Note


You can delete the NFS server only when there is no backup job in progress.


What to do next

Configure the added NFS server for backup. For more information, see Configure the location to store backup files.

Configure the location to store backup files

Catalyst Center allows you to configure backups for automation and Assurance data.

Use this procedure to configure the storage location for backup files.

Before you begin

Make sure that the following requirements are met:

  • Only a user with SUPER-ADMIN-ROLE permissions can perform this procedure.

  • The data backup server must meet the requirements described in Backup server requirements.

Procedure


Step 1

From the main menu, choose System > Backup and Restore.

You can view this window:

Step 2

Click Configure Settings.

Alternatively, choose System > Settings > System Configuration > Backup Configuration.

Step 3

Choose the Physical Disk or NFS server option.

The Backup Configuration page shows the physical disk option, mount path, encryption passphrase, and backup retention.

Step 4

Physical Disk: Catalyst Center provides an option to mount an external disk to the virtual machine, to store a backup copy of Assurance and automation data. To configure a physical disk, click the Physical Disk radio button and define these settings:

Note


The physical disk option is only supported for single-node virtual machines.

Field Description

Mount Path

Location of the external disk.

Encryption Passphrase

Passphrase used to encrypt the security-sensitive components of the backup. These security-sensitive components include certificates and credentials.

This passphrase is required, and you will be prompted to enter this passphrase when restoring the backup files. Without this passphrase, backup files are not restored.

After the passphrase is configured, if you want to change the passphrase, click Update Passphrase.

Backup Retention

Number of backups for which the data is retained.

Data older than the specified number of backups is deleted.

Step 5

NFS: Catalyst Center creates the backup files and posts them to a remote NFS server. For information about the remote server requirements, see Backup server requirements. To configure an NFS backup server, click the NFS radio button and define these settings:

Field Description

Mount Path

Location of the remote server.

Encryption Passphrase

Passphrase used to encrypt the security-sensitive components of the backup. These security-sensitive components include certificates and credentials.

This passphrase is required, and you will be prompted to enter this passphrase when restoring the backup files. Without this passphrase, backup files are not restored.

After the passphrase is configured, if you want to change the passphrase, click Update Passphrase.

Backup Retention

Number of backups for which the data is retained.

Data older than the specified number of backups is deleted.

Step 6

Click Submit.

After the request is submitted, you can view the configured physical disk or NFS server under System > Backup & Restore.


Create a backup

Use this procedure to create a backup of your appliance.

Before you begin

You must configure the backup location. For more information, see Configure the location to store backup files.

Procedure


Step 1

From the main menu, choose System > Backup & Restore.

Step 2

Click Schedule Backup.

The day-zero view of the Backup and Restore window.

The Schedule Backup slide-in pane opens.

Do the following in the Schedule Backup slide-in pane:

  1. Enter a unique name for the backup.

  2. In the Schedule Type area, choose one of the following options:

    • Backup Now: To immediately create a backup.

    • Schedule Backup Daily: To schedule the backup on a daily basis.

    • Schedule Backup Weekly: To schedule the backup on a weekly basis.

  3. In the Scope area, choose one of the following options:

    • Cisco Catalyst Center (All Data): Choose this option to create a backup for automation and Assurance data.

    • Cisco Catalyst Center (Without Assurance Data): Choose this option to create a backup only for automation data.

  4. Click Save.

Step 3

Catalyst Center begins the backup process. An entry for the backup is added to the Backup & Restore window.

The window displays the list of backups created.

When the backup is complete, its status changes from Creating to Success.

The image displays the status of the backup task.

Schedule data backup

Before you begin

Make sure that the following requirements are met:

Procedure


Step 1

From the main menu, choose System > Backup & Restore.

The Backup & Restore window is displayed.

Step 2

Click Schedule Backup.

Note


You can schedule a new backup only when there is no backup job in progress.

This image shows the Schedule Backup button in Backup & Restore window.

Step 3

In the Schedule Backup slide-in pane, do the following:

  1. In the Backup Name field, enter a unique name for the backup.

  2. Choose a schedule option:

    • Schedule Backup Daily: To schedule a daily backup job, choose the time of day when you want the backup to occur.

    • Schedule Backup Weekly: To schedule a weekly backup job, choose the days of the week and time of day when you want the backup to occur.

  3. Define the scope of the backup:

    • Cisco Catalyst Center (All data): This option allows the system administrator to create a backup for automation, Assurance, and system-specific sets.

    • Cisco Catalyst Center (without Assurance data): This option allows the administrator to create a backup for automation and system-specific sets.

  4. Click Save.

The Backup & Restore window displays a banner message that shows the day and time for which the backup is scheduled.

Step 4

(Optional) Click View Upcoming Backups to make any changes to the upcoming schedules. If you don't want the backup to occur on a scheduled date and time, in the Upcoming Schedules slide-in pane, click the toggle button to disable a particular schedule.

Step 5

(Optional) Click Edit Schedule to edit the schedule.

Step 6

(Optional) Click Delete Schedule to delete the schedule.

Step 7

After the backup starts, it appears in the Backup & Restore window. Click the backup name to view the lists of steps executed.

Alternatively, you can click View Activities at the top left of the Backup & Restore window and click the Execution ID. The Create Backup Details slide-in pane opens and shows the list of steps executed.

Step 8

In the Backup & Restore window, click the In Progress, Success, or Failure tab to filter the list of backups to show only those tasks with a status of In Progress, Success, or Failure.

During the backup process, Catalyst Center creates the backup database and files. The backup files are saved to the specified location. You are not limited to a single set of backup files, but can create multiple backup files that are identified with their unique names. The status of the backup job changes from In Progress to Success when the process is finished.

Note


If the backup process fails, there is no impact to the appliance or its database. The most common reason for a failed backup is insufficient disk space. If your backup process fails, make sure that there is sufficient disk space on the remote server and attempt another backup.


Add a physical disk for backup and restore

Use this procedure to add a physical disk that can be used for only Catalyst Center on ESXi backup and restore operations.

Procedure


Step 1

Power off the Catalyst Center on ESXi virtual appliance by shutting it down from a console session with the sudo shutdown command.

Step 2

Log in to VMware vSphere and verify that it is powered off.

Step 3

From the vSphere client left pane, right-click the ESXi host and then choose Edit Settings.

The Edit Settings option in the list of available actions.

Step 4

In the Edit Settings dialog box, click Add New Device and then choose Hard Disk.

The Hard Disk option in the Add New Device drop-down list.

Step 5

In the New Hard disk field, enter the desired storage size.

The New Hard disk field shows the storage size set to 125 GB.

Note


For information on the recommended storage space for backup, see Backup storage requirements.

Step 6

Click OK.

Step 7

Power on the appliance's virtual machine.

The Power On option is shown in the list of available actions.

What to do next

You can now configure the added physical disk for backup. For information on how to configure the physical disk, see Configure the location to store backup files.

Restore data from backups

Use this procedure to restore backup data from an NFS server.


Caution


The Catalyst Center restore process restores only the database and files. The restore process does not restore your network state or any changes that were made since the last backup, including any new or updated network policies, passwords, certificates, or trustpool bundles.


Before you begin

Make sure that the following requirements are met:

  • Only a user with SUPER-ADMIN-ROLE permissions can perform this procedure.

  • You have backups from which to restore data.

When you restore data, Catalyst Center enters maintenance mode and is unavailable until the restore process completes. Make sure that you restore data at a time when Catalyst Center can be unavailable.

Procedure


Step 1

From the main menu, choose System > Backup & Restore.

If you have created a backup, it appears in the Backup & Restore window.

Step 2

In the Backup Name column, locate the backup that you want to restore.

Step 3

In the Actions column, click the ellipsis and choose Restore.

This image displays Restore option in Backup & Restore window.

Step 4

In the Restore Backup dialog box, enter the Encryption Passphrase that you used while configuring the backup location and click Restore.

Enter the passphrase used while configuring backup settings.

The appliance goes into maintenance mode and starts the restore process.

When the restore operation is complete, its status in the Backup & Restore window table changes to Success.

Step 5

After the restore operation completes, click Log In to log back in to Catalyst Center.

Step 6

Enter the admin user's username and password, then click Login.


Restore data from a physical disk for a faulty virtual appliance

Use this procedure to restore data from a physical disk for a virtual appliance that has failed or is faulty.

Procedure


Step 1

For your new virtual appliance, complete these steps to configure Catalyst Center to use the storage disk that you configured for the faulty virtual appliance:

  1. Power OFF the appliance's virtual machine.

  2. Open a vSphere Client, right-click the Catalyst Center virtual machine in the left pane, and then choose Edit Settings.

  3. In the Edit Settings dialog box, click Add New Device and then choose Existing Hard Disk.

  4. In the Select File dialog box, click your ESXi host, click the storage disk (.vmdk) that was created, and then click OK.

  5. Power on the appliance's virtual machine.

It takes approximately 45 minutes for all the services to restart.

Note


After the virtual machine comes back up, run the magctl appstack status command to confirm that the services are running.

Step 2

To configure the storage location for the backup, complete these steps:

  1. From the Catalyst Center menu, choose System > Settings > System Configuration > Backup Configuration.

  2. Click the Physical Disk radio button.

  3. Choose the physical disk from the Mount Path drop-down list.

    This image shows the configuration settings for physical disk backup.
  4. Enter the passphrase that will be used to encrypt the security-sensitive components of the backup (such as certificates and credentials).

    Important


    Make sure that you don't lose this passphrase. You'll need to enter it later in the succeeding steps and won't be able to restore the backup you're about to create without it.

  5. Set how long backup files are kept before they are deleted.

  6. Click Submit.

Step 3

To restore the backup, complete these steps:

  1. From the Catalyst Center menu, choose System > Backup & Restore.

  2. Locate the backup in the Backup & Restore window, click the ellipsis under Actions column, and choose Restore.

    This image displays the Restore option for the backup created.
  3. Enter the same encryption passphrase that you entered in the preceding step, and click Restore.

    The appliance goes into maintenance mode and starts the restore process.

    When the restore operation is complete, its status in the Backup & Restore window changes to Success.

  4. After the restore operation completes, click Log In to log back in to Catalyst Center.

  5. Enter the admin user's username and password, then click Login.