SD-Access fabric
Fabric technology is an integral part of SD-Access. A fabric network is a logical group of devices that is managed as a single entity in one or multiple locations. Having a fabric network in place enables several capabilities, such as the creation of virtual networks and user and device groups, and advanced reporting. Other capabilities include intelligent services for application recognition, traffic analytics, traffic prioritization, and steering for optimum performance and operational effectiveness.
Catalyst Center allows you to add devices to a fabric network. These devices can be configured to act as control plane, border, or edge devices within the fabric network.
Add a fabric site
Before you begin
You can create a fabric site only if IP Device Tracking (IPDT) is already configured for the site. To enable IPDT, go to and in the Wired Endpoint Data Collection area, click the Enable Catalyst Center Wired Endpoint Data Collection At This Site radio button.
Ensure these requirements are met for IPv6 underlay support.
-
Supported platforms: Cisco IOS XE 26.1.1 and later, Cisco ISE Release 3.5 Patch 3.
-
Supported products: Cisco Catalyst 9000 Series Switches.
Cisco Catalyst 9200, IE9300, and IE3500 Series Switches are not supported in fabric edge roles but are supported in extended node and policy extended node roles. Cisco Catalyst 9200 Series Switches are supported in supplicant based extended role.
Cisco Catalyst C9350, C9610, 9550, 9600x, and 9500x Series Switches are not supported for any fabric roles in an IPv6 underlay fabric and for dual stack border role in an IPv4 fabric site.
-
A fabric site supports either IPv4 or IPv6 underlay, but not both.
-
IPv6 underlay is supported only with LISP Pub/Sub SDA fabric.
-
IPv6 overlay multicast is supported in HER/Unicast mode for both IPv4 and IPv6 underlay fabric sites.
Procedure
|
Step 1 |
From the main menu, choose . |
||||||
|
Step 2 |
Under SUMMARY, click the number that indicates the count of the fabric sites. The resulting window displays every fabric site that has already been created and its information (such as Health Score, Fabric Zones, Fabric Devices, Fabric Roles, and Connected Transits) in a tabular format. You can customize the table view to display only selected columns. Use the gear icon at the top right corner of the window to edit the Table Settings and Apply the changes. |
||||||
|
Step 3 |
Click Create Fabric Sites. Alternatively, instead of the first three steps, click the menu icon and choose . |
||||||
|
Step 4 |
In the Create Fabric Sites window, click Let’s Do it to go directly to the workflow. |
||||||
|
Step 5 |
In the Fabric Site Location window, select an area, building, or floor to add as a fabric site. |
||||||
|
Step 6 |
In the Wired Endpoint Data Collection window, ensure that the Wired Endpoint Data Collection check box is checked. |
||||||
|
Step 7 |
Choose the Underlay IP Addressing for the fabric.
|
||||||
|
Step 8 |
In the Authentication Template window, do these steps: |
||||||
|
Step 9 |
(Optional) In the Fabric Zones window, choose one of these options:
|
||||||
|
Step 10 |
In the Summary window, review the fabric site settings. You can edit any of the fabric site or zone settings here. |
||||||
|
Step 11 |
Schedule the task for deployment. Depending on Visibility and Control of Configurations settings, you can either:
|
||||||
|
Step 12 |
On the Tasks window, monitor the task deployment. |
||||||
|
Step 13 |
It takes a few seconds for the site and zones to be provisioned. Upon successful creation of the site, a Fabric Site Creation Completed message displays. Next, you are provided with options to either create a new fabric site or view the activities on the Tasks window. |
Add a device to a fabric
After you have created a fabric site, you can add devices to the fabric site. You can also specify whether the device should act as a control plane node, an edge node, or a border node.
You can add a new device to the fabric site only if IP Device Tracking (IPDT) is configured for the fabric site. To enable IPDT, go to and in the Wired Endpoint Data Collection area, click the Enable Catalyst Center Wired Endpoint Data Collection At This Site radio button.
A device that is assigned the Access role and has been provisioned before enabling IPDT on the site can’t be added to the fabric. Reprovision such devices before adding them to the fabric site. Check the Provision workflow to confirm the status of Deployment of IPDT on the device.
 Note |
|
Before you begin
Provision the device if you haven’t already provisioned it:
-
The window displays the discovered devices.
-
The topology view shows a device in gray if it has passed the fabric readiness checks and is ready to be provisioned.
-
If an error is detected during any of the fabric readiness checks, an error notification is displayed on the topology area. Click See more details to check the problem area listed in the resulting window. Correct the problem and click Re-check to ensure that the problem is resolved.
-
If you update the device configuration as a part of problem resolution, ensure that you resynchronize the device information by doing an for the device.
Note |
You can continue to provision a device that has failed the fabric readiness checks. |
Procedure
|
Step 1 |
From the main menu, choose . |
||||||||
|
Step 2 |
Under SUMMARY, click the number that indicates the count of fabric sites. |
||||||||
|
Step 3 |
Select the fabric site to add a device. The resulting topology view displays all devices in the network that have been inventoried. In the topology view, any device that is added to the fabric is shown in blue. |
||||||||
|
Step 4 |
From the List view under the Fabric Infrastructure tab, click a device. A slide-in pane displays these Fabric options:
To configure a device as a fabric-in-a-box, select the Control Plane Node, Border Node, and Edge Node options. To configure the device as a control plane and a border node, select both Control Plane Node and Border Node. |
||||||||
|
Step 5 |
(Optional) To enable the wireless capability for the device, under Capability, click the Embedded Wireless LAN Controller toggle button and do these steps: If the wireless capability is enabled for a device and there are changes in the wireless network settings, to push the changes to the device, you must click Configure and save the configuration. |
||||||||
|
Step 6 |
Click Add to save the configurations. |
||||||||
|
Step 7 |
Click Deploy under the Fabric Infrastructure tab to configure the device. |
||||||||
|
Step 8 |
Schedule the task for deployment. Depending on Visibility and Control of Configurations settings, you can either:
|
||||||||
|
Step 9 |
On the Tasks window, monitor the task deployment. |
What to do next
After a device is added to the fabric, fabric compliance checks are automatically performed to ensure that the device is fabric-compliant. The topology displays a device that has failed the fabric compliance check in blue color with a cross-mark beside it. Click See more details on the error notification to identify the problem area and correct it.
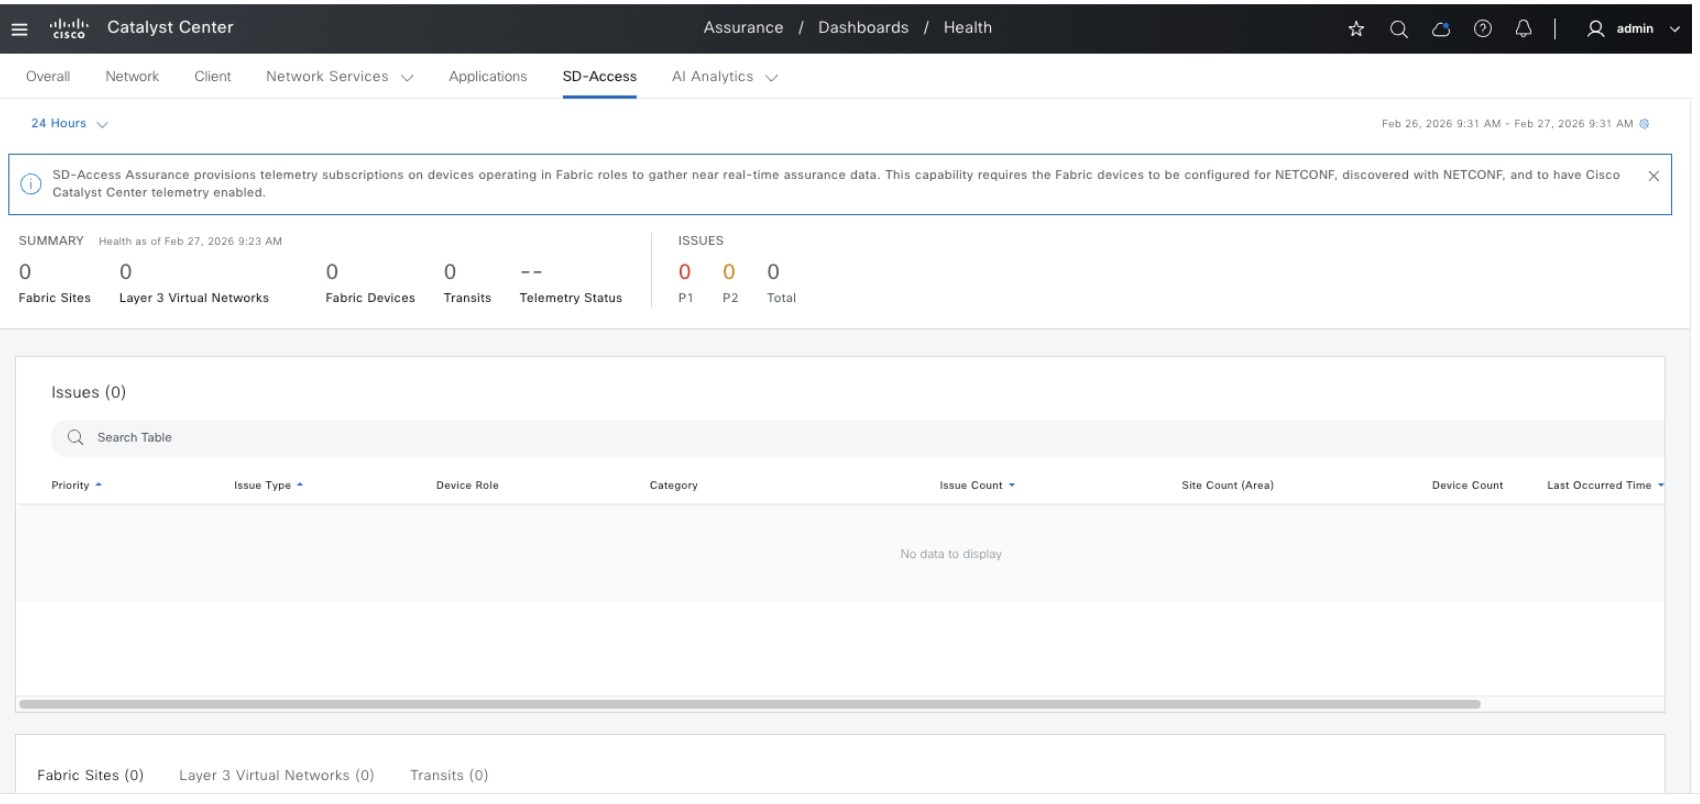
 ) in the top-menu bar to specify the time range of data that appears on the dashboard.

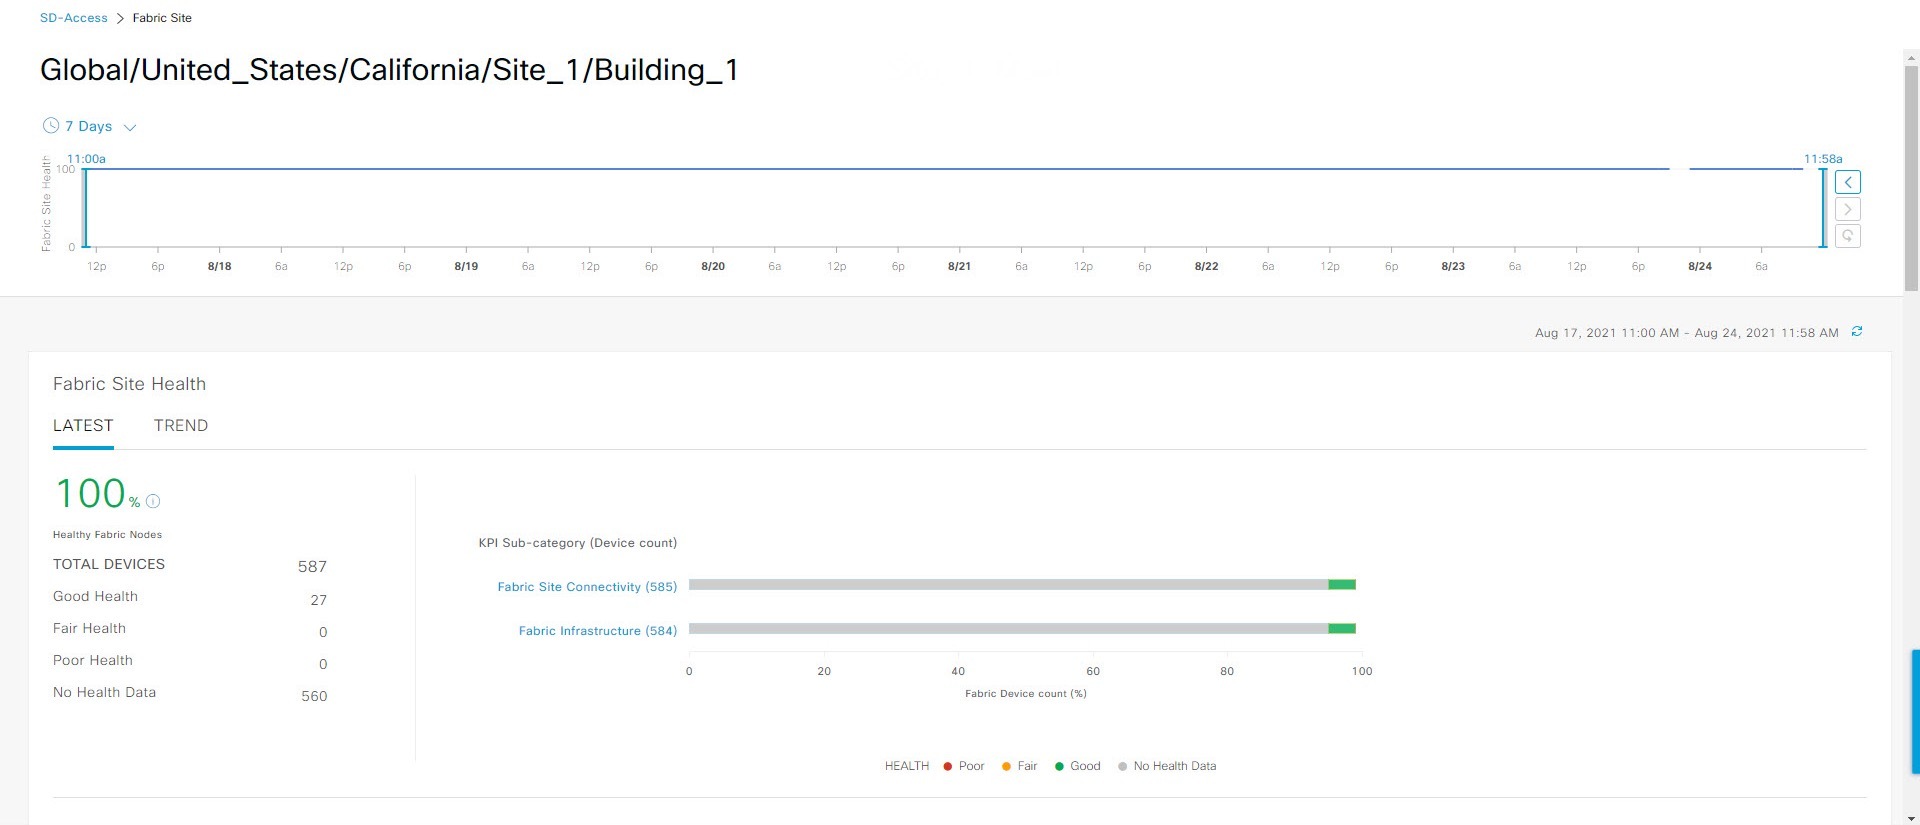
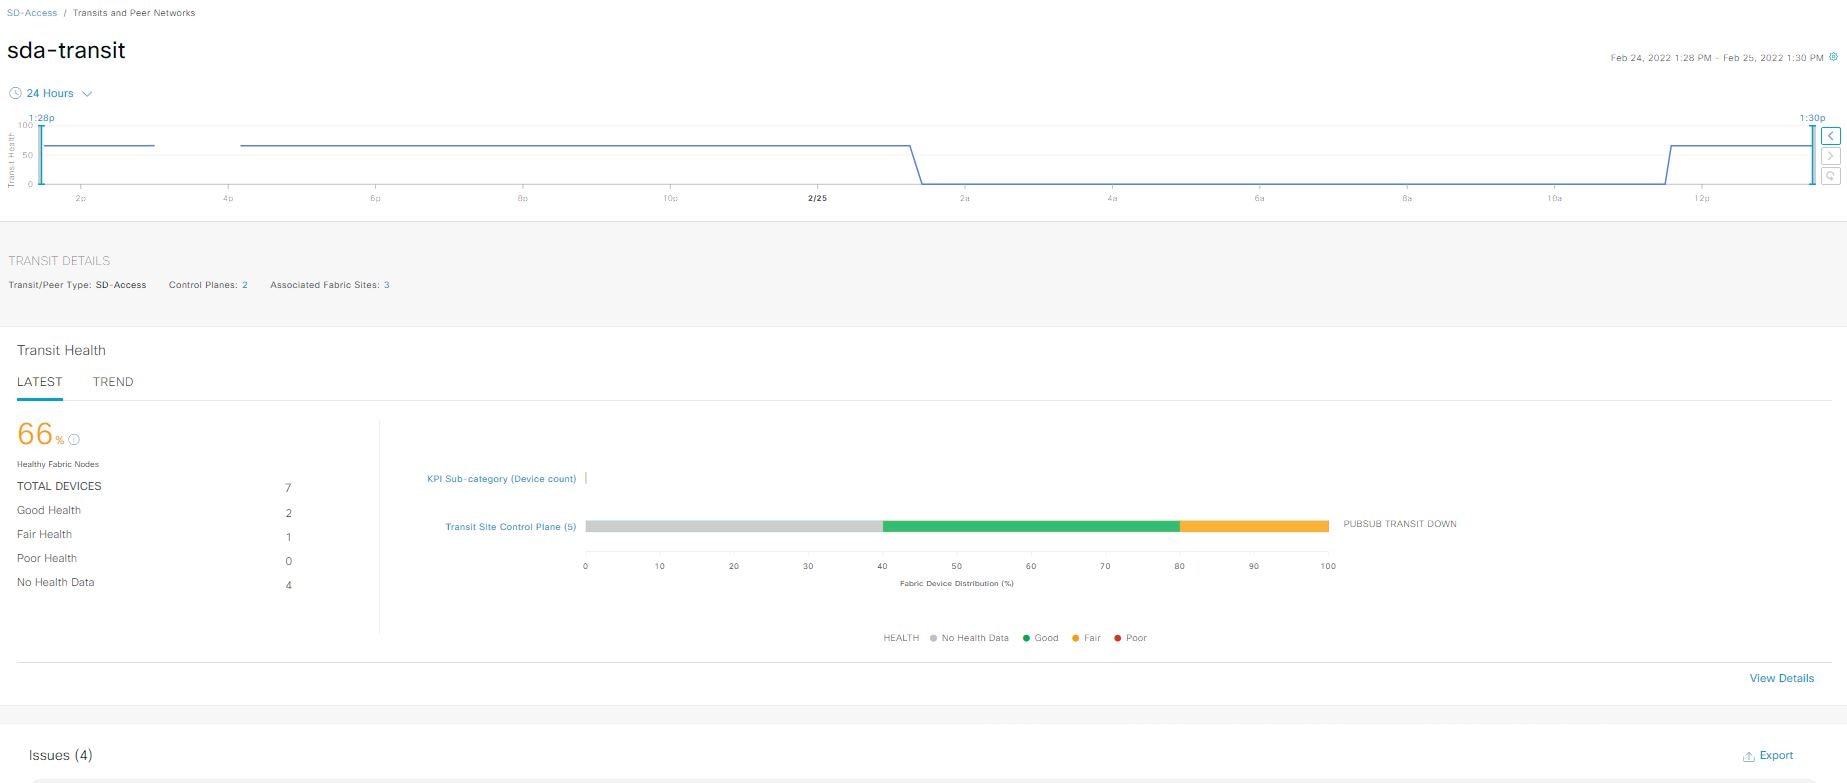
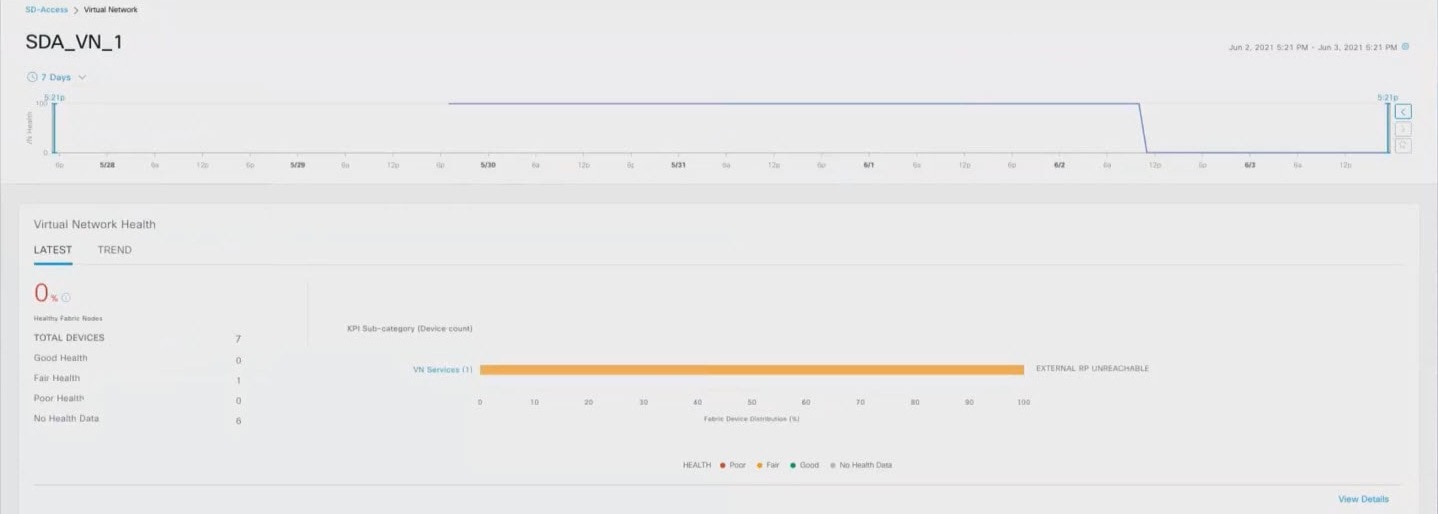
 : Poor network devices. Health score range is 1 to 3.
 : Fair network devices. Health score range is 4 to 7.
 : Good network devices. Health score range is 8 to 10.
 : No health data. Health score is 0.

 Feedback