Trusted Devices

Trusted devices

Trusted devices is a feature that

  • enables administrators to trust list and onboard devices directly through the dashboard,

  • automates enforcement of onboarding templates and authentication profiles via the Cisco Spaces Radius engine, and

  • streamlines device access provisioning, monitoring, and management at scale.

The Cisco Spaces dashboard improves onboarding and management of trusted devices through the Access Code Manager feature. Administrators trust list devices directly from the dashboard, eliminating the need for manual controller configuration or logging into multiple systems. The dashboard supports devices that don’t use captive portal browsers, enabling secure onboarding and allowing administrators to set session duration and bandwidth limits with configurable templates.

This ensures that onboarding templates and authentication profiles created in the dashboard are automatically interpreted and enforced by the Cisco Spaces Radius engine, maintaining consistency across your environment. You can monitor device onboarding status and policy application in real-time, allowing quick validation and troubleshooting when needed.
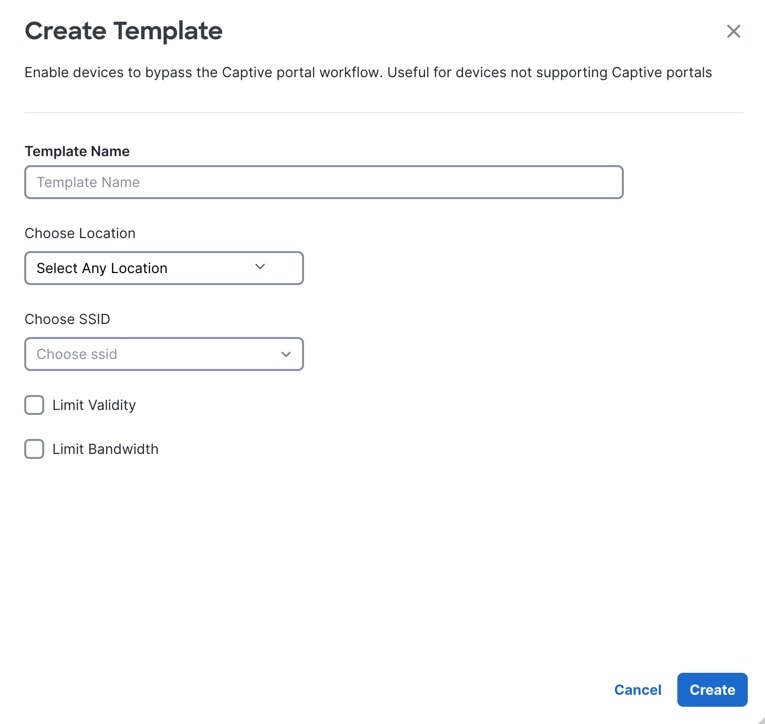
Template management

Template management becomes streamlined as administrators create, update, and retire reusable templates, assign them by location or SSID, and maintain device associations with built-in safeguards. You provision or revoke device access as needed, aligning with guest stays or operational policies. Enhanced MAC Address validation and centralized audit features strengthen network security.

These updates make device onboarding and management more efficient and secure, supporting operational needs at scale across your Cisco Spaces deployment.

Summary section

The Trusted Devices window displays the summary of the devices such as number of devices added, active, and expired.

Devices section

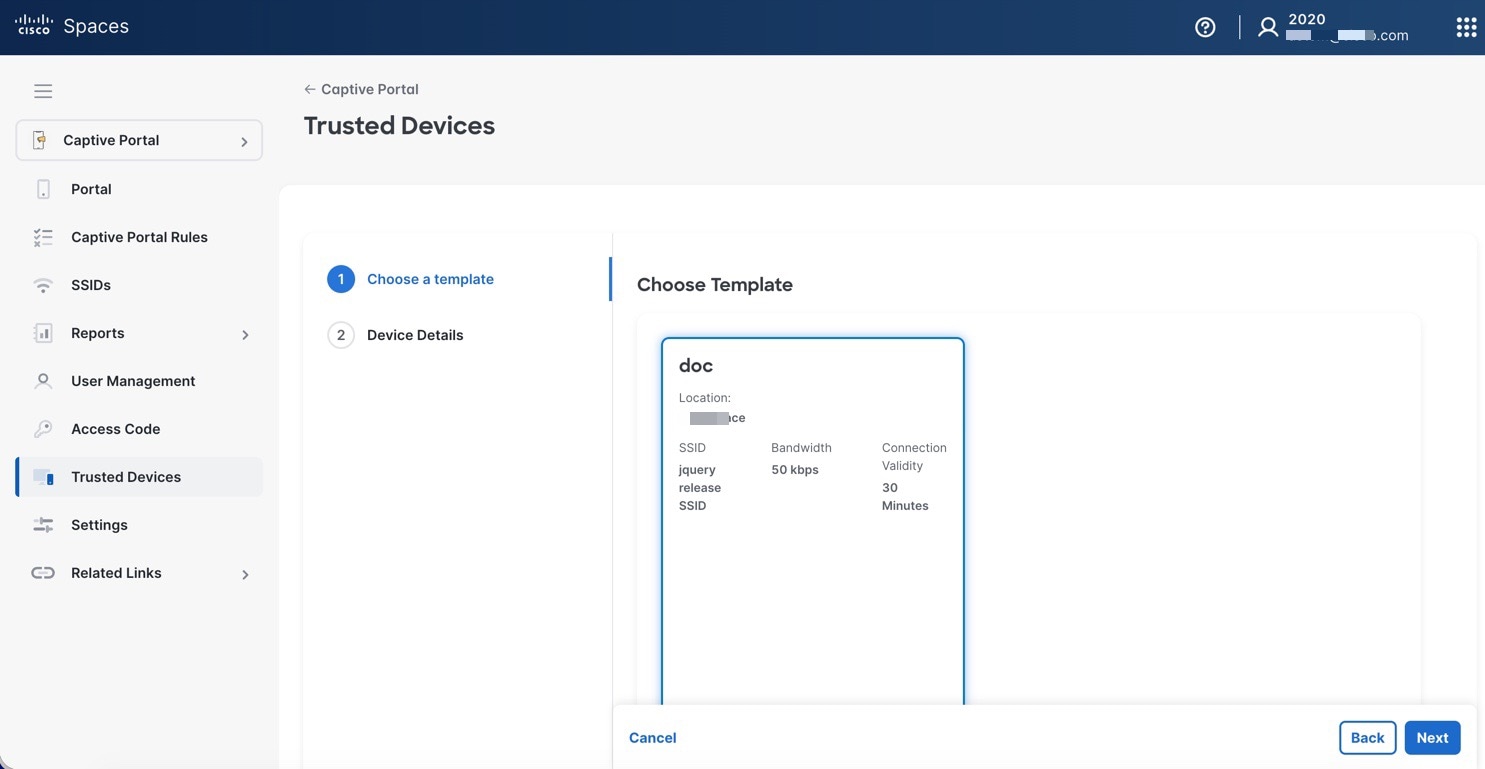
Templates are required to add devices as trusted. If there are no templates created, navigate to Settings > Trusted Devices Templates and proceed to create a new template.

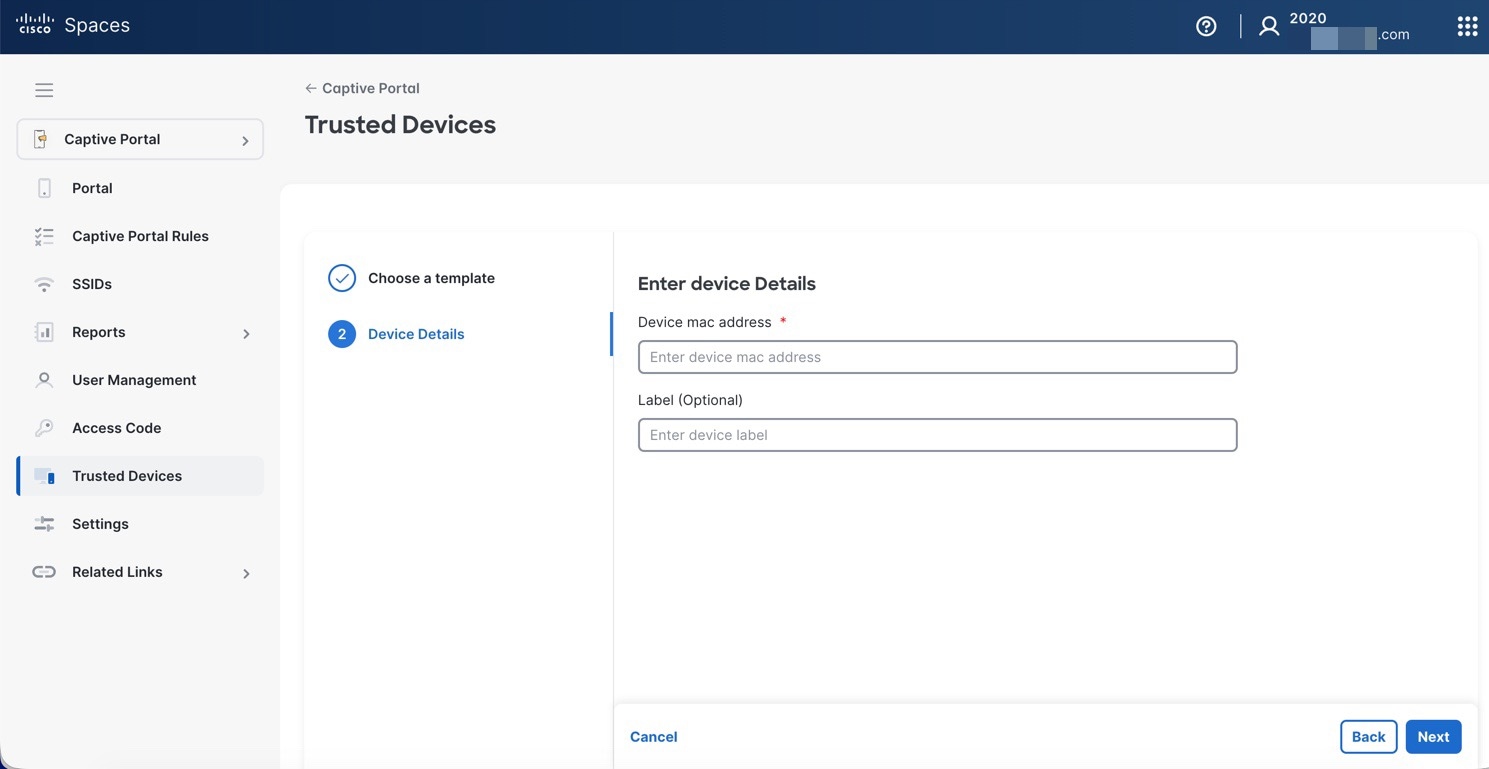
If templates are already available, click +New Devices to add new devices as trusted devices.

The Devices section includes two options: Expired Devices and Active Devices. If all devices are in expired status, the Active Devices option is toggled as +New Devices. Use the Search field to search for device details.

Figure 1. Trusted Devices

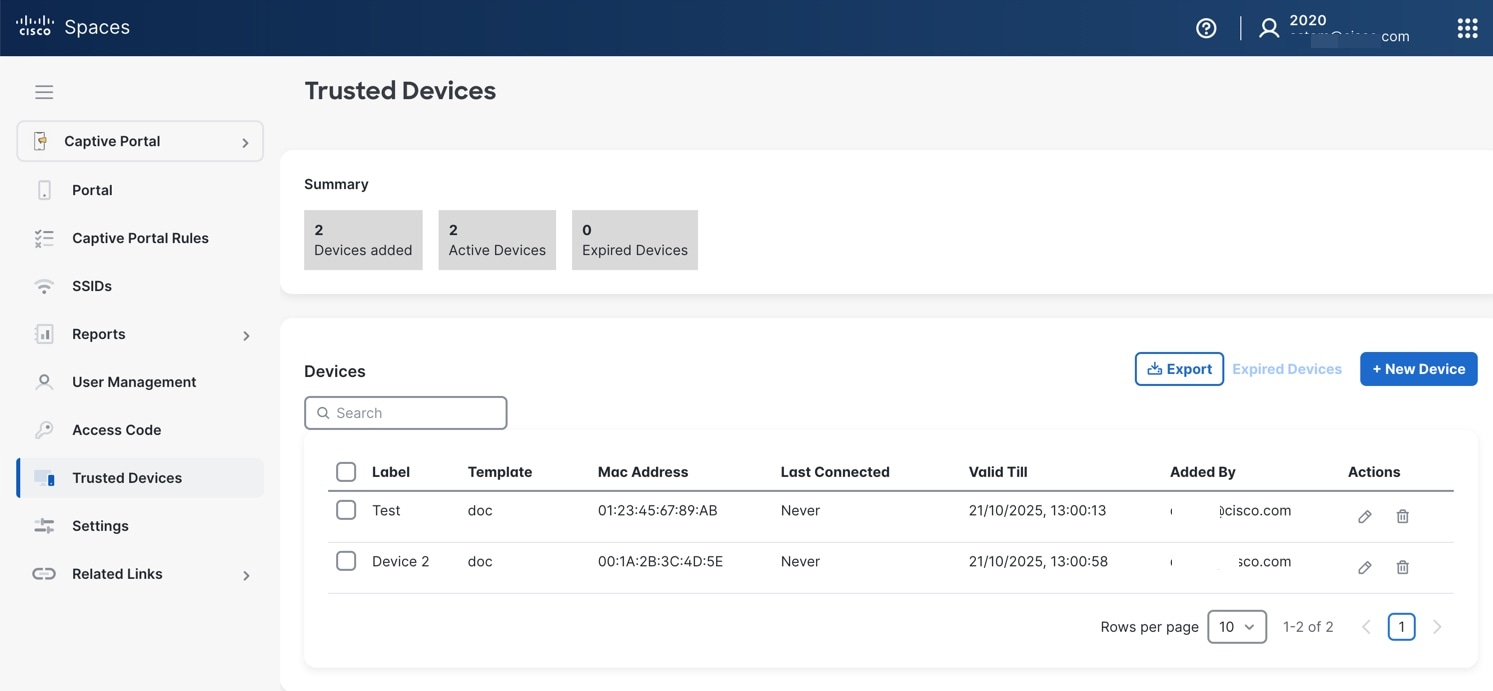
Click Expired Devices to view the Expired Devices section and the details of the expired devices. You can view:

  • Label

  • Template

  • MAC Address

  • Valid Till

  • Added By

  • Actions

Click Export to export the device details in CSV format.


Note


To use this feature, configure a Layer 2 captive portal and integrate RADIUS with the controller.


Create a template

Enable devices to bypass the Captive Portal workflow, useful for devices not supporting captive portals.

Create a trusted device template to define which devices are exempt from captive portal restrictions.

Procedure


Step 1

In Cisco Spaces dashboard, click the Menu icon and choose Home > SMART VENUES > Captive Portals app tile.

Optionally, from the Dashboard drop-down list (left navigation pane of the Cisco Spaces Home window), select Captive Portals.

The Portal window is displayed. In the left navigation pane, you can view the available tabs for Captive Portals app.

Step 2

In the left navigation pane, click Settings.

The SETTINGS window is displayed with three tabs: SMS Gateway, Social Apps, Access Code Templates, and Trusted Devices Templates.

Step 3

Click Trusted Devices Templates.

Step 4

To create a template, click Create Template.

The Create Template window is displayed.

Figure 2. Create template

Step 5

On the Create Template window, enter these parameters:

  • Template Name: Enter the name of the new template.

  • Choose Location: From the Choose Location drop-down list, select the location.

  • Choose SSID: From the Choose SSID drop-down list, select the SSID.

  • Limit Validity: To set the validity limit, check the Limit Validity check box and use the slide bar to limit the validity. The validity range is between 30 minutes and two months (approx. 60 days).

  • Limit Bandwidth: To set the bandwidth, check the Limit Bandwidth check box and use the slide bar to limit the bandwidth. The bandwidth is between 50 kilobits per second (kbps) and unlimited.

Step 6

Click Create.


The new template is successfully created and displayed in Settings > Trusted Device Templates tab.

What to do next

You can select the template and add devices.

Add the devices

Add trusted devices to the Captive Portal for device management.

Use this task to add new devices to Captive Portal by their MAC address.

Before you begin

Ensure you have the MAC addresses for all devices to be added.

Procedure


Step 1

In Cisco Spaces dashboard, click the Menu icon and choose Home > SMART VENUES > Captive Portals app tile.

Optionally, from the Dashboard drop-down list (left navigation pane of the Cisco Spaces Home window), select Captive Portals.

The Portal window is displayed. In the left navigation pane, you can view the available tabs for Captive Portals app.

Step 2

In the left navigation pane, click Trusted Devices.

Step 3

In the Trusted Devices window, click +New Devices.

Figure 3. Add devices

Step 4

Choose a template and click Next.

Step 5

In the Device Details section, enter the MAC address of the device and provide a label description. The device MAC address is mandatory.

Figure 4. Add device details

Step 6

Click Next to add the new trusted device.

The success message is displayed indicating that the new trusted device is saved successfully.

The new trusted device details are displayed in the Trusted Devices window under the Devices section.

What to do next

You can proceed to add multiple trusted devices or edit the existing device details. Use the Edit (pencil icon) to update the device details or Delete (trash icon) to delete the device.