- Preface
-
- Overview
- Adding and Deleting Mobility Services Engines and Licenses
- Synchronizing Mobility Services Engines
- Configuring High Availability
- MSE Delivery Modes
- Configuring and Viewing System Properties
- Mobile Concierge Services
- Managing Users and Groups
- Configuring Event Notifications
- Context-Aware Service Planning and Verification
- Working with Maps
- Monitoring the System and Services
- Index
Uploading the Cisco
CMX/MSE ISO Image to the Cisco MSE 3365
 Note | Make sure the Serial over Lan (SoL) functionality is enabled on the Cisco Unified Communication System (UCS). To enable SoL on the Cisco UCS server, use the set enabled yes command. For more information on enabling SoL, refer to the Cisco UCS documentation on Cisco.com. |
Uploading the Cisco CMX/MSE ISO Image to the Cisco MSE 3365
Note | Make sure the Serial over Lan (SoL) functionality is enabled on the Cisco Unified Communication System (UCS). To enable SoL on the Cisco UCS server, use the set enabled yes command. For more information on enabling SoL, refer to the Cisco UCS documentation on Cisco.com. |
- Uploading the Cisco CMX/MSE ISO Image to the Cisco MSE 3365 Using Newer CIMC Versions
- Uploading the Cisco CMX/MSE ISO Image to the Cisco MSE 3365 Using Older CIMC Versions
Uploading the Cisco CMX/MSE ISO Image to the Cisco MSE 3365 Using Newer CIMC Versions
| Step 1 | Download the Cisco MSE ISO image from the Download Software page on cisco.com. |
| Step 2 | Open a browser,
and enter the IP address of your device to log in to to the Cisco Integrated
Management Controller (CIMC) GUI interface (Address format is https://x.x.x.x).
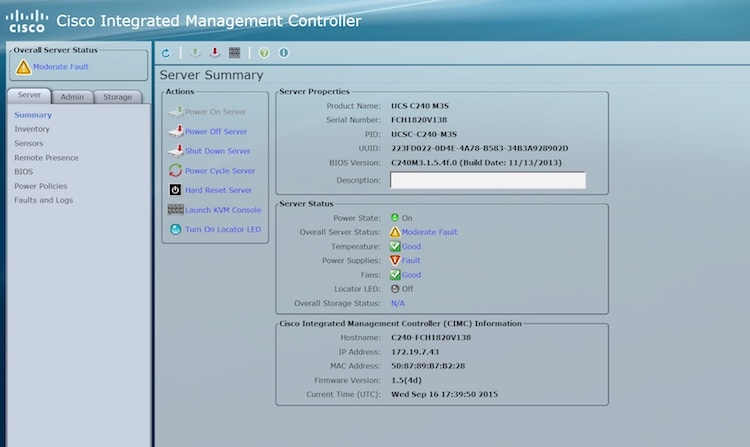 |
| Step 3 | Click Server and in the Server Summary page, click Launch KVM Console and click OK. A mini executable file is downloaded. |
| Step 4 | Open the file
using javaws.exe from the bin folder of your Java installation. If a security
error prevents you from installing the file, add the URL of the CIMC to the
list of exception sites, using the steps below.
|
| Step 5 | In the KVM
Console window that is displayed after the installation, click the
Virtual
Media tab.
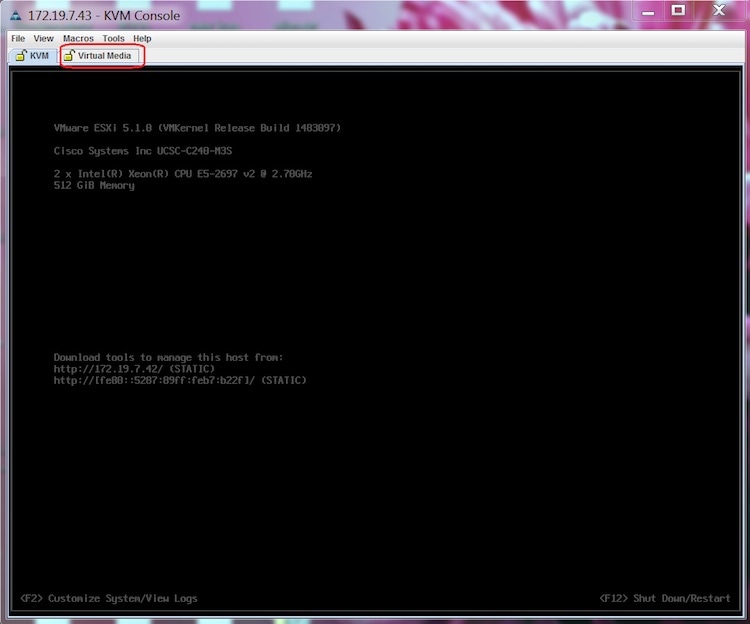 |
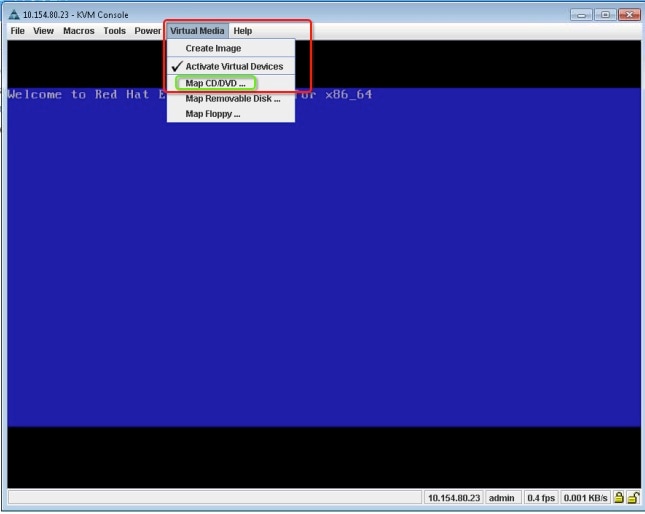
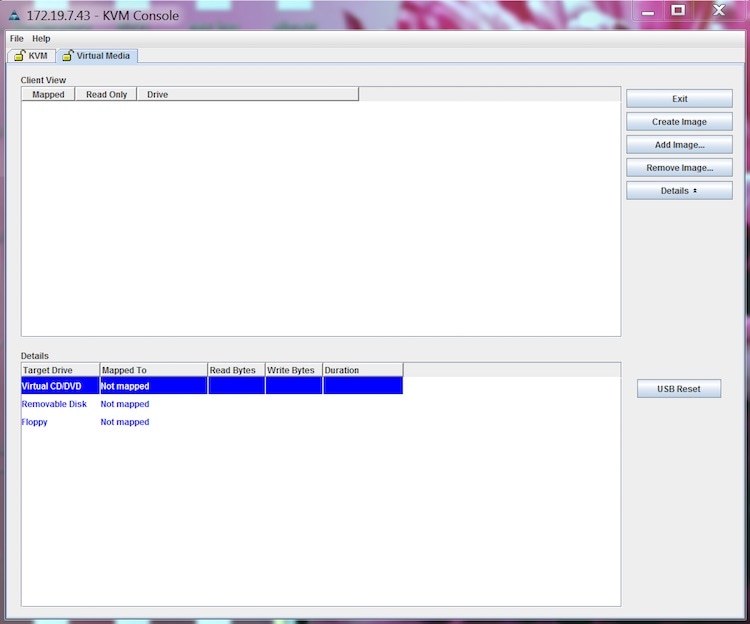
| Step 6 | In the
Virtual
Media window that is displayed, choose
Activate
Virtual Devices > Select "Map CD/DVD. Browse and select the
downloaded MSE image.
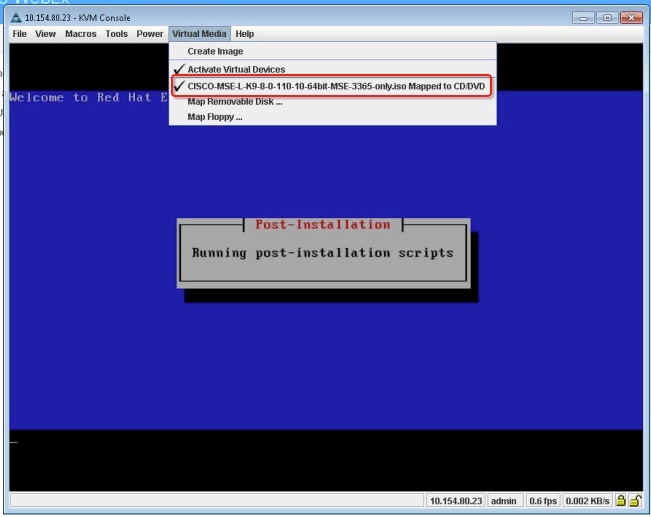 |
| Step 7 | During the
recovery process, respond to the prompt to press ENTER by starting an SSH
session to the CIMC interface, as the KVM console does not permit you to press
ENTER (With CSCuw32543). Use the following commands to initiate the SSH
session:
ssh <cimc-ip-address>
connect host
You can see that the image is being copied from CDROM. The process can take up to forty-five minutes to copy. 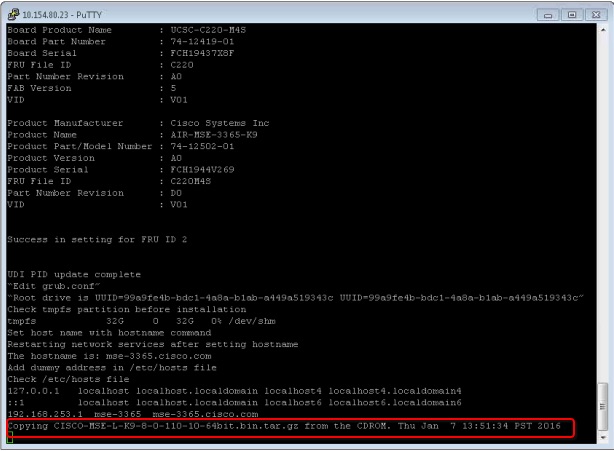 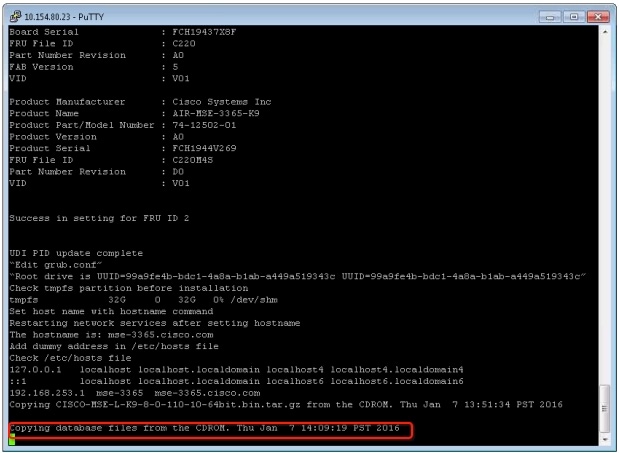 |
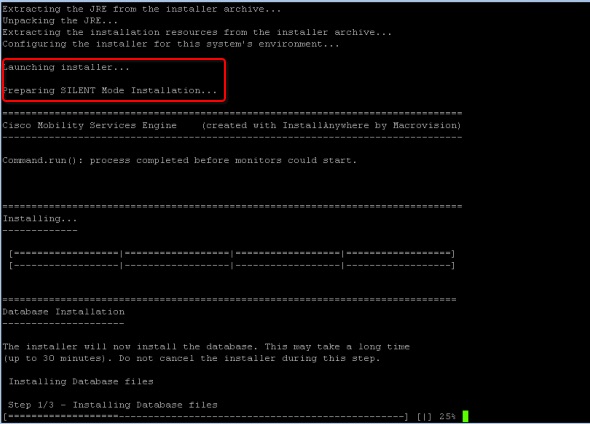
| Step 8 | Once the image
is copied, a silent installation is initiated.
 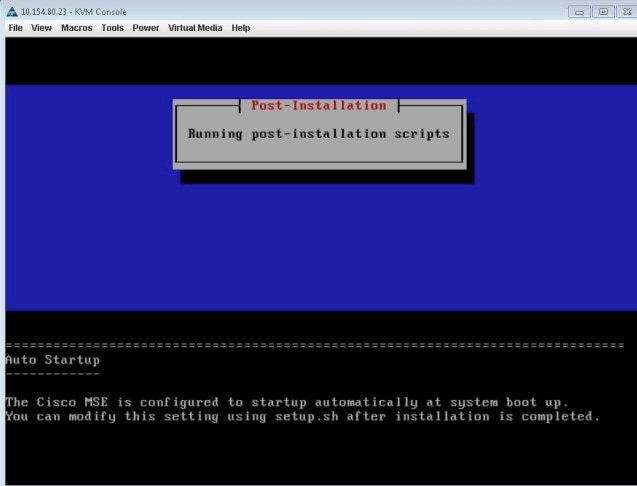 |
| Step 9 | The device boots
up with the newly loaded image. The CD/DVD mapping is automatically unchecked.
In case it is checked, uncheck the
Activate
Virtual Devices option, so that the BIOS setting is checked for the
image copied on the HDD every time it reboots.
 |
Uploading the Cisco CMX/MSE ISO Image to the Cisco MSE 3365 Using Older CIMC Versions
| Step 1 | Download the Cisco MSE ISO image from the Download Software page on cisco.com. |
| Step 2 | Open a browser,
and enter the IP address of your device to log in to to the Cisco Integrated
Management Controller (CIMC) GUI interface (Address format is https://x.x.x.x).
|
| Step 3 | Click Server and in the Server Summary page, click Launch KVM Console and click OK. A mini executable file is downloaded. |
| Step 4 | Open the file
using javaws.exe from the bin folder of your Java installation. If a security
error prevents you from installing the file, add the URL of the CIMC to the
list of exception sites, using the steps below.
|
| Step 5 | In the KVM
Console window that is displayed after the installation, click the
Virtual
Media tab.
|
| Step 6 | In the
Virtual
Media window that is displayed, click
Add
Image.
 |
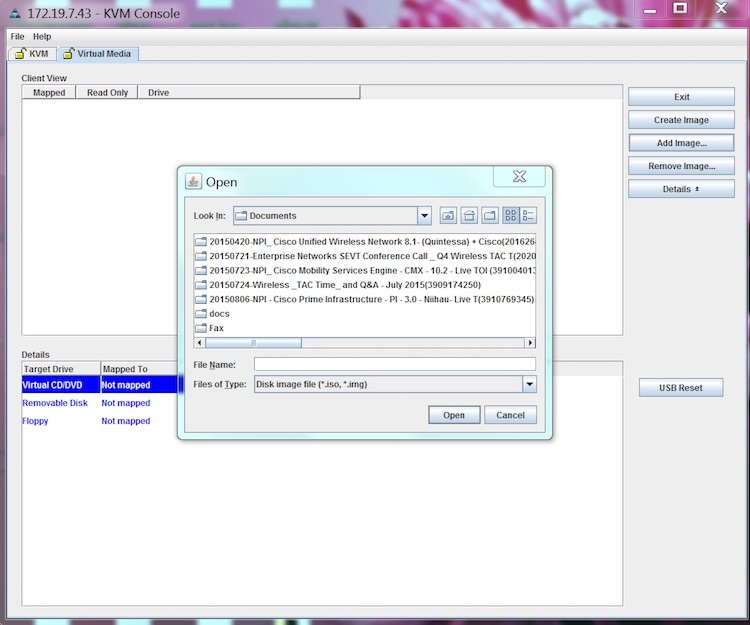
| Step 7 | Browse and
select the downloaded MSE image and click
Open.
 |
| Step 8 | During the
recovery process, respond to the prompt to press ENTER by starting an SSH
session to the CIMC interface, as the KVM console does not permit you to press
ENTER (With CSCuw32543). Use the following commands to initiate the SSH
session:
ssh <cimc-ip-address> connect host |
The device boots up with the newly loaded image.
 Feedback