Accessories

Supported Accessories

You can use a number of accessories with your phone.

  • Headsets:

    • Standard headsets that use a 3.5 mm jack

    • Bluetooth headsets

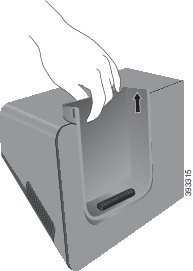
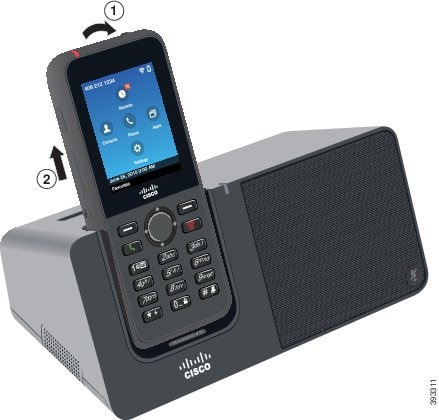
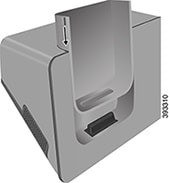
  • Cisco Wireless IP Phone 8821 Desktop Charger: charges the Cisco Wireless IP Phone 8821 only

  • Cisco Wireless IP Phone 8821-EX Desktop Charger: charges the Cisco Wireless IP Phone 8821-EX only

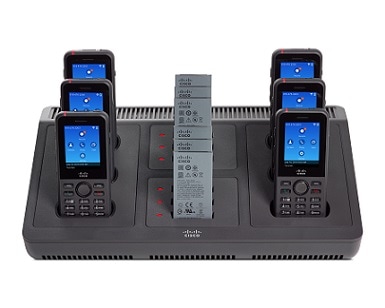
  • Cisco Wireless IP Phone 8821 Multi Charger: charges the Cisco Wireless IP Phone 8821 only

  • Cisco Wireless IP Phone 8821-EX Multi Charger: charges the Cisco Wireless IP Phone 8821-EX only


Note

The Cisco Wireless IP Phone 8821-EX has not been tested or certified with any accessories for use in Potentially Explosive Atmosphere.


The phones can only connect to Bluetooth headsets and speakers. They do not support any other type of Bluetooth device.

The phones have other accessories, including carry cases and a silicone case. For more information on accessories, see the Cisco Wireless IP Phone 882x Series Accessory Guide, located here: http://www.cisco.com/c/en/us/support/collaboration-endpoints/unified-ip-phone-8800-series/products-user-guide-list.html.

Headsets

You can use wired and Bluetooth headsets with your phone. For information about the supported headsets, see the Cisco Wireless IP Phone 882x Series Accessory Guide.

Although we perform some internal testing of third-party wired and Bluetooth wireless headsets for use with the Cisco Wireless IP Phone 8821 and 8821-EX, we do not certify or support products from headset or handset vendors. Because of the inherent environmental and hardware inconsistencies in the locations where phones are deployed, there is not a single "best" solution that is optimal for all environments. We recommend that customers test the headsets that work best in their environment before deploying a large number of units in their network.


Note

The Cisco Wireless IP Phone 8821-EX has not been tested for wired and Bluetooth headsets in hazardous locations.


We recommend the use of good quality external devices, like headsets that are screened against unwanted radio frequency (RF) and audio frequency (AF) signals. Depending on the quality of these devices and their proximity to other devices such as cell phones and two-way radios, some audio noise may still occur.

The primary reason that a particular headset would be inappropriate for the phone is the potential for an audible hum. This hum can be heard by either the remote party or by both the remote party and you, the phone user. Some potential humming or buzzing sounds can be caused by a range of outside sources, for example, electric lights, electric motors, or large PC monitors. In some instances, the mechanics or electronics of various headsets can cause remote parties to hear an echo of their own voice when they speak to phone users.

Standard Headsets

You can use a wired headset with your phone. The headset requires a 3.5 mm, 3-band, 4-connector plug.

We recommend the Cisco Headset 520 Series. This headset offers outstanding audio performance. It has a 3.5 mm audio plug that you can plug into the wireless phone. You can also use the headset and its inline controller with some of the desk phones in the Cisco IP Phone 8800 Series. For more information on the headset, see https://www.cisco.com/c/en/us/products/collaboration-endpoints/headset-500-series/index.html.

If you plug a headset into the phone during an active call, the audio path automatically changes to the headset.

Bluetooth Headsets

You can use a Bluetooth® headset with your phone. When you use a Bluetooth wireless headset, the headset usually increases battery power consumption on your phone and may result in reducing battery life.

For a Bluetooth wireless headset to work, it does not need to be within direct line-of-sight of the phone, but some barriers, such as walls or doors, and interference from other electronic devices, can affect the connection.

Desktop Chargers

You can use the Cisco Wireless IP Phone 8821 Desktop Charger to charge your Cisco Wireless IP Phone 8821 and spare phone battery. The charger works on AC power or from a charged spare phone battery. It can be secured with a standard laptop cable lock. This charger has a label on the back to show the maximum voltage (4.35 V).

You can use the Cisco Wireless IP Phone 8821-EX Desktop Charger to charge your Cisco Wireless IP Phone 8821-EX and spare phone battery. The charger works on AC power or from a charged spare phone battery. It can be secured with a standard laptop cable lock. The charger looks the same as the Cisco Wireless IP Phone 8821 Desktop Charger except that it shows the graphic of the Cisco Wireless IP Phone 8821-EX and doesn't have the voltage label.


Caution

The Cisco Wireless IP Phone 8821 Desktop Charger can only charge the Cisco Wireless IP Phone 8821 and a spare battery for that phone. You can't charge the Cisco Wireless IP Phone 8821-EX or its spare batteries in the Cisco Wireless IP Phone 8821 Desktop Charger.


The following figure shows the Cisco Wireless IP Phone 8821 Desktop Charger with a Cisco Wireless IP Phone 8821.

Figure 1. Cisco Wireless IP Phone 8821 and Cisco Wireless IP Phone 8821 Desktop Charger
phone and charger

Caution

Do not use the desktop charger in a hazardous environment.


The desktop charger also allows you to use your phone in handsfree mode.

In this document, the term desktop charger refers to both chargers.

Set Up the Desktop Charger

Place the desktop charger on a stable work surface.

Before you begin

You need the cable that comes with the charger. This cable has a round barrel plug on one end and a USB connector on the other end.

You need the power adapter that comes with the charger.


Note

Don't use the power adapter that came with the phone; it doesn't work with the charger. Check the list of Cisco part numbers to make sure that you have the correct power adapter for your charger.


Procedure


Step 1

Plug the round barrel plug end of the cable into the desktop charger.

Step 2

Plug the USB end of the cable into the power adapter and plug the power adapter into the electrical outlet.


Charge Your Phone with the Desktop Charger

You can tell when your phone is charging in the charger when the phone LED lights red and a message or icon displays on the phone screen. When the battery is fully charged, the LED turns green. Your phone can take up to 3 hours to recharge.

If your phone has a protective case, you don't need to remove the case before you charge the phone in the desktop charger. You adapt the charger to fit the phone.

When you put the phone into the charger, make sure that you align the charging pins on the bottom of the phone with the connector in the charger. When the phone is correctly placed in the charger, it is held in place with magnets. If the LED does not light, then the alignment is not correct.


Caution

Do not charge the phone in a hazardous environment.

Do not charge the phone if it is wet.


Procedure


Step 1

(Optional) Adapt the charger for a phone in a case: Turn the charger so that the back is facing you, put three fingers about 3/4 of the way into the cup, press in, and lift. The cup should slide out.

graphical representation of the step

Note 

You might need to use two hands to remove the cup the first time.

Step 2

Place your phone in the charging slot with the screen facing towards you. If your phone is in a case, press the phone into the charging slot to ensure that the phone connects with the contacts.

Make sure that the LED on the phone lights red. If the LED does not light up, remove the phone and reinsert it into the charger.

If your phone is in a case, the phone and case will tilt out because of the case.

Step 3

When you remove the phone from the charger, tilt the phone forward and lift it up to disconnect the connecter from the magnets.

graphical representation of the step

Step 4

(Optional) Slide the charging cup into the charger. Make sure that the cup is flush with the front and top of the charger.

graphical representation of the step


Charge Your Spare Battery with the Desktop Charger

You can charge a spare battery in the desktop charger. The battery can take up to 3 hours to charge.


Caution

Do not charge the battery in a hazardous environment.


When the battery is charging, the spare battery LED on the charger lights red. When the battery is charged, the spare battery LED on the charger lights green.

Procedure


Step 1

Hold the battery so that the Cisco label faces you, and the arrows on the battery point down.

Step 2

Place the spare battery in the slot behind the phone cradle and press down firmly.


Multichargers

You can charge up to six Cisco Wireless IP Phone 8821 and six spare batteries at the same time with the Cisco Wireless IP Phone 8821 Multi Charger. If your phone is in a protective case, you can charge it without removing the case. This charger has a label on the back to show the maximum voltage (4.35 V).

You can charge up to six Cisco Wireless IP Phone 8821-EX and six spare batteries at the same time with the Cisco Wireless IP Phone 8821-EX Multi Charger. If your phone is in a protective case, you can charge it without removing the case. The charger looks the same as the Cisco Wireless IP Phone 8821 Multi Charger except that it shows the graphic of the Cisco Wireless IP Phone 8821-EX and doesn't have the voltage label.


Caution

The Cisco Wireless IP Phone 8821 Multi Charger can only charge the Cisco Wireless IP Phone 8821 and a spare battery for that phone. You can't charge the Cisco Wireless IP Phone 8821-EX or its spare batteries in the Cisco Wireless IP Phone 8821 Multi Charger.


The following figure shows the multicharger. The phones are placed in the charging cups on the left and right, and the spare batteries are placed in the center.

Figure 2. Cisco Wireless IP Phone 8821 and Cisco Wireless IP Phone 8821 Multi Charger

Caution

Do not use the multicharger in a hazardous environment.


The multicharger can be placed on a work surface or mounted on a wall with the wall mount kit.

In this document, the term multicharger refers to both chargers.

Set Up the Multicharger

The power jack is on the right side of the multicharger.

Procedure


Step 1

Plug the jack end of the power cord into the multicharger.

Step 2

Plug the other end of the power cord into the power adapter.

Step 3

Plug the power adapter into the electrical outlet.

Step 4

Place the multicharger on a stable work surface.


Install the Multicharger Wall Mount Kit

The wall mount kit comes with the following components:

  • bracket

  • package with 5 screws and 5 self-tapping wall anchors

Before you begin

You need the following tools:

  • Drill and a 0.25 inch drill bit

  • Pencil

  • Level

  • Philips #1 and #2 screwdrivers

You need the power cable and power adapter.

Procedure


Step 1

Determine the location for the bracket. The bottom right corner of the bracket must be less than 50 inches (127 cm) from an electrical outlet.

Step 2

Mount the wall bracket.

graphical representation of the next substeps
  1. Hold the bracket on the wall, as shown in the diagram.

  2. Use the level to ensure that the bracket is level and use a pencil to mark the screw holes.

  3. Install the anchors, using the drill and drill bit.

  4. Screw the bracket to the wall.

Step 3

Locate the post holders in the multicharger.

Step 4

Hold the multicharger so that the post holders are in front of the posts on the bracket, press the multicharger towards the wall, and then push the multicharger down so that the posts seat into the holder.

graphical representation of the step

Here is a close-up of the post holder.

graphical representation of the text
Step 5

Plug the jack end of the power cord into the multicharger.

Step 6

Plug the other end of the power cord into the power adapter.

Step 7

Plug the power adapter into the electrical outlet.


Charge Your Phone with the Multicharger

You can tell when your phone is charging in the multicharger when the phone LED lights red. When the battery is fully charged, the LED turns green. Your phone can take up to 3 hours to recharge.

If your phone has a protective case, you don't need to remove the case before you charge the phone in the multicharger. You adapt the multicharger to fit the phone.

When you put the phone into the multicharger, make sure that you align the charging pins on the bottom of the phone with the connector in the multicharger. If the LED does not light, then the alignment is not correct.


Caution

Do not charge the phone in a hazardous environment.

Do not charge the phone if it is wet.


Procedure


Step 1

(Optional) Adapt the charger for a phone in a case: Reach into the cup with three fingers, locate the slots on the inside of the cup, and use the slots to pull the cup out.

graphical representation of the step
Step 2

Place your phone in the empty charging slot. If your phone is in a case, press the phone into the charging slot to ensure that the phone connects with the contacts.

Make sure that the LED on the phone lights red. If the LED does not light up, remove the phone and reinsert it into the multicharger.

Step 3

(Optional) Slide the charging cup into the multicharger and press the cup into place so that the cup is flush with the top of the multicharger.


Charge Your Spare Battery with the Multicharger

You can charge a spare battery in the multicharger. The battery can take up to 3 hours to charge.


Caution

Do not charge the battery in a hazardous environment.


When the battery is charging, the Battery LED beside the battery lights red. When the battery is charged, the Battery LED lights green.

Procedure


Place the battery in an empty spare battery slot, aligning the battery contacts with the charger connecter.

If the Battery LED does not light red, remove the battery and reinsert it into the battery slot.


Secure the Charger with a Cable Lock

You can secure your desktop charger or multicharger with a laptop cable lock that is up to 20 mm wide.

Procedure


Step 1

Take the looped end of the cable lock and wrap it around the object to which you want to secure your phone.

Step 2

Pass the lock through the looped end of the cable.

Step 3

Unlock the cable lock.

Step 4

Press and hold the locking button to align the locking teeth.

Step 5

Insert the cable lock into the lock slot of your charger and release the locking button.

Step 6

Lock the cable lock.