Configuring Dynamic ARP Inspection

This chapter contains the following sections:

Finding Feature Information

Your software release might not support all the features documented in this module. For the latest caveats and feature information, see the Bug Search Tool at https://tools.cisco.com/bugsearch/ and the release notes for your software release. To find information about the features documented in this module, and to see a list of the releases in which each feature is supported, see the "New and Changed Information"chapter or the Feature History table in this chapter.

Information About DAI

ARP

ARP provides IP communication within a Layer 2 broadcast domain by mapping an IP address to a MAC address. For example, host B wants to send information to host A but does not have the MAC address of host A in its ARP cache. In ARP terms, host B is the sender and host A is the target.

To get the MAC address of host A, host B generates a broadcast message for all hosts within the broadcast domain to obtain the MAC address associated with the IP address of host A. All hosts within the broadcast domain receive the ARP request, and host A responds with its MAC address.

ARP Spoofing Attacks

ARP spoofing attacks and ARP cache poisoning can occur because ARP allows a reply from a host even if an ARP request was not received. After the attack, all traffic from the device under attack flows through the attacker’s computer and then to the router, switch, or host.

An ARP spoofing attack can affect hosts, switches, and routers connected to your Layer 2 network by sending false information to the ARP caches of the devices connected to the subnet. Sending false information to an ARP cache is known as ARP cache poisoning. Spoof attacks can also intercept traffic intended for other hosts on the subnet.

Figure 1. ARP Cache Poisoning.

This figure shows an example of ARP cache poisoning.

Hosts A, B, and C are connected to the device on interfaces A, B, and C, which are on the same subnet. Their IP and MAC addresses are shown in parentheses; for example, host A uses IP address IA and MAC address MA. When host A needs to send IP data to host B, it broadcasts an ARP request for the MAC address associated with IP address IB. When the device and host B receive the ARP request, they populate their ARP caches with an ARP binding for a host with the IP address IA and a MAC address MA; for example, IP address IA is bound to MAC address MA. When host B responds, the device and host A populate their ARP caches with a binding for a host with the IP address IB and the MAC address MB.

Host C can poison the ARP caches of the device, host A, and host B by broadcasting two forged ARP responses with bindings: one for a host with an IP address of IA and a MAC address of MC and another for a host with the IP address of IB and a MAC address of MC. Host B and the device then use the MAC address MC as the destination MAC address for traffic intended for IA, which means that host C intercepts that traffic. Likewise, host A and the device use the MAC address MC as the destination MAC address for traffic intended for IB.

Because host C knows the true MAC addresses associated with IA and IB, it can forward the intercepted traffic to those hosts by using the correct MAC address as the destination. This topology, in which host C has inserted itself into the traffic stream from host A to host B, is an example of a man-in-the middle attack.

DAI and ARP Spoofing Attacks

DAI ensures that only valid ARP requests and responses are relayed. When DAI is enabled and properly configured, a Cisco Nexus device performs these activities:

  • Intercepts all ARP requests and responses on untrusted ports

  • Verifies that each of these intercepted packets has a valid IP-to-MAC address binding before updating the local ARP cache or before forwarding the packet to the appropriate destination

  • Drops invalid ARP packets

DAI can determine the validity of an ARP packet based on valid IP-to-MAC address bindings stored in a Dynamic Host Configuration Protocol (DHCP) snooping binding database. This database is built by DHCP snooping if DHCP snooping is enabled on the VLANs and on the device. It can also contain static entries that you create. If the ARP packet is received on a trusted interface, the device forwards the packet without any checks. On untrusted interfaces, the device forwards the packet only if it is valid.

DAI can validate ARP packets against user-configured ARP access control lists (ACLs) for hosts with statically configured IP addresses. The device logs dropped packets.

You can configure DAI to drop ARP packets when the IP addresses in the packets are invalid or when the MAC addresses in the body of the ARP packets do not match the addresses specified in the Ethernet header.

Interface Trust States and Network Security

DAI associates a trust state with each interface on the device. Packets that arrive on trusted interfaces bypass all DAI validation checks, and packets that arrive on untrusted interfaces go through the DAI validation process.

In a typical network configuration, the guidelines for configuring the trust state of interfaces are as follows:

Untrusted

Interfaces that are connected to hosts

Trusted

Interfaces that are connected to devices

With this configuration, all ARP packets that enter the network from a device bypass the security check. No other validation is needed at any other place in the VLAN or in the network.


Caution


Use the trust state configuration carefully. Configuring interfaces as untrusted when they should be trusted can result in a loss of connectivity.


Figure 2. ARP Packet Validation on a VLAN Enabled for DAI.

The following figure, assume that both device A and device B are running DAI on the VLAN that includes host 1 and host 2. If host 1 and host 2 acquire their IP addresses from the DHCP server connected to device A, only device A binds the IP-to-MAC address of host 1. If the interface between device A and device B is untrusted, the ARP packets from host 1 are dropped by device B and connectivity between host 1 and host 2 is lost.

If you configure interfaces as trusted when they should be untrusted, you may open a security hole in a network. If device A is not running DAI, host 1 can easily poison the ARP cache of device B (and host 2, if you configured the link between the devices as trusted). This condition can occur even though device B is running DAI.

DAI ensures that hosts (on untrusted interfaces) connected to a device that runs DAI do not poison the ARP caches of other hosts in the network; however, DAI does not prevent hosts in other portions of the network from poisoning the caches of the hosts that are connected to a device that runs DAI.

If some devices in a VLAN run DAI and other devices do not, the guidelines for configuring the trust state of interfaces on a device that runs DAI becomes the following:

Untrusted

Interfaces that are connected to hosts or to devices that are not running DAI

Trusted

Interfaces that are connected to devices that are running DAI

To validate the bindings of packets from devices that do not run DAI, configure ARP ACLs on the device that runs DAI. When you cannot determine the bindings, isolate at Layer 3 the devices that run DAI from devices that do not run DAI.


Note


Depending on your network setup, you may not be able to validate a given ARP packet on all devices in the VLAN.


Prioritizing ARP ACLs and DHCP Snooping Entries

By default, DAI filters DAI traffic by comparing DAI packets to IP-MAC address bindings in the DHCP snooping database.

When you apply an ARP ACL to traffic, the ARP ACLs take precedence over the default filtering behavior. The device first compares ARP packets to user-configured ARP ACLs. If the ARP ACL denies the ARP packet, the device denies the packet regardless of whether a valid IP-MAC binding exists in the DHCP snooping database.


Note


VLAN ACLs (VACLs) take precedence over both ARP ACLs and DHCP snooping entries. For example, if you apply a VACL and an ARP ACL to a VLAN and you configured the VACL to act on ARP traffic, the device permits or denies ARP traffic as determined by the VACL, not the ARP ACL or DHCP snooping entries.


Logging DAI Packets

Cisco NX-OS maintains a buffer of log entries about DAI packets processed. Each log entry contains flow information, such as the receiving VLAN, the port number, the source and destination IP addresses, and the source and destination MAC addresses.

You can also specify the type of packets that are logged. By default, aCisco Nexus device logs only packets that DAI drops.

If the log buffer overflows, the device overwrites the oldest DAI log entries with newer entries. You can configure the maximum number of entries in the buffer.


Note


Cisco NX-OS does not generate system messages about DAI packets that are logged.


Virtualization Support for DAI

The following information applies to DAI used in virtual device contexts (VDCs):

  • IP-MAC address bindings are unique per VDC.

  • ARP ACLs are unique per VDC. You cannot use an ACL that you created in one VDC in a different VDC.

  • Because ACLs are not shared by VDCs, you can reuse ACL names in different VDCs.

  • The system does not limit ARP ACLs or rules on a per-VDC basis.

Prerequisites for DAI

  • You must enable the DHCP feature before you can configure DAI.

    Guidelines and Limitations for DAI

    DAI has the following configuration guidelines and limitations:

    • DAI is an ingress security feature; it does not perform any egress checking.

    • DAI is not effective for hosts connected to devices that do not support DAI or that do not have this feature enabled. Because man-in-the-middle attacks are limited to a single Layer 2 broadcast domain, you should separate the domain with DAI from domains without DAI. This separation secures the ARP caches of hosts in the domain with DAI.

    • DAI depends on the entries in the DHCP snooping binding database to verify IP-to-MAC address bindings in incoming ARP requests and ARP responses. If you want DAI to use static IP-MAC address bindings to determine if ARP packets are valid, DHCP snooping needs only to be enabled. If you want DAI to use dynamic IP-MAC address bindings to determine if ARP packets are valid, you must configure DHCP snooping on the same VLANs on which you configure DAI.

    • When you use the feature dhcp command to enable the DHCP feature, there is a delay of approximately 30 seconds before the I/O modules receive the DHCP or DAI configuration. This delay occurs regardless of the method that you use to change from a configuration with the DHCP feature disabled to a configuration with the DHCP feature enabled. For example, if you use the Rollback feature to revert to a configuration that enables the DHCP feature, the I/O modules receive the DHCP and DAI configuration approximately 30 seconds after you complete the rollback.

    • When DHCP snooping is disabled or used in a non-DHCP environment, you should use ARP ACLs to permit or to deny packets and disable DAI.

    • DAI is supported on access ports, trunk ports, port-channel ports, and private VLAN ports.

    • The DAI trust configuration of a port channel determines the trust state of all physical ports that you assign to the port channel. For example, if you have configured a physical port as a trusted interface and then you add that physical port to a port channel that is an untrusted interface, the physical port becomes untrusted.

    • When you remove a physical port from a port channel, the physical port does not retain the DAI trust state configuration of the port channel.

    • When you change the trust state on the port channel, the device configures a new trust state on all the physical ports that comprise the channel.

    • If you want DAI to use static IP-MAC address bindings to determine if ARP packets are valid, ensure that DHCP snooping is enabled and that you have configured the static IP-MAC address bindings.

    • If you want DAI to use dynamic IP-MAC address bindings to determine if ARP packets are valid, ensure that DHCP snooping is enabled.

    Default Settings for DAI

    This table lists the default settings for DAI parameters.

    Table 1. Default DAI Parameters

    Parameters

    Default

    DAI

    Disabled on all VLANs.

    Interface trust state

    All interfaces are untrusted.

    ARP ACLs for non-DHCP environments

    No ARP ACLs are defined.

    Validation checks

    No checks are performed.

    Log buffer

    When DAI is enabled, all denied or dropped ARP packets are logged.

    The number of entries in the log is 32.

    The number of system messages is limited to 5 per second.

    The logging-rate interval is 1 second.

    Per-VLAN logging

    All denied or dropped ARP packets are logged.

    Configuring DAI

    Enabling or Disabling DAI on VLANs

    You can enable or disable DAI on VLANs. By default, DAI is disabled on all VLANs.

    Before you begin

    If you are enabling DAI, ensure the following:

    • Ensure that the DHCP feature is enabled.

    • The VLANs on which you want to enable DAI are configured.

    SUMMARY STEPS

    1. configure terminal
    2. [no] ip arp inspection vlan list
    3. (Optional) show ip arp inspection vlan list
    4. (Optional) copy running-config startup-config

    DETAILED STEPS

      Command or Action Purpose

    Step 1

    configure terminal

    Example:

    switch# configure terminal
    switch(config)#

    Enters global configuration mode.

    Step 2

    [no] ip arp inspection vlan list

    Example:

    switch(config)# ip arp inspection vlan 13

    Enables DAI for the specified list of VLANs. The no option disables DAI for the specified VLANs.

    Step 3

    (Optional) show ip arp inspection vlan list

    Example:

    switch(config)# show ip arp inspection vlan 13
    (Optional)

    Shows the DAI status for the specified list of VLANs.

    Step 4

    (Optional) copy running-config startup-config

    Example:

    switch(config)# copy running-config startup-config
    (Optional)

    Copies the running configuration to the startup configuration.

    Configuring the DAI Trust State of a Layer 2 Interface

    You can configure the DAI interface trust state of a Layer 2 interface. By default, all interfaces are untrusted.

    A device forwards ARP packets that it receives on a trusted Layer 2 interface but does not check them.

    On untrusted interfaces, the device intercepts all ARP requests and responses and verifies that the intercepted packets have valid IP-MAC address bindings before updating the local cache and forwarding the packet to the appropriate destination. If the device determines that packets have invalid bindings, it drops the packets and logs them according to the logging configuration.

    Before you begin

    If you are enabling DAI, ensure that the DHCP feature is enabled.

    SUMMARY STEPS

    1. configure terminal
    2. interface type number / slot
    3. [no] ip arp inspection trust
    4. (Optional) show ip arp inspection interface type number / slot
    5. (Optional) copy running-config startup-config

    DETAILED STEPS

      Command or Action Purpose

    Step 1

    configure terminal

    Example:

    switch# configure terminal
    switch(config)#

    Enters global configuration mode.

    Step 2

    interface type number / slot

    Example:

    switch(config)# interface ethernet 2/1
    switch(config-if)#

    Enters interface configuration mode.

    Step 3

    [no] ip arp inspection trust

    Example:

    switch(config-if)# ip arp inspection trust

    Configures the interface as a trusted ARP interface. The no option configures the interface as an untrusted ARP interface.

    Step 4

    (Optional) show ip arp inspection interface type number / slot

    Example:

    switch(config-if)# show ip arp inspection interface ethernet 2/1
    (Optional)

    Displays the trust state and the ARP packet rate for the specified interface.

    Step 5

    (Optional) copy running-config startup-config

    Example:

    switch(config-if)# copy running-config startup-config
    (Optional)

    Copies the running configuration to the startup configuration.

    Applying ARP ACLs to VLANs for DAI Filtering

    You can apply an ARP ACL to one or more VLANs. The device permits packets only if the ACL permits them. By default, no VLANs have an ARP ACL applied.

    Before you begin

    Ensure that the ARP ACL that you want to apply is correctly configured.

    SUMMARY STEPS

    1. configure terminal
    2. [no] ip arp inspection filter acl-name vlan list
    3. (Optional) show ip arp inspection vlan list
    4. (Optional) copy running-config startup-config

    DETAILED STEPS

      Command or Action Purpose

    Step 1

    configure terminal

    Example:

    switch# configure terminal
    switch(config)#

    Enters global configuration mode.

    Step 2

    [no] ip arp inspection filter acl-name vlan list

    Example:

    switch(config)# ip arp inspection filter arp-acl-01 vlan 100

    Applies the ARP ACL to the list of VLANs, or if you use the no option, removes the ARP ACL from the list of VLANs.

    Step 3

    (Optional) show ip arp inspection vlan list

    Example:

    switch(config)# show ip arp inspection vlan 100
    (Optional)

    Shows the DAI status for the specified list of VLANs, including whether an ARP ACL is applied.

    Step 4

    (Optional) copy running-config startup-config

    Example:

    switch(config)# copy running-config startup-config
    (Optional)

    Copies the running configuration to the startup configuration.

    Enabling or Disabling Additional Validation

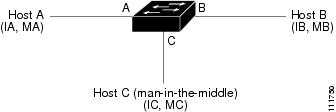
    You can enable or disable additional validation of ARP packets. By default, no additional validation of ARP packets is enabled. When no additional validation is configured, the source MAC address and the source IP address check against the IP-to-MAC binding entry for ARP packets are done by using the ARP sender MAC address and the ARP sender IP address.

    DAI intercepts, logs, and discards ARP packets with invalid IP-to-MAC address bindings. You can enable additional validation on the destination MAC address, the sender and target IP addresses, and the source MAC address.

    You can use the following keywords with the ip arp inspection validate command to implement additional validations:

    dst-mac

    Checks the destination MAC address in the Ethernet header against the target MAC address in the ARP body for ARP responses. When enabled, packets with different MAC addresses are classified as invalid and are dropped.

    ip

    Checks the ARP body for invalid and unexpected IP addresses. Addresses include 0.0.0.0, 255.255.255.255, and all IP multicast addresses. Sender IP addresses are checked in all ARP requests and responses, and target IP addresses are checked only in ARP responses.

    src-mac

    Checks the source MAC address in the Ethernet header against the sender MAC address in the ARP body for ARP requests and responses. When enabled, packets with different MAC addresses are classified as invalid and are dropped.

    When enabling additional validation, follow these guidelines:

    • You must specify at least one of the keywords. You can specify one, two, or all three keywords.

    • Each ip arp inspection validate command that you enter replaces the configuration from any previous commands. If you enter an ip arp inspection validate command to enable src-mac and dst-mac validations, and a second ip arp inspection validate command to enable ip validation, the src-mac and dst-mac validations are disabled when you enter the second command.

    SUMMARY STEPS

    1. configure terminal
    2. [no] ip arp inspection validate {[src-mac] [dst-mac] [ip]}
    3. (Optional) show running-config dhcp
    4. (Optional) copy running-config startup-config

    DETAILED STEPS

      Command or Action Purpose

    Step 1

    configure terminal

    Example:

    switch# configure terminal
    switch(config)#

    Enters global configuration mode.

    Step 2

    [no] ip arp inspection validate {[src-mac] [dst-mac] [ip]}

    Example:

    switch(config)# ip arp inspection validate src-mac dst-mac ip

    Enables additional DAI validation, or if you use the no option, disables additional DAI validation.

    Step 3

    (Optional) show running-config dhcp

    Example:

    switch(config)# show running-config dhcp
    (Optional)

    Displays the DHCP snooping configuration, including the DAI configuration.

    Step 4

    (Optional) copy running-config startup-config

    Example:

    switch(config)# copy running-config startup-config
    (Optional)

    Copies the running configuration to the startup configuration.

    Configuring the DAI Logging Buffer Size

    You can configure the DAI logging buffer size. The default buffer size is 32 messages.

    SUMMARY STEPS

    1. configure terminal
    2. [no] ip arp inspection log-buffer entries number
    3. (Optional) show running-config dhcp
    4. (Optional) copy running-config startup-config

    DETAILED STEPS

      Command or Action Purpose

    Step 1

    configure terminal

    Example:

    switch# configure terminal
    switch(config)#

    Enters global configuration mode.

    Step 2

    [no] ip arp inspection log-buffer entries number

    Example:

    switch(config)# ip arp inspection log-buffer entries 64

    Configures the DAI logging buffer size. The no option reverts to the default buffer size, which is 32 messages. The buffer size can be between 1 and 1024 messages.

    Step 3

    (Optional) show running-config dhcp

    Example:

    switch(config)# show running-config dhcp
    (Optional)

    Displays the DHCP snooping configuration, including the DAI configuration.

    Step 4

    (Optional) copy running-config startup-config

    Example:

    switch(config)# copy running-config startup-config
    (Optional)

    Copies the running configuration to the startup configuration.

    Configuring DAI Log Filtering

    You can configure how the device determines whether to log a DAI packet. By default, the device logs DAI packets that are dropped.

    SUMMARY STEPS

    1. configure terminal
    2. Enter one of the following commands:
      • ip arp inspection vlan vlan-list logging dhcp-bindings all
      • ip arp inspection vlan vlan-list logging dhcp-bindings none
      • ip arp inspection vlan vlan-list logging dhcp-bindingspermit
      • no ip arp inspection vlan vlan-list logging dhcp-bindings {all | none | permit}
    3. (Optional) show running-config dhcp
    4. (Optional) copy running-config startup-config

    DETAILED STEPS

      Command or Action Purpose

    Step 1

    configure terminal

    Example:

    switch# configure terminal
    switch(config)#

    Enters global configuration mode.

    Step 2

    Enter one of the following commands:

    • ip arp inspection vlan vlan-list logging dhcp-bindings all
    • ip arp inspection vlan vlan-list logging dhcp-bindings none
    • ip arp inspection vlan vlan-list logging dhcp-bindingspermit
    • no ip arp inspection vlan vlan-list logging dhcp-bindings {all | none | permit}

    Example:

    switch(config)# ip arp inspection vlan 100 dhcp-bindings permit

    Configures DAI log filtering, as follows. The no option removes DAI log filtering.

    • Logs all packets that match DHCP bindings.

    • Does not log packets that match DHCP bindings.

    • Logs packets permitted by DHCP bindings.

    • Removes DAI log filtering.

    Step 3

    (Optional) show running-config dhcp

    Example:

    switch(config)# show running-config dhcp
    (Optional)

    Displays the DHCP snooping configuration, including the DAI configuration.

    Step 4

    (Optional) copy running-config startup-config

    Example:

    switch(config)# copy running-config startup-config
    (Optional)

    Copies the running configuration to the startup configuration.

    Verifying the DAI Configuration

    To display the DAI configuration information, perform one of the following tasks. For detailed information about the fields in the output from these commands, see the Cisco Nexus 7000 Series NX-OS Security Command Reference.

    Command

    Purpose

    show ip arp inspection

    Displays the status of DAI.

    show ip arp inspection interface ethernet

    Displays the trust state.

    show ip arp inspection vlan

    Displays the DAI configuration for a specific VLAN.

    show arp access-lists

    Displays ARP ACLs.

    show ip arp inspection log

    Displays the DAI log configuration.

    Monitoring and Clearing DAI Statistics

    To monitor and clear DAI statistics, use the commands in this table. For more information about these commands, see the Security Command Reference for your Cisco Nexus device.

    Command

    Purpose

    show ip arp inspection statistics

    Displays DAI statistics.

    clear ip arp inspection statistics vlan <id>

    Clears DAI statistics.

    Configuration Examples for DAI

    Example 1-Two Devices Support DAI

    These procedures show how to configure DAI when two devices support DAI.

    Figure 3. Two Devices Supporting DAI.

    The following figure shows the network configuration for this example. Host 1 is connected to device A, and Host 2 is connected to device B. Both devices are running DAI on VLAN 1 where the hosts are located. A DHCP server is connected to device A. Both hosts acquire their IP addresses from the same DHCP server. Device A has the bindings for Host 1 and Host 2, and device B has the binding for Host 2. Device A Ethernet interface 2/3 is connected to the device B Ethernet interface 1/4.

    DAI depends on the entries in the DHCP snooping binding database to verify IP-to-MAC address bindings in incoming ARP requests and ARP responses. Make sure to enable DHCP snooping to permit ARP packets that have dynamically-assigned IP addresses.

    • This configuration does not work if the DHCP server is moved from device A to a different location.

    • To ensure that this configuration does not compromise security, configure Ethernet interface 2/3 on device A and Ethernet interface 1/4 on device B as trusted.

    Configuring Device A

    To enable DAI and configure Ethernet interface 2/3 on device A as trusted, follow these steps:

    Procedure

    Step 1

    While logged into device A, verify the connection between device A and device B.

    switchA# show cdp neighbors 
    Capability Codes: R - Router, T - Trans-Bridge, B - Source-Route-Bridge
                      S - Switch, H - Host, I - IGMP, r - Repeater,
                      V - VoIP-Phone, D - Remotely-Managed-Device,
                      s - Supports-STP-Dispute 
    Device ID              Local Intrfce   Hldtme  Capability  Platform      Port ID 
    switchB                Ethernet2/3     177     R S I    WS-C2960-24TC Ethernet1/4 
    switchA#


    Step 2

    Enable DAI on VLAN 1 and verify the configuration.

    switchA# config t 
    switchA(config)# ip arp inspection vlan 1 
    switchA(config)# show ip arp inspection vlan 1 
    Source Mac Validation      : Disabled 
    Destination Mac Validation : Disabled 
    IP Address Validation      : Disabled 
    Vlan : 1 
    ----------- 
    Configuration   : Enabled 
    Operation State : Active 
    switchA(config)#


    Step 3

    Configure Ethernet interface 2/3 as trusted.

    switchA(config)# interface ethernet 2/3 
    switchA(config-if)# ip arp inspection trust 
    switchA(config-if)# exit 
    switchA(config)# exit 
    switchA# show ip arp inspection interface ethernet 2/3
     Interface        Trust State    Rate (pps)    Burst Interval
     -------------    -----------    ----------    --------------
     Ethernet2/3      Trusted           15             5


    Step 4

    Verify the bindings.

    switchA# show ip dhcp snooping binding 
    MacAddress         IpAddress        LeaseSec  Type           VLAN  Interface 
    -----------------  ---------------  --------  -------------  ----  ------------- 
    00:60:0b:00:12:89  10.0.0.1         0         dhcp-snooping  1     Ethernet2/3 
    switchA#


    Step 5

    Check the statistics before and after DAI processes any packets.

    switchA# show ip arp inspection statistics vlan 1 
    Vlan : 1 
    ----------- 
    ARP Req Forwarded  = 0 
    ARP Res Forwarded  = 0 
    ARP Req Dropped    = 0 
    ARP Res Dropped    = 0 
    DHCP Drops         = 0 
    DHCP Permits       = 0 
    SMAC Fails-ARP Req = 0 
    SMAC Fails-ARP Res = 0 
    DMAC Fails-ARP Res = 0 
    IP Fails-ARP Req   = 0 
    IP Fails-ARP Res   = 0 
    switchA#


    If host 1 sends out two ARP requests with an IP address of 10.0.0.1 and a MAC address of 0002.0002.0002, both requests are permitted, and are shown as follows:

    switchA# show ip arp inspection statistics vlan 1 
    Vlan : 1 
    ----------- 
    ARP Req Forwarded  = 2 
    ARP Res Forwarded  = 0 
    ARP Req Dropped    = 0 
    ARP Res Dropped    = 0 
    DHCP Drops         = 0 
    DHCP Permits       = 2 
    SMAC Fails-ARP Req = 0 
    SMAC Fails-ARP Res = 0 
    DMAC Fails-ARP Res = 0 
    IP Fails-ARP Req   = 0 
    IP Fails-ARP Res   = 0


    If host 1 tries to send an ARP request with an IP address of 10.0.0.3, the packet is dropped and an error message is logged.

    00:12:08: %SW_DAI-4-DHCP_SNOOPING_DENY: 2 Invalid ARPs (Req) on Ethernet2/3, vlan 1.([0002.0002.0002/10.0.0.3/0000.0000.0000/0.0.0.0/02:42:35 UTC Fri Jul 13 2008])


    The statistics display as follows:

    switchA# show ip arp inspection statistics vlan 1 
    switchA# 
    Vlan : 1 
    ----------- 
    ARP Req Forwarded  = 2 
    ARP Res Forwarded  = 0 
    ARP Req Dropped    = 2 
    ARP Res Dropped    = 0 
    DHCP Drops         = 2 
    DHCP Permits       = 2 
    SMAC Fails-ARP Req = 0 
    SMAC Fails-ARP Res = 0 
    DMAC Fails-ARP Res = 0 
    IP Fails-ARP Req   = 0 
    IP Fails-ARP Res   = 0 
    switchA#


    Configuring Device B

    To enable DAI and configure Ethernet interface 1/4 on device B as trusted, follow these steps:

    Procedure

    Step 1

    While logged into device B, verify the connection between device B and device A.

    switchB# show cdp neighbors 
    Capability Codes: R - Router, T - Trans-Bridge, B - Source-Route-Bridge
                      S - Switch, H - Host, I - IGMP, r - Repeater,
                      V - VoIP-Phone, D - Remotely-Managed-Device,
                      s - Supports-STP-Dispute 
    Device ID              Local Intrfce   Hldtme  Capability  Platform      Port ID 
    switchA                Ethernet1/4     120     R S I    WS-C2960-24TC Ethernet2/3 
    switchB#


    Step 2

    Enable DAI on VLAN 1, and verify the configuration.

    switchB# config t 
    switchB(config)# ip arp inspection vlan 1 
    switchB(config)# show ip arp inspection vlan 1 
    Source Mac Validation      : Disabled 
    Destination Mac Validation : Disabled 
    IP Address Validation      : Disabled 
    Vlan : 1 
    ----------- 
    Configuration   : Enabled 
    Operation State : Active 
    switchB(config)#


    Step 3

    Configure Ethernet interface 1/4 as trusted.

    switchB(config)# interface ethernet 1/4 
    switchB(config-if)# ip arp inspection trust 
    switchB(config-if)# exit 
    switchB(config)# exit 
    switchB# show ip arp inspection interface ethernet 1/4
     Interface        Trust State    Rate (pps)    Burst Interval
     -------------    -----------    ----------    --------------
     Ethernet1/4      Trusted           15             5 
    switchB#


    Step 4

    Verify the list of DHCP snooping bindings.

    switchB# show ip dhcp snooping binding 
    MacAddress         IpAddress        LeaseSec  Type           VLAN  Interface 
    -----------------  ---------------  --------  -------------  ----  ------------- 
    00:01:00:01:00:01  10.0.0.2         4995      dhcp-snooping  1     Ethernet1/4 
    switchB#


    Step 5

    Check the statistics before and after DAI processes any packets.

    switchB# show ip arp inspection statistics vlan 1 
    Vlan : 1 
    ----------- 
    ARP Req Forwarded  = 0 
    ARP Res Forwarded  = 0 
    ARP Req Dropped    = 0 
    ARP Res Dropped    = 0 
    DHCP Drops         = 0 
    DHCP Permits       = 0 
    SMAC Fails-ARP Req = 0 
    SMAC Fails-ARP Res = 0 
    DMAC Fails-ARP Res = 0 
    IP Fails-ARP Req   = 0 
    IP Fails-ARP Res   = 0 
    switchB#


    If Host 2 sends out an ARP request with the IP address 10.0.0.2 and the MAC address 0001.0001.0001, the packet is forwarded and the statistics are updated.

    switchB# show ip arp inspection statistics vlan 1 
    Vlan : 1 
    ----------- 
    ARP Req Forwarded  = 1 
    ARP Res Forwarded  = 0 
    ARP Req Dropped    = 0 
    ARP Res Dropped    = 0 
    DHCP Drops         = 0 
    DHCP Permits       = 1 
    SMAC Fails-ARP Req = 0 
    SMAC Fails-ARP Res = 0 
    DMAC Fails-ARP Res = 0 
    IP Fails-ARP Req   = 0 
    IP Fails-ARP Res   = 0 
    switchB#


    If Host 2 attempts to send an ARP request with the IP address 10.0.0.1, DAI drops the request and logs the following system message:

    00:18:08: %SW_DAI-4-DHCP_SNOOPING_DENY: 1 Invalid ARPs (Req) on Ethernet1/4, vlan 1.([0001.0001.0001/10.0.0.1/0000.0000.0000/0.0.0.0/01:53:21 UTC Fri Jun 13 2008])


    The statistics display as follows:

    switchB# show ip arp inspection statistics vlan 1 
    Vlan : 1 
    ----------- 
    ARP Req Forwarded  = 1 
    ARP Res Forwarded  = 0 
    ARP Req Dropped    = 1 
    ARP Res Dropped    = 0 
    DHCP Drops         = 1 
    DHCP Permits       = 1 
    SMAC Fails-ARP Req = 0 
    SMAC Fails-ARP Res = 0 
    DMAC Fails-ARP Res = 0 
    IP Fails-ARP Req   = 0 
    IP Fails-ARP Res   = 0 
    switchB#


    Example 2 One Device Supports DAI

    This procedure shows how to configure DAI when the second device involved in the network configuration does not support DAI or DHCP snooping.

    Figure 4. One Device Supporting DAI.

    Device B, shown in this figure does not support DAI or DHCP snooping; therefore, configuring Ethernet interface 2/3 on device A as trusted creates a security hole because both device A and Host 1 could be attacked by either device B or Host 2.

    To prevent this possibility, you must configure Ethernet interface 2/3 on device A as untrusted. To permit ARP packets from Host 2, you must set up an ARP ACL and apply it to VLAN 1. If the IP address of Host 2 is not static, which would make it impossible to accurately configure the ARP ACL on device A, you must separate device A from device B at Layer 3 and use a router to route packets between them.

    Procedure


    Step 1

    Configure the access list to permit the IP address 10.0.0.1 and the MAC address 0001.0001.0001, and verify the configuration.

    switchA# config t 
    switchA(config)# arp access-list H2 
    switchA(config-arp-acl)# permit ip host 10.0.0.1 mac host 0001.0001.0001 
    switchA(config-arp-acl)# exit 
    switchA(config)# show arp access-lists H2 
    ARP access list H2 
    10 permit ip host 1.1.1.1 mac host 0001.0001.0001 
    switchA(config)#


    Step 2

    Apply the ACL to VLAN 1, and verify the configuration.

    switchA(config)# ip arp inspection filter H2 vlan 1 
    switchA(config)# show ip arp inspection vlan 1 
    Source Mac Validation      : Disabled 
    Destination Mac Validation : Disabled 
    IP Address Validation      : Disabled 
    Vlan : 200 
    ----------- 
    Configuration    : Enabled 
    Operation State  : Active 
    ACL Match/Static : H2 / No


    Step 3

    Configure Ethernet interface 2/3 as untrusted, and verify the configuration.

    Note


    By default, the interface is untrusted.

    switchA(config)# interface ethernet 2/3 
    switchA(config-if)# no ip arp inspection trust 
    switchA(config-if)# exit 
    switchA# show ip arp inspection interface ethernet 2/3 
    switchA#


    The show ip arp inspection interface command has no output because the interface has the default configuration, which includes an untrusted state.

    When Host 2 sends 5 ARP requests through Ethernet interface 2/3 on device A and a "get" is permitted by device A, the statistics are updated.

    switchA# show ip arp inspection statistics vlan 1 
    Vlan : 1 
    ----------- 
    ARP Req Forwarded  = 5 
    ARP Res Forwarded  = 0 
    ARP Req Dropped    = 0 
    ARP Res Dropped    = 0 
    DHCP Drops         = 0 
    DHCP Permits       = 0 
    SMAC Fails-ARP Req = 0 
    SMAC Fails-ARP Res = 0 
    DMAC Fails-ARP Res = 0 
    IP Fails-ARP Req   = 0 
    IP Fails-ARP Res   = 0 
    switchA#


    Configuring ARP ACLs

    Session Manager Support for ARP ACLs

    Session Manager supports the configuration of ARP ACLs. This feature allows you to create a configuration session and verify your ARP ACL configuration changes prior to committing them to the running configuration. For more information about Session Manager, see the Cisco Nexus 7000 Series NX-OS System Management Configuration Guide.

    Creating an ARP ACL

    You can create an ARP ACL on the device and add rules to it.

    SUMMARY STEPS

    1. configure terminal
    2. arp access-list name
    3. [sequence-number] {permit | deny} ip {any | host sender-IP | sender-IP sender-IP-mask} mac {any | host sender-MAC | sender-MAC sender-MAC-mask} [log]
    4. [sequence-number] {permit | deny} request ip {any | host sender-IP | sender-IP sender-IP-mask} mac {any | host sender-MAC | sender-MAC sender-MAC-mask} [log]
    5. [sequence-number] {permit | deny} response ip {any | host sender-IP | sender-IP sender-IP-mask} [any | host target-IP | target-IP target-IP-mask]] mac {any | host sender-MAC | sender-MAC sender-MAC-mask} [any | host target-MAC | target-MAC target-MAC-mask] [log]
    6. (Optional) show arp access-lists acl-name
    7. (Optional) copy running-config startup-config

    DETAILED STEPS

      Command or Action Purpose

    Step 1

    configure terminal

    Example:

    switch# configure terminal
    switch(config)#

    Enters global configuration mode.

    Step 2

    arp access-list name

    Example:

    switch(config)# arp access-list arp-acl-01
    switch(config-arp-acl)#

    Creates the ARP ACL and enters ARP ACL configuration mode.

    Step 3

    [sequence-number] {permit | deny} ip {any | host sender-IP | sender-IP sender-IP-mask} mac {any | host sender-MAC | sender-MAC sender-MAC-mask} [log]

    Example:

    switch(config-arp-acl)# permit ip 192.168.2.0 255.2555.255.0 mac 00C0.4F00.0000 ffff.ff00.0000

    Creates a rule that permits or denies any ARP message based upon the IP address and MAC address of the sender of the message. Using a sequence number allows you to specify a position for the rule in the ACL. Without a sequence number, the rule is added to the end of the rules.

    Step 4

    [sequence-number] {permit | deny} request ip {any | host sender-IP | sender-IP sender-IP-mask} mac {any | host sender-MAC | sender-MAC sender-MAC-mask} [log]

    Example:

    switch(config-arp-acl)# permit request ip 192.168.102.0 0.0.0.255 mac any

    Creates a rule that permits or denies ARP request messages based upon the IP address and MAC address of the sender of the message. Using a sequence number allows you to specify a position for the rule in the ACL. Without a sequence number, the rule is added to the end of the rules.

    Step 5

    [sequence-number] {permit | deny} response ip {any | host sender-IP | sender-IP sender-IP-mask} [any | host target-IP | target-IP target-IP-mask]] mac {any | host sender-MAC | sender-MAC sender-MAC-mask} [any | host target-MAC | target-MAC target-MAC-mask] [log]

    Example:

    switch(config-arp-acl)# permit response ip host 192.168.202.32 any mac host 00C0.4FA9.BCF3 any

    Creates a rule that permits or denies ARP response messages based upon the IPv4 address and MAC address of the sender and the target of the message. Using a sequence number allows you to specify a position for the rule in the ACL. Without a sequence number, the rule is added to the end of the rules.

    Step 6

    (Optional) show arp access-lists acl-name

    Example:

    switch(config-arp-acl)# show arp access-lists arp-acl-01
    (Optional)

    Shows the ARP ACL configuration.

    Step 7

    (Optional) copy running-config startup-config

    Example:

    switch(config-arp-acl)# copy running-config startup-config
    (Optional)

    Copies the running configuration to the startup configuration.

    Changing an ARP ACL

    You can change and remove rules in an existing ARP ACL. You cannot change existing rules. Instead, to change a rule, you can remove it and recreate it with the desired changes.

    If you need to add more rules between existing rules than the current sequence numbering allows, you can use the resequence command to reassign sequence numbers.

    SUMMARY STEPS

    1. configure terminal
    2. arp access-list name
    3. (Optional) [sequence-number] {permit | deny} [request | response] ip IP-data mac MAC-data
    4. (Optional) no {sequence-number | {permit | deny} [request | response] ip IP-data mac MAC-data
    5. show arp access-lists
    6. (Optional) copy running-config startup-config

    DETAILED STEPS

      Command or Action Purpose

    Step 1

    configure terminal

    Example:

    switch# configure terminal
    switch(config)#

    Enters global configuration mode.

    Step 2

    arp access-list name

    Example:

    switch(config)# arp access-list arp-acl-01
    switch(config-acl)#

    Enters ARP ACL configuration mode for the ACL that you specify by name.

    Step 3

    (Optional) [sequence-number] {permit | deny} [request | response] ip IP-data mac MAC-data

    Example:

    switch(config-arp-acl)# 100 permit request ip 192.168.132.0 255.2555.255.0 mac any
    (Optional)

    Creates a rule.

    Using a sequence number allows you to specify a position for the rule in the ACL. Without a sequence number, the rule is added to the end of the rules.

    Step 4

    (Optional) no {sequence-number | {permit | deny} [request | response] ip IP-data mac MAC-data

    Example:

    switch(config-arp-acl)# no 80
    (Optional)

    Removes the rule that you specified from the ARP ACL.

    Step 5

    show arp access-lists

    Example:

    switch(config-arp-acl)# show arp access-lists

    Displays the ARP ACL configuration.

    Step 6

    (Optional) copy running-config startup-config

    Example:

    switch(config-arp-acl)# copy running-config startup-config
    (Optional)

    Copies the running configuration to the startup configuration.

    Removing an ARP ACL

    You can remove an ARP ACL from the device.

    Before you begin

    Ensure that you know whether the ACL is applied to a VLAN. The device allows you to remove ACLs that are currently applied. Removing an ACL does not affect the configuration of VLANs where you have applied the ACL. Instead, the device considers the removed ACL to be empty.

    SUMMARY STEPS

    1. configure terminal
    2. no arp access-list name
    3. show arp access-lists
    4. (Optional) copy running-config startup-config

    DETAILED STEPS

      Command or Action Purpose

    Step 1

    configure terminal

    Example:

    switch# configure terminal
    switch(config)#

    Enters global configuration mode.

    Step 2

    no arp access-list name

    Example:

    switch(config)# no arp access-list arp-acl-01

    Removes the ARP ACL you specified by name from running configuration.

    Step 3

    show arp access-lists

    Example:

    switch(config)# show arp access-lists

    Displays the ARP ACL configuration.

    Step 4

    (Optional) copy running-config startup-config

    Example:

    switch(config)# copy running-config startup-config
    (Optional)

    Copies the running configuration to the startup configuration.

    Changing Sequence Numbers in an ARP ACL

    You can change all the sequence numbers assigned to rules in an ARP ACL.

    SUMMARY STEPS

    1. configure terminal
    2. resequence arp access-list name starting-sequence-number increment
    3. show arp access-lists name
    4. (Optional) copy running-config startup-config

    DETAILED STEPS

      Command or Action Purpose

    Step 1

    configure terminal

    Example:

    switch# configure terminal
    switch(config)#

    Enters global configuration mode.

    Step 2

    resequence arp access-list name starting-sequence-number increment

    Example:

    switch(config)# resequence arp access-list arp-acl-01 100 10
    switch(config)#

    Assigns sequence numbers to the rules contained in the ACL, where the first rule receives the starting sequence number that you specify. Each subsequent rule receives a number larger than the preceding rule. The difference in numbers is determined by the increment that you specify.

    Step 3

    show arp access-lists name

    Example:

    switch(config)# show arp access-lists arp-acl-01

    Displays the ARP ACL configuration for the ACL specified by the name argument.

    Step 4

    (Optional) copy running-config startup-config

    Example:

    switch(config)# copy running-config startup-config
    (Optional)

    Copies the running configuration to the startup configuration.

    Verifying the ARP ACL Configuration

    To display ARP ACL configuration information, use the commands in this table. For detailed information about the fields in the output from these commands, see the Cisco Nexus 7000 Series NX-OS Security Command Reference.

    Command

    Purpose

    show arp access-lists

    Displays the ARP ACL configuration.

    show running-config aclmgr

    Displays ACLs in the running configuration.

    Additional References for DAI

    Related Documents

    Related Topic

    Document Title

    DAI commands: complete command syntax, command modes, command history, defaults, usage guidelines, and examples

    Cisco Nexus 7000 Series NX-OS Security Command Reference

    DHCP snooping commands: complete command syntax, command modes, command history, defaults, usage guidelines, and examples

    Cisco Nexus 7000 Series NX-OS Security Command Reference

    Standards

    Standards

    Title

    RFC-826

    An Ethernet Address Resolution Protocol

    Feature History for DAI

    This table lists the release history for this feature.

    Table 2. Feature History for DAI

    Feature Name

    Releases

    Feature Information

    Dynamic ARP Inspection

    6.0(1)

    No change from Release 5.2.

    Dynamic ARP Inspection

    4.2(1)

    No change from Release 4.1.