Replace the SSD
The Cisco Secure Firewall CSF-1230, CSF-1240, and CSF-1250 ship with an SSD installed. You can replace this SSD should it fail. The SSD is not hot-swappable. Before replacing the SSD, you must power off the chassis by pressing the power switch on the rear panel.
 Caution |
You cannot swap SSDs between different platforms. For example, you cannot use a 3100 series SSD in a 2100 series model. If you are removing an SSD, use the remove-secure local disk command, otherwise sometimes the SED (self-encrypting drive) gets locked. If you get an error message that the SED is locked, you can enter the PSID and the system clears the SED and creates a new set of keys. To avoid this situation, especially if you do not know what the PSIDs are, always use the remove-secure local disk when removing SSDs. |
Caution |
You lose your configuration after you replace the existing SSD with a new SSD. |
Follow these steps to replace an SSD in the chassis:
Procedure
|
Step 1 |
Loosen the thumb screws on both sides of the SSD bay and pull the existing SSD out of the bay. |
|
Step 2 |
Insert the new SSD into the bay and push it in until it is seated. 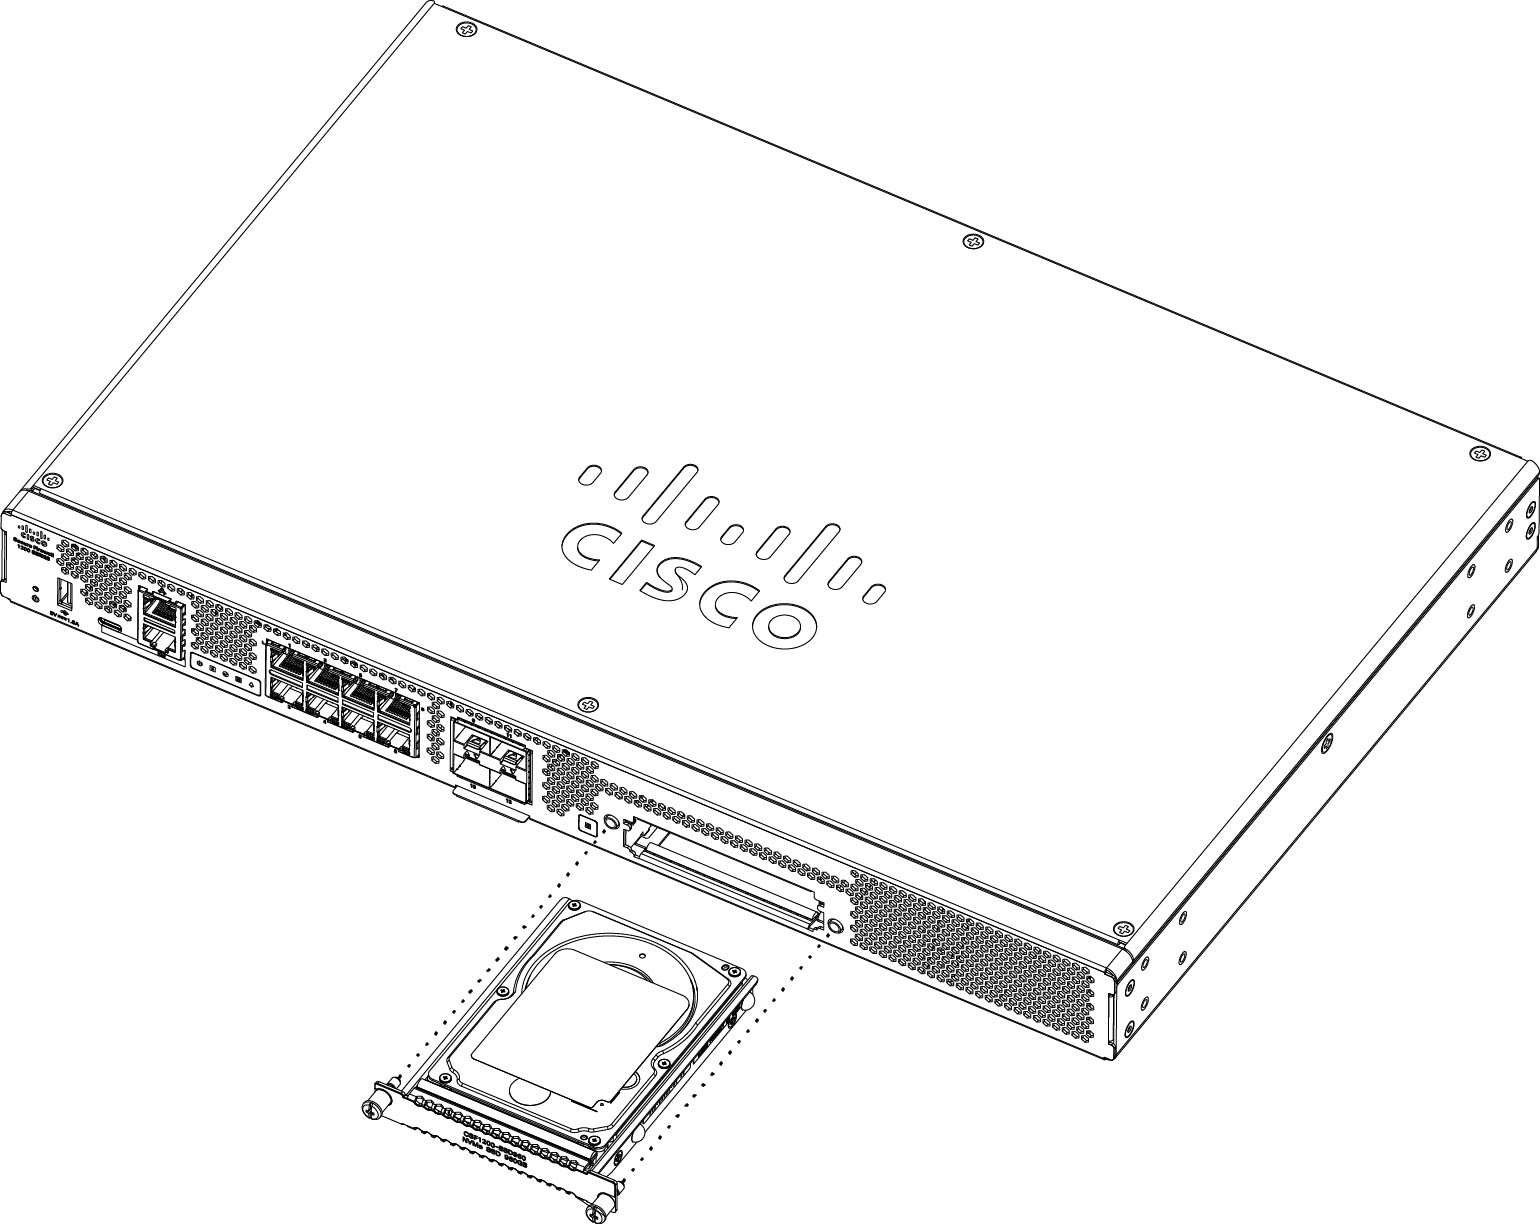 |
|
Step 3 |
Tighten the thumb screws on both sides of the SSD bay. |
|
Step 4 |
Check the SSD LED to make sure the SSD is seated properly and functioning. |
 Feedback