
Configuring Integrations
Cisco Identity integrates with a number of identity providers (IdPs), Human Resources Information (HRIS) platforms, or critical business applications to ingest data about the users, Non-human identities (NHIs), devices, and applications present in these sources.
With this data, Cisco Identity not only creates a singular place to gain visibility into all these entity types across all your connected sources, but it also generates insights and alerts that can be sent to various messaging platforms, ticketing systems or SIEMs so that your team to consume this valuable info in the tools already used throughout their day.
Use the cards listed below, which are categorized by integration , to review the available integration options and to jump to the relevant setup guide. Some cards open an overview page with multiple setup methods. You can also refer to the sidebar menu navigation on the lefthand side of this page to navigate directly to the docs for an integration of interest.
Accessing your Cisco Identity tenant with Duo Single Sign-On
Access to Cisco Identity tenant is managed with Duo Single Sign-On or via Cisco Security Cloud Control, depending on your product licensing.
For Duo Advantage or Premier customers
Review the Duo setup guide for more information on how to enable and configure access to Cisco Identity via your Duo Admin Panel.
For all other customers (including Duo Essentials or Free customers)
Review the documentation for the respective Cisco product (Firewall, Secure Access, XDR, etc.) that entitles you to limited usage of Cisco Identity via Security Cloud Control. Follow the Cisco Identity setup steps associated with your licensed product.
Identity Sources
Identity Sources are the primary data sources that Cisco Identity uses to build entity graphs and analyzes to generate interesting insights, reports, or detections - also known as Checks.
Multiple providers can be configured per tenant. Multiple instances of a singular provider can also be configured if needed (ie: you can add 3 integrations for Salesforce if your org has multiple, separate Salesforce environments that it would like to monitor)
For details on specific provider sources, such as how to configure an integration, what permissions are needed, etc, locate the integration that you are interested among the cards listed below, or via the side menu navigation, and review the specific article for that source.
If you want to learn about how Cisco Identity generally handles data type collection, refer to our article on Managed Integrations.
Identity Providers (IdPs) & Directories
These integration sources provide Cisco Identity with data regarding core identities, access events and sign-in events. Many of them also share data regarding NHIs, Apps, and Devices.
- Auth0
- Microsoft Active Directory — On-Premise Active Directory
- AWS Identity Center
- Duo Security
- Microsoft Entra ID Data Integration — Formerly Microsoft Azure AD
- Azure Event Hub Log Streaming for Microsoft Entra ID
- Google — Covers both Google Workspace & Cloud Platform (GCP)
- Okta Data Integration
- Okta Log Streaming AWS EventBridge
- Okta Workflows
- PingFederate
- SCIM Provisioning
HRIS
HR data often acts as the source of truth for identities in the workplace, making them valuable sources of information
Leverage these integrations to sync workforce data alongside IdP and other SaaS app data within Cisco Identity and uncover gaps or process issues with user lifecycle flows (joiners, movers and leavers), automated processing, etc. that introduce risk to your organization.
- Workday (RaaS)
- UKG Pro (via SCIM)
- Google Sheets
- SCIM Provisioning
- Manual Import (CSV)
- Crowdstrike
Critical business applications & other security tools
Organizations typically host a variety of critical and sensitive company info and processes across multiple, disparate tools. This type of info can include protected customer data, mission-critical systems to run your org's products or services, intellectual property and more, and are often forgotten when thinking of a wider org's enterprise security, making them interesting targets for attackers.
Cisco Identity can integrate with several commonly used and often sensitive SaaS applications, as well as other security products, to ingest this data and leverage it as additional sources of information about the users, NHIs, devices, and apps within your environment to further enrich your IdP/directory data with more context and generate different types of insights.
- Bloodhound Enterprise
- Datadog
- Github
- Jamf
- OpenAI
- Salesforce
- Snowflake
- Webex Directory — Docs for Webex as a notification target for alerts are in Notifications section
- Shared Signals Framework (SSF) and SSF Receivers
- AppOmni (via SSF)
- Cisco Identity Services Engine (ISE)
Notifications and outbound integrations
Use these integrations to route alerts, notifications, and event streams out of Cisco Identity.
Notification Targets are configured to allow Cisco Identity to communicate information regarding checks and other alerts to an external system. These alerts can be sent via email, or via messaging systems including Microsoft Teams, Slack and Webex.
Cisco Identity also integrates with a couple email providers to allow customers to further customize the notifications Cisco Identity sends - for example, to change the domain address of the email so it is sent from your org's own domain.
Additionally, you can configure Cisco Identity use our Webhook system to send alerts to any external systems that can accept webhook events, even if there is no native integration supported, and to build automated processes using this info from Cisco Identity.
- Email Notifications
- Microsoft Teams Notification
- Slack
- Webex Notification
- Webhooks
- Mailgun
- SendGrid
SIEMs
Use these integrations to stream Cisco Identity detections into your org's analytics and security operations platforms (SIEM/SOAR).
- Azure Sentinel SIEM
- Splunk
- Webhooks
Ticketing and response workflows
Use these integrations to open and manage response tasks in external ticketing systems that are part of your organization's workflows.
- Jira
- ServiceNOW
Managed Integrations
For each Provider Data Integration, Cisco Identity needs to collect various data types to surface specific user information or alert on certain checks. We are constantly adding new data types, which can be a burden for Admins to add manually and stay on top of. We developed Managed Integrations to automatically enable data types for your integrations so that you no longer need to continuously check your data integrations to enable newly added data types.
This article will explain how managed data types appear when configuring a new integration, how to modifying an existing integration's data types, as well as the differences between having a managed or unmanaged integration, and required vs additional data types.
Creating a new data integration with managed data types
To create a new data integration:
- Navigate to the Integrations tab within Cisco Identity and select the blue + Add Integration button on the right side of the screen
- Select the data integration type you would like to configure (Okta, Azure, etc)
-
Fill in the require fields displayed on the General Settings tab and click the blue Connect button on this page
Note: For most integrations, initial setup steps are required on the data integration side to create keys, secrets, etc needed to fill in the fields of the General Settings page. To learn more about what steps are needed for each specific data integration, refer to the documentation for the [desired integration]
-
Once you have clicked Connect, Cisco Identity will test the connection to the integration to ensure the information provided is correct, and will read the licenses/permissions associated with that data integration to determine what data types are available
- The connectivity test can take a few minutes to run. All the information is saved, so you can leave this page and come back later if needed
- If the connectivity test is successful: Your integration will be saved with the appropriate managed data types based on the licensing/permissions/etc detected for the integration. On the Integrations page, you will see Connectivity: Successful and Collection Status: Success in the table for the given integration.
- If the connectivity test fails: If you did not navigate away from this page during the connectivity test, you will see an error message. Review the data that was entered for each field on the General Settings page to make sure there are no mistakes. If there are no errors, click Keep and Continue to save the integration. On the Integrations page, you will see Connectivity: Disconnected and Collection Status: Disabled in the table for the given integration
- Click Edit Settings for the given integration on the Integrations tab
- Go to the Advanced Settings tab to review the data types. Here you may see some questions regarding license types, permissions, API permissions, etc that have been filled out according to the integration data received during the connectivity test
- Adjusting the answer to any of these questions will change which managed data types are selected for the integration. If any answers are incorrect, fill in the correct answer and confirm the necessary permissions, etc are correctly configured on the data source side as well
- Click Save
For how to modify an existing integration, [jump to the section below].
Managed vs unmanaged data integrations
By default, all data integrations are managed integrations upon creation. You can determine if a data integration is managed or unmanaged by looking at the Advanced Settings page for that integration.
Note: We highly recommend keeping integrations in managed mode to save time and make sure you aren't missing out on any data!
If your integration is managed, when Cisco Identity adds a new data type for a specific integration, the data type will automatically be enabled and collected for you (assuming the integration has the necessary license, permissions, etc for this data type ).
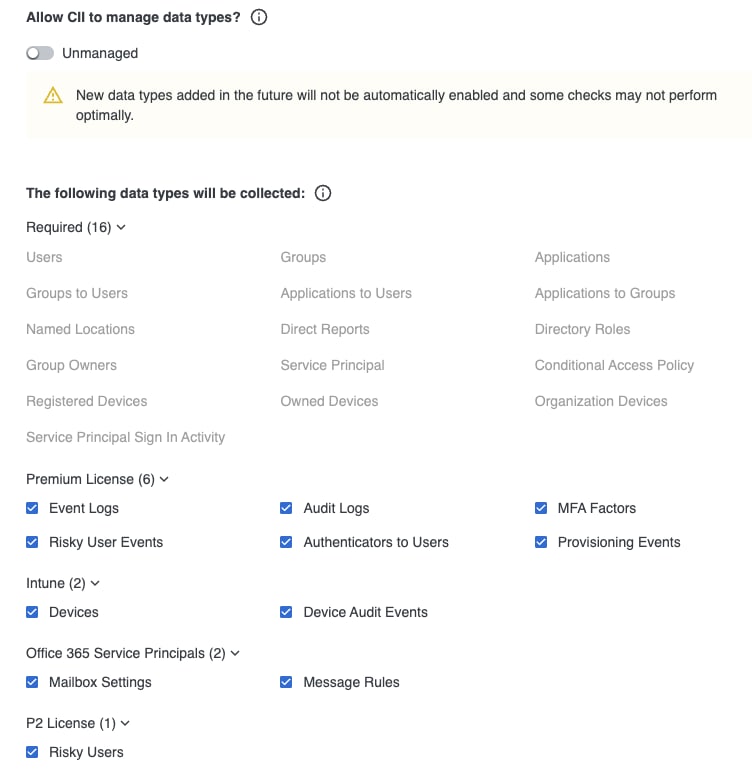
If your integration is unmanaged, when Cisco Identity adds a new data type for a specific integration, the data type will NOT be automatically enabled and collected. You will need to go to the specific Integration, select Edit Settings, go to the Advanced Settings tab for the integration and manually select each new data type to start collecting that data. Since new data types are added continuously, you will need to return to each integration page regularly to review any new data types that have been added and enable them.
To change a data integration to managed or unmanaged, use the toggle found on the Advanced Settings tab of each data integration.
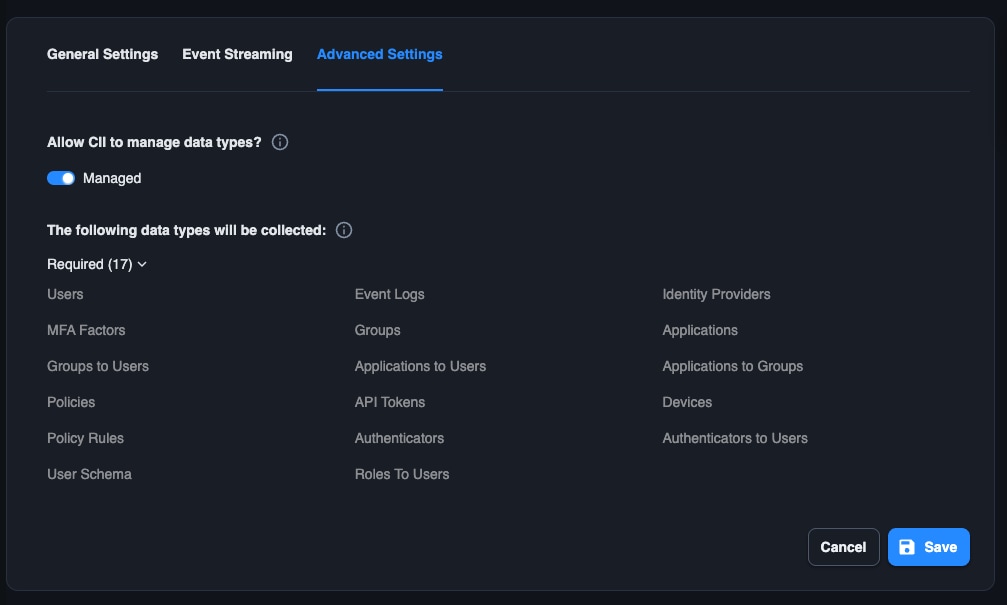
Required data types vs Additional data types
Within each data integration, there can be required data types and additional data types.
Required data types are greyed out and cannot be disabled regardless of if the integration is [managed or unmanaged]. These are data types that must be enabled for the data integration to be configured and working properly. Cisco Identity may add or remove new data types to the required data types, if needed.
Additional data types are most often associated with the questions at the top of the Advanced Settings tab because the additional data types will vary depending on a given data source's licenses, permissions, etc. These questions are answered automatically based on the connectivity test results, but the responses can be modified if needed, which will impact which data types are collected automatically and visible on this page.
Note: If the integration is not licensed for or doesn't have the correct permissions for a selected data type, you may see errors on the Integrations page noting that the data collection for that integration was not fully successful. If a data type is incorrectly enabled, Cisco Identity will fail the data collection for only that disallowed data type, but will still collect for all other allowed data types.
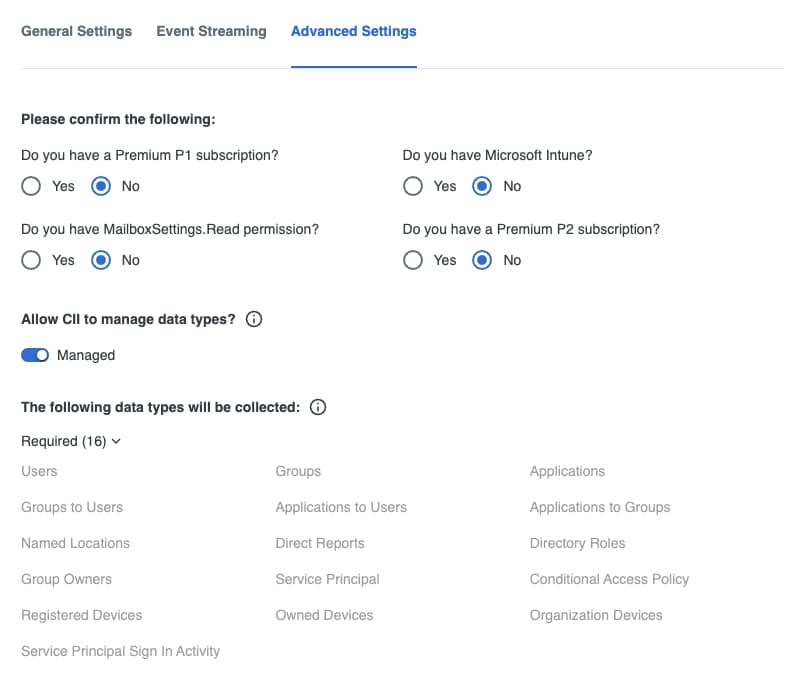
Additional data types will be greyed out and not editable if the integration is [managed]. If the integration is [unmanaged], any additional data types will have a check box next to it, indicating that this data type can be modified.
Though it is possible to deselect additional data types, we highly recommend not removing additional data types to ensure you are collecting as much information as possible for each user and to not impact any checks that may rely on this data.
Modify an existing integration's data types
Existing integrations can be modified via the Advanced Settings in a few ways related to this topic:
- Change an integration from managed to unmanaged, or vice versa, by using the toggle on the Advanced Settings tab to change between managed and unmanaged
- Add or remove additional data types by changing answer(s) to the questions and/or change integration to unmanaged to select/deselect any non-required data types (Note: Required data types cannot be removed)
Microsoft Entra ID Data Integration
Overview
Cisco Identity’s platform can analyze authentication events in Microsoft Entra ID (formerly Azure AD) to give insights into how users are accessing your applications. In order to provide Insights, you have to set up an integration between Microsoft Entra ID and Cisco Identity for analysis. This document will walk you through the process of setting up API access inside of Entra ID and will also walk you through the complementary set up inside of the Cisco Identity console.
Important Notes
-
UPDATE [2026.07.20] - Please note the updated API permissions required to collect Entra ID agent data types for non-Marketplace based integrations - see section below. After adding the API permissions, review the Advanced settings tab of the integration and set the corresponding data type selection to
Yes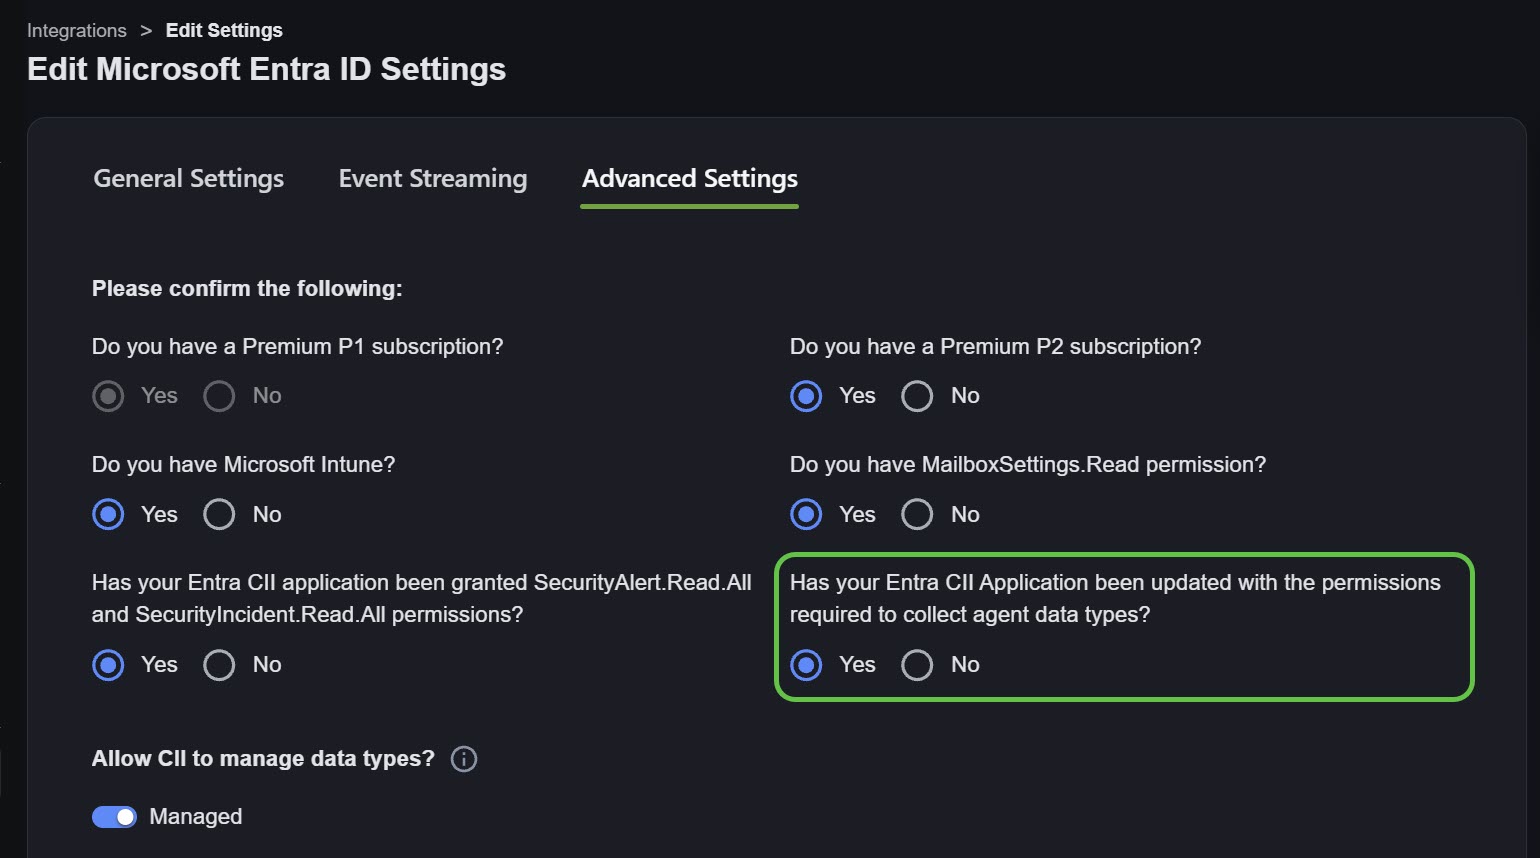
-
Microsoft Licensing - Please see the section below for the implications of Microsoft product licensing on Cisco Identity data collection for specific data types.
- Microsoft Entra ID B2C is not supported.
- This integration is for Entra ID data collection. For SSO to your Cisco Identity tenant using Entra ID, please use Duo SSO with Entra ID as an external authentication source (article).
- If this is a brand new Microsoft Entra ID tenant, for instance a development environment, then make sure to enable a Microsoft Entra ID subscription and resource provider.
Entra ID Integration
At a high-level, Entra ID has different activity log types which each contain different sets of information. Cisco Identity will ingest the Sign-ins and audit logs, as well as the Directory data. Sign-in and audit logs are available through the Microsoft Entra ID portal.
- Sign-ins – Information about sign-ins and how your resources are used by your users.
- Directory - User and Group information from your Entra ID.
Entra ID Sign-in Log Availability
Sign-in logs are available via Microsoft Graph API for 30 days inside Entra ID with a Premium subscription (P1 or P2).
Note - sign-in logs are NOT currently available via Graph API with non-P1 or P2 Entra ID subscriptions, e.g Microsoft Entra ID Free.
- Reference:
- Data Retention - https://docs.microsoft.com/en-us/azure/active-directory/reports-monitoring/reference-reports-data-retention
- Sign-in Logs - https://docs.microsoft.com/en-us/azure/active-directory/reports-monitoring/concept-sign-ins
Based on this 30 day retention, Cisco Identity will start ingestion with the last 30 days of logs. On subsequent log collections, Cisco Identity will ingest only the latest logs.
Manual App Registration Setup Steps
This section details the manual process to create the Entra ID app registration for Cisco Identity data collection.
Note: You do not need to complete this section if you prefer to use the method detailed below. Skip to that section.
There are 2 high-level steps you need to go through to set up your Microsoft Entra ID API key then connect it to Cisco Identity.
- Setup App registration with API permissions and create an app secret in Microsoft Entra ID
- Add Entra ID API details to Cisco Identity Dashboard
Setup App and API secret in Microsoft Entra ID
Next, we will create the app in your Microsoft Entra ID tenant, assigning the correct permissions, and add an API secret.
Add an app in your Microsoft Entra ID tenant
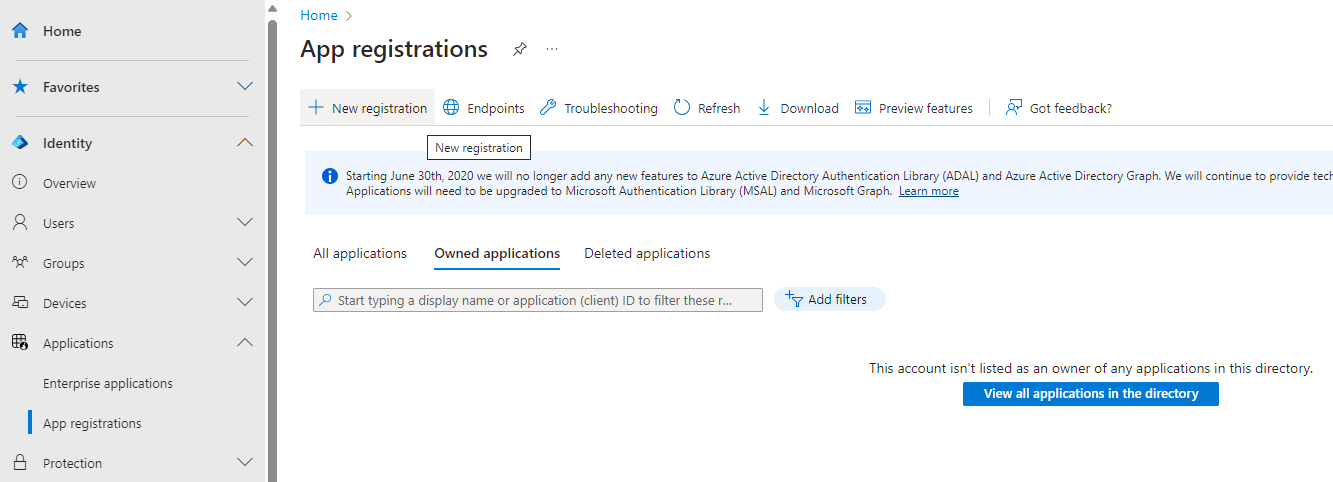
- Go to Microsoft Entra ID...App registrations
-
Select New registration
-
Fill in the details for the new app
- Name this app "Cisco Identity Data Integration" or something similar
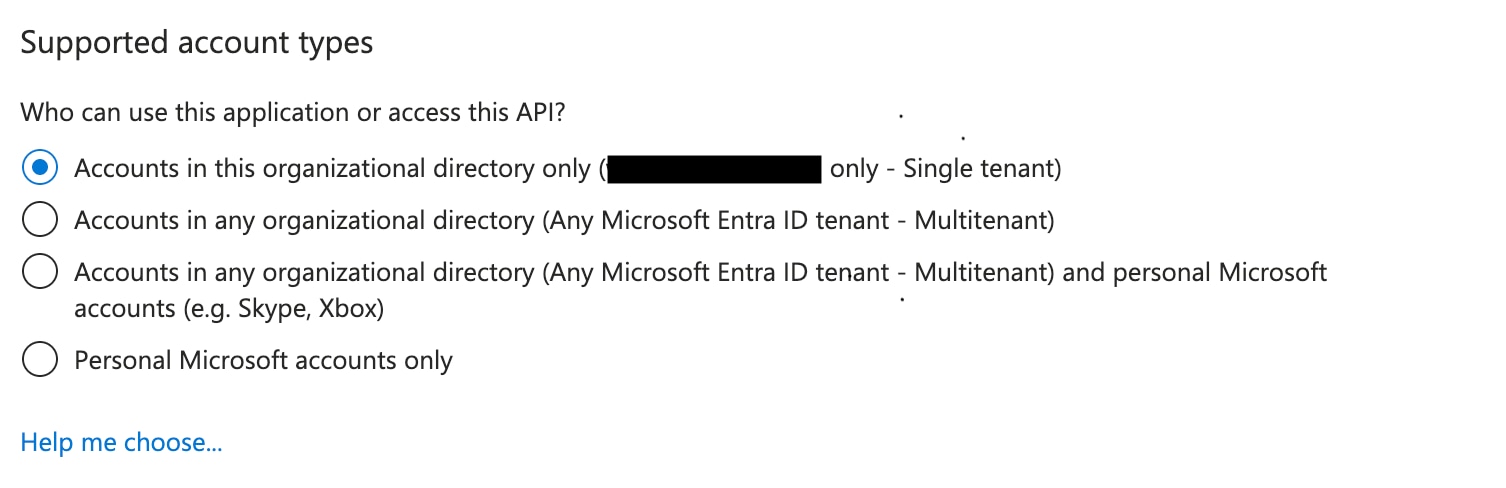
- Make sure to select “Accounts in this organizational directory only (
Your Entra ID tenant nameonly – Single Tenant)” - No redirect URI is required - leave these fields blank
-
Select Register
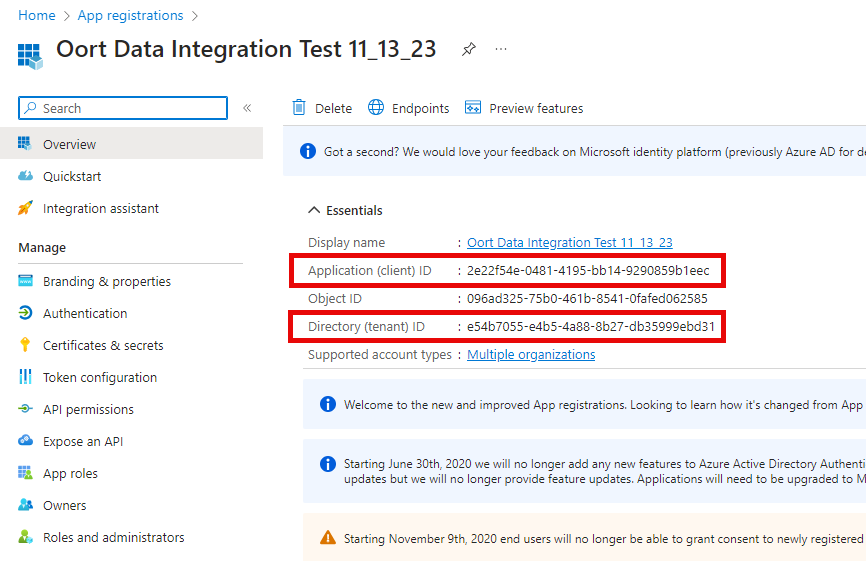
- Save the following information as it will get entered into the Cisco Identity dashboard. * Application (client) ID * Directory (tenant) ID
- Proceed to the section once complete
Understanding Cisco Identity API Permissions for Entra
There are two sets of API permissions that can be used with your Cisco Identity tenant
- Read-only - used for data ingestion and analysis only
- Read/write (which includes the first set of read-only permissions) - read/write permissions are used for the defined list of Cisco Identity [Remediation Actions].
Remediation actions can only be taken by administrator or help desk roles in Cisco Identity and are limited to the list in the above article. This table outlines the relationship from remediation actions to the API permissions.
Write Permission
User.ReadWrite.All, User.ManageIdentities.All, Directory.ReadWrite.All
Associated Remediation Type
Update User Type, Delete Guest User
Write Permission
User.ReadWrite.All, Directory.ReadWrite.All
Associated Remediation Type
User Log out
Write Permission
UserAuthenticationMethod.ReadWrite.All
Associated Remediation Type
Reset MFA
Write Permission
User.ReadWrite.All
Associated Remediation Type
Delete Guest User
Add API Permissions
The instructions below are shown for full read/write capabilities. For a read-only model, please omit the read/write API permissions.
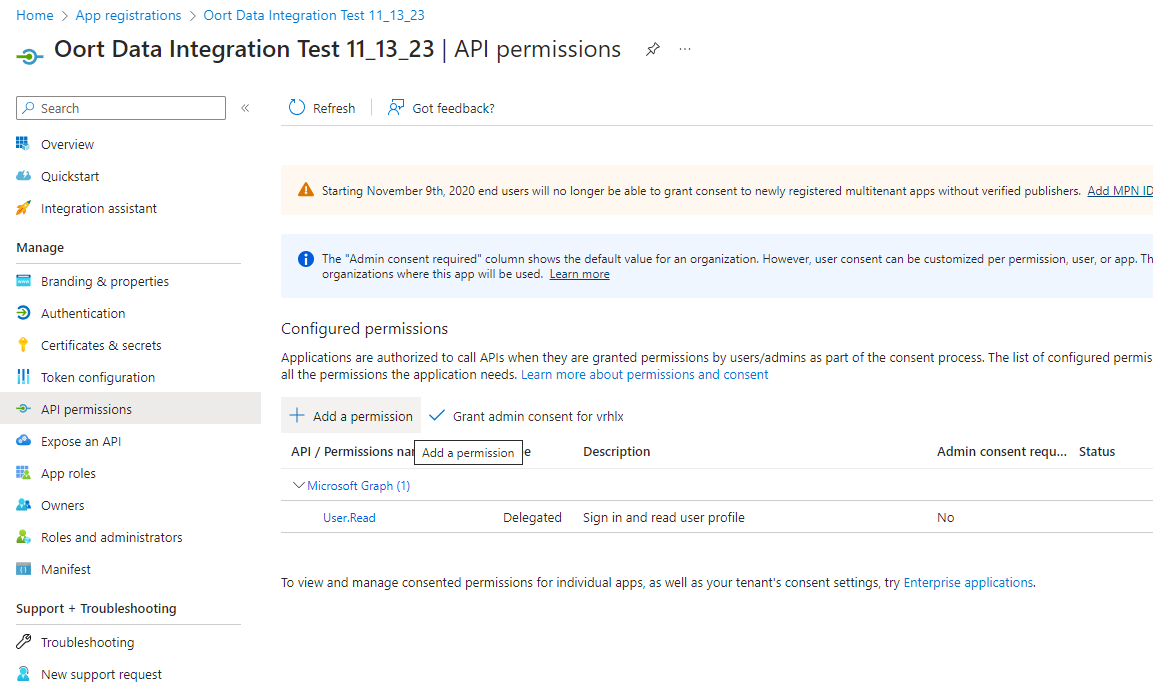
- Go to API Permissions under your newly created Cisco Identity Integration app
-
Select Add a permission
-
Select Microsoft Graph
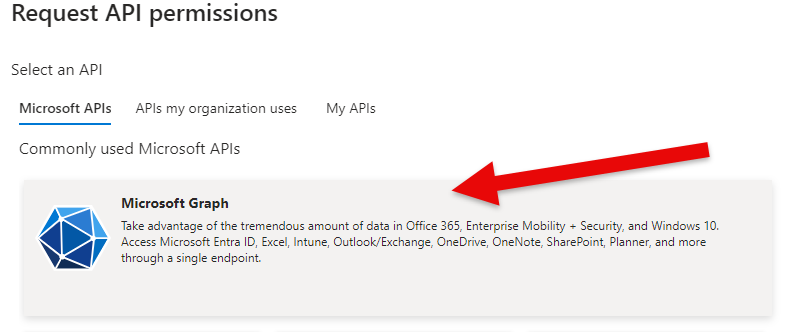
-
Select Application Permissions * NOTE - Permissions to be added below must ALL be of type Application
-
Read-only permissions: Please repeat steps 2 through 4 for all of the following permissions. See notes for details. * AgentCardManifest.Read.All * AgentIdentity.Read.All * AgentIdentityBlueprint.Read.All * AgentIdentityBlueprintPrincipal.Read.All * AgentInstance.Read.All * Application.Read.All * AuditLog.Read.All * DeviceManagementApps.Read.All (requires Intune license) * DeviceManagementConfiguration.Read.All (requires Intune license) * DeviceManagementManagedDevices.Read.All (requires Intune license) * Directory.Read.All * Group.Read.All * GroupMember.Read.All * IdentityRiskEvent.Read.All * IdentityRiskyAgent.Read.All (requires P2 license) * IdentityRiskyServicePrincipal.Read.All (requires P2 license) * IdentityRiskyUser.Read.All (requires P2 license) * MailboxSettings.Read * Policy.Read.All * Reports.Read.All * Synchronization.Read.All * User.Read.All * UserAuthenticationMethod.Read.All
-
Read/write permissions for Remediation Actions: * User.ReadWrite.All * User.ManageIdentities.All * Directory.ReadWrite.All * UserAuthenticationMethod.ReadWrite.All
-
Once added to the list, select Add Permissions, then select Grant admin consent. Then select Yes
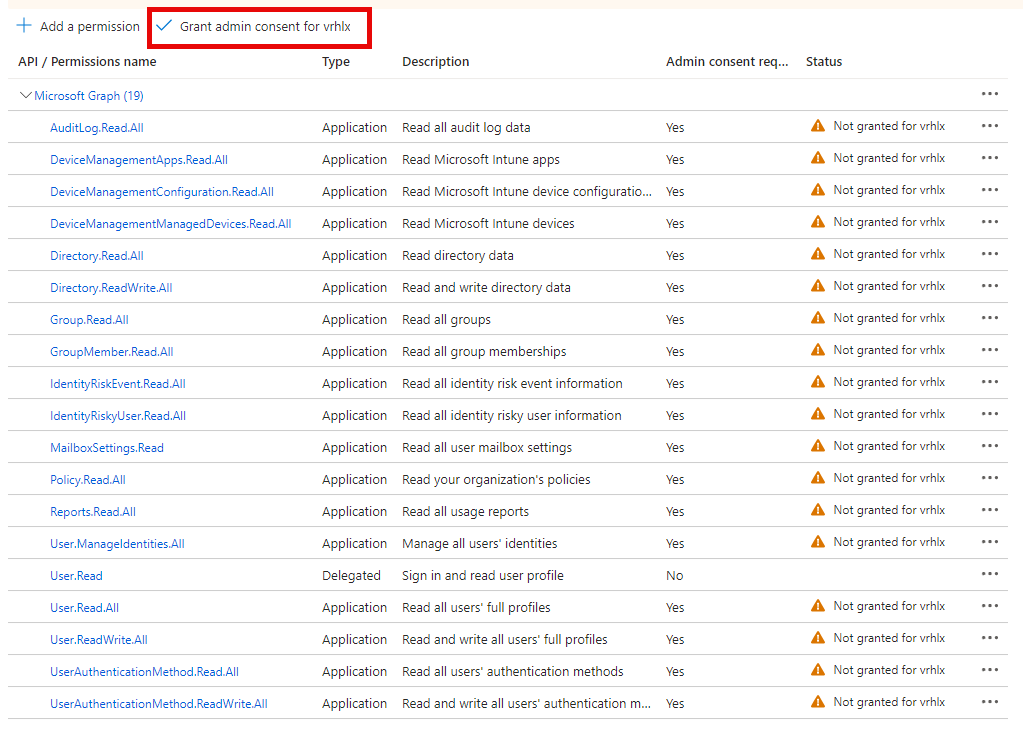
-
Proceed to the section of the documentation
Create Client secret
- Go to Certificates & Secrets under your Cisco Identity Integration app
- Select New client secret
-
Fill in the description, such as "Cisco Identity Integration", and the desired Expiration timeframe for the secret, (i.e. 12 months). Select Add
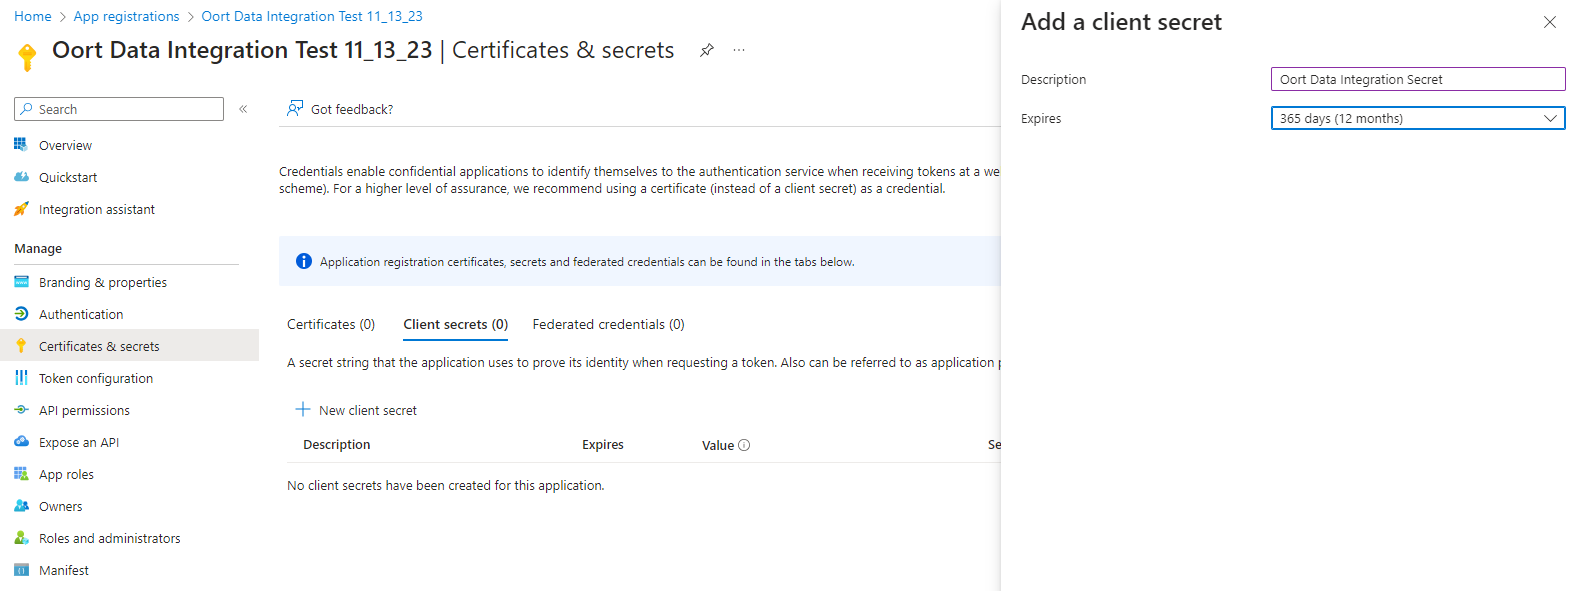
-
Save the Secret ID and Secret Value, as these will be used later in the Cisco Identity dashboard
- Select the copy icon to copy and save both to a secure location
- Important: Once you leave this page you WILL NOT be able to get the secret value again. If lost, you will have to delete and create a new one
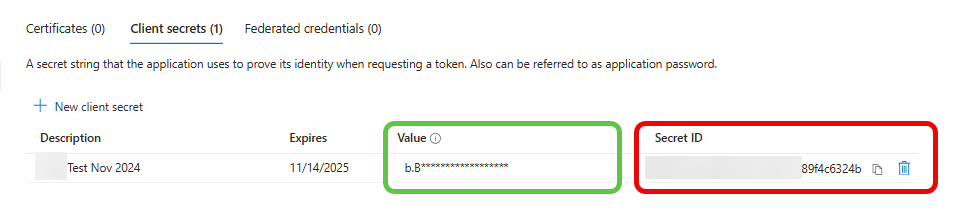
-
You can now proceed to the section if you would like to ingest data regarding Azure-specific non-human identities and analyze access to Azure resources (recommended). Otherwise, go to Skip the section referencing the
Azure Marketplace App Data Integration (Beta release)
Notes
At the present time, when the Azure Marketplace app is updated, for example to include new API permissions for new features and data collection, an existing instance of the application in your Entra tenant is not updated.
The app must be removed and reinstalled to obtain the latest version.
Pre-requisites
- An Azure Subscription - this is separate from an Entra ID P1 or P2 license referenced above and is required for the creation of User-assigned Managed Identities and Resource Groups.
- Azure / Entra admin permissions sufficient to
- Create a User-assigned Managed Identity
- Add a role to a Managed Identity which allows it to create App Registrations and Service Principals - Application Administrator role contains the minimum permissions required
- Azure Resource group to deploy Azure Marketplace application. Consider creating or using an EMPTY resource group, in case of any resource group-level policies that may cause issues
Create Managed Identity and assign Entra ID role
- Go to portal.azure.com
-
Select Create a resource

-
In the search box, enter “user-assigned managed identity” and select the resource to create it
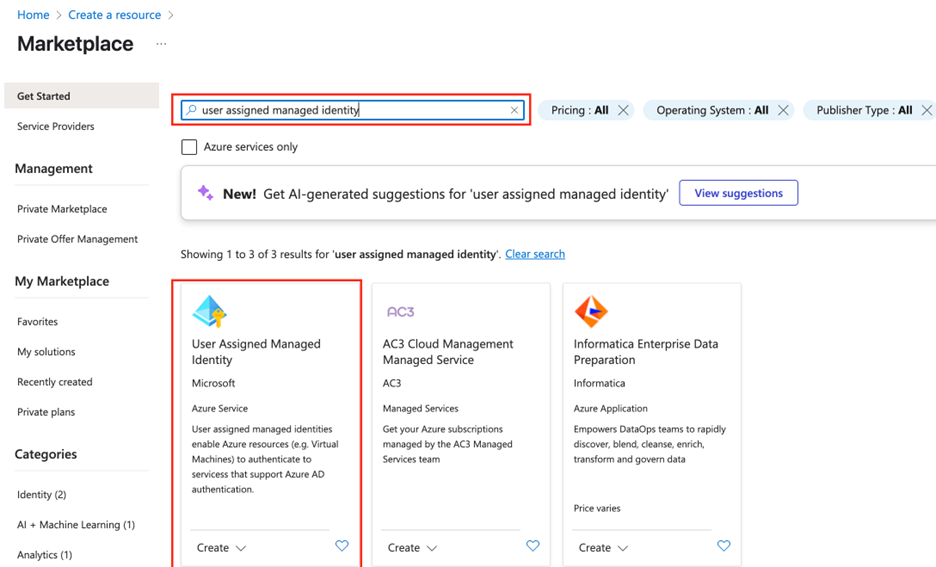
-
On the creation screen, enter the following info: Subscription, Resource Group name for a new resource group, Identity name, and Region
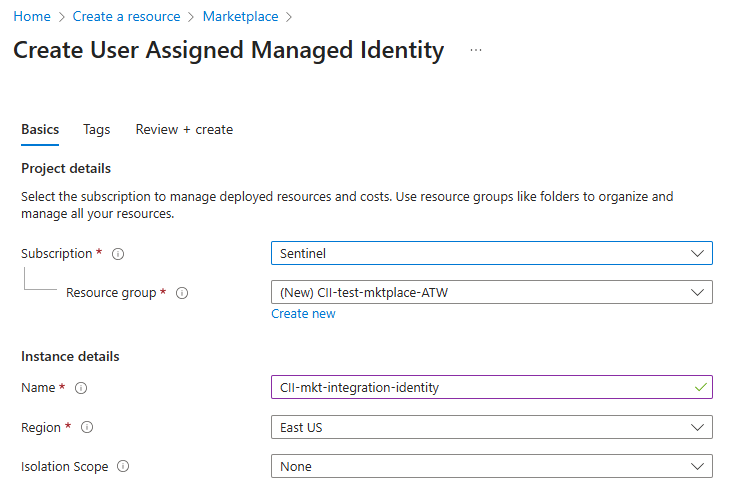
- Proceed with Review and Create step. Create the managed identity
-
Go to Entra ID and navigate to roles
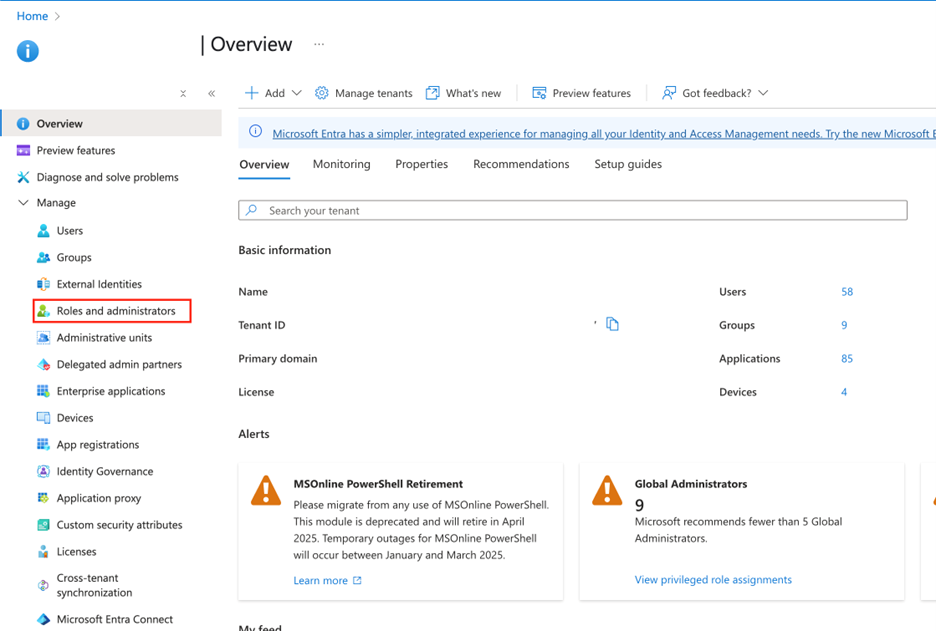
-
In All roles, find Application Administrator role and select the number in Assignments column
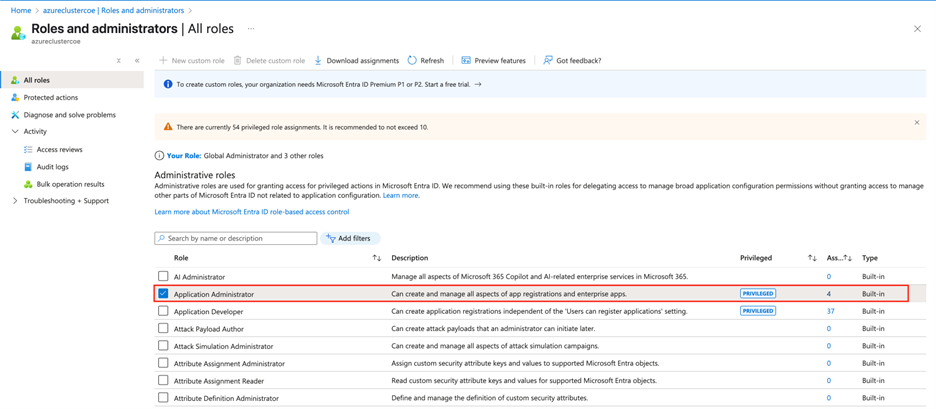
-
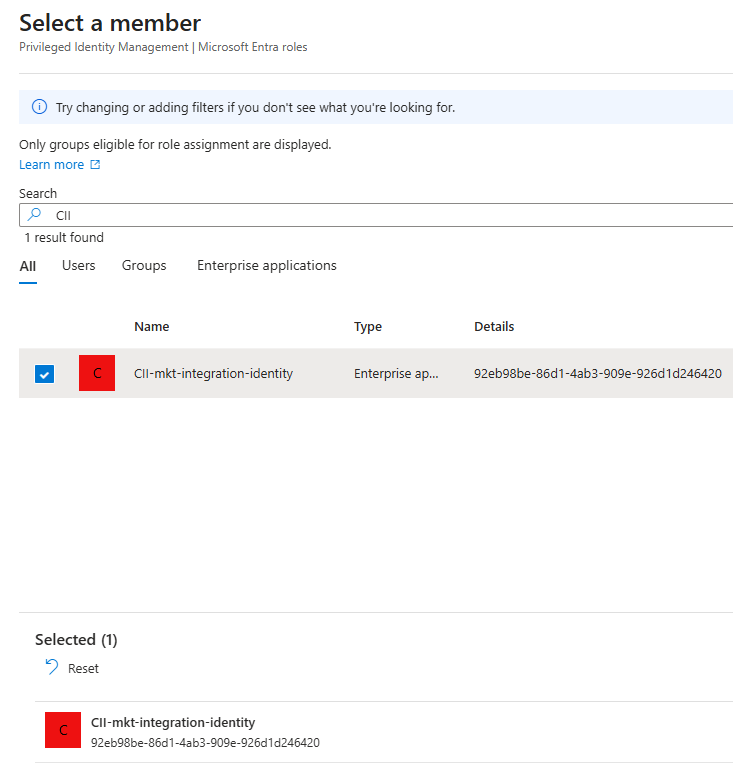
Select Add assignments. Locate your managed identity by name, and assign it to the role. Once you have completed these steps, proceed to the instructions in the section of the documentation

Install Azure Marketplace Application
- Within Azure or Entra ID portal, select Create a resource
-
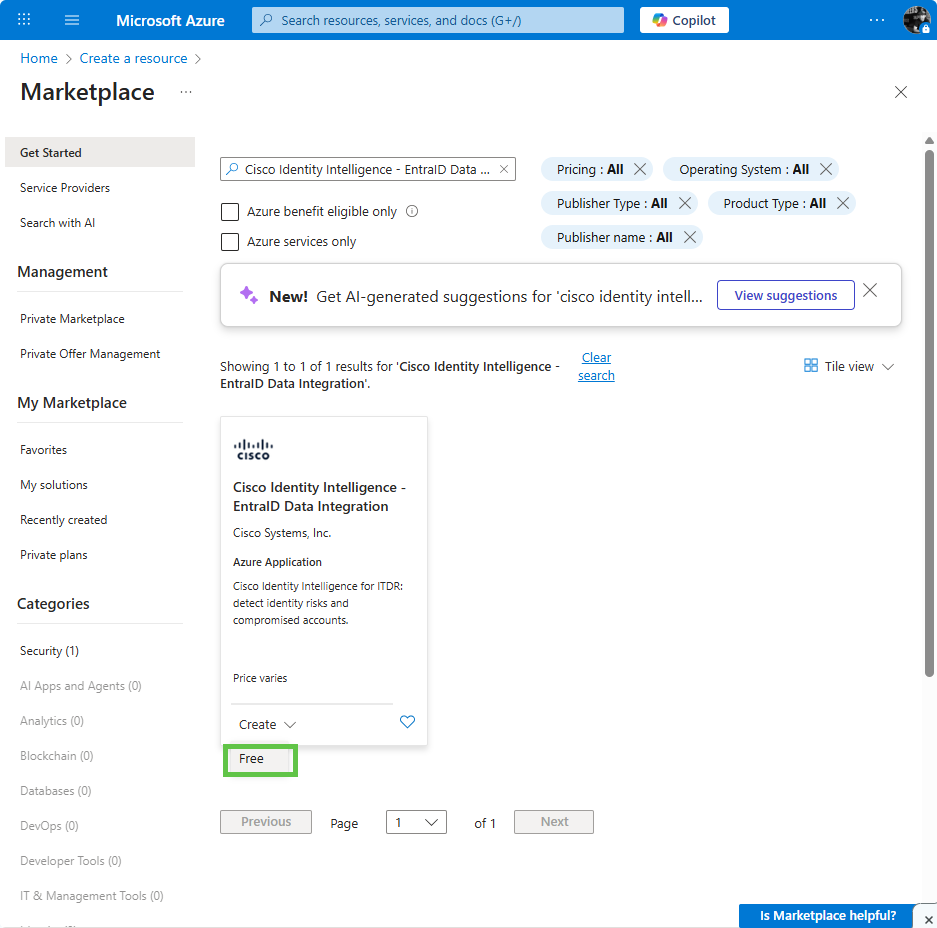
Search for "Cisco Identity" and select Entra ID Data Integration
-
Select the Free Plan option and Create it
-
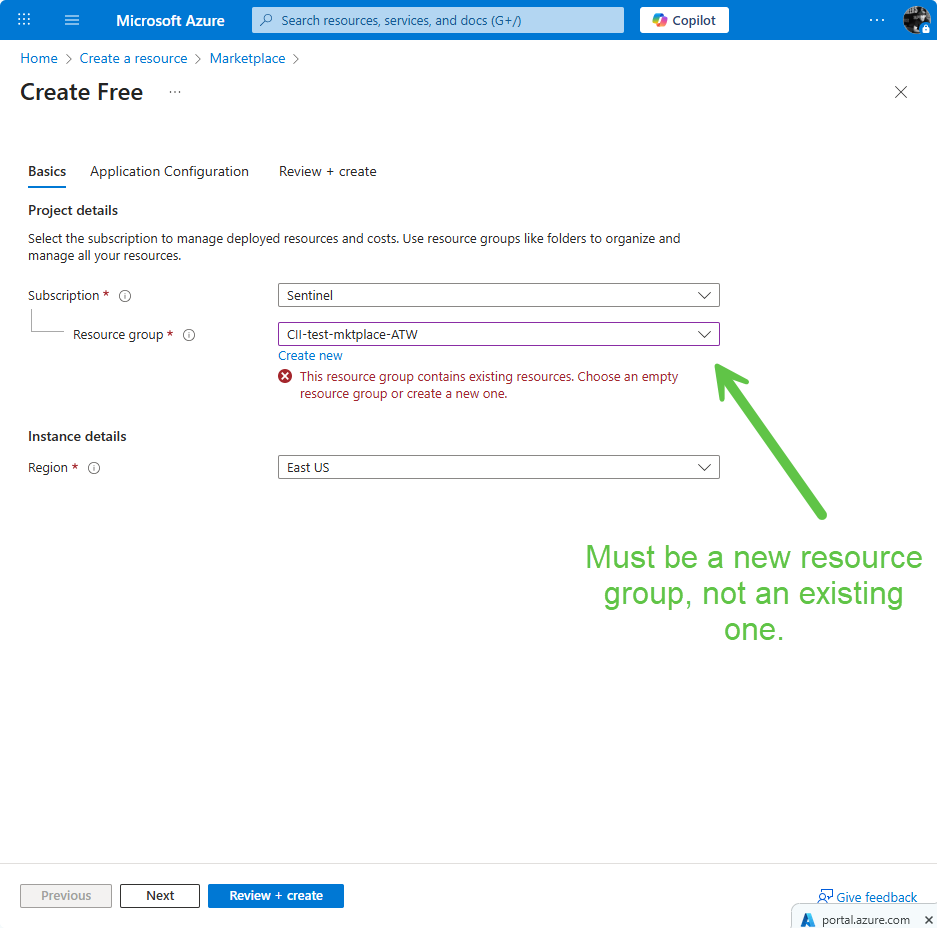
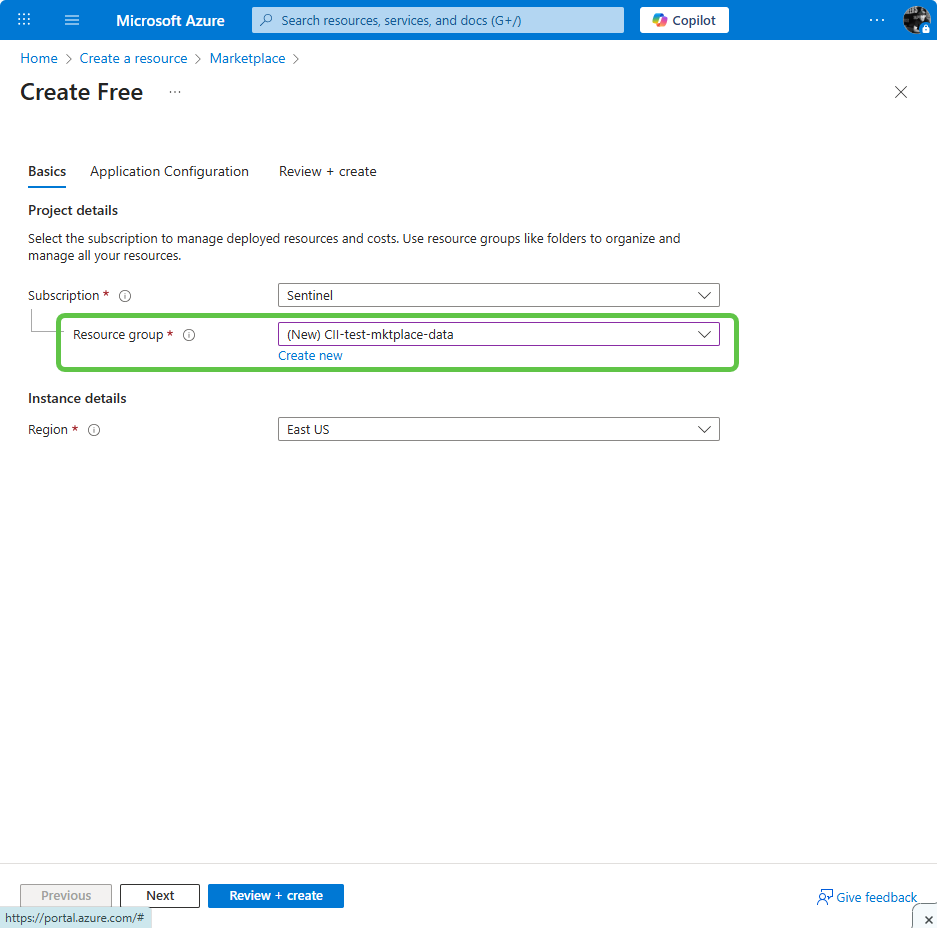
Enter all the details into the relevant input boxes as per the table and example screenshot below NOTE: As mentioned above, the Azure Resource group specified here to deploy Marketplace offer MUST be empty. It cannot have other existing resources already contained within it.
-
Select Next
-
Enter or select the following fields accordingly, as shown in the screenshot and table below
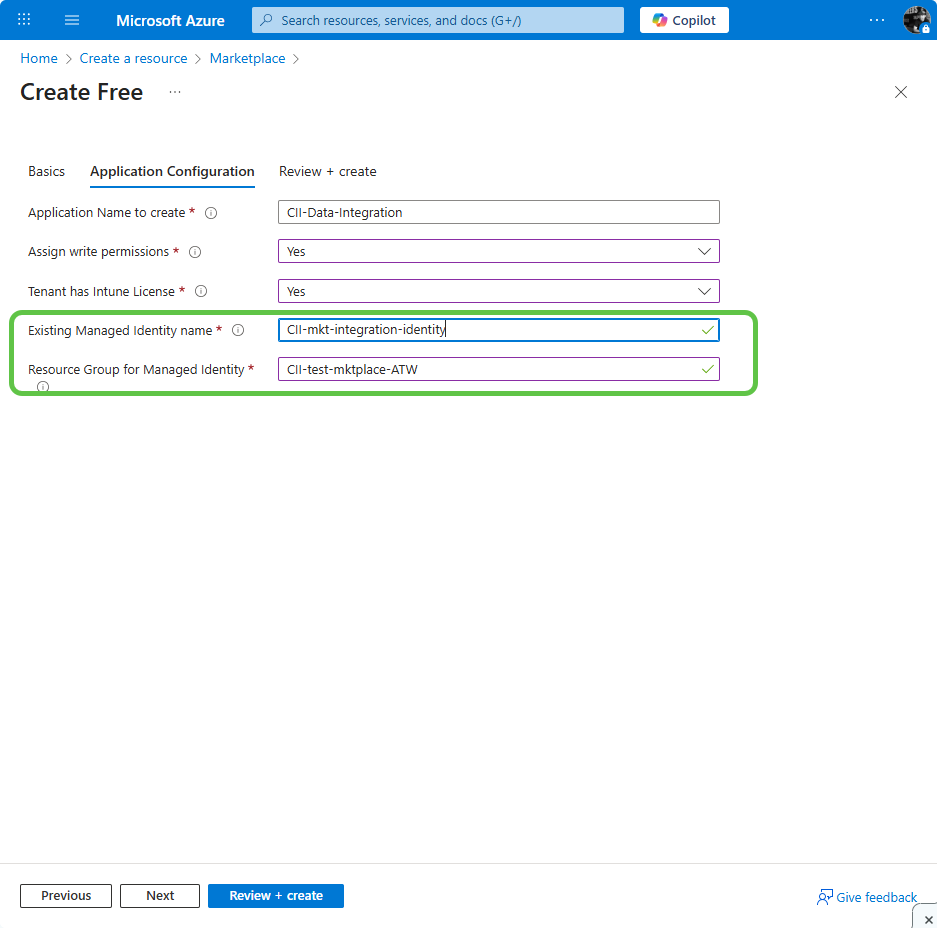
| Input Field | Description |
|---|---|
| Region | Which Azure region Deployment Script should be deployed |
| App Registration Name | Name of App Registration for Data Integration |
| Assign write permissions | Yes or No (Recommended: Yes). Cisco Identity does NOT take automated write actions. Selecting Yes grants Cisco Identity a limited set of write permissions to Entra. If write permissions are granted, Admins or Helpdesk users in Cisco Identity can manually trigger certain remediation actions on Entra users, directly within the Cisco Identity interface, instead of navigating back to Entra to complete the same task (e.g: log user out of active Entra sessions, reset user's MFA). |
| Tenant has Intune License | Yes or No. Select Yes if this Entra ID tenant has Intune Licenses. This grants Cisco Identity read permissions to Device Management data. Select No if this Entra ID tenant does not have Intune Licenses. |
| Managed Identity Name | User-Assigned Managed Identity name from previous section |
| Managed Identity Resource Group | Resource Group name where Managed Identity is created |
- Select Create. The necessary App Registration and Service Principal will be created in Entra ID and corresponding Graph API permissions will be assigned to it
- Proceed to the section of the documentation
Grant Admin Consent for Graph permissions
Now you need to grant Admin Consent to the permissions that were assigned to the app registration.
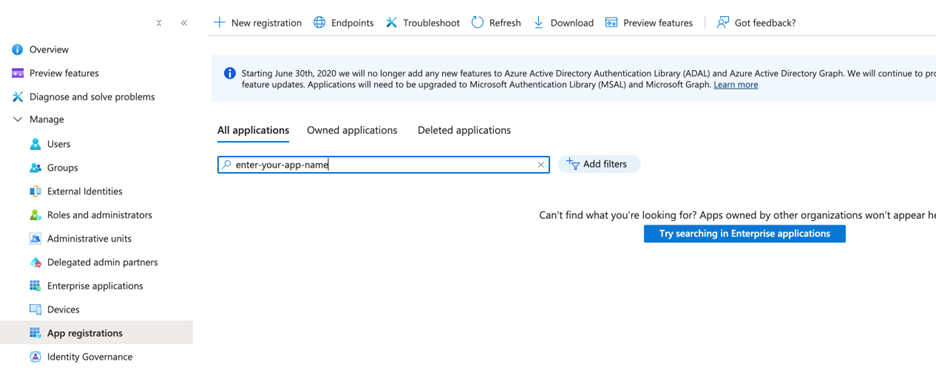
- Navigate to Entra ID and go to App Registrations
-
Select All Applications and enter the Cisco Identity application name that you specified during the Marketplace app creation steps above
-
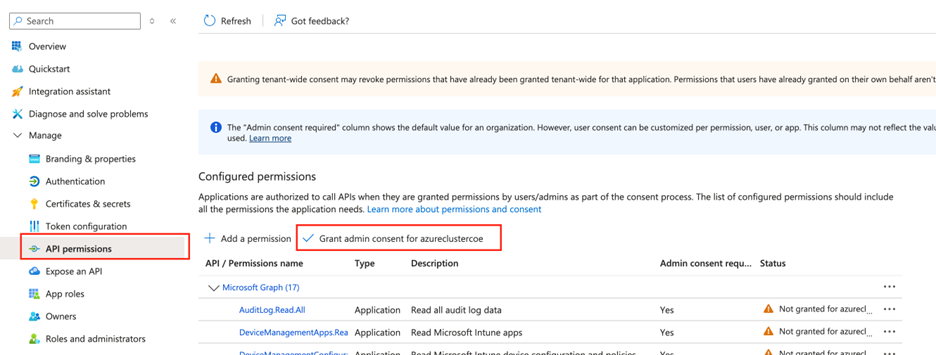
Select App Registration and go to the API Permissions pane found in the left menu
-
Select the Grant admin consent button as shown in the screenshot below
-
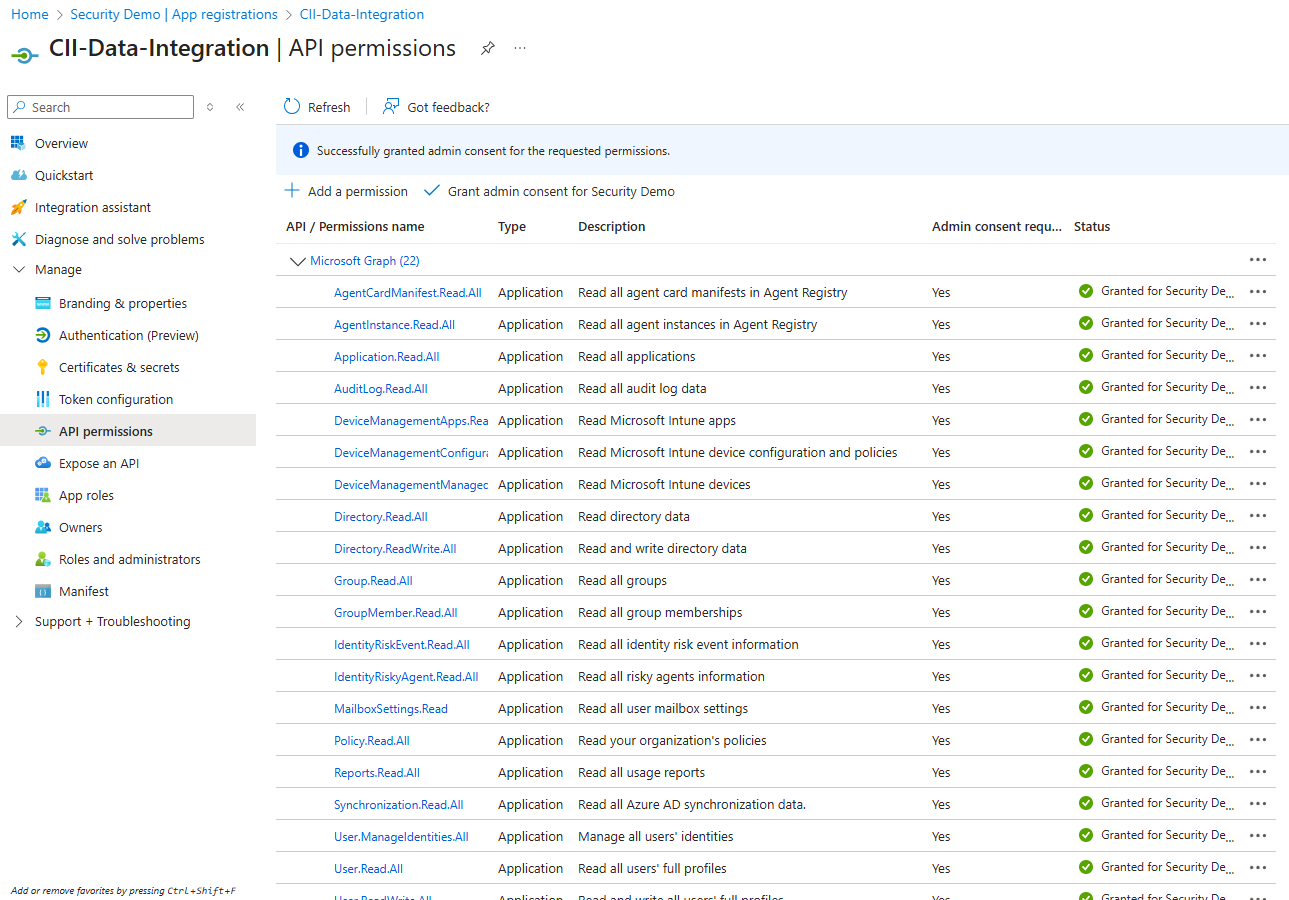
The Status column for all API permissions listed in the table should now be shown as Granted. Once you have confirmed all the API permissions have the correct status, proceed to the section of the documentation
Create Client Secret
- Go to the Certificates & Secrets pane in the left menu under your Cisco Identity app registration
-
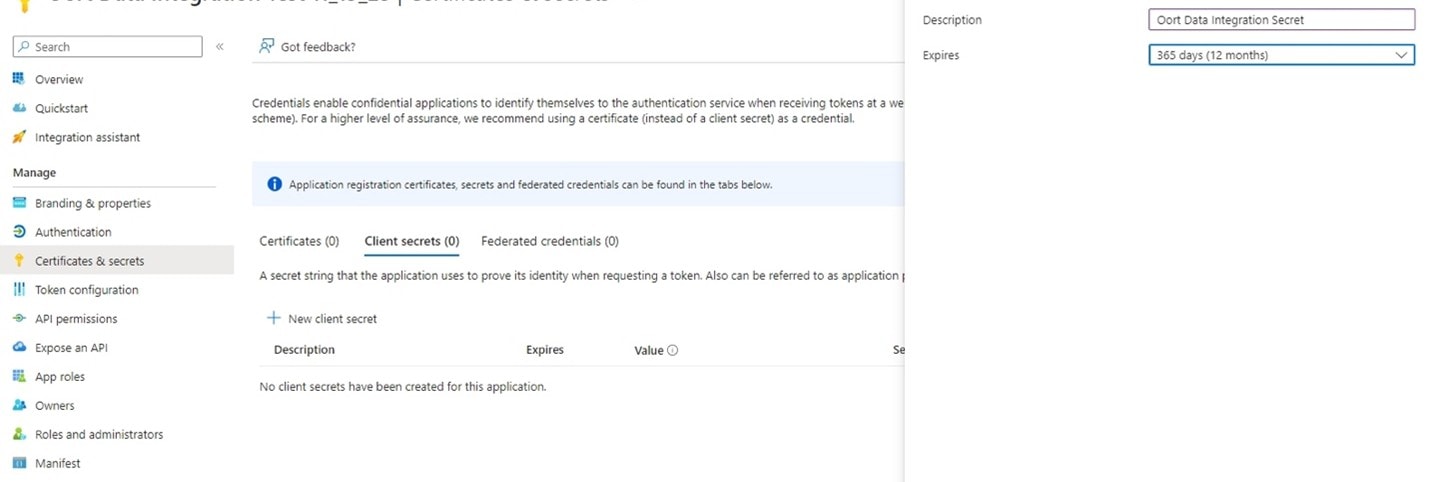
Select New client secret
-
Fill in the description using an easily recognizable and memorable name, such as "Cisco Identity Integration". Then select the desired Expiration timeframe for the secret (recommended: 365 days/12 months) and select Add
- Select the Copy icon to copy both the Secret Value and Secret ID and paste this information somewhere safe, as this will be needed to complete later steps of the integration set up in Cisco Identity
- Important: Once you leave this page you WILL NOT be able to generate the same key again. If the key is lost, you will need to delete the existing secret, create a new one and save that info
- After you have pasted the secret value and ID somewhere secure, proceed to the section of the documentation if you would like to ingest data regarding Azure-specific non-human identities and analyze access to Azure resources (recommended). Otherwise, proceed to the section to add the Entra ID integration to your Cisco Identity tenant and complete the integration set up process
Assign Azure RBAC Roles (Recommended)
For Cisco Identity to be able to monitor application access to your Azure Resources, improving its analysis and accuracy, the app also needs to be assigned an Azure Role. To do so, follow the steps below:
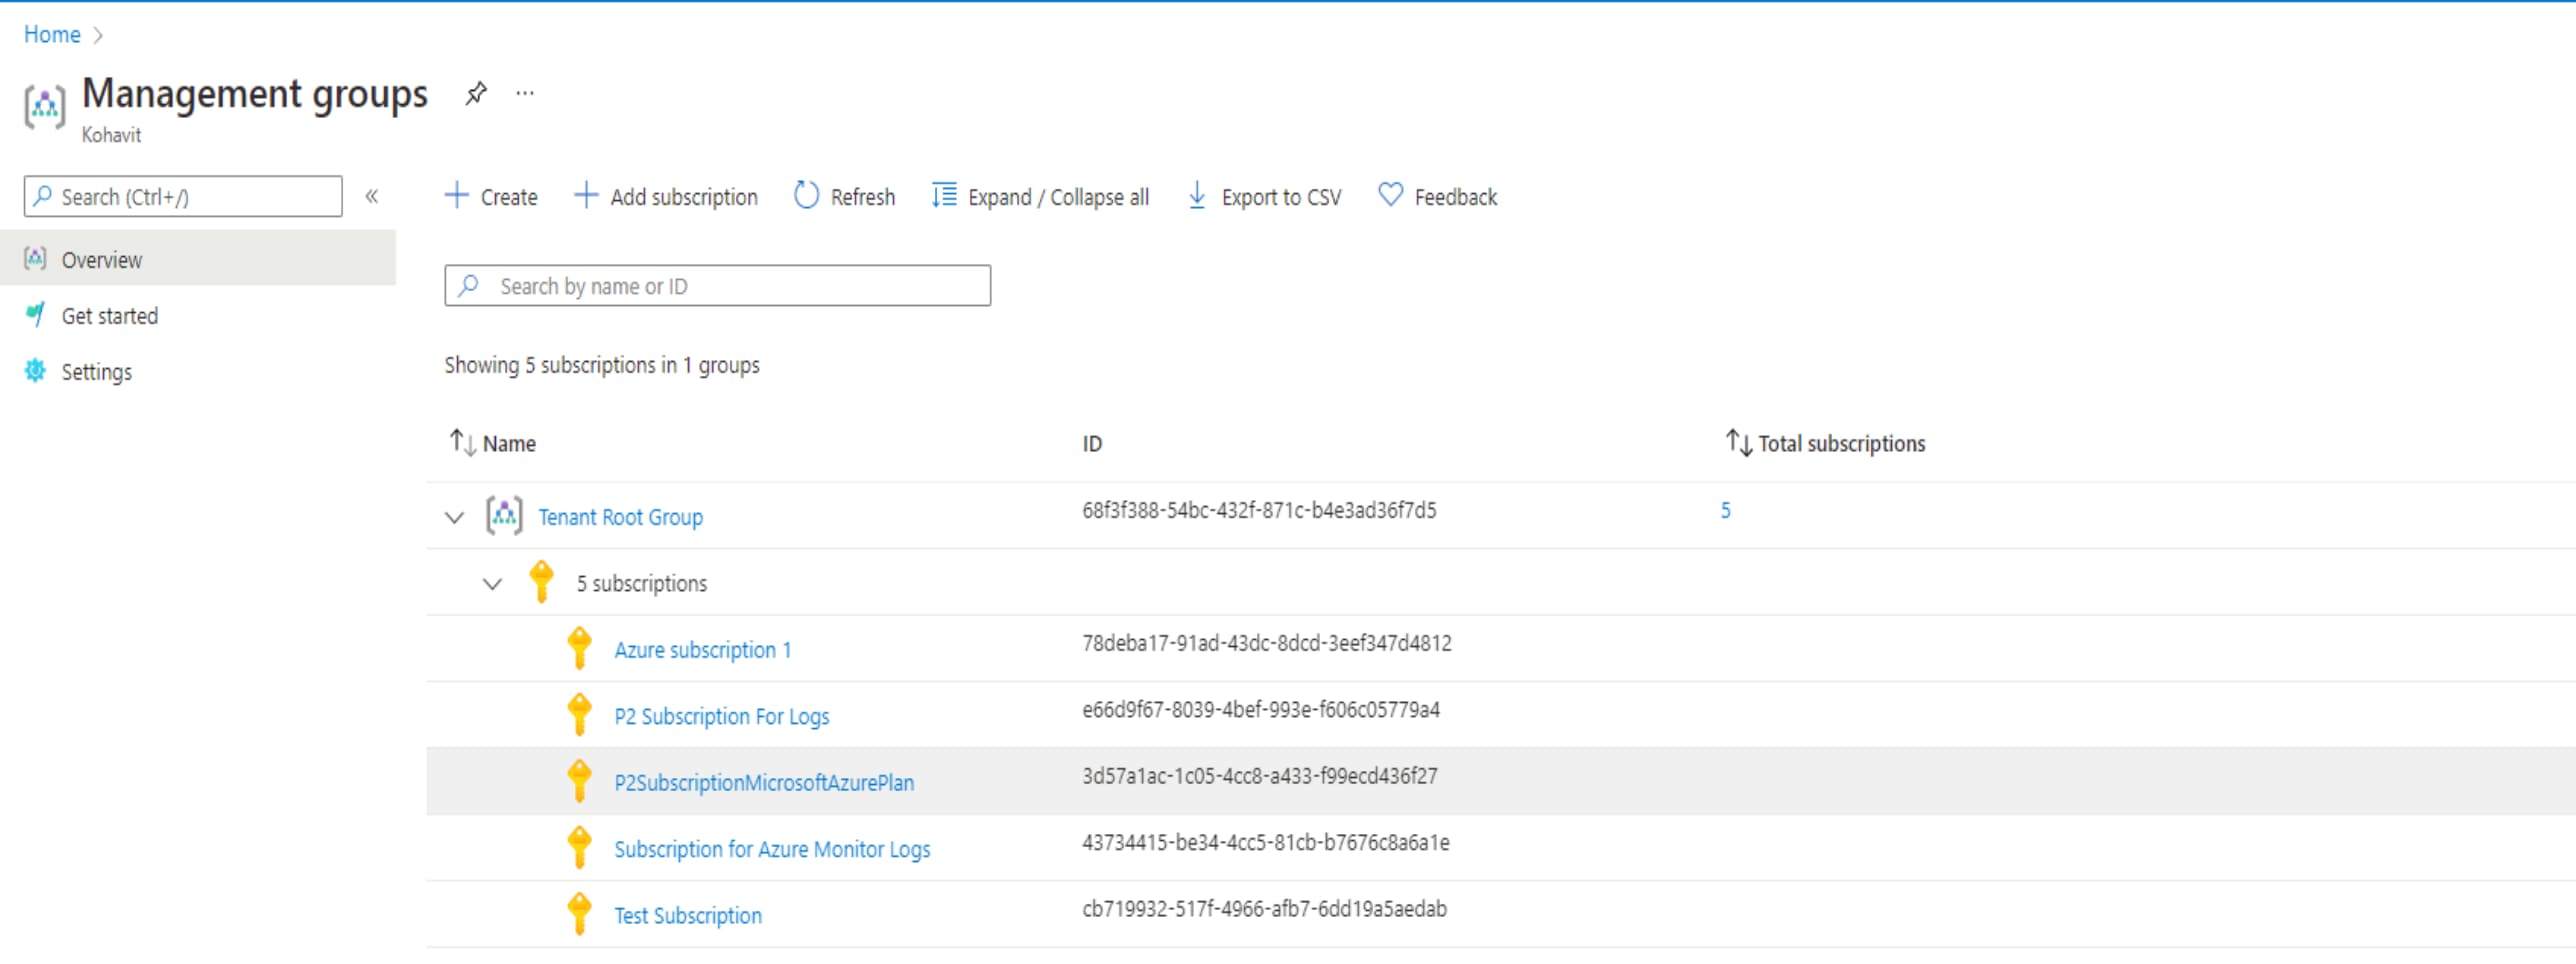
- Go to the Azure Portal and navigate to Management Groups
- Note: If you haven’t started working with Management Groups, select Get Started with Management Groups and wait a few minutes while Azure sets up your Root Management Group
- Select Tenant Root Group
- In the left panel, select Access control (IAM)
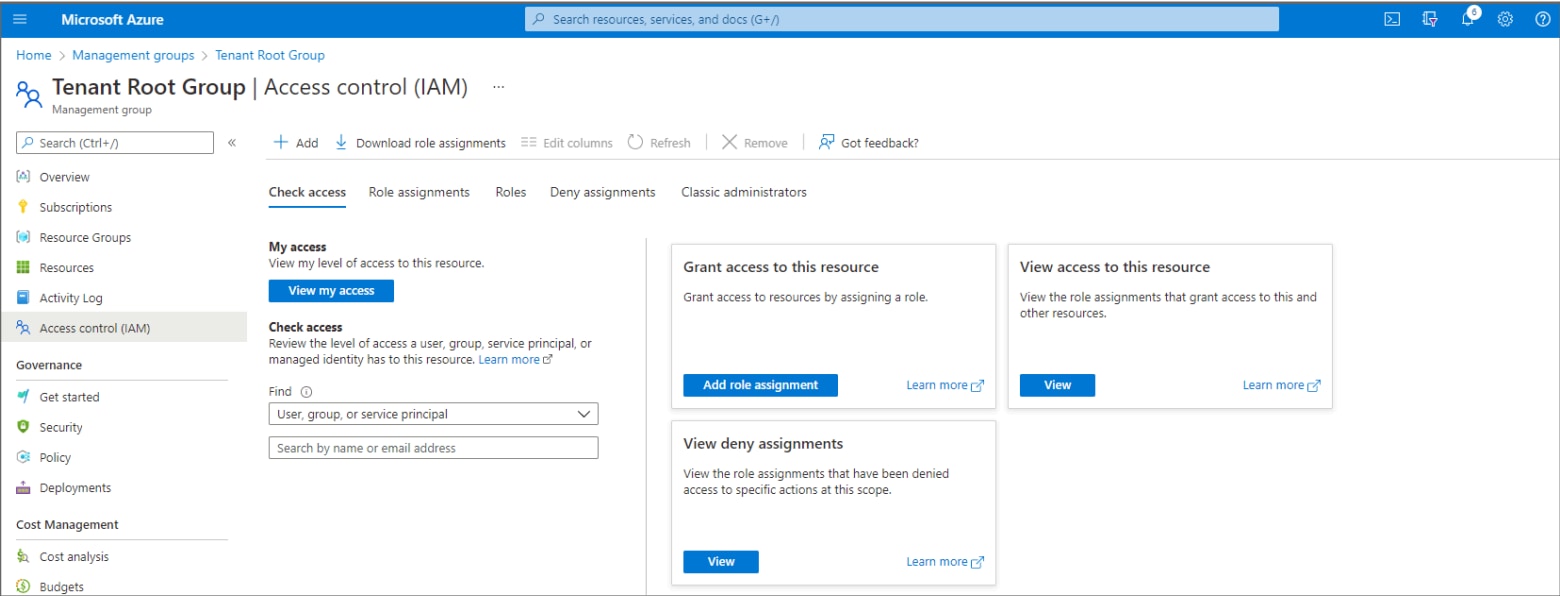
- Select Add and then choose Add role assignment
- Search for and choose the API Management Service Reader Role and select Next
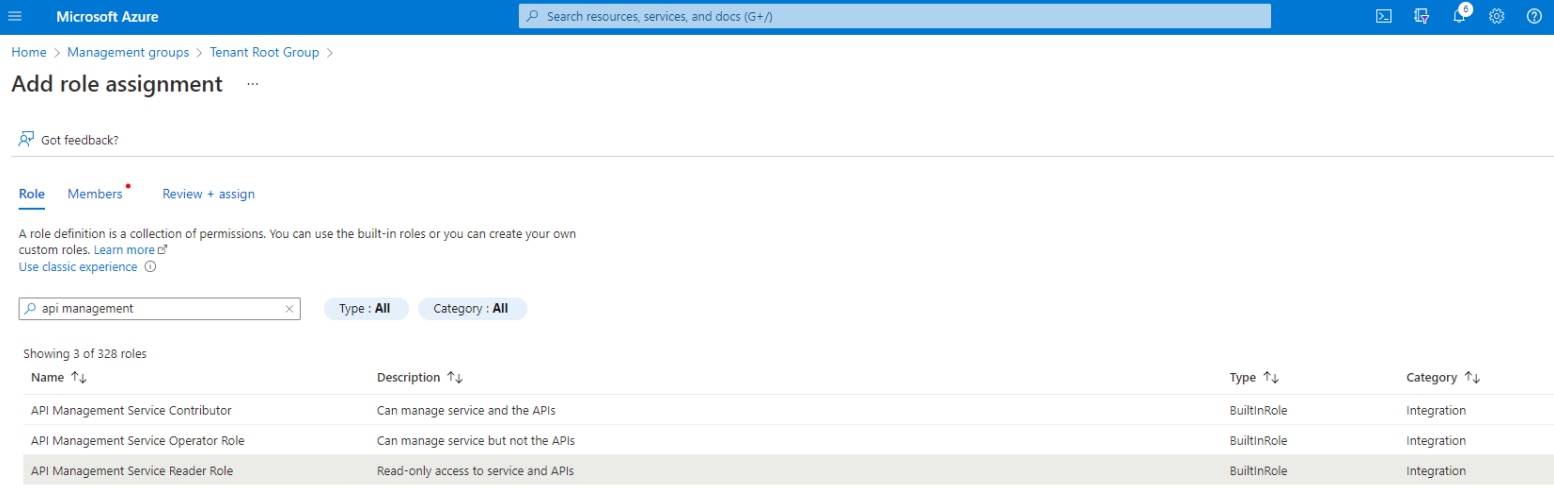
- Pick Assign access to “User, group or service principal”, and in + Select members, select the name given to your Cisco Identity integration app
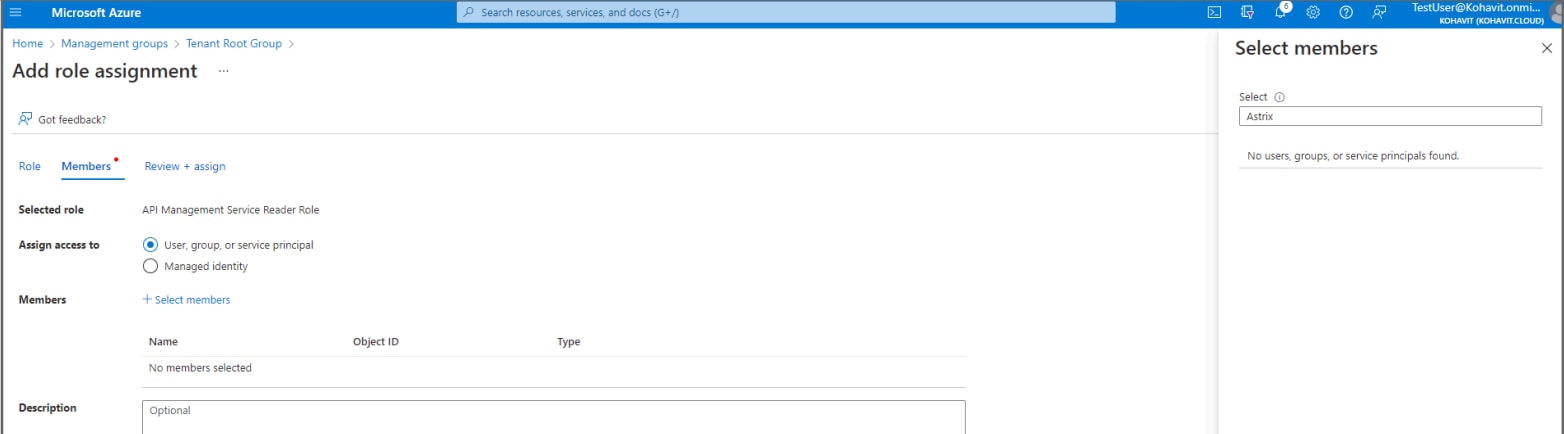
- Select Review + assign
- Repeat steps 3-7 for the “Reader” role assignment
- Proceed to the section. If you are not interested in Cisco Identity collecting Copilot data for analysis, skip to the section of the documentation (regardless of if you are following the manual registration process or the Marketplace app process)
Note: Note: You may have to first elevate your permissions to be able to assign an Azure role to the Root Management group.
If you get an error stating that you are not authorized to perform any of the above actions, please follow the instructions here, and then resume the instructions in this section from step 1 onwards
Enable Microsoft Copilot Data Ingestion (Recommended)
Configure Cisco Identity with your Microsoft Copilot Studio environments to enable it to securely collect and analyze data about your organization's Copilot Studio Agents so you can easily identity and manage risks across your AI Agent network.
A tenant-level administrator role in Entra is required to enumerate all Power Platform environments and register itself in each one. Someone with Global Administrator or Privileged Role Administrator needs to assign this role to any app registration used with this integration.
Register the application
- Within Entra Admin Panel, navigate to Microsoft Entra roles and administrators → Microsoft Entra roles and administrators
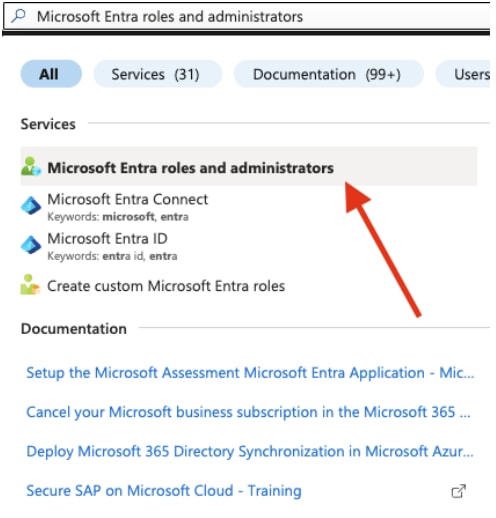
- Search for Power Platform Administrator (alternatively: Dynamics 365 Administrator) and select the role to open it

- Select Add Assignments
- Search for the Entra Integration app that you installed in prior steps, using the name you assigned it, then select the application
- Select Add and then wait a few minutes for the role assignment to propegate
- Next, you will need to register the Entra Integration app with the Power Platform Admin API. To do so, navigate to to https://portal.azure.com/#cloudshell/ and open a PowerShell shell
-
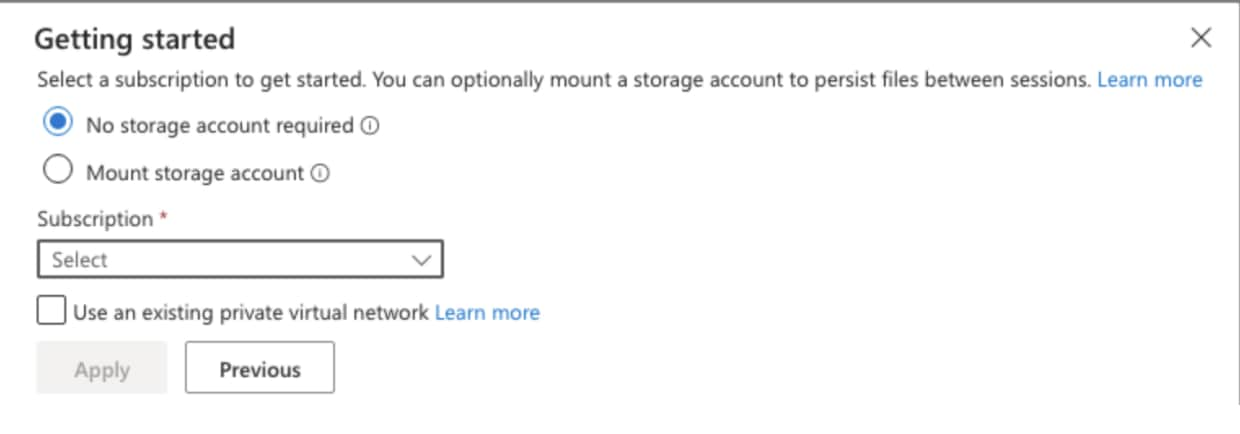
If this is your first time opening Cloud Shell, a "Getting started" dialog will appear asking you to select a subscription. Choose "No storage account required", then select any available Subscription from the dropdown, leave "Use an existing private virtual network" unchecked, and select Apply
-
Ensure that you are on PowerShell and not Bash. To switch to PowerShell, select Switch to PowerShell in the top left corner

- Run the following command
- The
Tenant IDis the ID of theTenant Root Group. It can be found by navigating to the Management Groups page in Azure - The
App Client IDis the valueApplication (client) IDof the Cisco Identity EntraID Data Integration app that your previously installed. It can be found by going to the App Registration page, selecting All Applications and then searching for the Cisco Identity EntraID Integration app using the name you assigned it - The
ClientPubmust stay as1950a258-227b-4e31-a9cf-717495945fc2. This is the public Microsoft ID and cannot be changed
$TenantId = '<YOUR_TENANT_ID>' # your Tenant ID from earlier section
$ApplicationId = '<YOUR_APPLICATION_APP_ID>' # the App Client ID from the earlier section
$ClientPub = '1950a258-227b-4e31-a9cf-717495945fc2' # leave as-is- Sign in via device code, open the printed URL and enter the following:
$authority = "https://login.microsoftonline.com/$TenantId/oauth2/v2.0"
$form = 'application/x-www-form-urlencoded'
$scope = 'https://api.bap.microsoft.com/.default offline_access'
$body = @{ client_id = $ClientPub; scope = $scope }
$dc = Invoke-RestMethod -Method Post -Uri "$authority/devicecode" -ContentType
$form -Body $body-
It will output the sign-in URL and one-time code. Visit the URL and enter the following to authorize the request:
$dc.message -
Wait for sign-in to complete, then capture the token:
$tokenBody = @{
 grant_type = 'urn:ietf:params:oauth:grant-type:device_code'
 client_id = $ClientPub
 device_code = $dc.device_code
}
$tokenUri = "$authority/token"
$userToken = $null
while (-not $userToken) {
 Start-Sleep -Seconds $dc.interval
 try {
 $resp = Invoke-RestMethod -Method Post -Uri $tokenUri -ContentType $form
-Body $tokenBody
 $userToken = $resp.access_token
 } catch {
 $err = ($_.ErrorDetails.Message | ConvertFrom-Json).error
 if ($err -ne 'authorization_pending') { throw }
 }
}- Register the app (grants admin-API access):
$bapUrl = 'https://api.bap.microsoft.com'
$path = 'providers/Microsoft.BusinessAppPlatform/adminApplications'
$uri = "$bapUrl/$path/$ApplicationId" + '?api-version=2020-10-01'
$headers = @{ Authorization = "Bearer $userToken" }
Invoke-RestMethod -Method Put -Uri $uri -Headers $headers
Power Platform - Configure access to Copilot data sources
In this section you will grant permissions for the Microsoft Copilot tables stored in Dataverse to the Entra app you previously created. This is done by running a Powershell script that performs actions against the Power Platform API and the Dynamics API. The script discovers every Dataverse-enabled environment in the tenant, creates a least-privilege "Cisco Identity Reader" role with read-only permissions on the Copilot tables, provisions an application user for the Identity Intellgience Security app, and assigns the correct role.
-
Download the first-time setup script here
-
Before running the script, set the following environment variables in your shell by creating a
.envfile in the same directory as the script you have just downloaded - never paste them into the script file: AZURE_TENANT_ID- the Tenant ID captured in earlier stepsAZURE_CLIENT_ID- the App Client ID captured in earlier stepsAZURE_CLIENT_SECRET- Generate a new client secret as explained in- Run the script with PowerShell 7.x:
set -a; source .env; set +a
pwsh -NoProfile -File ./Deploy-AstrixIntegration-Setup.ps1- Once complete, proceed to the section of the documentation
Create Microsoft Entra ID Integration in Cisco Identity
Next, we will add the integration in the Cisco Identity dashboard
- Login to the Cisco Identity Dashboard with an Cisco Identity Admin role
- Using the left hand menu bar, navigate to the Integrations page. Select the Add Integration button
- Locate the Microsoft Entra ID integration tile and select the Add Integration button within that tile
-
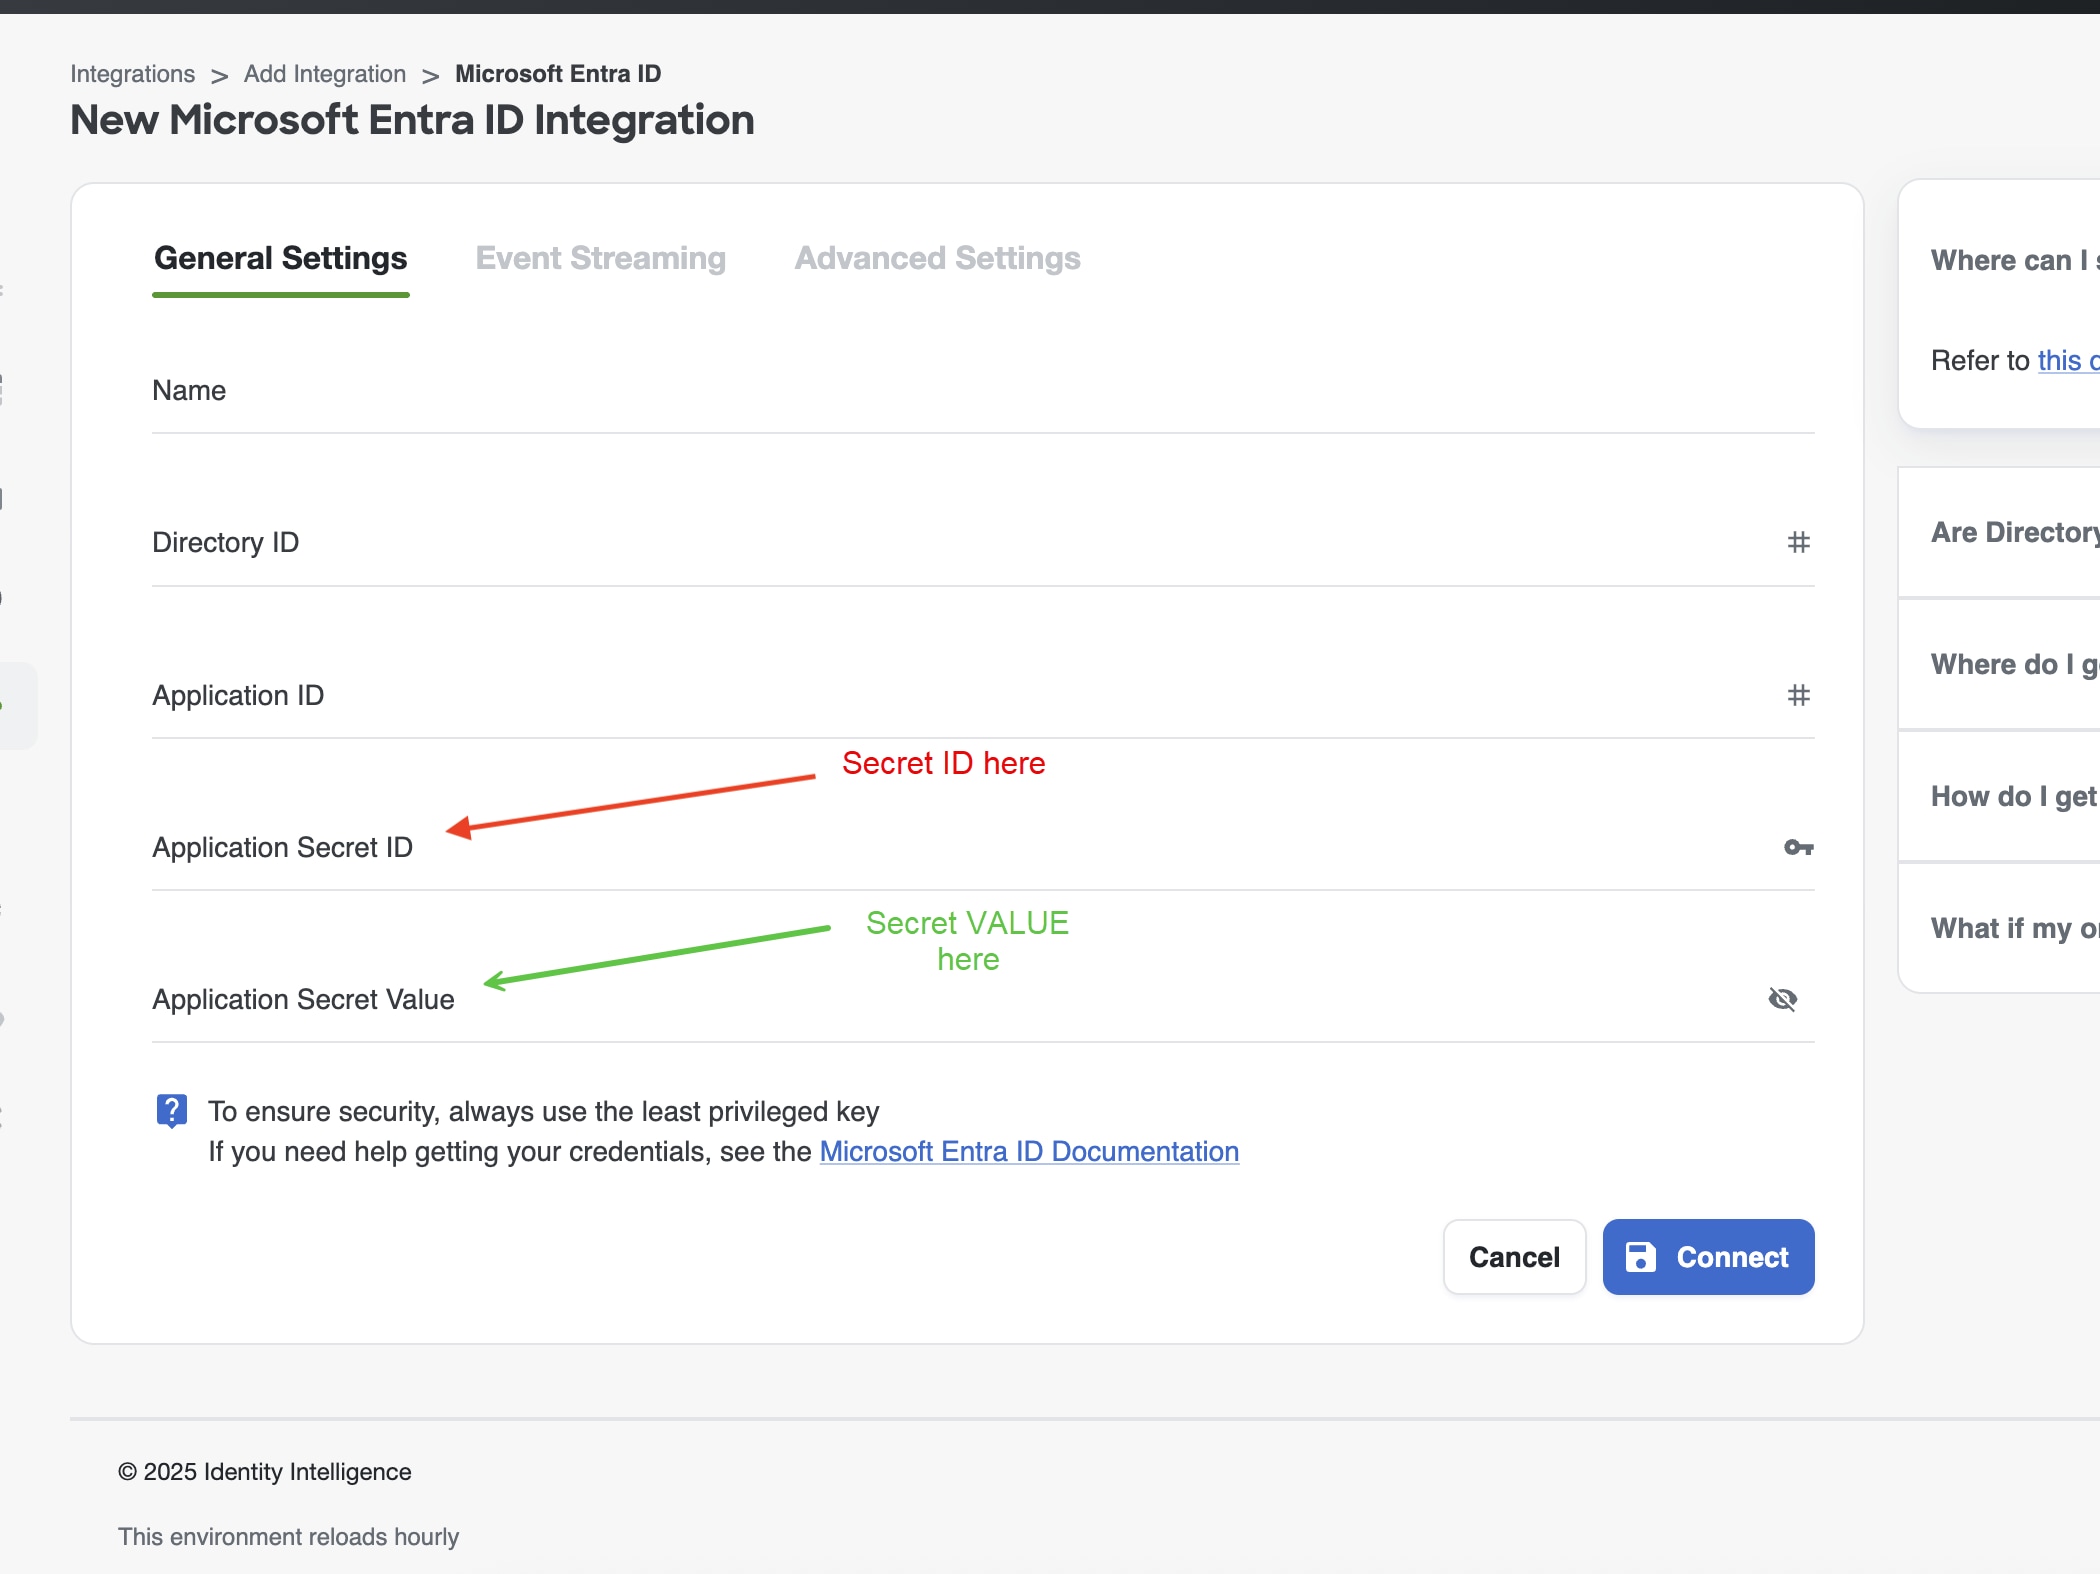
Fill in the details for the Microsoft Entra ID Integration. Enter the values saved from earlier on in the Microsoft Entra ID setup for all fields except Name
- Name - The display name for the Entra Integration that will be used to recognize the integration throughout Cisco Identity
- Directory ID
- Application ID
- Secret ID
- Secret VALUE
-
Select Connect to test the connectivity. This may take a few minutes to complete
- Once the connectivity test is successful, if desired, you can then review the data types that will be collected. Otherwise, proceed to step 7
- Navigate to the Advanced tab and review the responses to the questions at the top of the page to confirm they are answered correctly based on your Entra Licensing and permissions. Adjust the responses to any questions as needed. We highly recommend keeping your integration set to Managed mode. To read more about managed data types, refer to our [Managed Integrations] documentation
- Select Save. You will now see the integration listed on the Integrations page. Ensure that the integration's Connectivity Status is
Connected - On the right hand side of the row for your Entra integration, select the 3-dot button to open the pop-up menu. Select Collect Now to start the first data ingestion. You can also skip this step and it will happen automatically within the next 24 hours.
- If you would like to enable real-time event streaming, please continue to the [azure-active-directory-event-hub-streaming.md] article to follow the steps to create an Azure Event Hub integration
- Congratulations, you have successfully set up the Microsoft Entra ID Integration!
Update the Microsoft Entra ID API App (client) Secret
It is critical that your Entra ID Secret for the Cisco Identity integration does not expire. If the secret expires before it can be refreshed, Cisco Identity will not be able to collect data from Entra until a new secret is created. If too many days lapse before a new secret can be created and assigned, Cisco Identity will not be able to collect all the historical data and logs generated in that period, which will create gaps in your org's Entra data set.
You can proactively monitor the status of your Cisco Identity Microsoft Entra ID integration secret via the Cisco Identity Client Secret Expiring Soon check within Cisco Identity.
The default setting for this check is configured to start alerting 90 days prior to the secret's expiration date. We*_*highly_**recommend [enabling notifications on this check] to send alerts to the channel of your choosing (email, messaging system, webhooks) so that you can be made aware of the upcoming expiration date with sufficient notice to take the appropriate steps.
If your app (client) secret is expiring or has expired, you must:
- Navigate to Entra ID and delete the expiring/expired secret for the Cisco Identity data integration app
- Having multiple secrets on the same app, even if expired, is not security best practice
- Create a new app (client) secret and copy it somewhere secure as you will need it to complete later steps. Refer to the [Create Client Secret] section of this article for detailed instructions on how to make a new secret
- Navigate back to Cisco Identity and go to the Integrations page. Locate the existing Entra integration that needs to have its app (client) secret updated
- Select the 3-dot menu button on the right side of the row for the desired Integration. Select Edit Settings from the pop up menu
- If you have more than one Entra integration, you can confirm which Microsoft Entra ID app registration is the correct one by comparing the Entra ID integration app (client) ID listed in Cisco Identity console to the Client ID listed in Entra.
- Select the Reset Credentials button to remove the previous secret from Cisco Identity. Note: This does not delete the Secret in Entra. You must also delete the previous secret within Entra, which is the recommended best practice to avoid confusion about which secret is in use
- Paste the new Secret ID and Secret Value that were generated in Entra during earlier steps into the respective fields. Then select Save
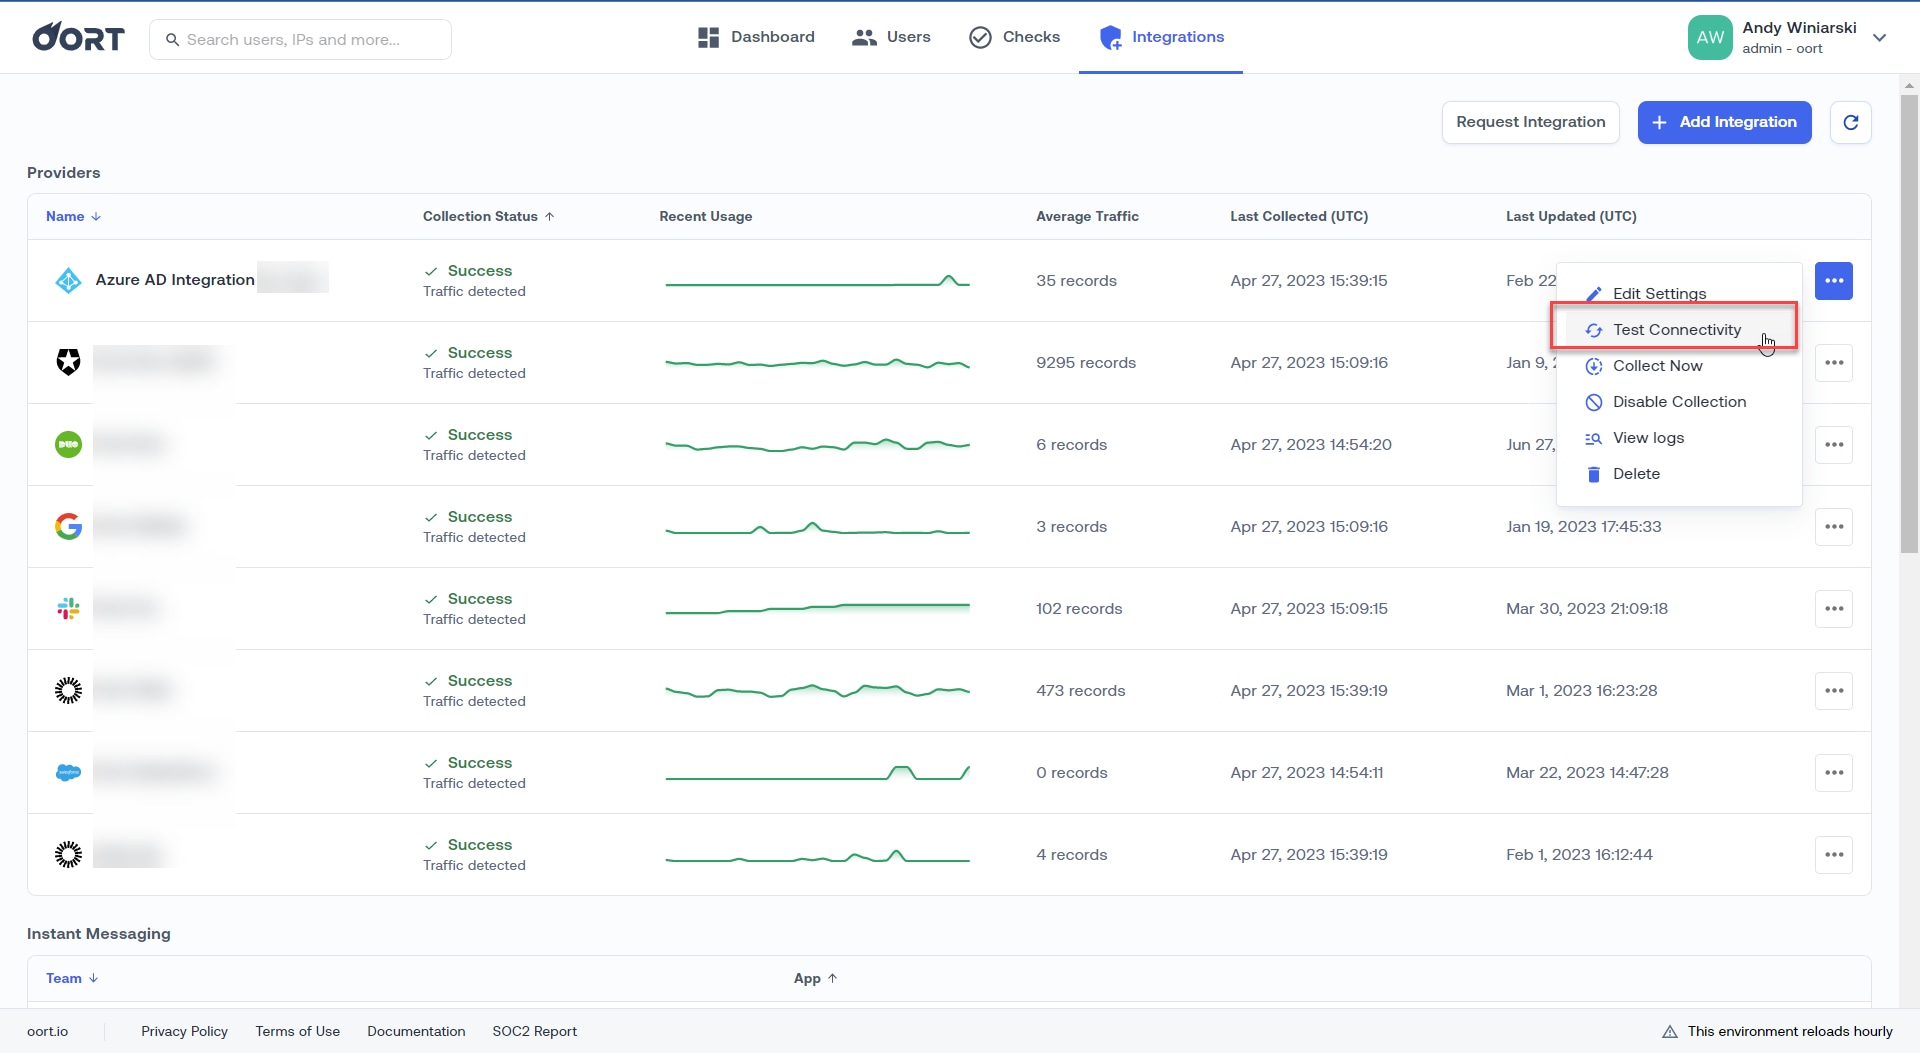
- Back on the Integrations page, select the 3-dot menu button for the Microsoft Entra ID integration and select Test Connectivity to verify the new secret is working correctly. This may take a few minutes to complete. The Connectivity column in the table of Integrations will change to Connected once the test is successful.
If it shows a status other than Connected, it means something was configured incorrectly and you will need to repeat the steps to resolve the error.
Azure Event Hub Log Streaming for Microsoft Entra ID
Overview
The Cisco identity security platform integrates with Azure AD tenants via the Graph API to collect user account information, device information, and sign-on and application activity.
The Microsoft Graph API is rate limited, meaning that platforms such as Cisco Identity can only pull a certain amount of data in a given interval before the API stops responding.
In some larger environments, Graph API does not provide enough bandwidth for the initial capture of historical user activity data (prior 30 days) or even the on-going user event data.
The solution to this limitation is to convert the sign-on activity data to an Azure Event Hub streaming model. Then the Cisco Identity platform can subscribe to that Hub and capture the events in that way. Enabling streaming also addresses one of the requirements for enabling more frequent notifications for event or behavioral based identity threats if desired.
What is an Azure Event Hub?
Per Microsoft documentation -
“Azure Event Hubs is a Big Data streaming platform and event ingestion service that can receive and process millions of events per second. Event Hubs can process and store events, data, or telemetry produced by distributed software and devices. Data sent to an event hub can be transformed and stored using any real-time analytics provider or batching/storage adapters.”
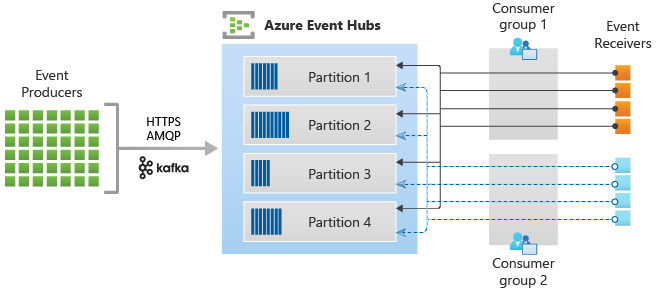
From the Microsoft Event Hubs overview page, the diagram below depicts the high-level architecture and data flow.
In this diagram, the Event Producer (green) on the left side would be the Azure AD tenant and the Event Receiver on the right side would be your unique Cisco Identity cloud tenant.
Deploy Event Hub Streaming from Azure Marketplace (Beta Release)
Prerequisites
- A completed and functioning [azure-active-directory-integration.md] in your Cisco Identity tenant
- Azure admin role / permissions sufficient to create the objects below.
- An existing EMPTY resource group to deploy this Azure Marketplace application to (in case of any resource group-level policies that could cause issues or conflicts).
- Microsoft Entra ID B2C is not supported.
Event Hub Tier and Scaling
The Beta Marketplace app will create the Event Hub object with the Standard Tier. Standard tier provides a maximum of 40 throughput units. For very, very large enterprises, if you feel Standard tier is not sufficient and a higher tier like the Premium tier is required, follow the below to manually create the Event Hub Namespace and Event Hub object with that their.
For Azure Event Hub pricing, please contact your Microsoft representative or see this article.
Install Azure Marketplace Application
When pre-requisites steps are in place, proceed to install the Entra ID integration package to Azure.
- In Azure, click on Create a Resource.
- Search for Cisco Identity and select Log Streaming
- Select the Free Plan option and Create it
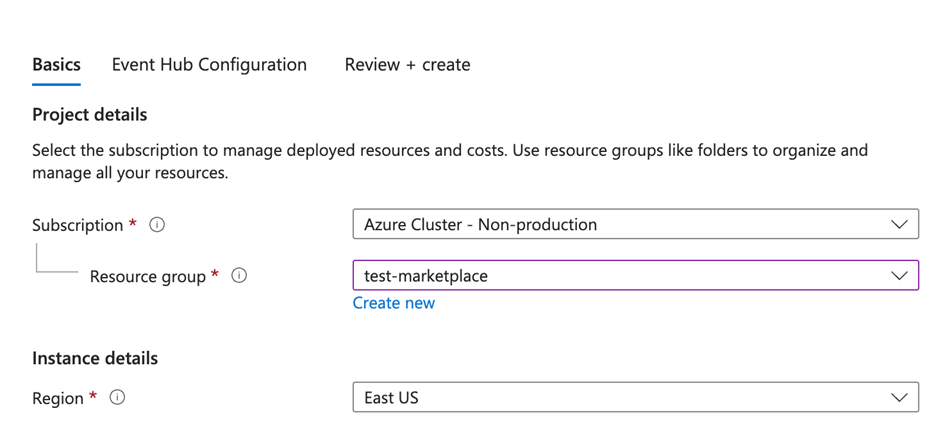
- Enter all the details into the input boxes as per the table and example screenshot below.
NOTE: As mentioned above, the Azure Resource group specified here to deploy Marketplace offer MUST be empty. (It cannot have other existing resources already contained within it.)
| Input Field | Description |
|---|---|
| Region/location | Which Azure region Deployment Script should be deployed |
| Event Hub Namespace Name | Name of Event Hub Namespace to be created |
| Event Hub Name | Name for Event Hub |
| Consumer Group Name | Name for Consumer Group inside the Event Hub (Using $Default is acceptable) |
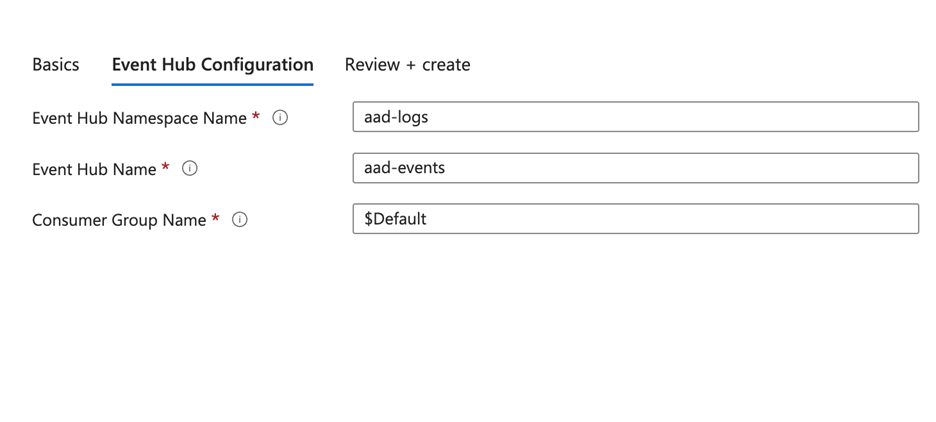
- Click Create
- The following objects will have been created in the Azure environment:
- Event Hub Namespace
- Event Hub
- Consumer Group
Configure Event Hub Settings
The Marketplace app will create the Event Hub object with the Standard Tier with 1 Throughput Unit.
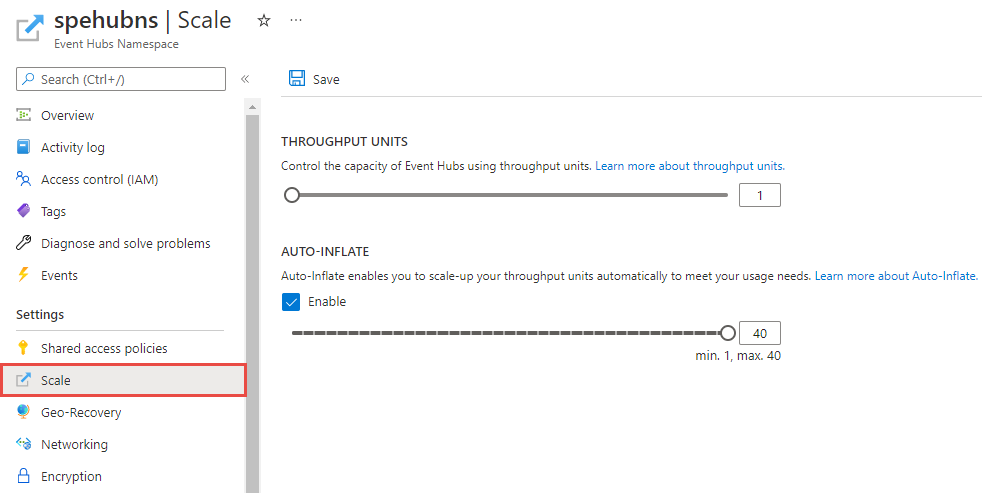
Auto-infate is not enabled by default, but it should be, as one TU will not be sufficient for most mid to large organizations. See Event Hub Scalability and Automatically Scale-up Event Hub for more information.
To do so:
- Navigate to the Event Hub Namespace, expand the Settings menu, and select the Scale pane from the left hand menu.
- Under Auto-Inflate, check the Enable box and set the max throughput units.
- Click Save.
- Optional: When you apply the auto inflate configuration to increase throughput units, the Event Hubs service emits diagnostic logs that give you information about why and when the throughput increased. To enable diagnostic logging for an event hub, select Diagnostic settings on the left menu on the Event Hub page in the Azure portal. For more information, see Set up diagnostic logs for an Azure event hub.
Connect Entra ID logs to the Event Hub
Connect Entra ID logs to the Event Hub using the Microsoft instructions in this link.
High-level steps and important notes:
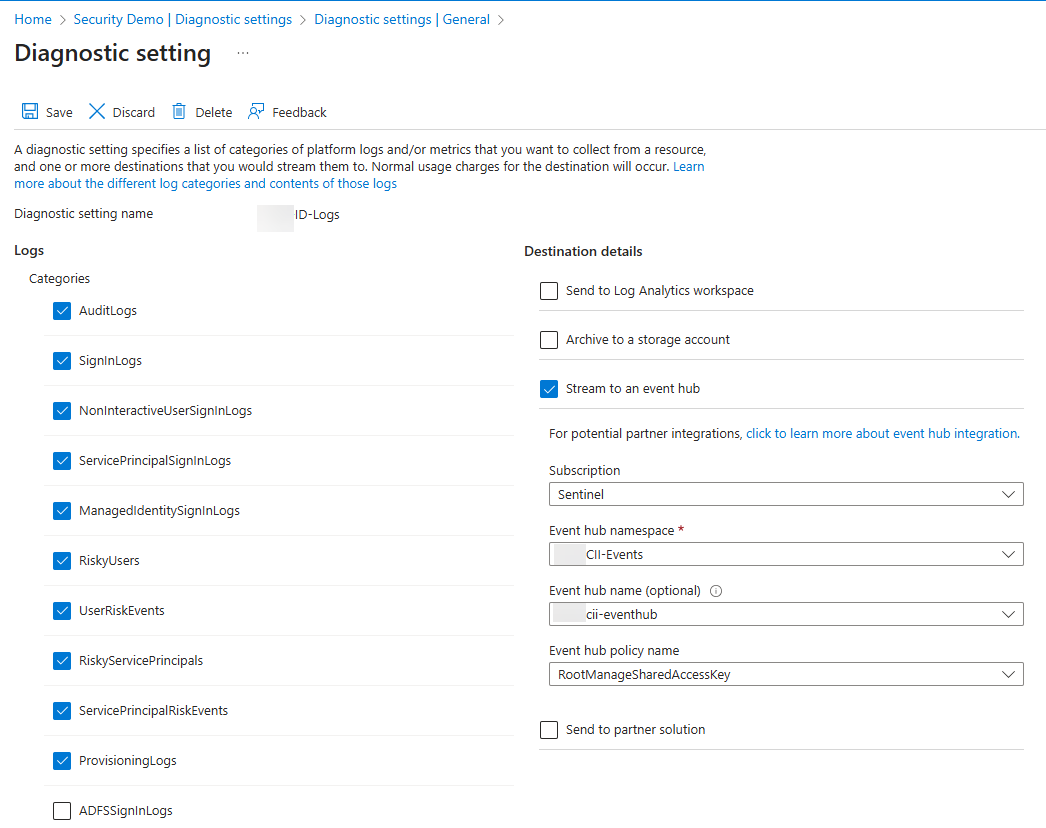
- Select the following Event types to stream (screenshot below) and select the Event Hub namespace and Event Hub created in the steps above.
- Also, use the RootManageSharedAccessKey or another key with write permissions to the event hub namespace
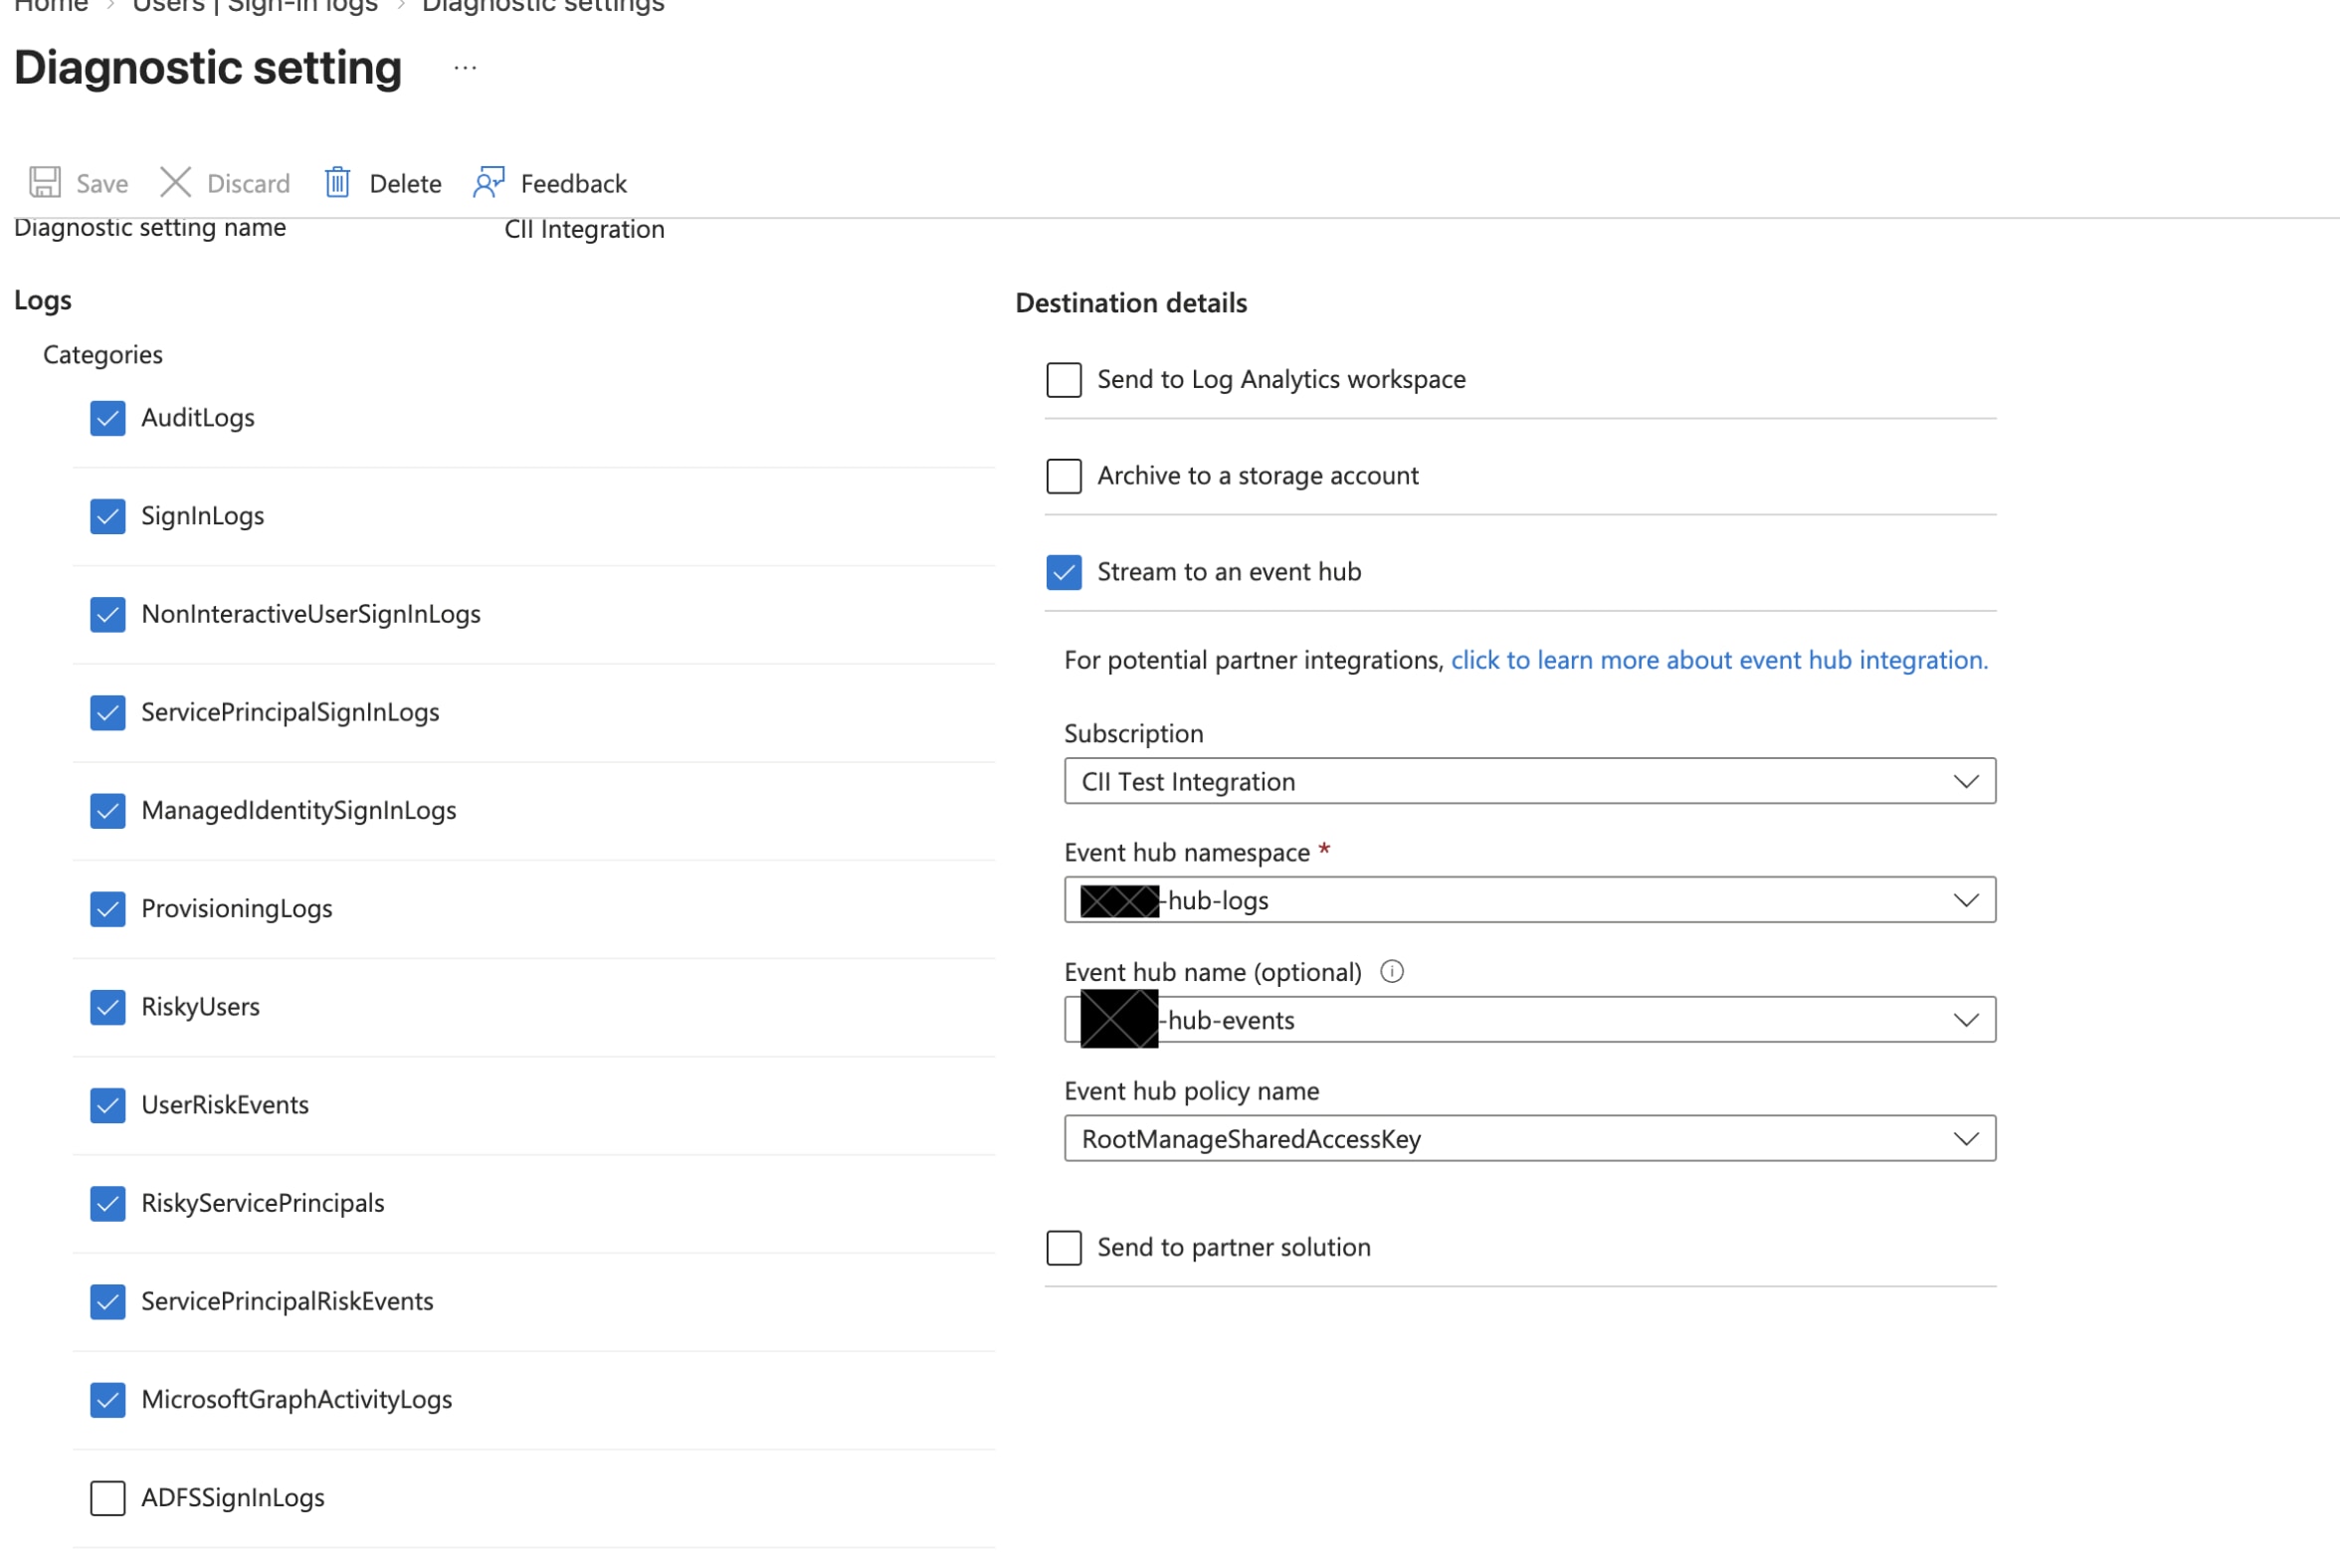
- Save and confirm that events after visible in the Event Hub after ~15 min
Proceed to the section to finish the setup Event Hub setup.
Manual Azure Event Hub Setup Process
Note: This section contains the manual steps required to setup the Event Hub object for event streaming. Please use the steps above unless you require a bespoke configuration, such as an Event Hub tier other than Standard tier.
To configure an Azure Event Hub and integrate it with Azure AD involves the following high-level steps.
Step 1 - Create an Event Hub in Azure
Open and follow these Microsoft instructions - Event Hub setup - to complete initial the initial setup of the Event Hub namespace and event hub object.
High-level steps and notes:
- Create a Resource Group in Azure. A Resource Group is associated with a subscription in Azure. You may already have a Resource Group associated with Azure AD or identity security that you want to use for this purpose.
-
Create an Event Hub namespace. Within the Event Hub namespace create, you will choose the Resource Group and Subscription. You also need to choose the Pricing Tier and Throughput units.
For test environments and smaller production environments, Basic will likely suffice.
For larger production environments, Standard should be selected, with the Enable Auto-Inflate selected.
See Event Hub Scalability and Automatically Scale-up Event Hub for more information. For Azure Event Hub pricing, please contact your Microsoft representative or see this article.
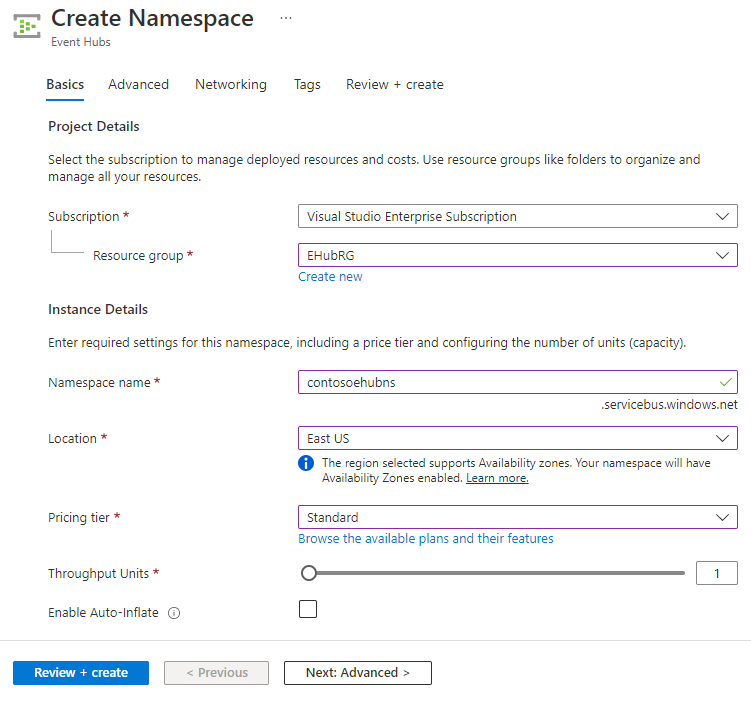
-
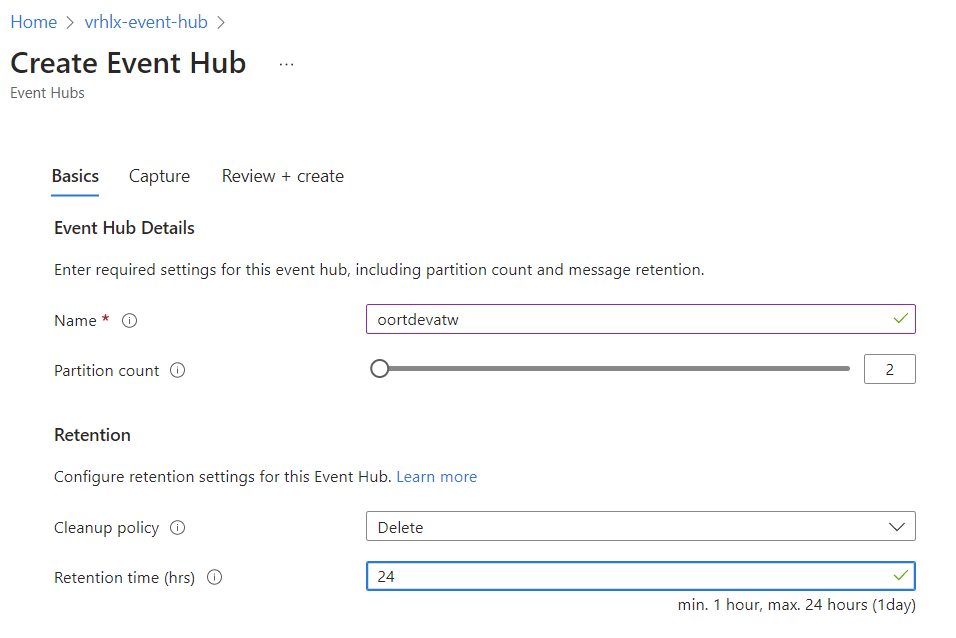
Create the Event Hub object. The default number of partitions will suffice. For the Retention period, set the time to a higher value than the default 1 hr, up to 24 hrs for Basic tier event hub namespaces.
-
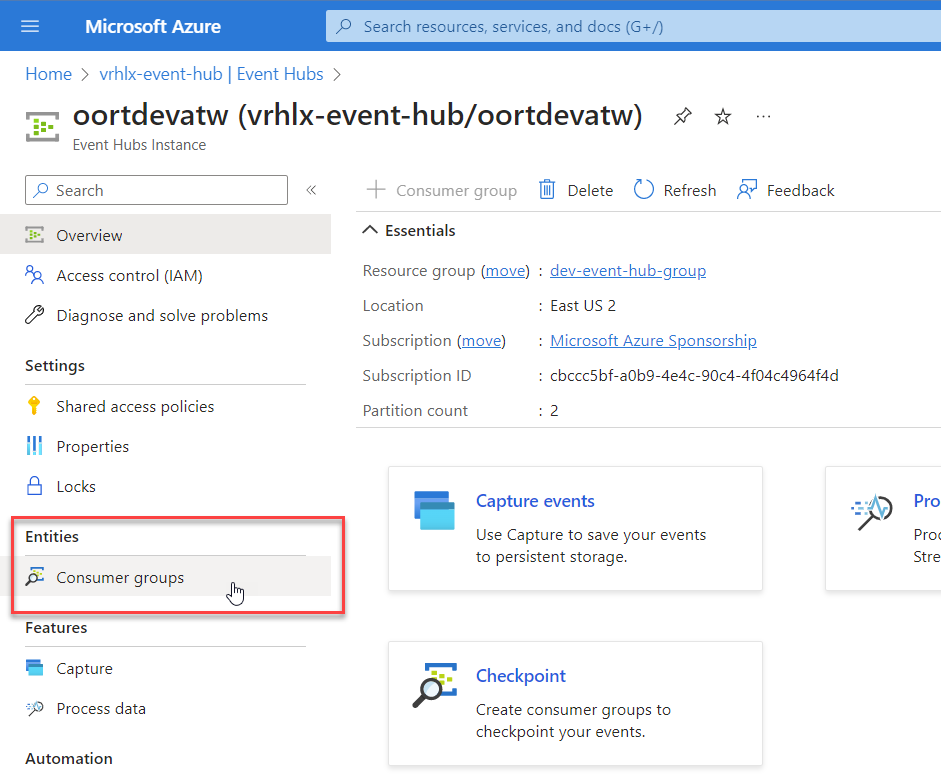
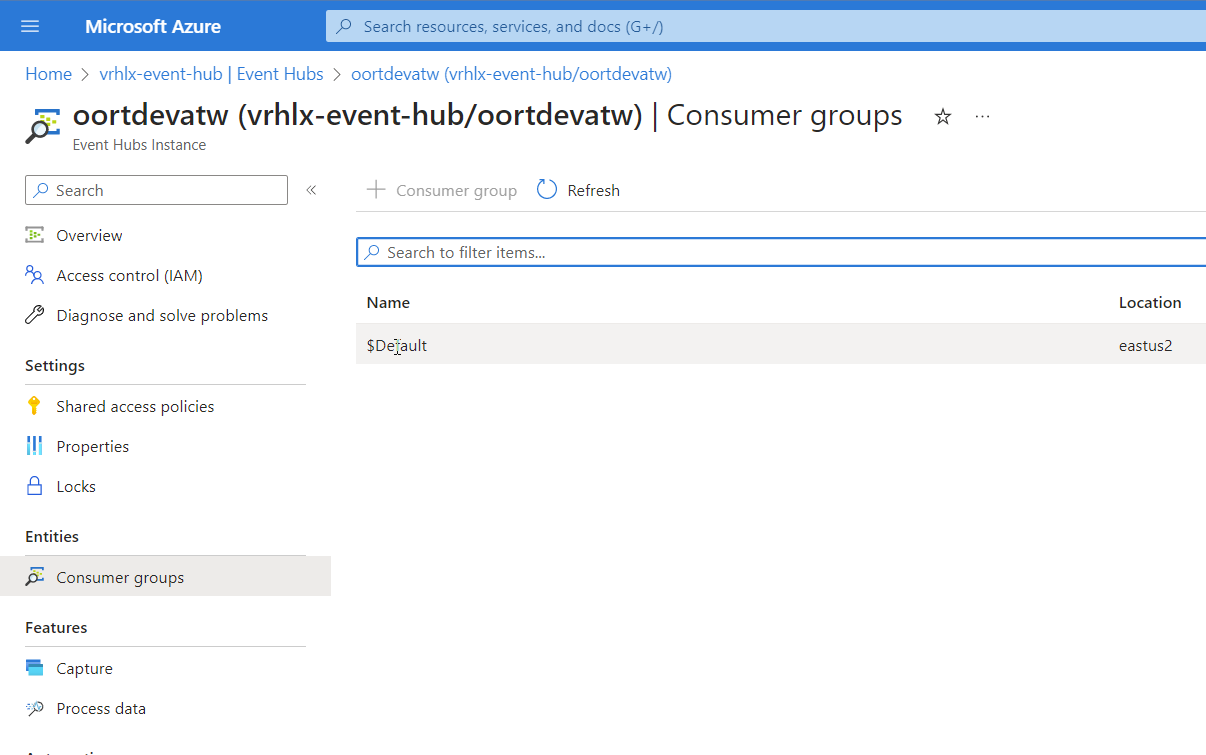
Create a Consumer Group for the event hub. For Basic tier event hubs, the $Default consumer group is created automatically and can be used. For Standard tier, different consumer groups can be created if desired.
Step 2 - Connect Azure AD logs to the Event Hub
Connect Azure AD logs to the Event Hub using the Microsoft instructions in this link.
High-level steps and important notes:
- Configure Azure AD event logs to export to your new Event Hub
-
Select the following Event types to stream (screenshot below) and select the Event Hub namespace and Event Hub created in the steps above. Also, use the RootManageSharedAccessKey or another key with write permissions to the event hub namespace
-
Save and confirm that events after visible in the Event Hub after ~15 min
Create a shared access key policy
Note that Shared Access Policies can be created at the Event Hub namespace level or the Event Hub object itself. In this example, we'll create a policy at the namespace level.
-
Within the Event Hub namespace, select Shared Access Policies and then click Add.
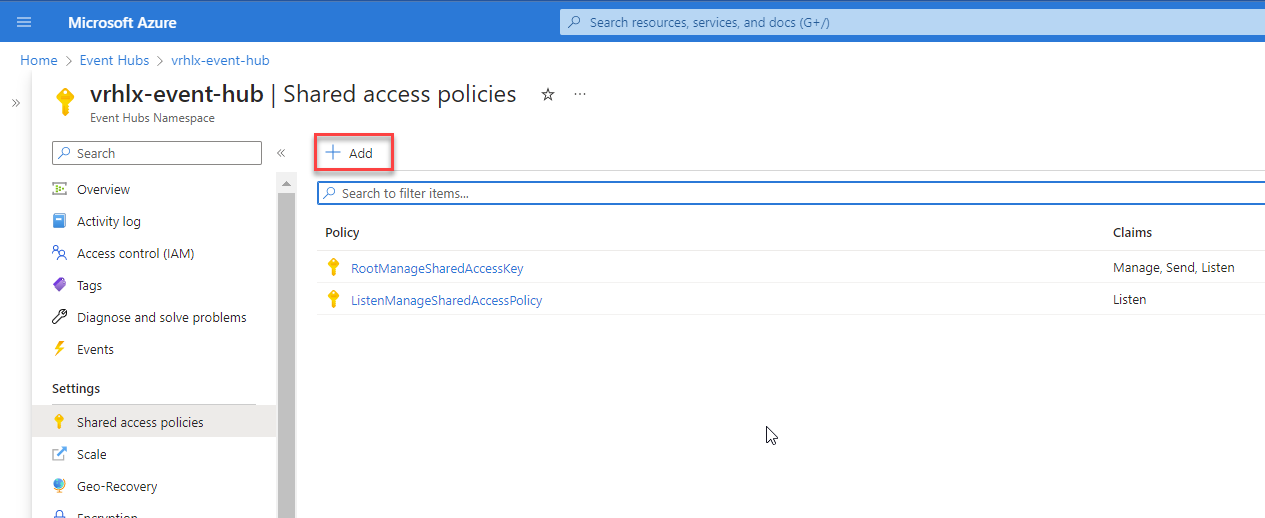
-
Give the policy a name, select Listen permissions and click Create.
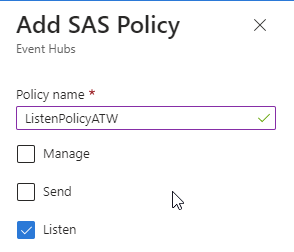
-
Click on the new policy and note the Primary key for use in the next steps.
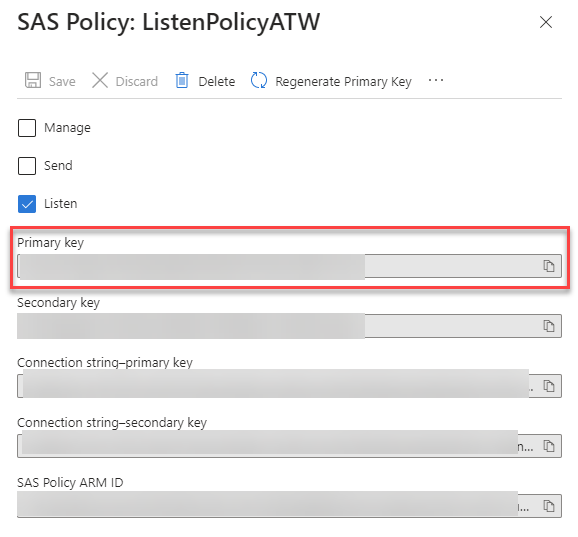
Cisco Identity Tenant Configuration for Azure Event Hub
The next step is to connect the Event Hub to the Cisco Identity tenant.
Note: Note - this section assumes that the Entra ID data integration is already in place for your tenant. If it is not, complete that integration first.
-
In the Cisco Identity console, under the existing Entra ID integration, select Edit Settings and navigate to the Event Streaming tab.
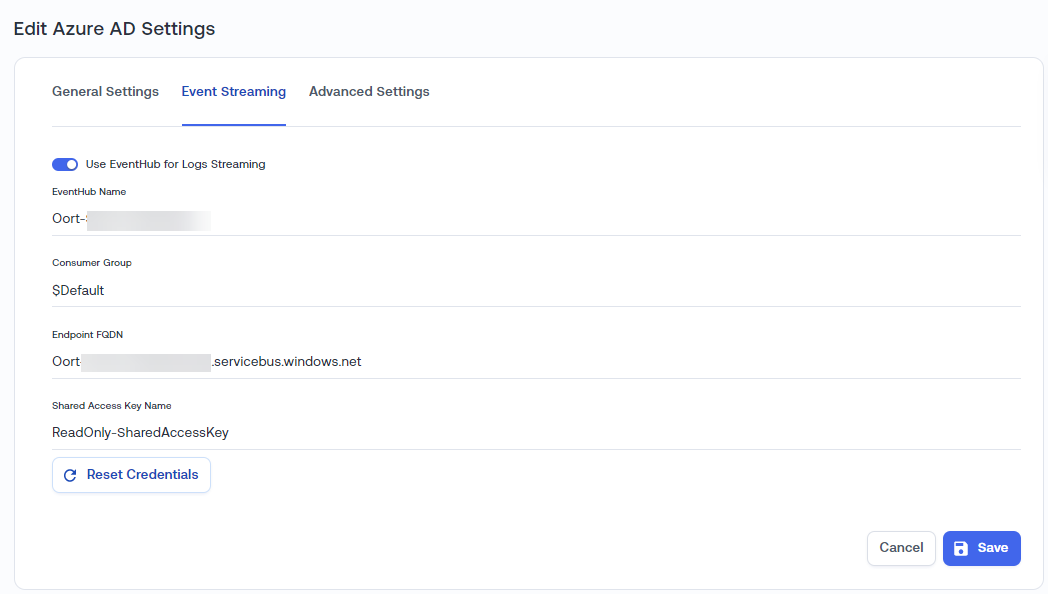
-
Toggle the slider button to Use EventHub for Logs Streaming to ON.
- Enter the required information -
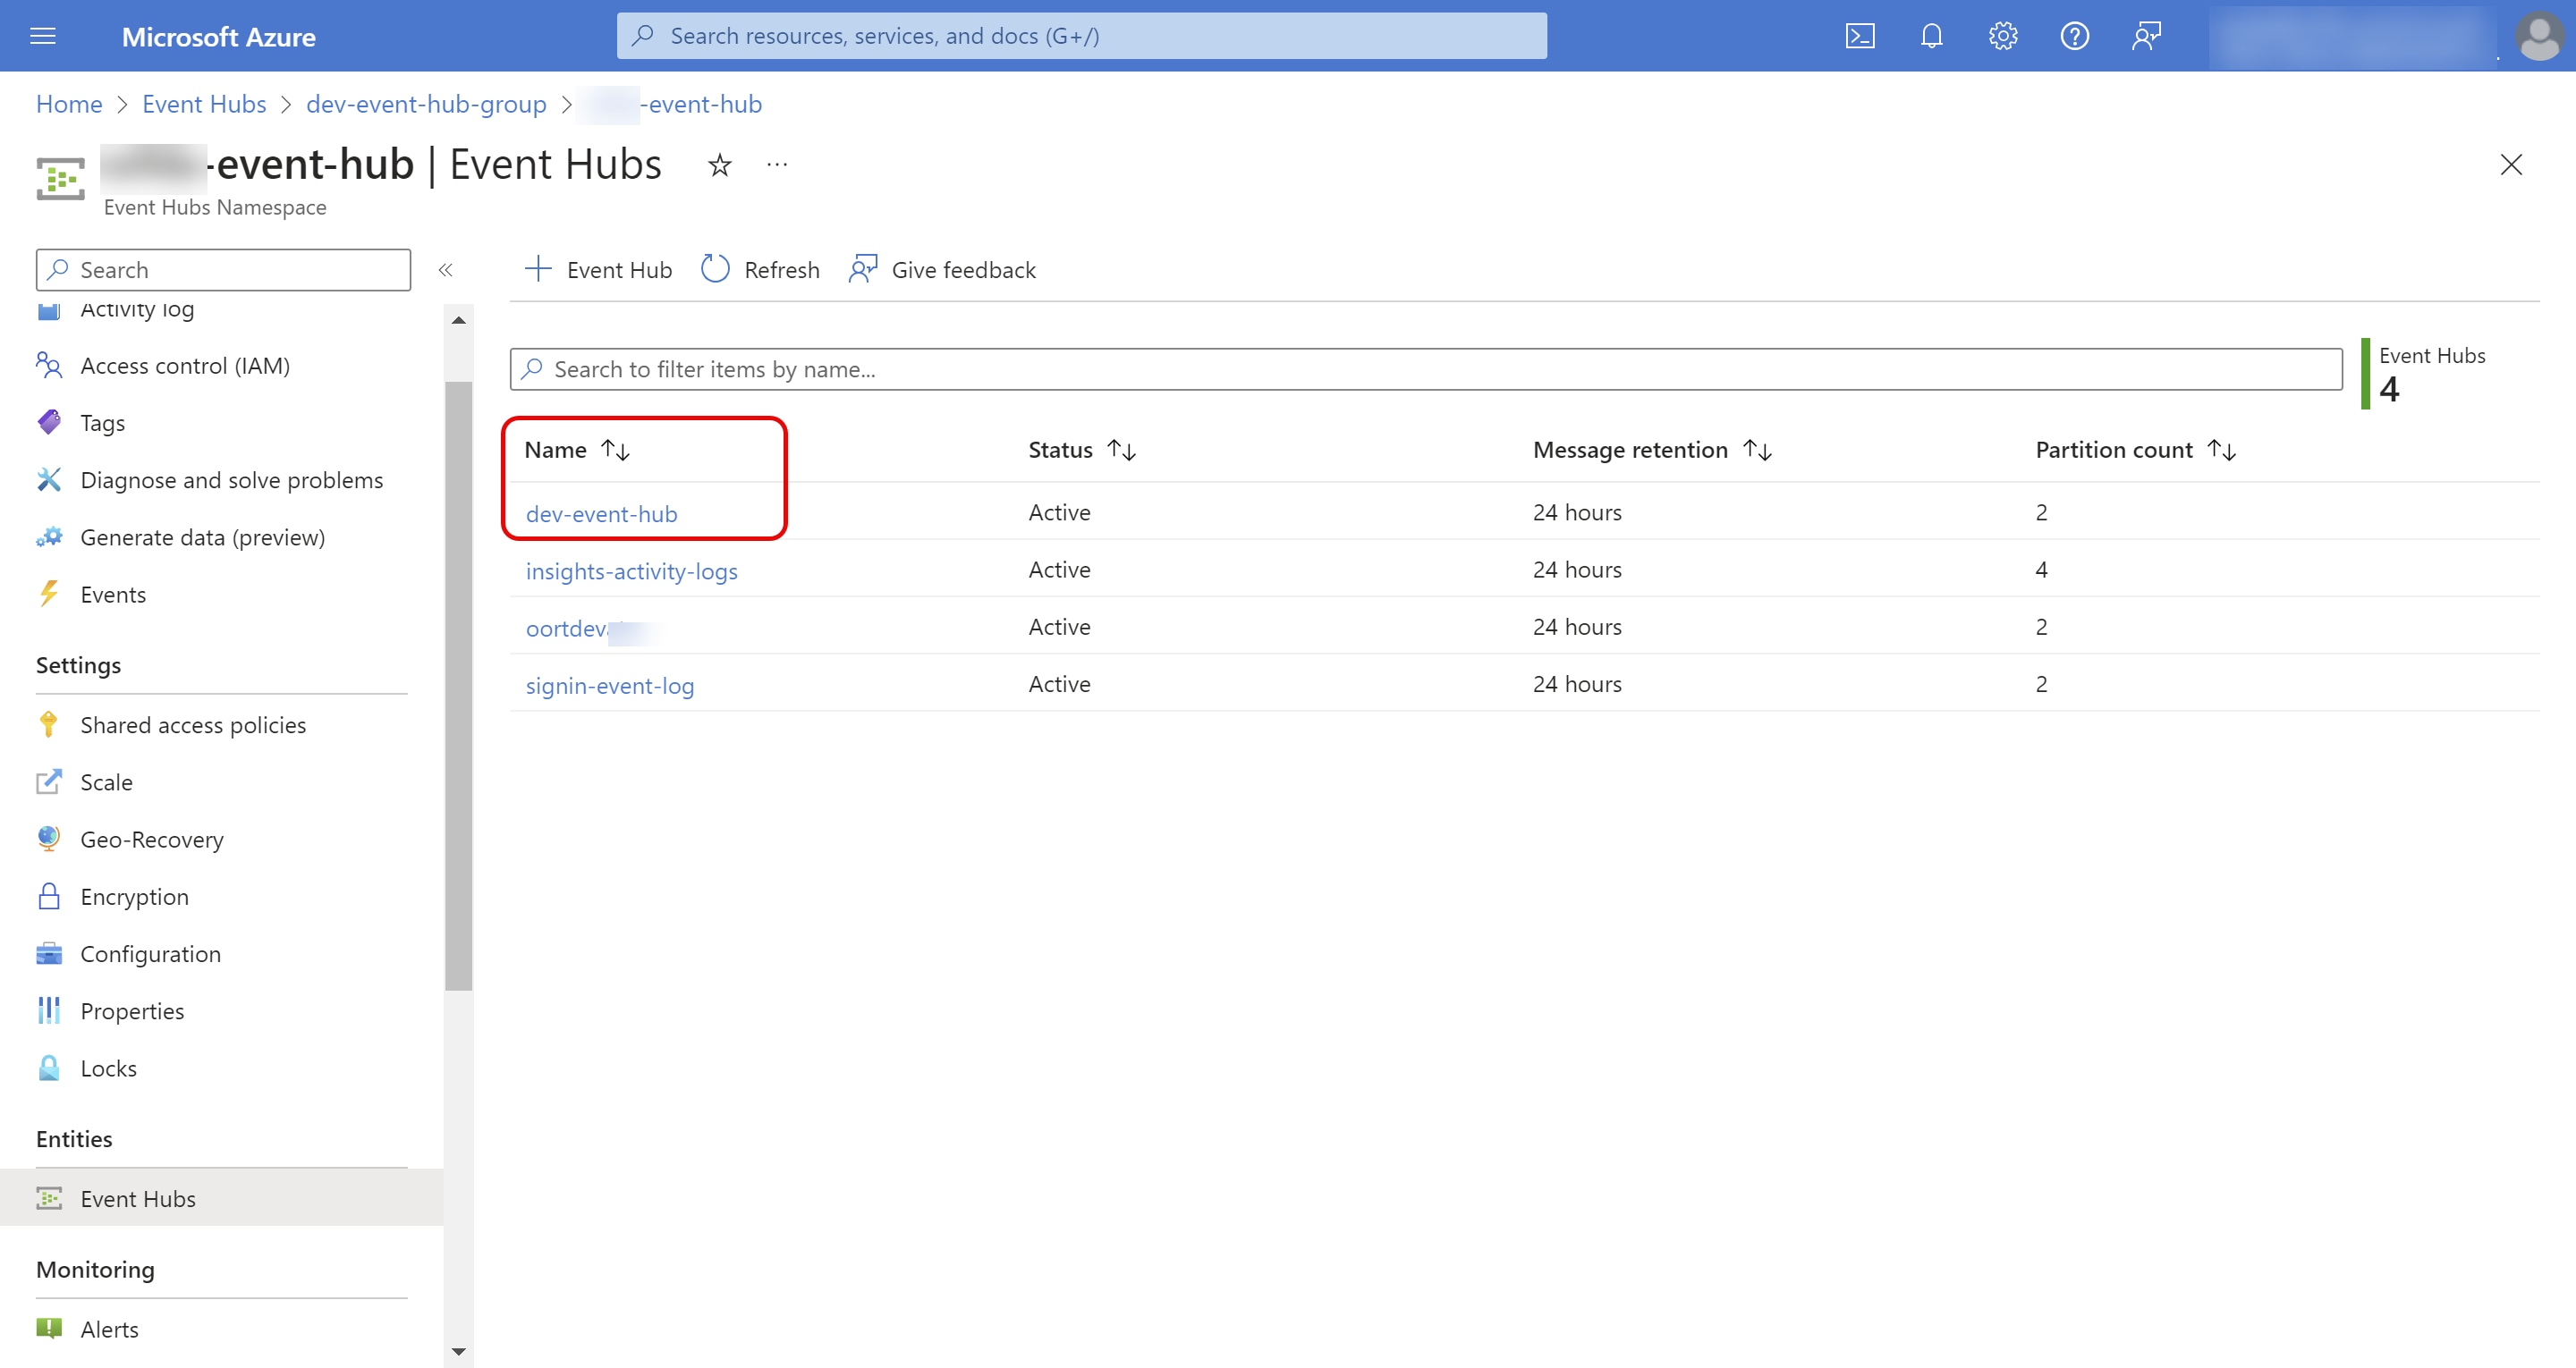
- EventHub Name - NOTE: this field is NOT just a display name. This name needs to match the name of the Event Hub object created under your Event Hub Namespace in Azure. In the screenshot below, you would enter
dev-event-hubif that was the specific object you had created and configured.
- Consumer Group (if not using $Default group)
- Endpoint FQDN - this is typically of the form
.servicebus.windows.net - Shared Access Policy Name
- Shared Access Primary Key Value
Click Save to save the configuration.
Troubleshooting
In the event that the following error is received when trying to collect data from the Event Hub:
[ERROR] CNT: Failed to receive event hub data MessagingError: The supplied sequence number '0' is invalid. The last sequence number in the system is '-1'The quickest solution to at this time is to simply delete the Event Hub object (not the entire Event Hub namespace) and recreate it. We would suggest altering the Event Hub name slightly and updating the event streaming configuration in the Cisco Identity Entra ID integration, just for easy identification between the previous and current hubs.
Azure Sentinel SIEM
Overview
Cisco Identity’s platform can tie into existing Sentinel workflows often used by Security Teams. This document will walk you through the process of setting up the App Registration inside of Azure AD.
Azure Sentinel Integration - High-level Steps
This article follows the Microsoft Azure Sentinel tutorial - Send data to Azure Monitor Logs by using a REST API (Azure Portal).
The following items will be needed to complete the integration inside of the Cisco Identity Console:
- Name / Description - (What Azure Sentinel instance are you connecting to?)
- Directory (tenant) ID
- Application (client) ID
- Application (client) Secret
- Logs ingestion Endpoint URI
- Custom Log Table Name
- Data Collection Rule Immutable ID
The sections below go into more detail on each of the steps.
Azure Sentinel Configuration
- Configure Azure application registration to authenticate against the API, follow the instructions.
Note the Application (client) ID, Directory (tenant) ID and secret value for further setup.
- Create data collection endpoint, follow the instructions.
Note the Logs ingestion URI for further setup.
- Add a custom log table, follow the instructions. Note the table name for further setup and be aware that there is
_CLadded automatically to the table name. We will need the full name with the_CLsuffix. -
After clicking Next, the next step is to parse and filter a sample data set. In the Schema and transformation screen, review the Microsoft instructions as a reference and then complete the process using the data and steps below.
Do not use the sample data and transform code provided in the Microsoft article. Use the the steps below.
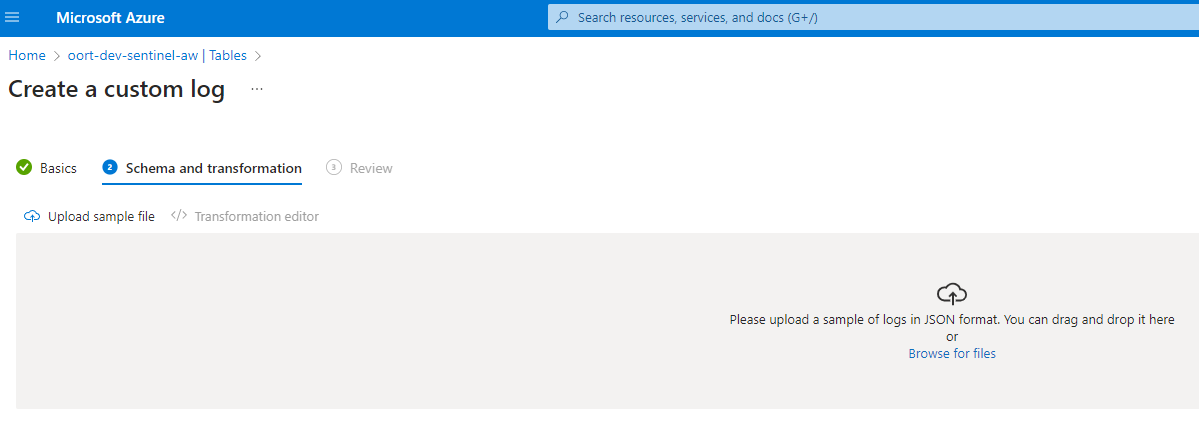
- Save content of this block in a local file or download the sample_data file linked below. NOTE - this step is done outside of the Azure console.
[{ "activity": "END_USER__CHECK_FAILED", "targetResourceIds": { "checkId": "no-mfa", "login": "ciuser-noreply+cnt-dev-1661195950711@oort.io", "userIds": ["28a8cf1a-9ff8-457c-8049-1dee4caa3177"] }, "lastModified": "2022-11-02T12:28:07.850Z" }] -
Click Browse for files and use the content of the file from the previous step for that purpose.
-
Data from the sample file is displayed with a warning that a
TimeGeneratedis not in the data.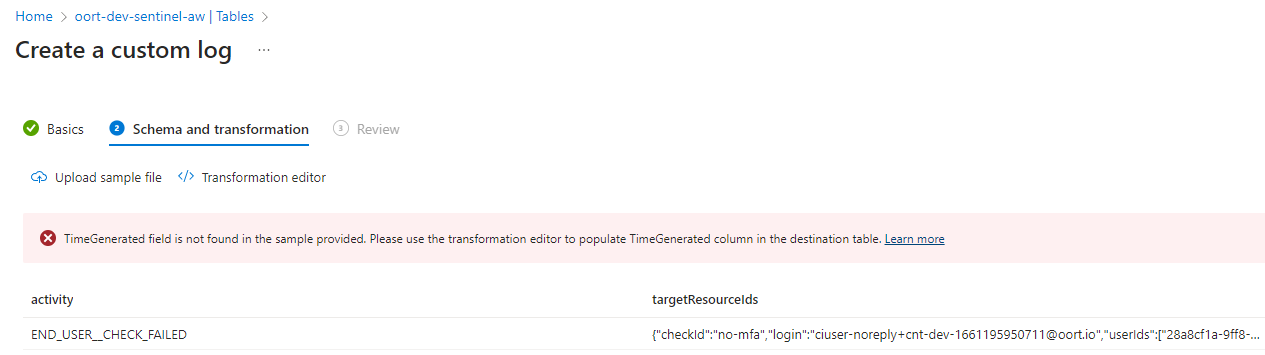
Click Transformation editor to open the transformation and paste content of the below block (note that
sourceis already present in the editor UI):source | extend TimeGenerated = todatetime(['lastModified']) | project-rename activityDate = lastModified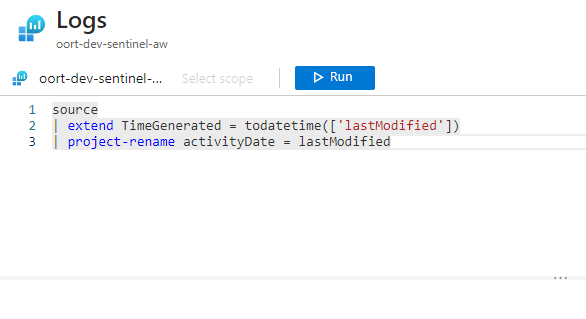
-
Click Run to view the results, click Apply to save the transformation, Next to get to the Review tab, and click Create to save the custom log.
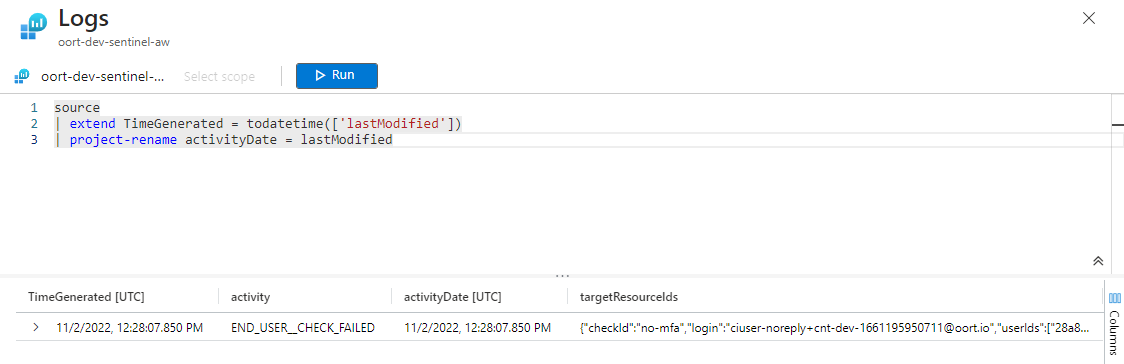
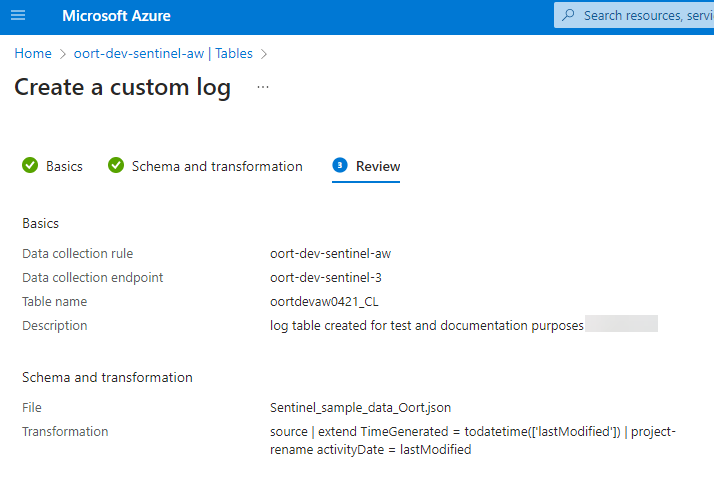
- To collect information from data collection rule (DCR), follow the instructions.
Note immutableId for further setup.
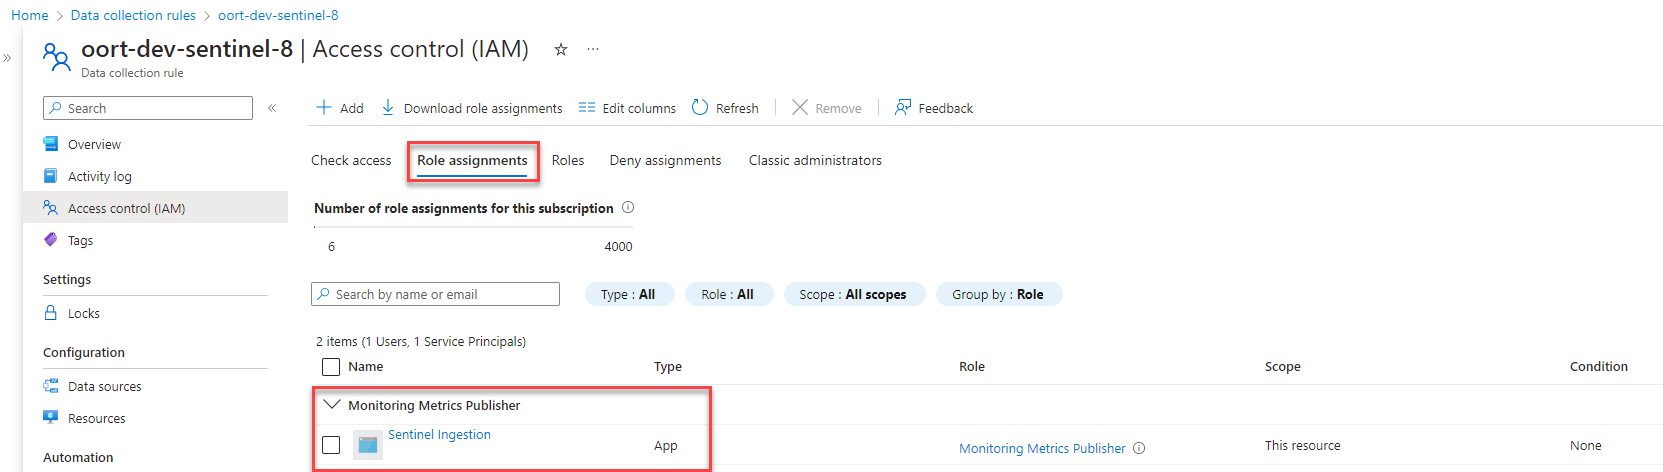
- Next to assign permissions to the DCR, follow the instructions.
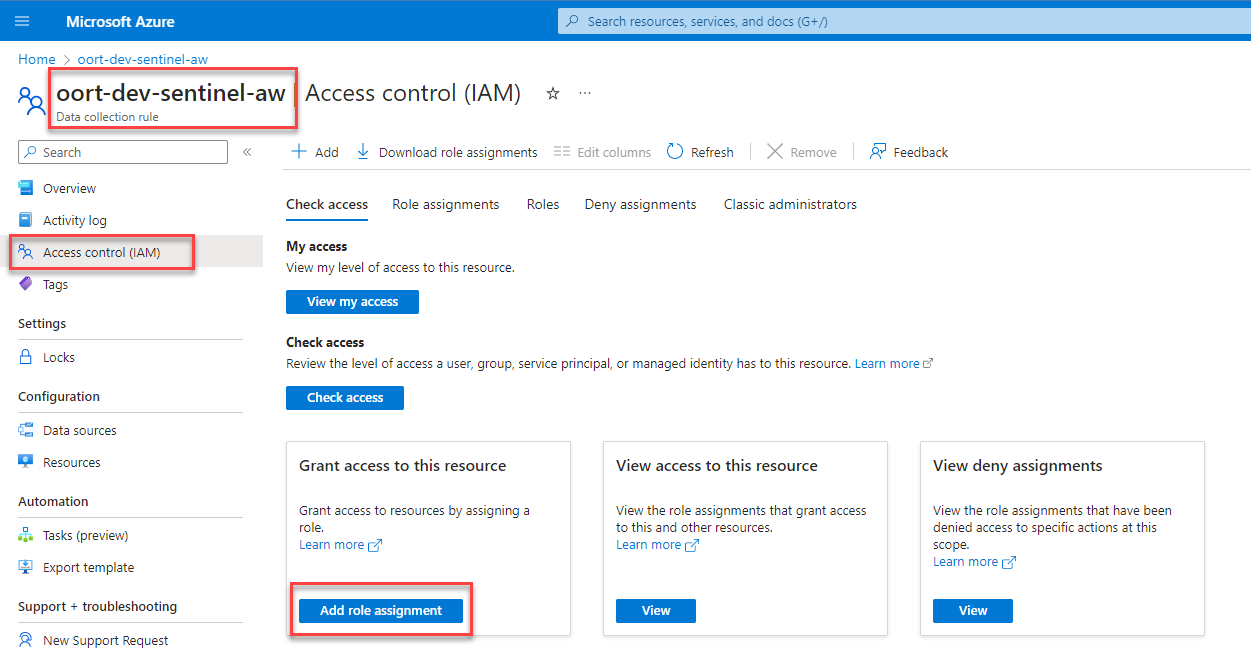
In the end, you will see your App Registration as a Monitoring Metrics Publisher under the Role Assignments tab.
Azure Configuration Summary
After the setup above, you will have the following components in your Azure tenant. These objects will be used to setup a corresponding Sentinel SIEM integration in Cisco Identity:
- App registration (client ID, client secret, tenant ID)
- Logs Ingestion Endpoint URI from the data collection endpoint (DCE) to receive data over HTTP
- Data collection rule (DCR) immutable Id
- Custom table name in Log Analytics workspace (including the _CL suffix)
Cisco Identity Tenant Configuration for Sentinel
Within your Cisco Identity console, follow these steps to configure your Sentinel integration.
- On the Integrations page, click Add Integration and scroll to the bottom of the page to select Azure Sentinel.
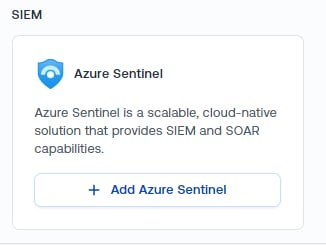
- Enter the information collected as shown below -
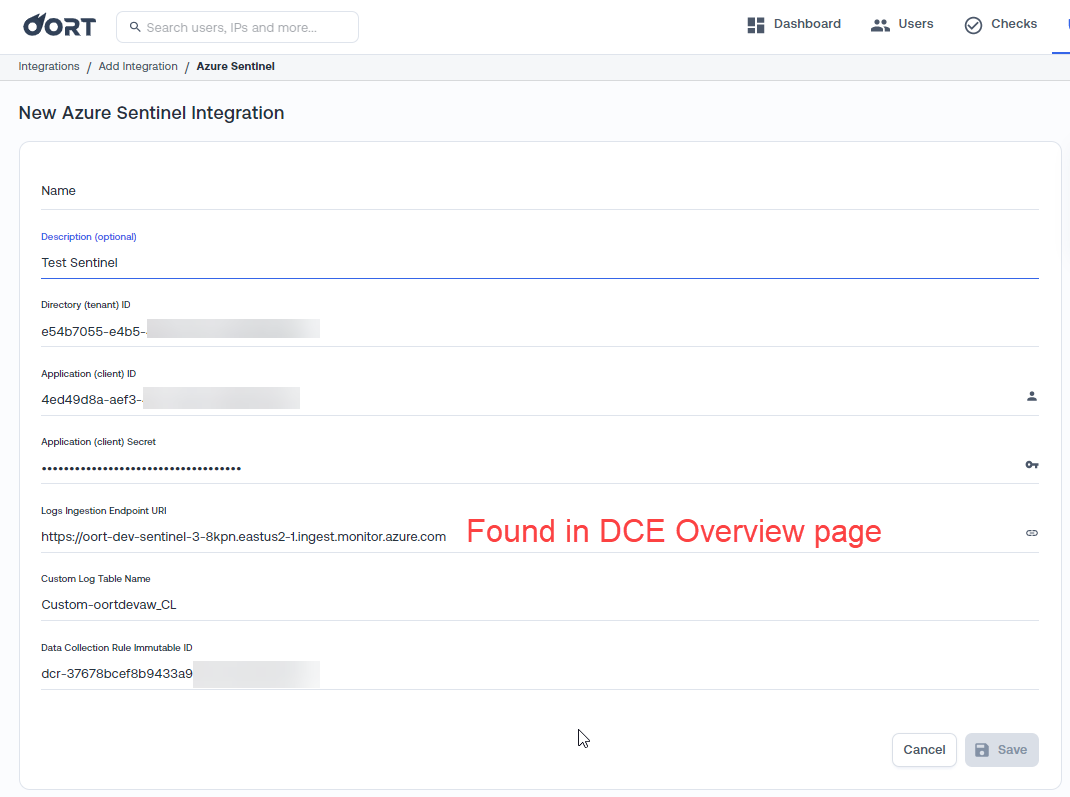
- Name - for display purposes only
- Description (optional)
- Azure directory (tenant) ID
- App (client) ID
- App (client) secret
- Logs Ingestion Endpoint URI - this is a property of the data collection endpoint (DCE) created above
- Custom log table name
- DCR Immutable ID - this is found in the JSON View of the DCR
- Click Save
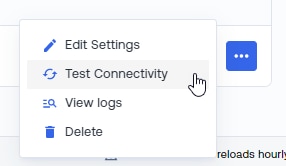
- On the Integrations page, click the 3-dot menu for the Sentinel integration and select Test Connectivity.
Viewing your Cisco Identity logs in Azure Sentinel
By default, your Cisco Identity tenant will send all new Check failures for all checks to your Azure Sentinel custom table once every 24 hours.
To calculate any new check failures since the last data collection and analysis, you may want to do the following:
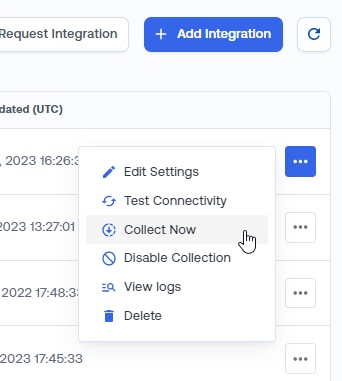
- From the Integrations page, manually run collection from your Azure data integration using the Collect Now option.
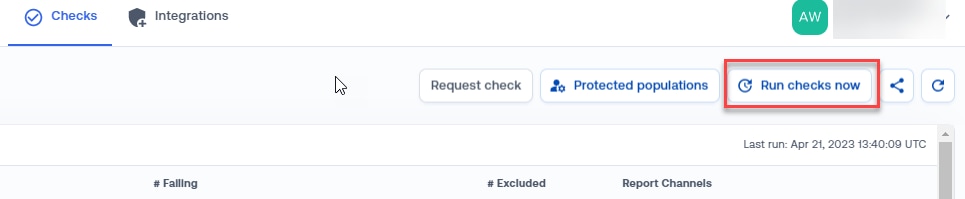
- After that completes, from the Checks page, select Run Checks Now
To view your logs in Azure Sentinel, do the following -
- Navigate to your Azure Sentinel instance that contains the configuration you created for this integration.
- Select Logs in the left nav pane.
- Under Queries, run a new query with the name of the custom table created for this purpose.
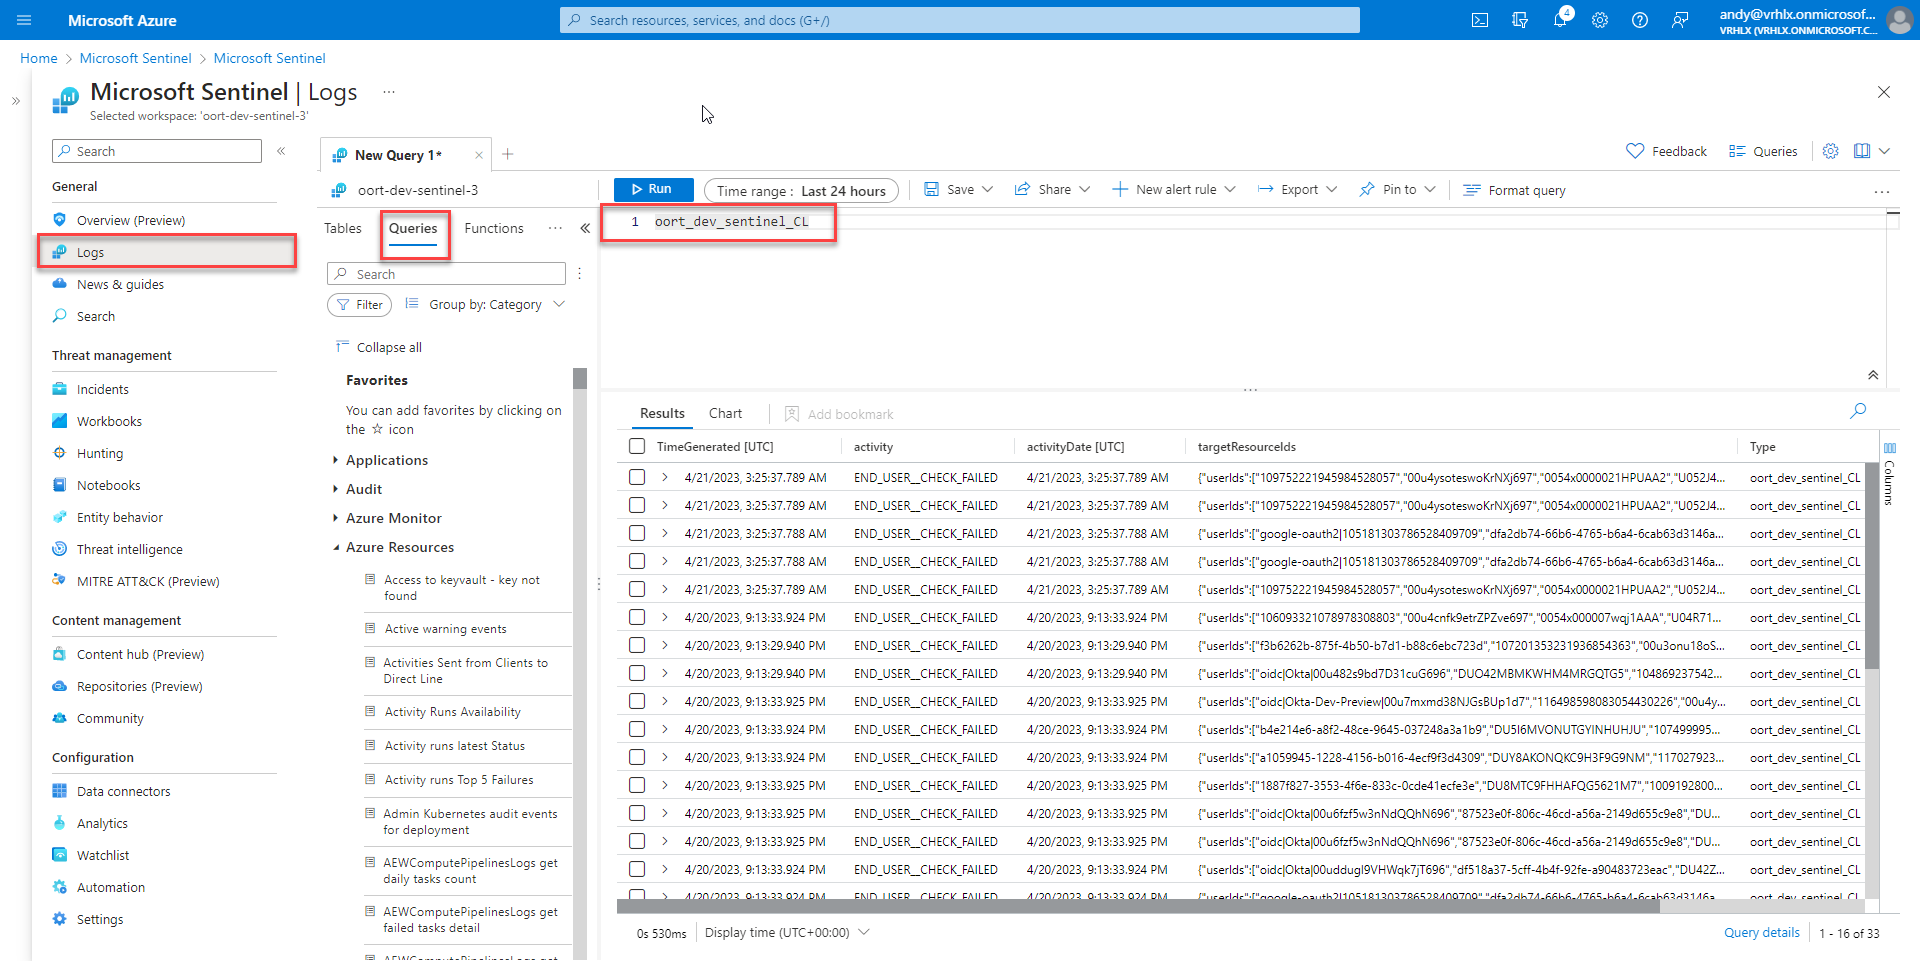
- The Results will show the most recent check failures from your Cisco Identity tenant.
- Expand individual rows of the results table to see details for each item.

Okta Data Integration
Overview
The Cisco Identity security platform reads a variety of user account data and event data to build a full picture of the identity security posture of your Okta tenant, as well as on-going identity threats against your organization.
Okta OAuth2 Data Integration
Cisco Identity has created an OAuth2 SPI service application in the Okta network for the purpose of the data ingestion.
This bar below is the link to the application in the Okta network :point_down:
https://www.okta.com/integrations/cisco-identity-intelligence-read-write-management-api-service/
To implement this application, do the following:
- Confirm that your Okta organization is using Okta Identity Engine (OIE), and not Okta Classic. Upgrade if needed. If you're unsure which solution you're using, check the footer on any page of the Okta Admin Console. The version number is appended with E for OIE orgs and C for Classic Engine orgs
- Select Add Integration from the link in the bar above :point_up: or search for the API Integration within the Okta Admin Console (If you have multiple tenants, ensure you're signed into the correct Okta org!). Then select Next
-
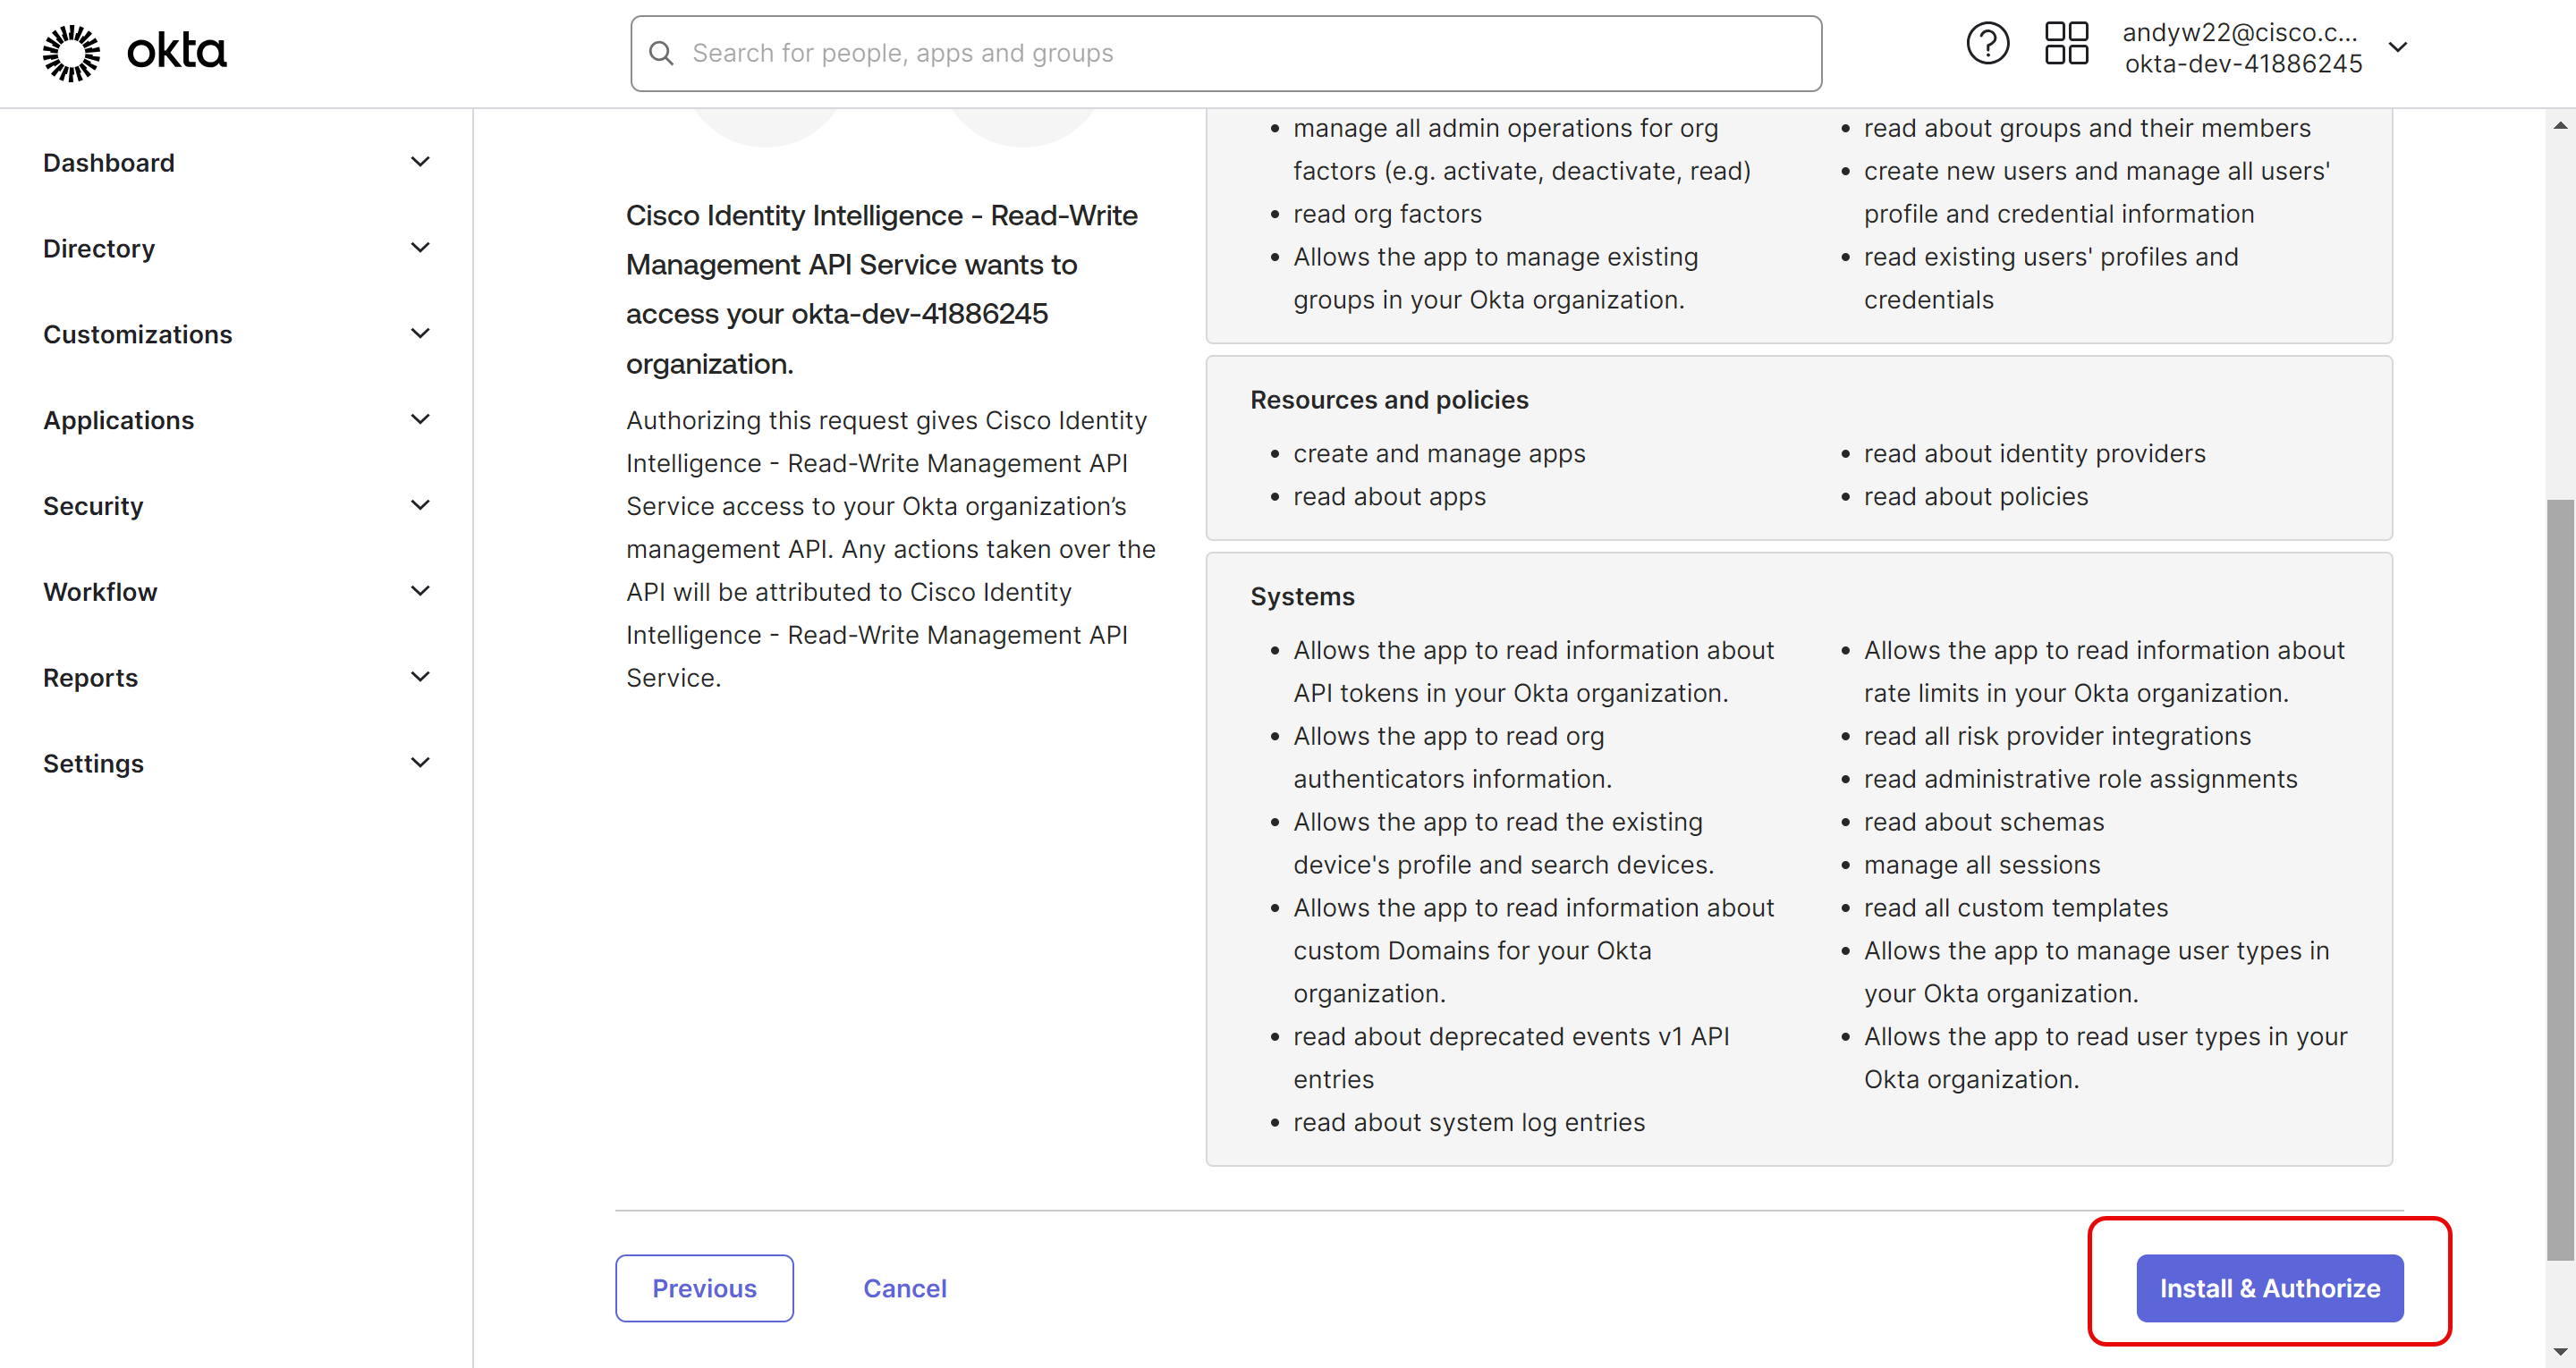
Select Install & Authorize
-
Copy the client secret to a secure location, such as a key vault, if desired
- Select Done
- Within your Cisco Identity tenant, go to the Integrations page and select Add Integration. Select the Okta integration
-
Enter the display name, Issuer (your Okta URL), Client ID, and Client Secret in the respective fields and select the Save button
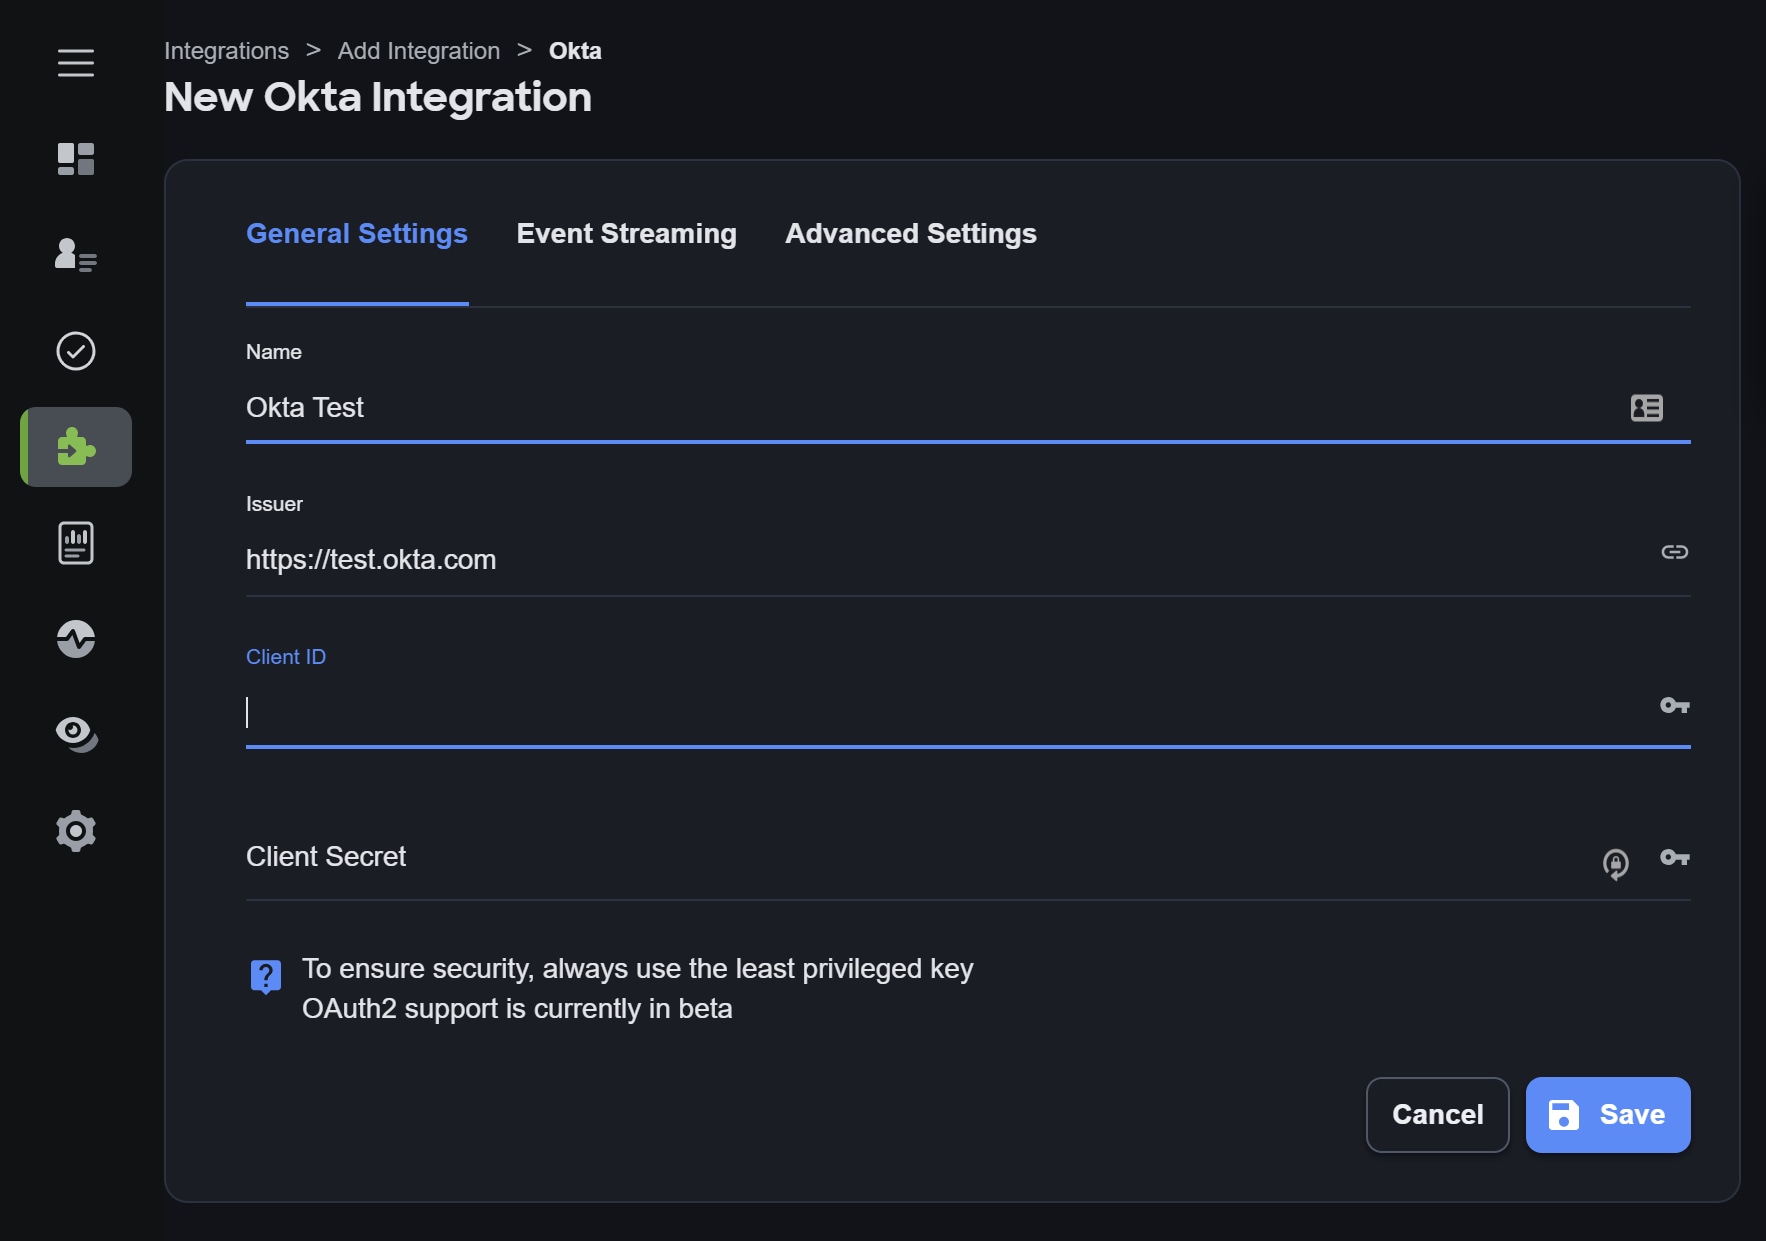
-
Under the Advanced Tab, review the answers to the questions in the top section of the page to make sure they are answered correctly. Then ensure the integration is set to "Managed" to enable the relevant data types based on the answers to those questions. Read our documentation about [Managed Integrations ]to learn about the benefits
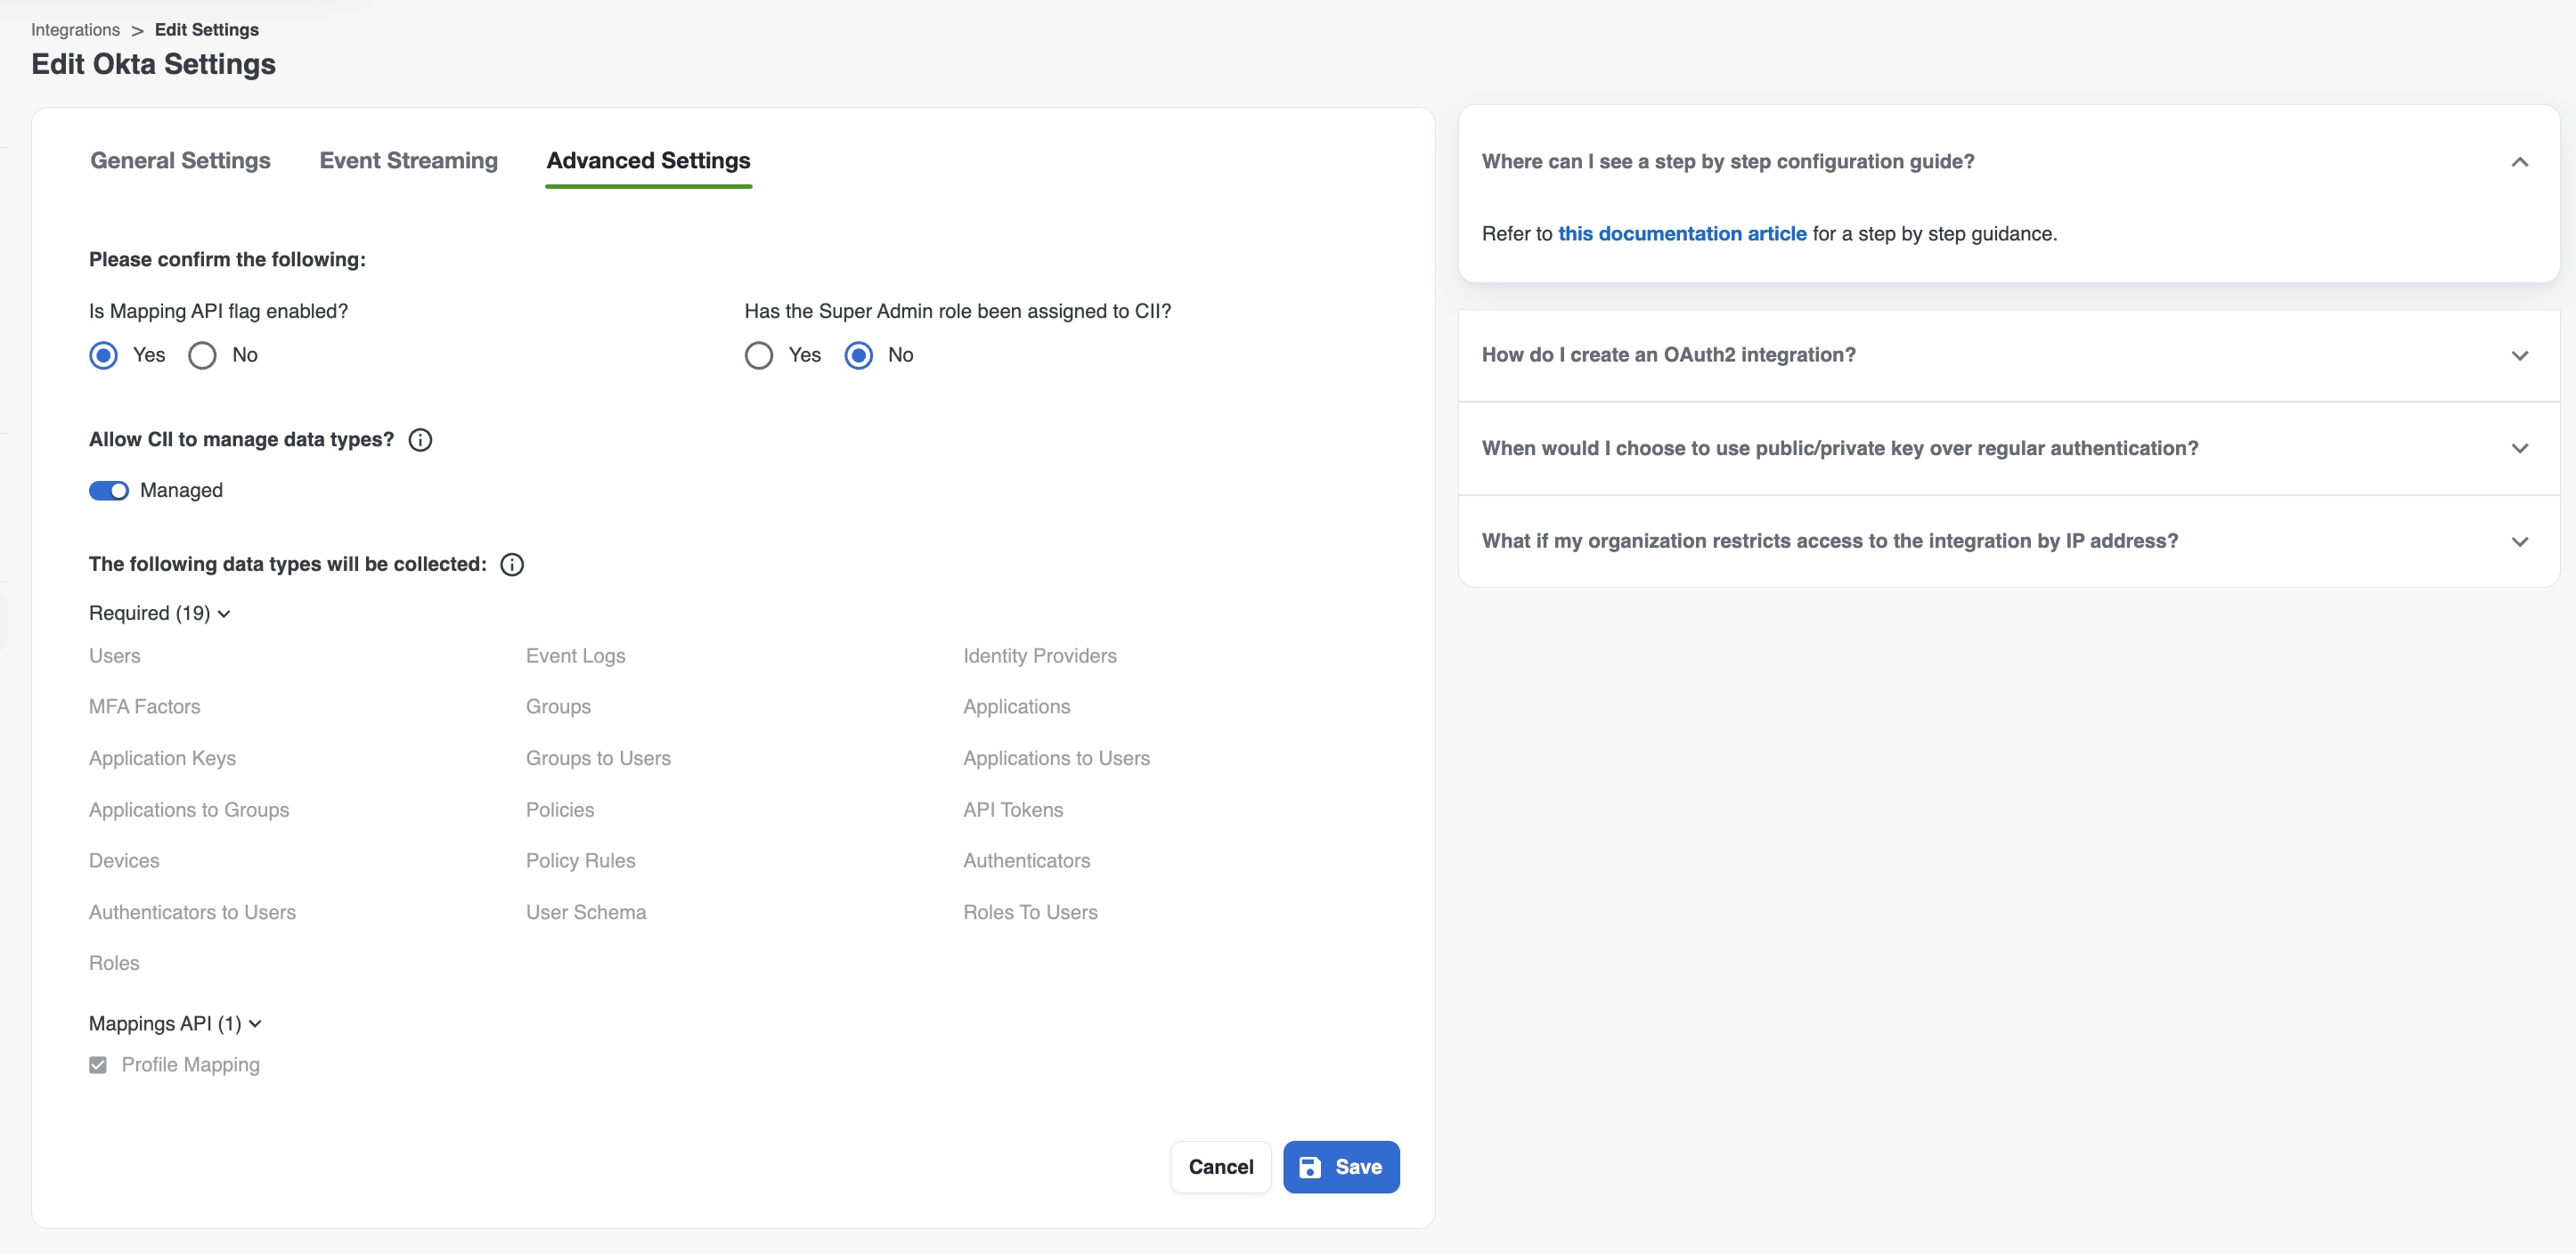
Note: After configuration is completed in both systems, you may see a yellow banner on the Cisco Identity API Service App page in the Okta Admin Console that states, "Cisco Identity - Read - Write Management API Service is not configured until you complete the setup instructions". You can disregard this message. The integration is fully configured
Test Connectivity
- On the Integrations page, select the three dots menu on the right side of the new Okta integration tile. Select Test Connectivity
Configure Okta Event Streaming
If you have the Log Streaming module as part of your current Okta subscription follow the steps below to configure Log Streaming. Log Streaming is not required to configure the Okta Data Integration, but it is recommended if you have it.
- Once successfully verified, select the 3-dot menu again and select Edit settings for the Okta integration. Go to the Event Streaming tab
- Use the information provided to set up Okta log streaming via an AWS Eventbridge. [Instructions can be found here]
- After you register the log stream, select Save. Then use the 3-dot menu for the integration and select Collect Now to begin initial data collection
NOTE: Due to Okta API rate limiting, the initial data collection, including historical log data, may take 24 hrs or longer. Your Cisco Identity technical contact will assist with any questions in this process
Okta Read-only OAuth 2.0 Client Application (Alpha)
The Okta Service Application integration is the preferred method for collecting data from Okta as it the most secure, ensures the best experience and will automatically update when Cisco Identity supports collection of additional data types. Although it requests certain scopes or permissions, such as "create user", these are required by Okta for Service Apps and Cisco Identity does not utilize these permissions.
Although we highly recommend using the Okta Service Application, if required, there is also read-only option using OAuth 2.0, which is a widely adopted authorization framework that provides secure and scalable access delegation. In this context, Okta's implementation of OAuth 2.0 allows you to grant specific API permissions to applications while maintaining control over sensitive resources. For this reason, it require a more complex set up and will require manual updates from your Okta Admin to grant access to new scopes or permissions when Cisco Identity adds them.
This section provides a step-by-step guide for configuring a read-only OAuth 2.0 API service integration with Okta. By following this guide, you will enable secure access to Okta APIs with the least privilege principle, ensuring that the integration can only retrieve (read) data without the ability to modify it.
Key Features of This Integration
- Read-Only Access: Limit the scope of API access to read-only operations, ensuring enhanced security
- Scoped Permissions: Use OAuth 2.0 scopes to define the exact level of access the integration is permitted
- Service Account Integration: Create a service account that interacts programmatically with Okta APIs
- Secure Authentication: Leverage client credentials for authentication to ensure secure communication
Prerequisites
Before you begin, ensure you have the following:
- IMPORTANT:This feature is currently in Alpha phase, meaning it is a limited preview. Contact Cisco or Duo Support to have this feature enabled for your Cisco Identity tenant.
- Administrative Access to Okta: You must have the necessary permissions to create and manage API service integrations within your Okta instance
- Okta Developer Account or Production Environment: A valid Okta environment where the integration will be configured
- Understanding of OAuth 2.0: Familiarity with OAuth 2.0 concepts such as scopes, tokens, and client credentials
What You'll Learn
By the end of this section, you will:
- Set up an OAuth 2.0 application in Okta
- Configure client credentials for secure API authentication
- Define and apply the appropriate read-only scopes for the integration
- Test the integration to ensure it retrieves data as expected
Let’s get started with the configuration process!
Okta Integration: creation of the OIDC client in Okta with Public/Private Keys authentication for read-only integration
Step 1: Log into Okta Admin Console
- Open your Okta Admin Console (e.g., https://your-org.okta.com/)
- Log in using your admin credentials
Step 2: Create a custom admin role
- Navigate to Security > Administrators > Roles tab
- Select Create role
- Provide a name and description for the role
- Under Permissions, select Identity and Access Management > View roles, resources, and admin assignments
- Select Save Role
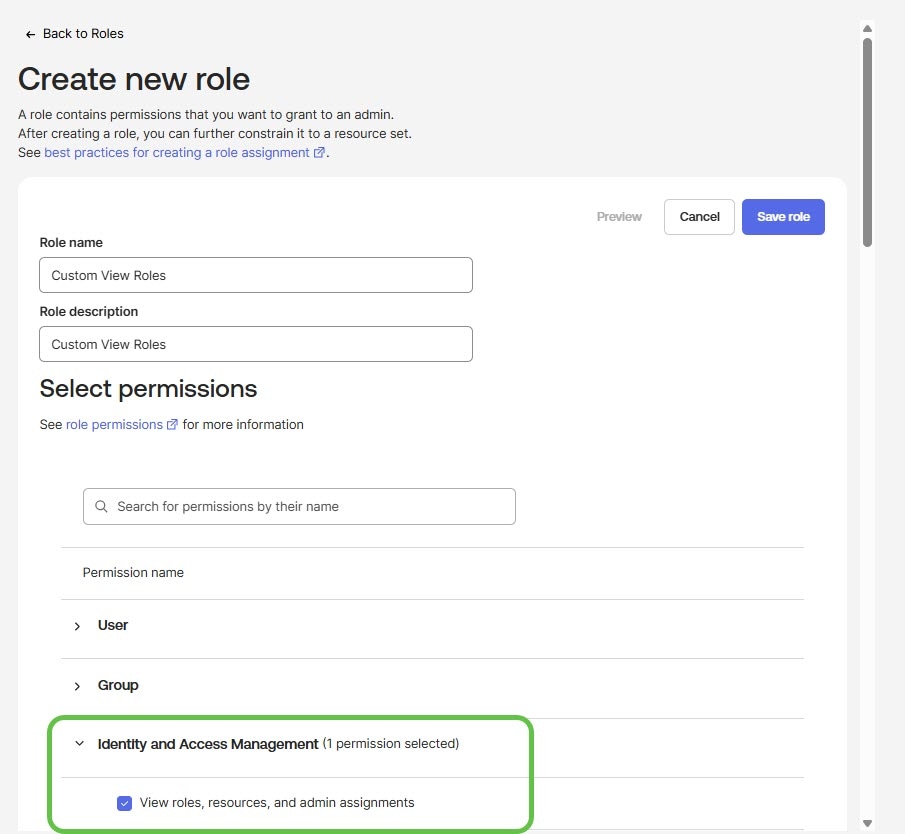
Step 3: Create an API Services Application
- In the Okta Admin Console, go to Applications > Applications
- Select Create a new app integration
-
Choose API Services and select Next
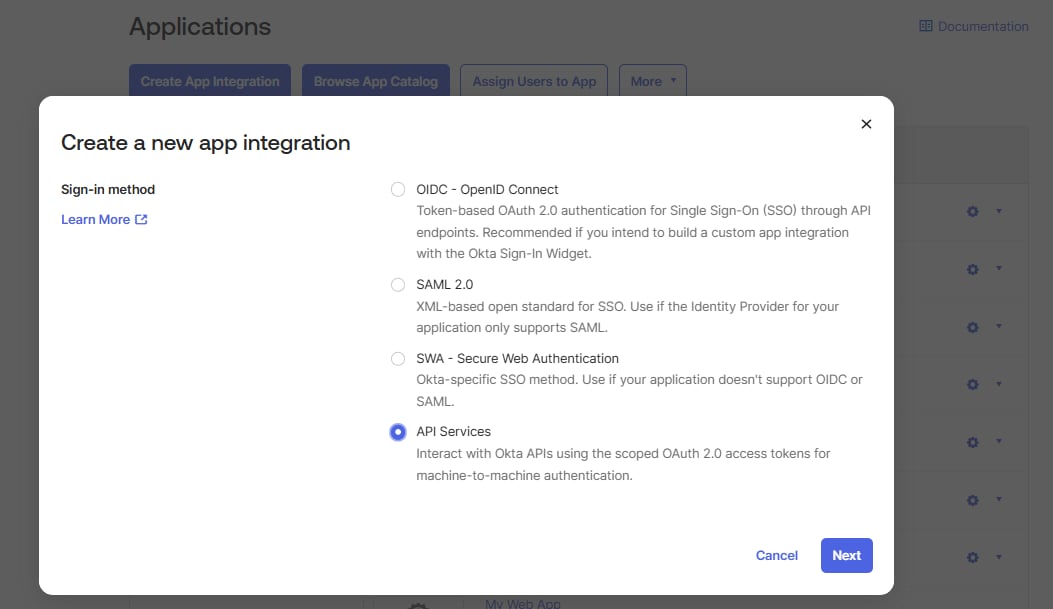
-
Enter a recongizable name for your App Integration and select Save
- Under Client Credentials, select Client Authentication and then Edit.
- Select Public key / Private key as the authentication method
- Check the box to Save keys in Okta
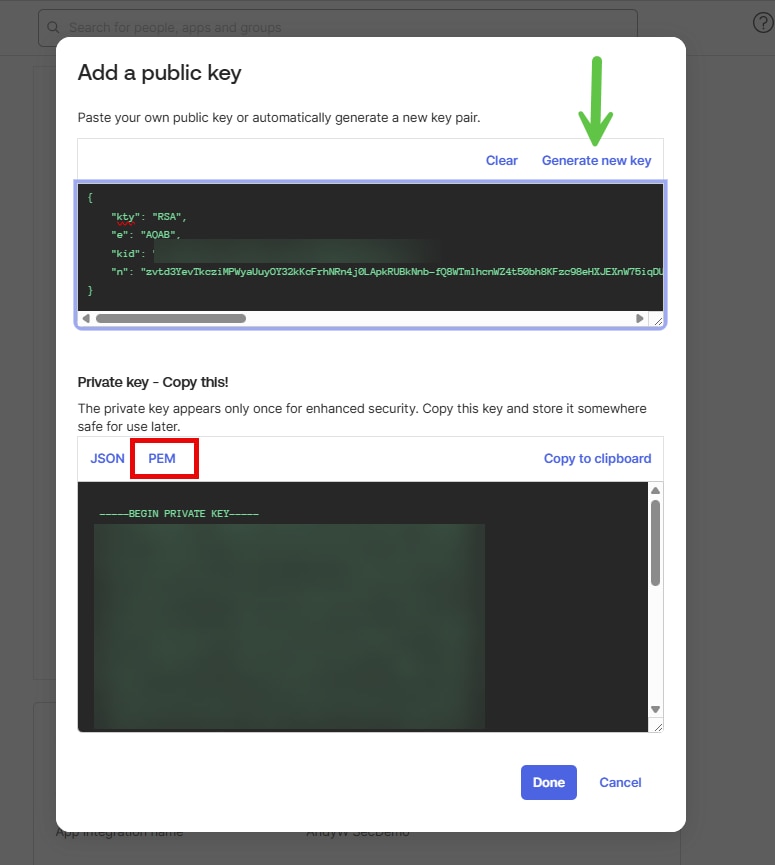
- Select Add Key, then select Generate new key
-
Choose Private Key in PEM format (not JSON), and make sure to copy the private key and KID to a secure location (you won’t be able to see the private key again once you close this window).
-
Select Done, then select Save
-
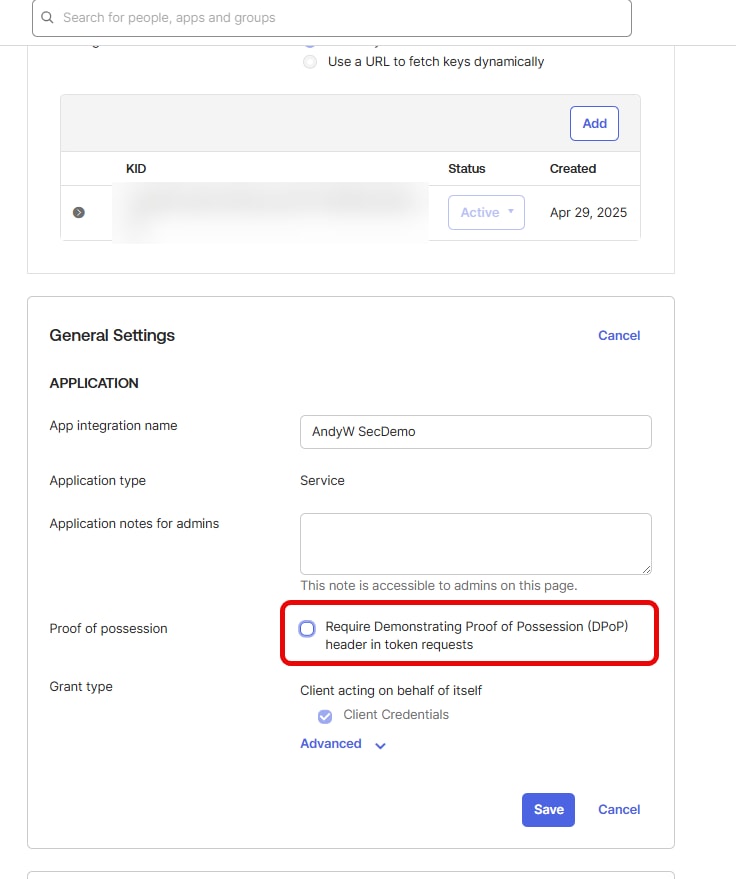
Under General Settings, select Edit, deselect Proof of possession, then select Save
Step 4: Configure Permissions
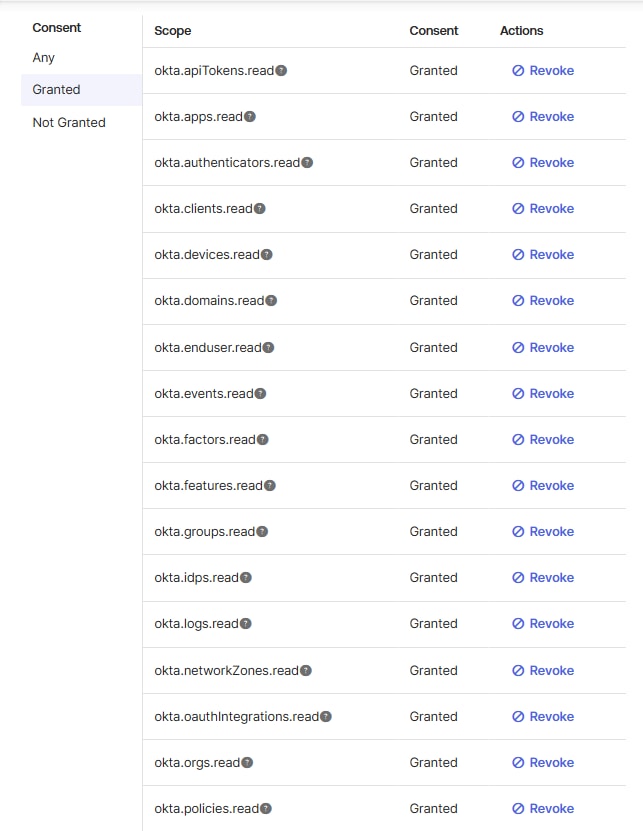
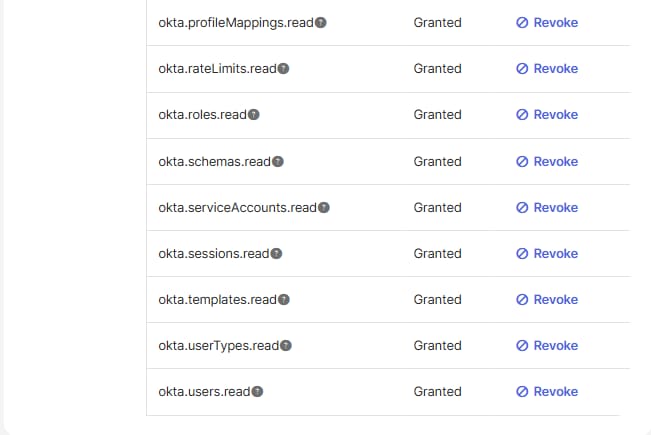
- Go to the Okta API Scopes tab
- Grant the necessary permissions for the scopes required by Cisco Identity
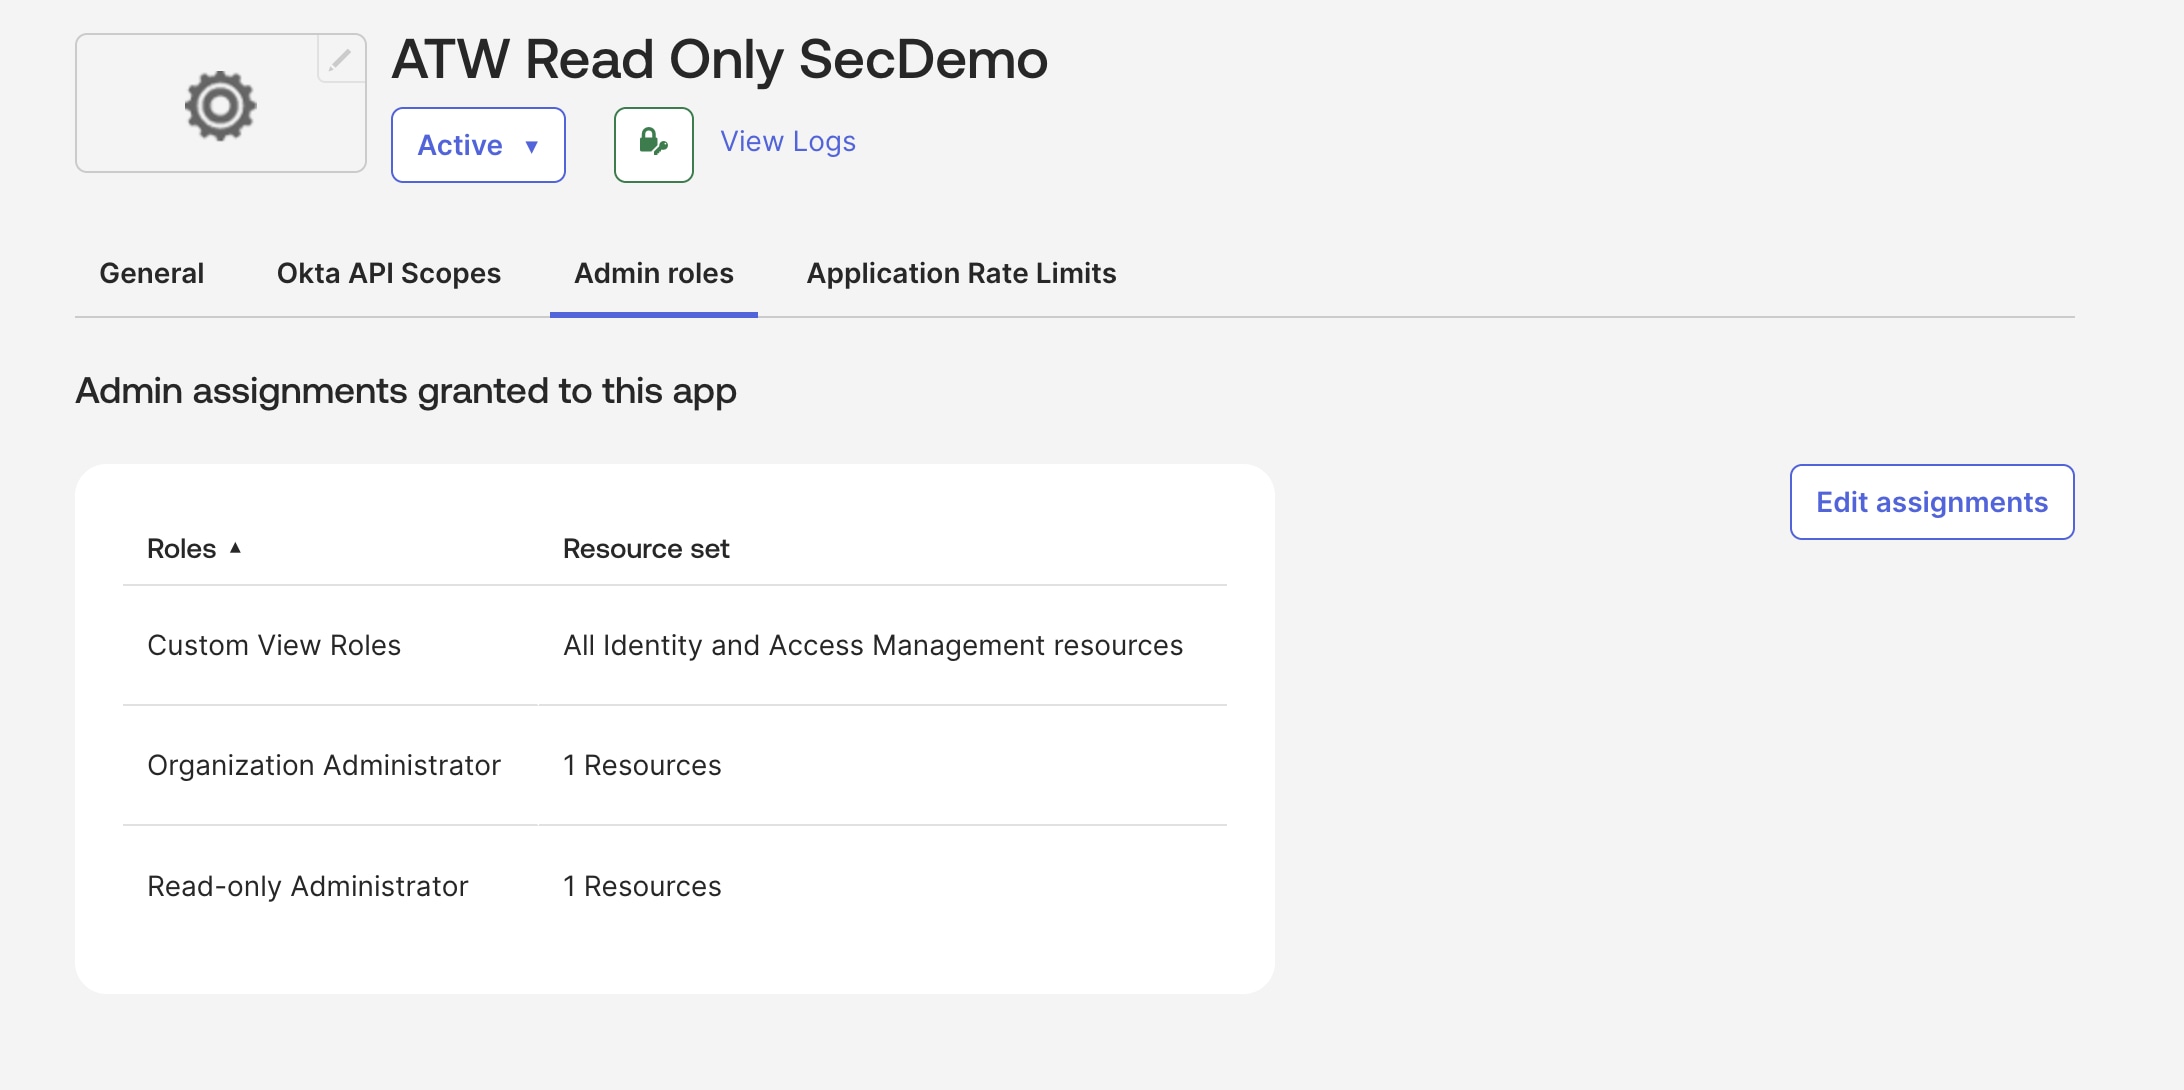
Step 5: Configure Admin Roles
- On the Admin roles tab, add two roles to this application
- Add either Super Admin role OR BOTH Org Administrator role and Read-only Administrator role (Without Org Admin role, Cisco Identity will not be able to collect
API Service IntegrationandUser Schemadetails for the tenant) -
Add the custom role created in the steps above, with a resource set of
All Identity and Access Management resourcesNOTE - the application is still constrained by the granted API scopes. However, per Okta, a corresponding role must be granted that allows the selected scopes, such as
okta.schemas.readSee their article for more details on this
Step 6: Configure Okta Integration in Cisco Identity
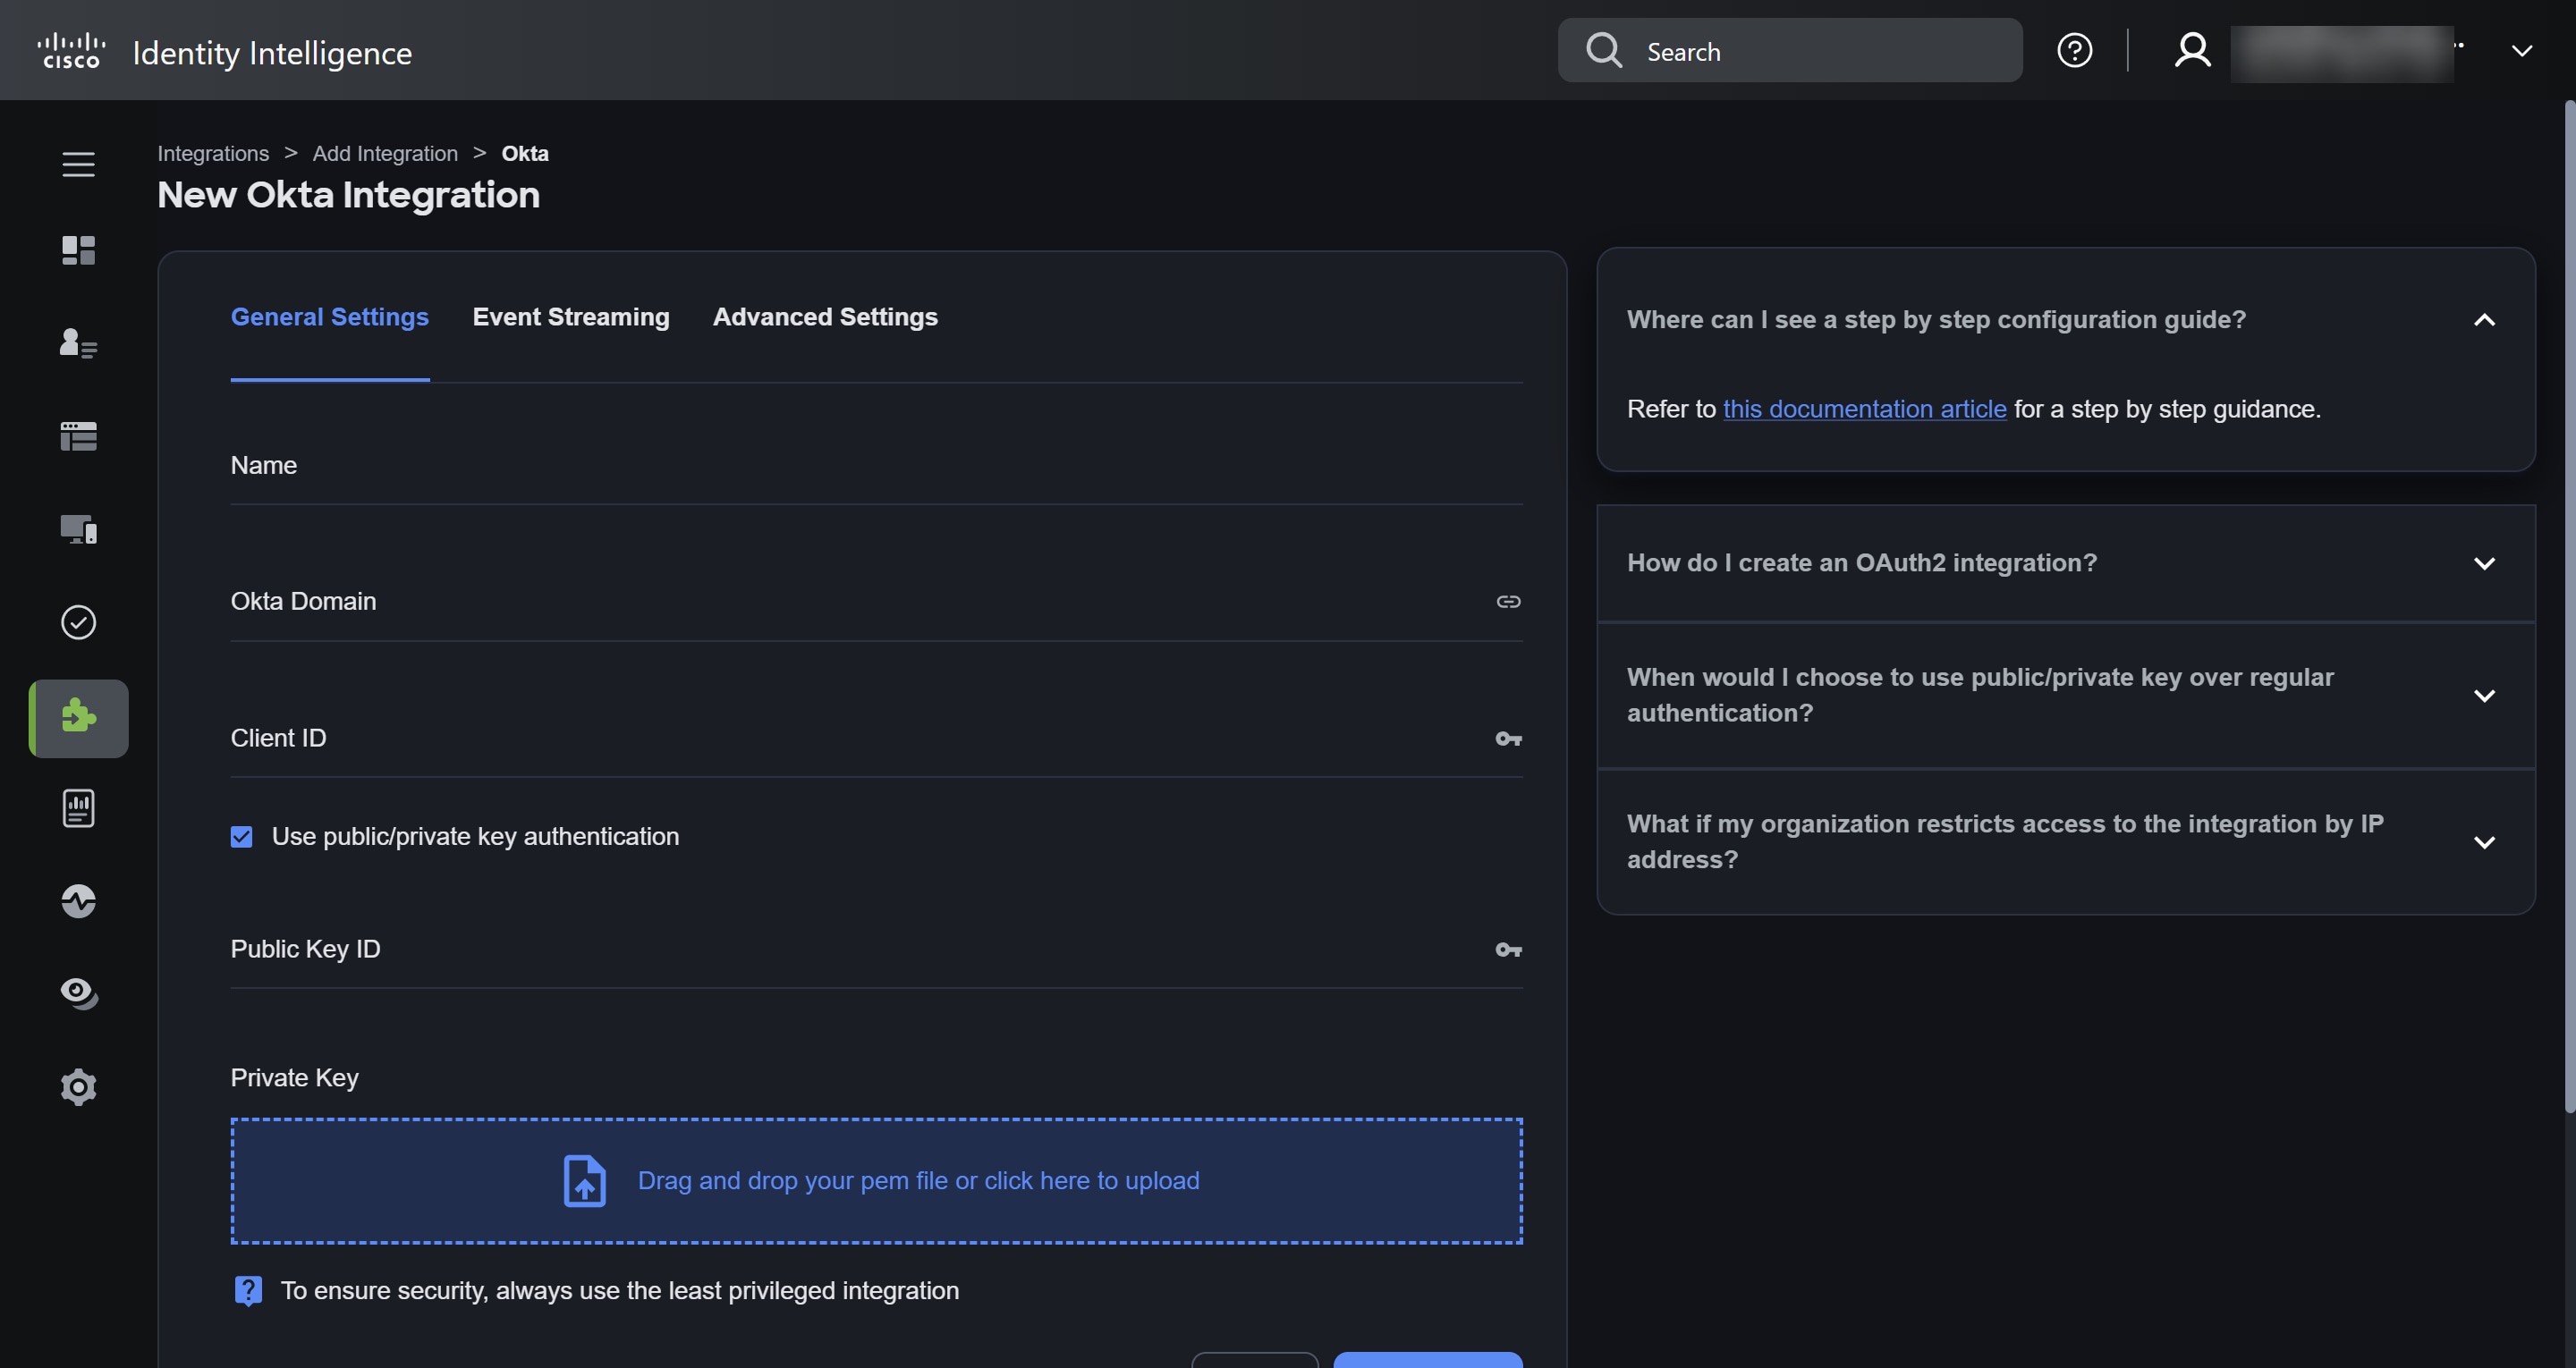
- Within Cisco Identity, navigate to Integrations > select the Add Integration button> select Okta
- Check the box for public/private key authentication
Note: NOTE: If you do not see this option, contact Cisco or Duo support to have this feature enabled for your tenant.
- Use the following details to configure the Okta integration in Cisco Identity:
- Display name
- Okta domain (URL)
- Client ID
- KID
-
Private Key PEM file
-
Select Connect and the API connection will be tested automatically
- We highly recommend implementing
Okta Log Streaming AWS EventBridge
Overview
The Cisco Identity identity security platform integrates with Okta tenants to collect user account information, device information, and sign-on and application activity.
To enable hourly analysis of user activity and events, Cisco Identity can leverage Okta log streaming to an AWS EventBridge streaming model. Then the Cisco Identity platform can capture the events from the log stream.
NOTE:
- By default, with event streaming enabled, the analysis of event-based detections will be performed hourly and associated notifications will be sent at that time
- Individual events for a user will only be added to the user's Activity table once per day. To fetch the most recent events for a user, run the Refresh User Data action from the actions menu
- If a near-time compatible check failure is detected for an Okta user, it can trigger other non-near-time check failure notifications to be sent outside of the standard 24hr cycle
Prerequisites
You must already have an active Okta data integration in your Cisco Identity tenant that is connected via an Okta API token. Please see instructions here.
You must also have the Log Streaming module enabled for your tenant. Please see your Okta representative if you do not have this module as part of your current subscription.
Okta Log Streaming Configuration
For reference, the Okta log streaming documentation can be found here.
Permission requirements for setting up Cisco Identity integration with Okta
To add the necessary configuration in Okta, you need to be one of the following:
- Read-only administrator
Setup Steps
There are 3 steps you need to go through to set up the AWS log streaming integration between Okta and Cisco Identity.
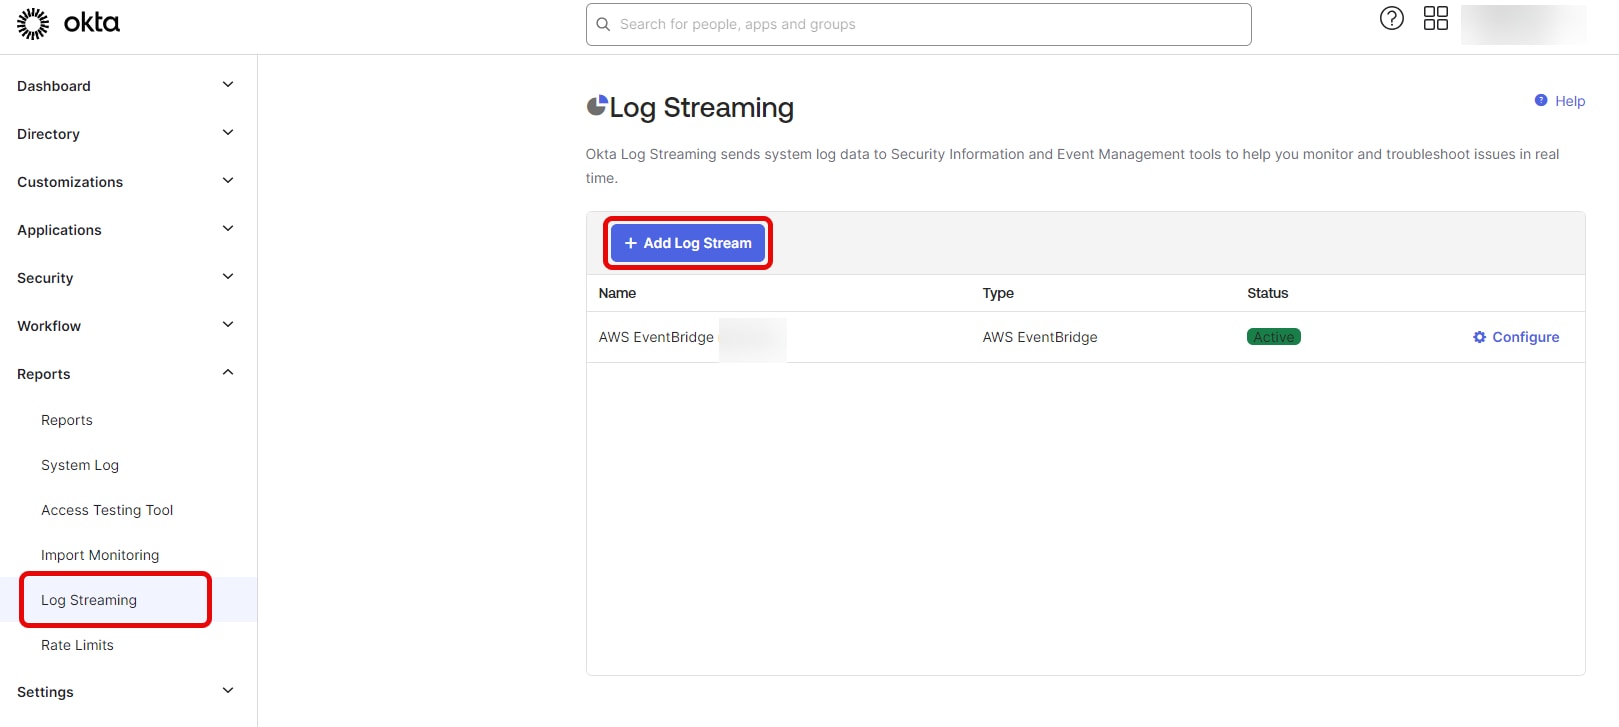
- In the Admin Console, go to Reports > Log Streaming. This page shows all of the log stream targets available in your org.
- Click Add Log Stream to start the log stream wizard.
-
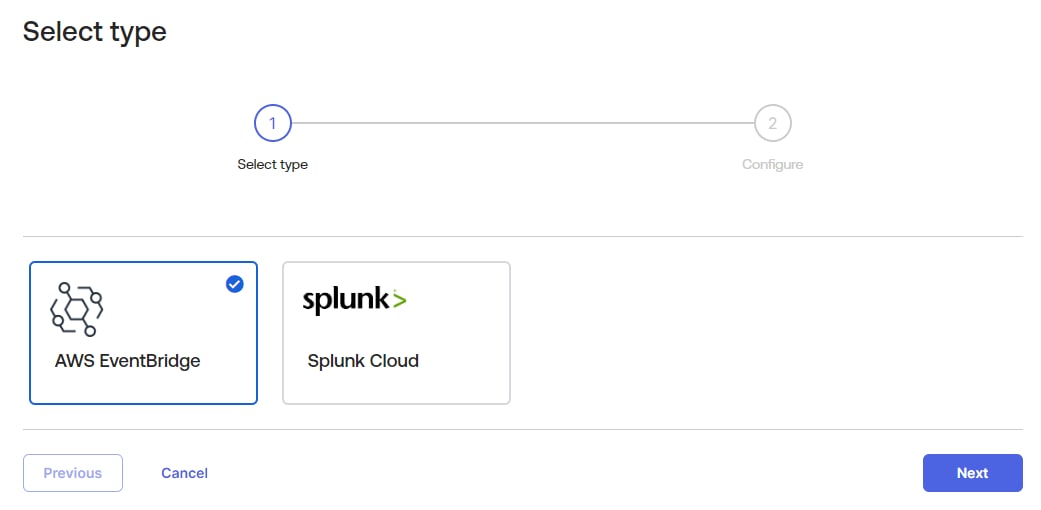
Select AWS EventBridge from the catalog. Click Next.
-
Name: Provide a unique name for this log stream in Okta.
- AWS Event Source Name: The source name needs to be the Okta integration ID, which is available in the Event Streaming tab of your existing Okta integration. Go to Integrations -> Edit Okta integration
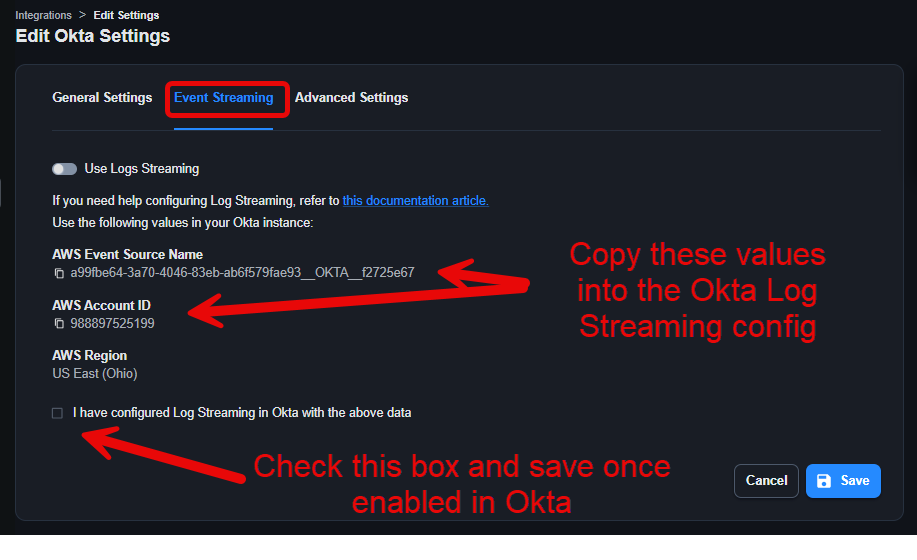
- Copy the AWS Event Source Name and AWS account ID shown into your Okta AWS Log Stream configuration
- Enter the AWS region shown on the page in your Okta integration.
- Save this information in the Okta Log Stream wizard FIRST
- Check the box shown above and click Save in the Cisco Identity UI
Okta Workflows
Fetch end user information and react to Cisco Identity threat detection with Cisco Identity.
Authorization
Prerequisites
Generate client API credentials:
- From the Integrations tab, click Add Integration.
- Scrolls down and click Add API Client.
- Provide a Name and Description.
- Click Save and generate credentials.
- Click Copy all to copy the credentials to your clipboard.
Create a connection
When you add a Cisco Identity card to a flow for the first time, you'll be prompted to configure the connection. This will enable you to connect your Cisco Identity account, save your account information, and reuse the connection for future Cisco Identity flows.
To create a new connection from an Action card:
- Click New Connection.
- Enter a Connection Name. This is useful if you plan to create multiple Cisco Identity connections to share with your team.
- Enter the Client ID, Client Secret and Audience values from the integration created earlier.
- Select the appropriate geographical region in the Region dropdown.
- Click Create.
Connector cards
Cisco Identity event cards
| Event | Description |
|---|---|
| [Cisco Identity Webhook] | Triggers a flow when a specific check has new users failing the check in Cisco Identity. |
Cisco Identity action cards
| Action | Description |
|---|---|
| [Get End User State] | Fetch a concise summary of end-user information, including key fields and relevant details. |
| [Get End Users By IP] | Retrieve users associated with a specified IP address. |
Events
Cisco Identity Webhook
Triggers a flow when a user is failing the check in Cisco Identity.
Options
| Field | Definition | Type | Required |
|---|---|---|---|
| Shared Secret | A secret string for verifying the source of webhooks. It is sent by Cisco Identity events in a header named "x-api-client-token" in the webhook payload | Text | TRUE |
| Check ID | A Cisco Identity check ID to send events from to the webhook. This can be later updated in the Cisco Identity dashboard. | Text | FALSE |
Output
| Field | Definition | Type |
|---|---|---|
detail |
Webhook payload. | Object |
➥ id |
The the event ID | Text |
➥ checkId |
The ID of the failed check in the Cisco Identity that triggered the event | Text |
➥ title |
The check title. | Text |
➥ severity |
The check severity in Cisco Identity. | Text |
➥ login |
The login identifier of the failing user | Text |
➥ explainabilityDetails |
List of objects of type {"key":, "value":} with explainability details about the failing check |
List of Objects |
➥ checkTopics |
List of topic the check relates to (e.g. Compliance, Devices) |
List of Text |
➥ checkTags |
List of tags applied to the check | List of Text |
➥ frameworks |
List of frameworks the check is a part of (e.g. NIST, MITRE) |
List of Text |
➥ published |
Timestamp the payload was generated. | Date & Time |
region |
The Cisco Identity deployment region from which the event originated | Text |
id |
The webhook event ID | Text |
time |
The Date/Time the event was triggered | Text |
detail-type |
Type of content in the event | Text |
source |
Identifier of the Cisco Identity instance | Text |
Actions
Get End User State
Fetch a concise summary of end-user information, including key fields and relevant details.
Input
| Field | Definition | Type | Required |
|---|---|---|---|
| Login | User's email address. | Text | TRUE |
Output
| Field | Definition | Type |
|---|---|---|
Status Code |
HTTP response code. | Number |
EndUser State |
Summary of end-user information. | Object |
id |
The user ID in Cisco Identity. | Text |
displayName |
The user's display name. | Text |
login |
User's email address. | Text |
employeeID |
The user ID Employee ID in the Identity Provider or HR system. | Text |
status |
The aggregated user status in the identity providers. | Text |
userTypeClassification |
The user classification in Cisco Identity | Text |
managerLogin |
User's manager email address. | Text |
ipAddresses |
List of IP Addresses used by the user. | List of Objects |
➥ ipAddress |
IP Address used by the user. | Text |
➥ location.city |
IP Geolocation city of the IP Address. | Text |
➥ location.state |
IP Geolocation state of the IP Address. | Text |
➥ location.country |
IP Geolocation country of the IP Address. | Text |
phoneNumber |
User's phone number. | Text |
unusedApplications |
Names of applications the user has access and did not access in the past 30 days. | List of Text |
usedApplications |
Names of applications the user has access and accessed in the past 30 days. | List of Text |
usedFactors |
Authentication factors used by the user. | List of Text |
referenceUrl |
User's URL in Cisco Identity. | Text |
registeredLocationDetails |
The user's registered location | Object |
➥ city |
The registered location city. | Text |
➥ state |
The registered location state. | Text |
➥ country |
The registered location country. | Text |
workingLocationDetails |
List of the locations the user works in. | List of Object |
➥ userLocationPrevalence |
The prevalence of the working location for the user, as a percentage. | Number |
➥ location.city |
The working location city. | Text |
➥ location.state |
The working location state. | Text |
➥ location.country |
The working location country. | Text |
Errors |
List of errors that might have occurred in the request. | List of Object |
path |
Paths that had errors in the request. | List of Text |
errorType |
Type of the error. | Text |
message |
Error message. | Text |
errorInfo |
Information about the error | List of Object |
data |
Data about the error | List of Object |
Get End Users By IP
Retrieve users associated with a specified IP address.
Input
| Field | Definition | Type | Required |
|---|---|---|---|
| IP Address | IP Address. | Text | TRUE |
Output
| Field | Definition | Type |
|---|---|---|
Status Code |
HTTP response code. | Number |
End Users IPs |
Itemized list of Users associated with a specified IP address. | Object |
id |
The user ID in Cisco Identity. | Text |
displayName |
The user display name in Cisco Identity | Text |
login |
User's email address. | Text |
referenceURL |
User's URL in Cisco Identity. | Text |
Errors |
List of errors that might have occurred in the request. | List of Object |
path |
Paths that had errors in the request. | List of Text |
errorType |
Type of the error. | Text |
message |
Error message. | Text |
errorInfo |
Information about the error | List of Object |
data |
Data about the error | List of Object |
Duo Security
Overview
Cisco Identity's platform can analyze authentication events in Duo Security to give insights into how users are accessing your applications and using MFA. In order to provide Insights, you have to set up an integration between Duo Security and Cisco Identity for analysis. This document will walk you through the process of setting up API access to Duo and will also walk you through the complementary setup inside of the Cisco Identity console.
Note: Attention Duo Customers!! This documentation should only be utilized if you are configuring an additional Duo integration, after you have provisioned your Cisco Identity tenant via the Duo Admin Panel.
For instructions on how to provision your Cisco Identity tenant, which includes an autogenerated Duo integration, via the Duo Admin Panel, please refer to the Duo documentation.
Duo Security Integration
Understanding Cisco Identity admin API permissions
There are different types of API types of permissions sets that can be used with your Cisco Identity tenant and Duo.
- Read-only admin API - this is generated using a read-only permission (shown below) and used for data ingestion and analysis only.
- Read/write admin API permissions - this adds the
Grant write resourcepermission in order to take advantage of the defined list of Cisco Identity's [Remediation Actions] - Auth API permissions - one of the Actions available for an individual user is to send a push notification to the user's Duo enrolled mobile device. The Duo Auth API requires a separate auth key, as outlined below.
Remediation actions can only be taken by administrator or help desk roles in Cisco Identity and are limited to the list in the above article.
Cisco Identity recommends configuring all of the APIs documented below for full functionality and the best experience.
Duo Admin API Configuration
You need to have admin access in Duo Security to add the necessary configurations using the following steps:
- From the Duo admin console, select Applications
- In the top right corner, select Protect an Application
- Search for Admin API and select Protect
- Add the necessary API Permissions
For read-only functionality, the API Permissions required are:
- Grant Administrators - Read
- Grant read information
- Grant read resource
- Grant read log
For read/write capabilities associated with [Cisco Identity Remediation Actions], add the Grant Write resource to the list of permissions
- Grant Administrators - Read AND Write
- Grant read information
- Grant read log
- Grant read resource
- Grant write resource
- Select Save Changes
Duo Auth API Configuration
A Duo Auth API key is required for the Send Push Notification functionality mentioned above.
In the Duo Admin panel 1. Select Applications and then select Protect Auth API
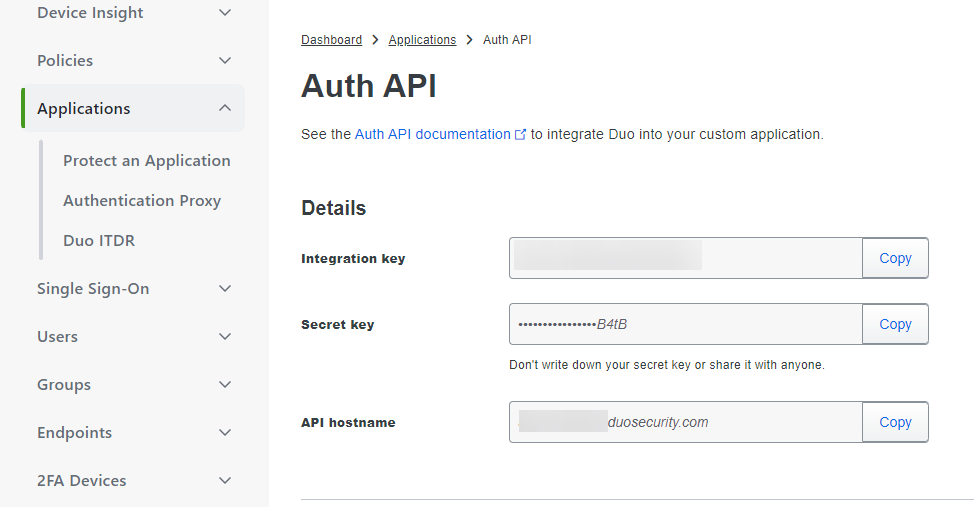
- Copy the Integration key and secret key for use in the Cisco Identity platform configuration
- Scroll down and give the Auth API a name that will indicate to end users that the push is from your company
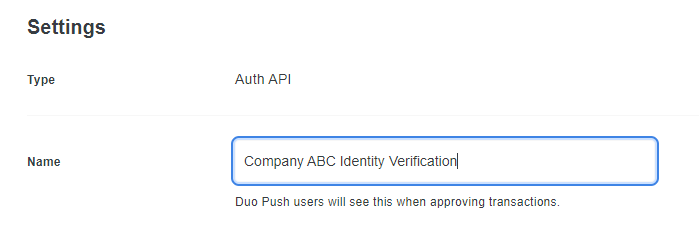
Cisco Identity Configuration
Follow the steps below to connect additional Duo integrations, other than the integration that was automatically created via Duo.
Navigate to Integrations -> New Integration -> Duo
Give the integration a display name.
Enter the API hostname, Integration key, and secret key into the Cisco Identity console.
NOTE - the API hostname must not contain a prefix like https:// - it should only be of the form api-xxxxxxx.duosecurity.com
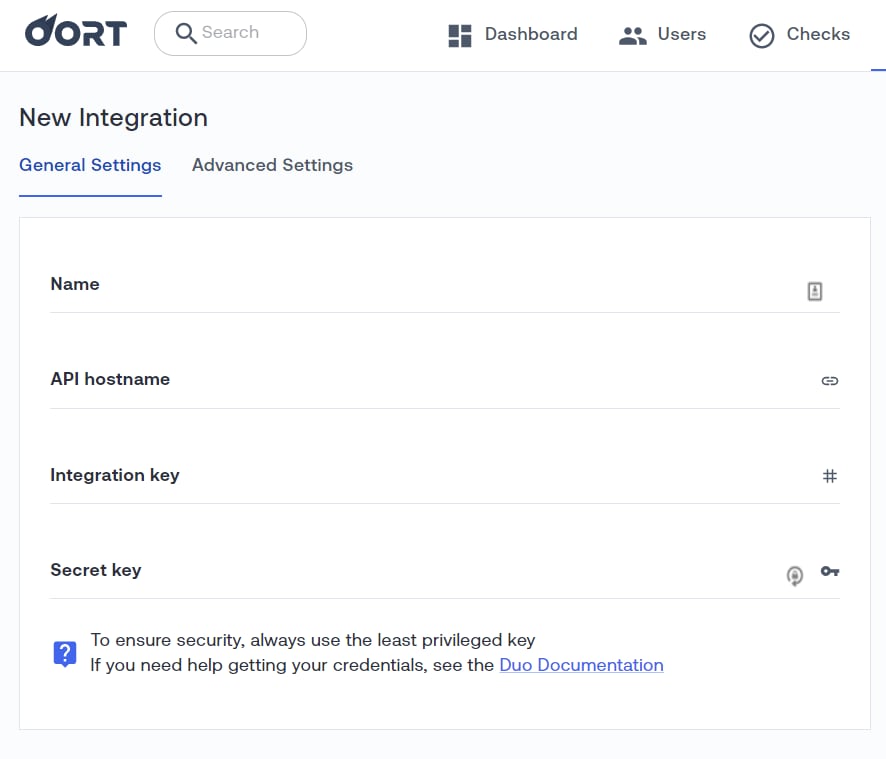
Slide the button to enable Support Push Verification.
Enter the Auth APIIntegration Key and Secret Key.
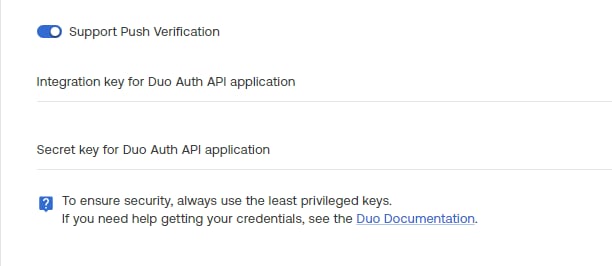
On the Advanced Settings tab, review the [Managed Integration] info to ensure that you are collecting the relevant data types
Click Save.
Test Connectivity and Start Collection
On the Integrations page, click the bar for the new Duo integration and select Test Connectivity from the menu.
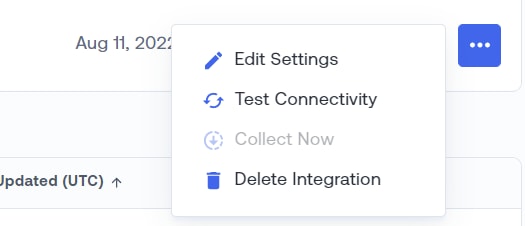
After testing successfully, click the Collect Now button to begin initial data collection immediately.
Event Streaming
Event streaming can only be configured for Duo integrations for Cisco Identity that were provisioned from the Duo Admin Panel. Enabling the event streaming is done on Step 2 of the wizard while provisioning, or it can be done after provisioning by going back to Step 2 of the wizard.
If you are creating a second Duo integration in Cisco Identity (in addition to the one autogenerated upon tenant creation), event streaming is not currently supported for additional Duo integrations.
Cisco Identity can analyze data from Google Workspace (formerly G Suite) and Google Cloud Platform (GCP) to provide insights into user identities and application activity. This document will walk you through the process of setting up the Cisco Identity Google Workspace integration.
Note: This integration uses both a Google Workspace admin user (required for access to Google Workspace Admin APIs), and a GCP service account (required for access to view service accounts and logs in GCP). To avoid confusion, please note the bolded terms used throughout these instructions and make sure you're using the right one.
Overview
These are the steps to connect Cisco Identity to your Google Workspace environment. The steps summarized here are explained in more detail in the linked sections below.
- [Configure a Google Workspace admin user] and role for Cisco Identity to use. This is required for directory access and Google Workspace audit logs.
- [Configure a GCP service account] with Security Reviewer, Log Viewer, Private Log Viewer, and Browser roles at the org level. Configure Domain-Wide-delegation for this service account for the required scopes (documented below) so that it can access the Google Workspace admin user created in Step 1. Generate a key for this service account for Cisco Identity to use. This allows Cisco Identity to monitor service account activity within your google projects.
- [Create a Google Workspace integration in your Cisco Identity tenant] using your Google Workspace customer ID as well as the email of the Google Workspace admin user from step 1 and the GCP service account key from step 2.
- [Configure GCP Audit Logging] at the project, folder, or organization level in GCP to start generating logs for Cisco Identity to monitor.
If you are unsure, refer to the [configuration checklist] at the end of this page.
Configure a Google Workspace Admin User and Role
This is where you will set up the Google Workspace admin user. For this step you will need administrator access to your Google Workspace account.
- In the Google Workspace Admin console, create a new account for the Service account to impersonate. Save this user's email for use in the following steps and in the Cisco Identity setup section. Use this user email whenever these instructions refer to the Google Workspace admin user.
- In the Google Workspace Admin console, create a custom role:
-
Navigate to Account > Admin roles > Create new role
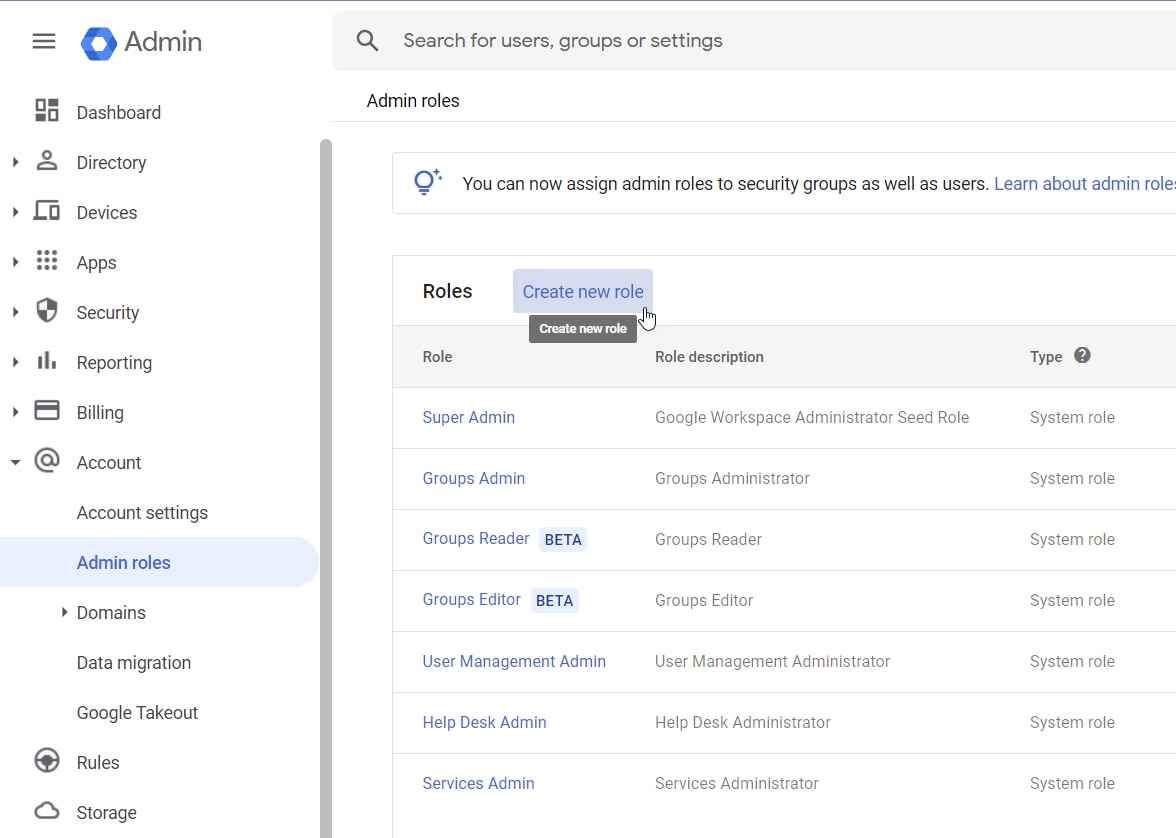
-
Provide a name and description
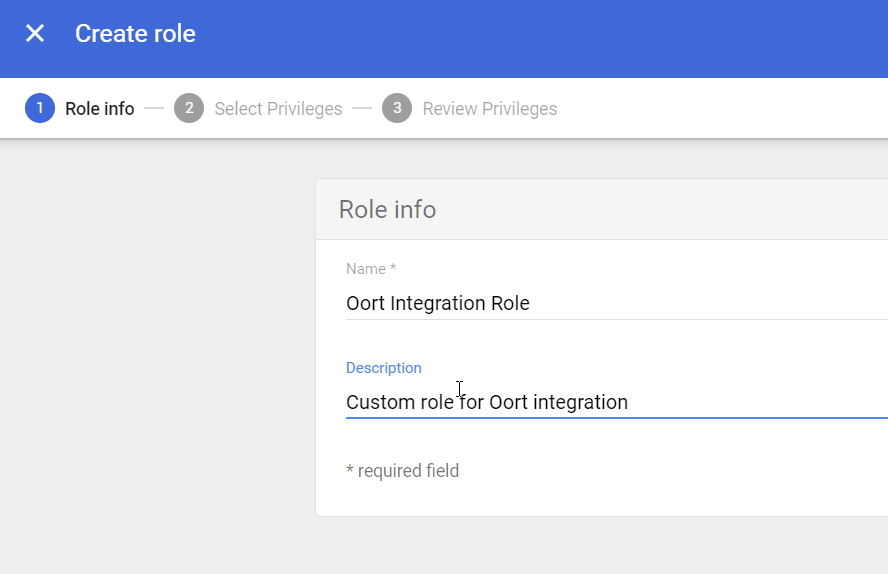
-
Under
Admin console privilegescheck the following privileges
4. UnderUsers > Read Services > Mobile Device Management > Manage Devices and Settings Services > Chrome Management > Settings > Manage Chrome OS Devices > ReadAdmin API privilegescheck the following privilegesReports Organizational Units > Read Users > Read Groups > Read User Security Management -
When all the permissions have been added, select Create Role to finish.
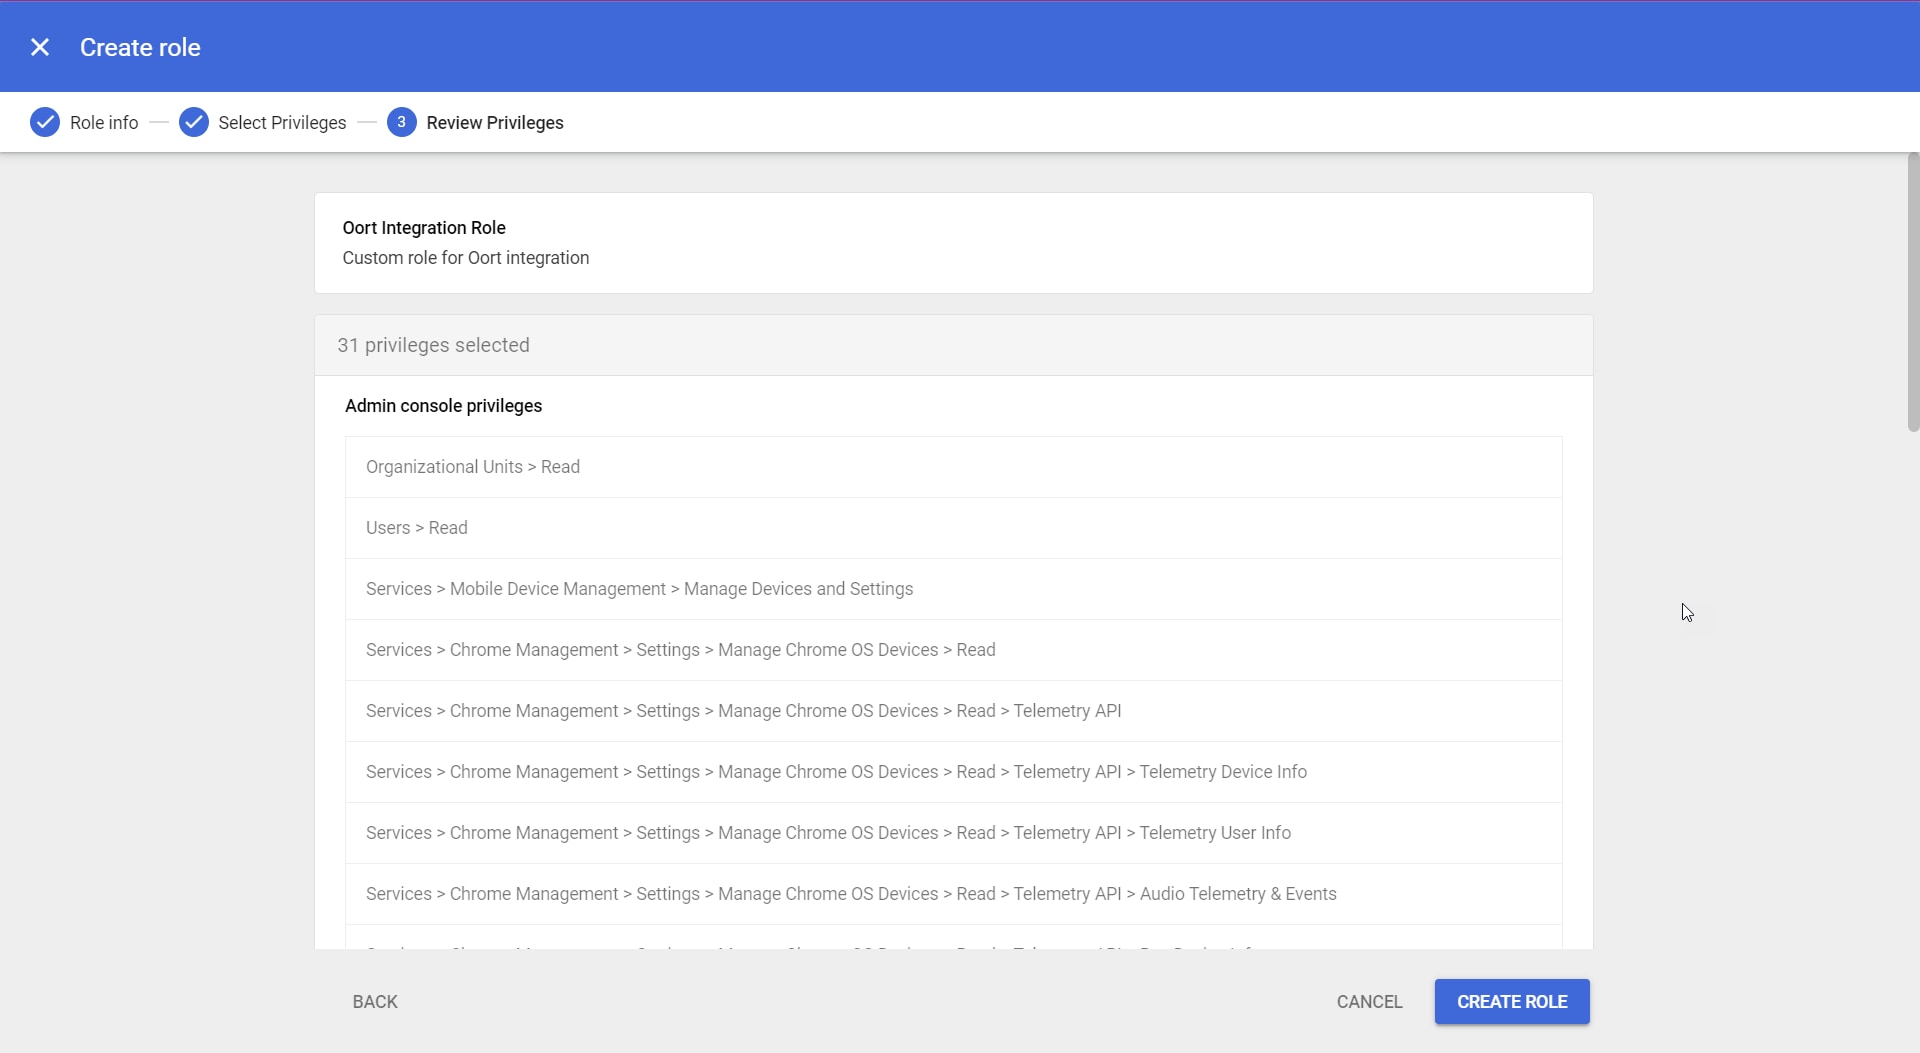
-
Assign this role to the Google Workspace admin user.
Configure a GCP service account
In this section, you will configure the GCP service account. To complete the steps in this section, you will need admin access to your GCP organization.
Warning: This section requires you to create a separate GCP Service account and assign the permissions to that service account. Do NOT assign the service account permissions/roles listed below to the previously created Google Workspace admin account for this section or it will lead to data collection issues. The proper GCP Service Account name format should follow this example:
SERVICE_ACCOUNT_EXAMPLENAME@PROJECT_ID.iam.gserviceaccount.com
- Login to the GCP console for your organization. Using the project selector, choose or create a project to host the service account that Cisco Identity will use for access.
-
Navigate to the APIs and Services tool under Google Cloud -> APIs and Services -> Enable APIs and Services
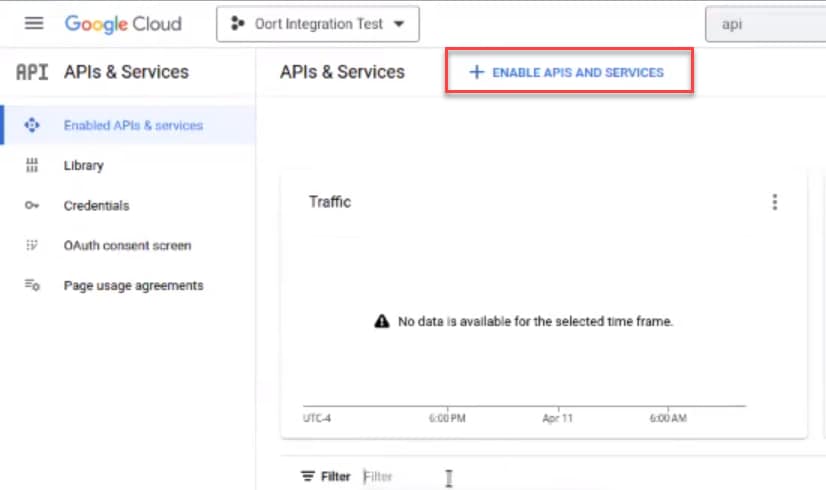
-
Search for Admin API SDK and select Enable.
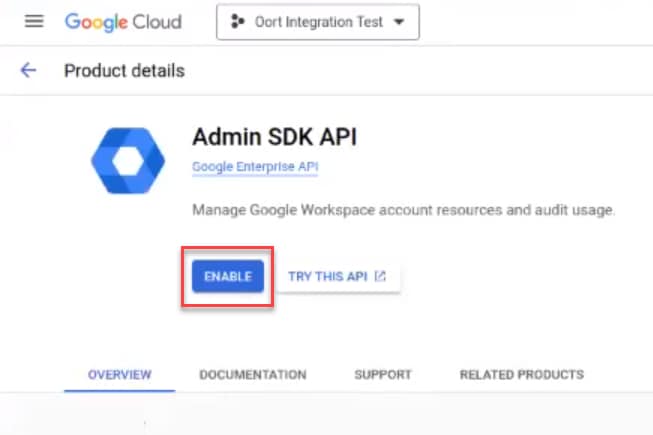
- Also enable the Cloud Resource Manager API, the Cloud Logging API and the Identity and Access Management (IAM) API.
- Create a GCP service account for Cisco Identity to use. Navigate to IAM > Service Accounts > Create Service Account.
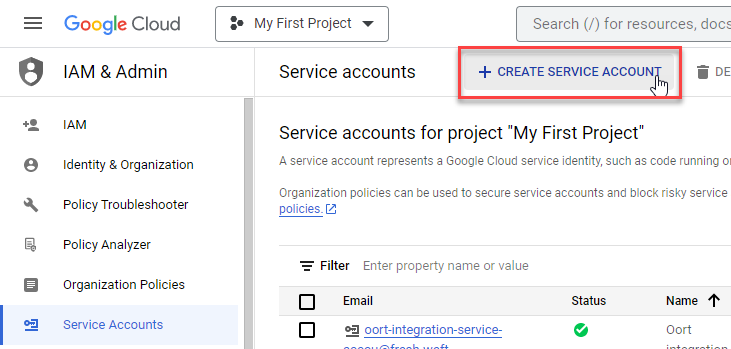
- Provide a name and description for the account
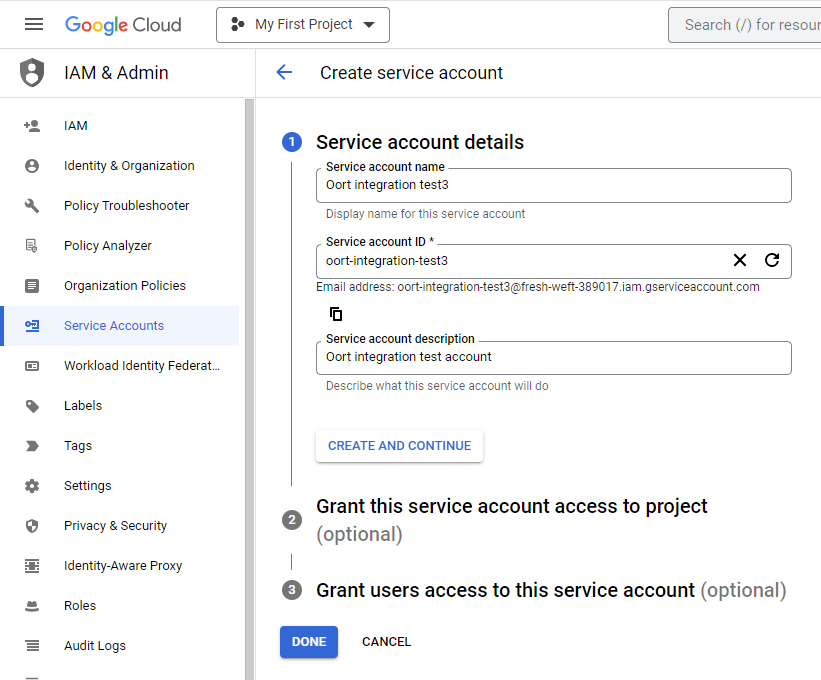
- Choose Add Key > Create New Key on the GCP service account you just made. Store the downloaded key file somewhere safe; you will need to upload it to Cisco Identity when you set up the integration in Cisco Identity.
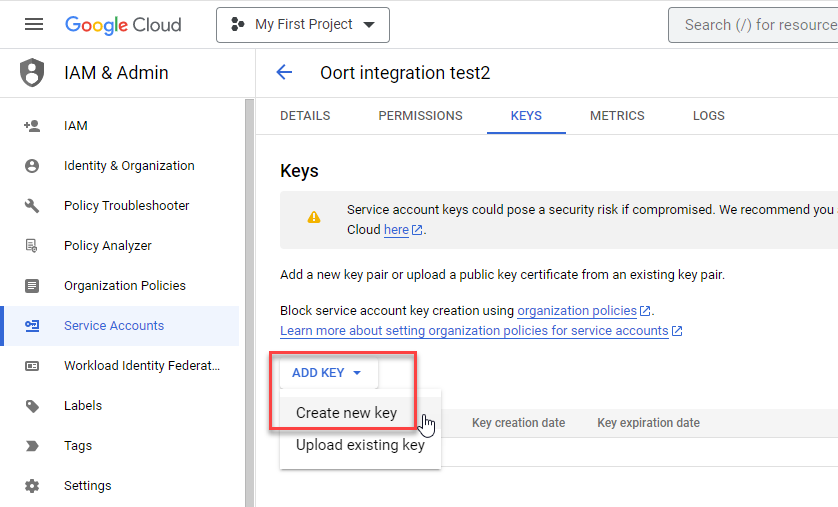
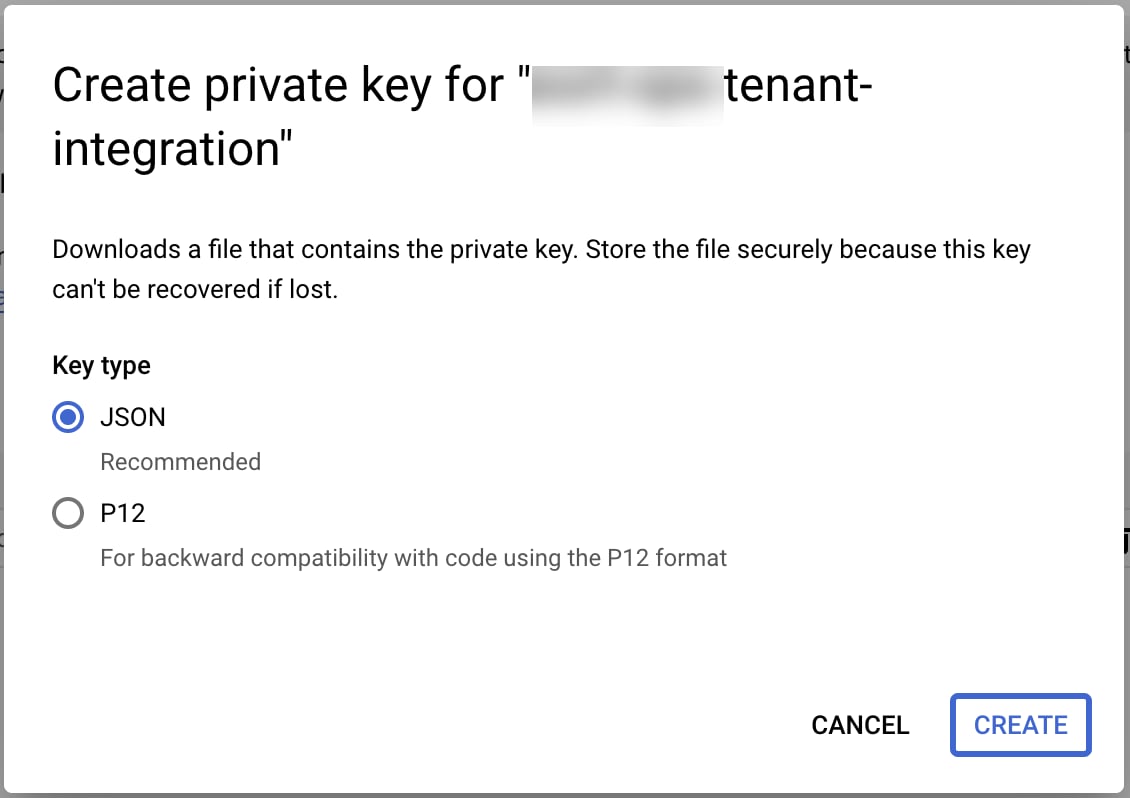
-
Note the Unique ID / OAuth2 client ID for use in the next section when you delegate domain authority for the Workspace API
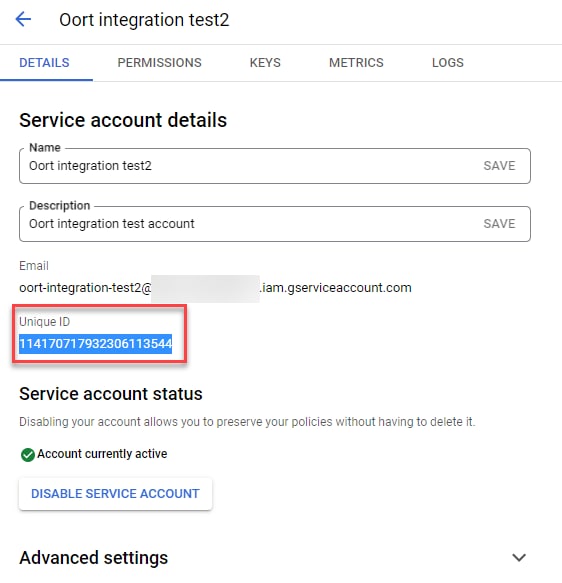
-
Delegate domain-wide authority to the Google Cloud service account created in the [GCP section above], as explained in the following Google docs: https://developers.google.com/identity/protocols/oauth2/service-account#delegatingauthority
-
Select the Add New button
-
In the OAuth scopes (comma-delimited) field,
- Add the Client ID for the GCP service account created in the section above, which is tied to the JSON keys downloaded
- Add the scopes in the code block below. Select Authorize
https://www.googleapis.com/auth/admin.directory.group.member.readonly,https://www.googleapis.com/auth/admin.directory.group.readonly,https://www.googleapis.com/auth/admin.directory.user.readonly,https://www.googleapis.com/auth/admin.directory.rolemanagement.readonly,https://www.googleapis.com/auth/admin.directory.orgunit.readonly,https://www.googleapis.com/auth/admin.directory.device.mobile.readonly,https://www.googleapis.com/auth/admin.reports.audit.readonly,https://www.googleapis.com/auth/admin.directory.device.chromeos.readonly,https://www.googleapis.com/auth/admin.directory.user.security,https://www.googleapis.com/auth/logging.read
Below are links for reference:
https://www.googleapis.com/auth/admin.directory.group.member.readonly, https://www.googleapis.com/auth/admin.directory.group.readonly, https://www.googleapis.com/auth/admin.directory.user.readonly, https://www.googleapis.com/auth/admin.directory.rolemanagement.readonly, https://www.googleapis.com/auth/admin.directory.orgunit.readonly, https://www.googleapis.com/auth/admin.directory.device.mobile.readonly, https://www.googleapis.com/auth/admin.reports.audit.readonly, https://www.googleapis.com/auth/admin.directory.device.chromeos.readonly, https://www.googleapis.com/auth/admin.directory.user.security, https://www.googleapis.com/auth/logging.read (for collecting Logging data)
Note that the admin.directory.user.security scope that is listed is required to use [Remediation Actions] for Google accounts within Cisco Identity
- Navigate to the IAM panel on the sidebar, and use the project selector to select the organization (top-level) context. Note that on the project picker it says "Organization" in the Type column for the correct resource. When you are on the right page you should see that it says "Permissions for organization \"
-
Select Grant Access at the top of the table
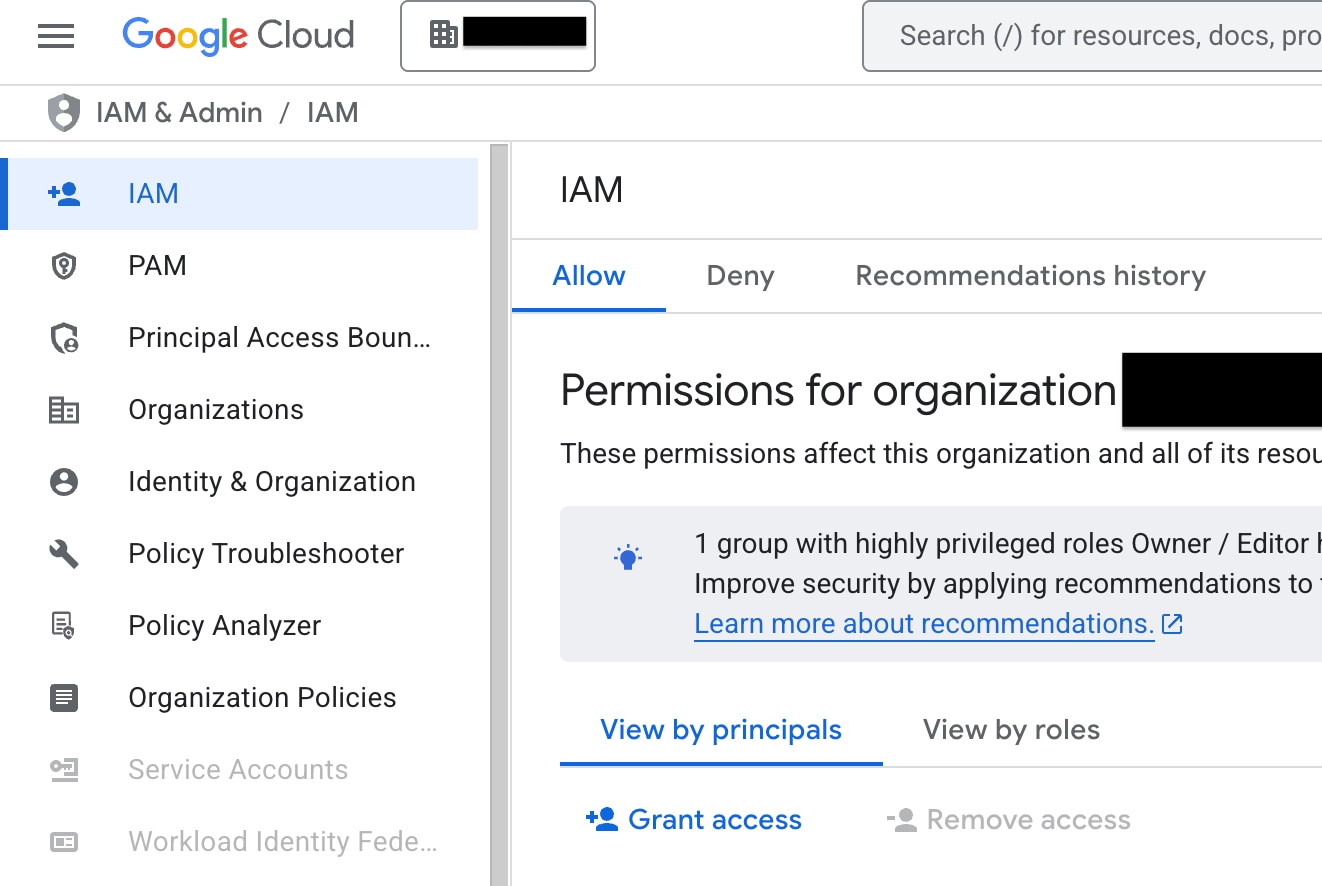
-
In the access form, enter the email address of the GCP service account in the New principals field, and assign the roles Logs Viewer, Private Logs Viewer, Security Reviewer and Browser. Select Save
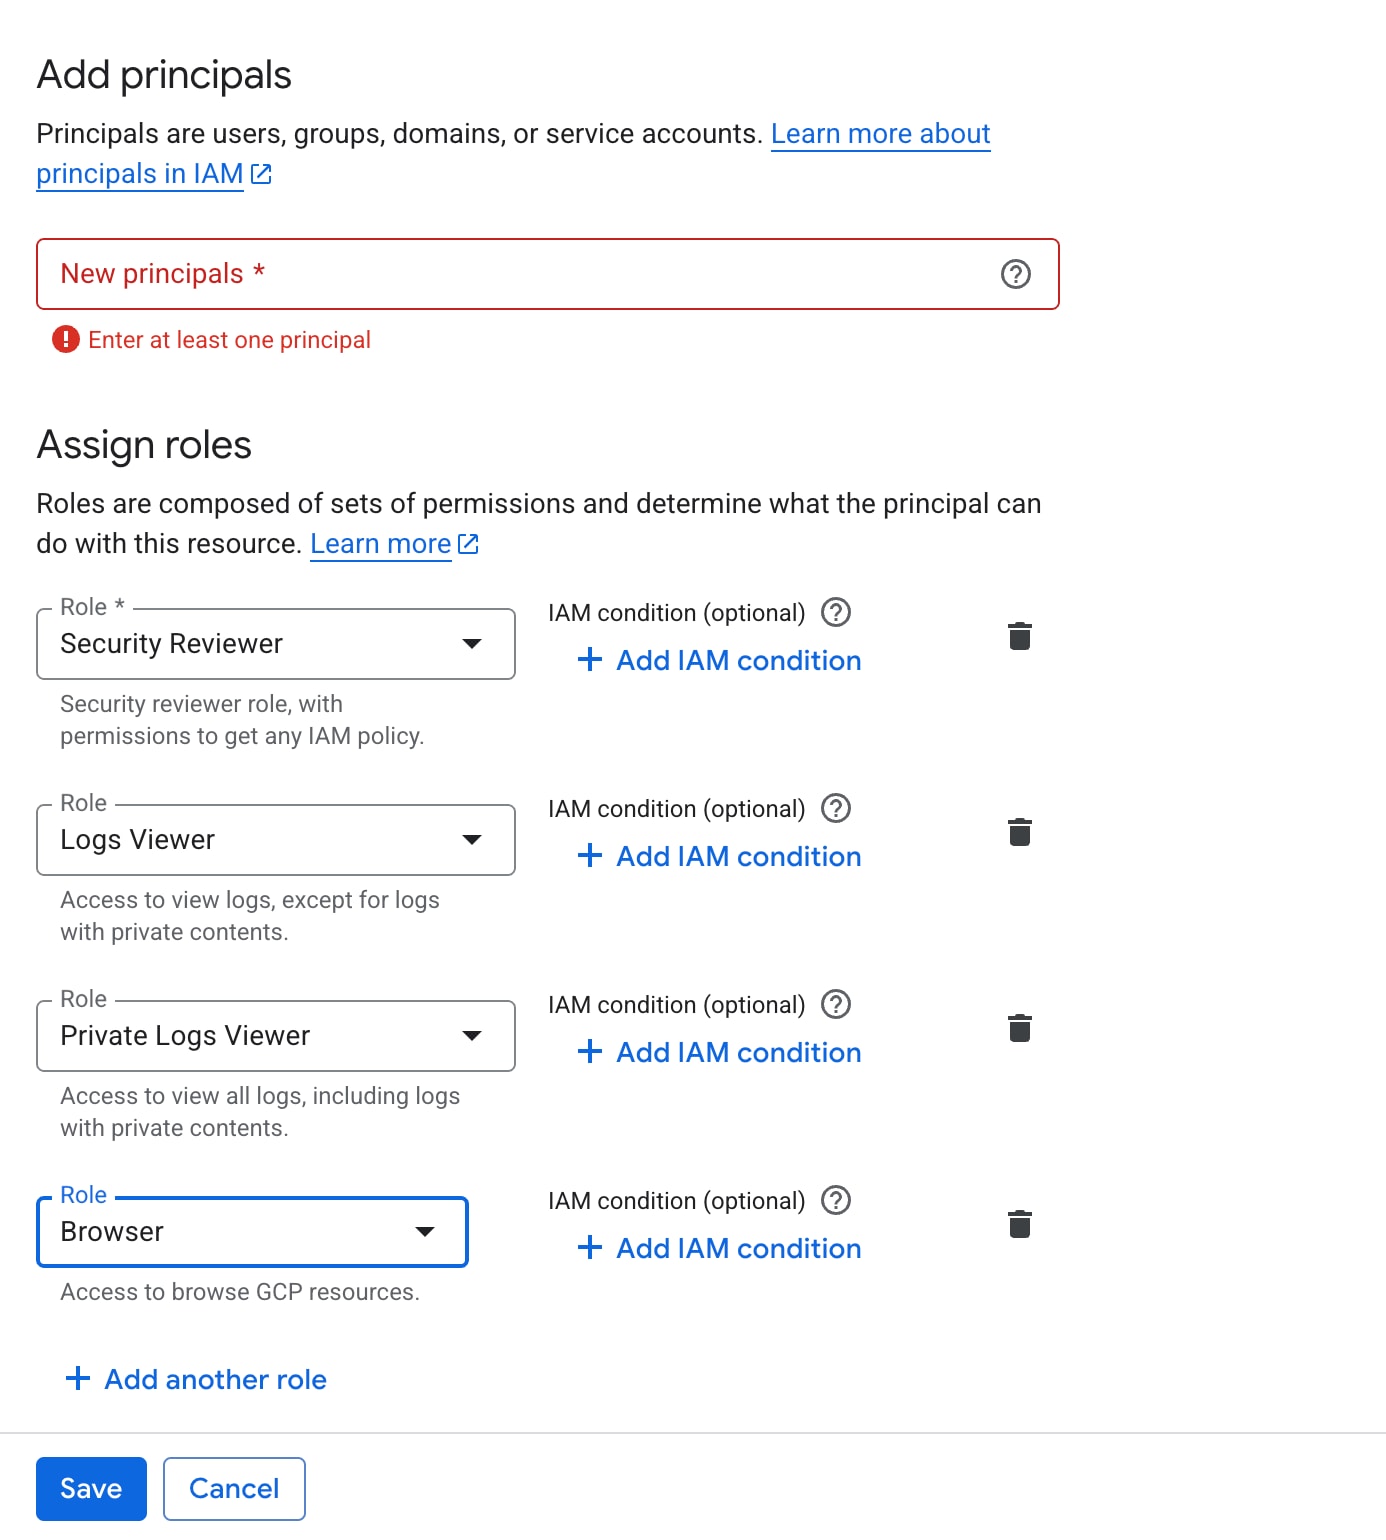
Create a Google Workspace integration in your Cisco Identity tenant
- From the Integrations page, select Add Integration and select Google Workspace
- Enter a name for the integration, such as Google-customername
- Enter your unique Google Workspace or Cloud customer ID. Note - You can find this ID in your Admin console: Account > Account settings > Profile
- Enter the email Google Workspace admin user that the service account is impersonating
- Upload the JSON key file created for the GCP service account
- Select Save. This will automatically trigger an initial connectivity test
Enable GCP Audit Logging
Not all service account activity is logged by default in GCP. Refer to the GCP documentation to configure your audit logging according to your needs at the project, folder, or organization level. Cisco Identity uses these logs as indicators of service account activity.
Updating Google Service Account Keys
If desired, the JSON keys created for the service account can be rotated or updated.
- Create new keys for the GCP service account.
- In the Cisco Identity console, select the 3 dot menu for the Google integration and select Edit Settings
- Select Reset Credentials. Then upload the new JSON file and select Save
- Test connectivity to ensure a successful connection
Configuration Checklist
If you are not seeing data or account activity that you expect to see, these are the things to check:
GCP Service Account
- The GCP service account has been created in a GCP project.
- The GCP service account has been given the Security Reviewer, Browser, Private Logs Viewer, and Logs Viewer roles at the organization level in IAM in GCP.
- The key for the GCP service account that Cisco Identity is using is still present and enabled in GCP IAM for its project.
- The GCP service account has been given Domain-Wide-Delegation with the scopes listed above.
- The Cloud Resource Manager API, the Cloud Logging API and the Identity and Access Management (IAM) API have been enabled in the project that hosts the GCP service account.
Google Workspace admin user
- The Google Workspace admin user has been created.
- The Google Workspace admin role has been created and has the permissions listed above.
- The Google Workspace admin role has been assigned to the Google Workspace admin user.
Cisco Identity Configuration
- The Google Customer ID has been entered correctly. Note that there can only be one integration per Google Customer ID in a Cisco Identity tenant.
- The email of the Google Workspace admin user has been entered correctly and exactly matches the user currently intended.
- The service account key for the GCP service account that Cisco Identity is using is currently enabled in GCP. If in any doubt, generate a new key in the GCP console and upload it to Cisco Identity.
GCP Audit Logging
- GCP Audit Logging has been configured at the desired level of the GCP organizational hierarchy (organization, folder, or project) and at the desired level of detail.
Service Account collection from projects with VPC Service Controls
Google's VPC Service Controls feature allows you to restrict the IPs from which GCP API calls — such as requests to list service accounts — can be made. Cisco Identity will skip collection from projects in which VPC Service Controls prohibit the required API calls. The VPC Service Controls docs in google show how you can add an exception allowing our IPs to access the the IAM and Cloud Logging resources within the service perimeter. In the Cisco Identity Add Integration dialog, you can see the list of IP addresses that Cisco Identity uses to collect integration data. Note that these IPs depend on the region in which your tenant is deployed, so you should not rely on the specific values in this image.
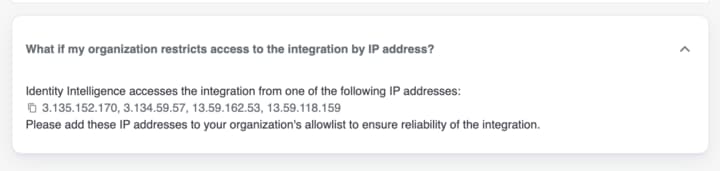
Google Sheets
Overview
The Cisco Identity Integration for Google Sheets allows you to use a familiar spreadsheet interface to manage user identity data. This add-on, available on the Google Workspace Marketplace, lets you add or update user information directly in any Google Sheet, and the integration will automatically synchronize these changes to your Cisco Identity tenant via SCIM.
This approach provides a simple, auditable, and efficient way for administrators to manage user identities without needing direct access to the Cisco Identity portal for every change.
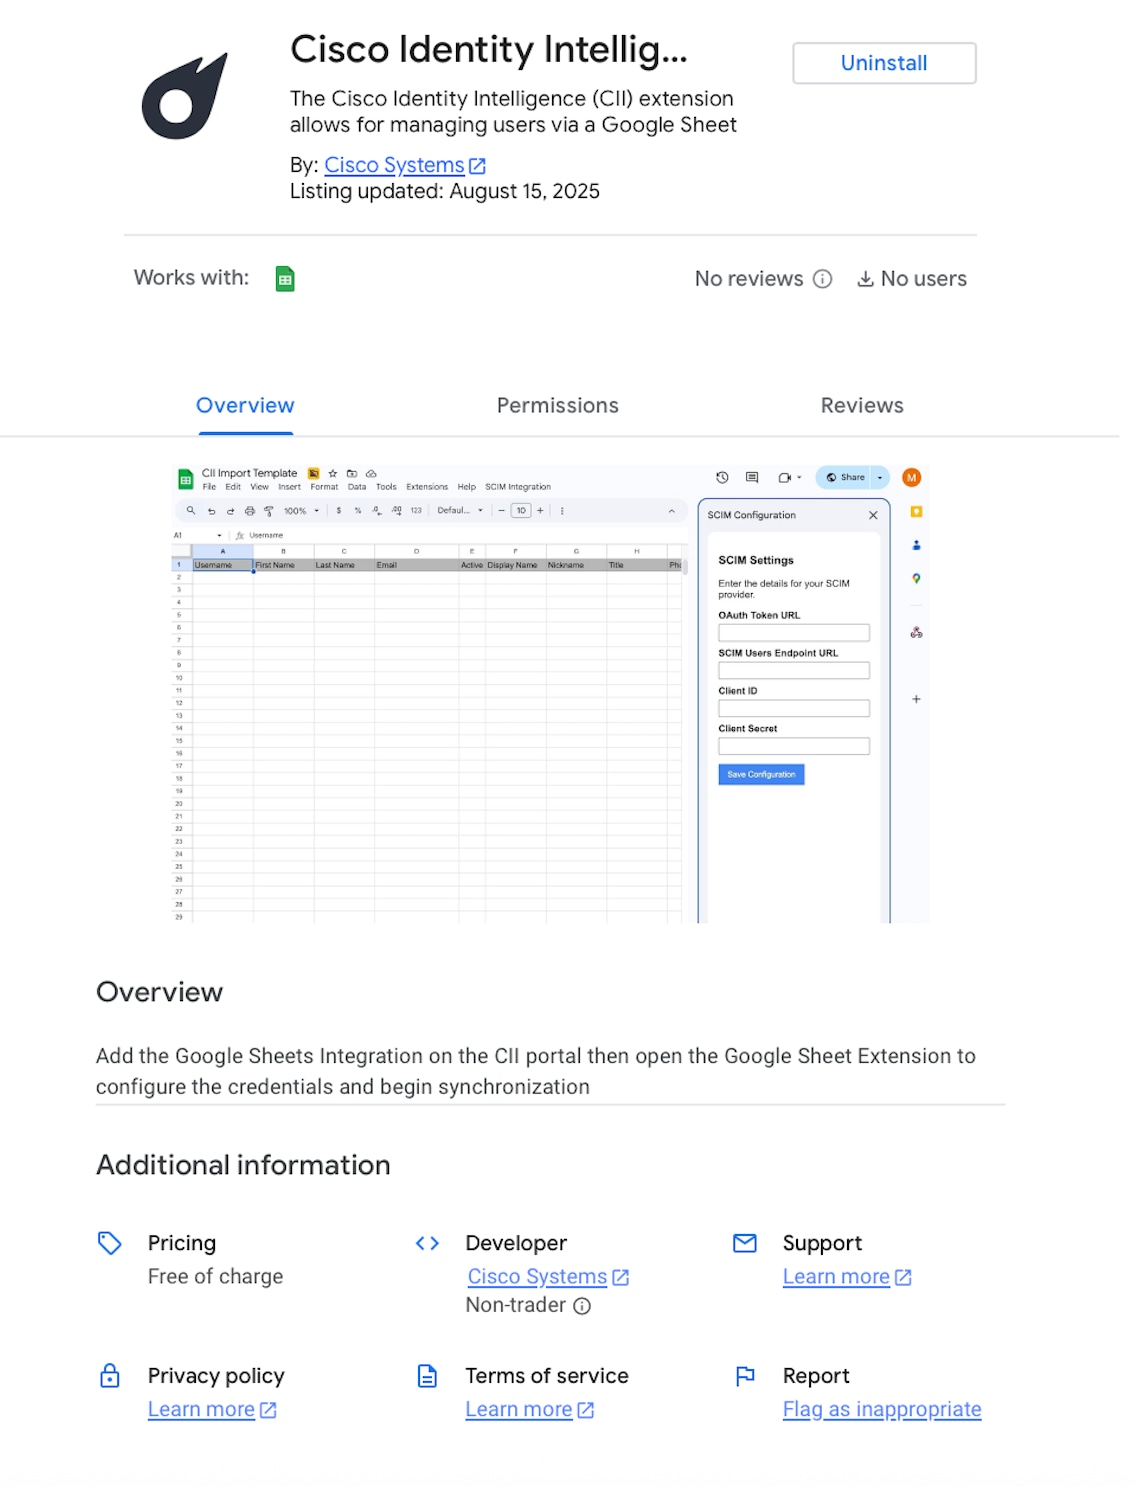
Privacy Policy & Terms of Use
- For information on the Cisco Identity Privacy Policy, please see this resource: https://oort.io/company/product-privacy-policy/
- For our Terms of Use, please see this resource: https://oort.io/terms-of-use/
How the Google Sheets Integration works
The Google Sheets integration is an official Google Workspace Add-on that you install directly into your Google account. Once installed, it adds a custom option under the Extensions toolbar to any Google Sheet you open, allowing you to configure and manage the sync process. The add-on runs entirely within your Google environment, acting on your behalf to securely send user data from your sheet to the Cisco Identity SCIM endpoint.
Permission Requirements within Google Sheets
The first time you run a function from the add-on menu, Google will require your permission for the add-on to work. This is a standard security procedure. You will be presented with a professional consent screen asking for a minimal set of permissions:
- See, edit, create, and delete the current spreadsheet: This scope is restricted to only the single spreadsheet you are working in. The add-on cannot see or access data within any other Google Sheets that do not have the add-on enabled
- Display and run third-party web content in prompts and sidebars: This allows the add-on to show the configuration menu
- Connect to an external service: This allows the add-on to send SCIM data to the secure Cisco Identity API endpoint you configure
- Allow this application to run when you are not present: This permission is required for the "Enable Automatic Sync" feature to work, allowing the add-on to check for updates on a schedule even when the spreadsheet is closed.
Configuration Steps
To set up the integration, perform the following steps:
Install the Add-on
- Go to the "Cisco Identity Sheets Extension" using this link link and select Install
- Follow the on-screen prompts to grant installation permissions for your account or domain.
Launch and Configure
- Create a new, empty Google Sheet
- Within that Google Sheet, navigate to the menu and select Extensions > Cisco Identity > 1. Configure Credentials which will open a configuration sidebar
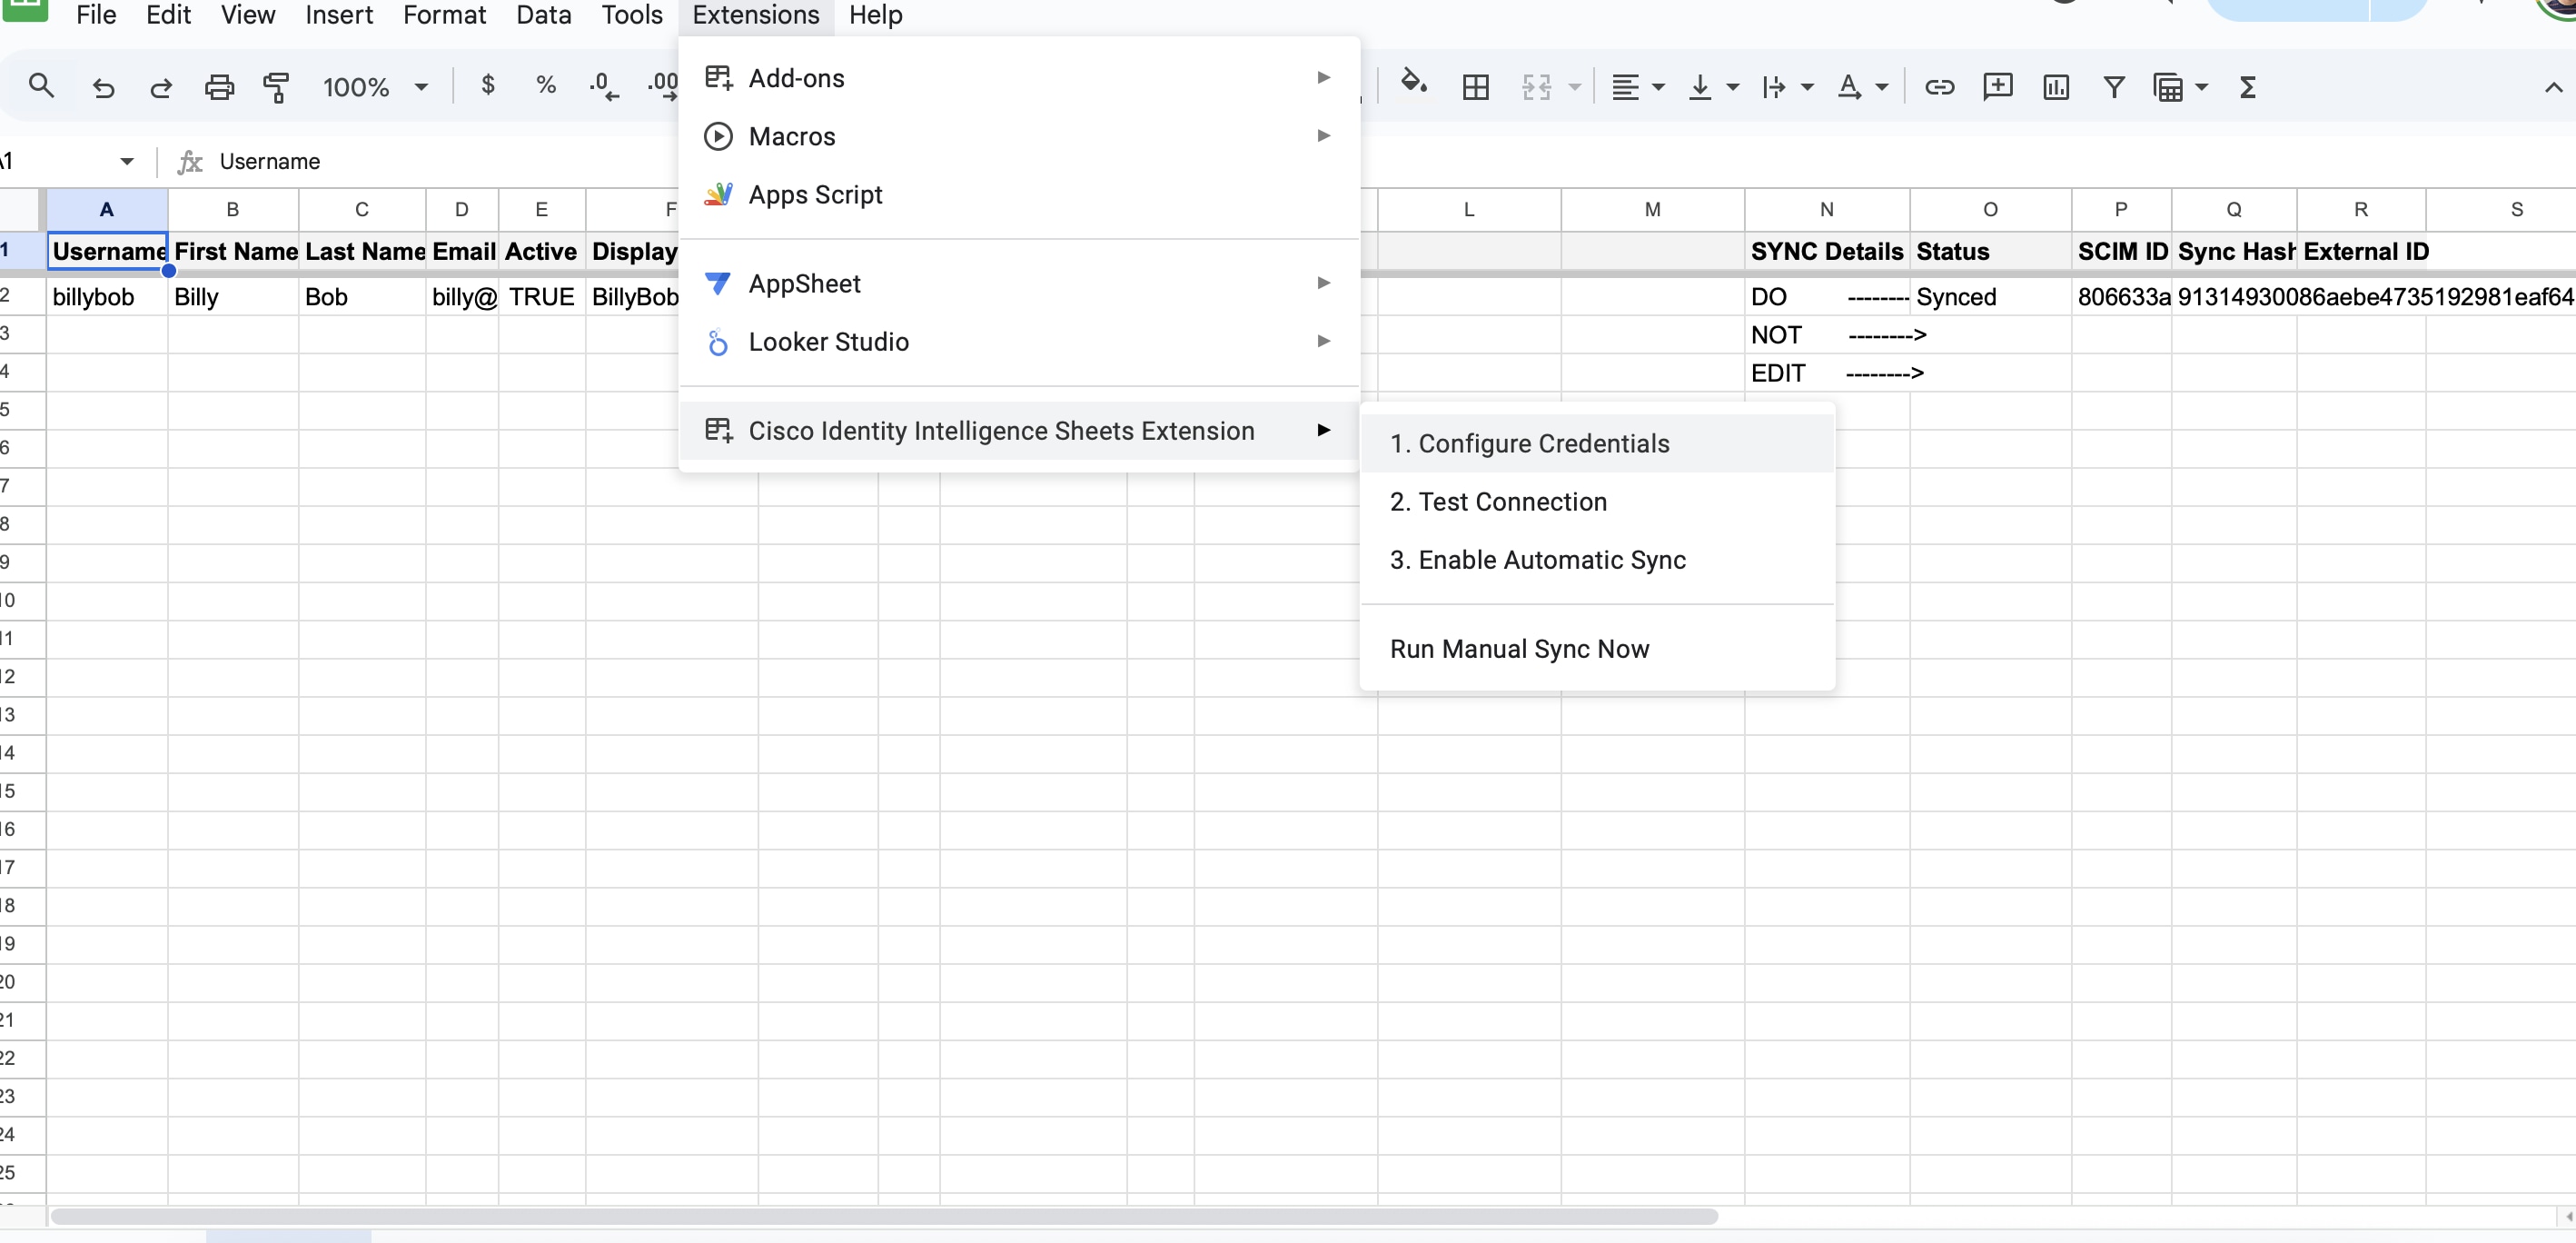
- Login to Cisco Identity and navigate to the Integrations menu item > Add integration > and select SCIM integration. Keep this page open because you will need to copy the credentials in the next step
- In the Google Sheets sidebar, paste the Endpoint URL, Token URL, Client ID, and Client Secret from the Cisco Identity SCIM integration set up page (Step 4) into the corresponding fields and select Save
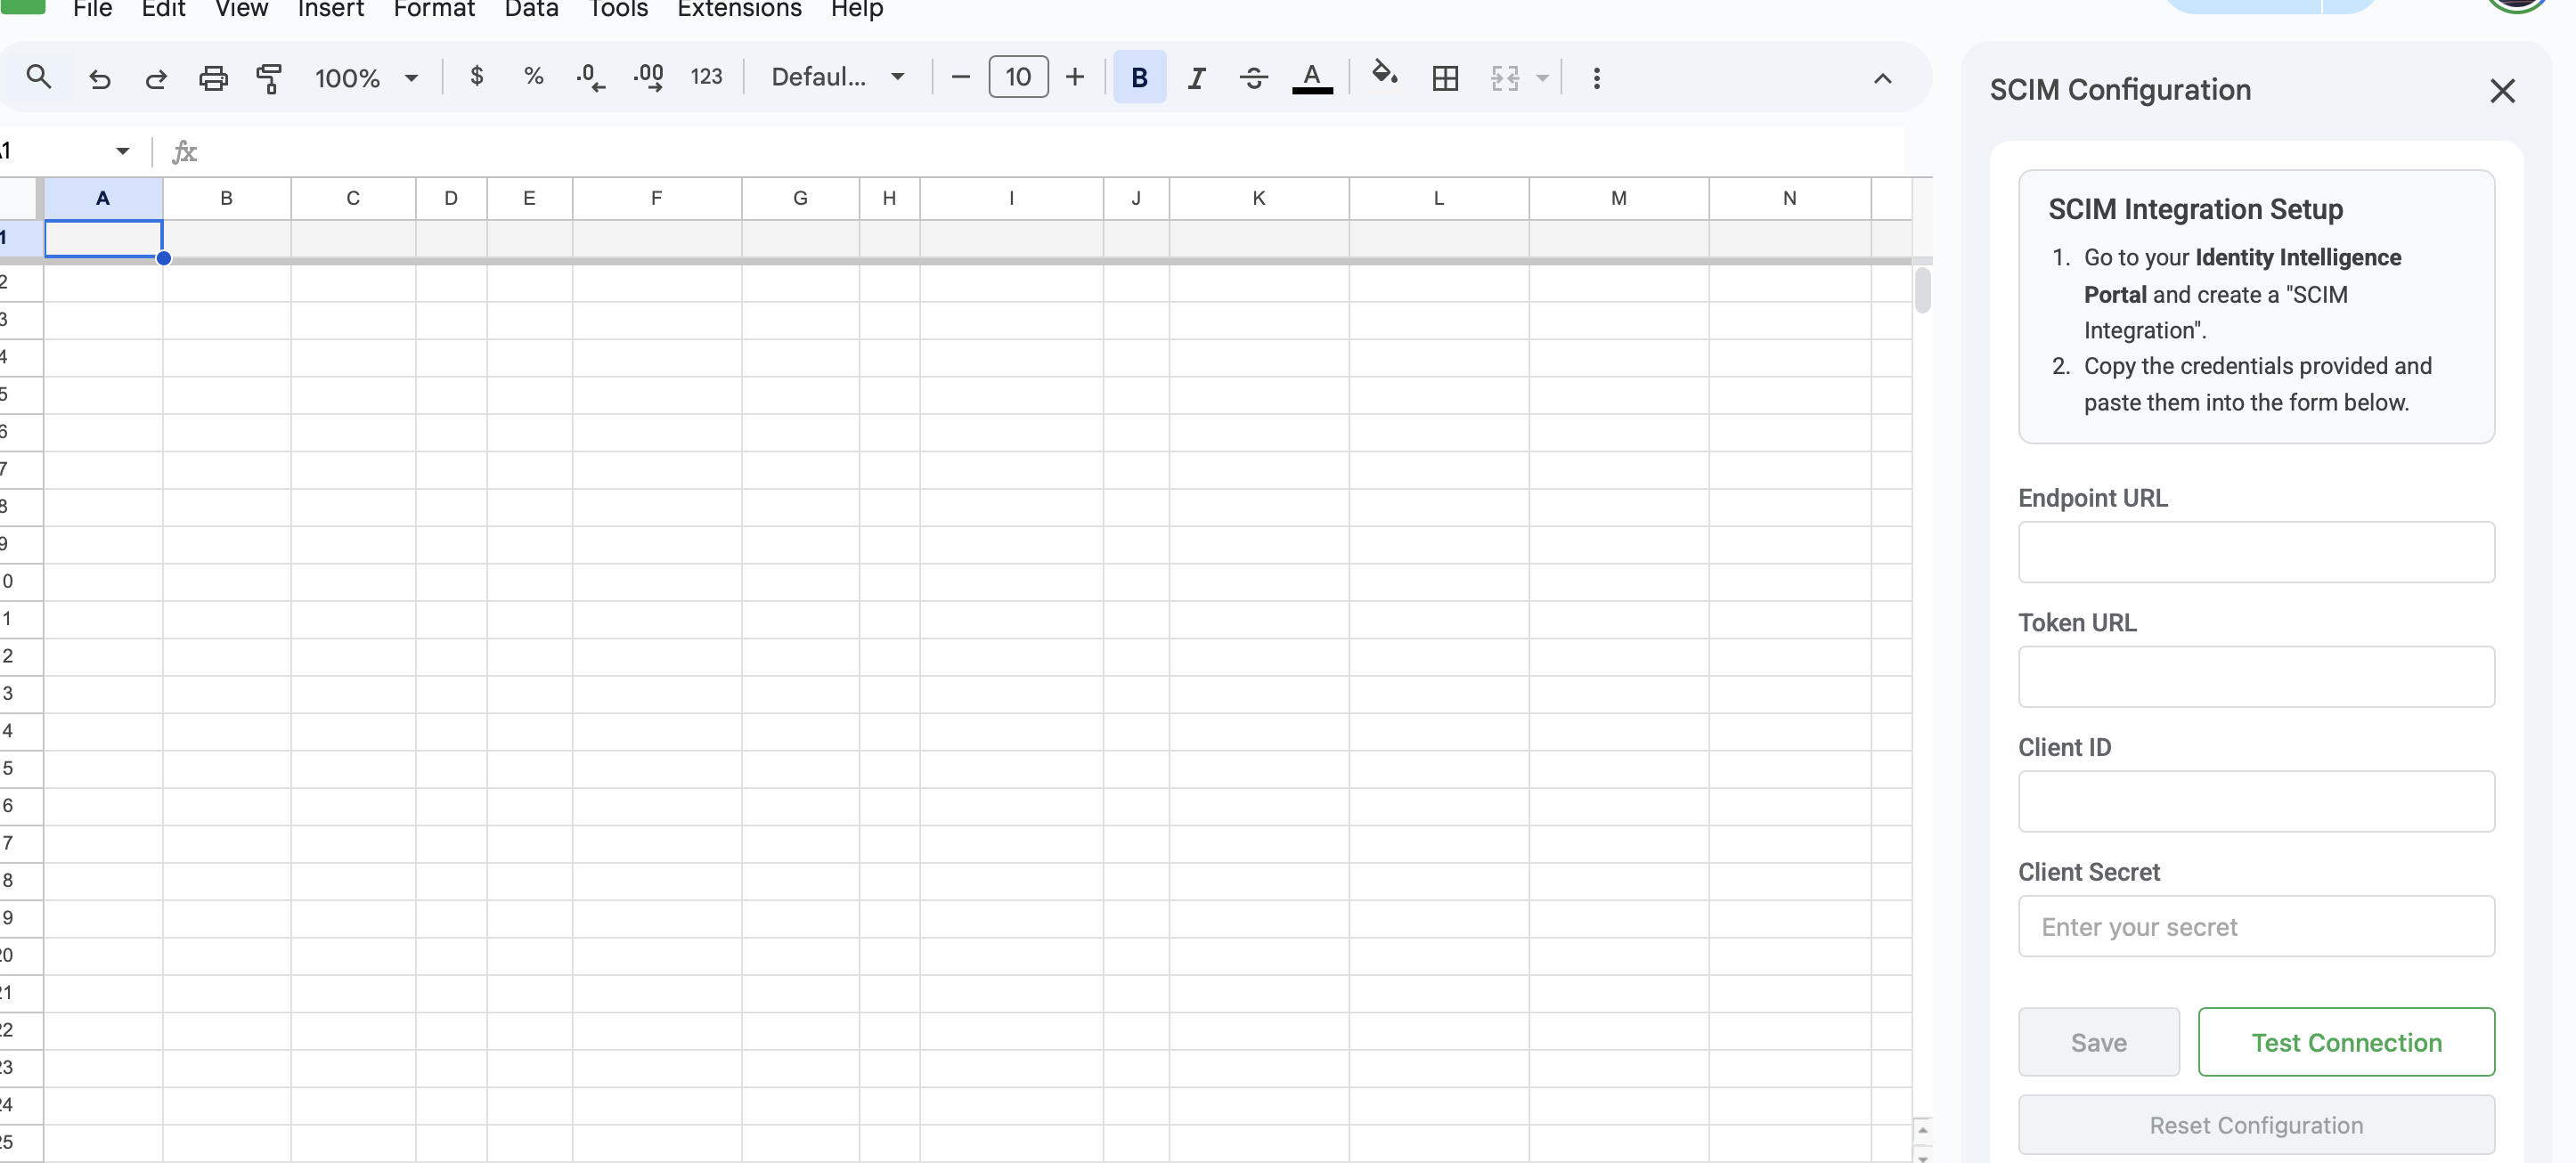
- Select your Google account. A professional consent screen will appear, showing the add-on name and the specific permissions requested
- Review them and select Allow
Test Connection and Enable Sync
-
After you have successfully saved your credentials, the add-on will automatically add the required template headers and formatting to the empty sheet
NOTE: This templating feature will only work if the sheet is completely empty. If your sheet contains any data, the save will fail with a warning
-
Within that Google Sheet, navigate to the menu and select Extensions > Cisco Identity > 2. Test Connection
- A pop-up will appear confirming if the connection to the Cisco Identity API was successful
- To enable the automatic sync, navigate to the Extensions menu again, select Cisco Identity > 3. Enable Automatic Sync. This will set up a trigger that automatically runs the sync process once every hour
- If you need to push changes immediately, you can select Run Manual Sync Now from the Cisco Identity Extensions menu at any time
Adding and Editing Users in the Sheet
Once the integration and connection between Google Sheets and Cisco Identity has been configured, adding and editing users in the sheet is simple.
Add a new user
Fill out a new row with the user's details - Username, First Name, Last Name, Email, Active. Leave the [Sync Details columns] (Status, Sync Hash) blank.
The script will populate these fields automatically upon creation.
Update an Existing User
Change the desired value(s) in a given user's row. For ex: change the Active column from TRUE to FALSE.
The script will detect the change and send an update request.
Sync Details" Columns
The following columns are managed by the script and SHOULD NOT be edited manually:
- Status - Shows if a row was successfully synced or if an error occurred
- Sync Hash - A "digital fingerprint" of the row's data which is used to detect changes
Microsoft Active Directory
Overview
Active Directory (AD) remains the cornerstone of identity management for the majority of enterprises and is a frequent target for identity-based attacks. Cisco Identity provides unified visibility and actionable insights across on-premises and hybrid identity environments by integrating directly with your AD using a secure, open-source PowerShell script.
This document provides a high-level overview, architecture, and the main benefits of AD integration. Detailed setup and technical instructions are maintained in the official GitHub README, which you should consult for the latest configuration steps.
What Problem Does This Solve?
Traditional Active Directory environments often lack unified visibility with cloud or other identity providers, making it challenging to detect risky accounts, misconfigurations, and weak access controls. By integrating Cisco Identity with AD, organizations are able to:
- Gain a comprehensive identity inventory by merging on-prem AD users and groups with identities from SaaS, cloud, or other directories, creating a single source of truth for identity management and security analytics.
- Detect risks and hygiene issues automatically such as stale accounts, guest accounts, and non-compliant or weak password practices, reducing attack surface and supporting regulatory compliance.
- Classify users flexibly (e.g., service accounts, administrators, executives) through customizable rules, which enhances monitoring, access control, and the enforcement of targeted security policies.
High-Level Architecture
The integration is designed for simplicity, security, and scalability:
- Open-Source PowerShell Script: A lightweight script, maintained by Cisco, runs on a server with AD connectivity—no agent installation needed on domain controllers.
- Provisioning and Credential Security: A one-time script is used to securely encrypt your Cisco Identity API credentials on the host machine. Credentials are encrypted and tied to the specific machine for enhanced security.
- Data Collection & Sync: The main script queries AD for user and group data, then transfers it securely to Cisco Identity using the SCIM protocol.
Setup and Deployment
-
Create a new integration in Cisco Identity UI. To get started, log in to Cisco Identity, go to Integrations > Add Integration > Active Directory. Follow the on-screen steps to give the integration a name, add an optional description, and generate your credentials. Once the credentials are generated, download them by clicking the Download json button.
-
Download scripts and follow README guidance. Next, visit the Active Directory Integration GitHub repository to download the integration scripts and follow the README for detailed guidance on installation, configuration, and customization.
All installation, configuration, and customization steps are documented and updated in the GitHub README. Please refer to the README for:
- Prerequisites and permissions
- Script download and credential provisioning
- Script execution and scheduling (e.g., with Windows Task Scheduler)
- Customization options (attribute filtering, user classification, etc.)
- Troubleshooting and FAQs
For security best practices, always follow the official guidance in the README regarding credential management and script updates.
Appendix
- License: The AD integration scripts are open source, licensed under the Apache License 2.0.
- Support: For technical issues not covered in the README, please reach out to Cisco support.
Cisco Identity Services Engine (ISE)
Overview
Cisco Identity connects to Cisco Identity Services Engine (ISE) through a secure, on-premises agent to collect identity, device, network session, authentication, and deployment health data from ISE and provide visibility into connected users and devices, ISE infrastructure health, and authentication activity.
The goal of this guide is to help you configure the integration between Cisco Identity and your organization’s ISE environment, including deploying the agent, configuring pxGrid, verifying the connection, and troubleshooting common issues.
Quick path
- Prepare ISE and the agent host. Enable the required ISE services and verify network connectivity.
- Create the ISE integration. In Cisco Identity, open Integrations, choose Cisco ISE, and enter a meaningful name and optional description.
- Capture the one-time deployment material. Download the agent package or copy the one-line installation command before leaving the setup page.
- Run the installer on an on-premises host. Use a dedicated directory on a host that can reach ISE and the required outbound cloud endpoints.
- Enter and verify ISE credentials. Setup validates the required ISE APIs before saving credentials in an encrypted store.
- Configure required pxGrid access. The agent requires pxGrid for real-time session events.
- Approve a new pxGrid client. If the agent registers a new client, approve it in ISE Client Management.
- Verify a healthy startup. Confirm pxGrid is active, IoT Core is connected, collection has started, and a fresh heartbeat appears in the ISE dashboard.
1. Prepare ISE and the agent host
Agent host prerequisites
- Docker with Compose, or Podman with podman compose or podman-compose.
- Cisco ISE 3.3 or later with ERS, the required endpoint APIs, and pxGrid enabled.
- Network access from the agent host to the configured ISE API port, which defaults to TCP 443 during setup.
- Network access from the agent host to ISE pxGrid services on TCP 8910.
- Outbound TCP 443 to the environment-specific IOT_ENDPOINT in .env, GitHub release and GHCR endpoints, and signed S3 upload hosts.
- If outbound access uses a proxy, the proxy must allow HTTP CONNECT on port 443. Enter it using an
http://URL during credential setup. - Create a dedicated internal ISE administrator account for the agent with:
- ERS Operator for the required ERS and endpoint API access
- MnT Admin for Monitoring API access used by health and active-session checks
- Use ERS Admin instead of ERS Operator if you would like to be able to perform write actions
ISE-side preparation
- Enable pxGrid services and arrange for an ISE administrator to approve the agent client
- Ensure the selected ISE host is reachable from the agent host
- Ensure TCP 8910 is available between the agent host and the applicable pxGrid nodes
- Enable password-based pxGrid account creation
- A Cisco ISE Super Admin or System Admin must navigate to Administration > pxGrid Services > Settings, then select "Allow password based account creation" and Save
- This setting is disabled by default and is required for the agent to create its pxGrid account. It is separate from enabling the pxGrid service on an ISE deployment node
Cisco Identity does not connect directly to the customer ISE environment. ISE communication originates from the on-premises agent.
Warning: Protect the deployment material: The package and copied command contain a sensitive, one-time bootstrap token. Transfer them only to the intended agent host, do not paste them into tickets or chat, and restrict access to the installation directory. The agent private key is generated locally during setup.
2. Create the Cisco ISE integration within Cisco Identity
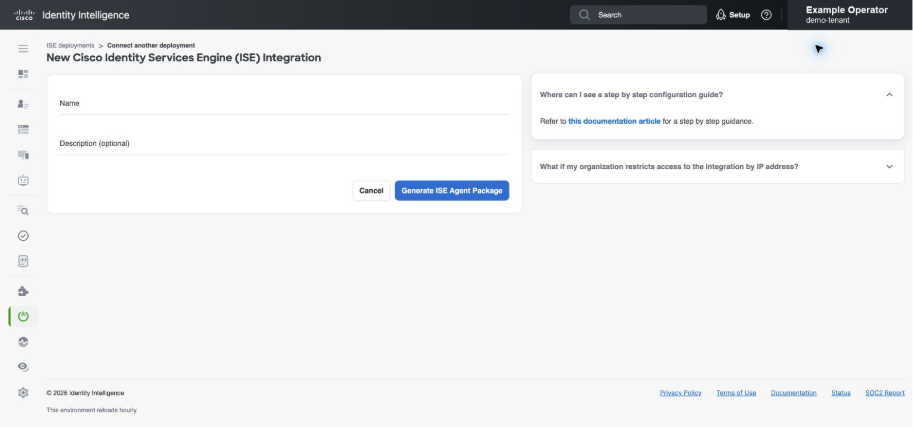
- Using an Admin role in Cisco Identity, navigate to Integrations and select Cisco ISE
- Enter a name and (optional) description into the form. Be sure to use a name that easily identifies the ISE cluster or location
- Select Generate ISE Agent Package. Cisco Identity will then provision the agent identity, and display the deployment package and copyable install command
- Save the deployment material immediately. Use Download ISE Agent Package or Copy Command. Note: You must save these credentials as they cannot be displayed again after leaving the setup page; if replacement material is generated and deployed, the running agent credentials are rotated.
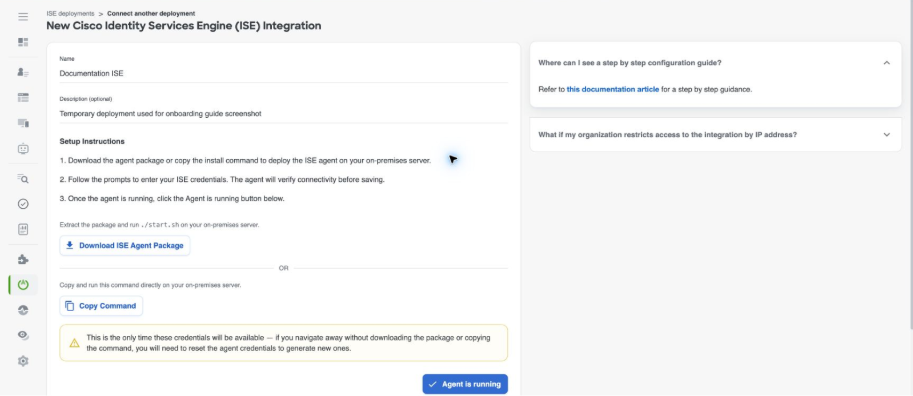
3. Install the agent on premises
Use a dedicated, access-controlled directory. Do not run the installer from a directory containing unrelated environment, certificate, Compose, or launcher files.
Option A — one-line install command
mkdir -p ~/ise-agent
cd ~/ise-agent
## Paste the complete command copied from Cisco Identity, then press Enter
The installer downloads the released host tools, creates the deployment files, completes the one-time agent setup, and starts credential and pxGrid configuration in the terminal.
Do not edit tenant IDs, agent IDs, the IoT endpoint, topic prefix, certificate, or private key
Option B — downloaded ZIP
- Copy the ZIP to the agent host using your organization-approved secure transfer method
- Extract it into a dedicated directory. Change into the directory that contains
.env,start.sh,docker-compose.yml, and certs - Restore executable permissions if necessary and start the agent
cd ~/ise-agent
chmod +x ./start.sh
./start.sh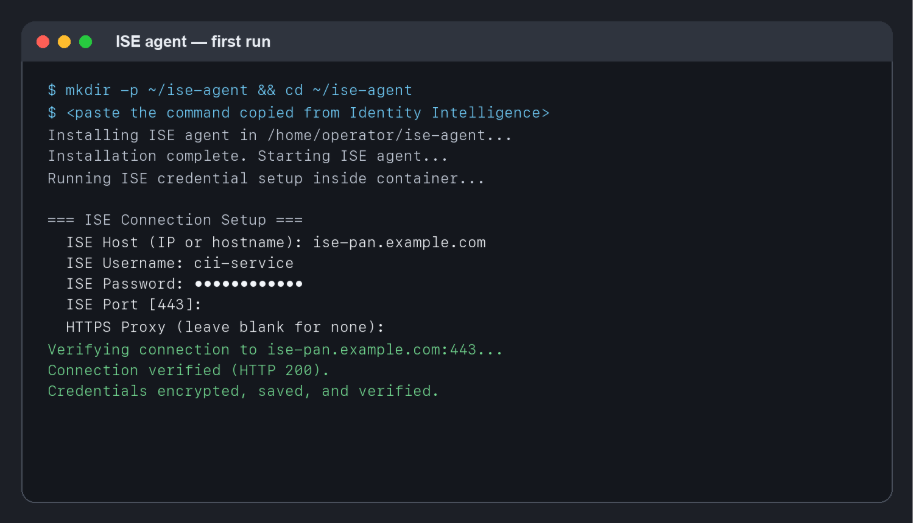
What the credential setup validates
| ISE Host, Username, Password, Port | Saved in an encrypted credential store under certs. The password is not written to .env |
|---|---|
| HTTPS Proxy (optional) | Used for AWS IoT Core and signed S3 egress. Leave blank for direct access and use an http:// URL when configured |
| ERS API verified | The agent reached ISE and the account had access to the required ERS API |
| Endpoints API verified | The account had access to the endpoint information required by the integration |
| HTTP 401 | The username or password was rejected. Nothing is saved |
| HTTP 403 | Authentication reached ISE, but the account lacks access to the identified API. Nothing is saved |
| Other HTTP error | ISE returned an unexpected response. Nothing is saved |
| Connection error or timeout | The agent host cannot reach the configured ISE host and API port. Nothing is saved |
| Proxy connection verified | Setup established an authenticated connection to AWS IoT Core through the configured proxy |
4. Configure required pxGrid access
pxGrid is required to ingest real-time session events and the complete session information expected by Cisco Identity. First-run setup proceeds directly to pxGrid configuration.
Ensure password-based pxGrid account create is enabled. See [ISE side preparations] section above for more info.
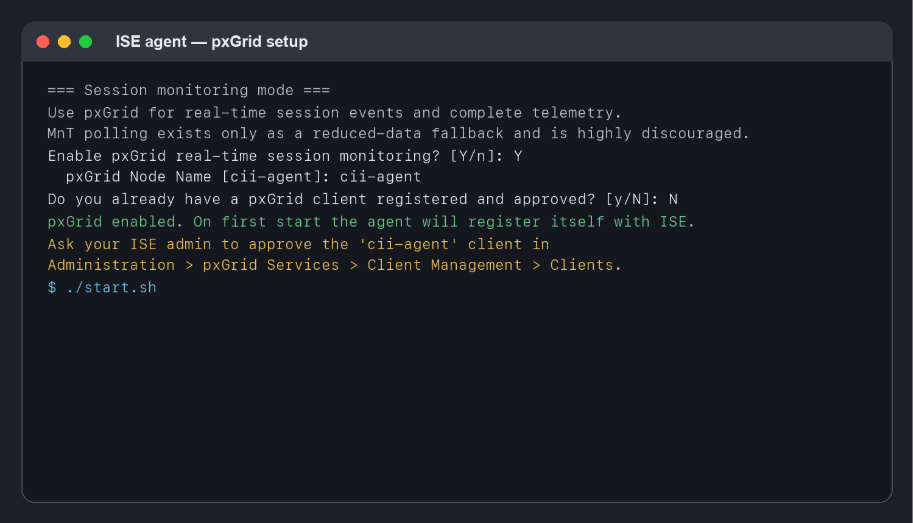
Register a new pxGrid client
- Choose a pxGrid node name. Accept
cii-agentor enter a deployment-specific name - When asked whether you already have an approved pxGrid client, answer
N - Start the agent and note the client name shown in the logs
- In ISE, go to Administration > pxGrid Services > Client Management > Clients
- Find and approve the displayed client
- Follow the logs and confirm account activation, WebSocket connection, session synchronization, and session-topic subscription
Use existing pxGrid credentials
- Enter the approved pxGrid node name
- Answer
Ywhen asked whether approved credentials already exist - Enter the pxGrid password
- Start the agent and verify successful activation and subscription
Reconfigure pxGrid later
./start.sh --enable-pxgrid This replaces the stored pxGrid configuration and restarts the deployment.
5. Verify the first connection
- Find the generated container name. Read the
container_nameline fromdocker-compose.yml. Do NOT assume a fixed suffix - Confirm the container is running. Use the Compose or Podman status command for your runtime
- Follow agent logs. Look for the healthy markers below and investigate any errors before continuing
- Confirm IoT Core connectivity as well as pxGrid activation and session subscription. A heartbeat starts immediately and then repeats every 60 seconds by default. Verify Connected to Iot Core and Agent connected, pxGrid account activated and WebSocket connected, Last Heartbeat, ISE Reachable, agent version, nodes, and current session information synchronized
- Complete the setup page by returning to the Integrations page within Cisco Identity. Select the existing ISE integration and select Agent is running after the first heartbeat is visible
grep 'container_name:' docker-compose.yml

## Docker
docker compose ps
docker logs --tail 200 -f

## Podman
podman ps
podman logs --tail 200 -f 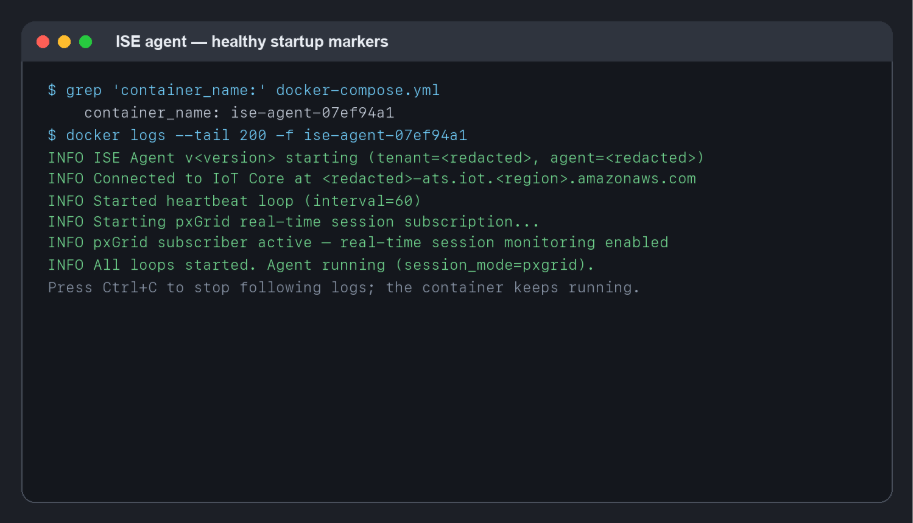
You will now see something similar to the screenshot below when you navigate to the ISE menu item in Cisco Identity:
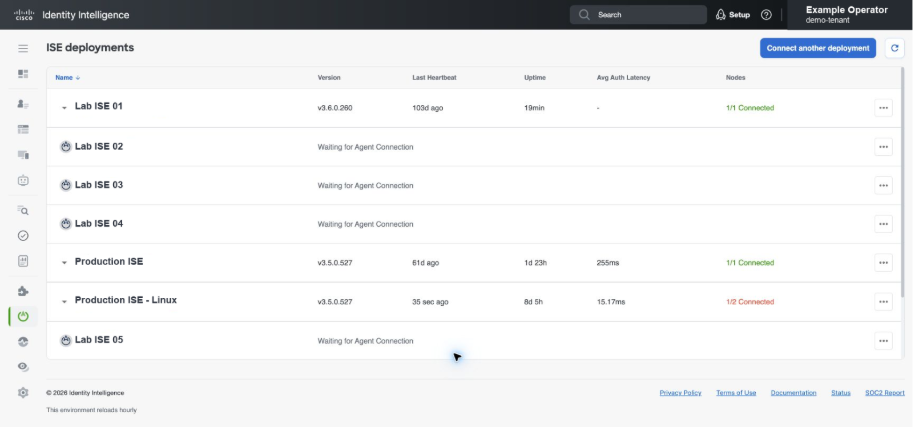
6. Supported host commands
Command
Use
./start.sh
Pull the released image once, run first-time setup when needed, and start the agent
./start.sh --reconfigure
Re-enter ISE credentials and the optional outbound proxy; restart with the new encrypted values
./start.sh --enable-pxgrid
Configure or replace pxGrid state, then restart
./start.sh --update
Pull ghcr.io/duosecurity/ise-agent:latest and restart the deployment
./start.sh --no-pull
Start using an already-loaded local image. Use only for offline or explicitly preloaded-image environments
./start.sh --update --no-pull
Skip the pull and restart the already-loaded local image
./start.sh --stop
Stop and remove the Compose-managed agent container without deleting the installation files or encrypted credentials
Safely reconfigure ISE credentials
Stop the running deployment before replacing ISE credentials or proxy settings.
./start.sh --stop
./start.sh --reconfigure
Note: COMMAND RULE Use only one action flag at a time.
--no-pullis the exception: it is a modifier that can accompany startup or--update.
7. Troubleshooting workflow
Step 1 — establish the local state
pwd
ls -la
test -f .env && echo '.env present'
test -f certs/certificate.pem.crt && echo 'certificate present'
test -f certs/private.pem.key && echo 'private key present'
grep 'container_name:' docker-compose.yml
Warning: DO NOT ATTACH SECRETS Never include
.env,certs/private.pem.key, certificate bundles,.credentials.enc, .pxgrid.enc, or the one-line bootstrap command in a support ticket. Be sure to always redact tenant IDs, agent IDs, hostnames, usernames, and IoT endpoint prefixes from logs when required by policy.
Step 2 — inspect container status and logs
## Docker
docker compose ps
docker logs --tail 200

## Podman
podman ps -a
podman logs --tail 200
Symptom
Next action
No container runtime found
Install Docker with Compose or Podman with a Compose provider, then rerun ./start.sh
Required file not found
Re-extract the complete package or reset agent credentials in the UI and deploy the replacement package. Do not reconstruct the missing file
Container repeatedly restarts
Read the first fatal error in logs. Common causes are missing env values, missing encrypted ISE credentials, authentication failure, or unreachable endpoints
Image pull fails
Verify access to ghcr.io and proxy/firewall policy. Use --no-pull only when the exact image is already present locally
Deployment material cannot be used
Generate replacement deployment material in Cisco Identity and redeploy the package
Step 3 — interpret the first relevant log error
Log / symptom
Meaning and next action
HTTP 401 / authentication failed
Rerun ./start.sh --reconfigure and enter the current ISE service-account credentials
HTTP 403 / access denied
Ask the ISE administrator to confirm the account has the required ERS API access
Connection error or timeout
Verify the configured ISE hostname and port, then confirm DNS, routing, and firewall access from the agent host
JSON or unexpected-response error
Capture the timestamp and surrounding redacted log lines, then contact support. Do not run diagnostic commands inside the container
Image pull failed
Verify registry and proxy access. Use --no-pull only when the released image is already present locally
To replace credentials safely, refer to the steps in the [Safely reconfigure ISE credentials] section above
Step 4 — diagnose outbound IoT / proxy failures
- Look for Connected to IoT Core. Repeated CONNACK timeouts or connect-attempt failures mean the cloud path is not healthy
- If direct access is expected, confirm outbound TCP 443 to the IOT_ENDPOINT value in
.env - If a proxy is required, rerun
./start.sh --reconfigureand enter the proxy ashttp://host:port(with credentials only if required). Setup performs an authenticated MQTT validation through the proxy before saving - Allowlist the
IOT_ENDPOINThostname, not a resolved IP address. Large batches also require HTTPS access to the host in the short-lived signed S3 URL
grep '^IOT_ENDPOINT=' .env
./start.sh --stop
./start.sh --reconfigure
Step 5 — diagnose pxGrid
Log / symptom
Meaning and response
Waiting for admin approval
Approve the displayed client under Administration > pxGrid Services > Client Management > Clients
Account disabled by ISE admin
Re-enable or recreate the pxGrid client, then rerun --enable-pxgrid if credentials changed
Activation timed out
Verify approval, node name, password, ISE reachability, and pxGrid service availability
Session service not found / pubsub service not found
Verify pxGrid services are enabled and advertised by the deployment
WebSocket connection failed
Verify TCP 8910 connectivity, routing, and pxGrid node availability
pxGrid activation failed
Correct the approval, credentials, TCP 8910 connectivity, or pxGrid service configuration, then restart the agent
After correcting pxGrid configuration, run:
./start.sh --enable-pxgrid Step 6 — agent is connected but the dashboard is stale
- Confirm IoT Core connectivity. Look for Connected to IoT Core and command / bulk-upload subscriptions
- Confirm heartbeat health. Look for Started heartbeat loop (interval=60) and ISE health warnings
- Check ISE reachability. Failed to collect ISE health means the heartbeat can reach the cloud while ISE itself is unavailable
- Use the dashboard refresh button. Refresh re-queries cloud-side integration, health-history, and node-metric data; it does not replace local log validation
- Update an old agent. Run
./start.sh --update, then verify the reported agent version and fresh heartbeat
docker logs --since 10m  2>&1 | \
grep -E 'Connected to IoT Core|heartbeat|Failed to collect ISE health|pxGrid|Connection failed'
Step 7 — collect safe support details
docker logs --since 30m
## Copy only the relevant time window and redact it before sharing.- Include the agent version, approximate failure time with timezone, container state, and the first relevant error chain
- State whether the failure affects ISE access, IoT Core, pxGrid, bulk S3 upload, or only the cloud dashboard
- Do not include the installation bundle, private keys, encrypted credential files, passwords, or unreviewed log output
AWS Identity Center
Overview
If your AWS integration was created before March 2025 and has an Access Key ID field in its setup page, see [AWS User-Based Access].
Cisco Identity can connect directly to AWS environments that use AWS IAM Identity Center and collect data regarding user accounts, activity, and more.
Requirements
This integration requires the following:
- AWS IAM Identity Center is the replacement for the former AWS Single Sign-on (SSO) functionality (see article). The use of AWS IAM Identity Center is a hard requirement for this integration. User data will not be collected without it.
- IAM Identity Center is configured for your AWS enterprise account at a parent level (organization), with child AWS accounts managed by that IAM Identity Center instance (example shown below)
- If IAM Identity Center is configured separately or discretely with individual AWS account instances, then you will need to set up a Cisco Identity AWS integration for each account.
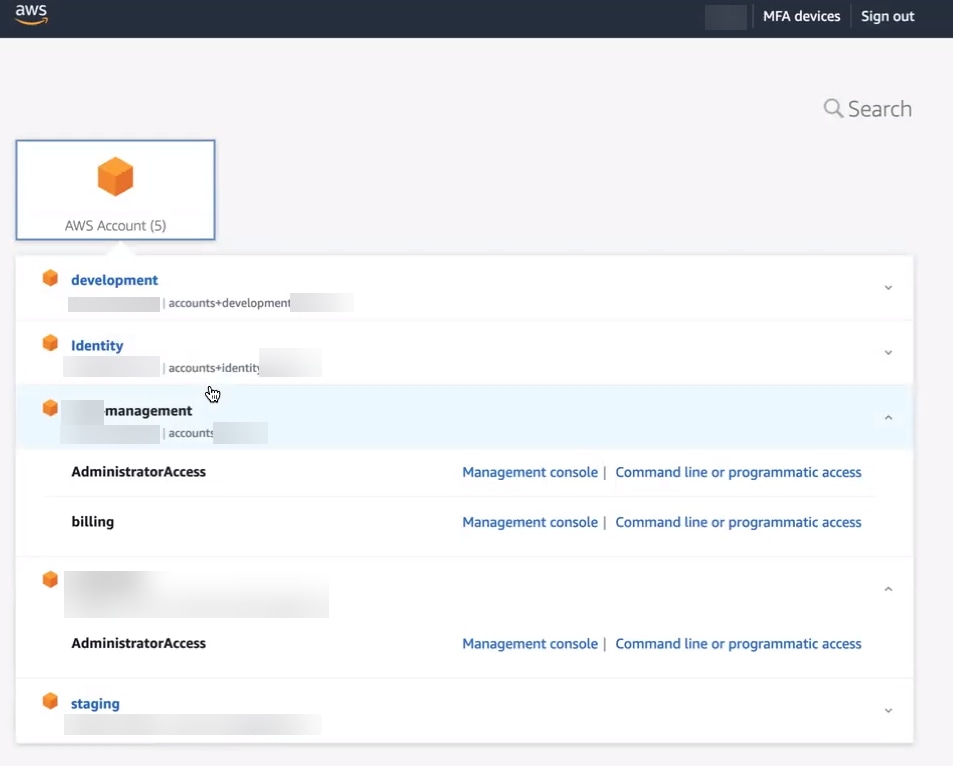
AWS Configuration
Note - This connection method requires only a role and policy. For ease of deployment, these are provided as a CloudFormation template within the Cisco Identity UI. If you are unable to apply CloudFormation templates in your environment, speak to your support representative about configuring the role and policy manually.
-
In Cisco Identity, go to Integrations, click Add Integration, select AWS, and open the Initial Setup tab. Click Generate External ID and save the generated value.
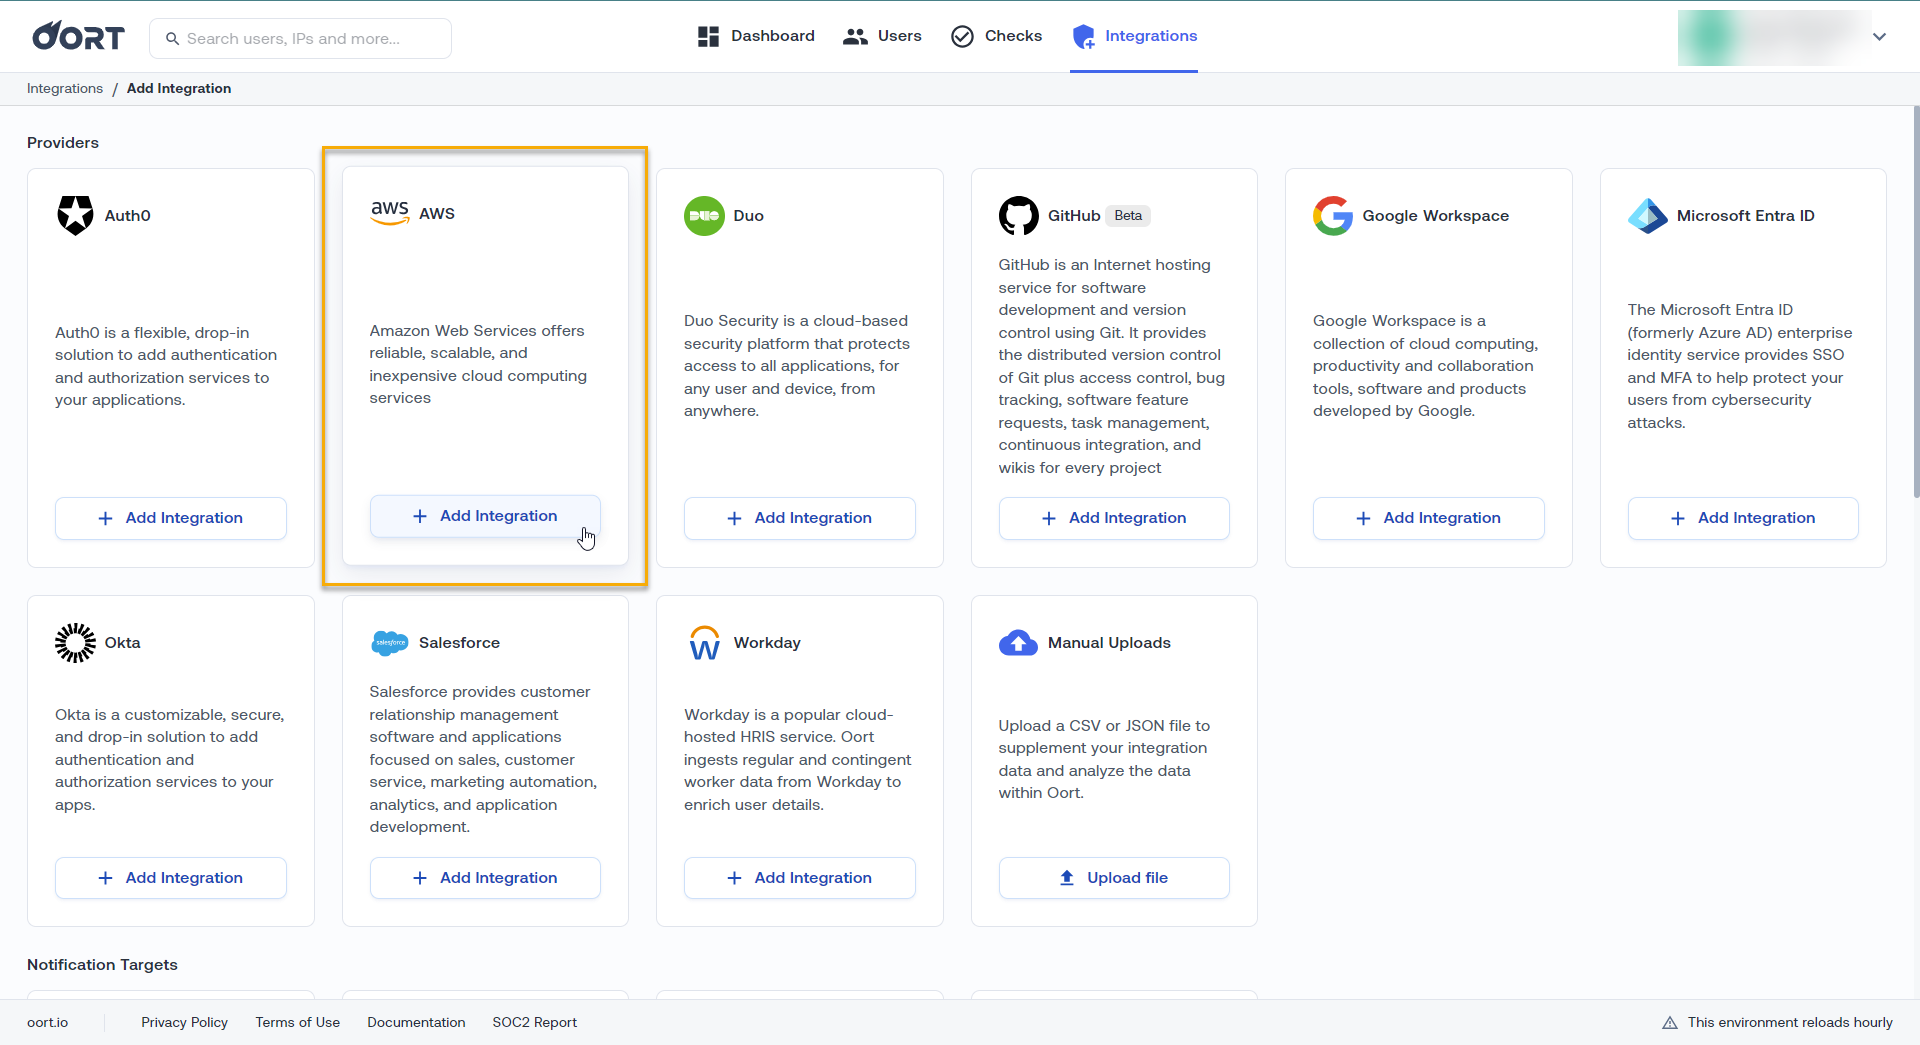
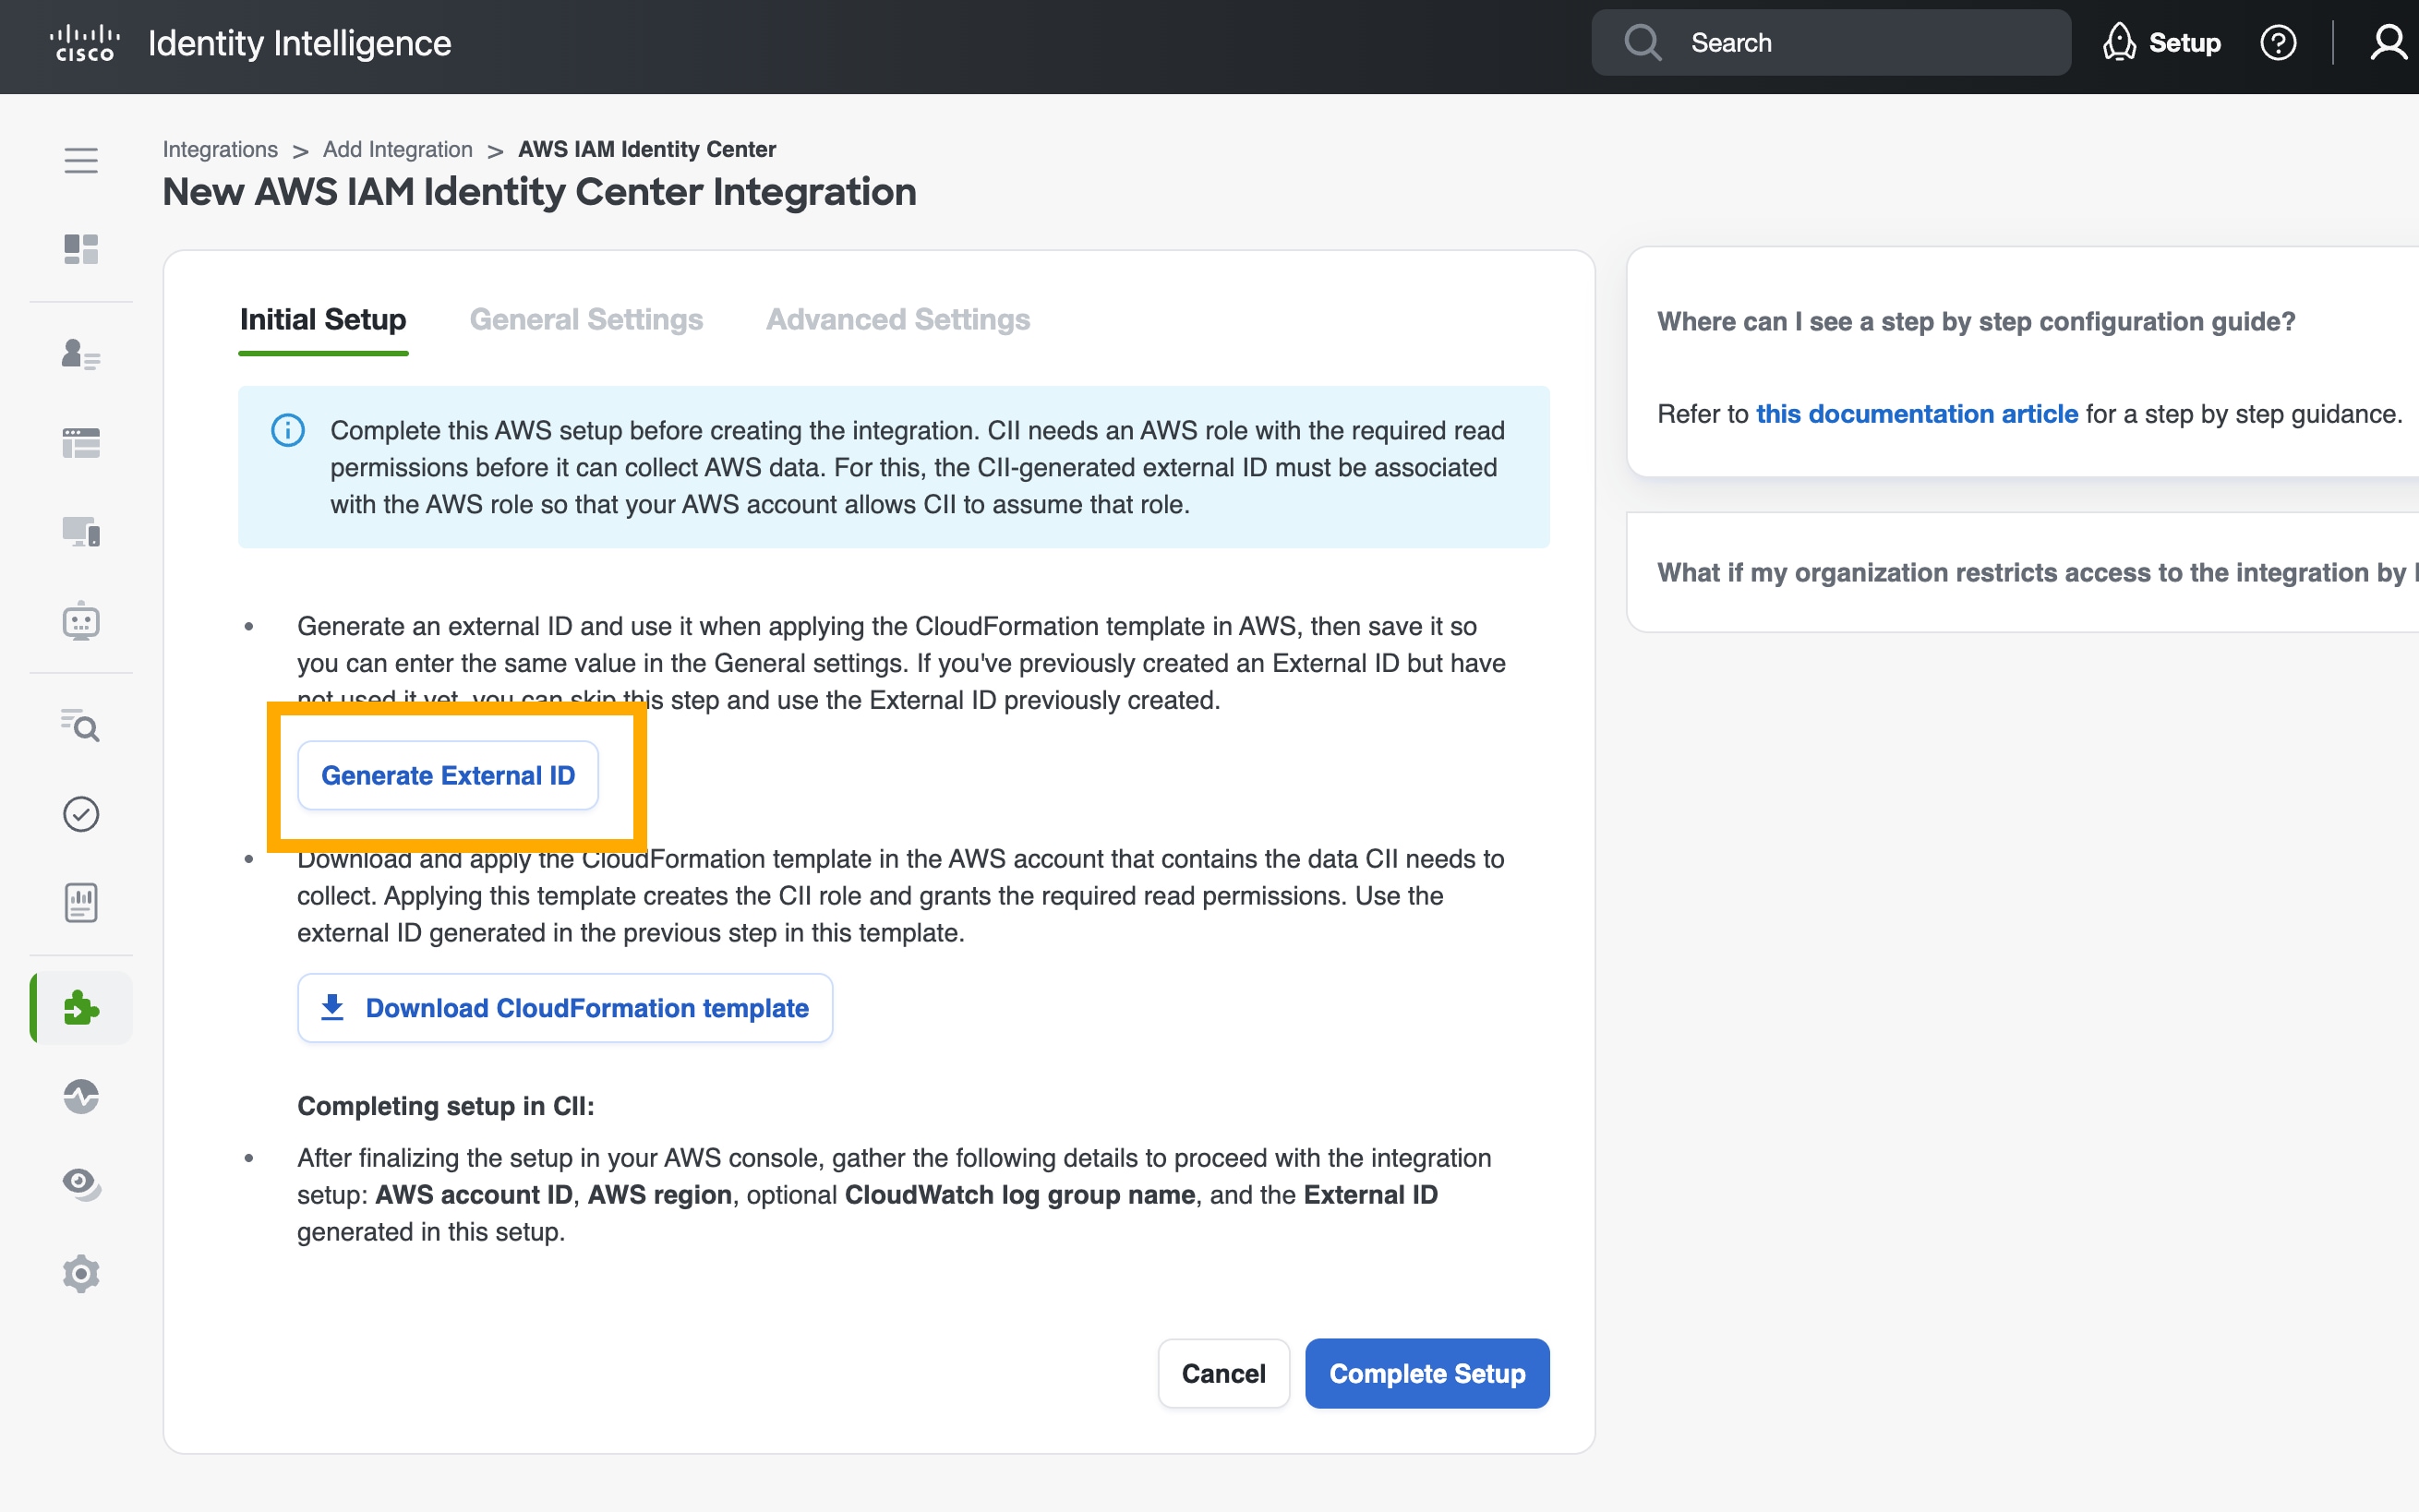
- On the same Initial Setup tab, download the CloudFormation template. You will need this template to create the Cisco Identity role and policy in your AWS account. You do not need to be signed in to Cisco Identity during the AWS part of the setup process. When you get back to Cisco Identity you can click to add an AWS integration and pick up where you left off.
-
Navigate to the AWS CloudFormation service in the parent AWS account that has SSO confgured. Make sure you are in the same region where IdentityCenter is configured.
-
At the top right, click "create stack" and choose "with new resources" from the dropdown. On the next page, select "Use an existing template" and "Upload a template file" and then use the "Choose file" button to select the template you downloaded from Cisco Identity. Click Next.
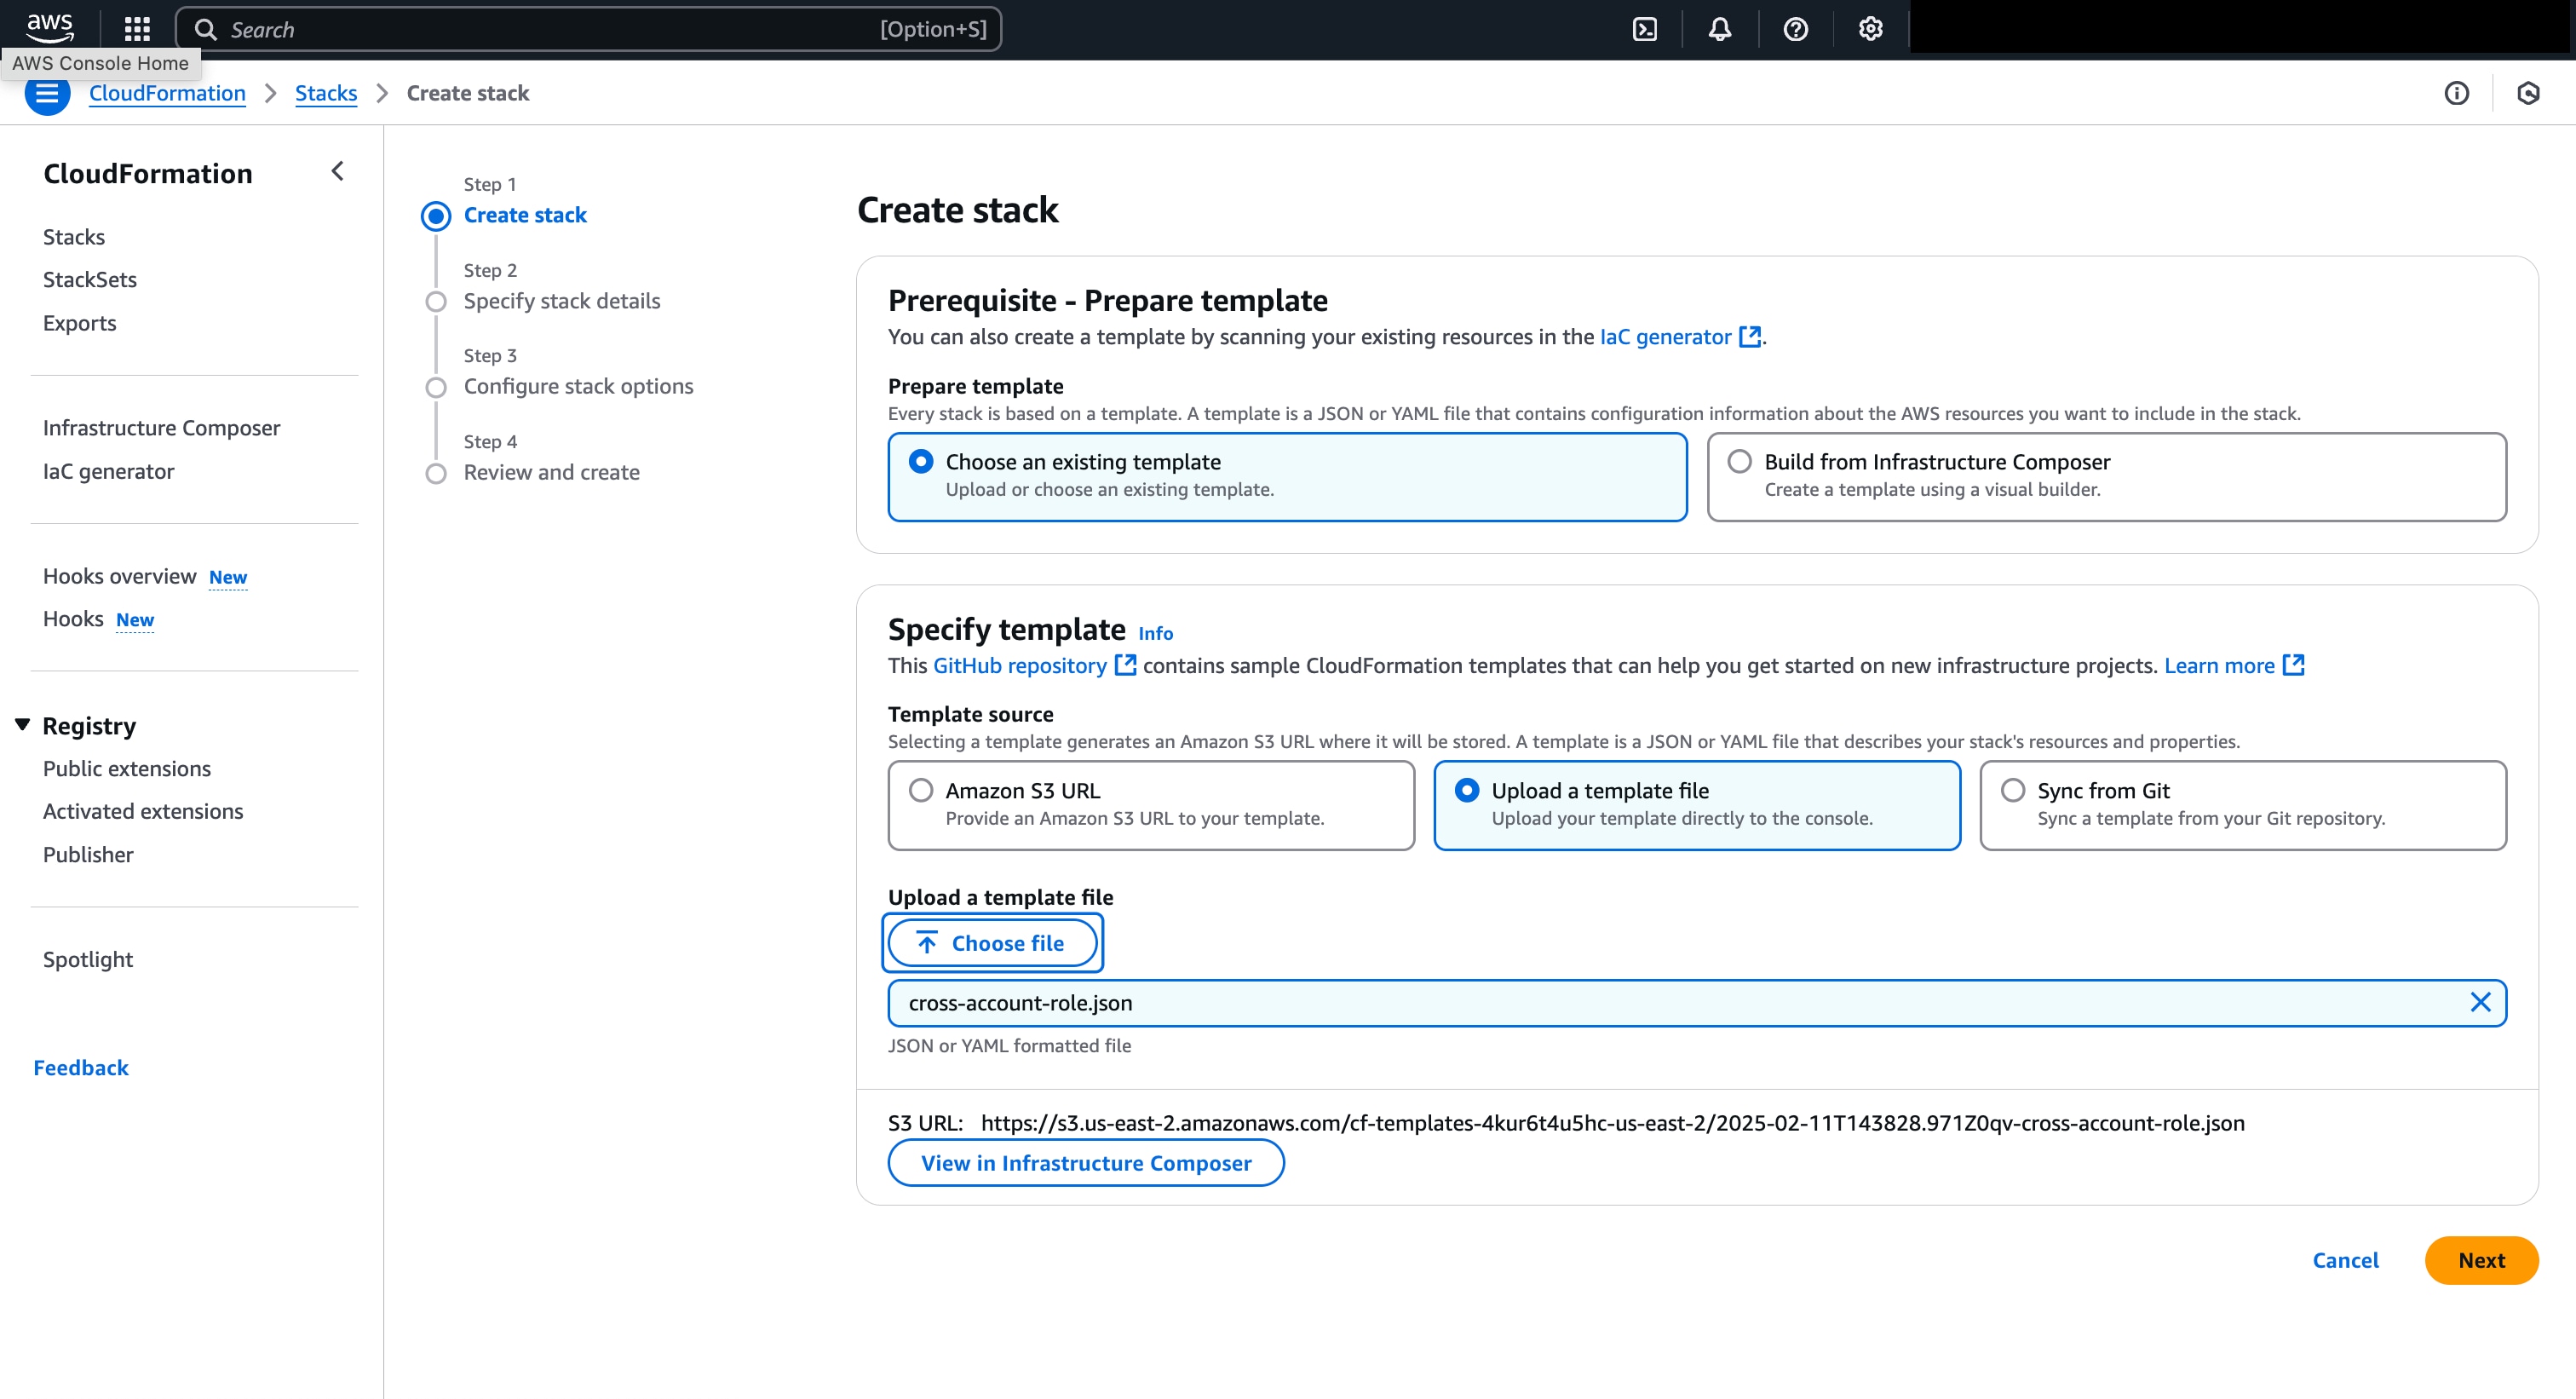
-
On the next page, choose a descriptive name for your stack and enter the Cisco Identity-generated External ID. You will need the same External ID when finishing the setup in Cisco Identity.
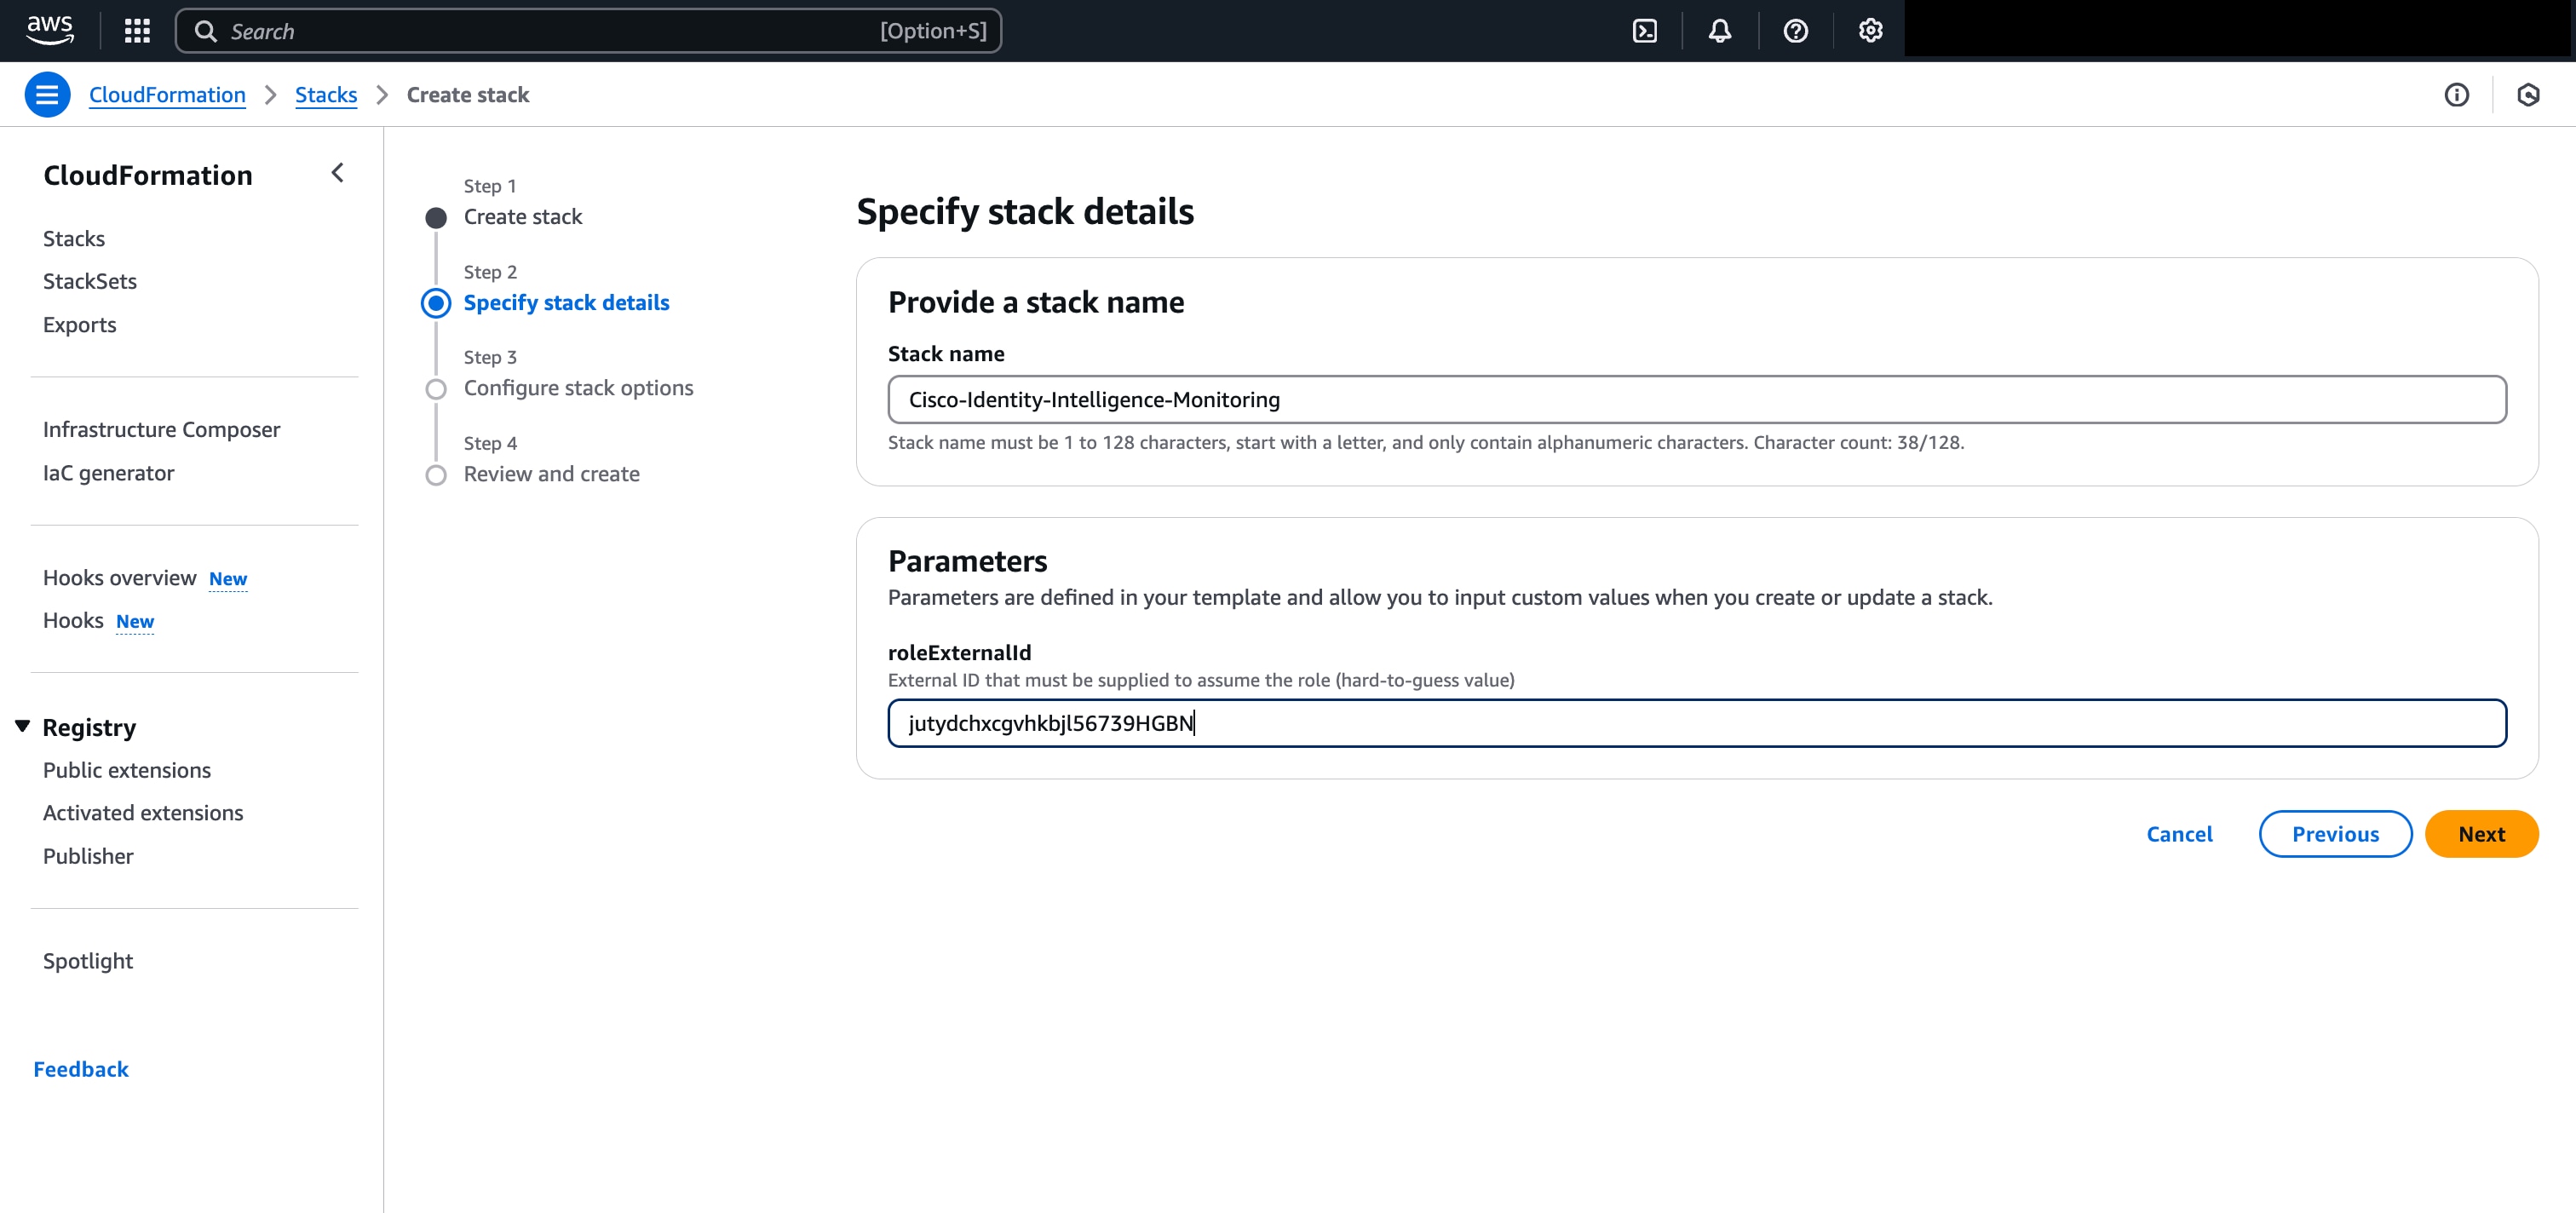
-
None of the options on the next page need to change. Check off the acknowledgement at the bottom of the page and click "Next."
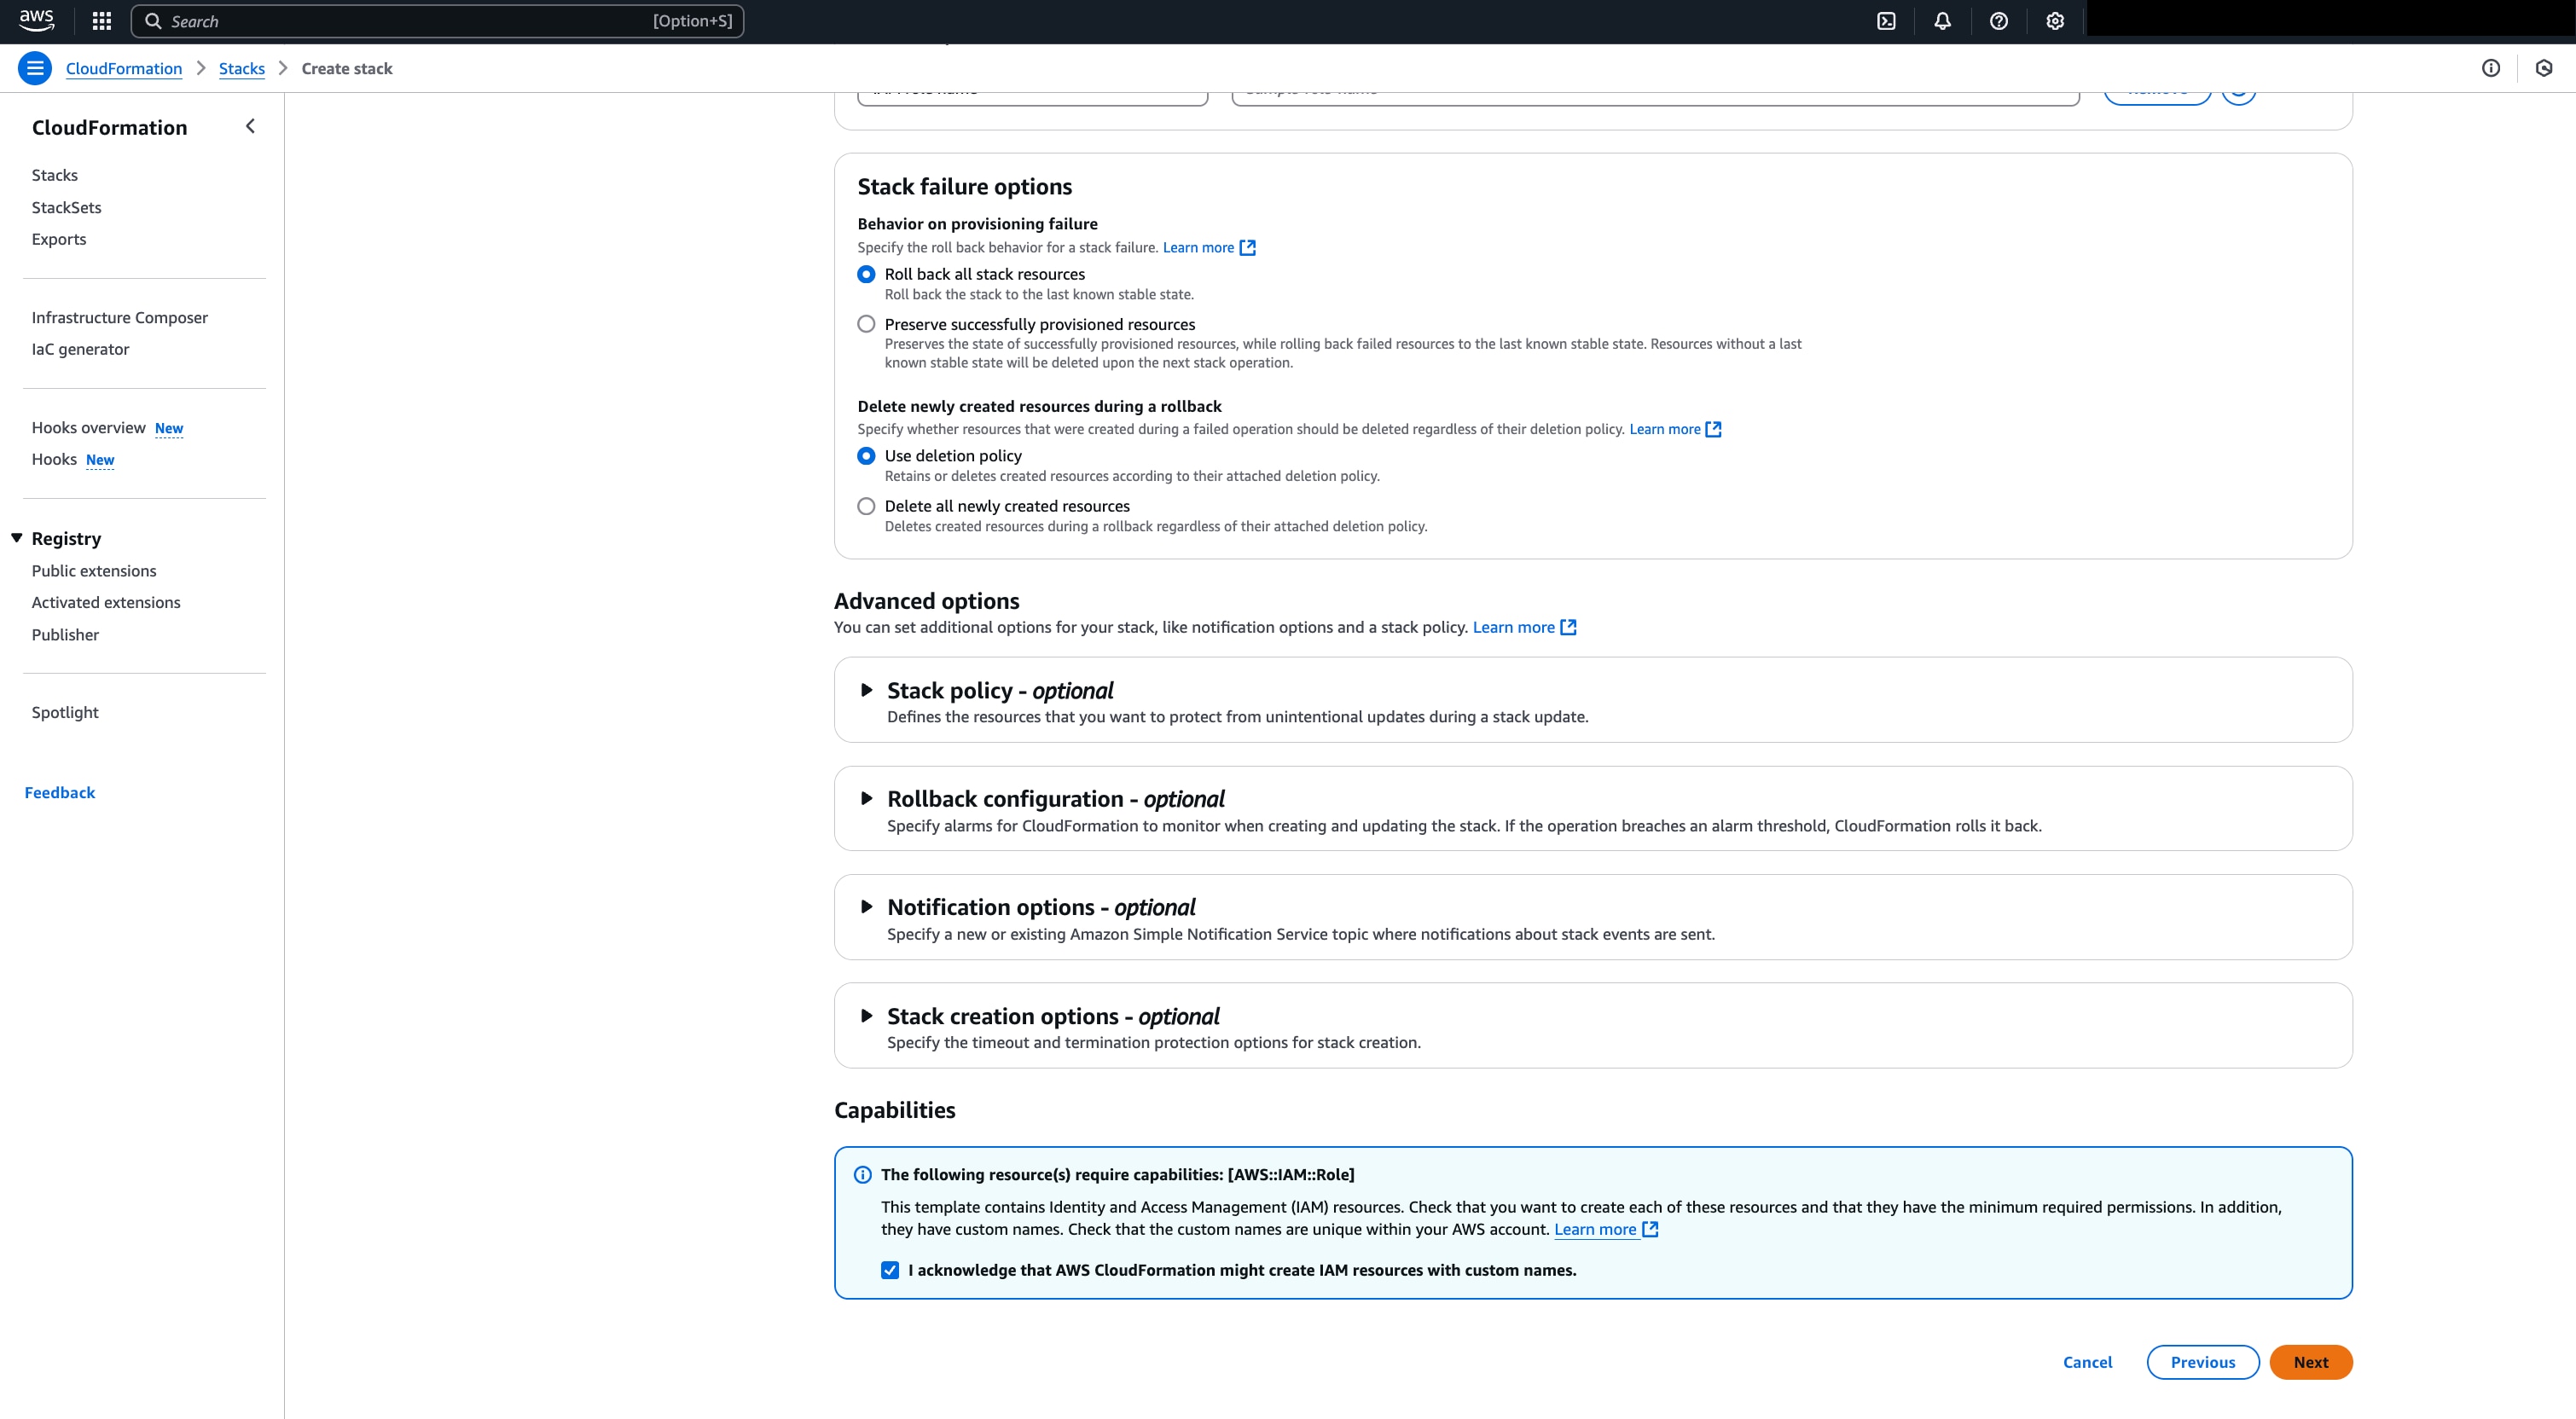
-
None of the options on the next page need to change. Scroll to the bottom and click "Submit."
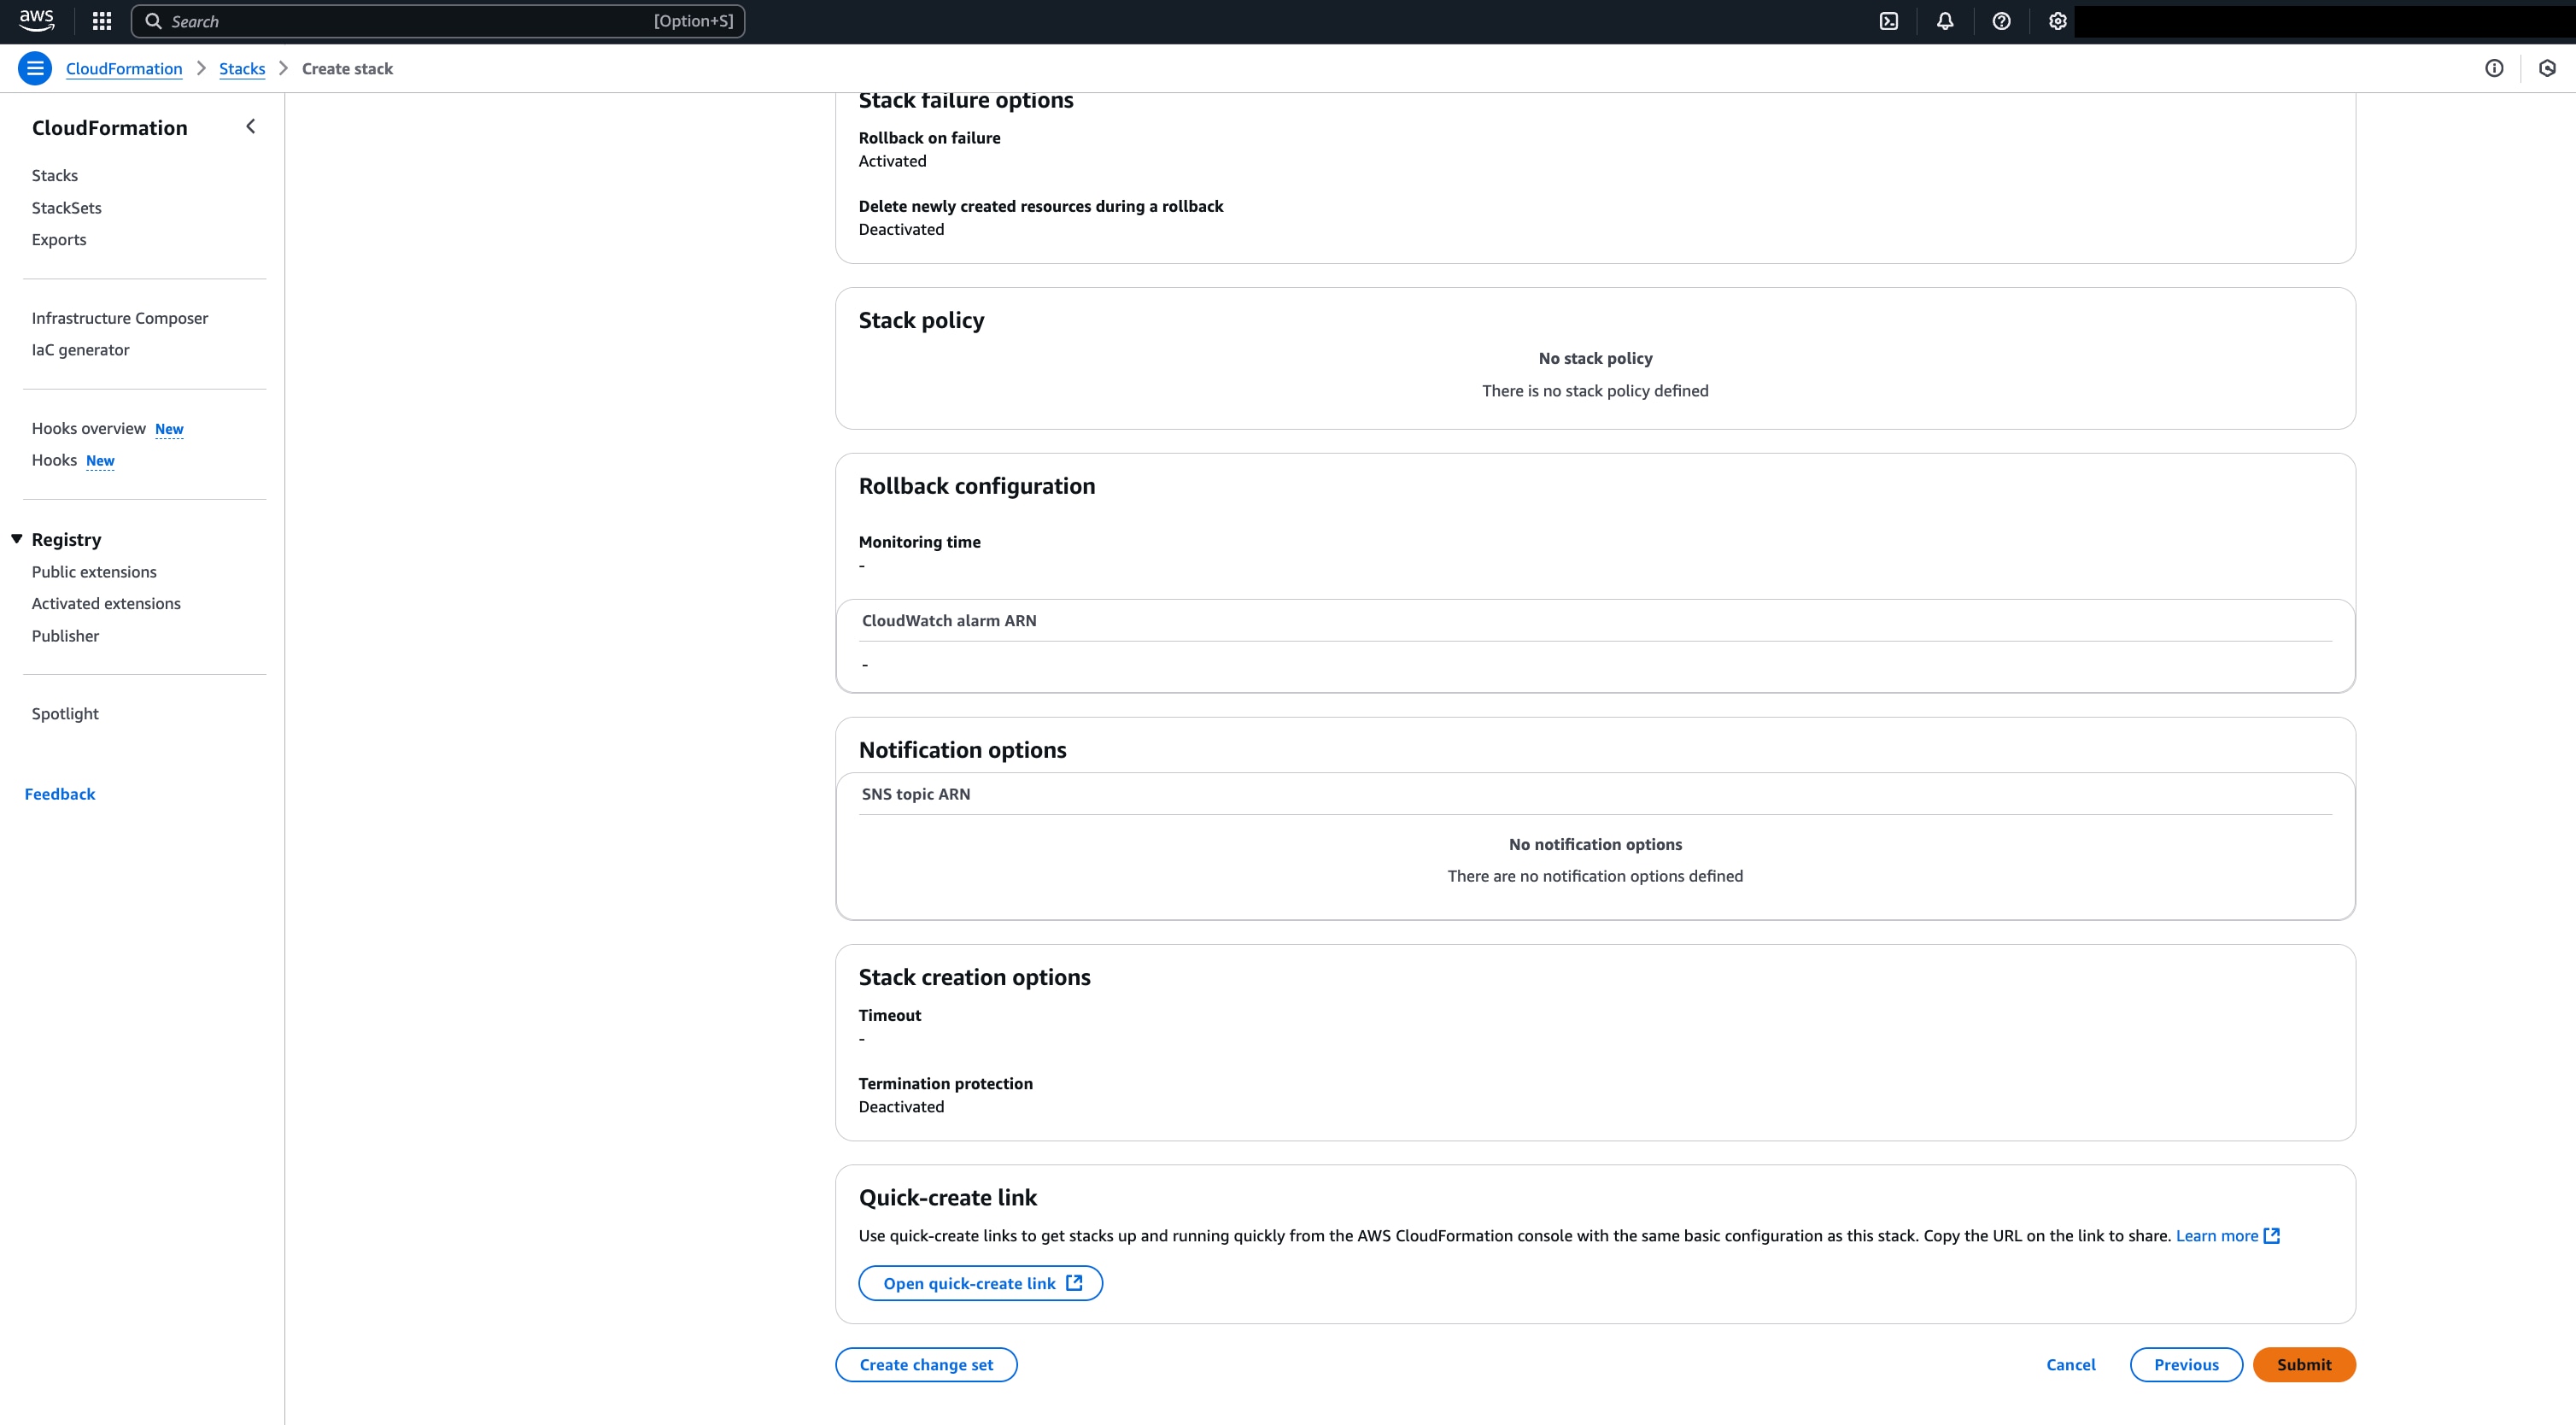
-
Wait until the following page shows that the stack creation is complete
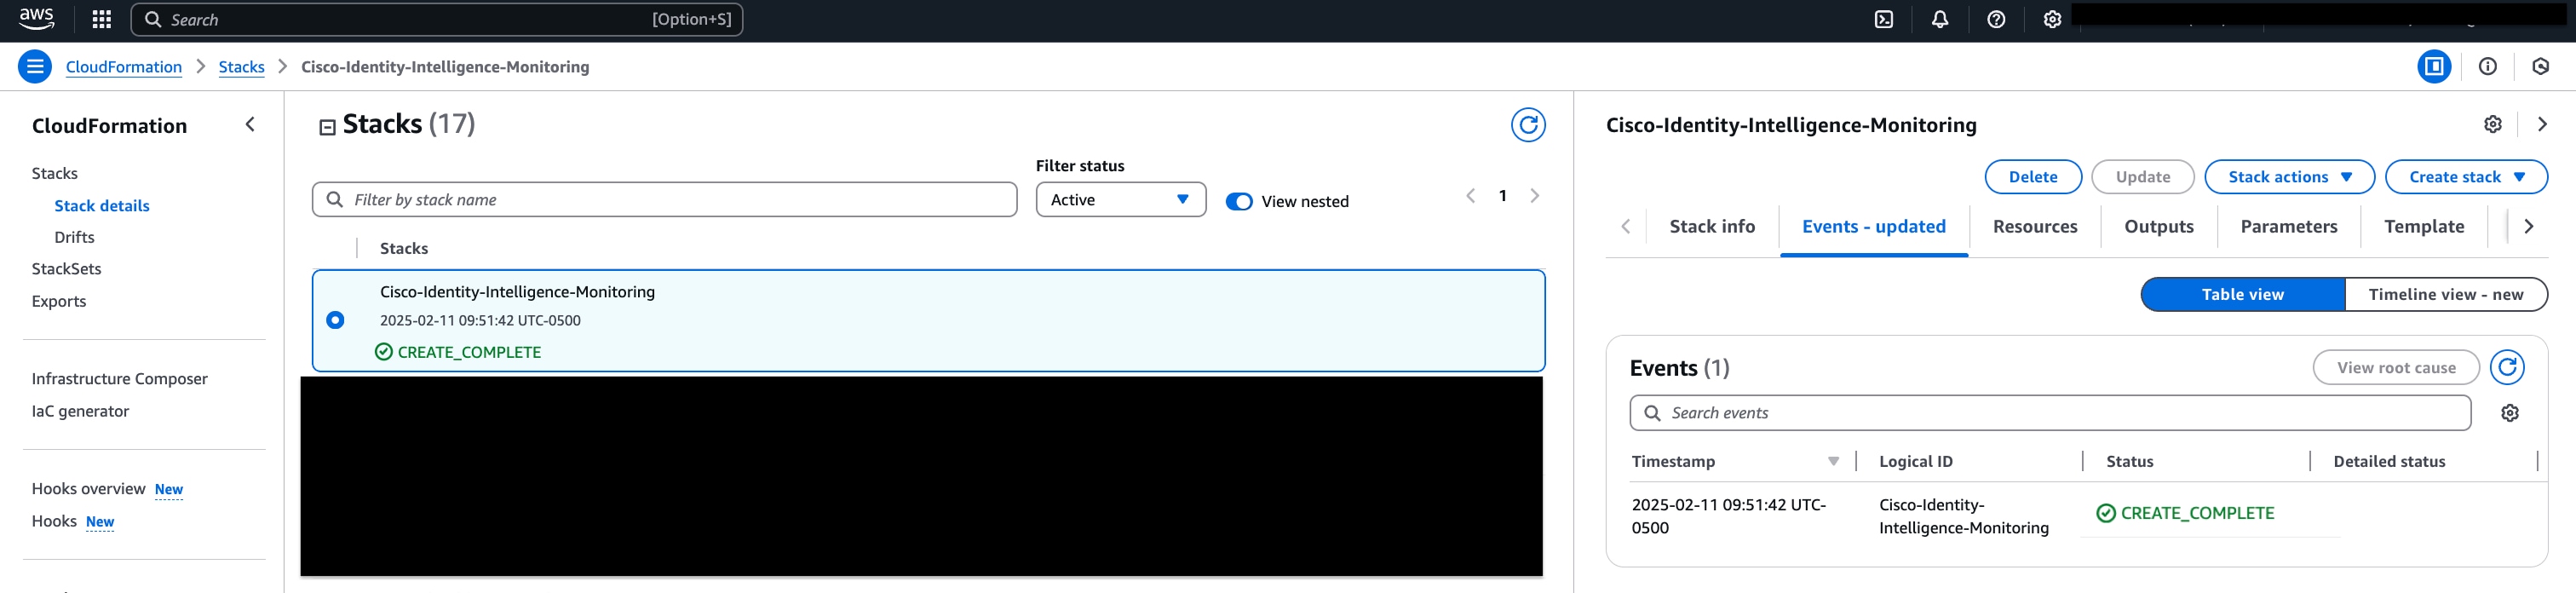
Recommended) Configure AWS CloudTrail Lake
We recommend utilizing AWS CloudTrail Lake queries to overcome API rate limit issues when collecting CloudTrail SSO events using the CloudTrail Lookup API.
About CloudTrail Lake
Below are the reasons that we recommend using CloudTrail Lake:
- Bypasses rate limits: The CloudTrail LookupEvents API is subject to strict rate limits, which can result in incomplete event collection or delays—especially when monitoring at scale.
- Provides continuous and reliable collections: CloudTrail Lake is built for high-volume, scalable querying. With it, Cisco Identity can collect all required events in near-time, without being blocked by API throttling.
- Provides custom retention: CloudTrail Lake allows you to choose how long to retain events (e.g., 1 year), aligning to your organization's compliance and audit needs.
- Provides security and control: You control exactly what is shared. Cisco Identity will only receive the event types chosen within the eventDataStore you create for the purpose of this integration.
Note: AWS only charges for storage and bytes scanned during queries. For more info, refer to AWS's CloudTrail pricing documentation.
Configuration Steps
Set Up a CloudTrail Lake Event Data Store
- Login to your AWS Console and go to CloudTrail.
- In the left menu, select Lake.
- Select Data stores, then select Create.
- Give your data store a name (e.g.,
Cisco Identity-Integration-Events). -
Choose the event types you would like to esnd to your data store: * Under Event types, select Management events (All). * Optionally, you can also add Data events or Insights events if you wish to include them.
-
Set your retention period (e.g., 1 year).
- Select Create.
Important: Only events generated after the data store is created are included. Historical events prior to setup are not available in the new data store.
Configure the IAM Policy to Allow Access
You must create an IAM role for Cisco Identity with cross-account access and attach a policy that lets Cisco Identity query your CloudTrail Lake data store.
- Go to IAM > Roles > Create role.
- Choose Another AWS account and enter our AWS Account ID (provided by us).
- If AWS asks for an External ID, use the same Cisco Identity-generated External ID.
- Attach the policy from the codeblock below. Be sure to replace the placeholders for
,, and `` with your actual values.
{
  "Version": "2012-10-17",
  "Statement": [
    {
      "Effect": "Allow",
      "Action": [
        "cloudtrail:StartQuery",
        "cloudtrail:GetQueryResults",
        "cloudtrail:ListQueries",
        "cloudtrail:DescribeQuery"
      ],
      "Resource": "arn:aws:cloudtrail:::eventdatastore/"
    },
    {
      "Effect": "Allow",
      "Action": [
        "cloudtrail:ListEventDataStores",
        "cloudtrail:GetEventDataStore"
      ],
      "Resource": "*"
    }
  ]
}- Complete role creation and take note of the Role ARN
Cisco Identity Configuration
- Log in to Cisco Identity. Navigate to the Integrations page, select the Add Integration button, select AWS, and open the General tab.
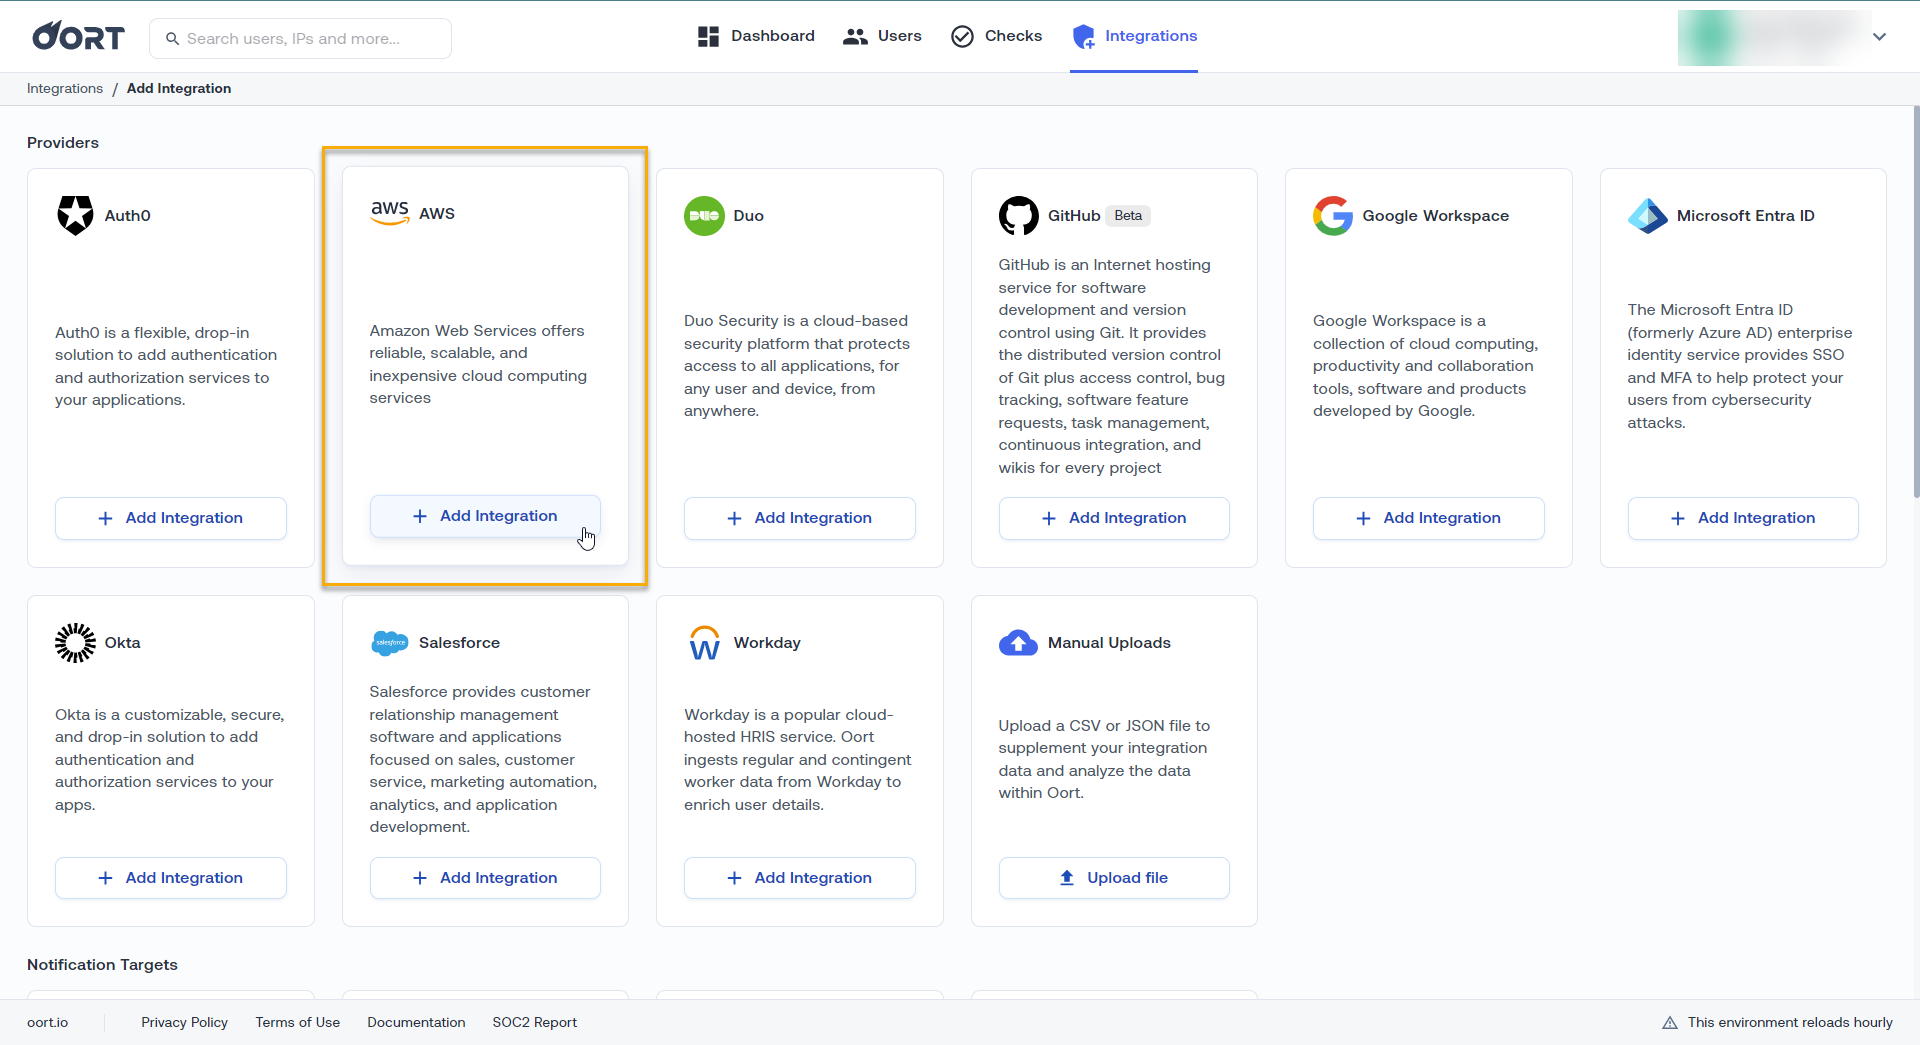
- Enter a display name for the integration
- Enter the AWS region where the CloudFormation stack was created, in
us-east-2format - Enter the 12-digit account ID of the AWS account where you set up the CloudFormation template
- Enter the Cisco Identity-generated External ID used in the CloudFormation stack. If you need to confirm it, it is visible in the CloudFormation stack parameters.
- If you set up [CloudTrail Lake], enter the value of eventDataStoreId.
- Select Connect
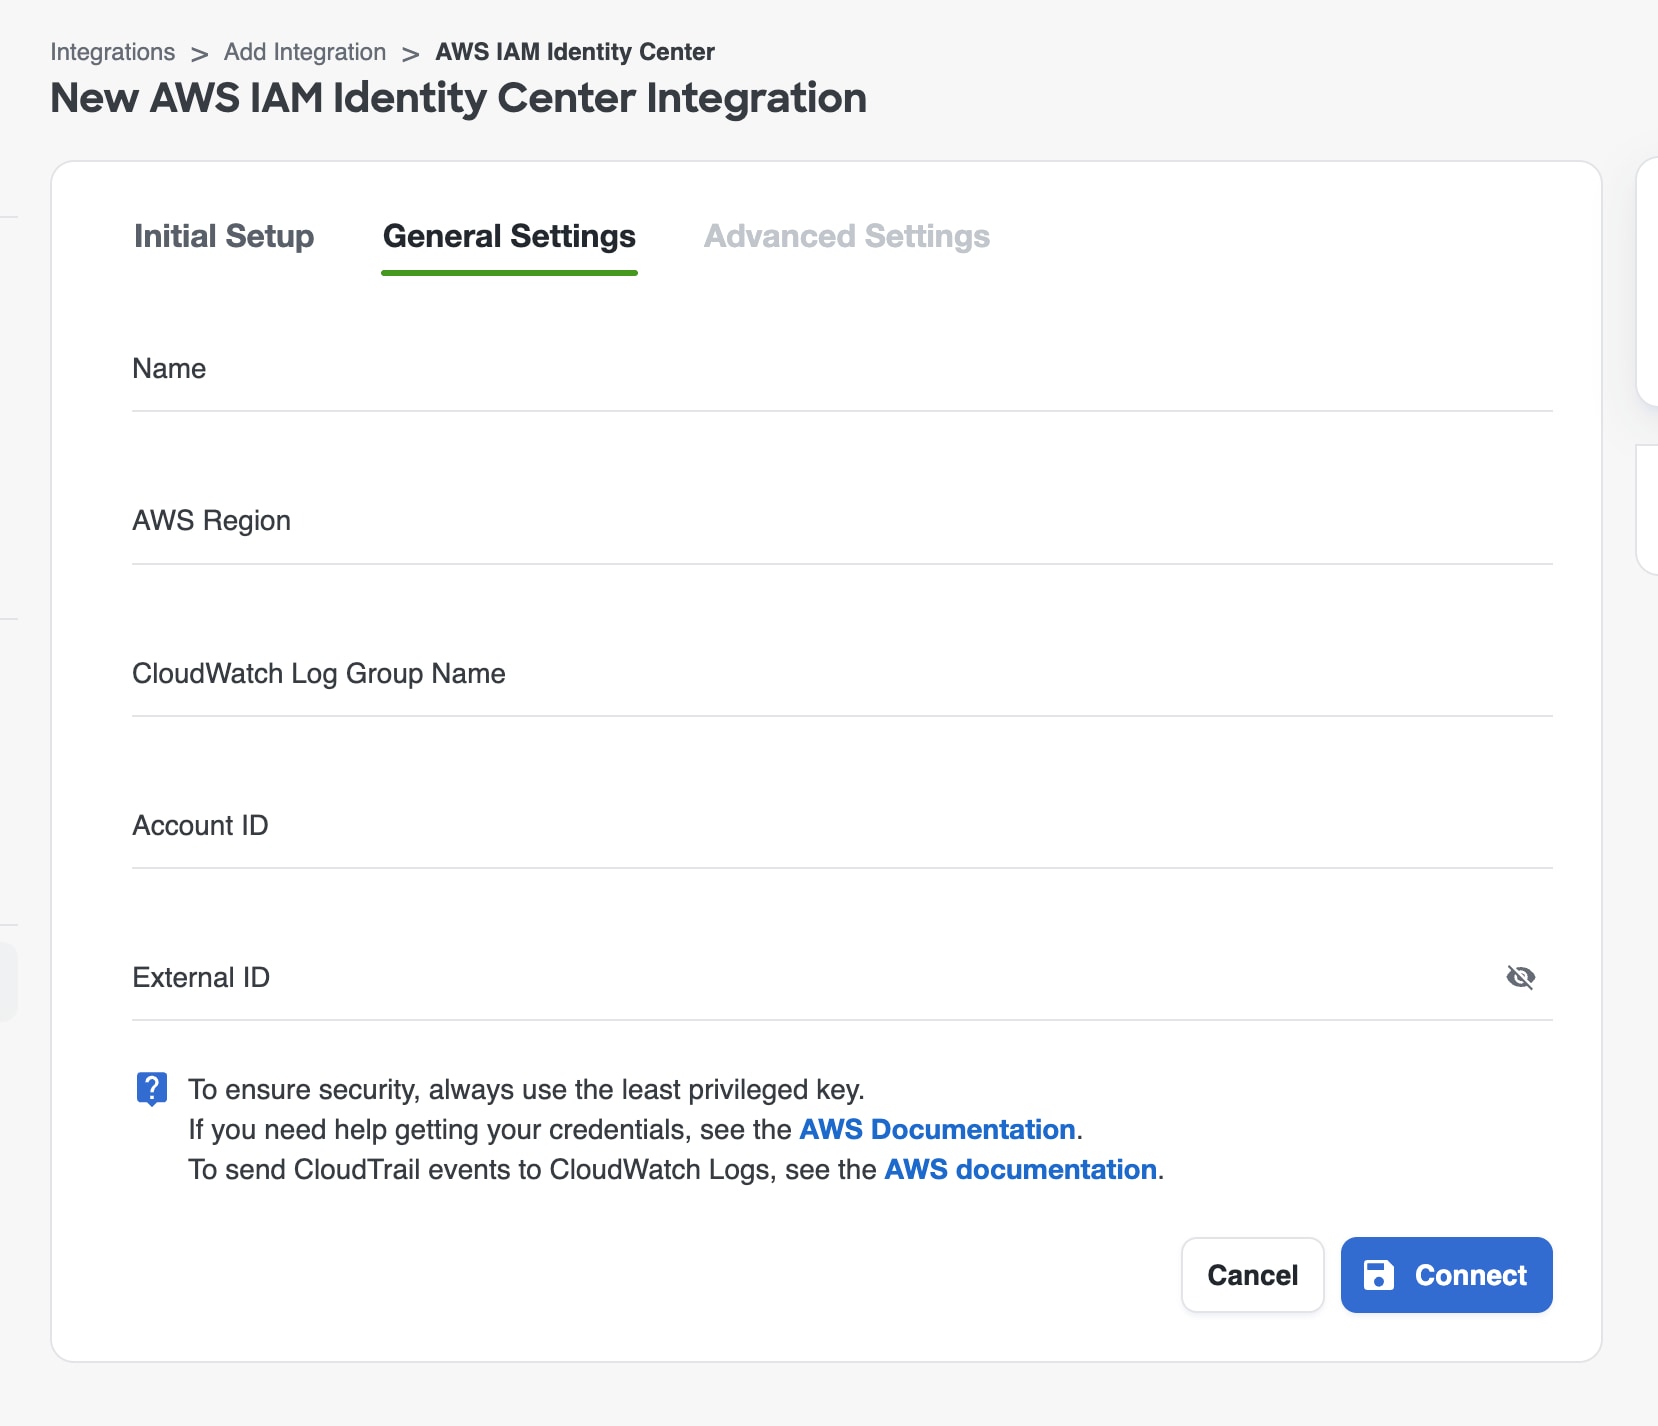
Test Connectivity
Once saved, on the Integrations page, you can click the 3-dot menu on the right side for your AWS integration and click Test Connectivity.
If successful with a "Connected" message in the lower left of the screen, you can click the 3-dot menu again and select Collect Now to begin collection.
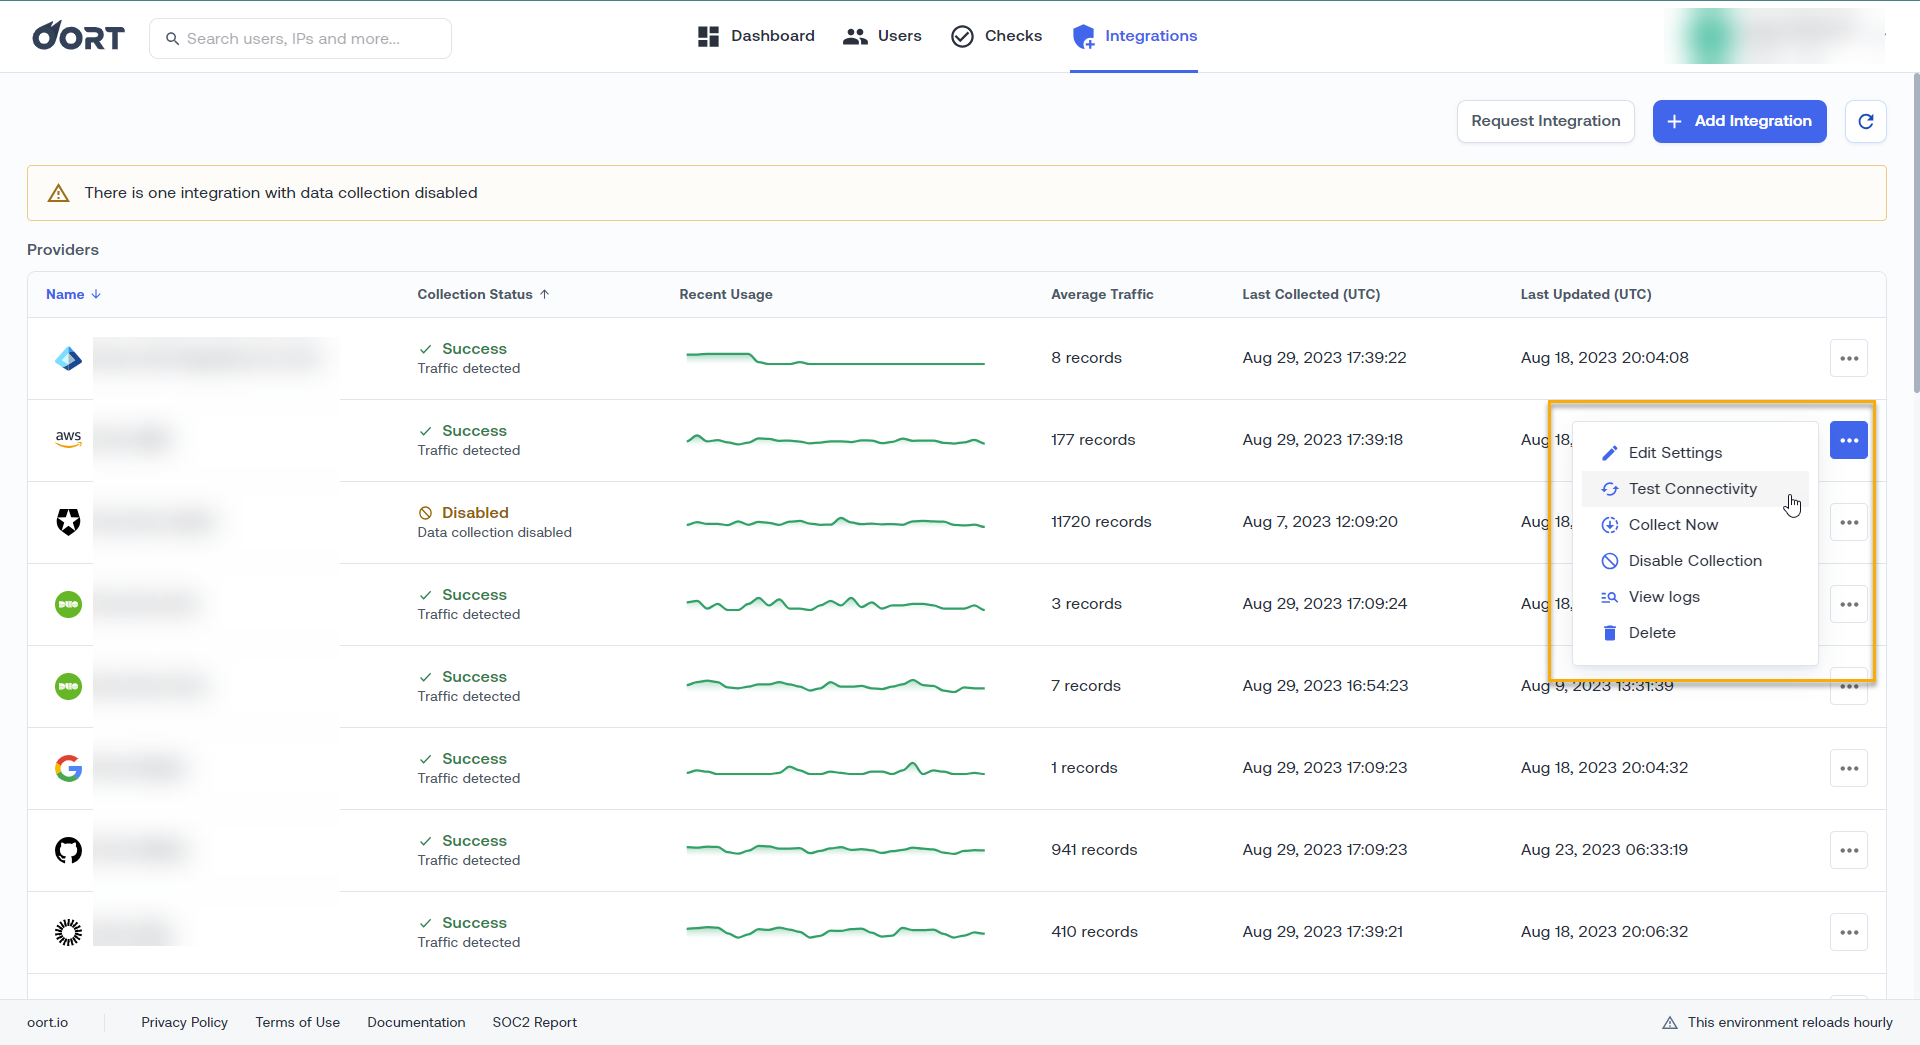
Auth0
Auth0 Data Integration
Note: Go Back to All Integrations
Overview
The Cisco Identity identity security platform reads a variety of user account data and event data to build a full picture of the identity security posture of your Auth0 tenant.
Goal
The goal of this document is to serve as a guide to set up Cisco Identity with a data integration to your Auth0 tenant.
Note - Once this initial integration has been configured, Auth0 Log Streaming via the Cisco Identity app on the Auth0 Marketplace can be configured for near-real time analysis of events and identity-based threats.
For more information, please see the auth0-streaming-integration.md article.
Auth0 Data Integration
Auth0 data integration is configured using a read-only API token.
Permission requirements
To add the necessary configuration in Auth0, you need the Admin role.
Auth0 Configuration Steps
- Create a Machine to Machine Application in Auth0 for use with Cisco Identity using the steps in the Auth0 documentation.
- Select the Auth0 Management API as the API (this exists by default)
- Add the following permission scopes:
| Scope | Description | Purpose |
|---|---|---|
| read:users | Read Users | Get a list of Users |
| read:logs | Read Logs | Read Auth0 Event logs |
| read:logs_users | Read logs relating to users | Read Auth0 User logs |
| read:guardian_factors | Read Guardian factors configuration | Get a list of Users and Authenticator configurations |
- From the Application Settings tab, collect the Domain, Client ID, and Client Secret
Cisco Identity Console Configuration
The rest of the configuration is completed in the Cisco Identity console.
- Login to your Cisco Identity tenant
- From the Integrations tab, click Add Integration and select Auth0
- Enter a display name, the Auth0 Domain URL, the Client ID and Client Secret from your Machine to Machine app created above.
- Click Save.
- On the Integrations screen, click the 3 dot menu and select Test Connectivity.
- Once successfully verified, click the same menu again and click Collect Now to begin initial data collection.
NOTE - Due to Auth0 API rate limiting, the initial data collection, including historical log data, may take up to 24 hrs. Your Cisco Identity technical contact will assist with any questions in this process.
Auth0 Log Streaming & Marketplace App
Overview
The Cisco Identity identity security platform integrates with Auth0 tenants to collect user account information, sign-on, and application activity.
To enable near-real time analysis of user activity and events, Cisco Identity can leverage Auth0 log streaming to an AWS EventBridge streaming model. Then the Cisco Identity platform can capture the events in real-time.
UPDATE: The Cisco Identity log streaming functionality is now supported as an app in the Auth0 Marketplace. This enables even faster setup and time to value of the Cisco Identity near-real time analysis capabilities.
For more information, please see the Cisco Identity Security app on the Auth0 Marketplace.
Prerequisites
You must already have an active Auth0 API-based integration configured in your Cisco Identity tenant setup. For more information, please see the Auth0 Data Integration article.
Auth0 Log Streaming Configuration
Permission requirements
This document assumes that you have the Admin role, which is required to modify the Monitoring section configuration of your Auth0 tenant.
Auth0 Setup Steps
These are the steps you need to go through to set up the Auth0 log streaming to Cisco Identity.
- Navigate to the Auth0 Marketplace entry for AWS EventBridge and add the integration.
- Log in to your Auth0 Dashboard, if you have not already.
- Navigate to Monitoring -> Streams
- Click + Create Stream
- Note - if you have reached the maximum number of streams for you Auth0 tenant, please contact Auth0 support to discuss options for adding additional streams.
- Select Amazon EventBridge and enter a unique name for your new Amazon EventBridge Event Stream.
- Create the AWS Event Source by providing your AWS Account ID and AWS Region.
- For Cisco Identity Production, the AWS Account ID is 988897525199
- For Cisco Identity Staging, the AWS Account ID is 909617834444
- If you are unsure which account ID to use, please open a support case
-
All Cisco Identity environments are in AWS Region US East (Ohio)
Note - this information can be viewed in your Cisco Identity tenant in step 1 below.
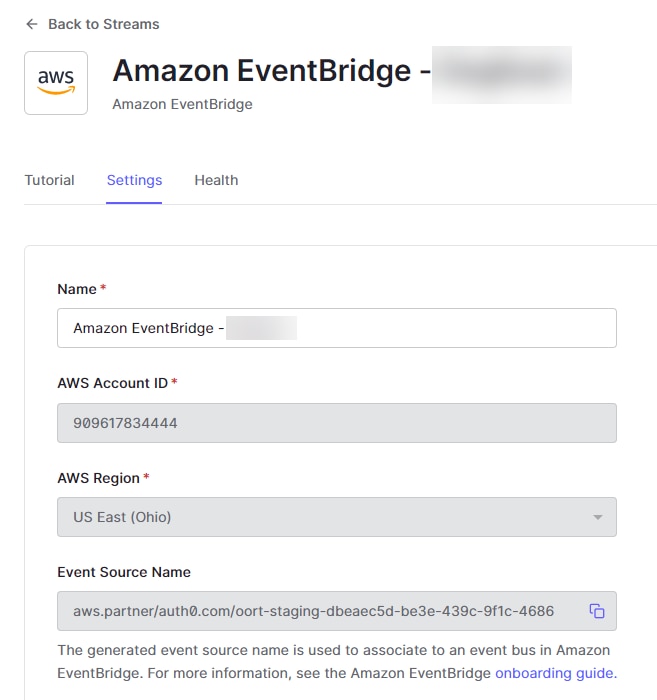
- Click Save. Auth0 provides you with an Event Source Name. Make sure to save your Event Source Name value.
- Complete the Cisco Identity steps below.
Cisco Identity Integration Steps
Within your Cisco Identity tenant where the existing Auth0 data connection resides, complete the following steps:
- Navigate to Integrations -> Auth0 -> Edit Settings and click the Event Streaming tab
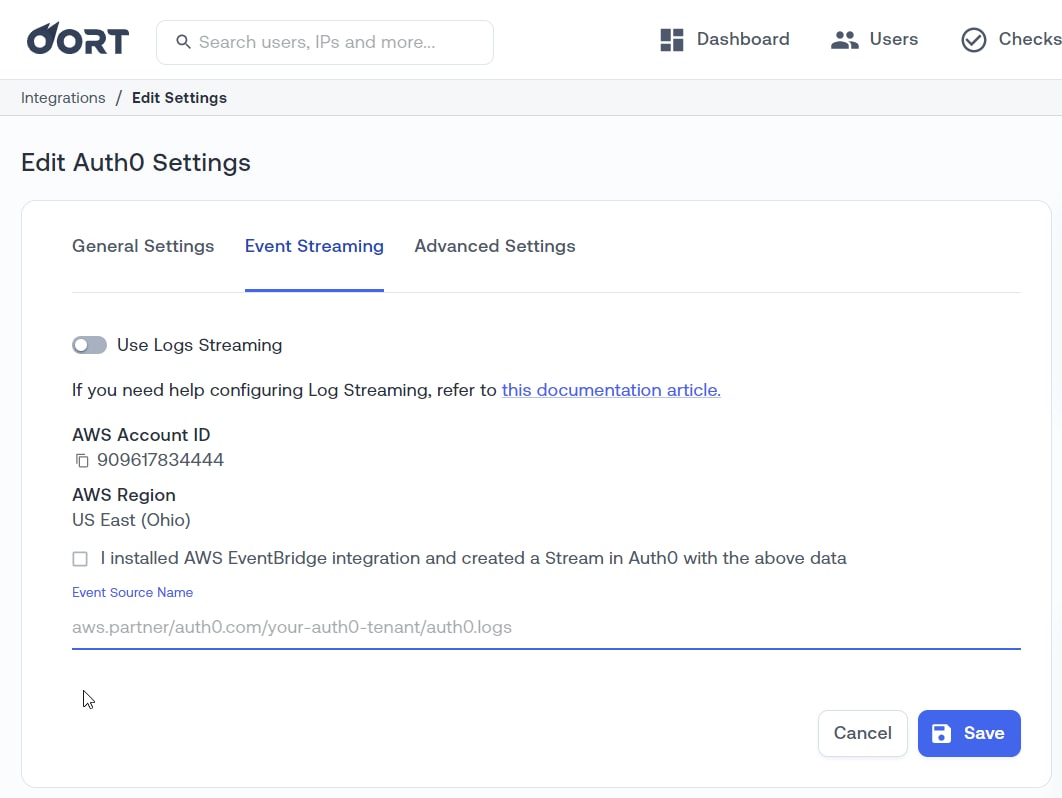
- Enter your Event Source Name from the Auth0 configuration above.
- Check the box to indicate that you've created the associated stream in Auth0.
- Click Save.
- Cisco Identity will complete the remaining configuration for your Cisco Identity tenant and inform you once the log streaming is in place and functioning.
PingFederate
Cisco Identity supports the ingestion of user and group objects from PingFederate directory deployments via its SCIM Provisioner and the Cisco Identity [SCIM integration].
Please refer to both sets of documentation linked above for more information.
SCIM Provisioning
Overview
Cisco Identity can receive user and group data via the System for Cross-domain Identity Management (SCIM) protocol from various identity providers, such as PingFederate. This integration enables automated user and group lifecycle management, ensuring that Cisco Identity has up-to-date identity context for enhanced security and analytics. These instructions will guide you through the process of configuring your Identity Provider to provision data to Cisco Identity.
NOTE - This integration is intended to support data ingestion from identity providers and sources that Cisco Identity does not already natively support or that don't offer public APIs for sharing identity data. In the case of Microsoft Entra ID and Okta, you should use the existing direct API integrations and data streaming options to integrate with Cisco Identity as these integrations provide more robust functionality.
Before you begin...
Make sure you have the following:
- A Cisco Identity account with Full Admin permissions that can manage integrations.
- An Identity Source (e.g. Identity Provider, such as PingFederate, or another identity source, like an HRIS System, that supports outbound SCIM provisioning) configured and ready to provision users/groups.
- Necessary administrative privileges within your chosen Identity Provider to configure SCIM applications.
The Cisco Identity SCIM Provisioning function does NOT support Bearer Token authentication at this time. Contact your Duo IAM representative if your identity source does not support OAuth client credentials as a SCIM authentication protocol.
Configuration Steps
The setup process involves two main phases: first, configuring Cisco Identity to provide credentials for its SCIM endpoint, and second, configuring your Identity Provider to send data to that endpoint.
Phase 1: Configure Cisco Identity for SCIM
Enable SCIM Provisioning in Cisco Identity:
- Navigate to the "Integrations" section within your Cisco Identity tenant and click Add Integration in the top right corner.
- Locate and click the "SCIM Provisioning" tile.
-
Within the form, provide the following: * Display name - for use within Cisco Identity Console to identify the integration * Description (optional) - for use within Cisco Identity console to provide additional info about the data source and purpose of the integration for record keeping * Source Type (optional, but highly recommended) - Defines what type of source the data is coming from. Cisco Identity will use this value to impact how the data from this source is treated, such as impacting check logic, user classifications, feature availability, etc. NOTE: if your SCIM source type is not listed, choose Unknown * Source (optional) - Provides Cisco Identity with more specific info on the data source provider. NOTE: if your SCIM source is not listed, choose None.
-
Select Save and Generate Credentials
-
Upon activation, Cisco Identity will provide you with: * SCIM Base URL: This is the endpoint where your Identity Provider will send SCIM requests (e.g.,
https:///scim/v2). * Enter Token URL and Client Credentials -
Test Connection: Most Identity Providers offer a "Test Connection" button. Use this to verify that the Identity Provider can successfully authenticate and communicate with the Cisco Identity SCIM endpoint.
- Configure Attribute Mappings: Map the standard user and group attributes from your Identity Provider to the corresponding SCIM attributes expected by Cisco Identity (e.g.,
userName,displayName,emails[type eq "work"].value,active,groups). Ensure that mandatory attributes are mapped correctly. - Define Scope: Specify which users and groups should be provisioned to Cisco Identity. This might involve assigning users/groups to the application or configuring filters.
- Enable Provisioning: Once all settings are configured and tested, enable the provisioning service. Users and groups will begin to synchronize with Cisco Identity based on your defined scope and mapping.
Specific Notes for Identity Providers
PingFederate
- Refer to PingFederate's official documentation for detailed steps on configuring SCIM outbound provisioning and OAuth clients. In the event of any conflicts between this document and the PingIdentity documents, use PingIdentity. https://docs.pingidentity.com/integrations/scim/pf_scim_connector.html
- PingFederate acts as a SCIM client for outbound provisioning.
- Create an OAuth Client (Recommended): For secure authentication, create an OAuth client in PingFederate under Applications > OAuth Clients. This client will be used by the SCIM Outbound Provisioner to obtain an access token for Cisco Identity.
- Configure Outbound Provisioning:
- Navigate to Applications > Outbound Provisioning.
- Add a new SCIM 2.0 Client instance.
- Connection Settings:
- Base URL: Enter the SCIM Base URL obtained from Cisco Identity (e.g.,
https:///scim/v2). - Authentication: Select "OAuth" and configure it to use the OAuth client you created.
- Base URL: Enter the SCIM Base URL obtained from Cisco Identity (e.g.,
- Attribute Mapping: Map the attributes from your PingFederate data store (e.g., LDAP directory) to the SCIM attributes required by Cisco Identity. Ensure that unique identifiers like
userNameare correctly mapped. - Provisioning Rules: Define the rules for which users and groups are provisioned (e.g., based on group membership or attribute values).
- Activation: Enable the provisioning connection.
Phase 3: Verify Provisioning in Cisco Identity
- Monitor Provisioning Status: After enabling provisioning in your Identity Provider, allow some time for the initial synchronization to complete. The time taken depends on the number of users/groups and the IdP's sync cycle.
- Check User/Group Inventories: Navigate to the Integrations page or Overview Dashboard to check the status of the SCIM integration. If users have been provisioned from the source IDP, then the Users page within your Cisco Identity console will contain those users.
- Confirm Data Ingestion: Verify that users and groups from your configured Identity Provider are appearing in Cisco Identity with the correct attributes and group memberships.
- Review Logs: Check provisioning logs in both your Identity Provider and, if available, in Cisco Identity for any errors, warnings, or failed synchronizations. These logs are crucial for troubleshooting.
Processing New Data
Cisco Identity will automatically process new SCIM data pushed to it from the identity source every 24 hrs on a regular schedule, but if you would like to manually trigger the processing of any data that has been pushed within the past 24 hrs, you can use the Process New Data menu option in the Integrations page for that integration.
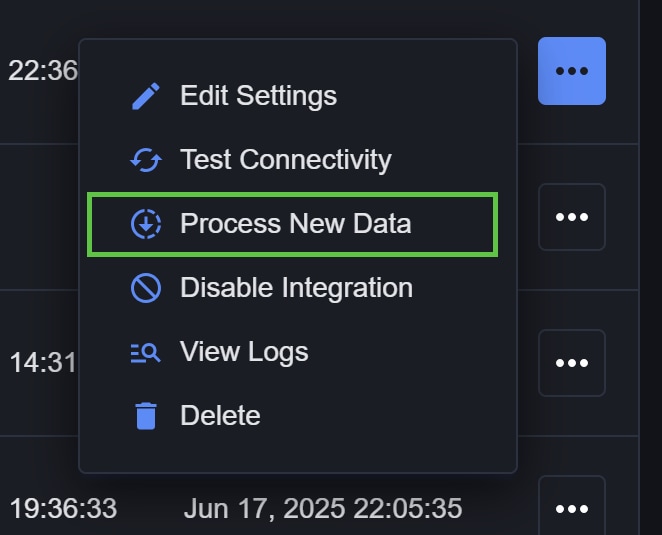
Managing SCIM Credentials
If desired, the SCIM Client secret used for authentication can be rotated or updated for security purposes.
- Generate New Secret in Cisco Identity:
- In Cisco Identity, navigate to the Integrations page and click Edit from the SCIM provisioning integration settings
- Select the Rotate Client Secret option\
- Click Save
- The new Client Secret will be shown. Copy it securely.
- Click Finish
- Update the Client Secret in the configuration of your source IDP.
Bloodhound Enterprise
Note: ## This integration is currently in Beta release phase.
Overview
Cisco Identity integrates with BloodHound Enterprise to ingest attack path findings and related identity exposure insights. This enables Cisco Identity to help identify users that appear on identity-based attack paths—paths that represent sequences of relationships and permissions an adversary could abuse to escalate privileges or reach high-value assets (for example, by chaining group memberships, delegated rights, and administrative roles).
Requirements
To complete this integration, you must have Administrative access to BloodHound Enterprise to generate API credentials.
You must also have administrative access to your Cisco Identity tenant.
Get Your Bloodhound Domain
You can find your BloodHound Domain by:
- Checking your BloodHound Enterprise welcome email or onboarding documentation
- Contacting your BloodHound administrator
- Looking at the URL in your browser when logged into BloodHound Enterprise
Create a BloodHound Enterprise API Token
In BloodHound Enterprise, navigate to Settings (gear icon) > Administration > Users > Manage Users.
You can generate an API token under your own user account if you have admin privileges, or, as a best practice, create a dedicated service user account—such as "cii_svc"—with admin rights specifically for integration with Cisco Identity.
To generate the token, locate the user account intended for integration, click the three-dot menu next to that user, select "Generate API Token," provide a name for the token, and copy the displayed Token ID and Token Key.
For more detailed guidance, refer to the BloodHound Enterprise product documentation.
The Token Key is shown only once. If you lose it, you must revoke the token and create a new one. Store these credentials in a secure location.
Note: For security, Cisco recommends using the least privileged token that still allows the integration to function.
Configure the BloodHound Enterprise integration in Cisco Identity
- In Cisco Identity, go to Integrations.
- Click Add Integration.
- For BloodHound Enterprise, click Add Integration.
- In General Settings, enter:
- Name for this integration instance.
- BloodHound Domain: Your BloodHound Enterprise domain name.
- Token ID: API token ID you found earlier.
- Token Key: API token key you found earlier.
- Click Connect.
- To verify the connection, open the integration’s 3-dot menu and click Test Connectivity. The message
Connected!displays to indicate that everything is working.
CrowdStrike
Cisco Identity can integrate with CrowdStrike Falcon NGSIEM (Falcon LogScale) to retrieve log data created by CrowdStrike agents on endpoints. This article explains how to create the required CrowdStrike API client and connect it to Cisco Identity.
Warning: The CrowdStrike integration is currently in Alpha and can only be enabled by the Cisco Identity team. Please contact Support to have it enabled for your account.
Overview
To connect CrowdStrike to Cisco Identity:
- Confirm that your CrowdStrike environment meets the prerequisites
- Create a Falcon API client with the required NGSIEM permissions and, if approved, the recommended read permissions for planned capabilities
- Copy the API client ID and secret
- Add the CrowdStrike integration in Cisco Identity
- Verify the connection and configure network allowlisting if required
Prerequisites
Before you begin, make sure that:
- An active CrowdStrike NGSIEM (Falcon LogScale) license is provisioned
- You have access to the Falcon Console
- You are a Falcon administrator, or have permission to manage Falcon API clients
- You have the necessary permissions to manage integrations in your Cisco Identity tenant
CrowdStrike configuration
Create a dedicated Falcon API client for the Cisco Identity integration:
- Sign in to the Falcon Console with a Falcon Administrator role
- Open Support and resources from the left navigation
- Under Resources and tools, select API clients and keys
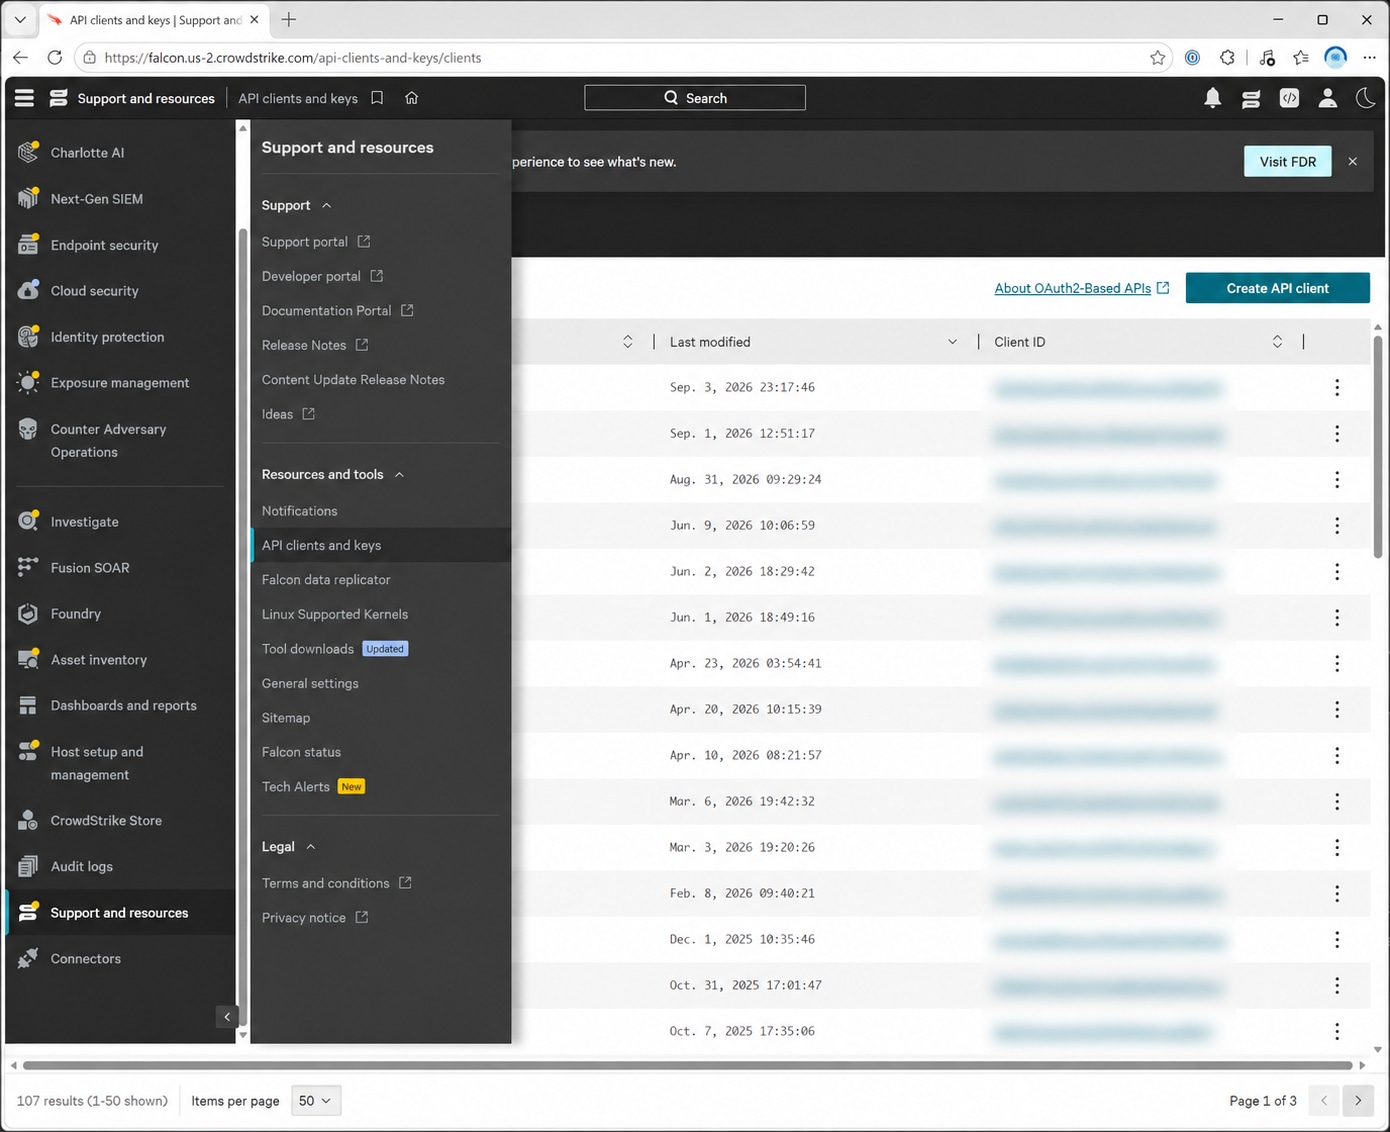
- Select Create API client
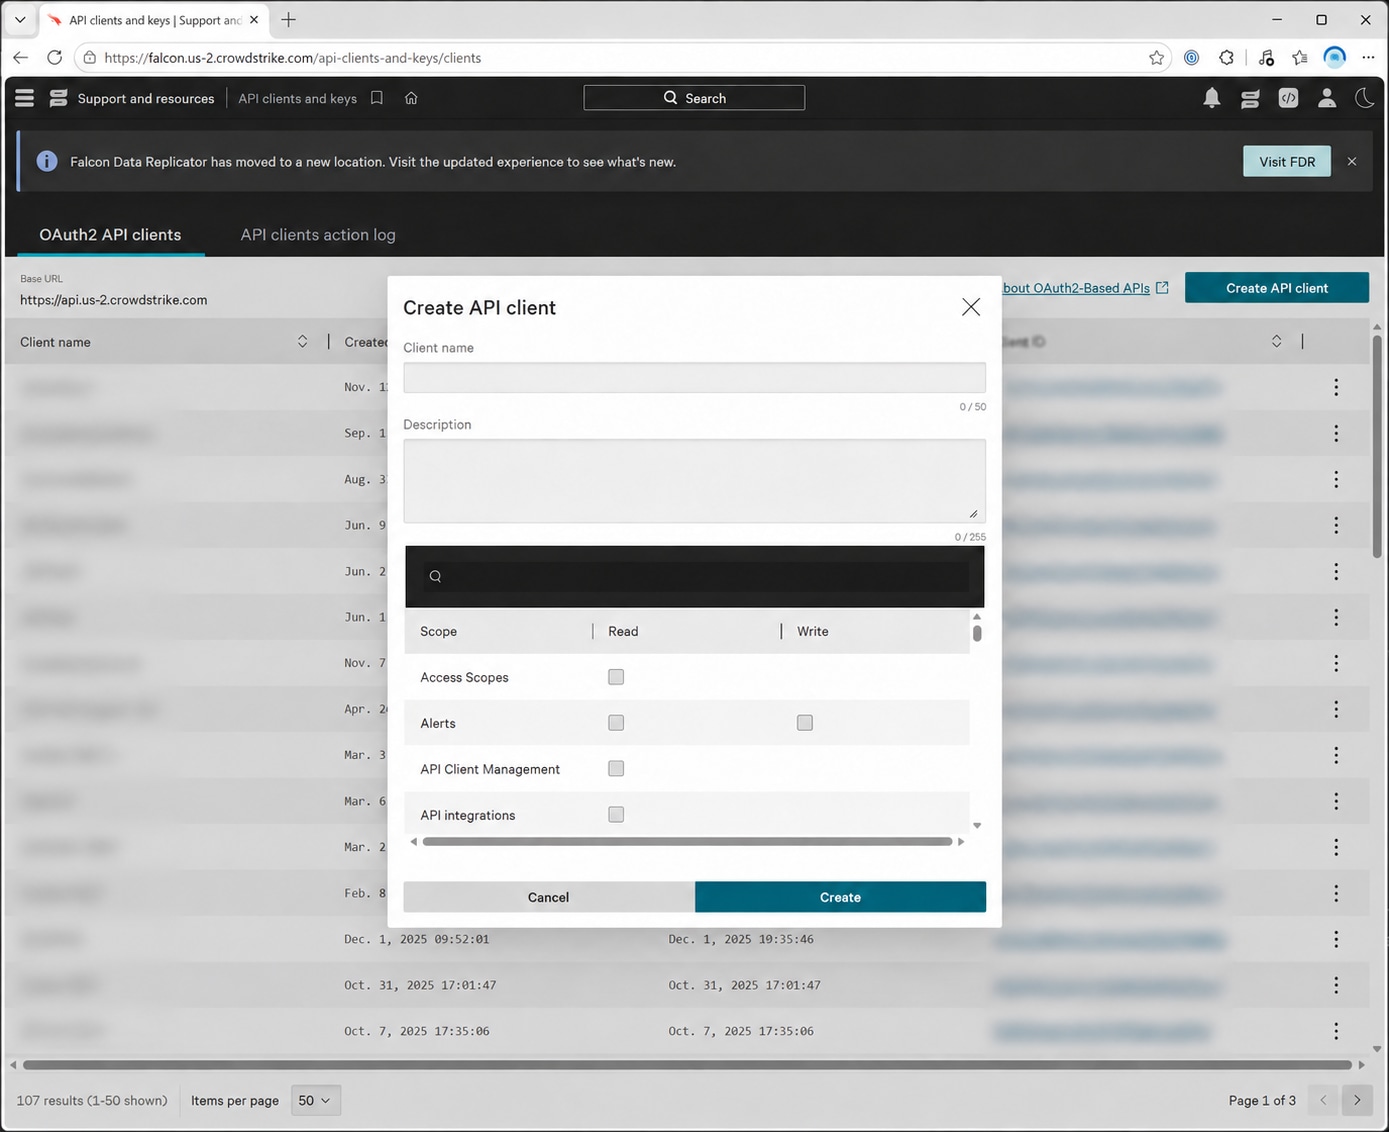
- Enter a descriptive client name, for example,
cii-crowdstrike-integration - Optionally, add a description to identify the client’s purpose
- In the scope search field, enter
ngsiem - On the NGSIEM row, select both the Read and Write checkboxes. These selections grant
NGSIEM:READandNGSIEM:WRITE
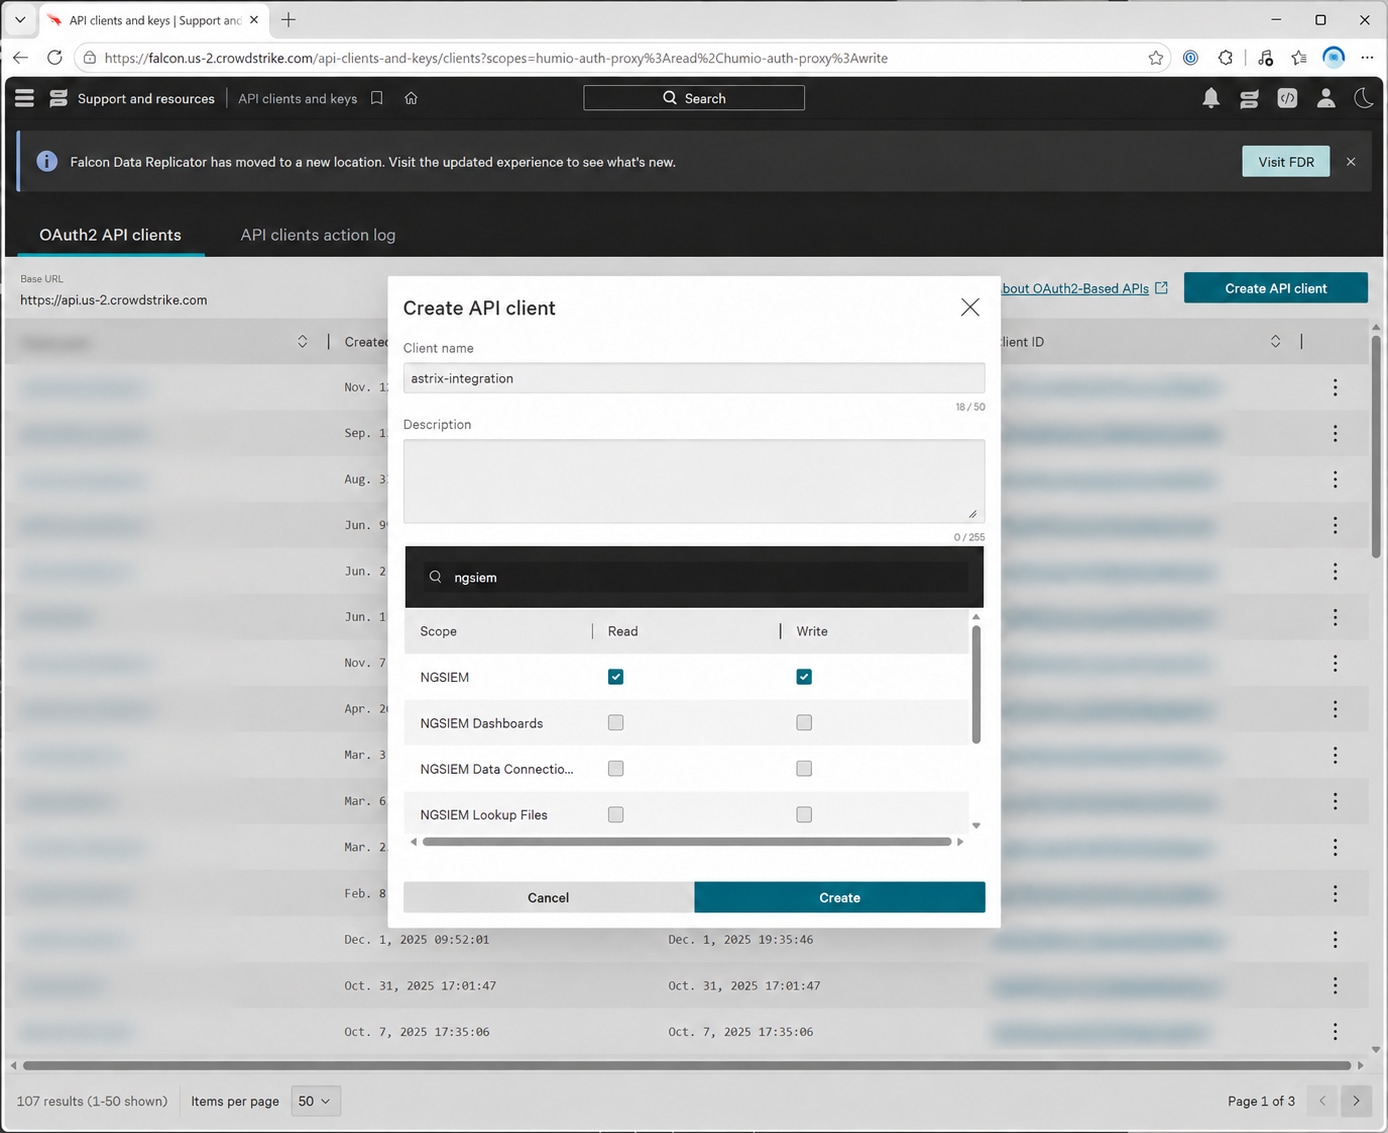
- Grant the
readpermissions described in Recommended permissions for planned capabilities. Granting them now will reduce the need to update the API client when the planned capabilities become available in the near future - Select Create
- Copy the Client ID and Client Secret, and store them securely. Proceed to the section, to enter these values in Cisco Identity and complete the integration process
Warning: Your client secret is sensitive. Do not include it in your org's internal documentation, source control, or support tickets. Use a dedicated client for Cisco Identity and follow your organization’s credential-rotation policy.
Required permissions
| Permission | Purpose |
|---|---|
NGSIEM:WRITE |
Required by the integration to send queries to the CrowdStrike cloud and retrieve relevant NGSIEM data. |
NGSIEM:READ |
Allows the integration to read or query NGSIEM data and receive the query results. |
Recommended permissions for planned capabilities
To prepare for expanded CrowdStrike data collection, consider granting the following read permissions when you create the API client.
Recommended approach: Grant Hosts - Read if you want the integration to be ready for planned endpoint inventory collection. Policy permissions are recommended; grant read scopes for policy types whose IDs you want Cisco Identity to resolve to friendly names.
Note: These permissions are optional for the current integration and do not enable additional endpoint or policy collection today. They are intended to support capabilities planned for approximately the next 3-6 months, though the delivery timeline may change.
| Planned capability | Falcon scope | Access | Potential future use |
|---|---|---|---|
| Endpoint inventory - recommended | Hosts | Read | Core permission for collecting endpoint inventory. |
| Policy name resolution | Prevention policies | Read | Resolve prevention policy IDs to friendly names. |
| Policy name resolution | Firewall management | Read | Resolve firewall policy IDs to friendly names. |
| Policy name resolution | Sensor update policies | Read | Resolve sensor update policy IDs to friendly names. |
| Policy name resolution | Device control policies | Read | Resolve device control policy IDs to friendly names. |
| Policy name resolution | Response policies | Read | Resolve response policy IDs to friendly names. |
Cisco Identity configuration
- Log in to Cisco Identity with an Admin role and navigate to Integrations
- Select the Add Integration button
- Find the CrowdStrike tile and select Add Integration in the respective tile
- Enter a name for the integration, such as
CrowdStrike-production - Enter the API client ID created in the Falcon Console
- Enter the corresponding API client secret when prompted
- Enter the CrowdStrike account ID for the Falcon environment you want to monitor
-
If needed, enter the CrowdStrike API base URL for your Falcon API region. The API clients and keys page displays this value as Base URL. This field is optional. For example:
https://api.us-2.crowdstrike.com -
Select Save
Verify the integration
After saving the integration:
- Confirm that the integration appears in the Cisco Identity integrations list
- Confirm that its connection status is successful or connected
- Return to the product in the next 24 hours to review that CrowdStrike data begins appearing in the Cisco Identity views that use this integration
If the connection fails, check the troubleshooting list below before creating a new client
IP allowlisting
If your organization restricts access to CrowdStrike by source IP address, add the Cisco Identity egress addresses to the relevant allowlist:
18.119.58.52
3.135.12.148
18.116.228.18
3.140.6.181
Confirm the current addresses shown in your Cisco Identity integration setup screen before applying an allowlist. Egress addresses can be environment- or region-specific.
Troubleshooting checklist
If Cisco Identity is not receiving CrowdStrike data, verify the following:
- The CrowdStrike NGSIEM license is active
- The API client was created in the Falcon environment you intend to monitor
- The API client has both
NGSIEM:WRITEandNGSIEM:READpermissions - The Client ID and Client Secret were copied correctly
- The CrowdStrike account ID is correct
- The API base URL is correct for the CrowdStrike region, or is left blank when the default is appropriate
- Any required Cisco Identity IP addresses are allowlisted by your organization
- The API client remains enabled in CrowdStrike
Rotate CrowdStrike credentials
When the Falcon API client secret must be rotated:
- Create or regenerate the credentials for the dedicated Falcon API client in the Falcon Console
- In Cisco Identity, navigate to Integrations, and select Edit Settings for the relevant CrowdStrike integration
- Resetting credentials removes the current stored credentials from the integration, so keep the replacement secret available before starting the reset
- Select Reset Credentials
- Enter the new Client ID and Client Secret
- Select Save
- Confirm that the integration reconnects successfully
Datadog
Note: This integration is currently in Beta.
Overview
This article provides a step-by-step guide to setting up the integration between Cisco Identity and Datadog, enabling enhanced identity security monitoring and analytics. Cisco Identity aggregates identity data from multiple identity providers (IdPs) and applications to deliver comprehensive visibility into identity activity and risks.
Datadog API Information
General information about Datadog API authentication can be found here.
More specifically, API and Application Keys information can be found in the Datadog docs here.
API keys API keys are unique to your organization. An API key is required by the Datadog Agent to submit metrics and events to Datadog.
Application keys Application keys, in conjunction with your organization’s API key, give users access to Datadog’s programmatic API. Application keys are associated with the user account that created them and by default have the permissions of the user who created them.
Datadog API Setup
Create an API key
-
Go to https://app.datadoghq.com/organization-settings/api-keys, OR
search for "API Keys" in the global search ("search on the top of the right side drawer") and select API Keys, OR
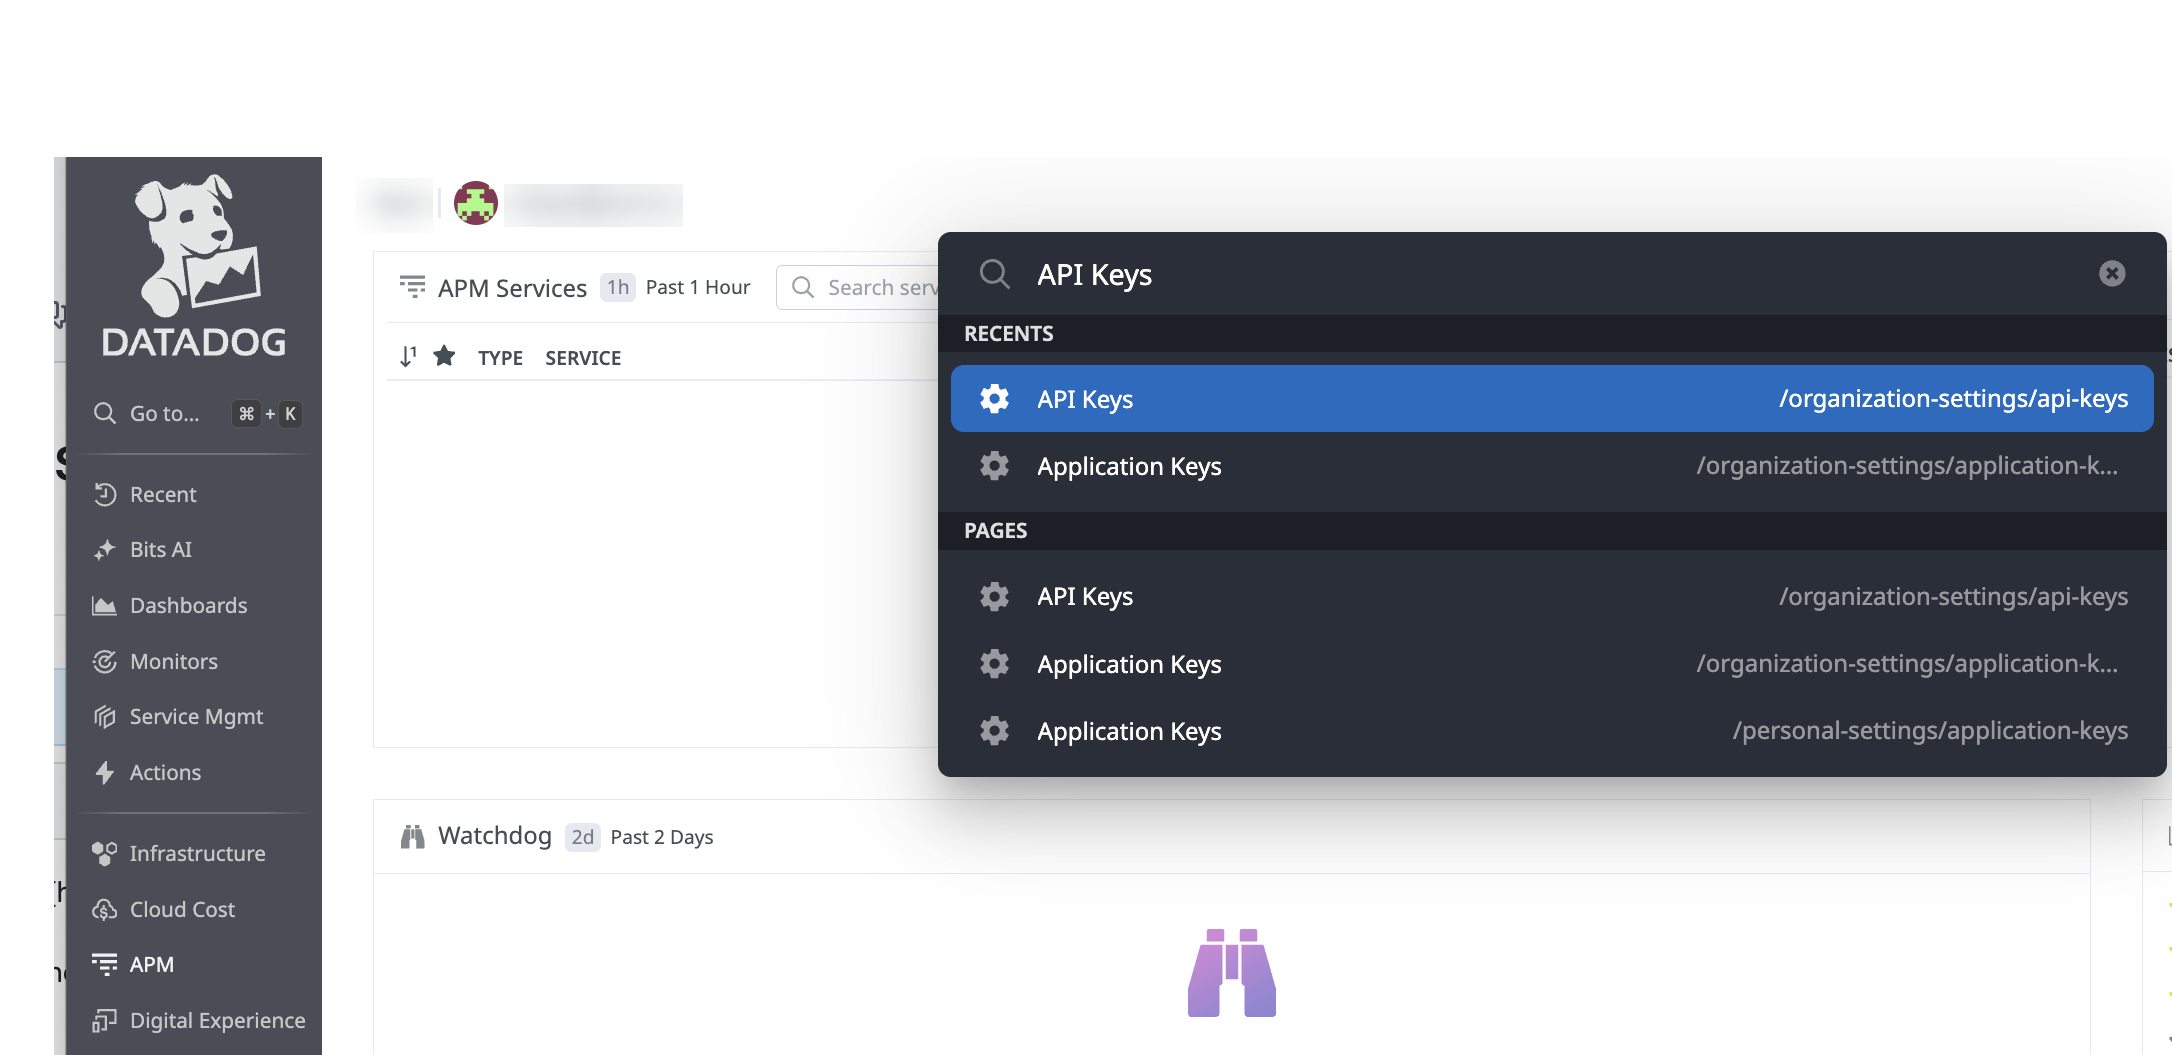
Hover on the username on the bottom right and select API Keys
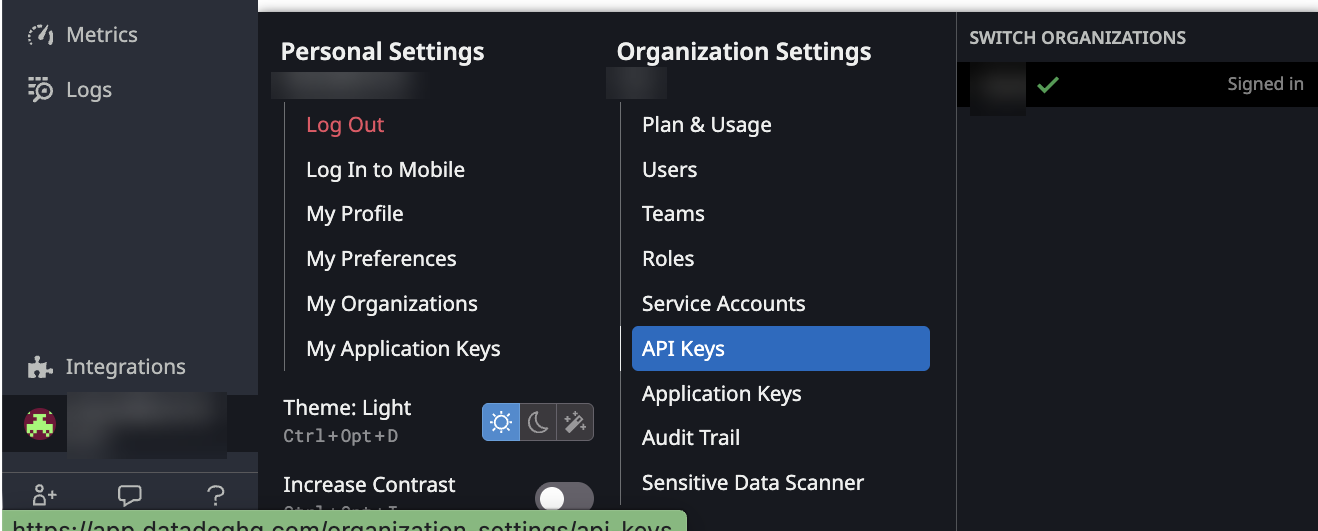
- Then click "+ New Key", give it a name and click "Create Key"
- Copy the value, save it somewhere secure and close.
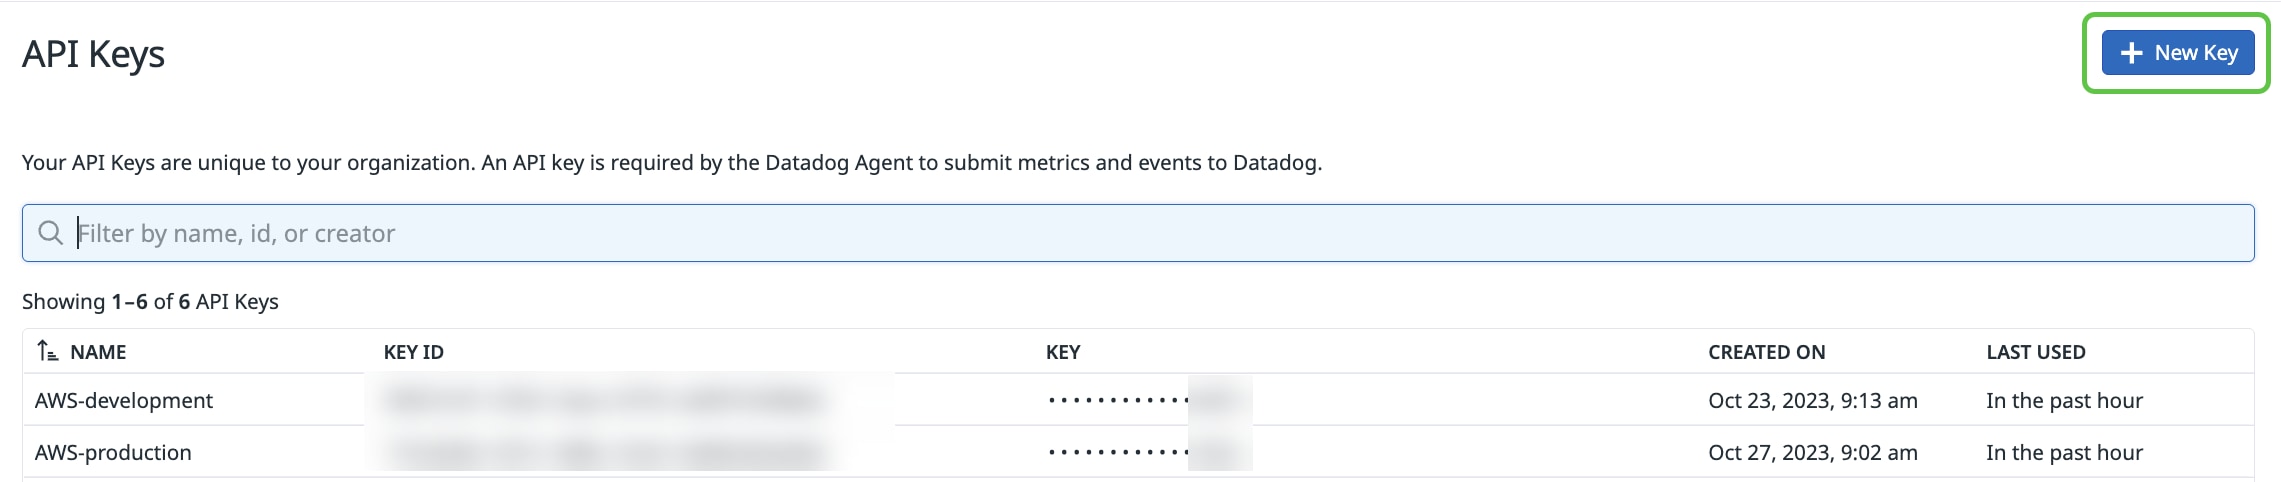
Create the Application Key
Go to https://app.datadoghq.com/organization-settings/application-keys, or use any of the methods described above, such as:
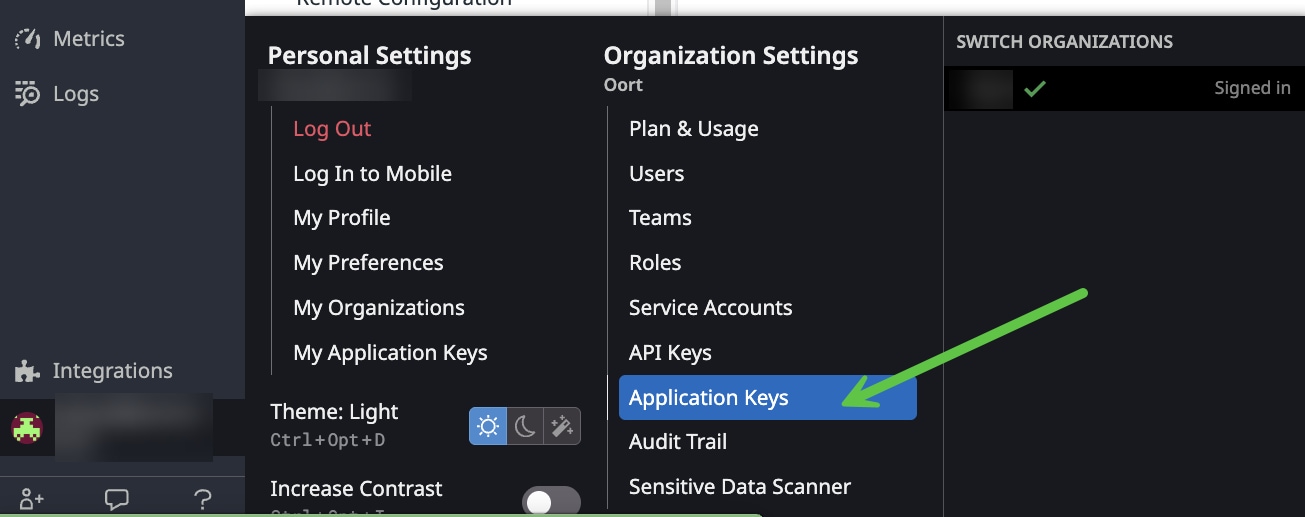
Then click "+ New Key", give it a name and click "Create Key"
Click "Edit" next to the "Scopes" section and check the scopes:
audit_logs_readevents_readuser_access_readapi_keys_readorg_app_keys_read(use the search bar to filter for these values)
Copy the Key and save it to a secure location.
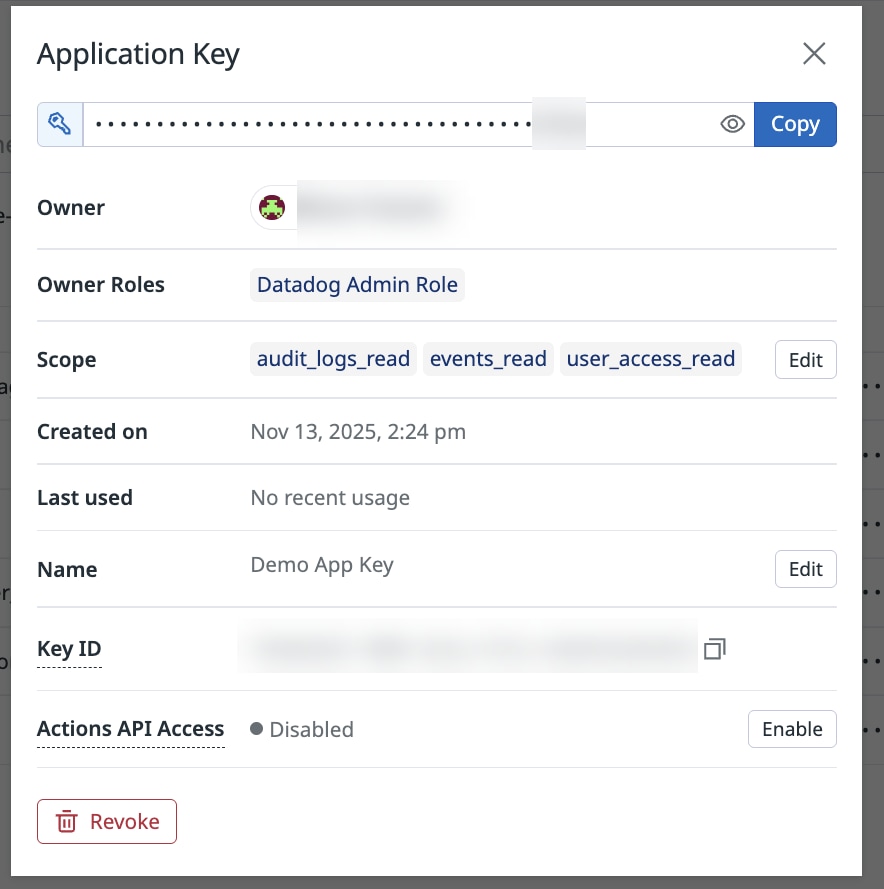
Datadog API URLs
The default value is datadoghq.com. You can consult this page for other Datadog app or API URLs.
Cisco Identity Integration Setup
- Under Integrations, select Add Integration in the top right corner
-
Select the Datadog integration
-
Provide a display name and enter both the API key and App key. Change the Site URL if your Datadog tenant is located under a different URL.
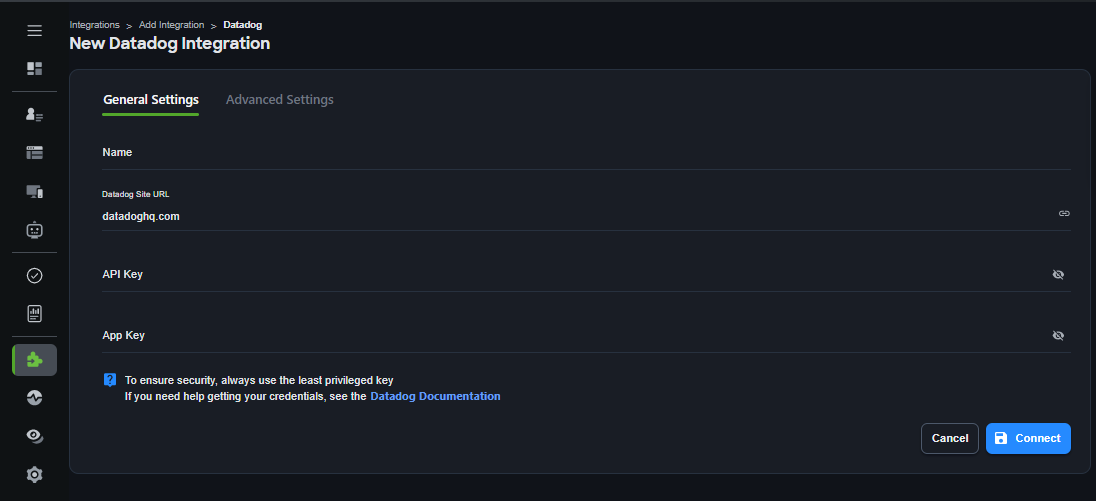
-
Select Connect
Github
Warning: The Cisco Identity Github integration is currently being moved away from it's previous classic PAT installation to a Github app installation, which is currently in Beta.
New PAT installations have been disabled, and existing Github integration customers will soon be notified to start migrating to the new installation method.
Overview
Cisco Identity can connect to Github Enterprise tenants and provide insights into user identities and activity on that platform.
This document will walk you through the process of setting up access from Cisco Identity to Github Enterprise.
Requirements
The following requirements are necessary for the Github integration -
- Github Enterprise subscription
- The integration currently does NOT support GitHub Enterprise Managed Users (EMU)
- A Github Enterprise admin account capable of creating and installing Github Apps on the enterprise.
- SSO from your Identity Provider to each Github org is set to "Enforced" (mandatory) and not "Configured" (optional), otherwise Cisco Identity cannot retrieve the emails for users in the "configured" org and they will not merge with their own record in the "enforced" org.
Github API Permission Structure
Enterprise vs. Org
Cisco Identity has chosen to connect to Github environments at the Enterprise level rather than per Organization. This allows for the use of one Github app for an entire customer environment, instead of a Github app being required for each Org.
Therefore, an Enterprise Admin account or an Enterprise service account is required.
Only Include Specific Github Orgs
Please see [Github Configuration Steps, step 8] to see how to configure Cisco Identity to only collect the data for specific orgs under your enterprise.
Compatible Checks
Currently, 17 security posture and threat detection Checks are compatible with the Github integration. Cisco Identity is continuously adding to this list, based on customer requests and also new and emerging identity-based threats for Github.
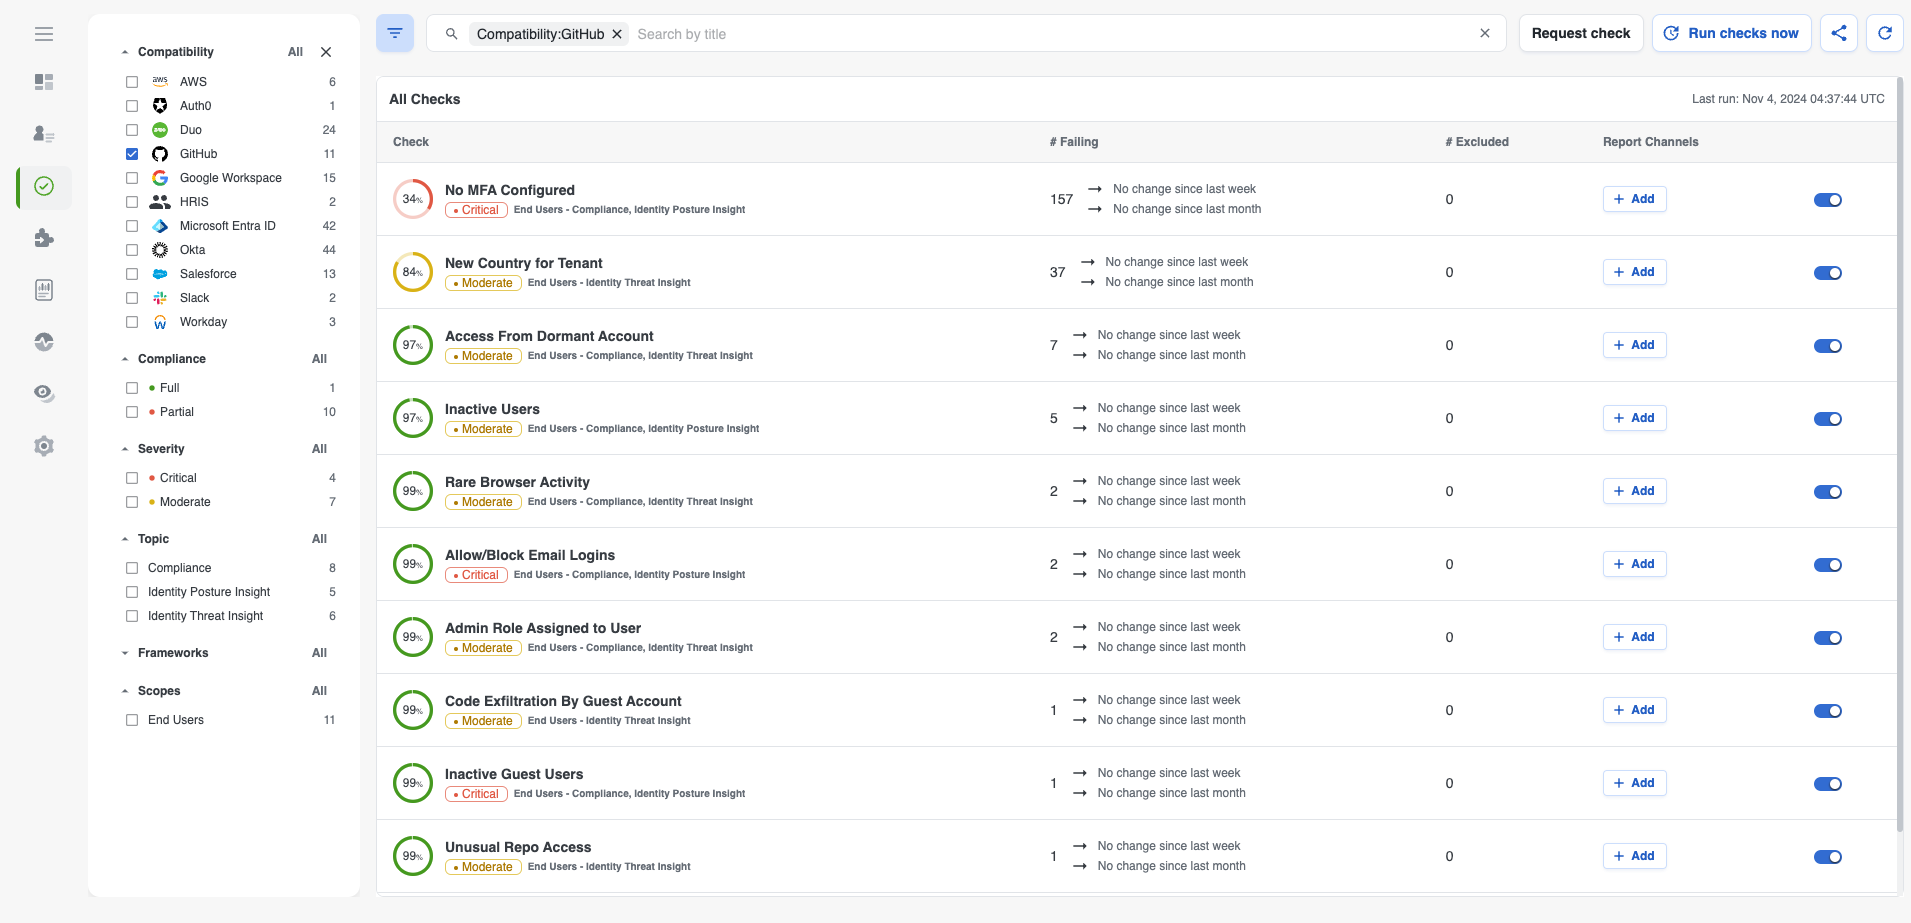
Github Configuration Steps
-
Login to Github with an Enterprise admin account. If you navigate to Github.com/settings/enterprises, it should look something like the following:
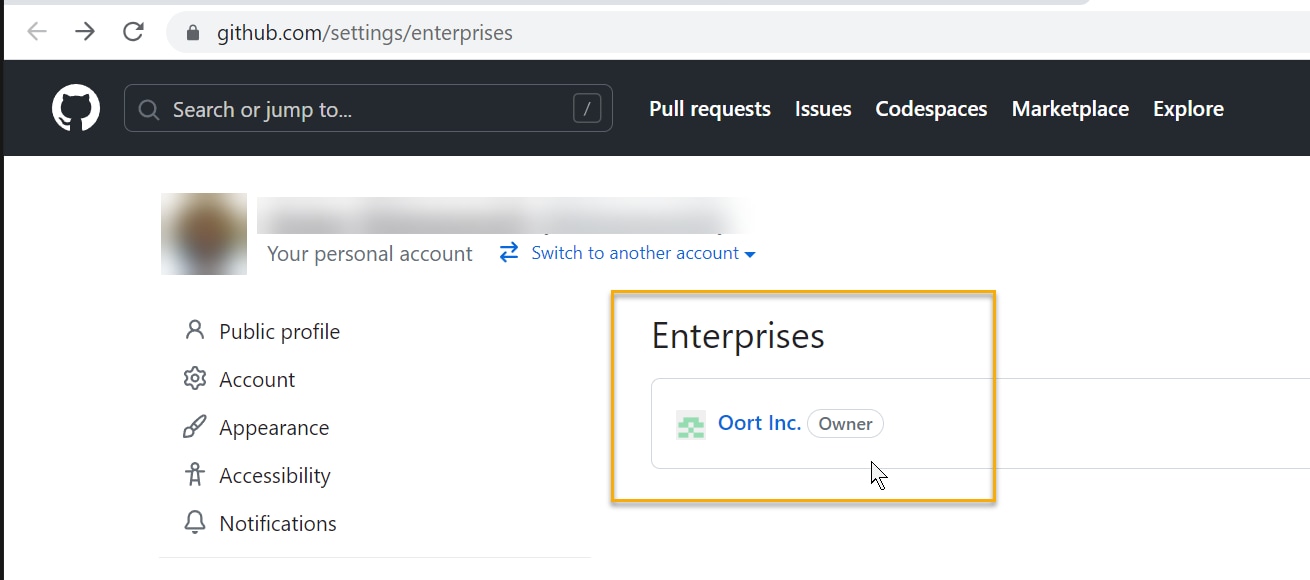
-
Enable displaying IP addresses in the Github Audit Log for your enterprise tenant as described in this article
- Follow the steps for registering a GitHub app as outlined in this Github article
- In step 2 make sure you follow the directions for apps owned by an enterprise.
- In step 7 enter the URL to your Cisco Identity dashboard.
- Skip steps 8-13.
- Complete step 14 to disable the webhook.
-
For step 18 configure the following permissions (note: all of these scopes are read-only unless otherwise mentioned):
- Repository permissions:
- Administration
- Dependabot secrets
- Secrets
- Organization permissions:
- Administration
- Blocking users
- Custom organization roles
- Custom repository roles
- GitHub Copilot Business
- Members
- Organization dependabot secrets
- Personal access tokens
- Secrets
- Enterprise Permissions:
- Custom enterprise roles
- Enterprise AI controls
- Enterprise custom organization roles
- Enterprise organization installation repositories (read and write for automatic organization installation; otherwise optional)
- Enterprise organization installations (read and write for automatic organization installation; otherwise optional)
- Enterprise people
- Enterprise single sign-on
- Repository permissions:
-
Once you have registered your new app you will need to generate and save a private key. Once you generate the key, the file should automatically be downloaded for you. Save this key as you will need to input it into Cisco Identity later
- Press save changes in the Github app screen. In the general page, note the app ID at the top of the page, as you will need this later
-
Go to the Install App page inside your new app. Your screen should look something like this:
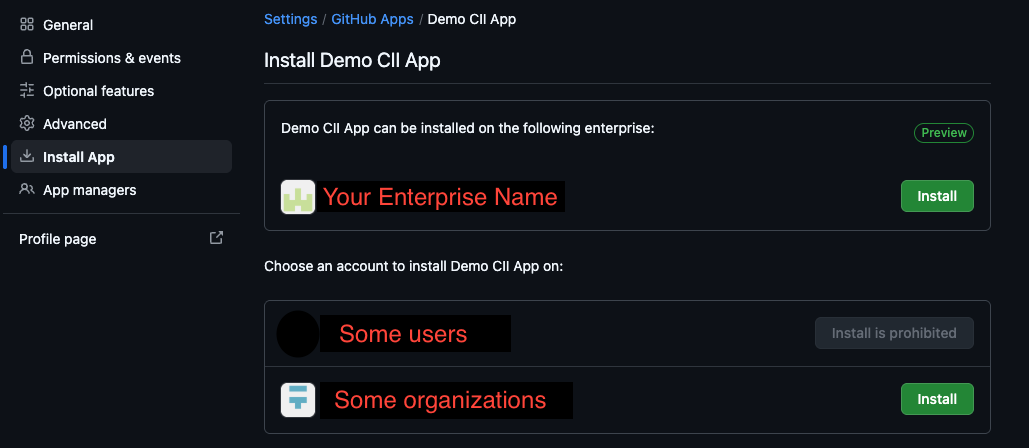
-
Press install on your enterprise and accept the permissions that you configured in step 3.
-
Choose how the app is installed on organizations in your enterprise using the options below. On initial install, wehighly recommend installing only a small subset of Github orgs to start, to confirm the configuration is working properly and the results are as expected, and then expanding to cover all your Github orgs when everything appears stable * Automatic installation: The Enterprise organization installation repositories and Enterprise organization installations permissions must both be set to Read and write. * Manual installation: If you do not grant these read/write permissions, go back to the Install App screen in the Github app's settings and install it on every organization you would like Cisco Identity to monitor.
-
Note the slug for your Enterprise Github tenant. This can be found under your enterprise profile tab.

Cisco Identity Configuration Steps
Sign in to your Cisco Identity tenant and perform the following steps:
Note: If you installed your Github app on multiple Github enterprises you will have to repeat this section once per enterprise.
- From the Integrations page, click Add Integration and select Github.
- Enter a display name for the integration, such as _Github _.
- Enter the value of your Github Enterprise slug, obtained in Step 9 above.
- If you are migrating to the app installation type, select app as the authentication type. Otherwise, this will automatically be done for you.
- Enter the Github app's application ID from step 5 above.
-
Enter the Github app's secret value that was downloaded for you in step 4 above.
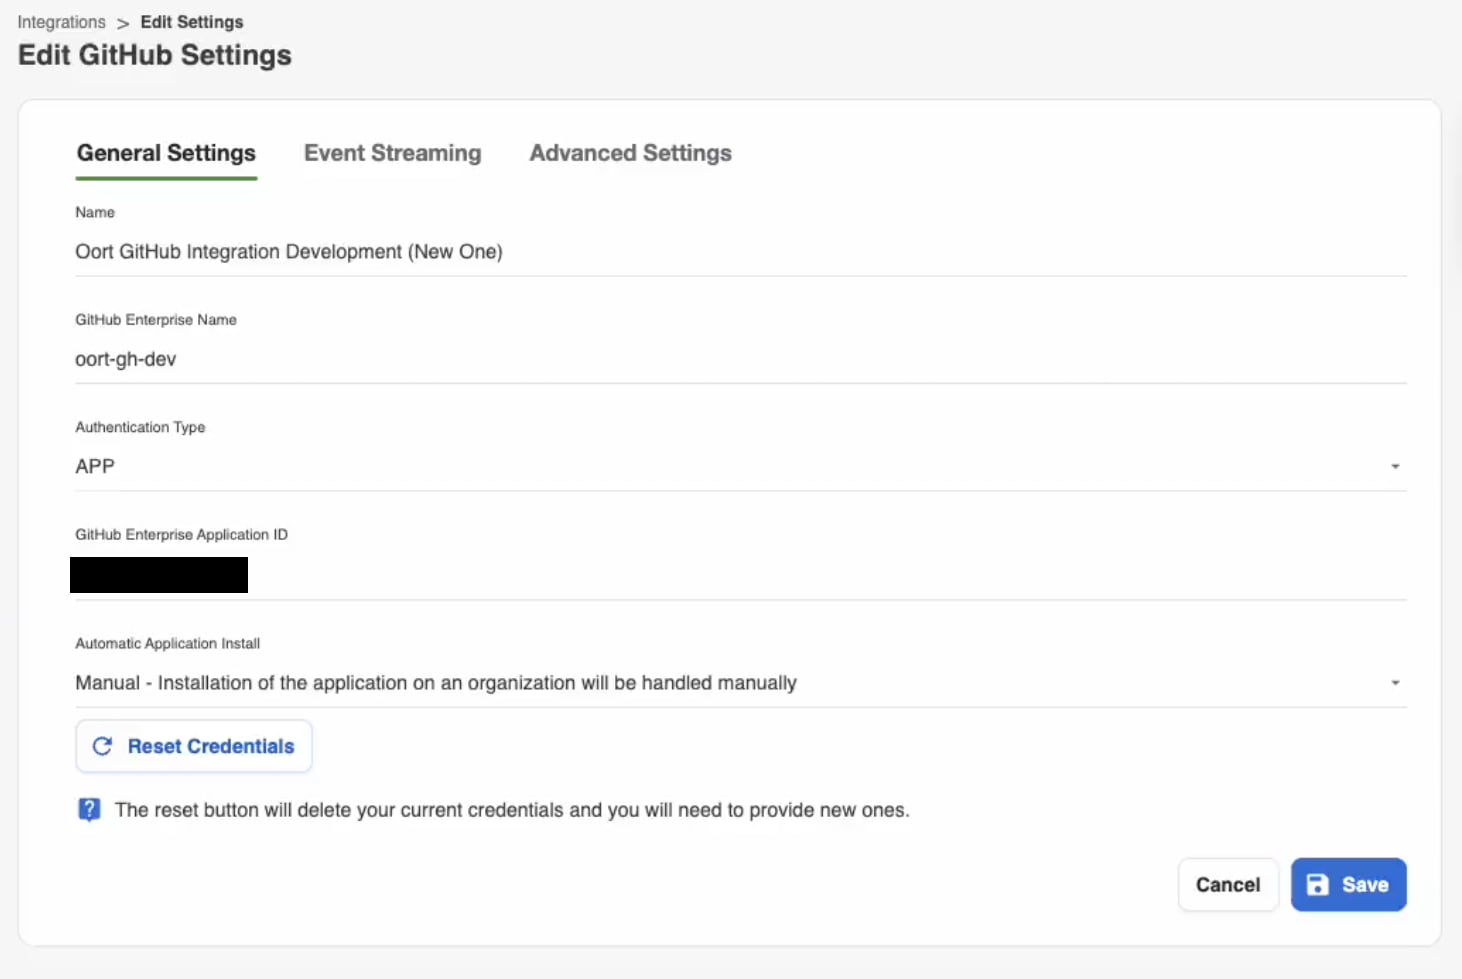
-
Once the configuration connection is successful, go back to the main Integrations page, click the 3-dot menu on the Github integration and select Collect Now. Collection may take some time, depending on the size of the environment.
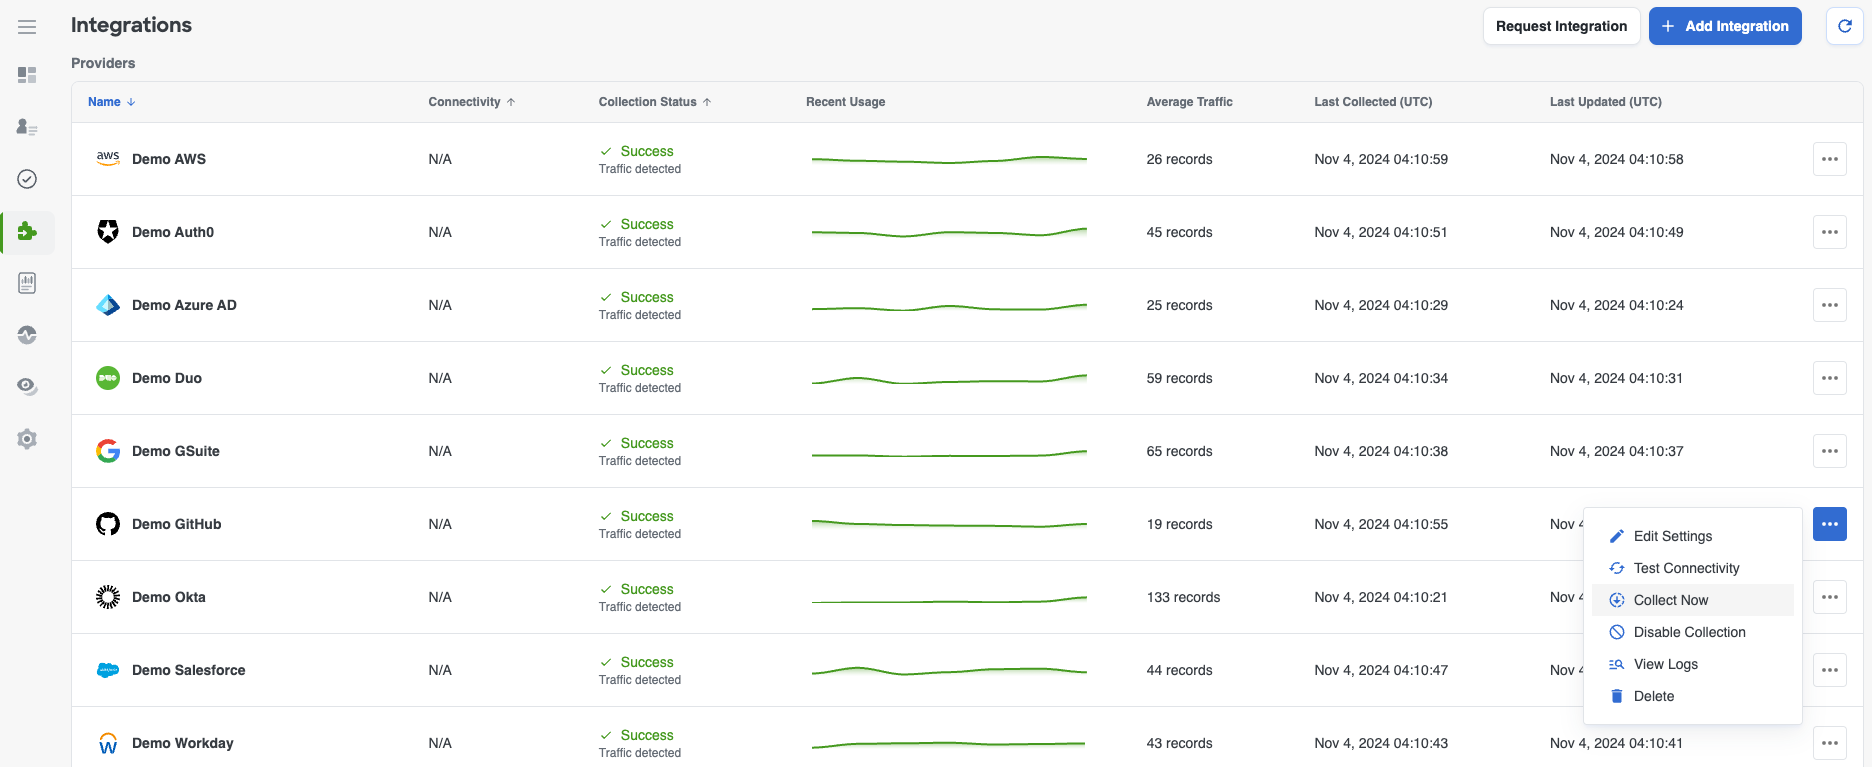
Github Event Streaming (Beta)
Warning: GitHub has no plans to take audit log streaming out of private beta. So if you are not already in the beta program you will not be able to use this feature.
Github has the capability to stream the audit log events. This is currently in Beta. If you do not see the option in your Github Enterprise tenant, contact your Github representative.
Note: The Github base configuration above must already be completed. This step is highly recommended.
- Within Cisco Identity, navigate to Integrations and click Edit Settings on the existing Github integration.
- Click the Event Streaming tab.
- Slide the button to Use Audit Log Streaming.
- Note the Domain, Path, and Port information for use in the Github setup.
-
Create a strong value for the Webhook Secret and enter it in the config.
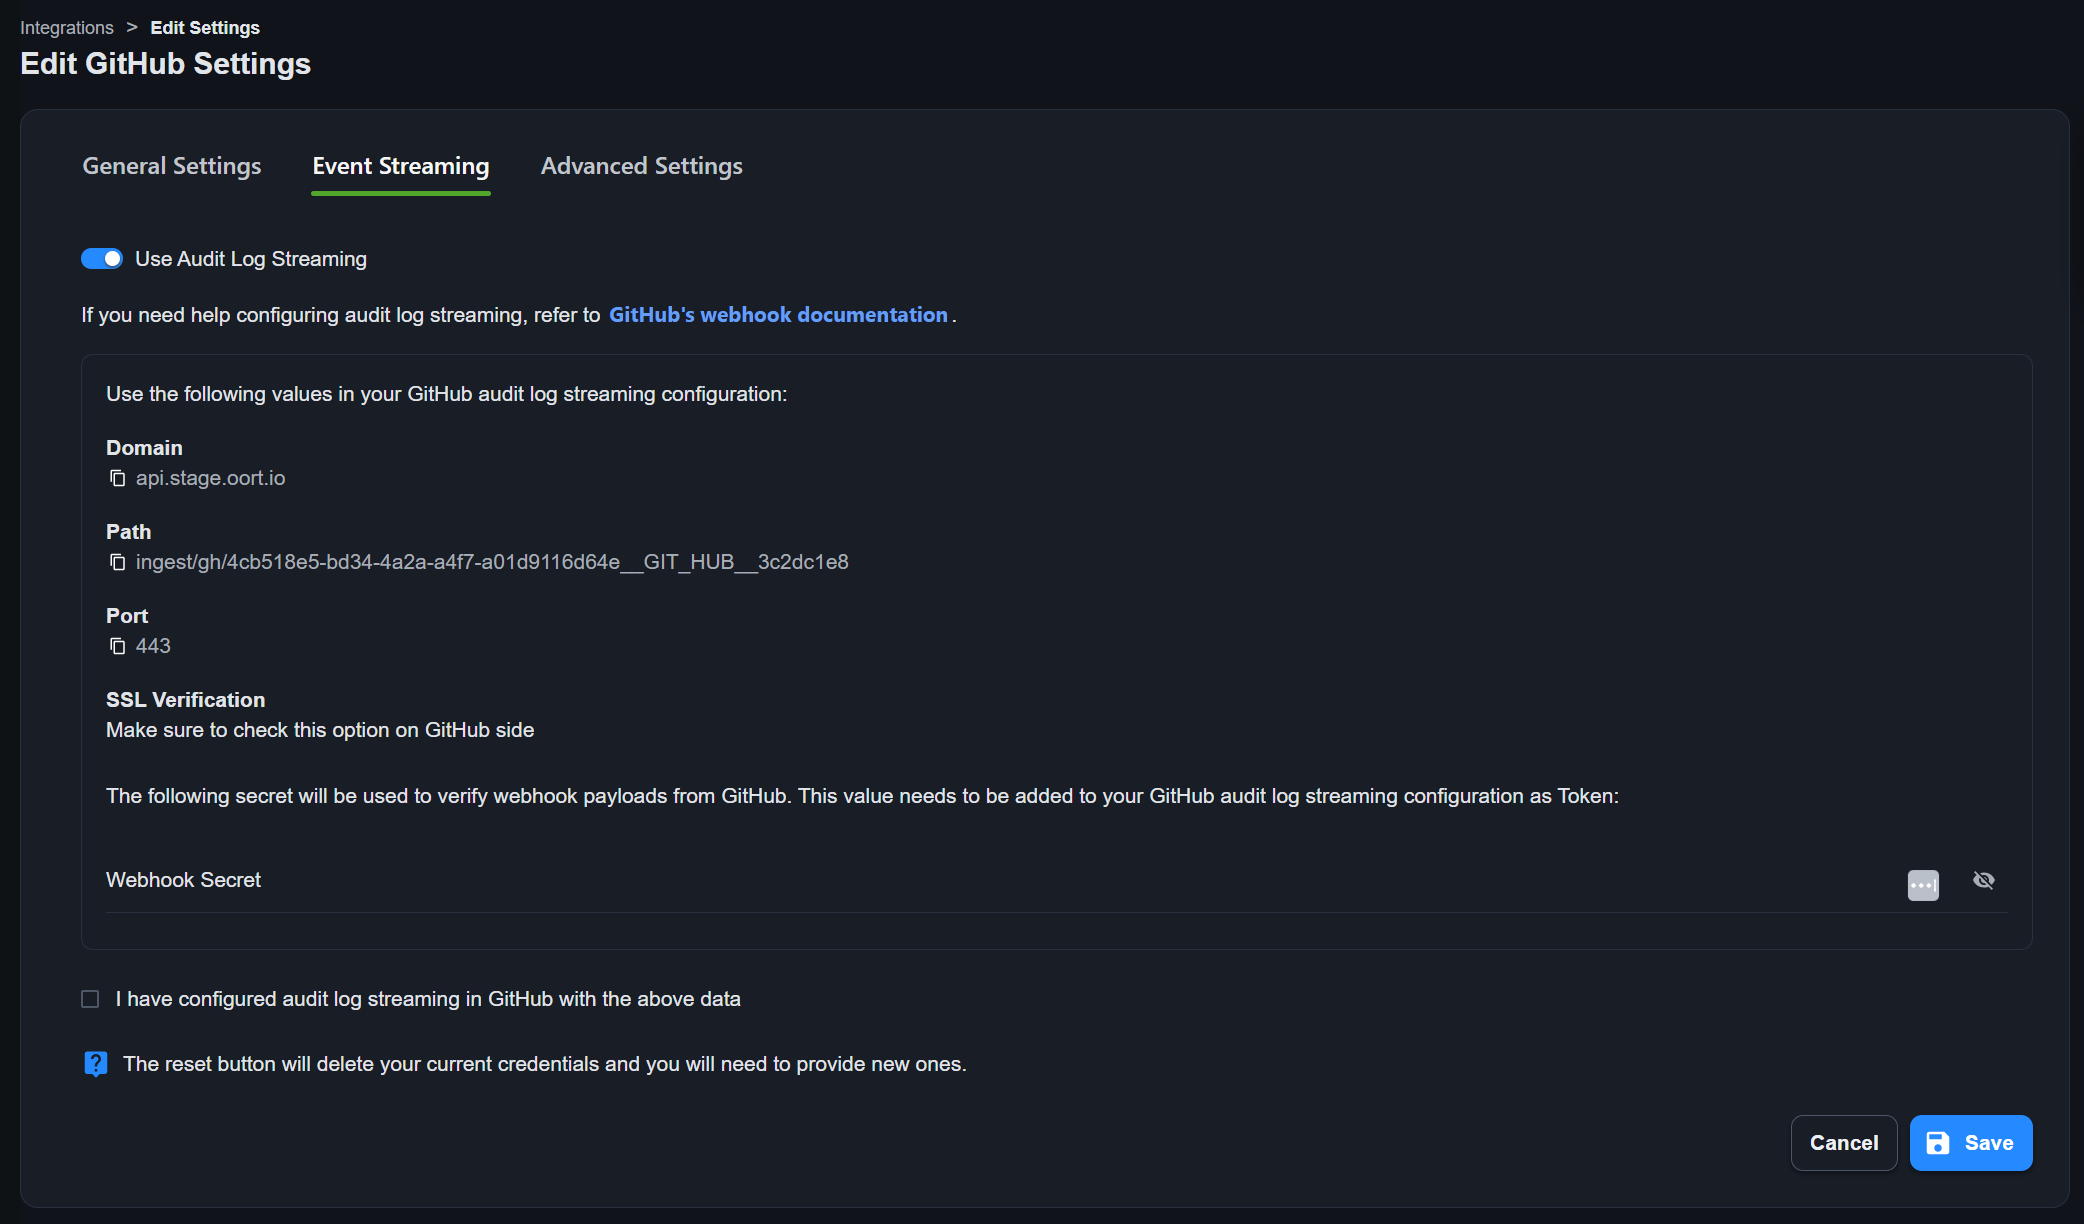
-
Within Github, navigate to Settings > Audit Log > Settings. Ensure that
Enable API Request Eventsis checked.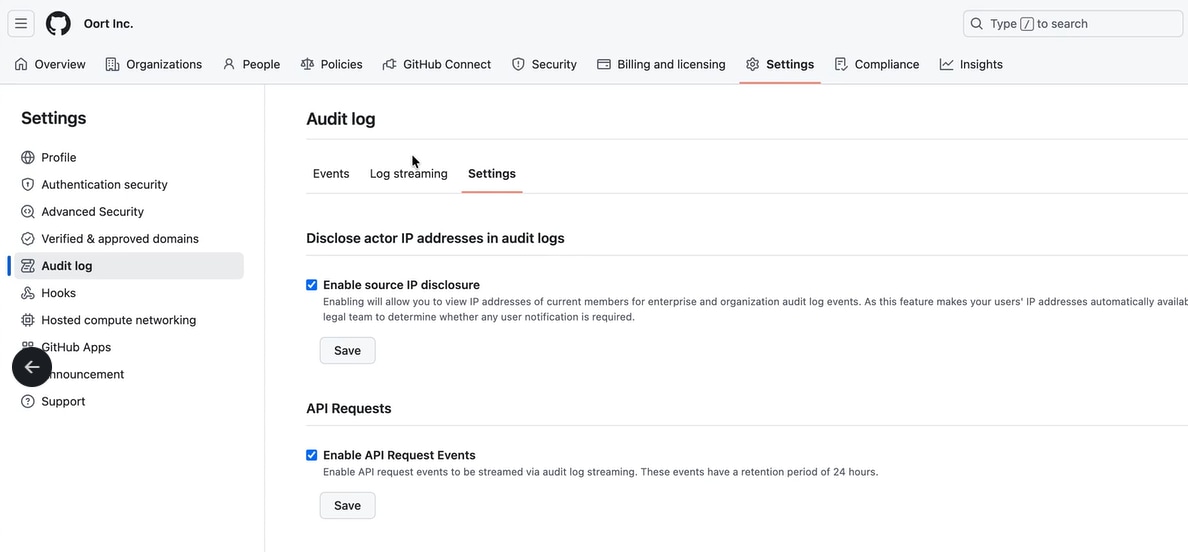
-
On the Log Streaming tab, select
HTTP Event Collectorfrom the Configure stream dropdown list.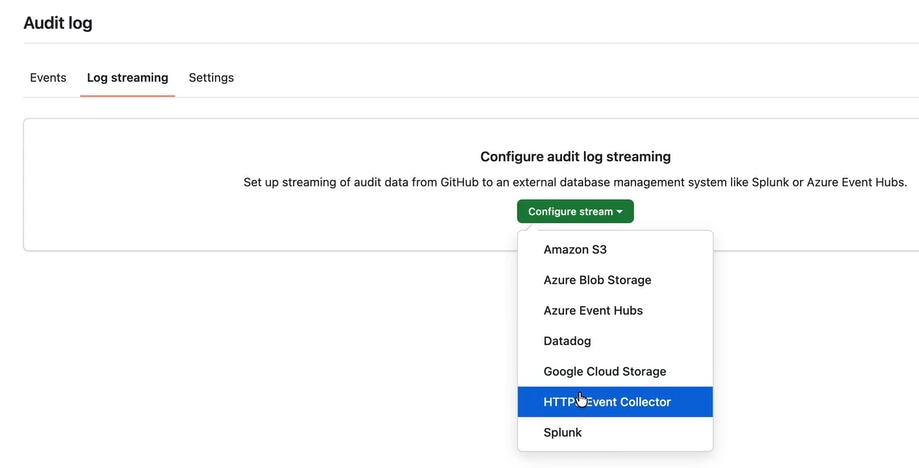
-
Enter the Domain, Path, Port, and Token (Webhook secret above).
-
Check the
Enable SSL verificationbutton.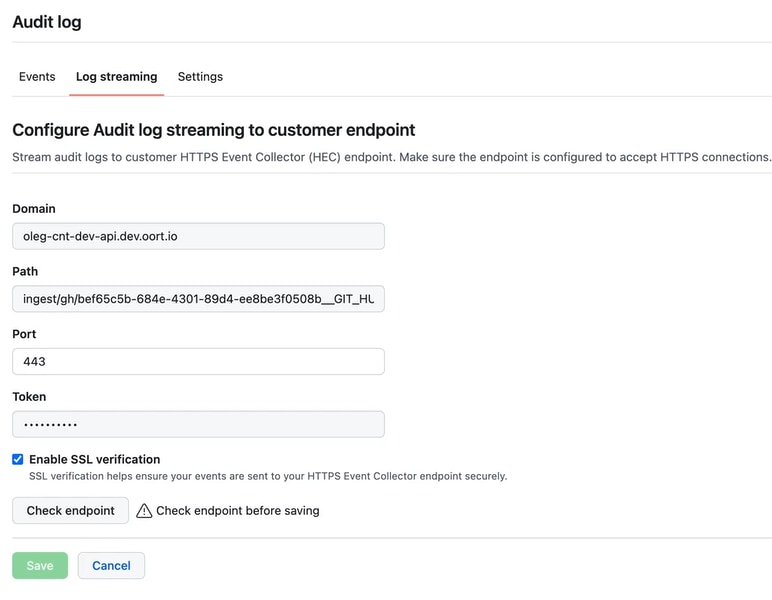
-
Back in the Cisco Identity integration settings, click the checkbox to confirm that you have configured Github streaming in that platform and then click
Save.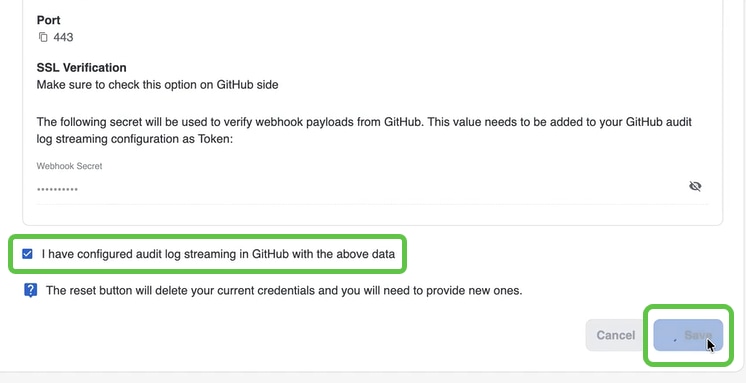
-
Back on the Github streaming configuration page, click the
Check endpointbutton. Once successful, clickSave.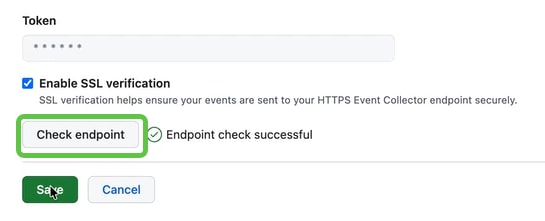
-
That's it. It should be all set.
Jamf
Overview
Cisco Identity can read user and device information from Jamf to determine management status and other security information about your organization's devices to provide additional visibility.
The goal of this document is to serve as a guide to set up a data integration between Cisco Identity and your organization's Jamf environment.
JAMF Data Integration
Permission requirements
You will need the Admin role in Jamf to add the necessary configuration in Jamf, you will need the Admin role.
Jamf Pro Configuration Steps
- Login to Jamf using your Admin account and navigate to Settings > System
- Select API roles and clients
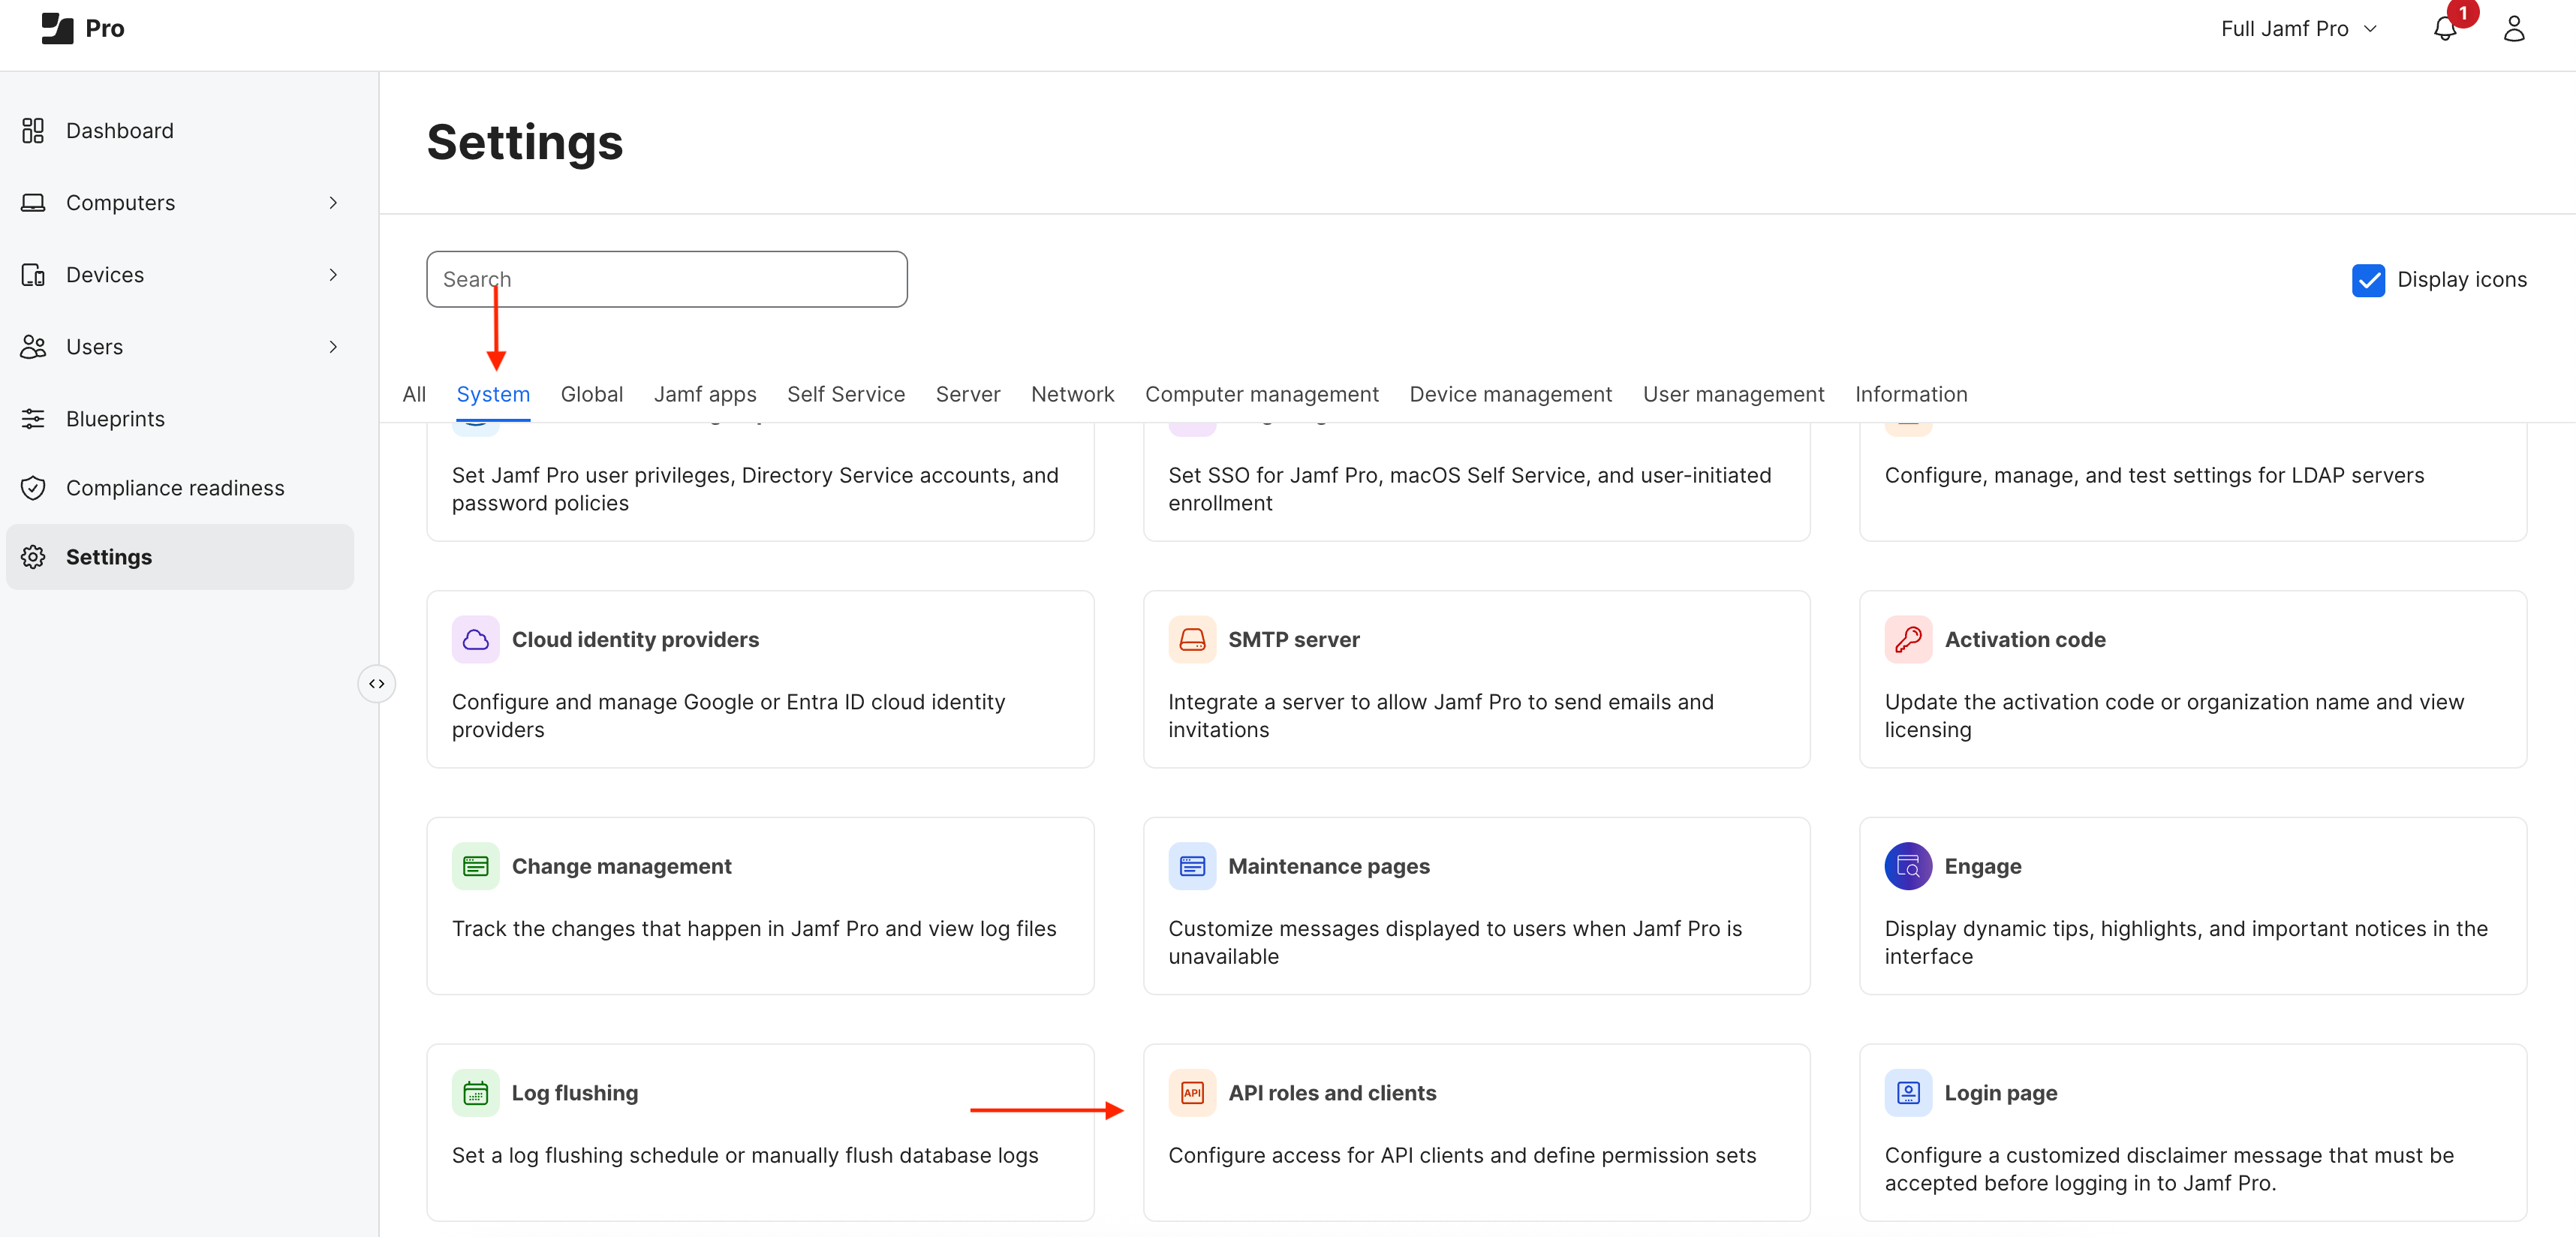
- Create a new API role with the following permissions:
Read Mobile DevicesRead Computers
Add the following permissions to enable Device Lockout functionality: Send Computer Remote Lock Command Send MDM command information in Jamf Pro API View MDM command information in Jamf Pro API
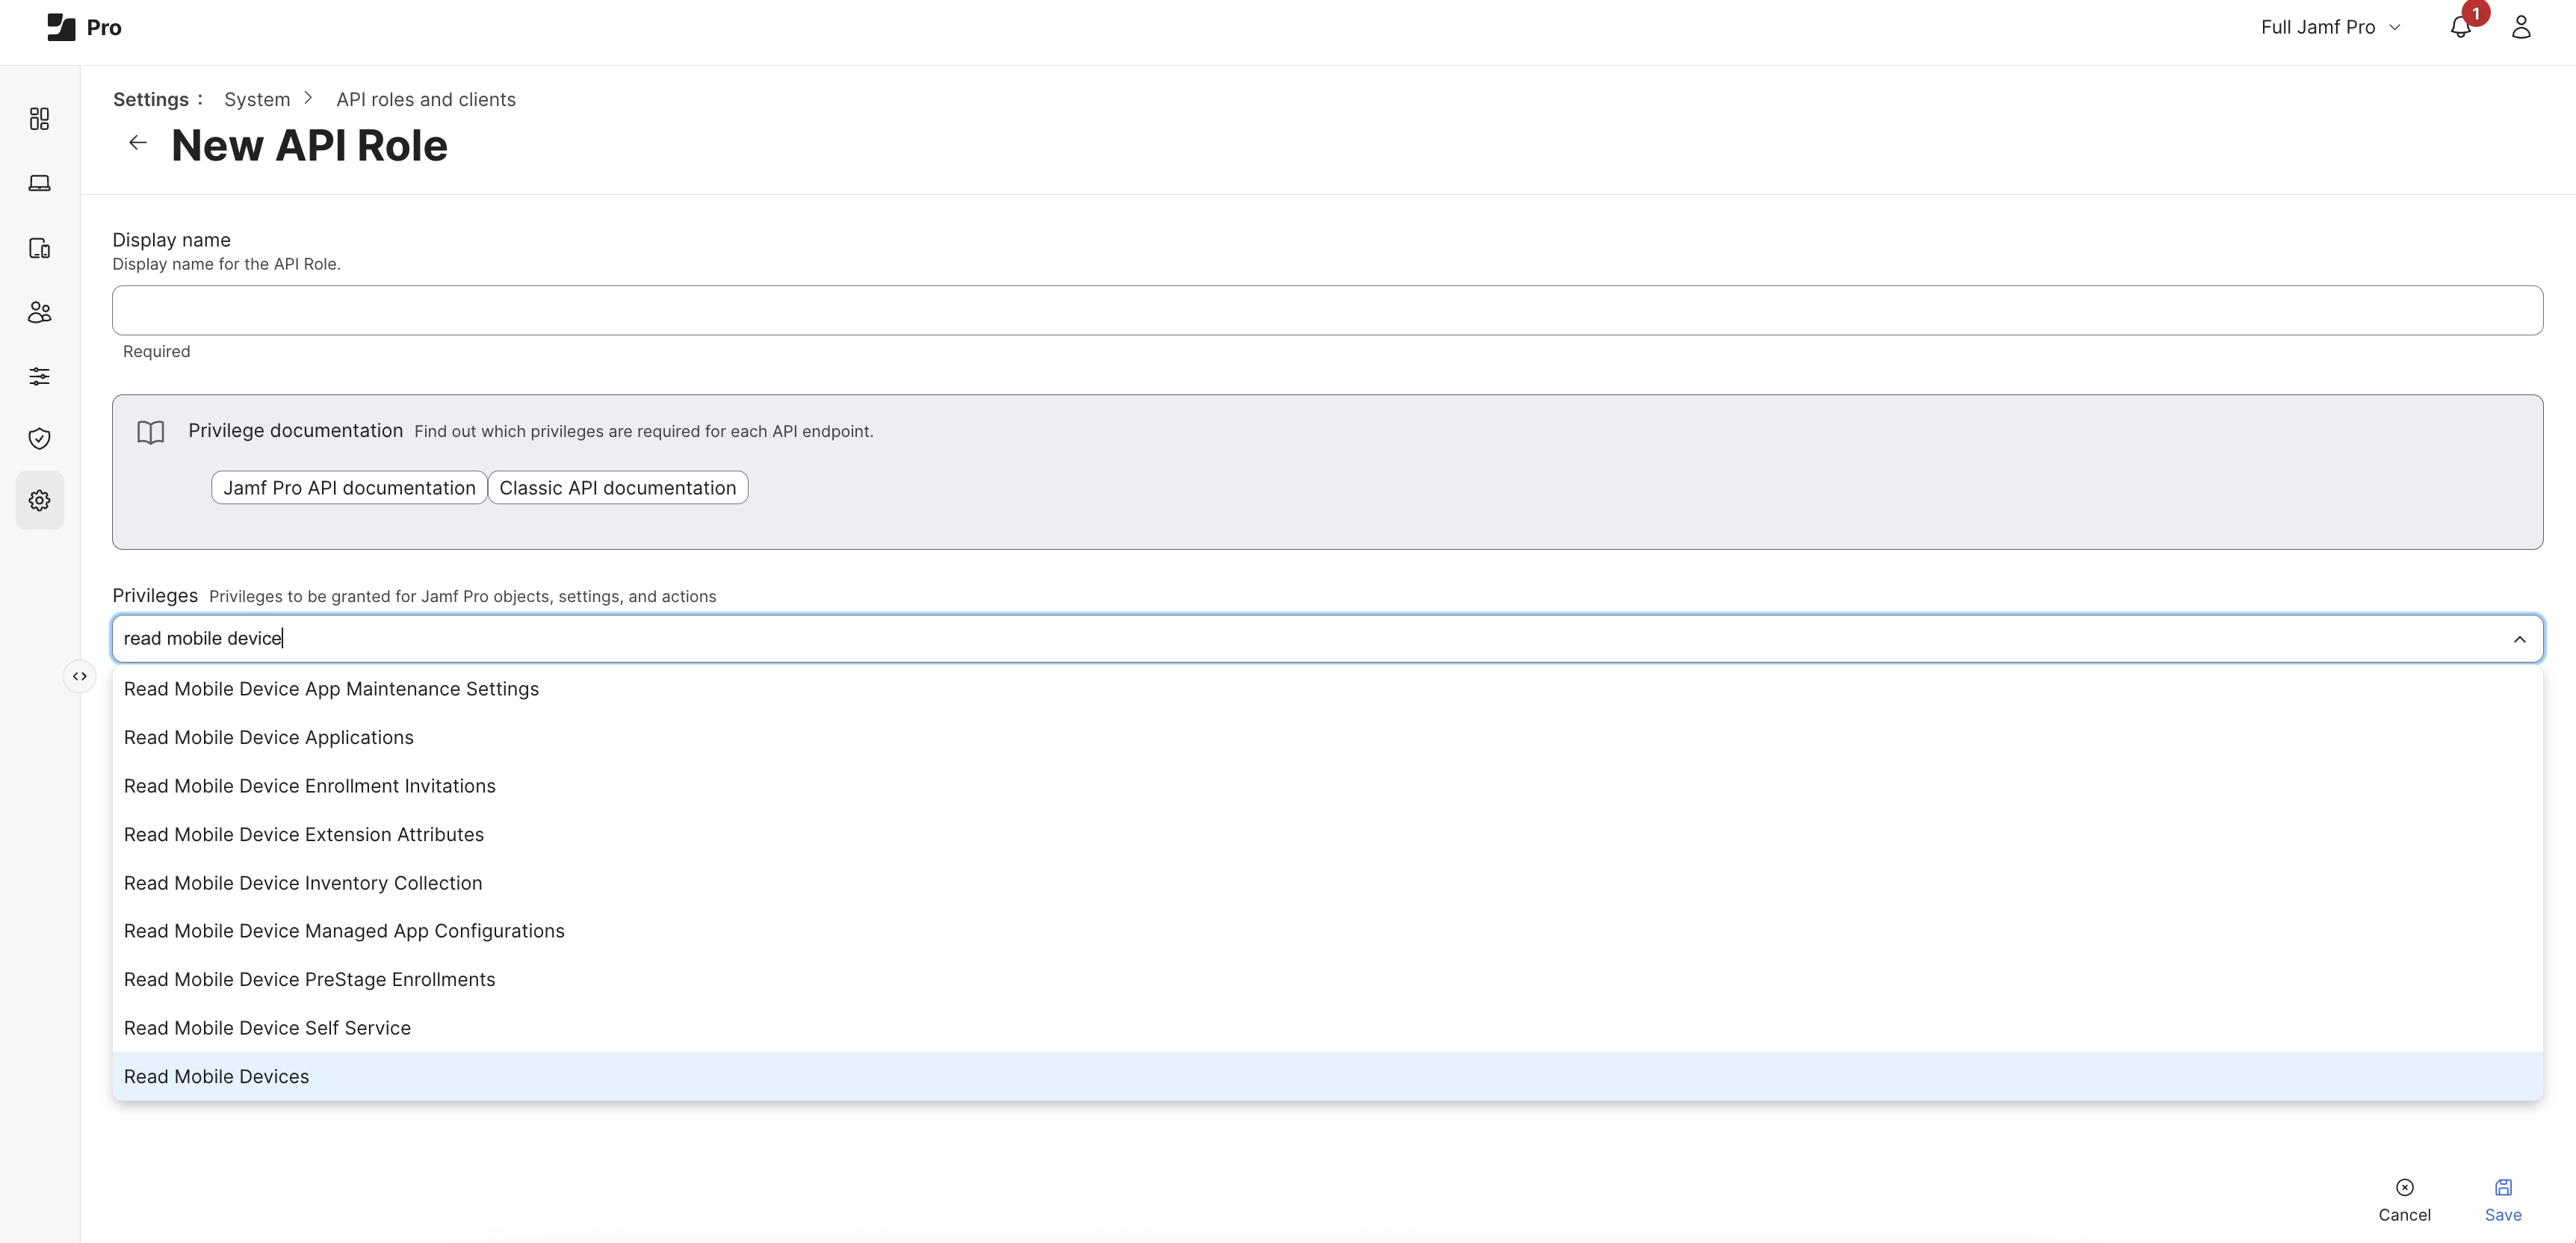
- Once the new role is created, navigate back to the API roles and clients page and create a new client using the role you configured in Step 3
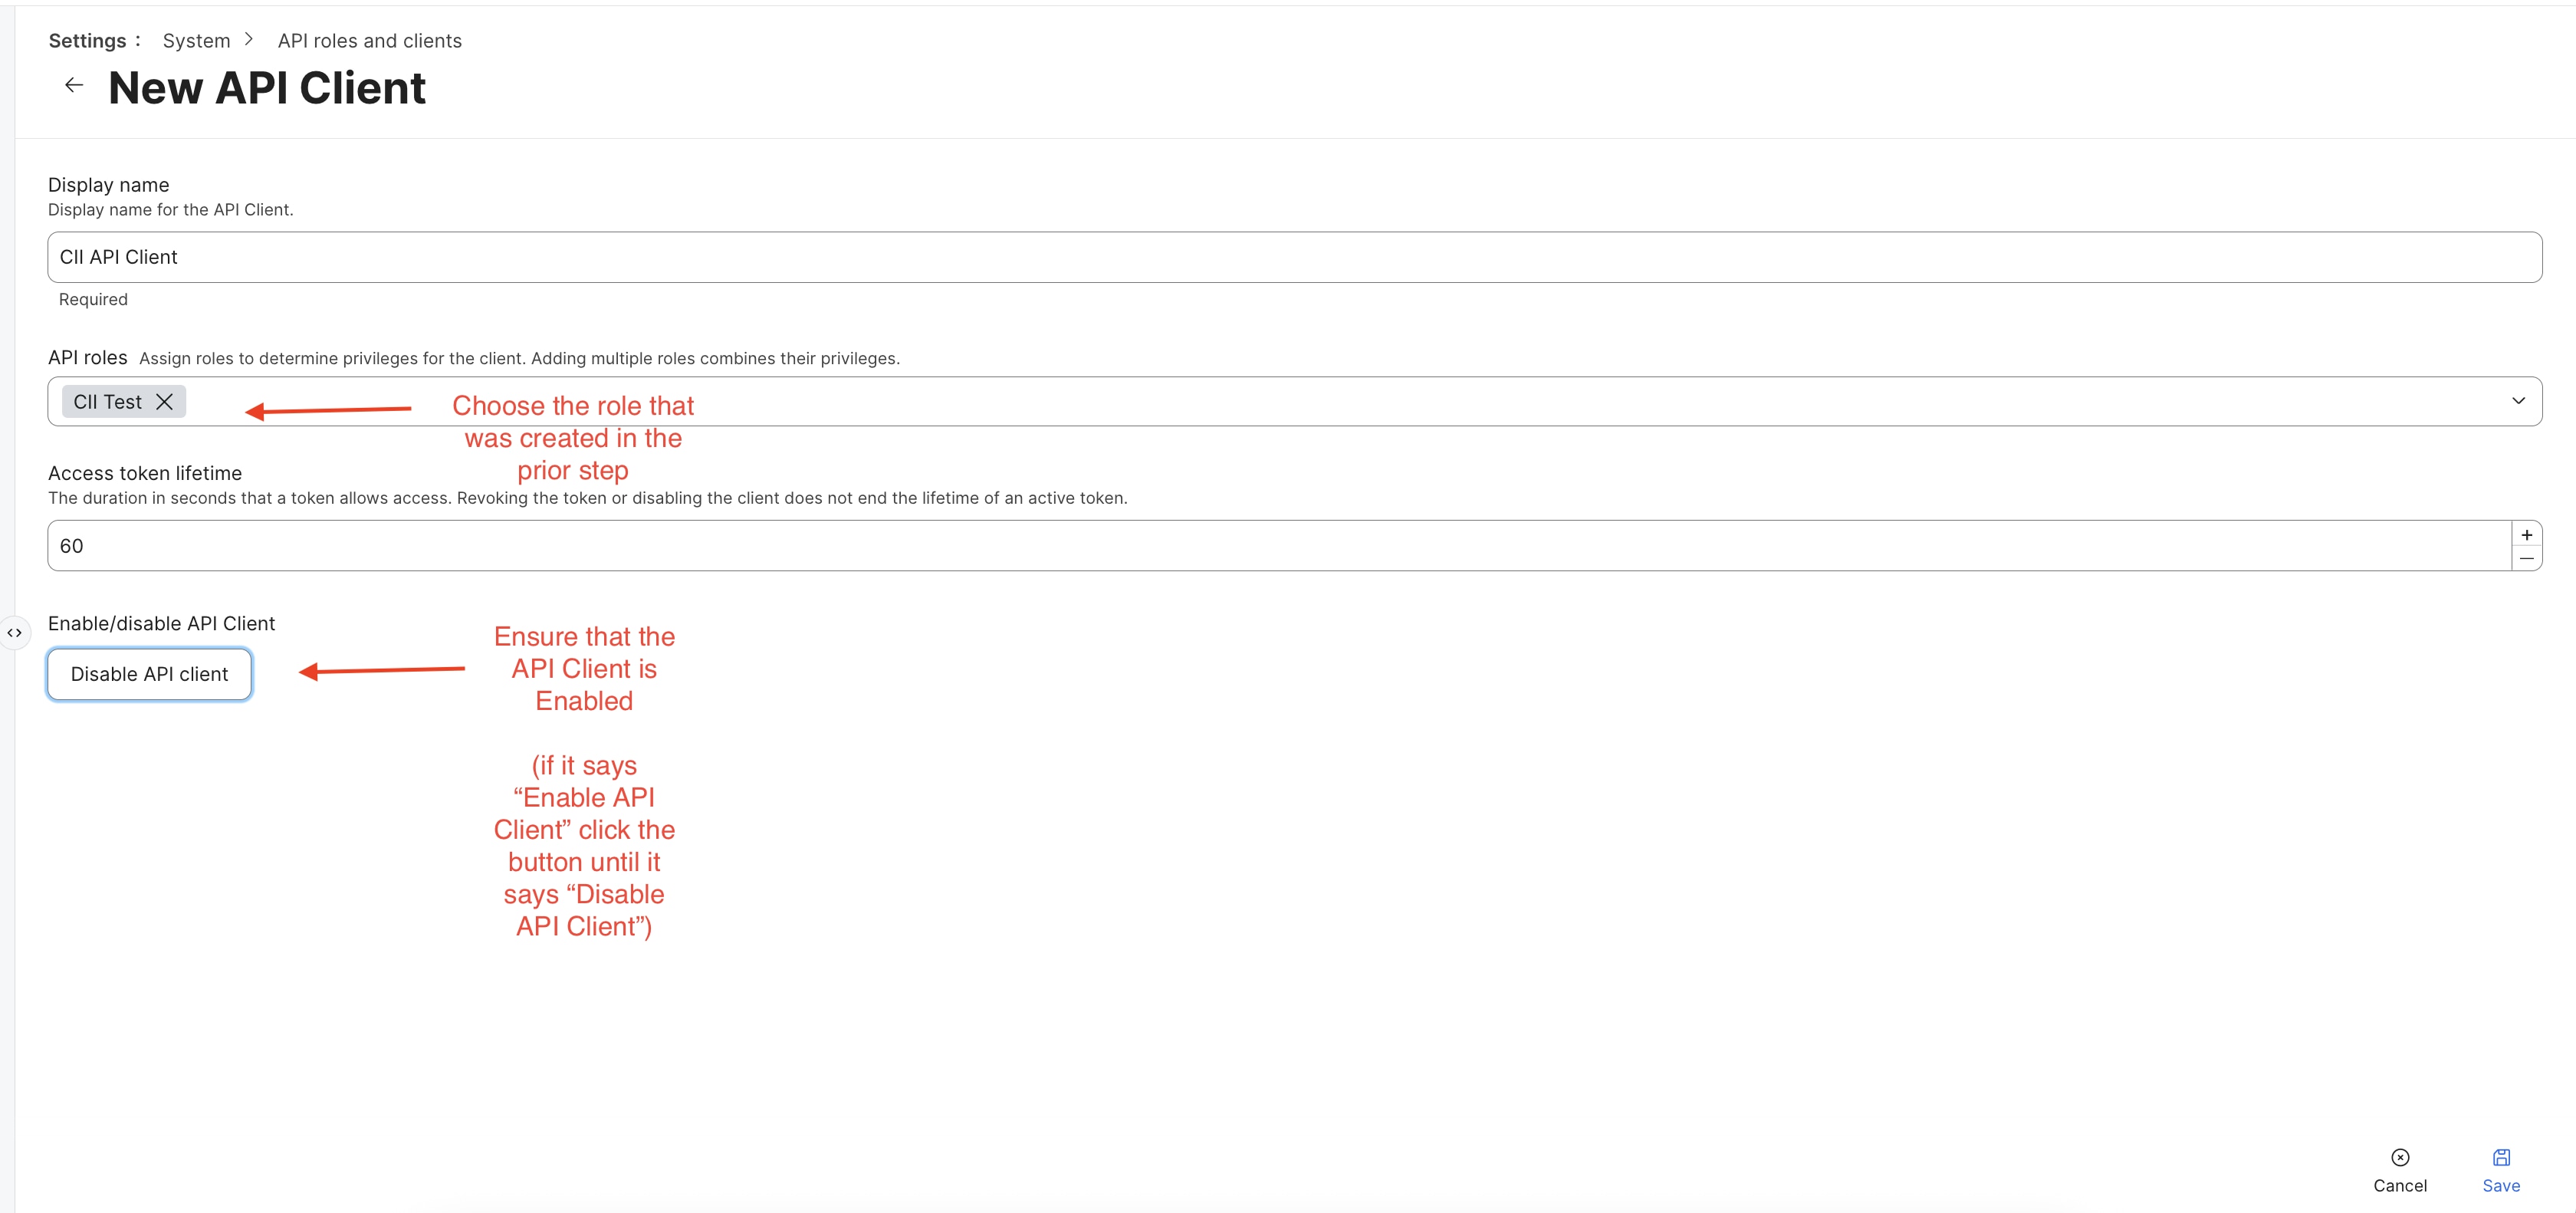
- Copy the Client ID and Client Secret for later use in Cisco Identity
Cisco Identity Configuration Steps
- Login to your Cisco Identity tenant and navigate to the Integrations menu item in the left hand navigation bar
- Select Add Integration
- Select Jamf
- Enter your desired display name, your Jamf Instance URL (ex:
https://foo.jamfcloud.com), and the Jamf Client ID and Client Secret referenced above in Step 5 - Select Save
OpenAI
Overview
Cisco Identity can integrate with OpenAI to gather data via their OpenAI Compliance API to surface users who have access to OpenAI models, how those models are being used, how they are configured and what tools they have access to.
Using this data, Cisco Identity can generate beneficial insights regarding the users and Non-Human Identities (NHIs) within OpenAI, such as improperly configured tools, improper use of tools, privilege escalation, data loss prevention, and more.
Requirements
The following are necessary to configure the OpenAI integration:
- OpenAI Enterprise subscription
- OpenAI workspace(s)
- An OpenAI Enterprise Platform admin account capable of creating API keys
OpenAI API Permission Structure
Cisco Identity requests the minimal scopes necessary to complete the required operations to support the integration. For this integration, Cisco Identity requires a `read-only` API token.
Note: The OpenAI Compliance API currently utilizes a coarse-grained permission structure that only supports either read-only or read-write permissions, and requires you to grant the API token permission to the whole API. It does not support granting a token access to limited portions of the API at this time.
Managing Conversation Data Collection Preferences for ChatGPT & Codex
The OpenAI Compliance API contains both conversation metadata and conversation logs regarding the conversations happening between end-users and your organization's instance of ChatGPT or Codex, which Cisco Identity can retrieve via this integration. The conversation logs from these tools contain valuable data and information that Cisco Identity can then analyze to generate and surface interesting insights about potential issues or risks associated with the OpenAI usage within your organization, such as detecting improper tool use or assisting with data loss prevention initiatives.
However, we understand that this data may be sensitive and your org may not want, or allow, Cisco Identity to retain conversation logs between your end-users and OpenAI models. For that reason, there are three setting options available that enable you to configure what conversation data Cisco Identity is allowed to process so that you can select the preferred data handling method for your org.
These three settings are:
- Do not collect ChatGPT or Codex conversation logs
- Cisco Identity will not retain any conversation metadata or logs
- [Default Setting]Collect conversation metadata only without conversation message content
- Cisco Identity will retain conversation log metadata only, but will not retain any fields that contain data regarding user prompts or model responses
- Collect conversation metadata and conversation content
- Cisco Identity will collect and retain full conversation data, including all metadata, user prompts and model responses
The following table depicts the different capabilities and functionality that Cisco Identity can perform based on the available Conversation Log settings.
Note: Note: The insights and capabilities listed below may represent future functionality that will be developed for the General Availability release, or after, and do not have guaranteed availability during Alpha
Baseline visibility
Option 1: Do not collect ChatGPT or Codex conversation logs
✅
Option 2: Collect conversation metadata only without conversation message content
✅
Option 3: Collect conversation metadata & conversation content
✅
Account directory-based data and insightsEg: Account activity, dormant accounts, admin privileges, etc.
Option 1: Do not collect ChatGPT or Codex conversation logs
✅
Option 2: Collect conversation metadata only without conversation message content
✅
Option 3: Collect conversation metadata & conversation content
✅
GPT definition-based data and insightsEg: Known risky tools, broadly defined tools, tools available to users who shouldn’t have access, etc.
Option 1: Do not collect ChatGPT or Codex conversation logs
✅
Option 2: Collect conversation metadata only without conversation message content
✅
Option 3: Collect conversation metadata & conversation content
✅
Basic tool usage insightsEg: Which tools were executed, what tool replied, etc.
Option 2: Collect conversation metadata only without conversation message content
✅
Option 3: Collect conversation metadata & conversation content
✅
Deeper insights based on detailed conversation logsEg: Tool misuse, AI drift, data exfiltration, etc.
Option 3: Collect conversation metadata & conversation content
✅
OpenAI Configuration Steps
Note: To configure this integration, OpenAI will first need to grant your organization custom Compliance API Scopes. This process, outlined in the OpenAI docs referenced in Step 1 (below), requires OpenAI support team involvement and may take several days depending on their availability and responsiveness. We encourage you to start this step as early as possible to avoid delays.
- Reference the Authentication section of the OpenAI docs and follow the steps to obtain and save your API key. Copy down this API key somewhere secure as you will need it to complete the integration set up process in Cisco Identity and you cannot generate the full API key again after it has been generated
- Make sure that you have created the API key under a service account and not as your own user or the integration will not work correctly
- Then navigate to the Organization Admin keys setting page and select Create new admin key. Give the key a name that is easy to recognize as linked to Cisco Identity (eg:
Cisco Identity Admin API Key - Note: OpenAI does not provide the option to create an admin API key linked to a service account
-
Select restricted permissions and grant read audit log scope and read organization administration scope. The settings should look like this:
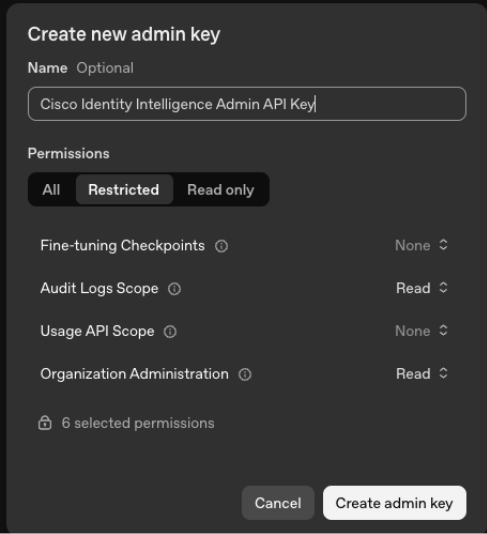
-
Once you have applied the correct permissions and scopes, select Create Admin Key. After you have successfully created the key, make sure to save the secret value. You will need this for later steps and you will not be able to see it again
- Navigate to the data controls settings section in OpenAI and enable audit logging
- Then, navigate to the Workspace Admin Settings section in OpenAI. Review the workspace name to confirm that you have selected the correct workspace
- On the Workspace Admin Settings page, you will find an Organization ID and a Workspace ID (screenshot example below). Copy both of these down as you will need them to complete the integration set up process in Cisco Identity
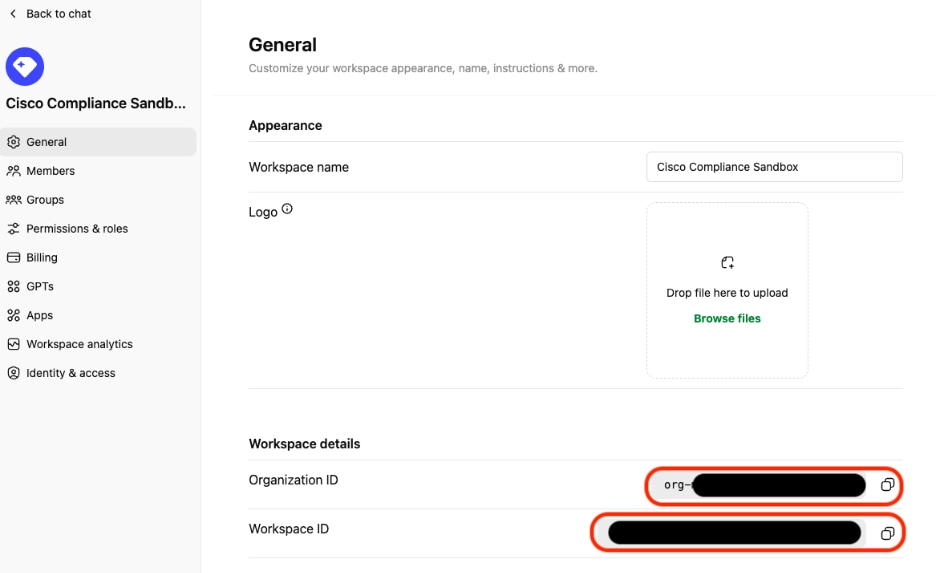
Cisco Identity Configuration Steps
After you have completed the OpenAI configuration steps outlined above, navigate to the Integrations page within your Cisco Identity tenant and perform the following steps :
- From the Integrations page, select the Add Integration button. Locate and select OpenAI Enterprise from the list of possible integration sources
- Enter an easily recognizable display name for this integration (eg:
OpenAI). This display name will be used throughout Cisco Identity to identify the integration among your other connected sources - Enter the workspace ID and organization ID that you copied during Step 5 of the [OpenAI Configuration Steps] section above into their respective fields
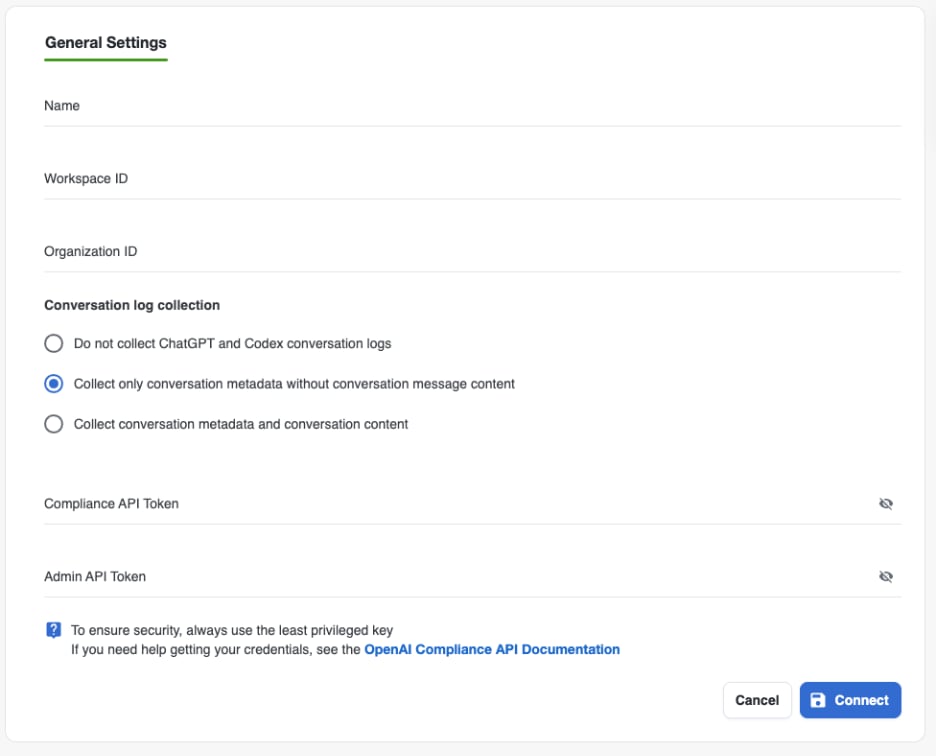
- Select the desired Conversation Log Collection setting
- More detailed info on the available settings are provided above in the [Managing Conversation Data Collection Preferences] section
- Enter both the Compliance key and Admin API key generated previously in OpenAI into their respective fields
- Select the Connect button to test the configuration connection
-
Once the connection test is successful, navigate back to the main Integrations landing page, locate the OpenAI integration in your list of integrations. Select the 3-dot menu button on right-hand side of the relevant row to open the menu, then select Collect Now to begin the OpenAI data ingestion process
- Note: Data collection can take some time, depending on the size of your environment. We recommend giving data ingestion a few days to stabilize before closely examining the results
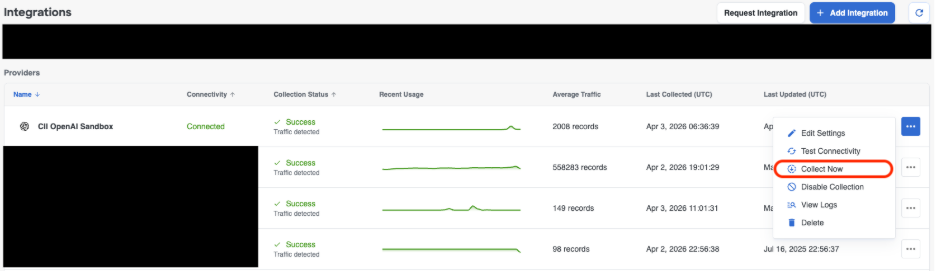
Polarity
Cisco Identity can integrate with Polarity to provide enhanced user identity context for critical security event triage and investigations.
Important Notes!
- The Polarity app setup currently points to the US production environment.
If you are looking to integrate with a different geo deployment (AU, JP or EU), then please consult your Polarity representative on how to change the configuration files to point to the correct Cisco Identity environment.
Cisco Identity Integration Steps
- From the Integrations tab, click Add Integration.
- Scrolls down and click Add API Client.
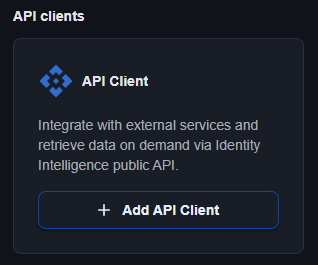
- Provide a Name and Description
- Click Save and Generate credentials
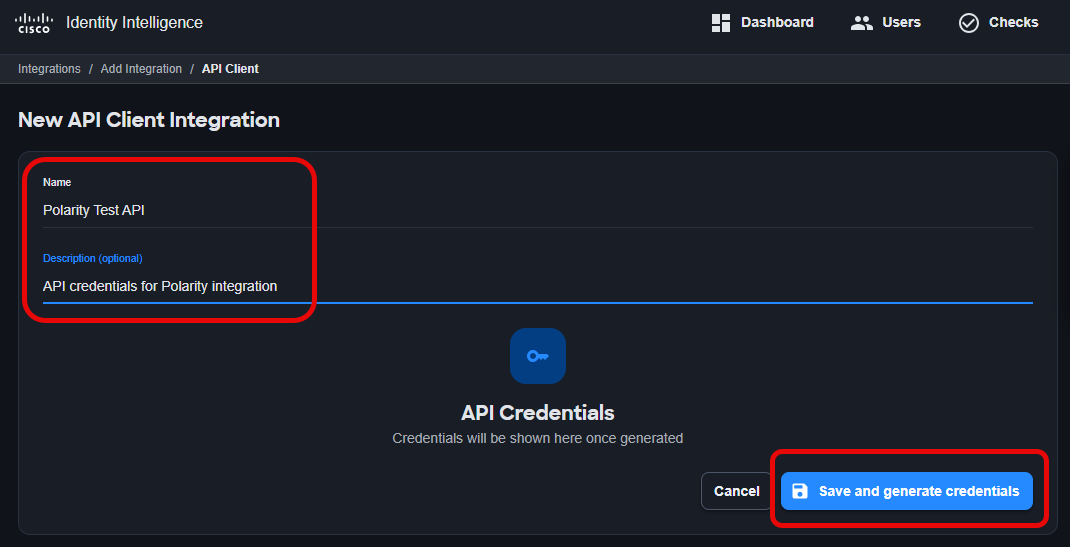
- Use the details provided in your Polarity configuration (see below).
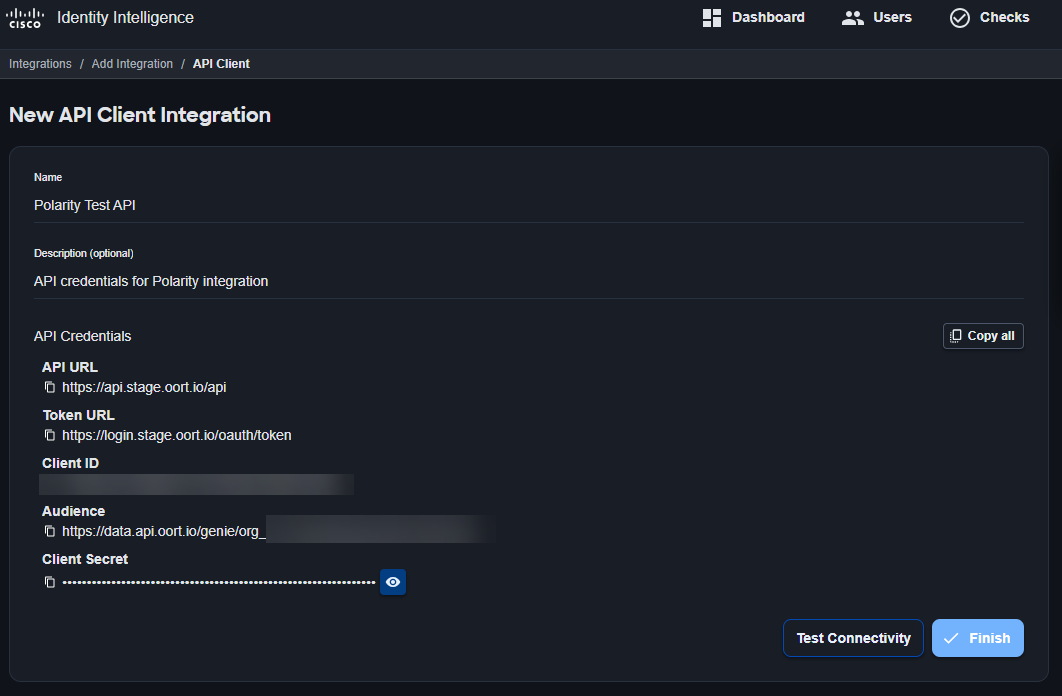
- After the Polarity steps below are complete, click Test Connectivity and Finish to complete the integration.
Polarity Configuration Steps
For information around how to set up Polarity for your Cisco Identity tenant, please see Polarity's Github documentation.
Salesforce
Overview
The Cisco Identity identity security platform can integrate with your Salesforce instance or instances to capture user account activity. This is valuable in particular for the following reasons -
- Identifying unused Salesforce accounts and reducing unnecessary licensing cost
- Review Salesforce authentication activity and maintain security compliance
- Detect unauthorized access or use of your Salesforce platform
Requirements
The following things are required to configure Salesforce integration with Cisco Identity:
- A Salesforce admin account
-
Licensing - a user account with Salesforce edition of Enterprise or above, due to the requirement for the Web Services API.
Developer edition and other lower tier editions will not work for this integration, as the API Only User option is required for the necessary credential flow, and that setting doesn't exist in those tiers.
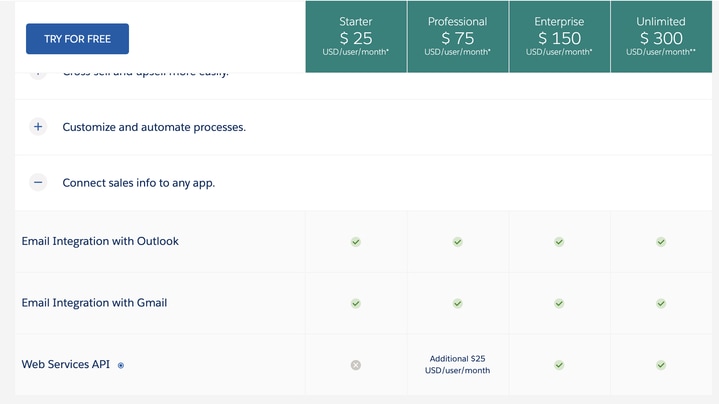
-
If access to Salesforce by API is restricted by IP address, please coordinate with your Cisco Identity representative or open a TAC case
Salesforce API Limits
The Cisco Identity integration for Salesforce will monitor API usage against your Salesforce tenant's daily limit. If the Cisco Identity detects that the API utilization is within 75% of the Salesforce tenant daily quota, Cisco Identity will stop any further collection for that day and resume the following day.
Salesforce Configuration
Step 1 - Create API Only User Account
-
The first step in the process is to create an API only user for integration purposes using the Salesforce documentation. Please note:
- As noted in the Salesforce KB article above, we recommend the user and permission set (if used) have at least a Salesforce license
DO NOT USE the
Minimum Access - API Only Integrationprofile or the Salesforce Integration license. They do not have the necessary permissions to collect the data required by Cisco Identity.
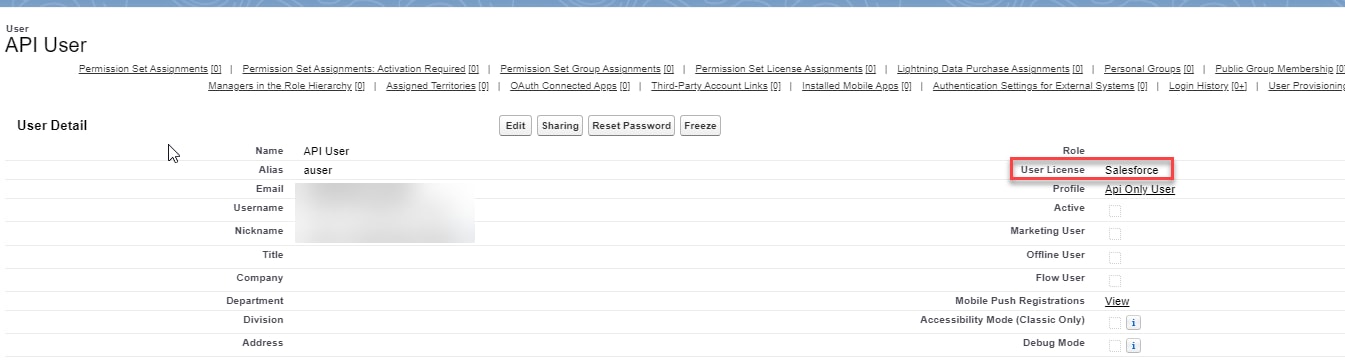
-
The Profile or Permission Set must have API Enabled and API Only User checked in the Administrative Permissions area
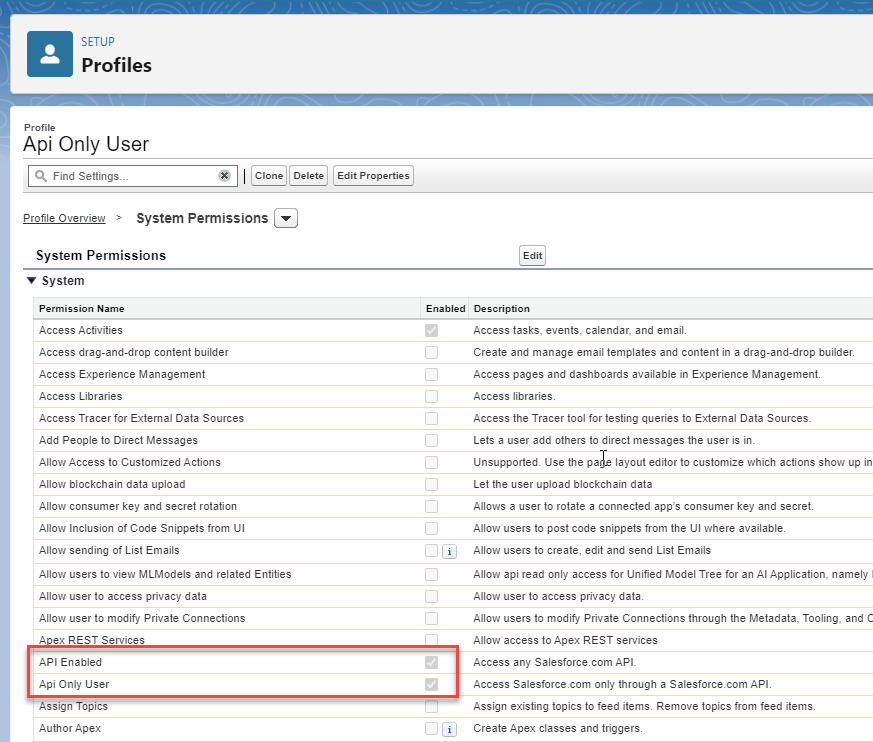
-
Manage Internal Users and Manage External Users permission under the User section is required to collect Login History of all users. Enabling this setting will automatically check a number of other related permissions
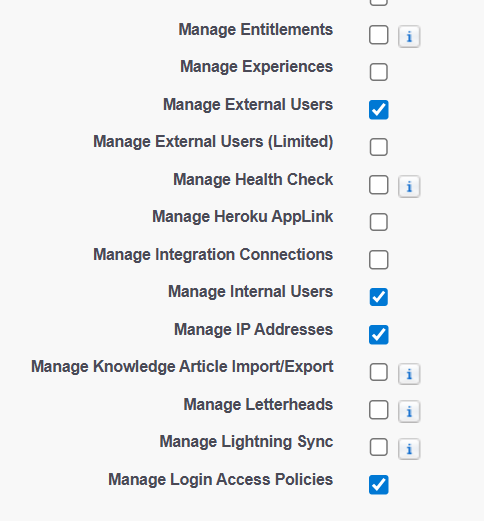
Step 2 - Set up a Connected App
Create Connected App
-
In Salesforce set up go to Apps --> External Client App Manager and click New External client App in the top right corner of the screen
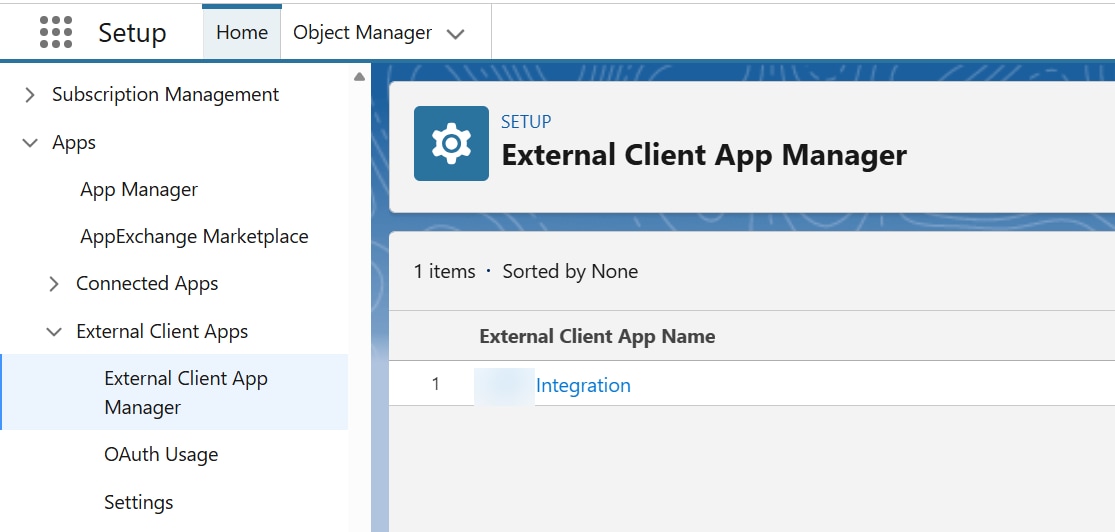
-
Fill in the connected app details, such as Name, Contact email, etc
- Check Enable OAuth
-
Fill in the Callback URL: https://localhost:3000/test/ The Cisco Identity API integration does not use an redirects and does not need a functioning callback URL for that purpose.
-
Add Manage user data via APIs scope.
- Check Enable Client Credentials Flow
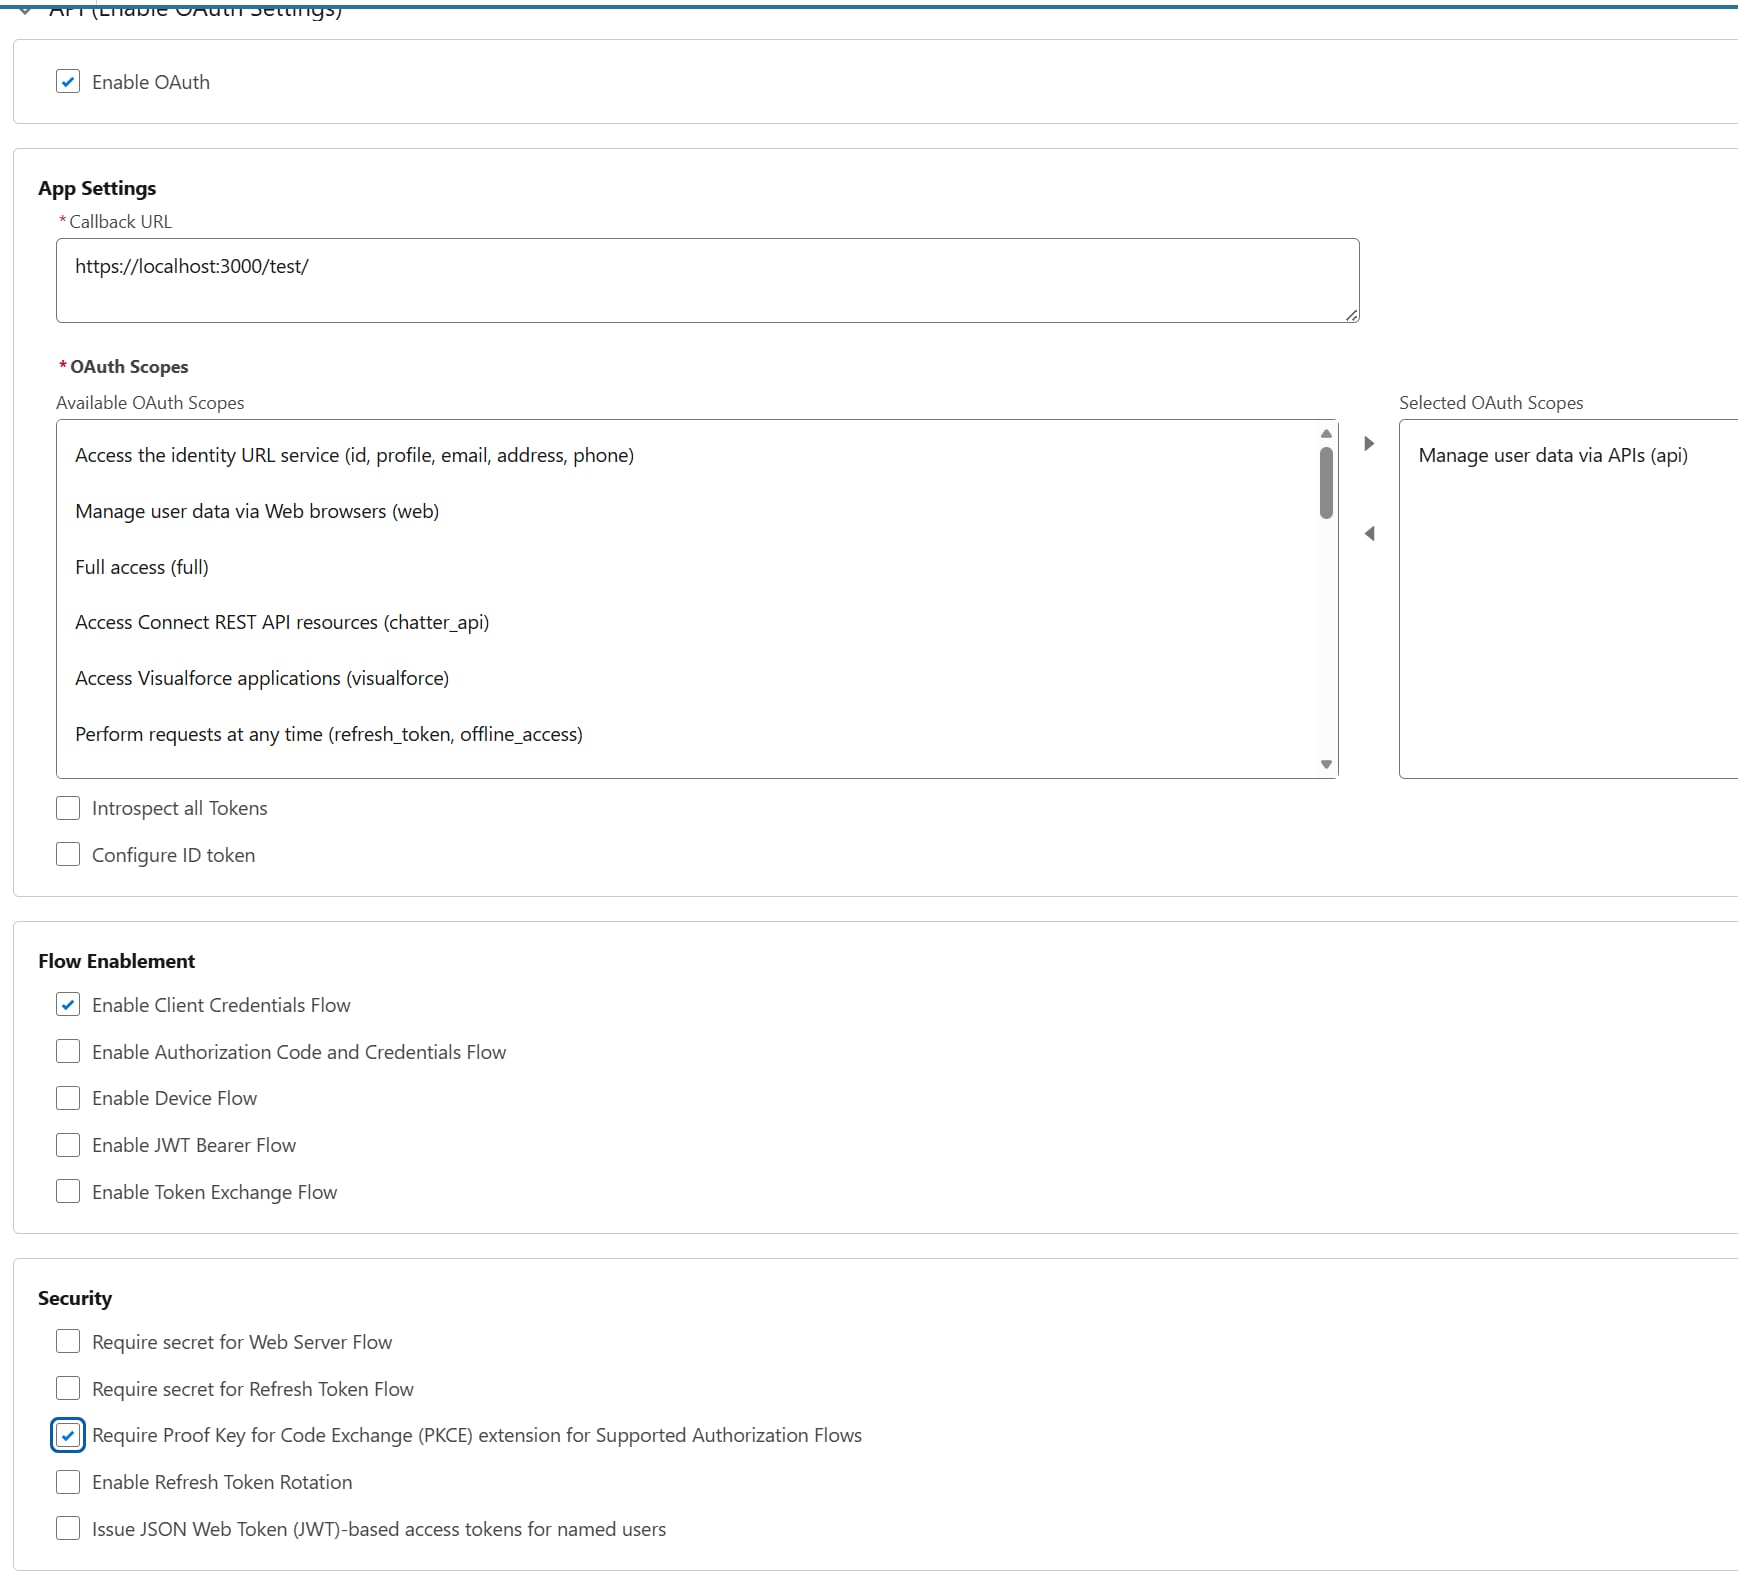
- Uncheck Require Secret for Web Server Flow and Require Secret for Refresh Token Flow
- Click Create. Click Continue if you see the warning: "Changes can take up to 10 minutes to take effect. Deleting a parent org also deletes all connected apps with OAuth settings enabled."
Get Key and Secret
-
On the Settings tab of the new app, under App Settings, click Consumer Key and Secret
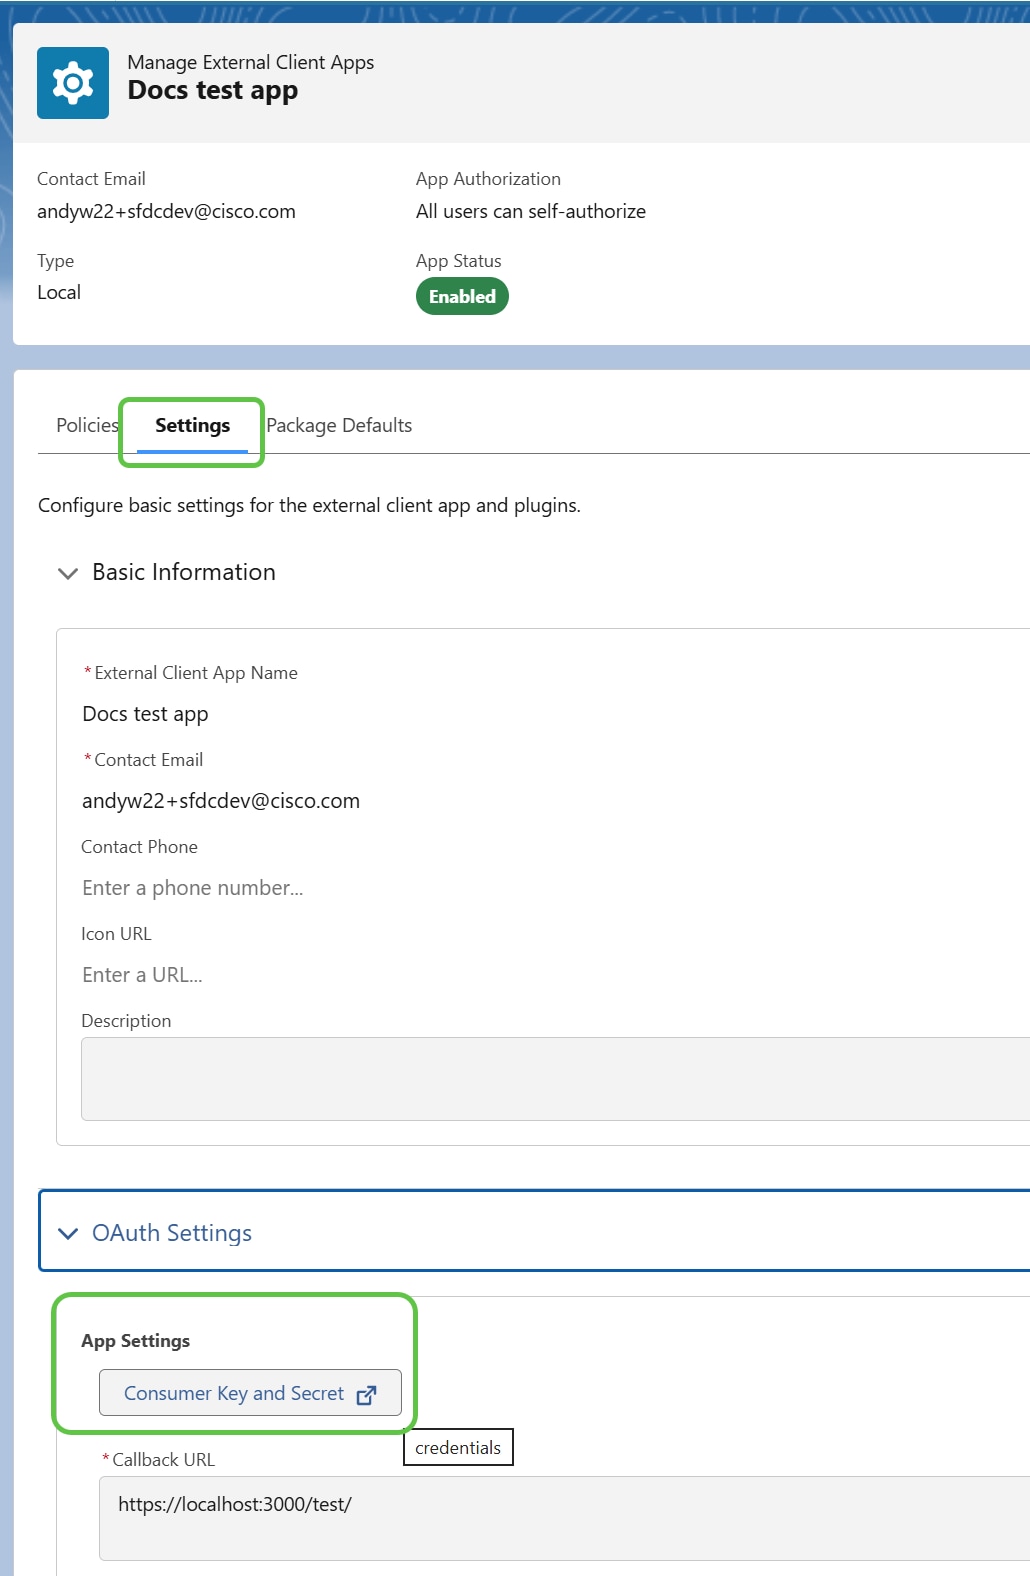
-
Reauthenticate to proceed
- Copy the Key and Secret to a secure temporary location or a key vault of your preference
Assign to API user
- Go back to the external app and go to the Policies tab. Click Edit
-
At the bottom, under Oauth Flows and External Client App Enhancements, click Enable Client Credentials Flow and enter the username / email of the API user account created above.
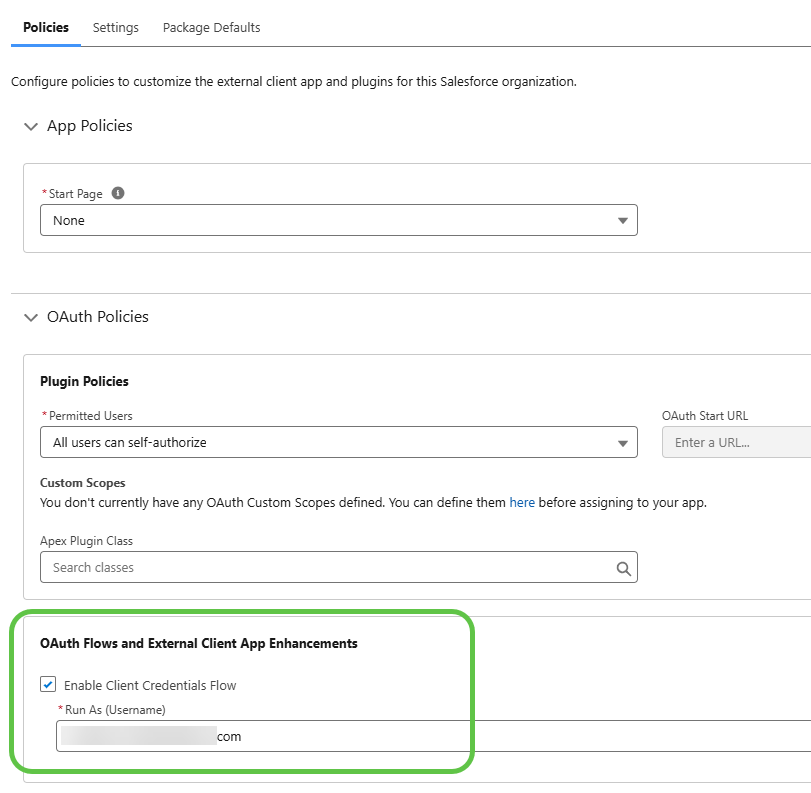
-
Click Save
- Find your Salesforce URL and save it for use in the next section. This will be under Company Settings -> My Domain
Step 3 - Cisco Identity Dashboard Configuration
- Login to your Cisco Identity Dashboard and go to the Integrations tab
- Click on Add Integration
- Click on Add Integration under Salesforce
- Fill in the details for the Salesforce Integration. Enter the values saved from earlier on in the Salesforce setup:
Display NameSalesforce URLConsumer KeyConsumer Secret
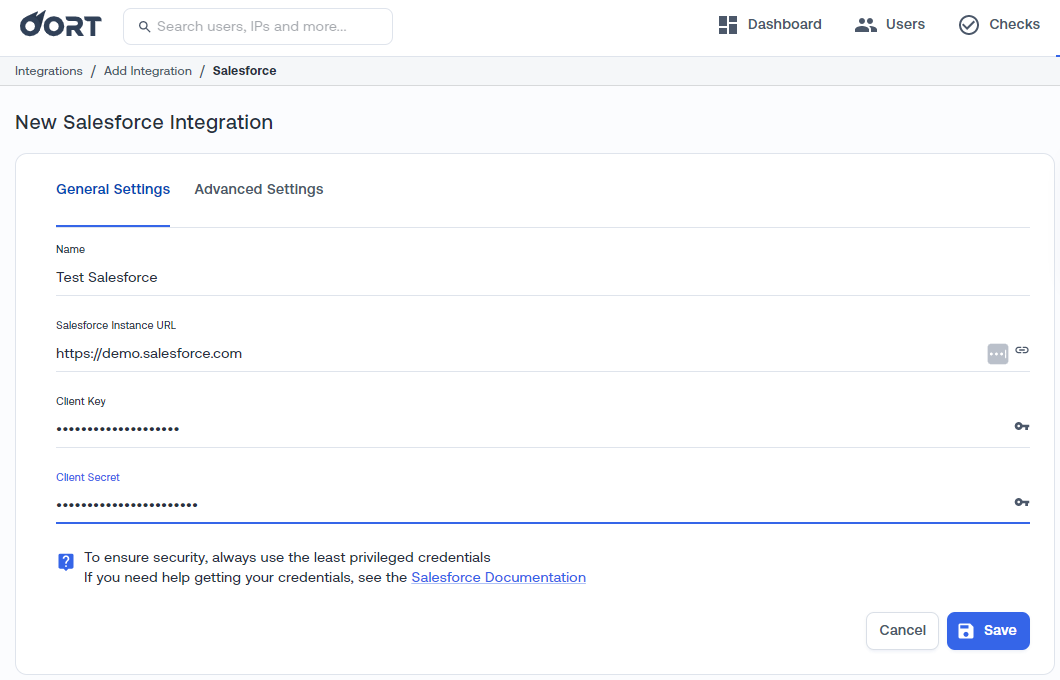
- Click Save. You will now have a new integration listed on the Integrations page
- For more details, click on integration name for details
-
You can also click the 3-dot menu drop-down and click Test Connectivity to test the API connectivity with Salesforce
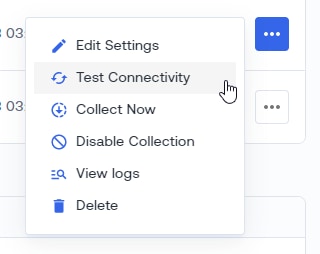
-
If you see “Connected!” everything is working
-
Now click the Salesforce integration bar again and click Collect Now to begin the first data collection
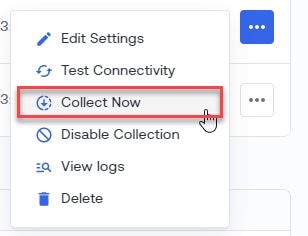
-
Initial data collection may take up to 24 hours, depending on the size of the environment
Cisco Secure Access Data Integration
Overview
Cisco Identity integrates with Cisco Secure Access to ingest and display data associated with Application and User and Entity Behavior Analytics events (UEBA).
For information on configuring Secure Access to consume Trust Level data from Cisco Identity via Security Cloud Control (SCC), please refer to the Secure Access documentation guide, which contains information about connecting both an existing or new Cisco Identity tenant to your Secure Access organization. If you already have an Cisco Identity tenant via Duo, please follow the "Existing Tenant" set up steps.
Configuration Steps
Follow the instructions below in the order written
Generate an API Key in Secure Access
You will first need to generate an API key with the necessary permissions within Secure Access. To do so:
- Log in to your Secure Access org with a Full Admin or Security Administrator role
- Navigate to the Admin menu item and select API Keys
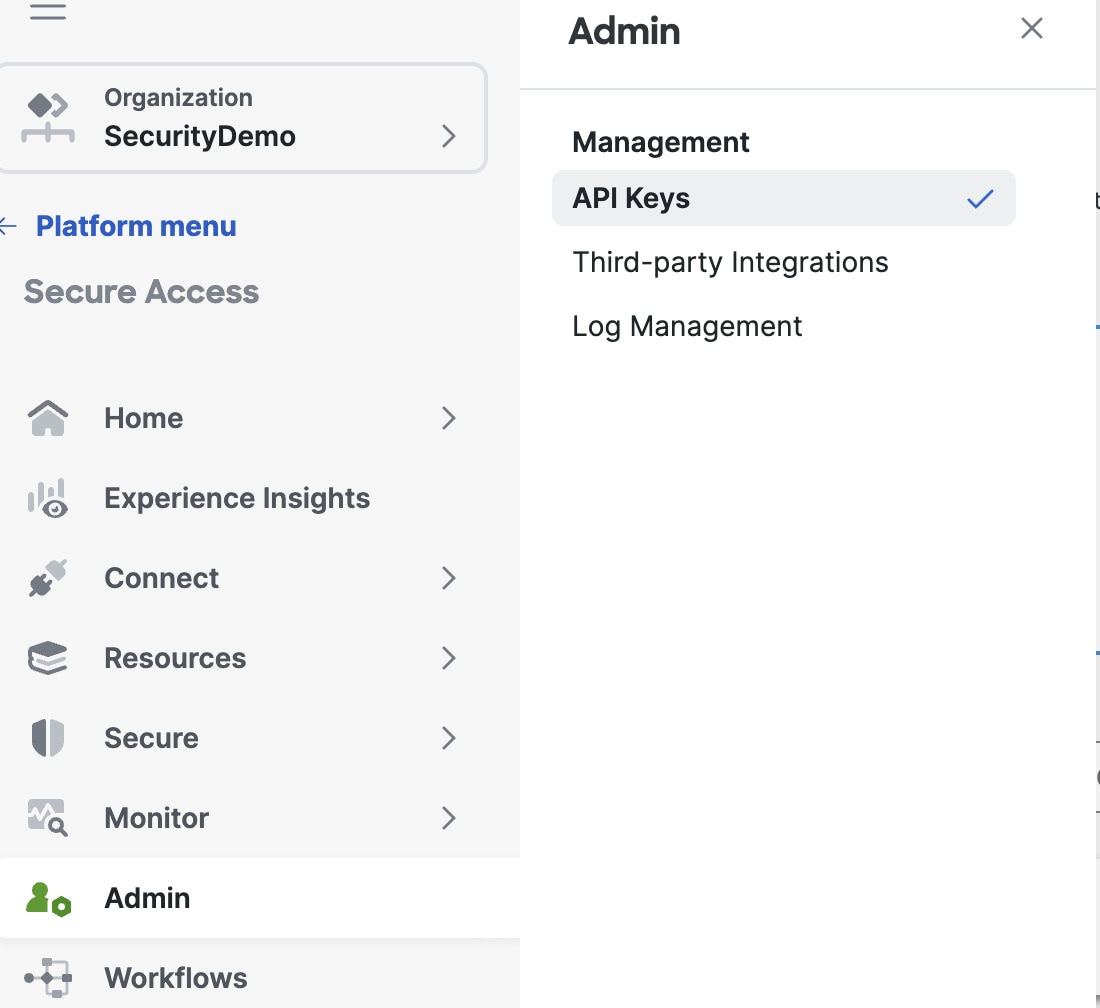
- Select Add, then enter a easily recognizable name and a description for the key
-
Assign the key the required scopes by selecting the respective check boxes:
- Deployments (Identities and Networks)
- Reports
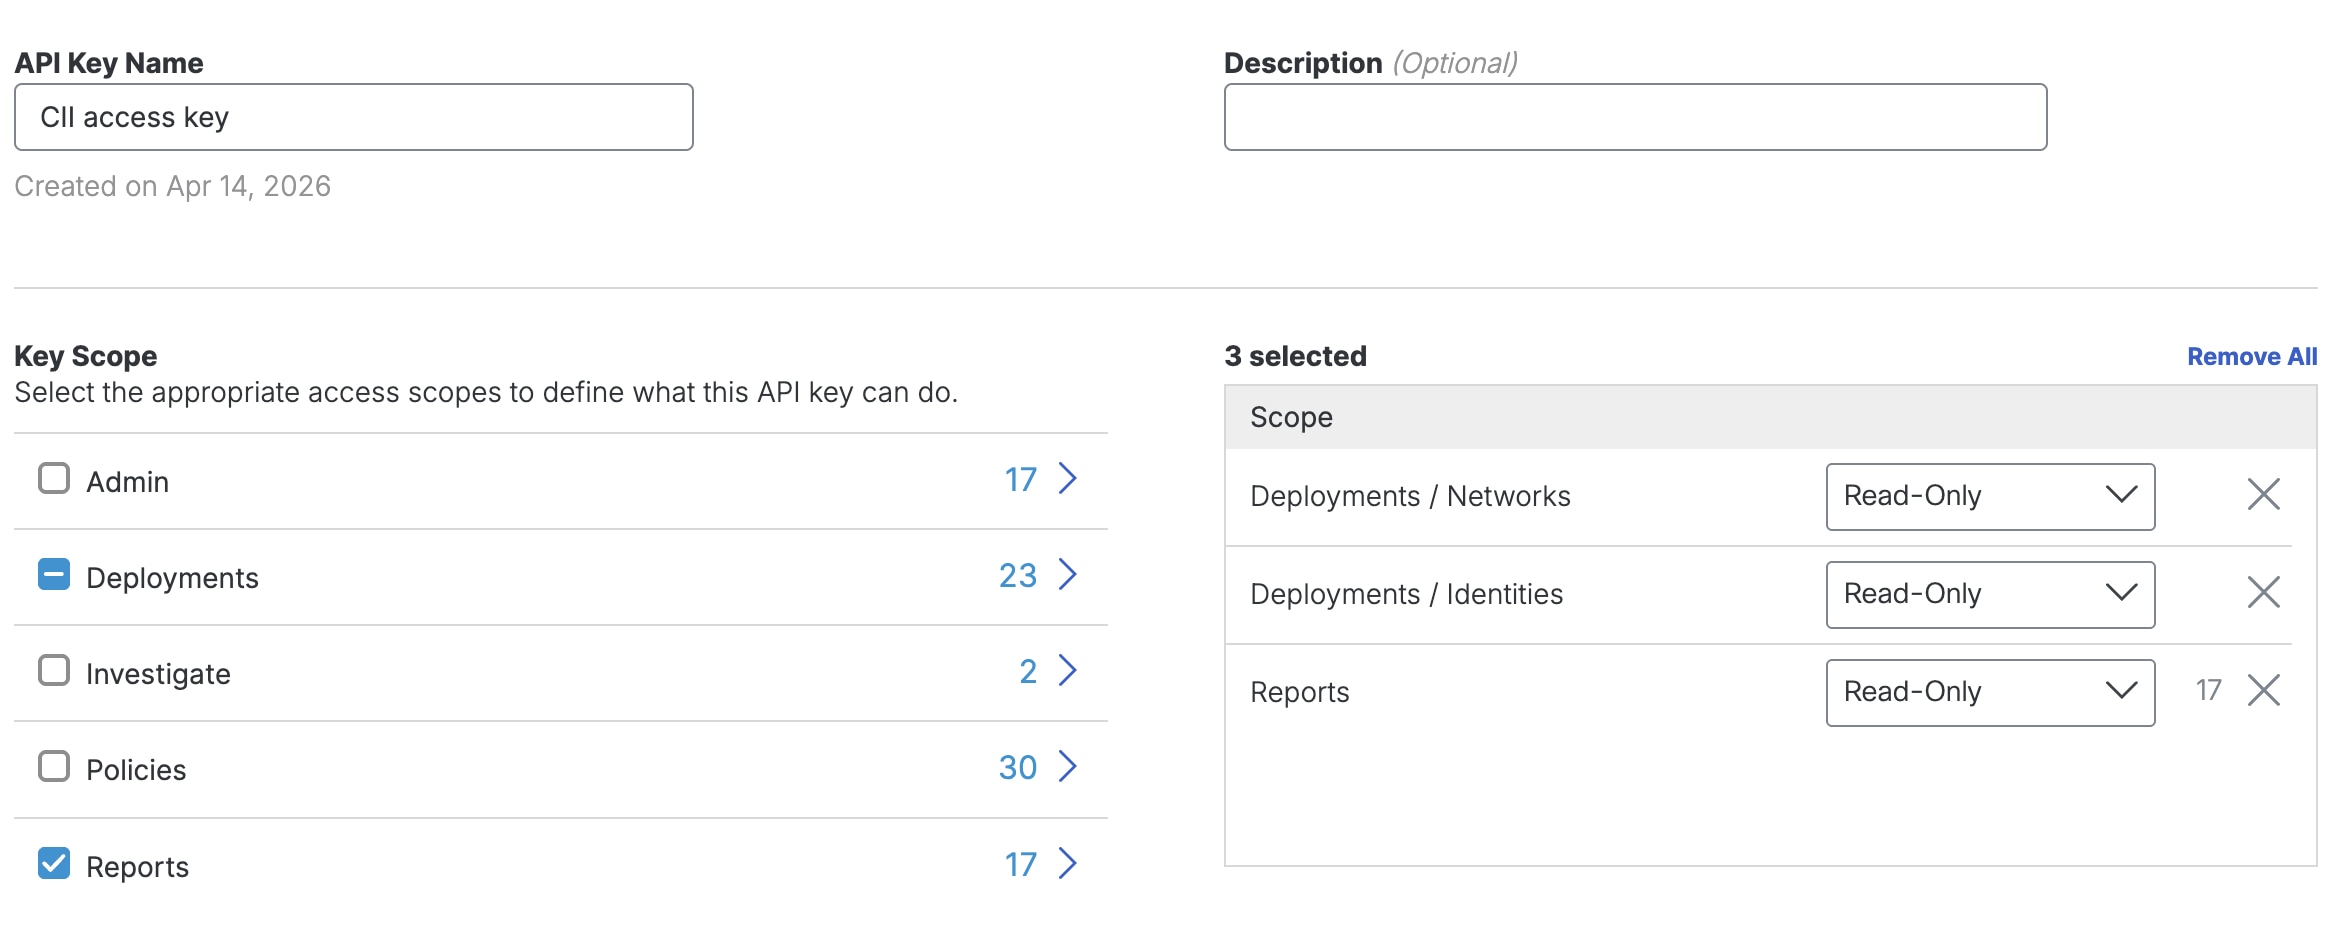
-
Select
Read-Onlyfor each selected scope and resource - For Expiry Date choose an expiration date or select Never Expire. Do NOT enter any information in the Network Restrictions area
- Select Create Key. Then copy and save your API Key and Key Secret in a secure location, as you will need this information to complete the integration steps within Cisco Identity
- Select Accept and Close
Cisco Identity Configuration Steps
- Sign in to Cisco Identity with an Administrator role
- Navigate to Integrations and select Add Integration from the Secure Access tile
- Enter a name for the integration. This name will be reused through Cisco Identity to identify the source
- Paste the API Key and Key Secret generated in Secure Access into their respective fields in the form
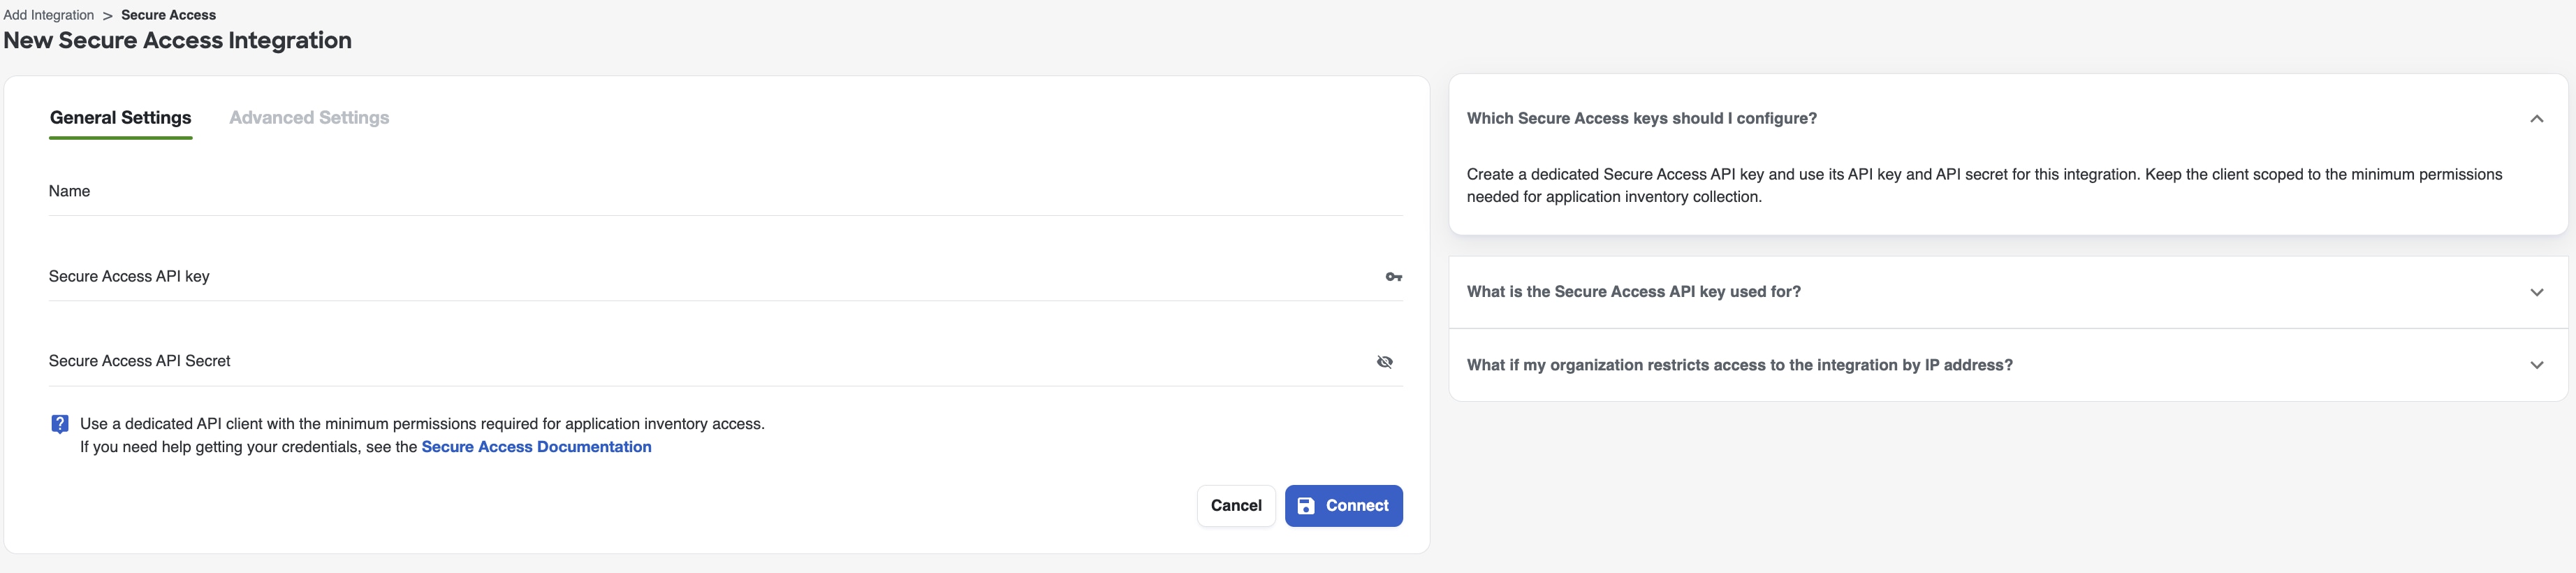
- Select Save to finish setting up the integration
- Your integration has been created! Cisco Identity will test the connectivity automatically, and if there are no errors, will begin the data ingestion process
Snowflake
Overview
Cisco Identity can connect directly to Snowflake warehouses to gather data on user accounts, activity, and other events. These instructions will guide you through the process of connecting your Snowflake account to Cisco Identity.
Before you begin...
Make sure you have the following:
- An Cisco Identity account with Admin permissions that can add integrations to your Cisco Identity tenant
- A Snowflake login that has
ACCOUNTADMINprivileges to grant read access to theSNOWFLAKEdatabase in your Snowflake account - The name of your Snowflake warehouse
- The values for the AWS ARN and AWS Account Id that Cisco Identity will be using when connecting to your Snowflake account. These can be found on the Intial Setup dialog when creating a new Snowflake integration in Cisco Identity
Configuration Steps
Provision a Cisco Identity user in Snowflake
To provision the user, you will need to:
- Create a role for Cisco Identity to use and grant it the necessary privileges
- Choose a name for the role that you will assign to the Cisco Identity user's role
- In the examples below, replace
with the name you choose. Replacewith the name of your Snowflake warehouse. - Using the "Query Data" UI in Snowflake, enter each of the following lines individually to provision the role:
CREATE ROLE ;GRANT IMPORTED PRIVILEGES ON DATABASE SNOWFLAKE TO ROLE ;-- This grant allows Cisco Identity to read Trust Center events
GRANT APPLICATION ROLE SNOWFLAKE.TRUST_CENTER_VIEWER TO ROLE ;GRANT USAGE ON WAREHOUSE TO ROLE ;- Create a service account user identified by the AWS Workload Identity Federation and give it access to the role
- Choose a name for the role that you will assign to the Cisco Identity service account user
- In the examples below, replace
with the name you choose. Replacewith the name of the role you created in the previous step. Replace `` with the arn displayed in the Initial Setup dialog for snowflake in Cisco IdentityCREATE USER DEFAULT_ROLE = TYPE = SERVICE WORKLOAD_IDENTITY = ( TYPE = AWS ARN = '');
- Next, execute the following commands to limit access to the new service account from just the AWS account id for Cisco Identity. Replace
with the name you choose. Replacewith the account id displayed in the Initial Setup dialog for snowflake in Cisco Identity -
CREATE AUTHENTICATION POLICY WORKLOAD_IDENTITY_POLICY = ( ALLOWED_AWS_ACCOUNTS = ('')); ALTER USER SET AUTHENTICATION POLICY ; -
Next, execute the following command to give the new service account user access to the role:
GRANT ROLE TO USER ;- If you would like to further secure Cisco Identity's access to your warehouse by restricting the allowed IP addresses, you may also add a network policy to the user you just created. In the example below, replace the `` placeholders with the IPs for your region (found in the Initial Setup for Snowflake in Cisco Identity):
-
CREATE OR REPLACE NETWORK POLICY ALLOWED_IP_LIST = ('', '') COMMENT = 'Created for Cisco Identity. Only allows access from known Cisco Identity NAT gateways'; ALTER USER SET NETWORK_POLICY = ;For more information, see the Snowflake documentation on network policies and the alter user command
Create your integration in Cisco Identity
The last step is to create your integration in Cisco Identity. For this, you will need:
- The name of the service account user you created in Snowflake
- The name of the role you assigned to the service account user in Snowflake
- The account locator and region for your Snowflake account. Please note that your organization and account name will NOT work instead.
- If you are having trouble finding this, you can run
SELECT current_account(), current_region();in your Snowflake account. You should see that the account is a string of letters and numbers likeSF12345and the region is something likeAWS_US_WEST_2. For these values, the combined identifier would besf12345.us-west-2.aws - The name of your Snowflake warehouse
- Navigate to the Integrations page in Cisco Identity and click "Add Integration" at the top right
- Find the Snowflake tile and click "Add Integration"
- Click "Complete Setup" below the instructions to go to the General Settings configuration
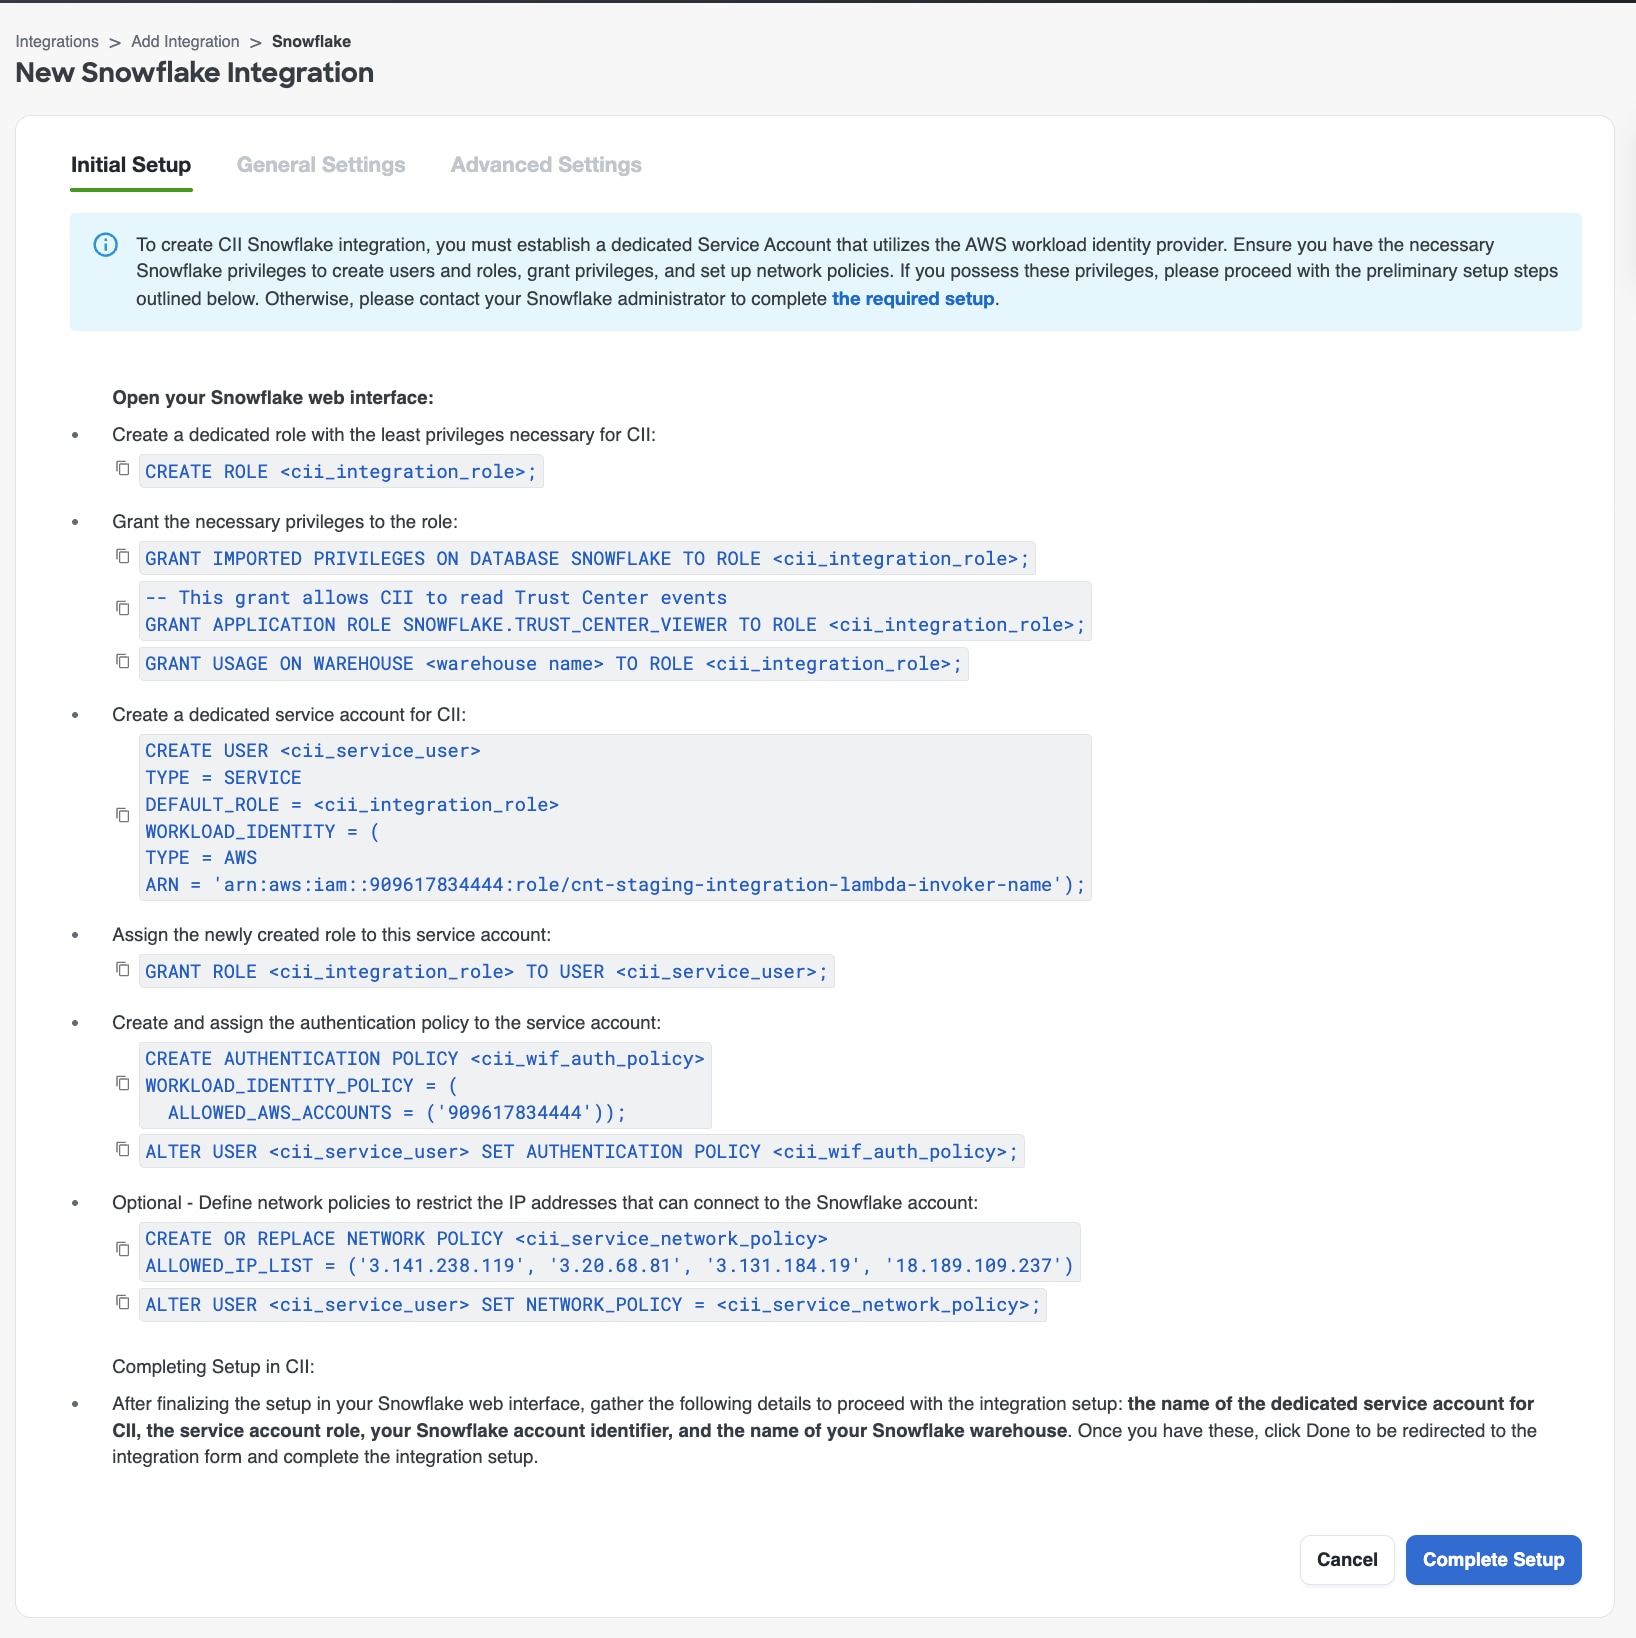
- You should now see the form in the screenshot
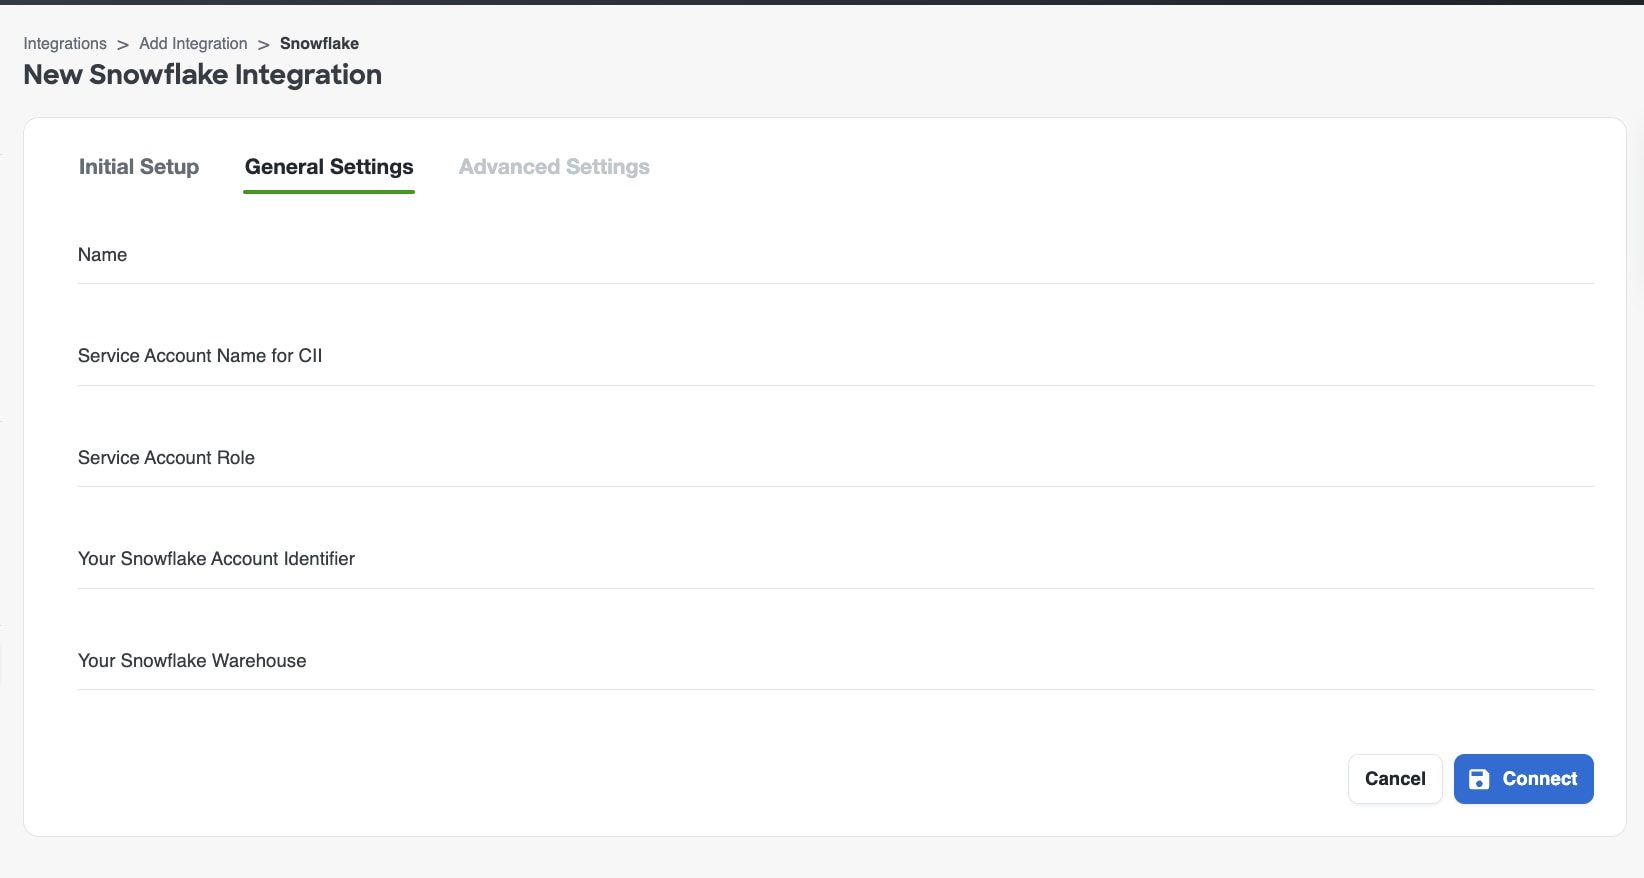
- Choose and enter a name for your integration within Cisco Identity that relates to the specific Snowflake warehouse that will be monitored into the "Name" field
- In the "Service Account Name for Cisco Identity" field, enter the name of the service account user you created in Snowflake
- In the "Service Account Role" field, enter the name of the role you assigned to the service account user in Snowflake
- In the "Your Snowflake Account Identifier" field, enter the account locator and region for your Snowflake account
- In the "Your Snowflake Warehouse" field, enter the name of your Snowflake warehouse
- Once you have entered the necessary information, click "Connect" to initialize your Snowflake integration and begin monitoring
Enable Cortex Agent Collection for Snowflake Integration
To allow Cisco Identity to collect Cortex Agent metadata and observability events, the Snowflake role used by the existing Cisco Identity integration service account (``) must be granted privileges for:
- Agent discovery (
SHOW AGENTS IN ACCOUNT) - Agent inspection (
DESCRIBE AGENT) - Observability event reads (
SNOWFLAKE.LOCAL.AI_OBSERVABILITY_EVENTS) - Optional un-redacted observability content reads, if you want Cisco Identity to collect Cortex Agent conversation content such as user prompts, executed SQL queries, and agent responses.
Why these grants are required
- Snowflake requires the executing role to have at least one privilege on each agent (
OWNERSHIP,USAGE,MONITOR, orOPERATE) forSHOW AGENTS/DESCRIBE AGENT - Snowflake also requires at least one privilege on the parent database and parent schema for those commands
- Access to
SNOWFLAKE.LOCAL.AI_OBSERVABILITY_EVENTSrequires AI Observability access roles, specificallySNOWFLAKE.AI_OBSERVABILITY_EVENTS_LOOKUP, and Cortex access viaSNOWFLAKE.CORTEX_USER - Access to un-redacted Cortex Agent conversation content requires the
READ UNREDACTED AI OBSERVABILITY EVENTS TABLEaccount privilege
Managing Cortex Agent Conversation Data Collection Preferences
Snowflake Cortex Agent observability events can include both conversation metadata and conversation content. Cisco Identity can leverage conversation metadata to understand agent usage patterns, tool execution, timing, errors, and other activity details. Conversation content can provide deeper insight into user prompts, SQL queries executed by agents, and agent responses.
Because conversation content may be sensitive, Cisco Identity provides collection settings that let you determine what Cortex Agent conversation data Cisco Identity is allowed to process and retain based on your org's needs.
The available settings are:
- Do not collect Cortex Agent conversation logs
- Cisco Identity will not retain Cortex Agent conversation metadata or content from observability events
- [Default Setting] Collect conversation metadata only without conversation content
- Cisco Identity will retain Cortex Agent conversation metadata and executed SQL queries, but will not retain fields containing user prompts, or agent responses
- Collect conversation metadata and conversation content
- Cisco Identity will collect and retain Cortex Agent conversation metadata and content, including user prompts, executed SQL queries, and agent responses
| Capability / Data | Option 1: Do not collect Cortex Agent conversation logs | Option 2: Collect conversation metadata only without conversation content | Option 3: Collect conversation metadata and conversation content |
|---|---|---|---|
| Cortex Agent inventory and configuration (e.g. agent name, creation date, tools and resources) | ✅ | ✅ | ✅ |
| Conversation metadata (e.g. timestamp, session and record ids, event name, status code, actor user name, SQL query id) | ✅ | ✅ | |
| User prompts | ✅ | ||
| Executed SQL query text | Only if READ UNREDACTED AI OBSERVABILITY EVENTS TABLE ON ACCOUNT is granted (see below) |
✅ | |
| Agent responses | ✅ |
Snowflake also controls whether unredacted observability content is visible to the integration role.
If you select either Collect conversation metadata and conversation content, OR Collect conversation metadata only without conversation content and you want Cisco Identity to collect also the executed SQL queries, you must also grant the following Snowflake account privilege to `` :
GRANT READ UNREDACTED AI OBSERVABILITY EVENTS TABLE ON ACCOUNT TO ROLE ;If this privilege is not granted, Snowflake will only expose metadata to the integration role even if Cisco Identity is configured to collect conversation content.
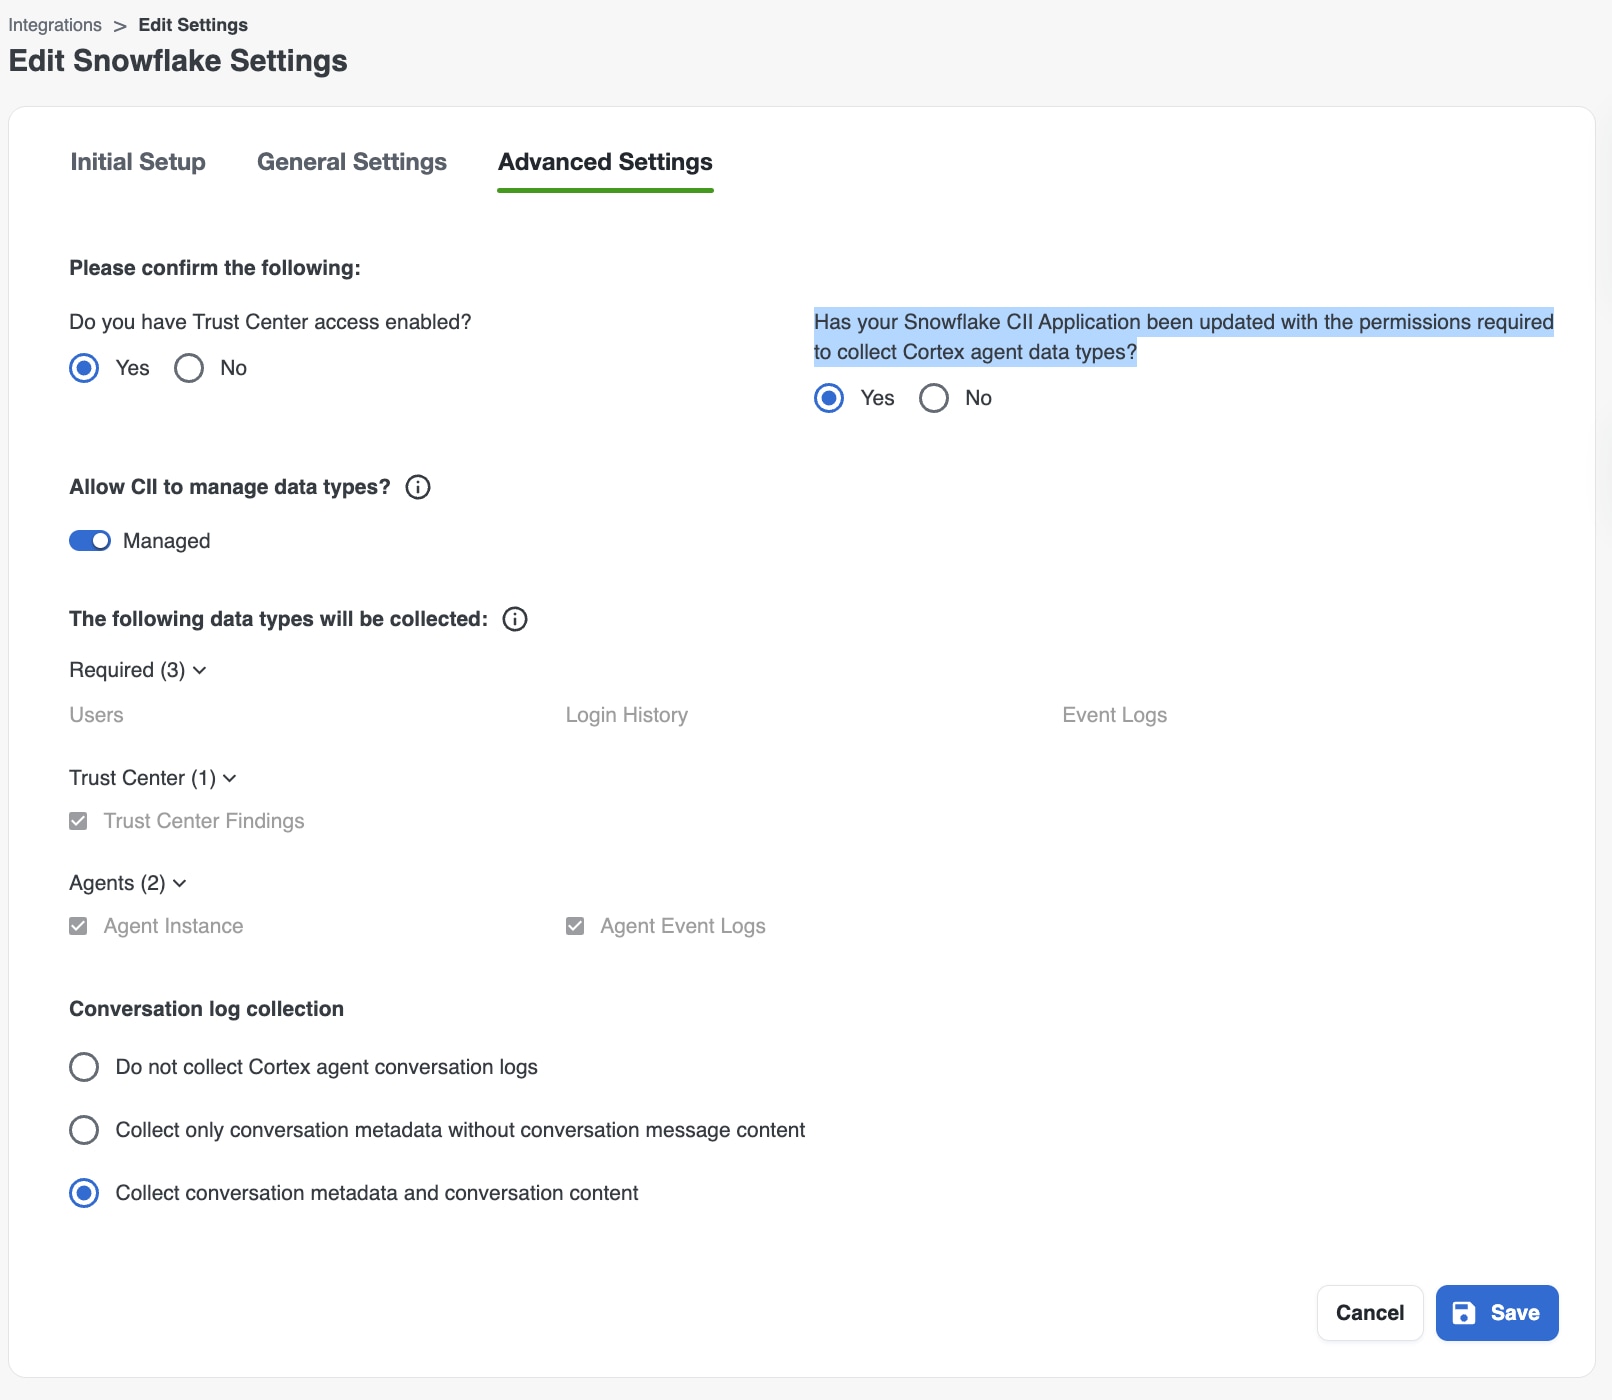
Configuring the required grants
Using a role that can grant the necessary permissions (typically ACCOUNTADMIN or equivalent role with required grant authority), run the following:
-- 1) Existing agents: grant MONITOR per agent. Repeat for each existing agent.
GRANT MONITOR ON AGENT .. TO ROLE ;

-- 2) Future agents in each relevant schema. Repeat for each database/schema.
GRANT MONITOR ON FUTURE AGENTS IN SCHEMA . TO ROLE ;

-- 3) Cortex database role
GRANT DATABASE ROLE SNOWFLAKE.CORTEX_USER TO ROLE ;

-- 4) AI Observability application role
GRANT APPLICATION ROLE SNOWFLAKE.AI_OBSERVABILITY_EVENTS_LOOKUP TO ROLE ;

-- 5) Parent database access. Repeat for each database.
GRANT USAGE ON DATABASE  TO ROLE ;

-- 6a) Option A: grant all schemas in database. Repeat for each database.
GRANT USAGE ON ALL SCHEMAS IN DATABASE  TO ROLE ;

-- 6b) Option B: grant only selected schemas. Repeat for each database/schema you would like Cisco Identity to have access to.
GRANT USAGE ON SCHEMA . TO ROLE ;

-- 7) Optional: only required if Cisco Identity should collect Cortex Agent conversation content.
GRANT READ UNREDACTED AI OBSERVABILITY EVENTS TABLE ON ACCOUNT TO ROLE ;
Verification (optional)
After grants are applied, use the following to test with the Cisco Identity integration role:
USE ROLE ;
SHOW AGENTS IN ACCOUNT;
DESCRIBE AGENT ..;
SELECT * FROM SNOWFLAKE.LOCAL.AI_OBSERVABILITY_EVENTS LIMIT 10;
Webex
Overview
The Cisco Identity integration for Webex allows you to synchronize user identity data from your Webex organization into Cisco Identity for comprehensive identity analytics and threat detection. This integration connects to Webex's API to collect user directory information, providing visibility into your Webex user base.
For documentation on configuring Webex as a notification target, please refer to our Webex Notification documentation.
Integration with Webex
The integration uses Webex's API to retrieve user directory data from your Webex organization. It performs incremental synchronization, collecting only users that have been modified since the last collection, ensuring efficient data transfer and minimal API usage.
The integration runs on a scheduled basis within the Cisco Identity infrastructure, automatically collecting user data and making it available for analysis in your Cisco Identity tenant.
Permission Requirements within Webex
The integration uses Login with Webex and a Service Application to authenticate with Webex. When you authorize the integration, you grant Cisco Identity permission to access:
- User Profile Information - Read user directory data via the API
- Organization Data - Access to your Webex organization's user list
The authorization is performed through Webex's secure OAuth login flow, ensuring your credentials are never shared with Cisco Identity directly.
Add and Configure the Webex Integration
To set up the integration, perform the following steps:
1. Add Integration in Cisco Identity Portal
- Log in to your Cisco Identity Portal
- Navigate to Integrations and click Add Integration
- Select Webex from the integration type list
- Click the Login with Webex button
- You will be redirected to Webex's secure login page
- Log in with your Webex administrator account credentials
- You will be redirected back to the Cisco Identity Portal
- A success message will confirm that the integration is now authorized
- Enter a descriptive Integration Name for this integration instance
- Click Connect to verify the integration is accessible
- After a successful connection, click Save
Data Collection Behavior
Incremental Collection
The Webex integration uses incremental collection to optimize performance:
- Initial Collection: On first run, all users in your Webex organization are collected
- Subsequent Collections: Only users modified since the last collection are retrieved using the
meta.lastModifiedfilter - Monthly Full Rebase: On the 10th of each month, a complete collection runs to ensure data consistency Collapse
Shared Signals Framework (SSF) and SSF Receivers
What is the Shared Signals Framework (SSF)?
Cisco Identity can ingest signals from security products and platforms that have adopted Shared Signals Framework through an SSF receiver that you configure in the product. These external detections and risk signals are then surfaced in Cisco Identity to support centralized visibility, investigation, and identity threat insights.
The Shared Signals Framework (SSF) is an open, standardized approach for exchanging identity and security signals between systems. It enables a signal provider (for example, a security platform) to publish events and a signal consumer (such as Cisco Identity) to receive and act on those events in near real time.
What is an SSF receiver in Cisco Identity?
An SSF receiver is the integration component in Cisco Identity that allows it to connect to an SSF-adopting provider and ingest the provider’s signals. Once configured, the receiver continuously brings external signals into Cisco Identity so they can be used to drive detections, checks, and investigation workflows.
Benefits of using SSF in Cisco Identity
- Near real-time signal ingestion to shorten time to detect and respond.
- Centralized visibility by aggregating signals from multiple providers in one console.
- More actionable detections by enriching incoming signals with identity context and user population data.
- Standards-based integrations that reduce custom integration effort and make it easier to add new signal sources over time.
AppOmni Integration Using SSF
Note: ## This integration is currently in Beta release phase.
Overview
Cisco Identity can receive security events and signals from AppOmni using the Shared Signals Framework (SSF). This integration allows Cisco Identity to ingest security telemetry from services monitored by AppOmni to enhance identity-based threat detection.
This document walks you through creating a long-lived OAuth token in AppOmni and configuring the AppOmni Receiver using Cisco Identity.
Requirements
The following requirements are necessary for the AppOmni SSF integration:
- An AppOmni administrator account with access to Settings and API Settings
- Access to your Cisco Identity tenant with permissions to manage Integrations
- The base URL for your AppOmni instance (for example, https://\
)
AppOmni Rate Limiting
The AppOmni API enforces rate limits to assure acceptable performance for all customers. By default, AppOmni tenants have a rate limit of 2,000 API requests per hour. All API requests include an X-RateLimit header in the response which displays your current rate limit and usage.
If you're interested in increasing your API rate limit, contact your AppOmni Customer Success Manager.
Create a Threat Detection Destination
Configure a Threat Detection destination that uses the access token to send Threat Detection events to the Shared Signals Bridge.
- Sign in to your AppOmni instance.
- In the left navigation, expand Settings and select API Settings.
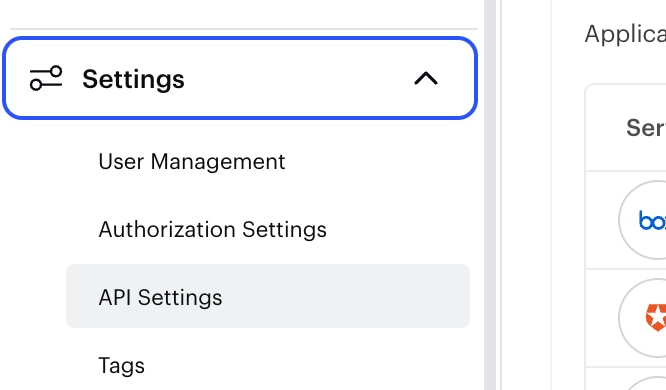
- On the API Settings page, click Add Application.
- In the Create new OAuth application dialog box, enter a Name and an optional Description.
- Follow the prompts on your screen to save the changes.
- In the API Settings table, select the application you just created to open its details.
- Open the Manage Tokens tab page.
- Click + OAuth Token.
- In the Manually Create OAuth Token dialog box:
- Enter a Description (for example, SSF token for Cisco Identity)
- Set the Token Expiration date according to your security policy (for a long-lived token, select an appropriately long expiration).
-
Click Submit. Copy the generated token immediately and store it securely. (The token cannot be viewed again after closing the dialog box.)
-
In API Settings, select the application you just created to open its details.
- Open the Manage Tokens tab page.
- Click OAuth Token.
- In the Manually Create OAuth Token dialog box:
- Enter a Description (for example, SSF token for Cisco Identity).
- Set the Token Expiration date according to your security policy (for a long-lived token, select an appropriately long expiration).
- Click Submit.
- Copy the generated token immediately and store it securely. (The token cannot be viewed again after you close the dialog box.)
Create an API application and access token
Requests to all AppOmni APIs are authenticated using OAuth access tokens. When configuring tokens for your API applications, you can optionally create an access token with an arbitrary expiration date, enabling you to create long-lived access tokens for use in integrations that can't follow an OAuth refresh token flow.
This task shows how to create an API application and long-lived OAuth2 access token for the SSF receiver.
- Sign in to your AppOmni instance.
- In the left navigation, expand Settings and select API Settings.
- On the API Settings page, click Add Application.
- In the Create new OAuth application dialog box, enter a Name and an optional Description.
- Follow the prompts on your screen to save the changes.
- In the API Settings table, select the application you just created to open its details.
- Open the Manage Tokens tab page.
- Click + OAuth Token.
- In the Manually Create OAuth Token dialog box:
- Enter a Description (for example, SSF token for Cisco Identity)
- Set the Token Expiration date according to your security policy (for a long-lived token, select an appropriately long expiration).
-
Click Submit. Copy the generated token immediately and store it securely. (The token cannot be viewed again after closing the dialog box.)
-
In API Settings, select the application you just created to open its details.
- Open the Manage Tokens tab page.
- Click OAuth Token.
- In the Manually Create OAuth Token dialog box:
- Enter a Description (for example, SSF token for Cisco Identity).
- Set the Token Expiration date according to your security policy (for a long-lived token, select an appropriately long expiration).
- Click Submit.
- Copy the generated token immediately and store it securely. (The token cannot be viewed again after you close the dialog box.)
Add the AppOmni Receiver in Cisco Identity
- Log in to your Cisco Identity tenant as an administrator.
- Click Integrations.
- Scroll to the Shared Signals section.
- Locate the AppOmni Receiver card and click Add AppOmni Receiver.
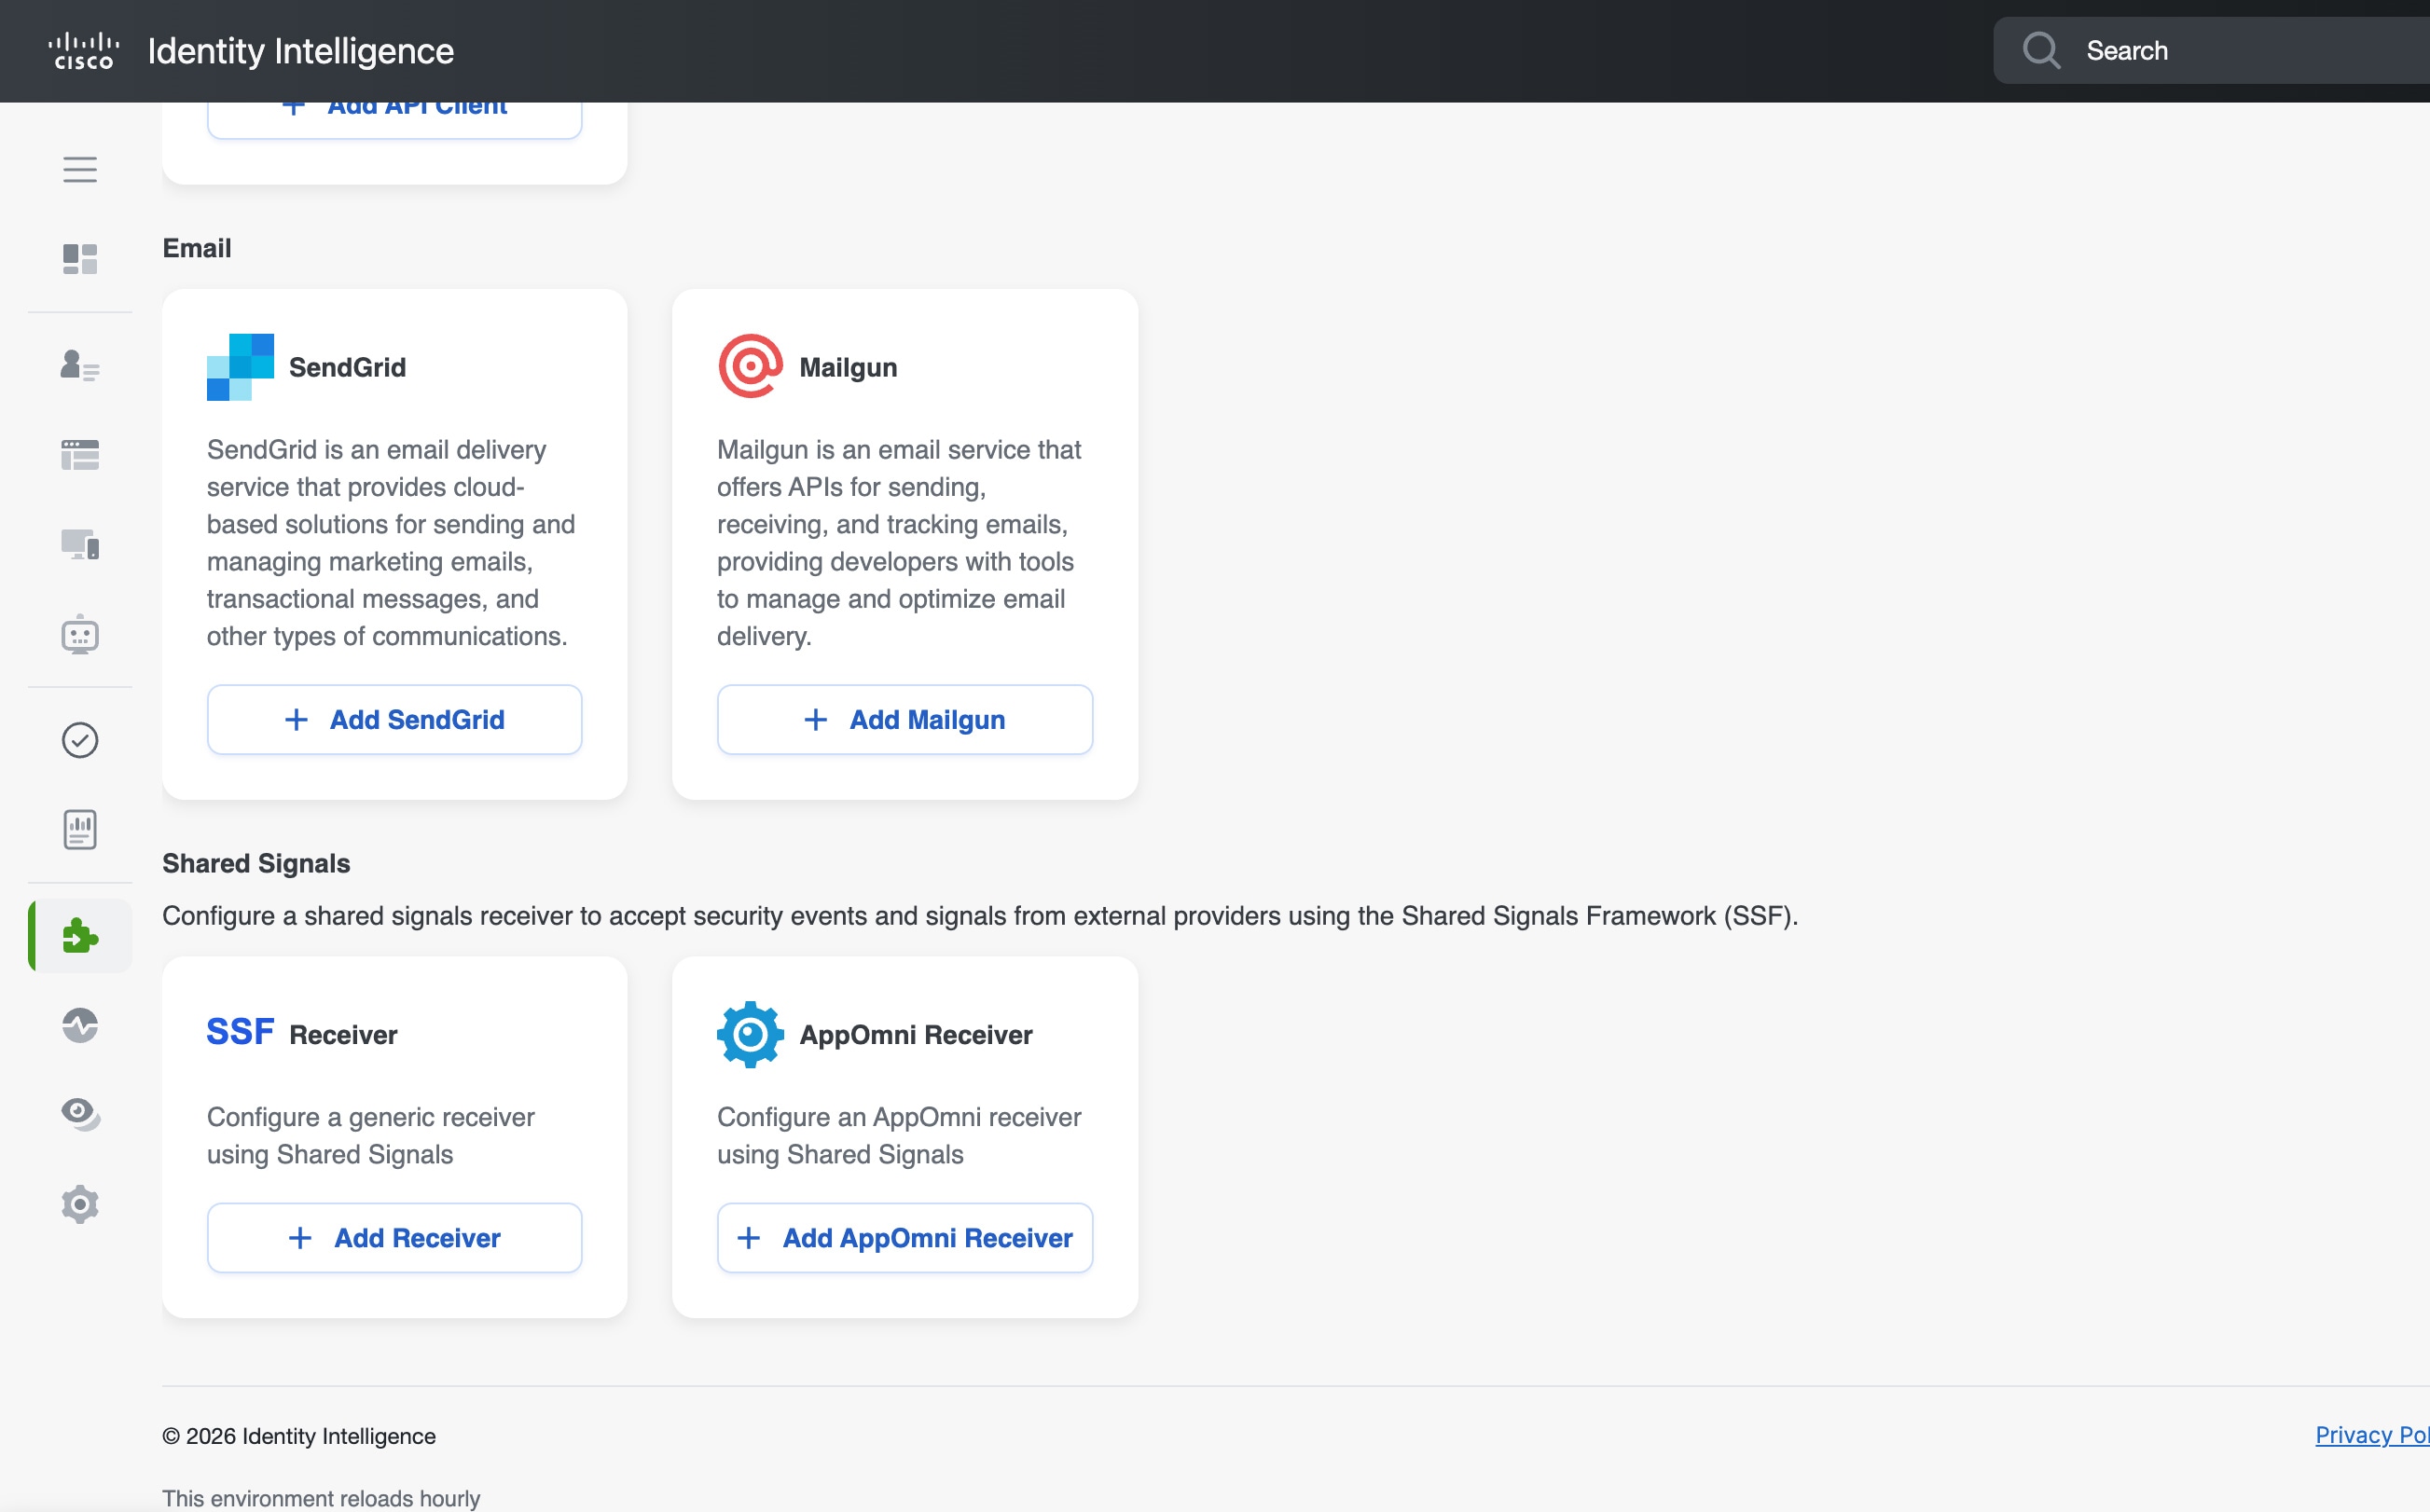
- Enter the following information:
- Name and optional Description.
- AppOmni URL: The base URL of your AppOmni instance.
- Token: Paste the OAuth token you created earlier in AppOmni.
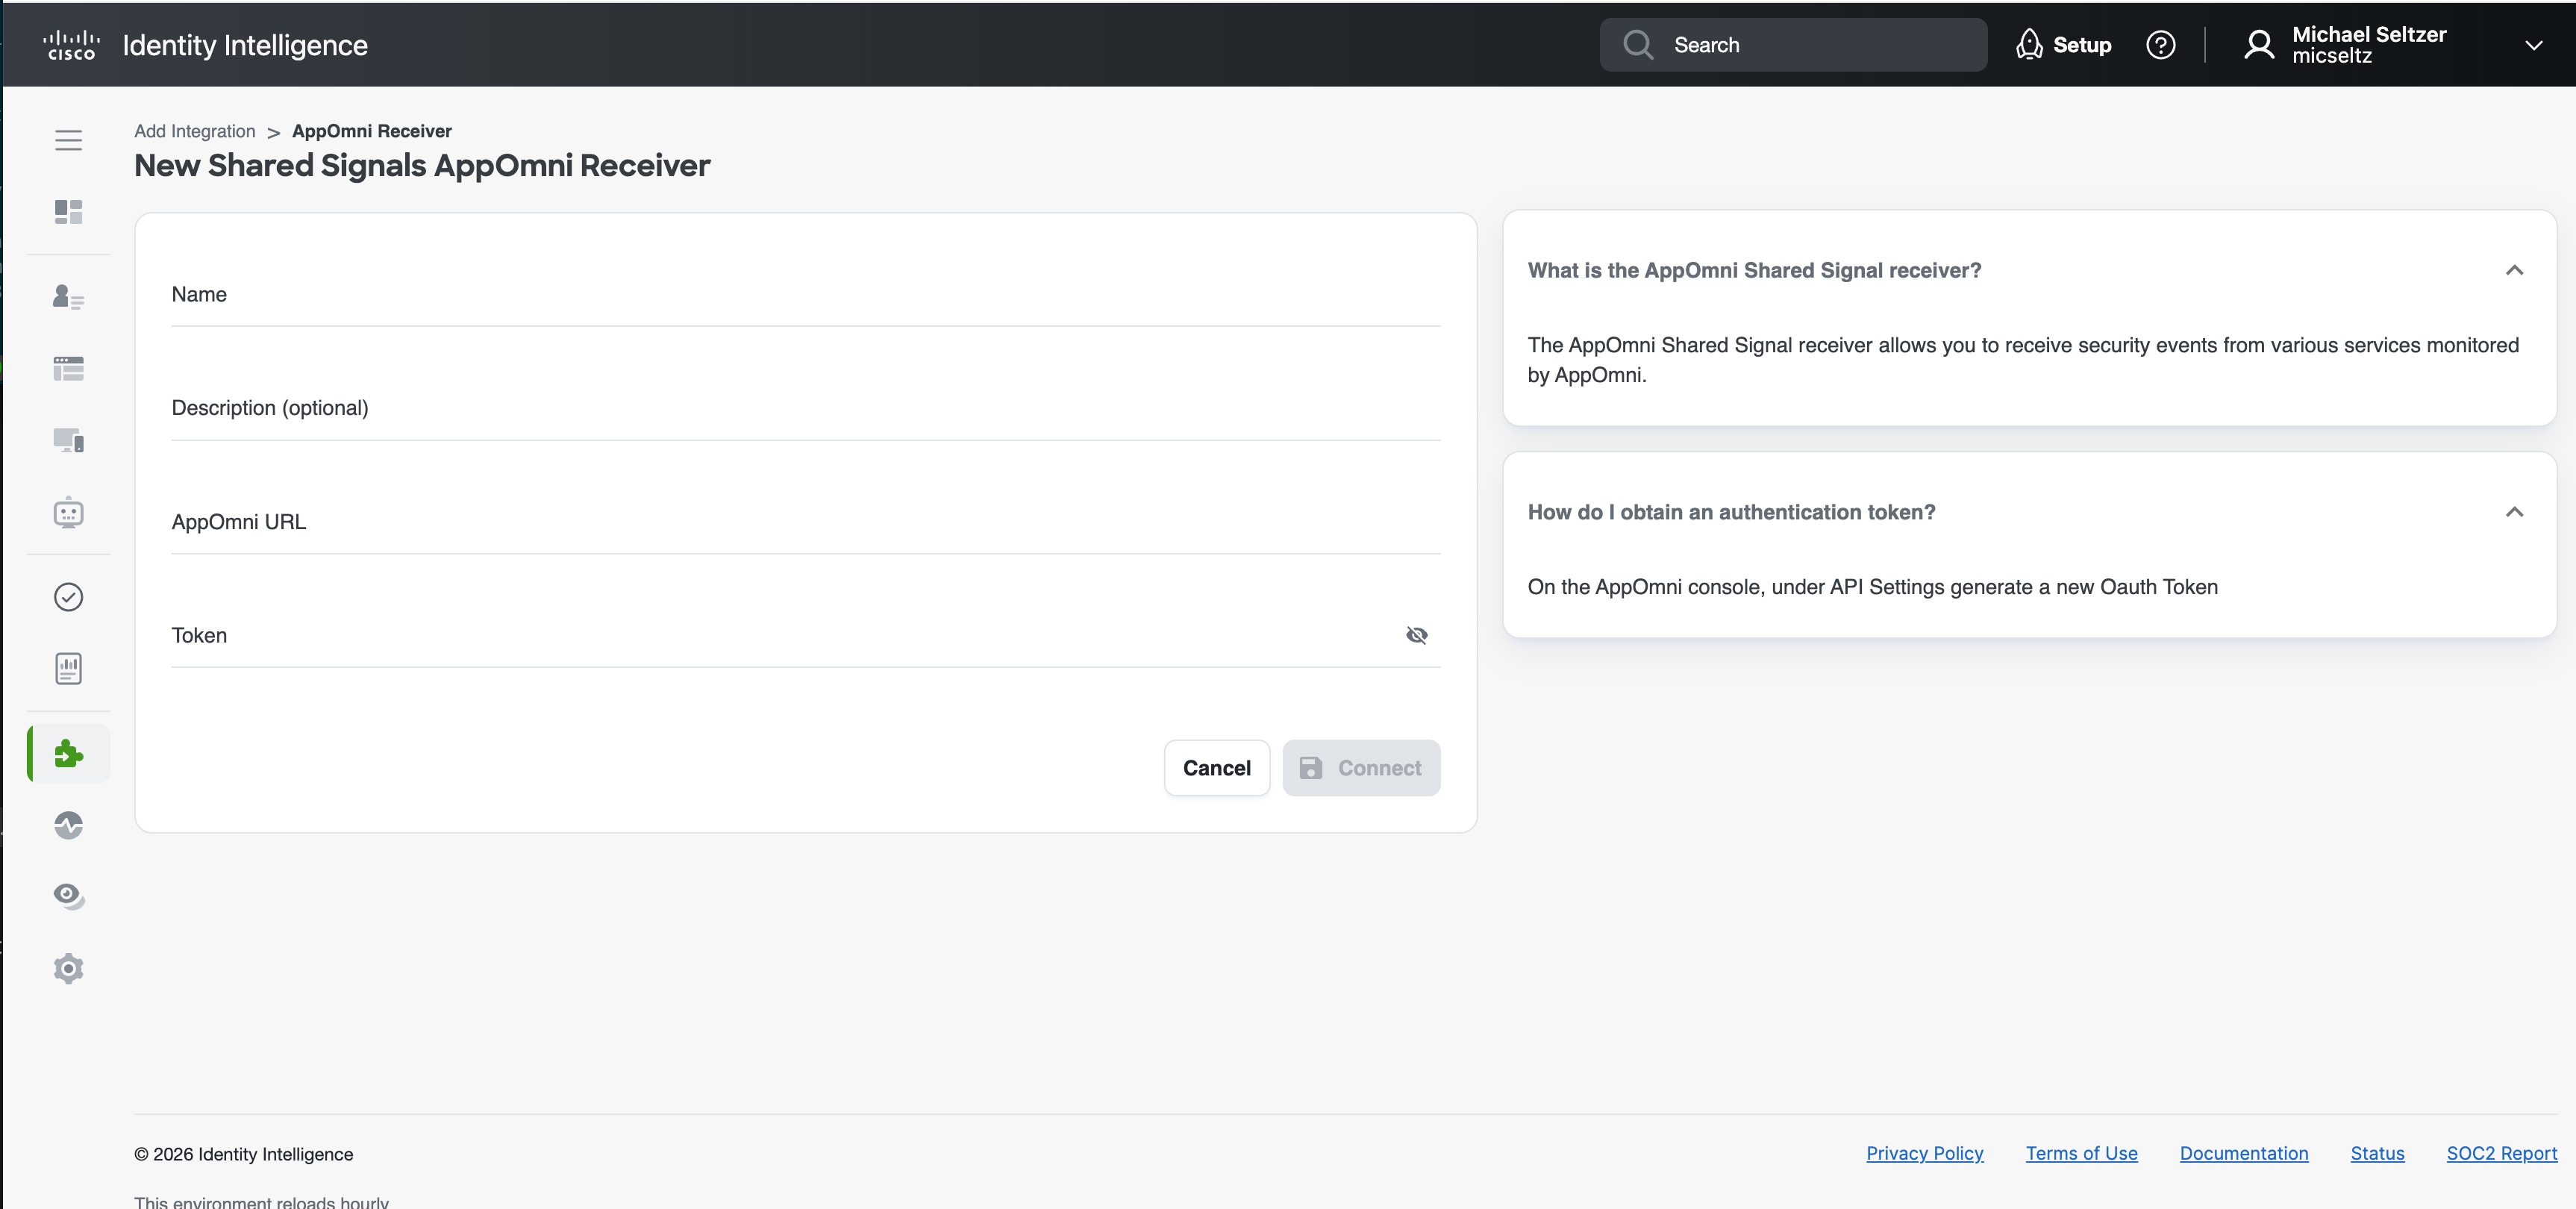
- Click Connect.
Workday
Workday can be integrated using APIs workday-report-as-a-service-integration.md or via a flat file using how-to-import-workday-hris-data.md. API integration is preferred if both options are available.
Report as a Service (RaaS)
Overview
The Cisco Identity security platform can integrate with Workday Report as a Service (RaaS) functionality to ingest Workday HR data in an automated fashion.
Workday HR data provides a key element to managing identities and identity security in your organization, as the HRIS system is frequently the source of truth for both internal and third party B2B users.
This document will walk you through the process of setting up access to Workday and will also walk you through the setup inside of the Cisco Identity console.
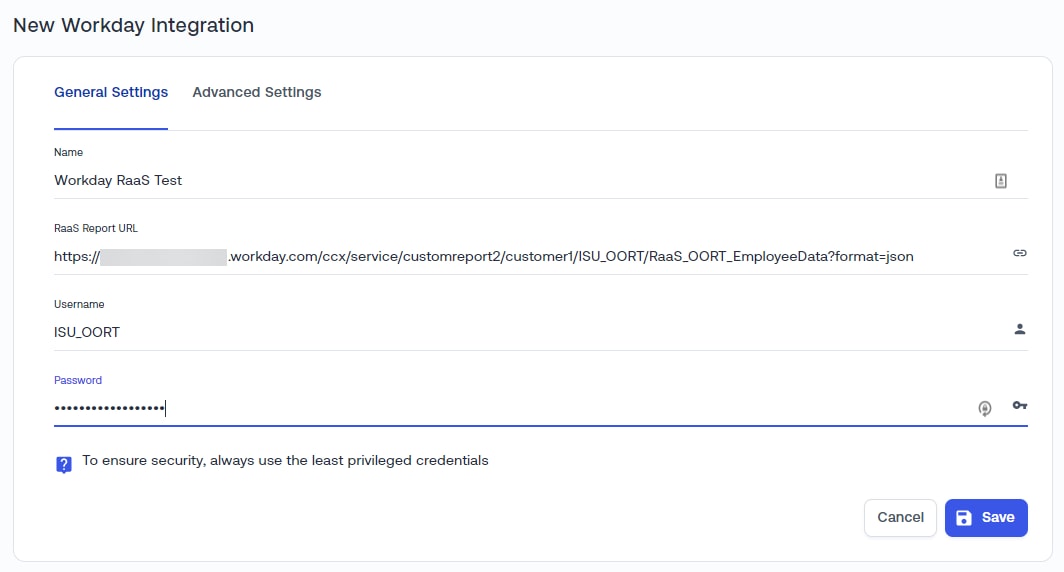
Workday Report as a Service Configuration
NOTE - This article assumes some familiarity with Workday platform administration. The purpose of the document is to provide the report structure and parameters, as well as provide guidance in the Cisco Identity configuration.
The high level steps to complete this task in Workday are as follows:
- Create a Workday Integration System User (ISU) (example documentation) - this user will act as the report owner and provide access to it from the Cisco Identity platform
- Create the custom report as defined below
- Enable the report as a web service in Advanced settings
- Ensure that the ISU created in Step 1 is the owner of the report in the Share settings
- Configure the Workday Report inside of the Cisco Identity console.
Create Workday ISU
To create the integration system user, follow the example documentation above or proceed as follows:
- Go to your Workday tenant and enter create integration system user in the search field. Under Tasks & Reports, click Create Integration System User.
- Enter a username and password for the new user.
- Leave the Require New Password at Next Sign In option clear.
- For Session Timeout Minutes, enter 0.
- Select Do Not Allow UI Sessions to prevent this user from signing into Workday.
- Click OK.
Ensure that the ISU created above is a member of the necessary security groups within Workday to be an owner of the report to be created in the next step.
Create Custom Report
Create a custom report in Workday with the following properties:
- Report type - Advanced
- Data source - All users (active, terminated, pre-hire) - This will depend on your Workday data structure.
- Data source type - Standard
- Primary business object - Worker
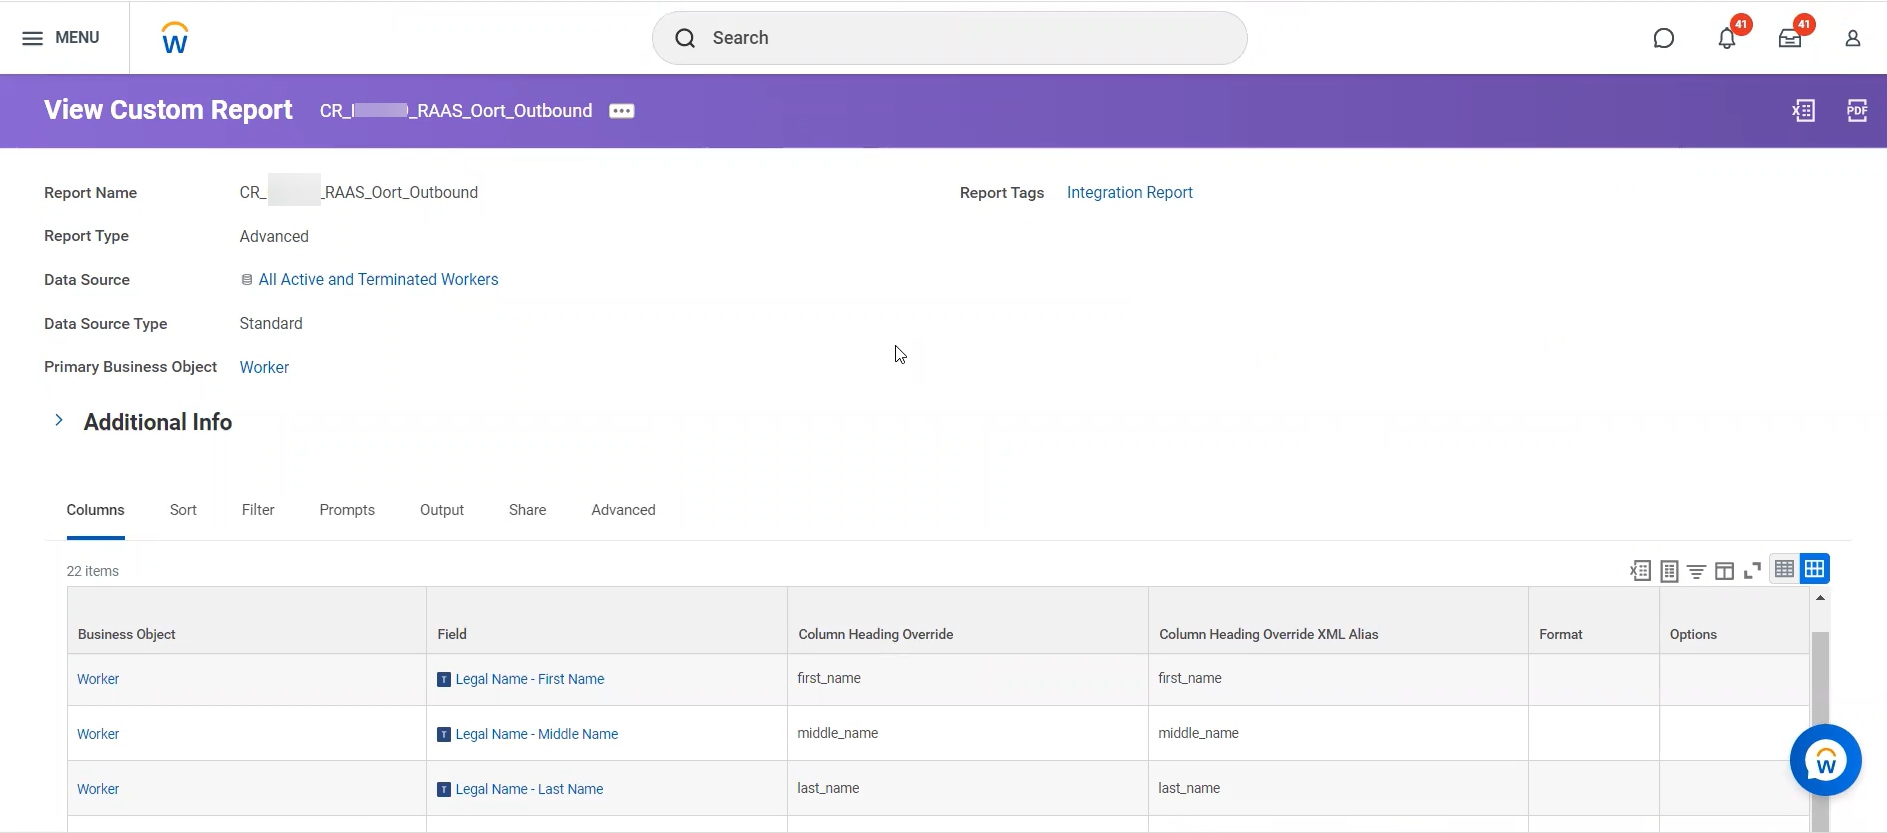
Add the following columns to the report, in this order. Some of the columns will be Workday native or static fields and some will be calculated fields.
NOTE - Please ensure that the Column Heading Override and Column Heading Override XML Alias columns use these specific names, so that the product can map the attributes correctly.
- user_id
- first_name
- middle_name
- last_name
- nickname
- active
- org_name
- business_title
- super_ref - (Manager ID)
- managername
- position_title
- division
- city
- state
- country
- hire_date
- termination_date
- category
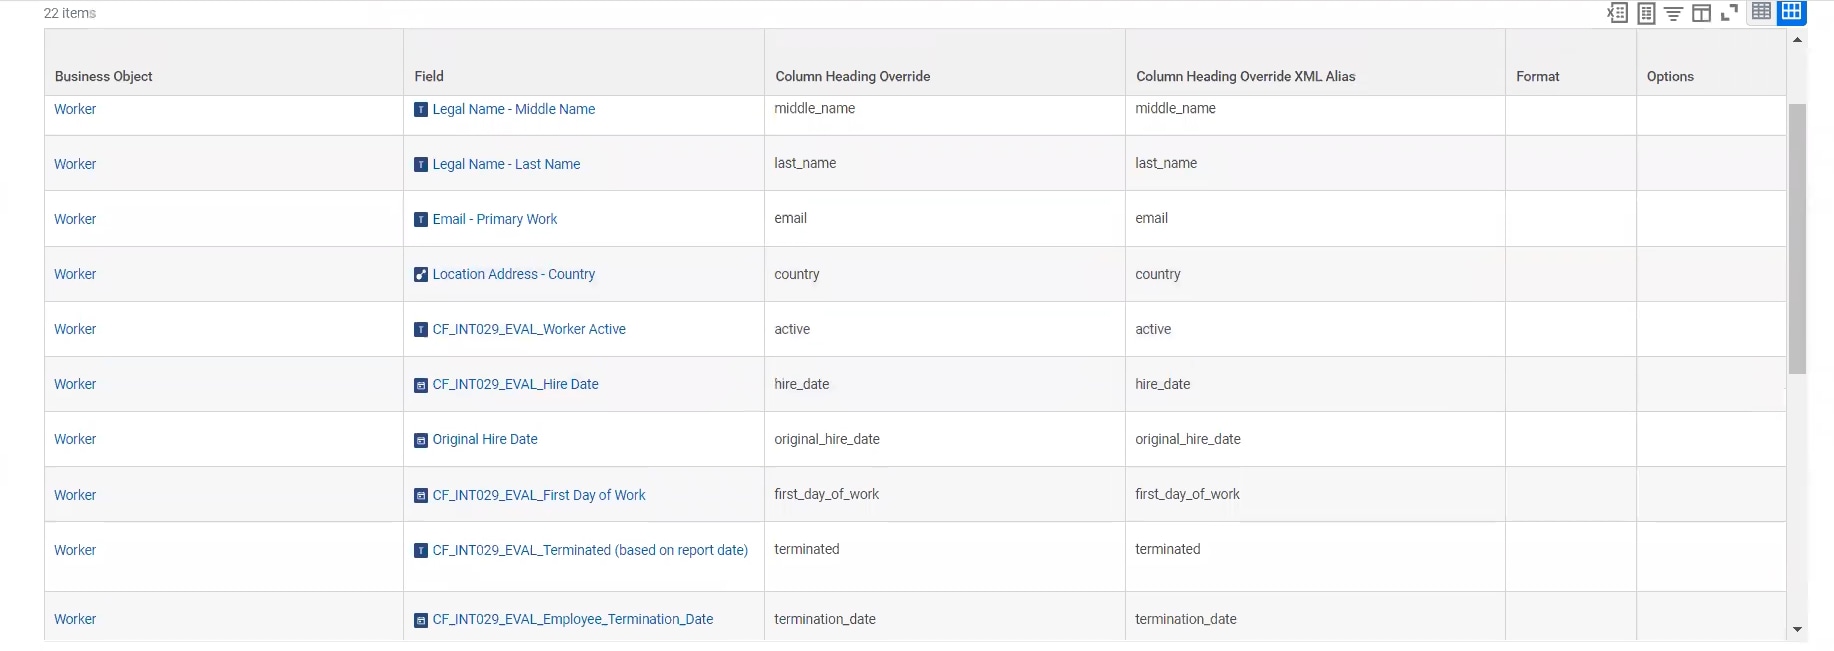
Work Report Properties & Examples
Note: Please note that value names are case sensitive!
| Name | Description | Value Examples [Usage Notes] | Type/Format | Is Required | How used in Cisco Identity |
|---|---|---|---|---|---|
| user_id | Employee/User ID | 14651848 | Numeric | Yes | |
| first_name | First Name | Robert | String | No | |
| middle_name | Middle Name | Douglas | String | No | |
| last_name | Last Name | McGurrin | String | No | |
| nickname | Nickname | Bob | String | No | |
| Email Address | dmcgurrin@personal.com | String | No | ||
| active | Is User Active? | true or false | Boolean | No | |
| org_name | Organization Name | P&S Broadcast | String | No | |
| business_title | Business Title | Partner Account Director [Combined with position_title] | String | No | |
| super_ref | Employee/User ID of the Supervisor/Manager | 91601870 | String | No | |
| managername | Name of the Supervisor/Manager | Marc Heady | String | No | |
| position_title | Position Title | SW Development Eng [Combined with business_title] | String | No | Maps to Title |
| division | Company Division | Belgium Division | String | No | |
| city | City | Sacramento | String | No | |
| state | State | CA | String | No | |
| country | Country | United States | String | No | |
| hire_date | Initial Hire Date | 2022-10-26 or 2022-10-26T17:30:00.000 | ISO 8601 Date Format | Yes | Maps to Start Date (verify) |
| termination_date | Termination Date | 2022-10-26 or 2022-10-26T17:30:00.000 | ISO 8601 Date Format | Yes, if user is not active | |
| category | Category of User | Contingent Worker | String | Yes | Used as User Type and to determine User Type Classification (internal/external) |
Enable this Report as a Web Service in the Advanced tab.
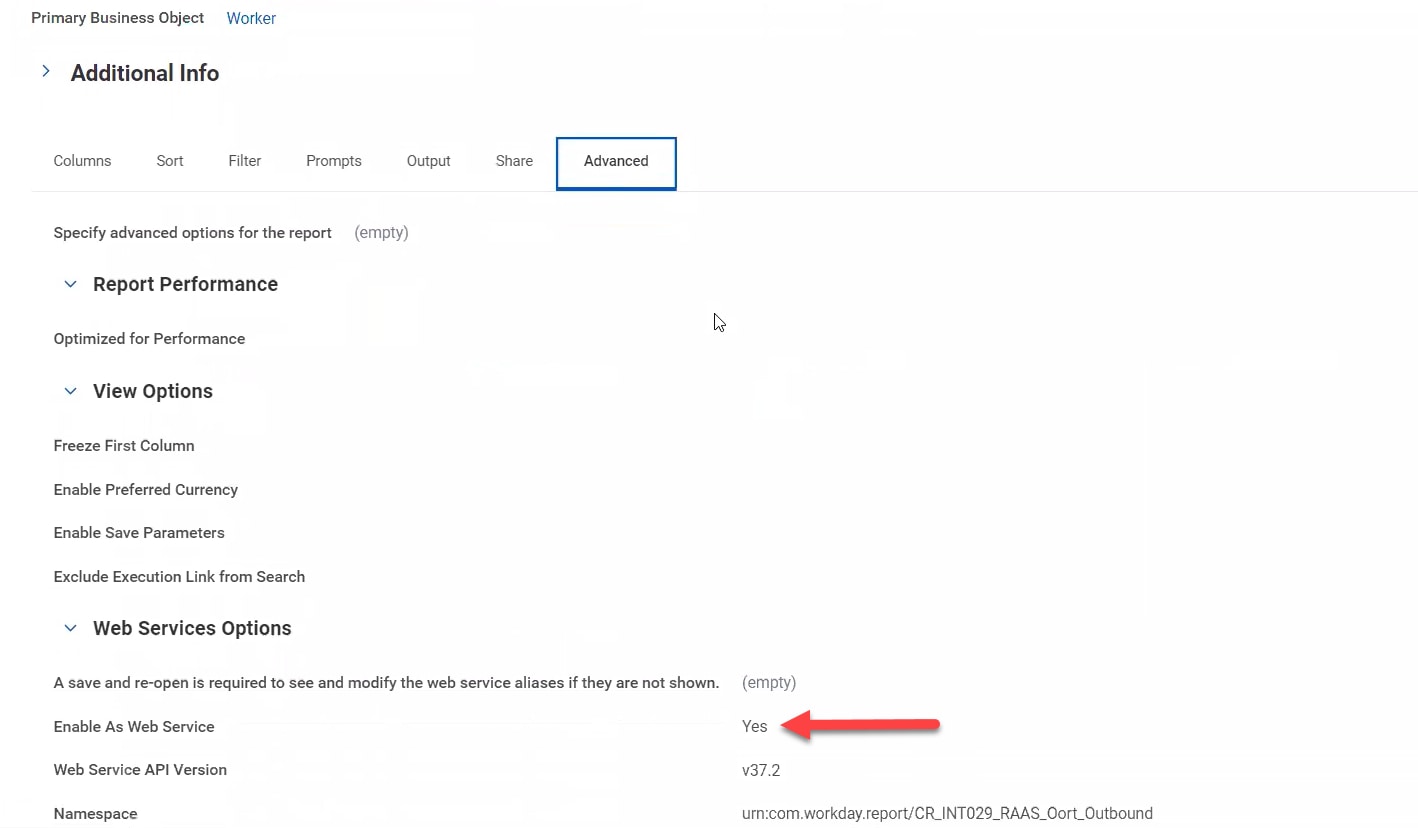
Ensure that the ISU user created above is listed as the Owner of the report in the Share tab.
Note - The ISU user will need access to ALL of the data fields in the report.
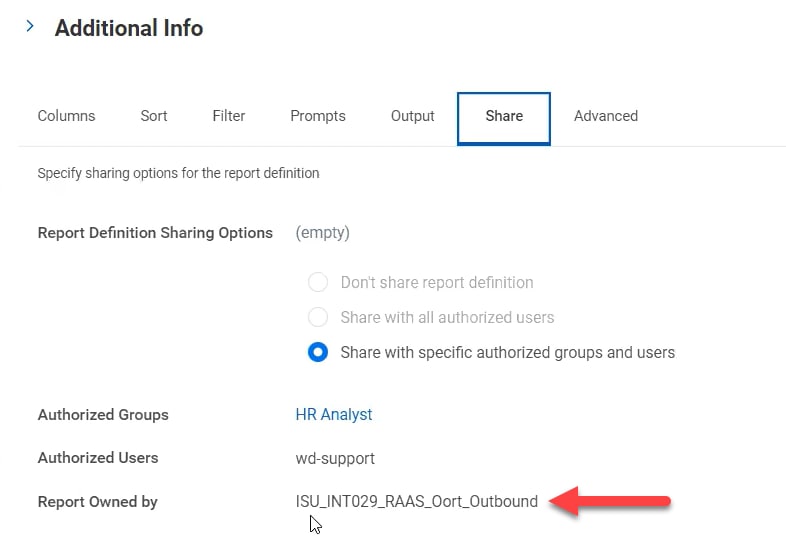
Copy the Report URL in JSON format for use in the Cisco Identity integration configuration.
Note - the Report URL can be obtained at the following location in the Workday report console.
The report URL must be for the JSON format.
Open the list of Report URLs in a new tab and right-click -> copy the JSON URL link below.
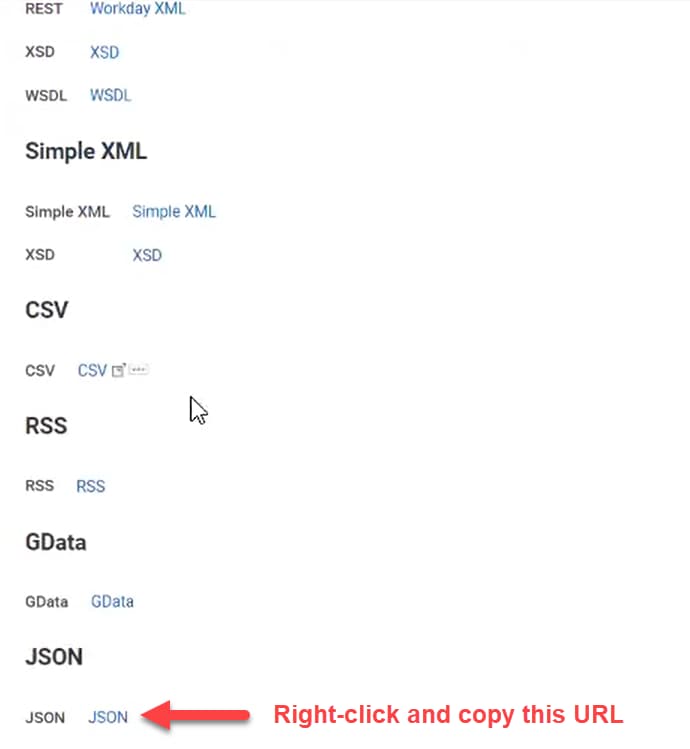
Cisco Identity Configuration
Within the Cisco Identity console, navigate to -
Integrations -> New Integration -> Workday
Enter the following information according to the instructions below.
- Enter a
Namefor the integration (just a display name) - Enter your Workday Report JSON URL created previously
- Enter the ISU username and password for the Workday ISU service account that was created previously
- Click Save.
Start Collection for the Workday Integration
Data collection for new integrations occurs automatically every 24 hrs overnight, but to manually start the collection process, do the following.
Click the three dot option menu on the newly created Workday RaaS integration and select Collect Now.
This process may take some time depending on the size of the Workday user population.
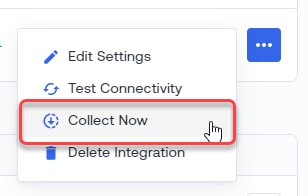
Manual Import (CSV)
Overview
Cisco Identity’s platform can ingest and analyze HRIS data from a number of platforms, including Workday. One way to integrate with Workday HRIS is to periodically upload exported reports from Workday into the Cisco Identity console.
Once HRIS data is integrated, Cisco Identity users can compare user HR records with accounts in their IDPs and IAM systems. Cisco Identity provides a number of built-in checks for discrepancies and missing data, which can be clear indicators of identity vulnerabilities.
Goal
The goal of this document is to provide instructions on importing Workday HRIS data into the Cisco Identity console via a Workday report CSV file.
Benefits
Mismatches between identity sources such as an HRIS system and a primary identity platform (IDP) or IAM system are a common and significant source of security vulnerabilities.
In many cases, discrepancies may arise, e.g. a user moves departments or managers in HR and the IDP system is not updated (or vice versa).
Importing this data provides the Cisco Identity platform with the ability to analysis and provide insights into these types of identity issues.
Workday HRIS File Format
There are two options for generating HRIS data from Workday for upload into Cisco Identity.
- Cisco Identity has defined a Workday report format which can be configured in Workday and then exported as a CSV, for upload into the Cisco Identity console
- Export in SCIM format. For more background on this topic, please see the Understanding HRIS Data and SCIM Overview article. Note that for Workday the template file to be used is listed below. Please work with your Cisco Identity Customer Success team to enable SCIM.
Workday CSV Data Structure Template
The template CSV file below can be viewed in Excel or other spreadsheet applications. The intent of the file is to show the structure of the Workday report to be exported.
The file structure is as follows -
user_id,first_name,middle_name,last_name,email,active,org_name,business_title,super_ref,managername,position_title,division,city,state,country,hire_date,termination_date,category
21f91774-0000-41d3-bfd1-70f6d378ce23,Robert,Douglas,Smith,Bob,robert.smith@simubiz.com,true,P&S Broadcast & Storage,Partner Account Director,8675309,Marc Heady,SW Development Engineer II,Belgium Division,Brussels,State,Belgium,2022-10-26,2023-10-27,Contingent Worker
The template file can be downloaded here
Work Report Properties & Examples
Note: Please note that value names are case sensitive!
| Name | Description | Value Examples | Type/Format | Is Required | How used in Cisco Identity |
|---|---|---|---|---|---|
| user_id | Employee/User ID | 14651848 | Numeric | Yes | |
| first_name | First Name | Robert | String | No | |
| middle_name | Middle Name | Douglas | String | No | |
| last_name | Last Name | McGurrin | String | No | |
| nickname | Nickname | Bob | String | No | |
| Email Address | dmcgurrin@personal.com | String | No | ||
| active | Is User Active? | true or false | Boolean | No | |
| org_name | Organization Name | P&S Broadcast | String | No | |
| business_title | Business Title | Partner Account Director | String | No | |
| super_ref | Employee/User ID of the Supervisor/Manager | 91601870 | String | No | |
| managername | Name of the Supervisor/Manager | Marc Heady | String | No | |
| position_title | Position Title | SW Development Eng | String | No | Maps to Title |
| division | Company Division | Belgium Division | String | No | |
| city | City | Sacramento | String | No | |
| state | State | CA | String | No | |
| country | Country | United States | String | No | |
| hire_date | Initial Hire Date | 2022-10-26 or 2022-10-26T17:30:00.000 | ISO 8601 Date Format | Yes | Maps to Start Date (verify) |
| termination_date | Termination Date | 2022-10-26 or 2022-10-26T17:30:00.000 | ISO 8601 Date Format | Yes, if user is not active | |
| category | Category of User | Contingent Worker | String | Yes | Used as User Type and to determine User Type Classification (internal/external) |
Importing the File
To import the file, navigate to the Integrations tab and select Add Integration.
Select the Manual Uploads tile.
Within the File Upload screen, complete the following -
- Provide a Name and Description for the file
- Select the date that the HRIS data was exported from Workday. This is important because certain Checks will key off this date for calculating discrepancies (e.g. if a user was hired after the export date, then they will not be expected to be present in the file)
- Select Users as the type of data in the file
- For the source type, select Legacy (deprecated)
- Drag and drop or select the file to be uploaded
- Click Save
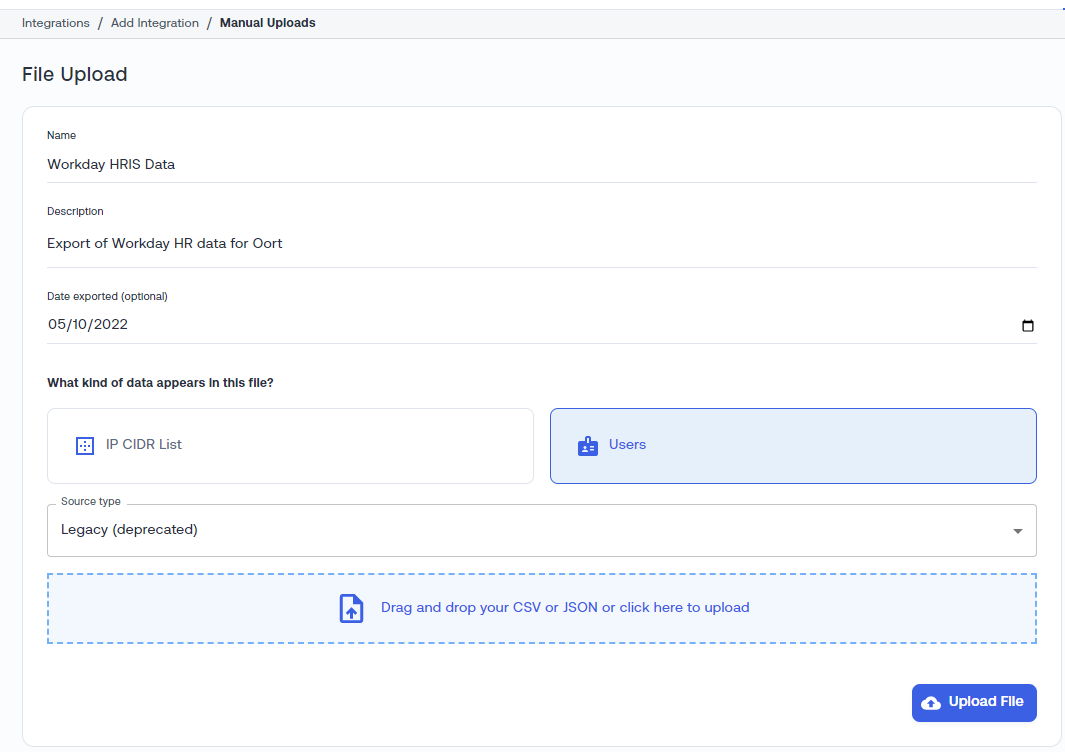
After the file is uploaded, the Cisco Identity team will verify the structure of the data within the file and complete the import into the tenant, typically in less than one business day.
Once the data is accepted and processed, the Manual integration will show success.

Uploading a New File Version
To upload a new file of the updated data from the Workday system, simply click the 3 dots menu at the right side of the integration and select Upload new file version.
This will replace the existing Workday HRIS data with the newer export of data.
If data is obtained from a different HR system, then create an entirely new HRIS integration object in the console.
UKG (via SCIM)
Overview
This project focuses on synchronizing user data from UKG (UltiPro) to Cisco Identity using the [SCIM integration]. This is accomplished using a script which collects the data from the UKG API and effectively "pushes" it to the Cisco Identity tenant using the SCIM API endpoint.
While the principles may apply to other SCIM implementations, this tool has been specifically tested and optimized for Cisco Identity's SCIM interface.
The script and associated collateral are provided as part of the Cisco Open Source repository. They can be found here - https://github.com/cisco-open/cisco-cii-ukg2scim
Note: Please review the README.md file within the repository for the most current information on how to configure and run the tool.
Customization
This tool was designed to work locally but is highly adaptable to different environments and requirements. You can use it as a core component and wrap it with whatever infrastructure is needed for your specific use case. You can customize various aspects to fit your specific:
- Organizational structure and user data model
- Field mappings between UKG and SCIM
- Execution environment (servers, containers, schedulers, cloud functions)
- Performance requirements via concurrency and batch size settings
- Error handling and logging preferences
- Integration with your existing automation workflows
Key customization points are highlighted throughout this documentation, especially in the "Field Mapping" and "Configuration" sections.
Key Information
- Daily Synchronization: This script should be configured to run daily to maintain proper synchronization between UKG and Cisco Identity. Each run recreates all user records on Cisco Identity, ensuring the most up-to-date information is always reflected. Note that this is a full refresh approach where users are entirely replaced rather than incrementally updated.
- Handling Deleted Users: Currently, this tool does not have a mechanism to detect and remove users that were completely deleted from UKG. If a user's record status (
employeeStatusCode) in UKG changes from active ('A') or leave ('L') to terminated ('T'), the tool correctly updates their status on Cisco Identity. However, if a user is completely removed from the UKG system, their record will persist in Cisco Identity as this tool has no way to identify such deletions. - Cisco Identity Integration Setup: Before using this script, you must create a SCIM integration on your Cisco Identity tenant. Use the integration API credentials (Base URL, Token URL, Client ID and Client Secret) to configure this script via the
.envfile. Important Security Note: The Client Secret is highly sensitive and should be treated as a credential. Never share it, commit it to public repositories, or expose it in logs. - UKG Pro REST API: This project utilizes the UKG Pro REST API to fetch user data from UltiPro. You can learn more about this API, its endpoints, and authentication requirements at the UKG Pro API Documentation.
This tool provides an automated solution for synchronizing user data between systems with configurable settings for pagination, rate limiting, and concurrency.
Email Notifications
Email notifications are one of the quickest and easiest ways to get started with outbound notifications for Cisco Identity.
Setup
Setting up an email notification target requires the full administrator role.
- From the Integrations page, click Add Integration.
- Select Add Email Target
-
Enter a target display name and description, if desired
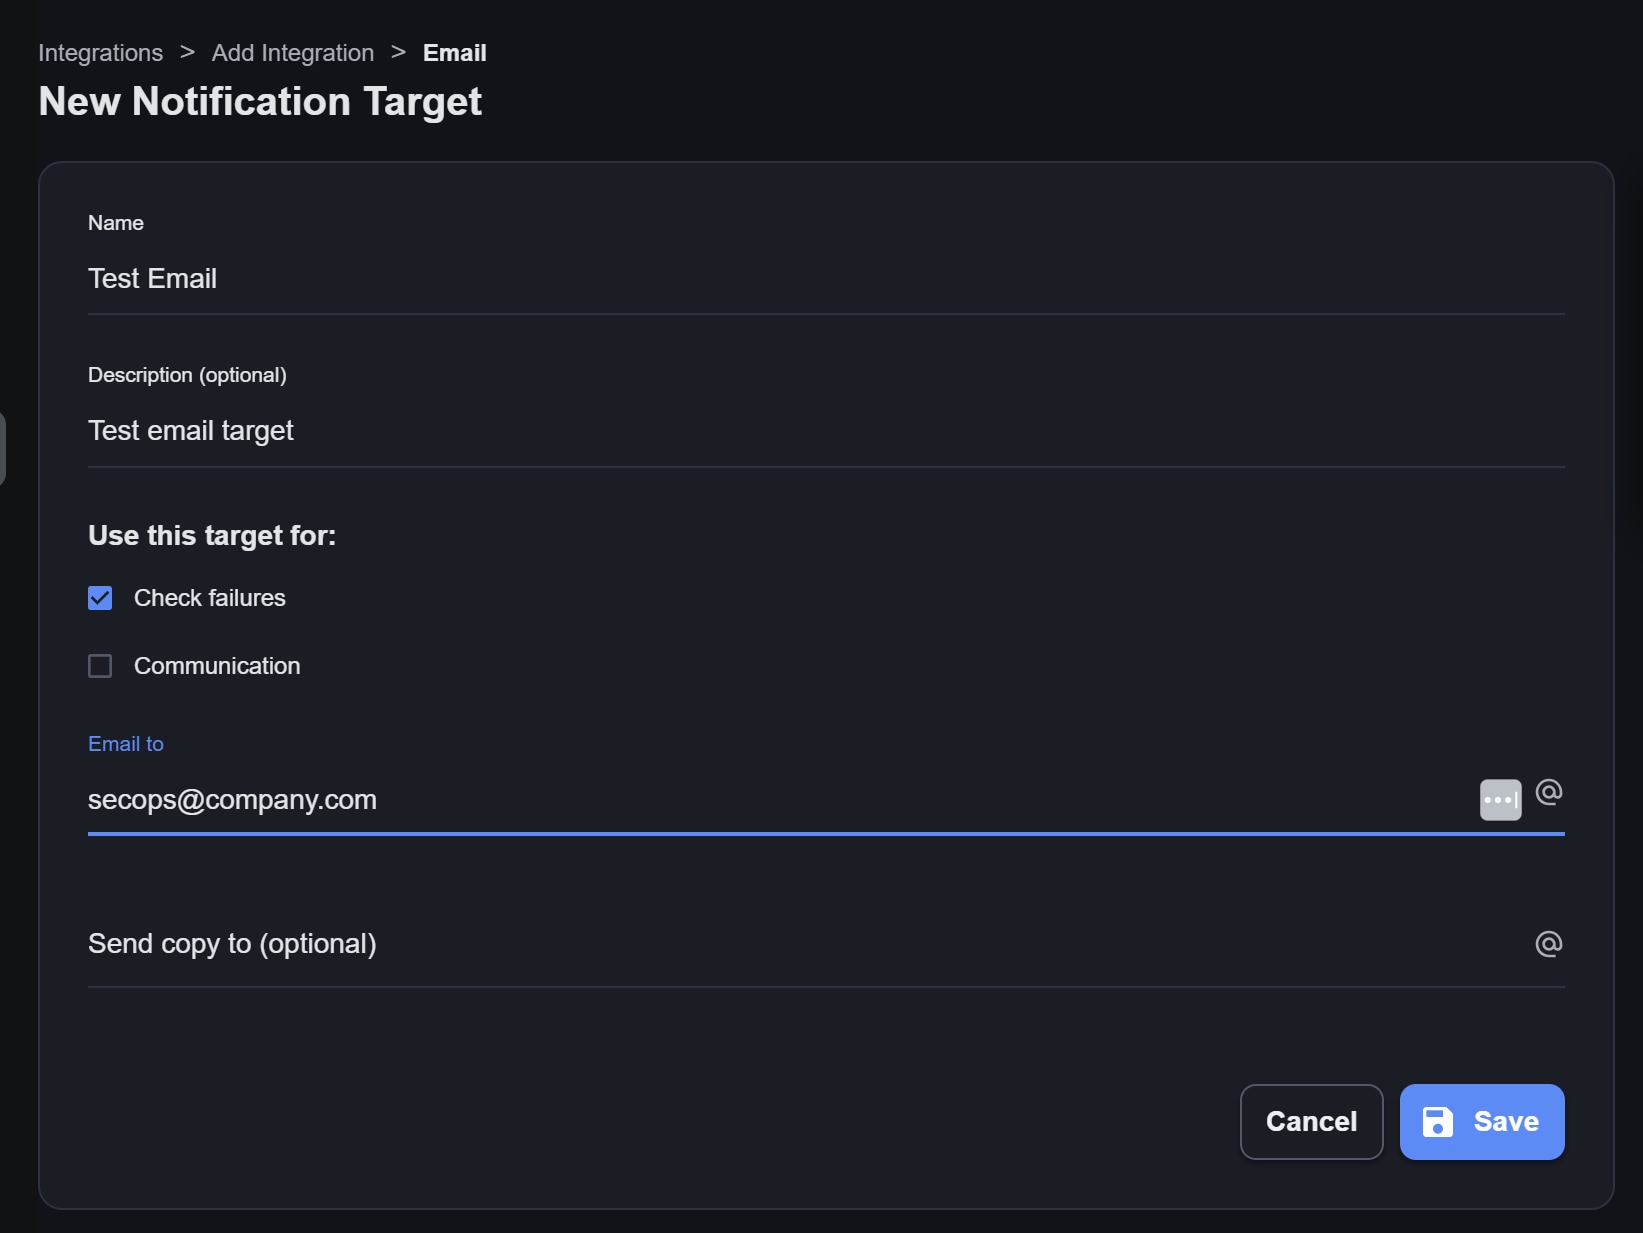
-
Choose the desired notification types to send to the notification target. A notification target can be used for one or multiple purposes. There are 3 options available:
- Check Failures - Notification Target will be used to alert on check failures where the target is configured via the[ Check Settings ]
- Data Collection - Notification Target will be used to alert when errors are encountered when collecting data from the integrations or when an on-demand collection is finished (via "Collect Now" button for an integration)
- Communication - Notification Target will be used as the "Reply-To" header value to the address in the configured notification target instead of a generic no-reply Cisco Identity email address. Learn more in the [Mailgun] or [SendGrid] documentation
- Enter the email address or distribution list, and any additional copy-to addresses. Use a comma-separated list to support multiple addresses
- Select Checks Manually: Check the box next to everything to check for. Use the search field to search for checks by name.
When you're finished, click Add Checks and select the check box next to each check to add. * Select Checks by Category: Check the box next to every Severity (or click All to select all severities), then check the box next to every Topic (or click All to select all topics).
Example:
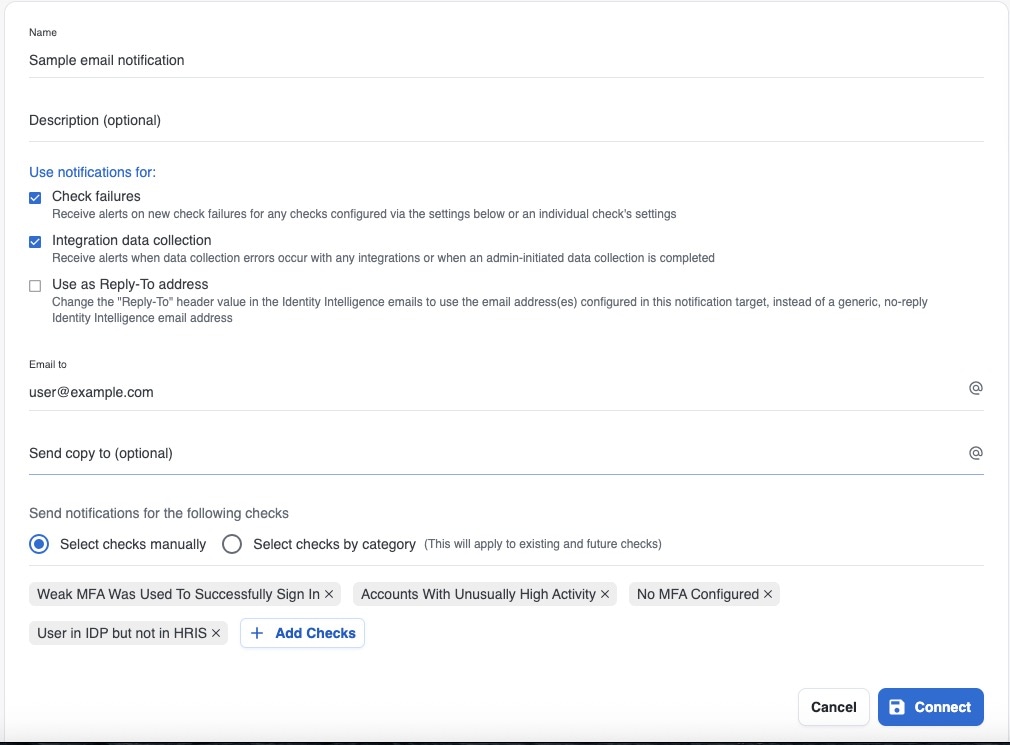
- Select Save
-
To test the new target from the Integrations page, select the 3-dot menu for it on the right and select Test Connectivity
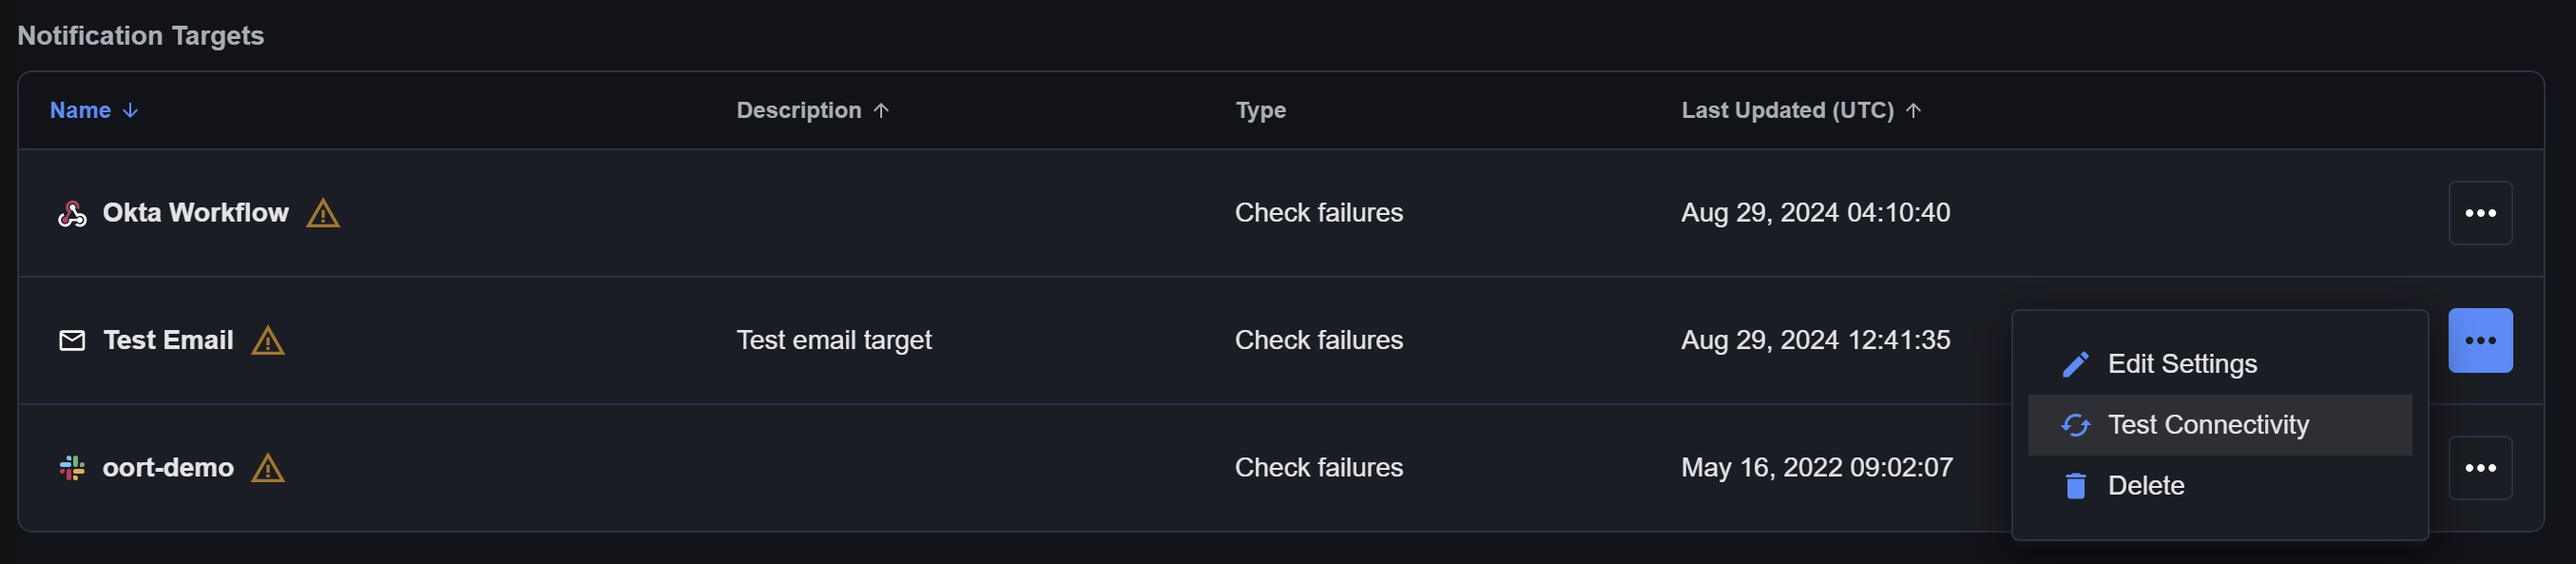
Add the Email Target to One or More Checks
- With the new email notification target in place, navigate to the Checks page.
-
Select the Add + button in the column and select one or more Checks where you would like email notifications for new failing users. You can also test the functionality from this point
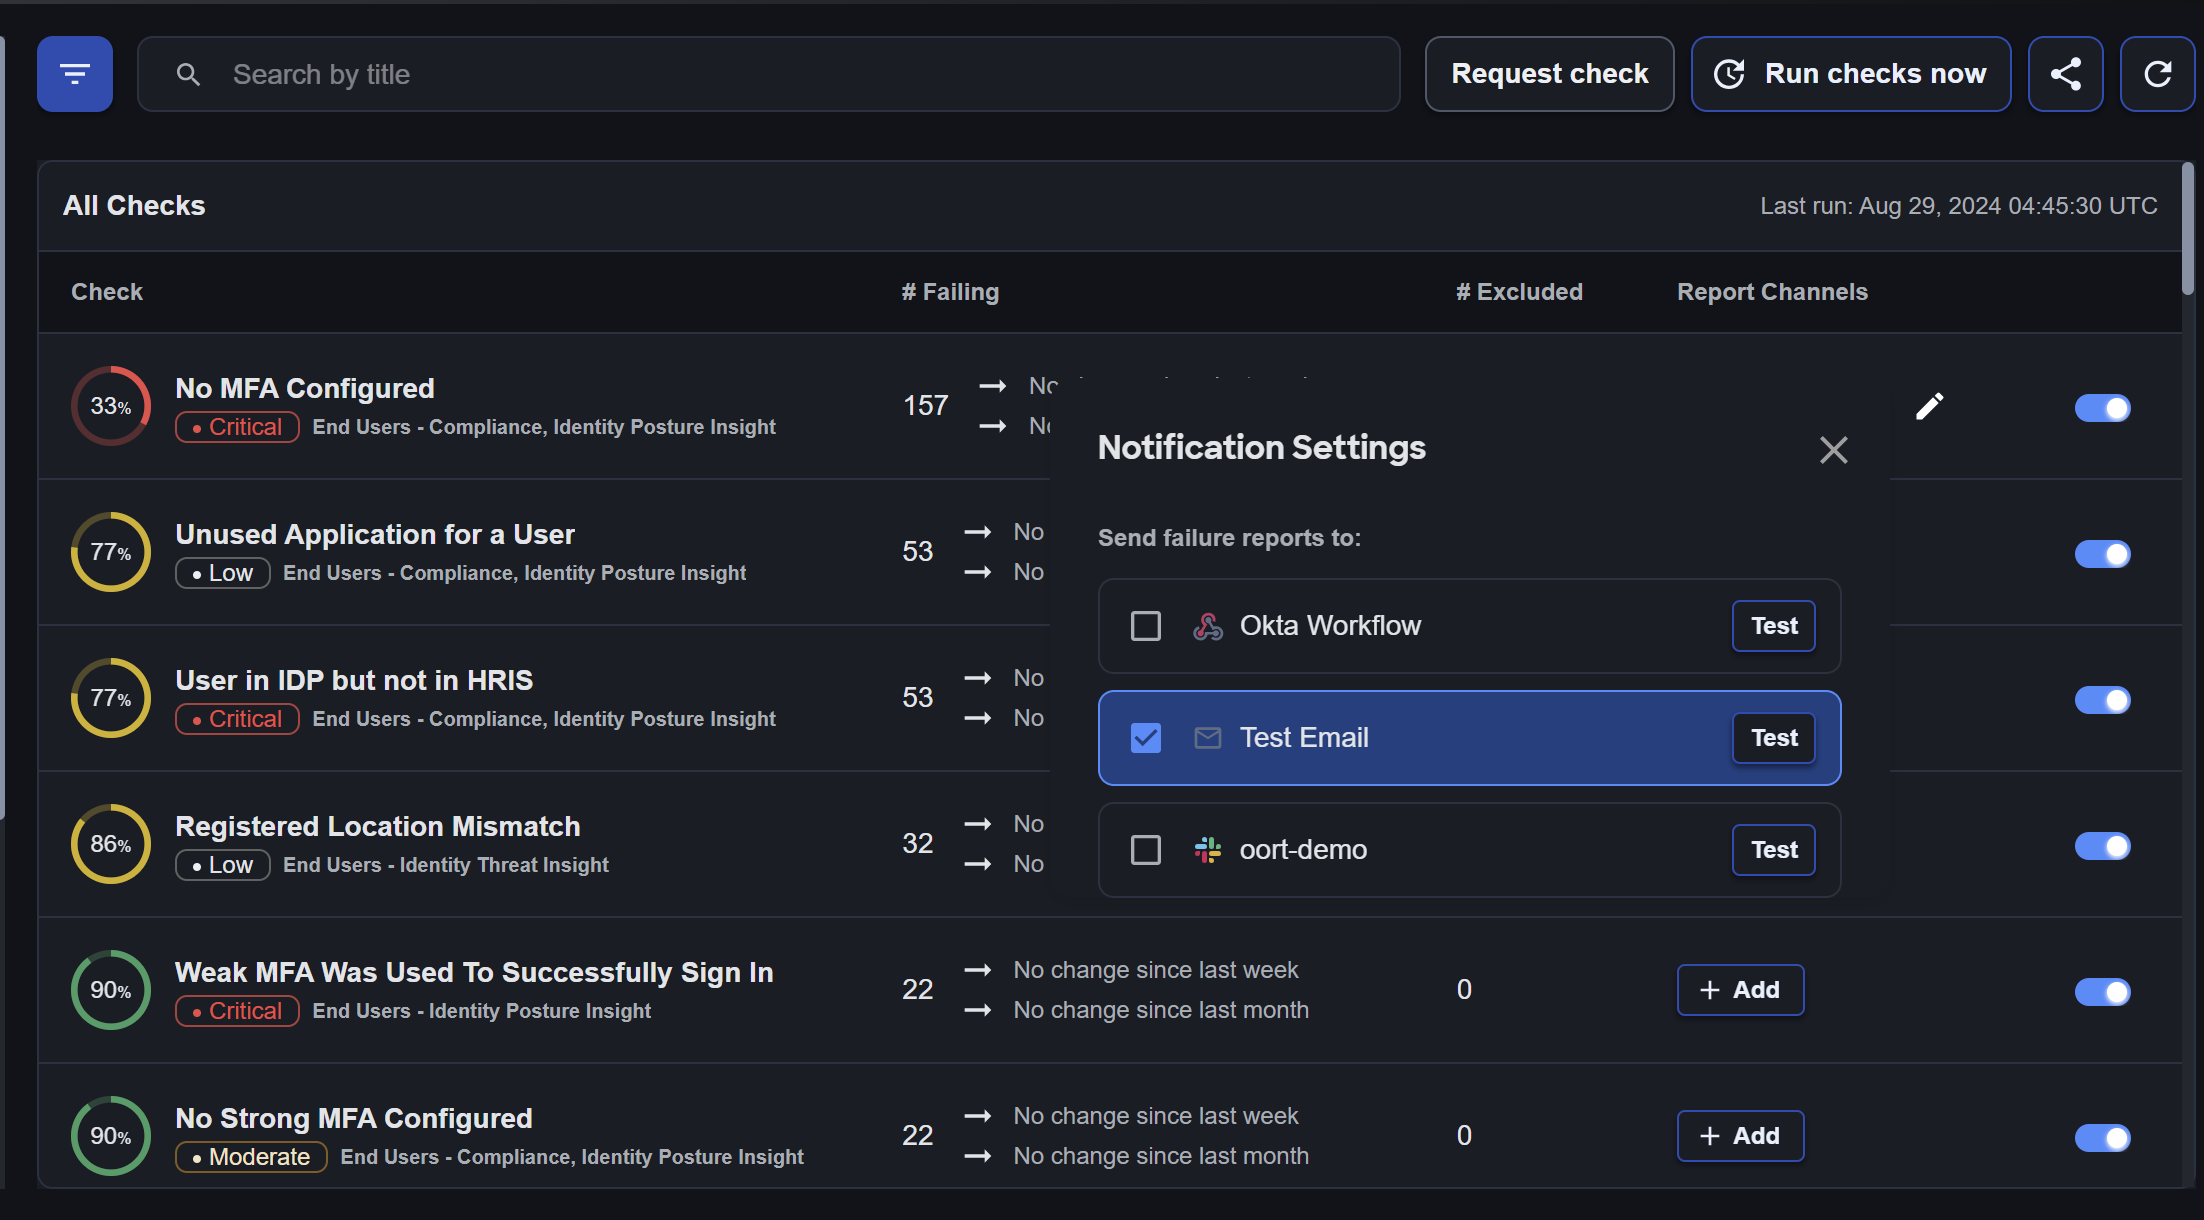
Notification Format and Frequency
Email notifications differ slightly from chat app notifications like [slack-notification-integration.md] and [microsoft-teams-notification-integration.md] in the following way:
- By default, one email is sent per check per day, with a summary report of up to 20 users.
- If more than 20 new users failed that particular check in a 24 hr period, then use the "See Report" link at the bottom of the email to view the list of users in the Cisco Identity dashboard
Mailgun
Overview
Many organizations elect to trigger an email notification or email-based workflow when the Cisco Identity security platform has a new finding or actionable alert. Please see the section below for more details.
Up to this point, this email would come from a cisco.com domain. For a more flexible seamless process, Cisco Identity has introduced the ability to configure several of the top mail providers.
In the integrations tab, there is a new section for “Email”, which includes options to set up integrations for your own Mailgun service.
Prerequisites
This article assumes that your organization has a Mailgun implementation and you have necessary admin rights to configure it.
Mailgun Configuration
- Go to the Integrations tab and select Add Integration
- Scroll to the Email section and select the SendGrid Integration
- Fill in the following fields and click Save when completed:
- Name - this is a display name in the Cisco Identity UI for the integration
- Description - optional
- From Address - an email address that exists on the verified domain
- Base URL - API base URL, corresponding to your geographic region, e.g. https://api.mailgun.net, https://api.eu.mailgun.net/ - please see this article https://documentation.mailgun.com/en/latest/api-intro.html#base-url
- Domain - this should be a verified Mailgun domain, as explained in https://help.mailgun.com/hc/en-us/articles/360026833053-Domain-Verification-Walkthrough
- Default email service (toggle) - enable this option to make this email integration the default provider from which email notifications will be sent
- API Key - An API key (secret), as explained in https://help.mailgun.com/hc/en-us/articles/203380100-Where-Can-I-Find-My-API-Key-and-SMTP-Credentials-
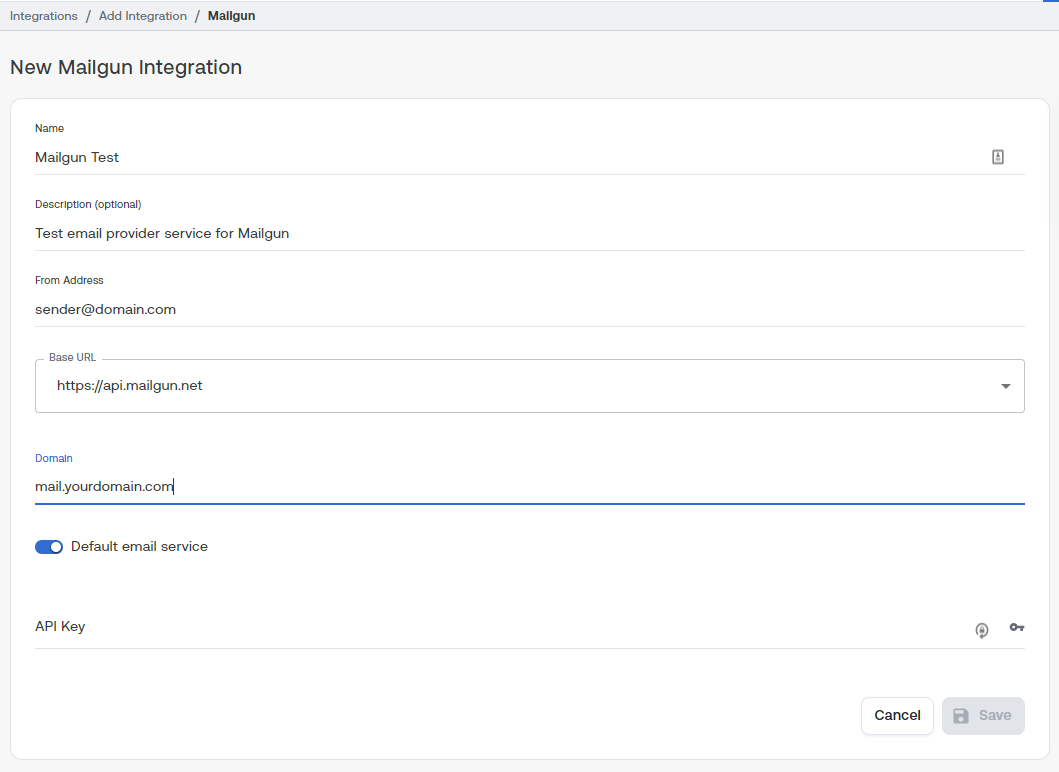
Test Connectivity - Mailgun
After the integration is created, you can test connectivity to the service using the 3-dot menu option on the integration row and select Test Connectivity -
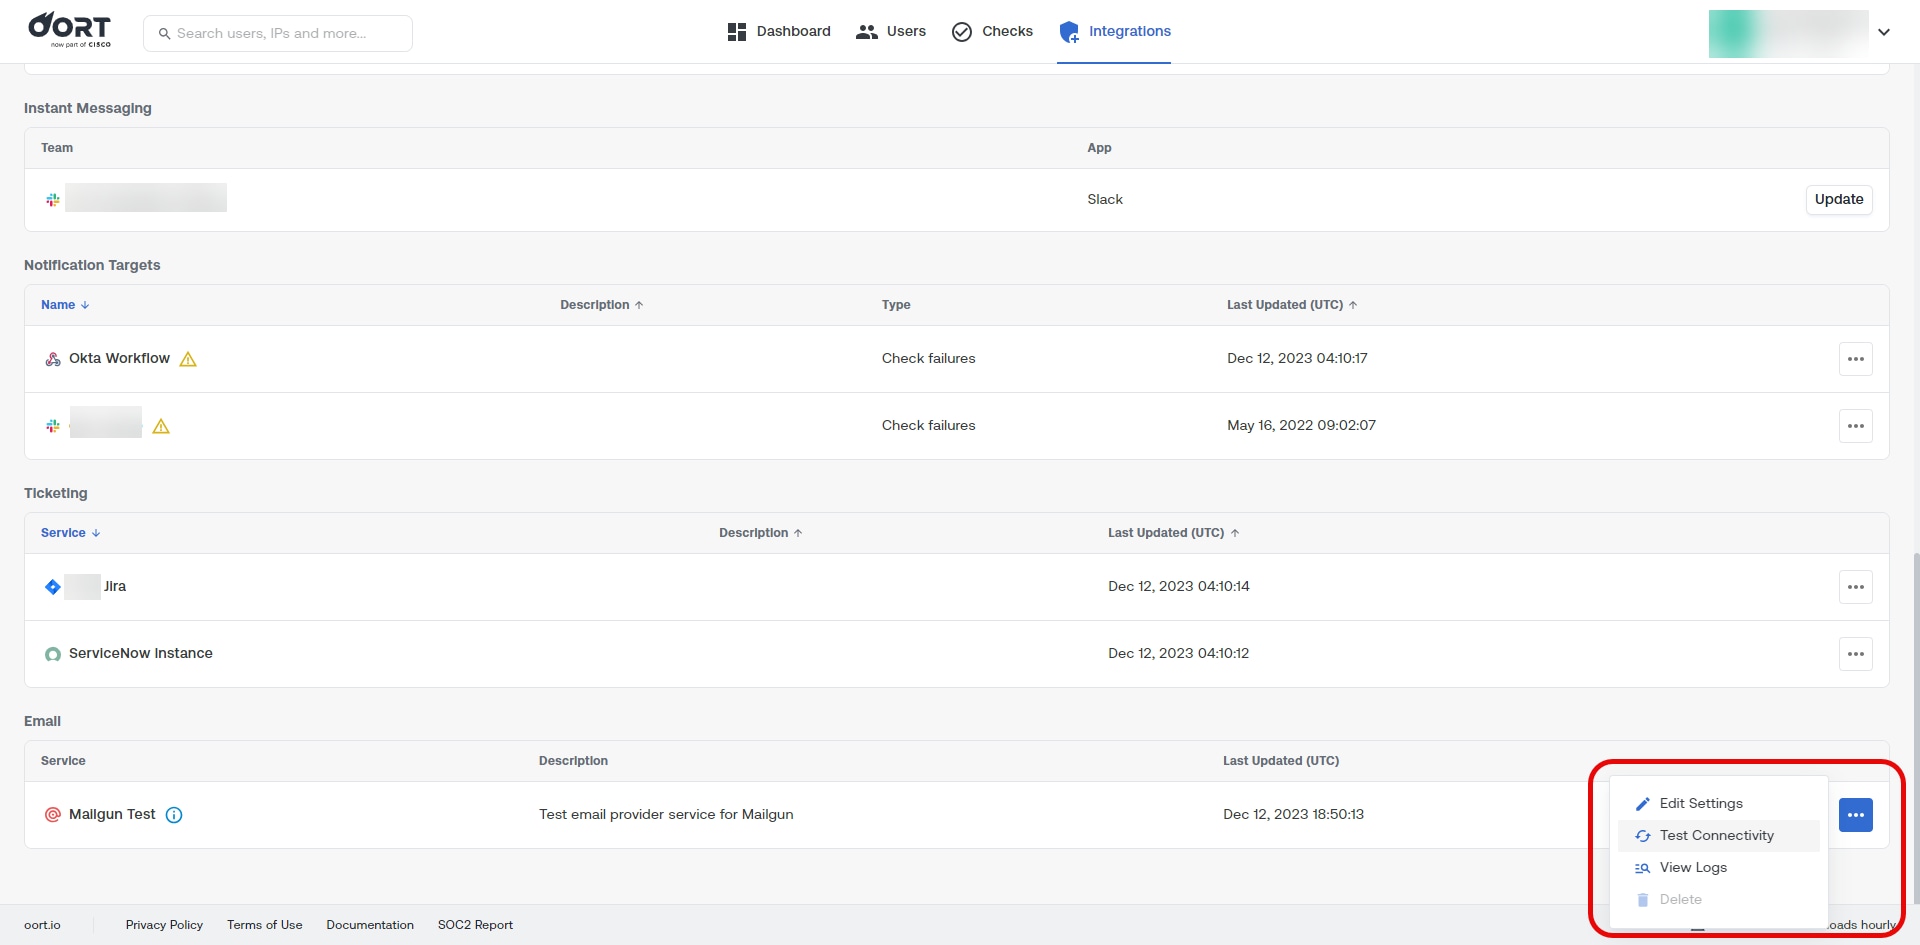
Example Use Case - Mailgun
Organizations may find that their users are connecting to corporate systems and applications while using personal 3rd party VPN services like NordVPN or ExpressVPN, or less reputable ones than that. This is a bad security practice and many companies prohibit this within their acceptable use policy.
Cisco Identity surfaces personal VPN usage in the [personal-vpn-usage.md] check. Using the check settings menu, you can configure Cisco Identity to send email messages to users (or their managers, if defined in the primary IDP), informing them of this policy violation.
With the Mailgun integration configured above and set to Default Email Service, this email will now originate via Mailgun from the sending From address list.
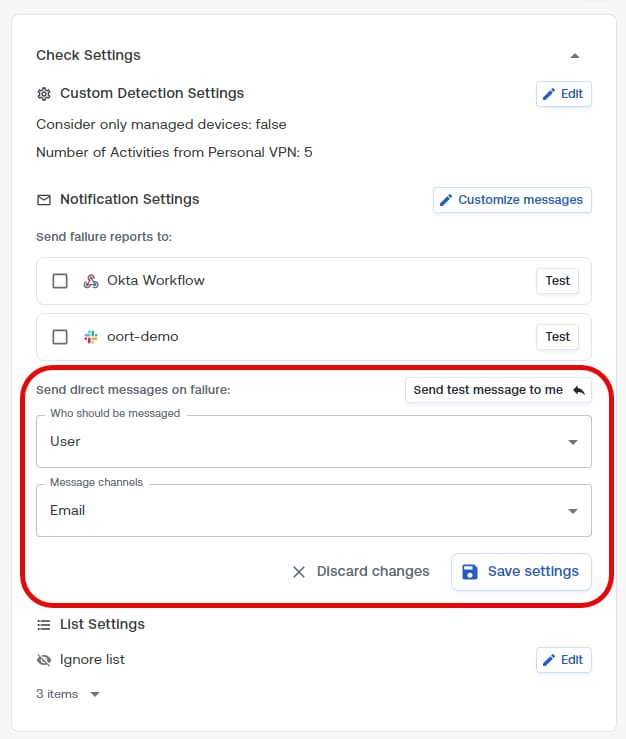
You can also customize the message sent to the end user per Check via the [Check Settings].
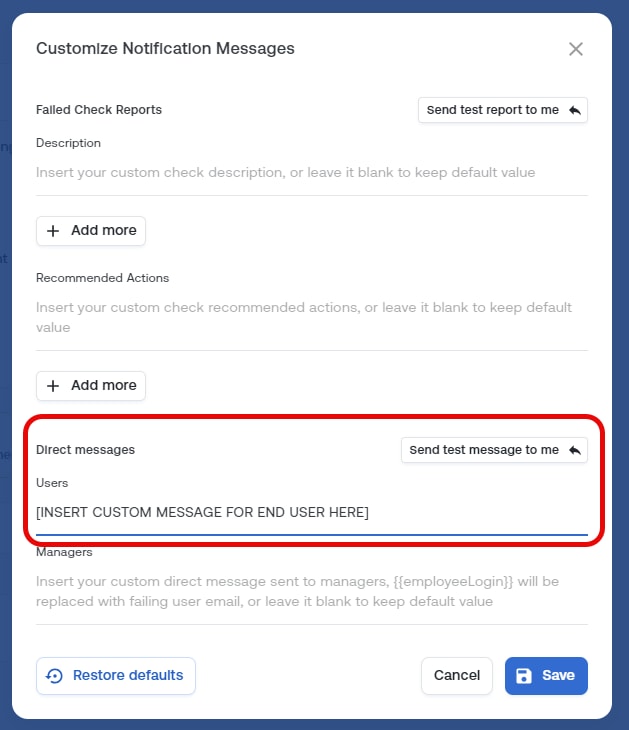
Microsoft Teams Notification
Note: The Microsoft Teams bot for Cisco Identity is currently only available within the US Duo deployment, for architectural reasons related to Teams app requirements. Cisco is working to expand access within Microsoft's framework for Teams apps and the Teams marketplace.
Overview
Cisco Identity can integrate with one or more Microsoft Teams instances to provide notifications and in some cases automation of frequently recurring identity tasks.
Audience
This document is intended for identity security, IAM, and IT administrators responsible for integrations between identity, security, and collaboration platforms, including notifications, alerting, and incident remediation.
Benefits
Integrating the Cisco Identity platform with your Teams environment allows for fast notification and remediation of both failed identity health checks and also individual user identity issues or investigations.
For more information, please see the corresponding article detailing different types of notifications and collaboration available from Cisco Identity.
Requirements
The following requirements exist for the Teams notifications integration:
- Azure AD must first be configured in your Cisco Identity tenant for Azure tenant that underlies your Teams environment
- A Teams admin account is required to upload the Cisco Identity Bot for Teams via the Teams admin center
- A Team or Channel owner role is required to add the Cisco Identity Bot app to the desired channel
Important Notes
- The Teams app cannot be added to a private Teams channel, due to Microsoft restrictions on third party apps
- The current Teams app only connects with US production Cisco Identity tenants. See notice above.
High-level Integration Steps
The current steps to configure this functionality are as follows.
- Configure the Azure AD integration for your Cisco Identity team to the corresponding Azure tenant where the Teams environment resides (required)
-
Download the Cisco Identity Production Teams App (zip file below). If you have any issues downloading the file, contact your Cisco Support representative
-
Install the Cisco Identity Teams communication bot in your Teams tenant as an administrator
- Configure Teams notifications for the desired checks and events in the Cisco Identity console
Installing the Cisco Identity app in your Teams environment
- From within the Teams admin center console, select Teams apps -> Manage apps
- Click + Upload and then Upload again
- Select the ZIP file, provided above, and upload it
- After successful upload, click the link to manage the app
- From here you will be see the details of the app
Adding the Cisco Identity app to a Teams channel or team
To add the app to a Team or Channel, perform the following steps.
Note - You must be signed into Teams with an account that has the Owner role for the Team and Channel where you want to install the Cisco Identity Bot for use in your organization.
- Select the desired Team and click the three dot menu. Select Manage team
- Select the Apps tab and then More apps button on the right. Click the Cisco Identity Bot. If there are many apps under Built for your org, then click See all on the right side
- Click Add to a team
- Select the desired Team and channel and click Install bot
- If you a receive a Something went wrong message, this means that the account you're signed into Teams with is not an owner of that Team or channel and doesn't have permissions to install applications. Sign out and sign in with an account that is an owner of the desired Team
- From the Manage channel -> Apps tab, you should now see the Cisco Identity Bot in your app list
You must now proceed to the next section to add Teams as a notification target within Cisco Identity.
Adding a Teams notification target in Cisco Identity
- Within your Cisco Identity tenant console, navigate to Integrations and Add Integration. You should now see a Microsoft Teams tile under the Notification Targets category.
- Click + Add MS Teams Target
- Provide a Name and Description for the notification target. NOTE: more than one target can be configured to the same Teams tenant
- Select either Failed checks or Data collection, or both, for the types of notifications to send to this target
- Failed checks notifications provide Teams notifications on a daily basis of net-new users failing specific health checks. Please see below
- Data collection provides a daily update notification upon successful user data collection from one or more integrations
- Select the desired Microsoft Teams environment
- Enter the desired channel name OR specific person via UPN (e.g. firstname.lastname@company.com) where the notifications should go to
Select Checks Manually: Check the box next to everything to check for. Use the search field to search for checks by name.
When you're finished, click Add Checks and select the check box next to each check to add.
Select Checks by Category: Check the box next to every Severity (or click All to select all severities), then check the box next to every Topic (or click All to select all topics).
- Click Save
- You will now see a Teams entry for both Instant Messaging (direct msgs to users or their managers) and Notification targets
- You can test connectivity using the three dot menu on the right side of the integration object
- A successful test message will be sent to the target indicating this is a "verification" message
Note: Using the Test button for a notification target on a specific check page will send a test message to the signed in user, NOT the configured channel, to verify any custom messages look as intended
Configuring Teams Notifications for Cisco Identity Checks
Now that the Teams integration is in place, configure one or more check types to send notifications to the configured channel.
For example, for the Inactive Users check, you can send Failure Reports to the Teams notification targets once a day. This occurs when data is collected and processed by Cisco Identity.
You can also send direct messages to users or their manager upon failure of a particular check. This is useful when the user or the manager can take direct action to remediate the issue.
For example, a manager of an inactive user can submit a ticket or begin the process to deactivate an inactive user account if that user no longer needs access.
Deleting the Cisco Identity app for Teams
Should it be necessary to delete the Cisco Identity app from your Teams environment, simply find it in the Manage apps screen and click it to see details.
From this screen, the three dot menu will provide an option for Actions -> Delete.
SendGrid
Overview
Many organizations elect to trigger an email notification or email-based workflow when the Cisco Identity security platform has a new finding or actionable alert. Please see the section below for more details.
Up to this point, this email would come from a cisco.com domain. For a more flexible seamless process, Cisco Identity has introduced the ability to configure several of the top mail providers.
In the Integrations tab, there is a new section for “Email”, which includes options to set up integrations for your own SendGrid service.
Prerequisites
This article assumes that your organization has a Sendgrid implementation and you have necessary admin rights to configure it.
SendGrid Configuration
- Go to the Integrations tab and select Add Integration
- Scroll to the Email section and select the SendGrid Integration
- Fill in the following fields and click Save when completed:
- Name - this is a display name in the Cisco Identity UI for the integration
- Description - optional
- From Address - this can take the form of either of the following:
- An email address on an authenticated domain as explained in https://docs.sendgrid.com/ui/account-and-settings/how-to-set-up-domain-authentication
- A verified Single Sender Identity as explained in https://docs.sendgrid.com/ui/sending-email/sender-verification
- Default email service (toggle) - enable this option to make this email integration the default provider from which email notifications will be sent
- API Key - Create an API Key as described in this article, with Full Access.
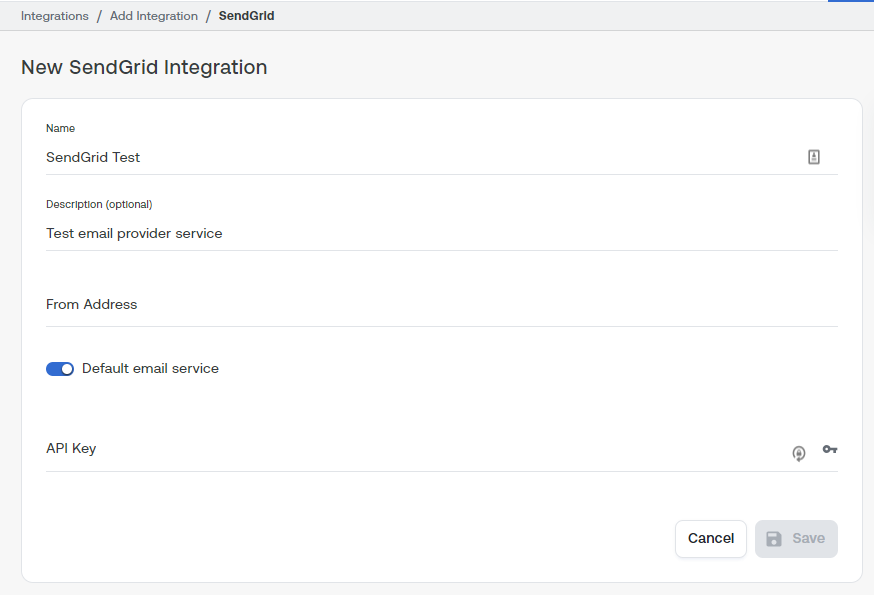
Test Connectivity
After the integration is created, you can test connectivity to the service using the 3-dot menu option on the integration row and select Test Connectivity.
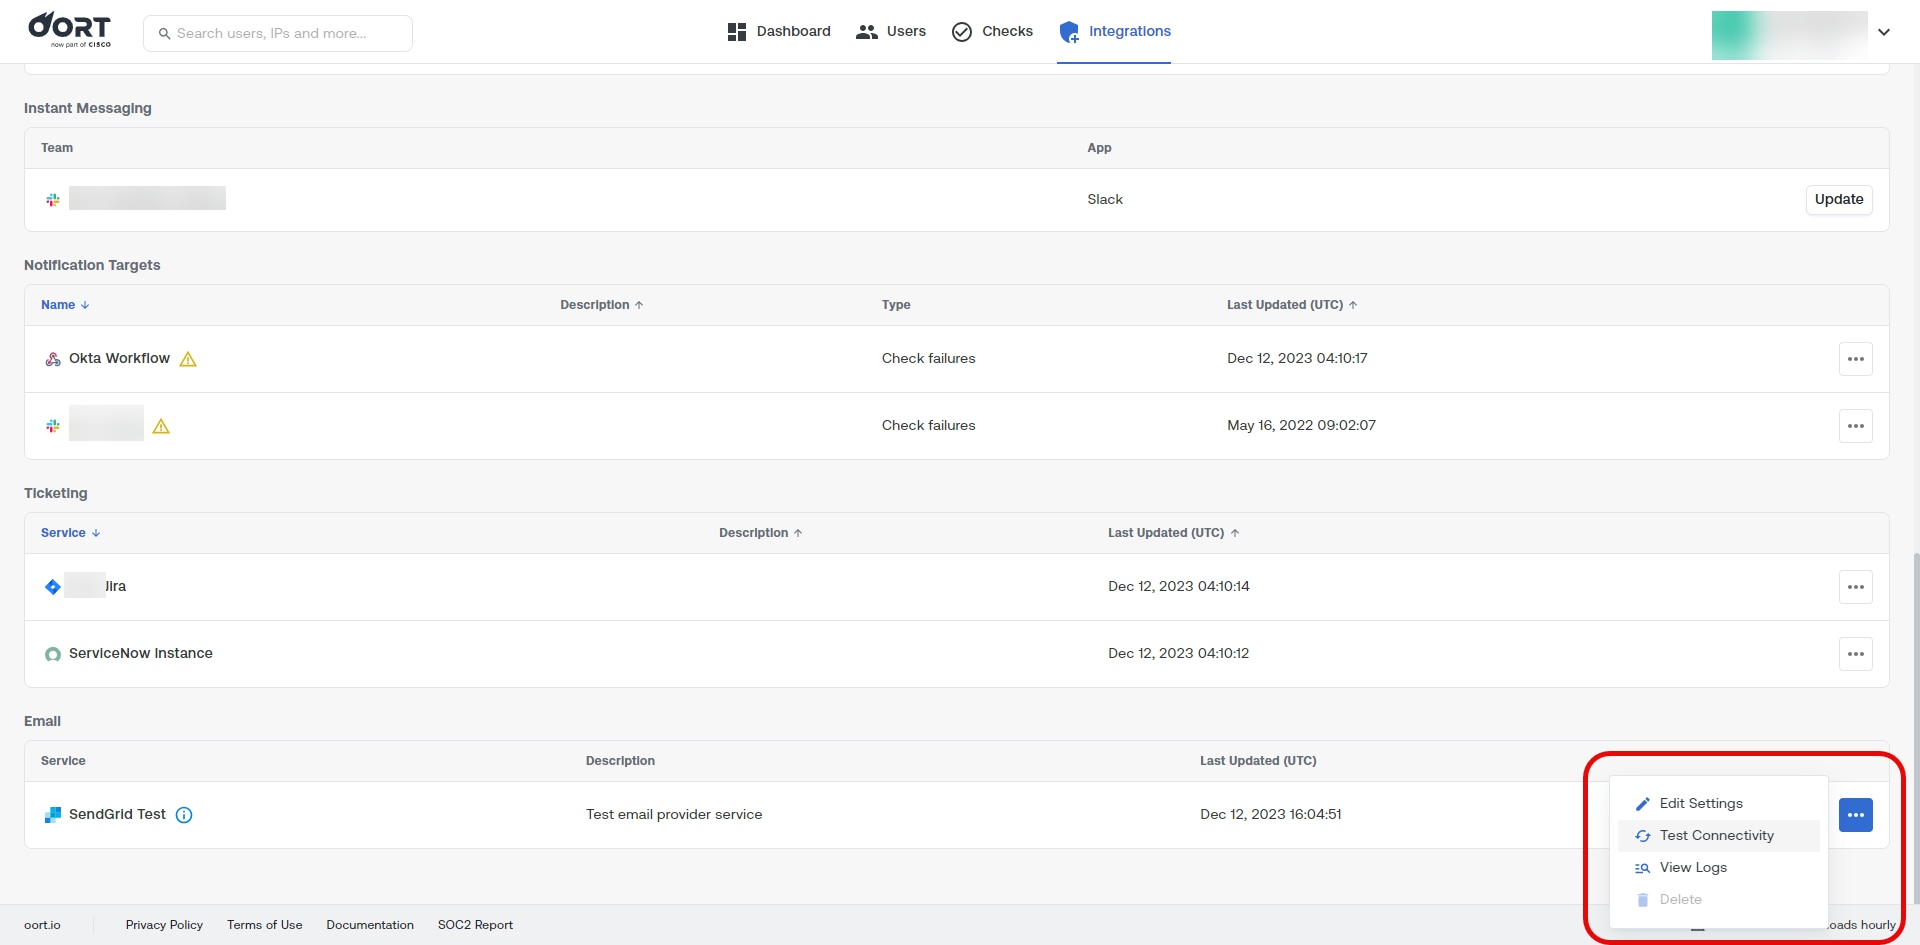
Example Use Case - SendGrid
Organizations may find that their users are connecting to corporate systems and applications while using personal 3rd party VPN services like NordVPN or ExpressVPN, or less reputable ones than that. This is a bad security practice and many companies prohibit this within their acceptable use policy.
Cisco Identity surfaces personal VPN usage in the [personal-vpn-usage.md] check. Using the check settings menu, you can configure Cisco Identity to send email messages to users (or their managers, if defined in the primary IDP), informing them of this policy violation.
With the SendGrid integration configured above and set to Default Email Service, this email will now originate via SendGrid from the sending From address list.
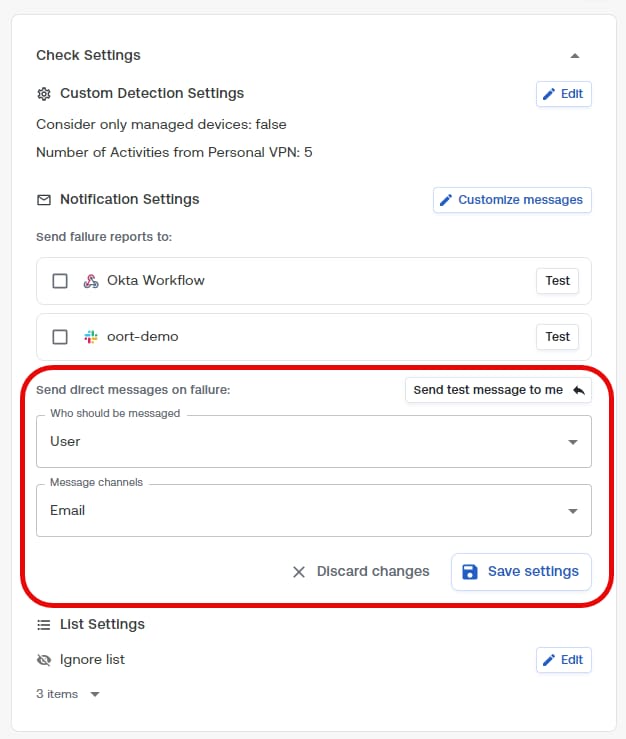
You can also customize the message sent to the end user per Check via the [Check Settings].
Slack
Overview
Cisco Identity can integrate with one or more Slack tenants to both ingest Slack identities as a source AND provide notifications to Slack channels and users.
Privacy Policy
For information on Cisco Identity Privacy Policy, please see this resource.
Integration with Slack
To enable the integration with Slack, you will need to add the Cisco Identity Bot for Slack available on the Slack Marketplace to your Slack workspace.
Cisco Identity can have multiple target notification channels configured for the same Slack org
Permission requirements within Slack
By default, any workspace member can install apps to Slack. However, many organizations have restricted the ability to install 3rd party apps to only administrators or via an approval process. If you don’t have permission to install apps, you may be able to submit an app request instead.
If installing new apps is restricted to Slack Admins, you can also ask your Slack Admin to pre-approve the Cisco Identity Bot app and then install it yourself once it has been approved.
NOTE - While Cisco Identity asks for permission to view email addresses of people in your workspace for account identification purposes (shown in screenshot below), Cisco Identity does not use the emails from Slack to actually send emails to users.
Geographic Distribution
Cisco Identity maintains different bots for Slack for different geographic deployments (names listed below).
During the setup process, you will be automatically directed to the correct bot for Slack based on your tenant location. This is for informational purposes only and no action is required on your part.
- Cisco Identity Bot (this is our main bot, the U.S. deployment)
- Cisco Identity Bot AU
- Cisco Identity Bot EU
- Cisco Identity Bot JP
- Cisco Identity Bot UK
- Cisco Identity Bot SG
High-level Setup Steps
There are 3 steps you need to go through to set up the integration with Slack for your Cisco Identity tenant to start receiving alerts about check failures:
- Add the Cisco Identity Bot for Slack to your Slack workspace
- Configure the destination Slack channel for notifications within your Slack workspace
- In Cisco Identity, create a new Integration for Slack
- Enable the Slack notification as a target in one or more Cisco Identity Checks (none are selected by default - you must opt-in for specific Check failure notification messages)
Add Cisco Identity Bot to Slack
To add the Cisco Identity Bot for Slack, perform the following steps:
- Login to Cisco Identity with a Cisco Identity full admin account that meets these requirements:
- The admin's account also exists in the desired Slack organization under the same user login
- The admin's account has permissions to install applications within your Slack organization (or the Cisco Identity bot has been pre-approved for your org by a Slack Admin)
- From the Integrations tab, click on Add Integration
- From the Notification Targets list, select Add Slack Target
- Provide the following details for the integration
- Display name
- Description (optional)
- Select the purpose of this particular Slack notification target. This could be one or both of these options:
- Check failures - notifications will be sent for the configured Checks. Additional instructions on how to can be found below
- Data collection - notifications will be sent to this channel if any the data collection fails for any of the integrations
-
Select Install Cisco Identity Bot on your Slack Workspace
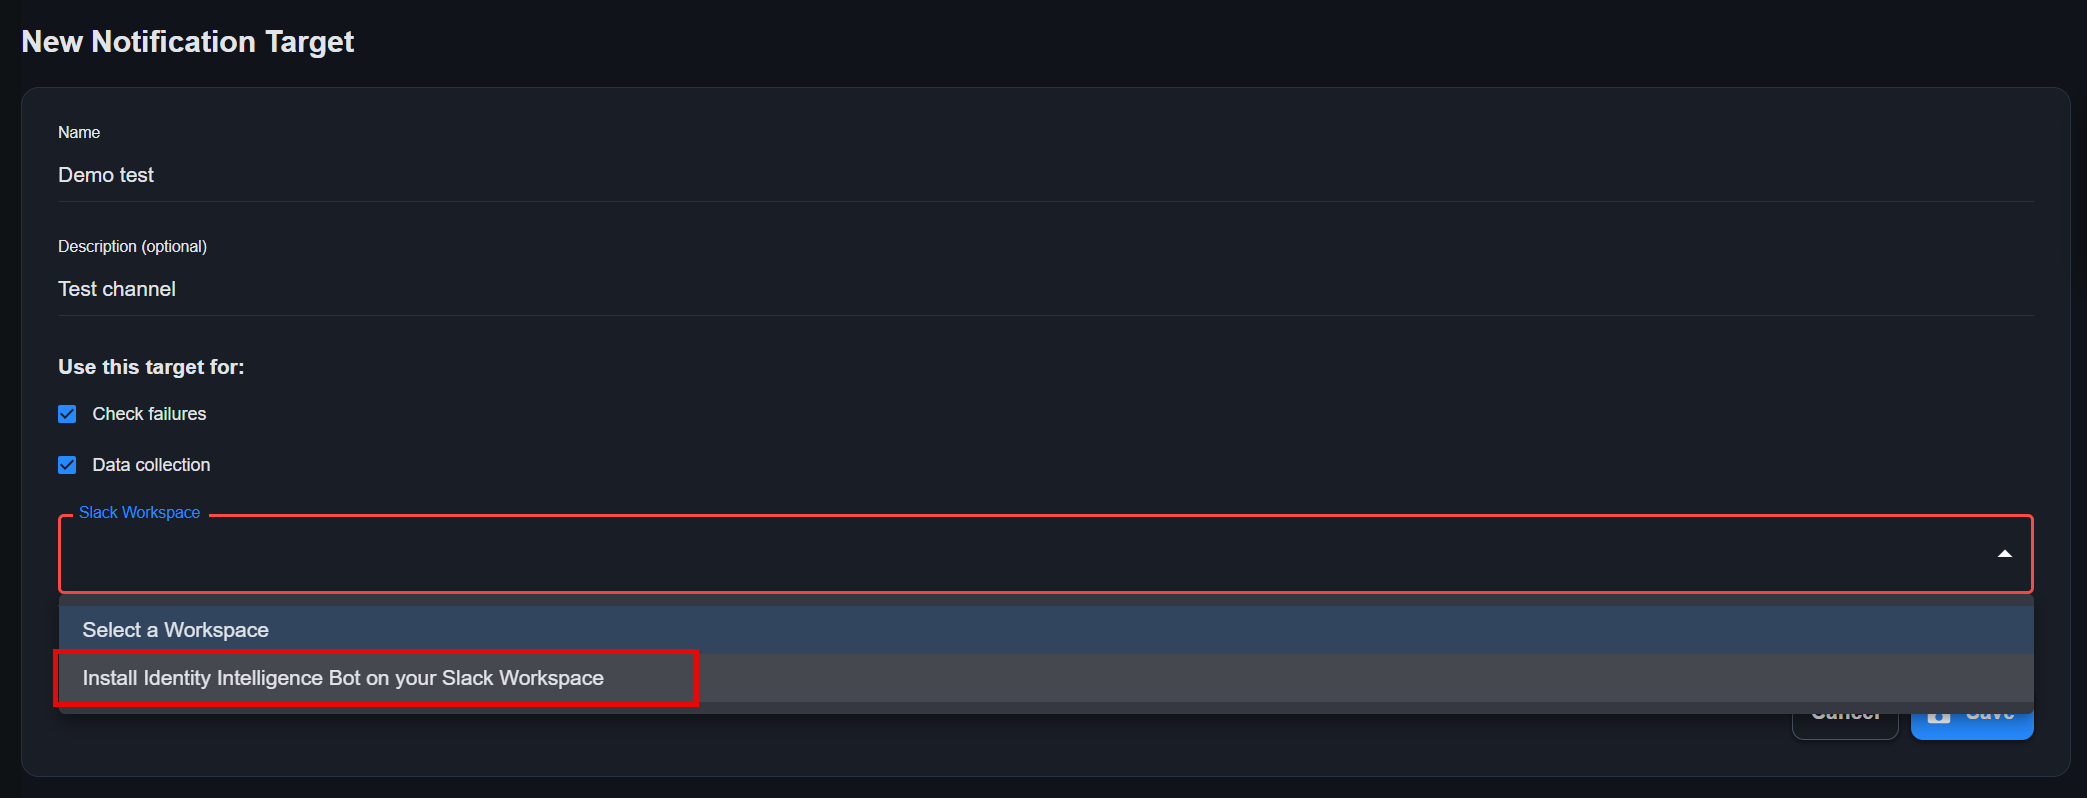
-
On the next screen, check the box to confirm that the Cisco Identity signed in user is a member of the target Slack org and then click Install Cisco Identity Bot for Slack button
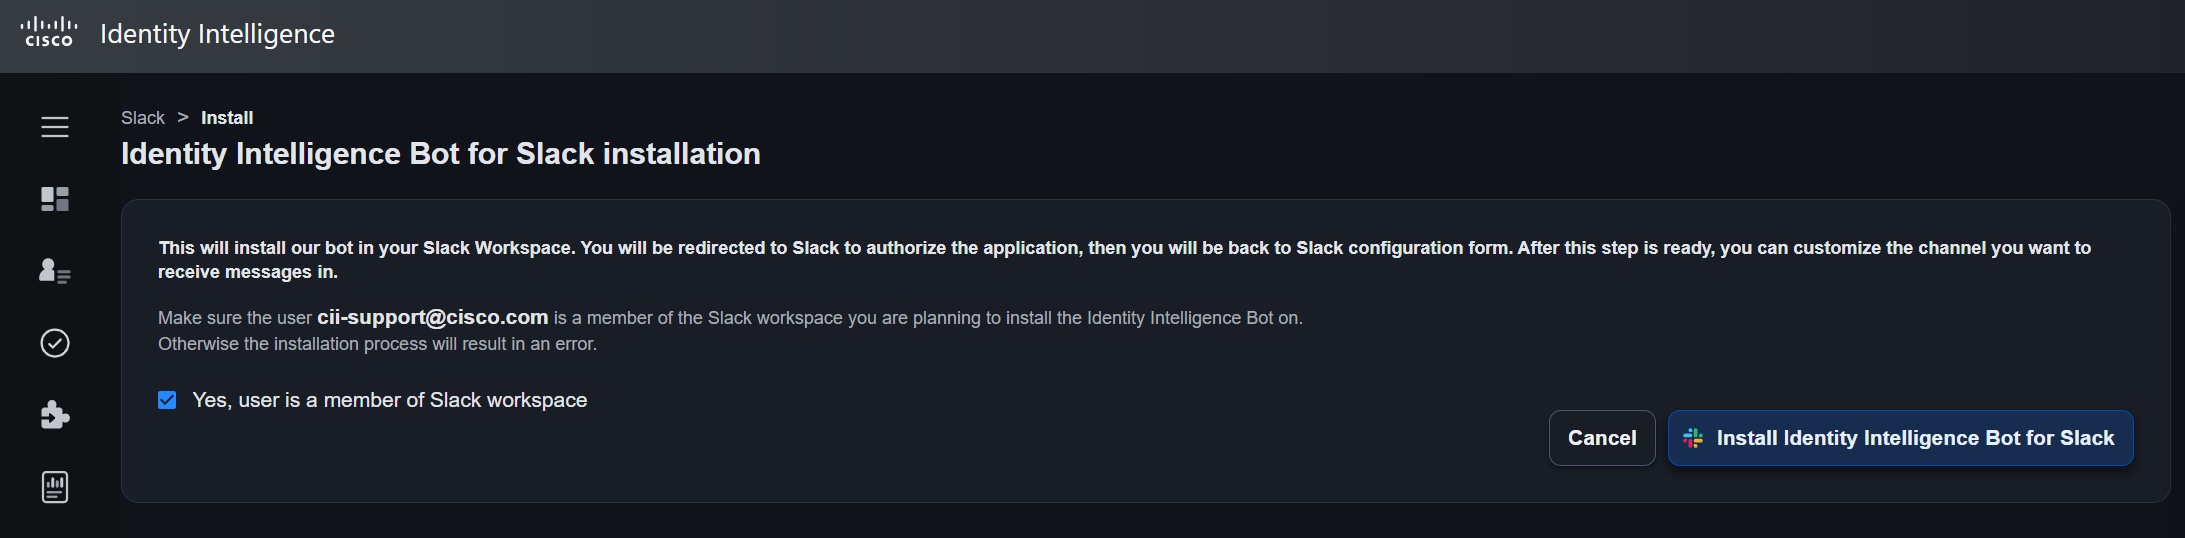
-
The browser will redirect Slack to accept permissions for the Cisco Identity Bot for Slack. Click Allow Note: * You must be signed into the Slack workspace where you want to install the Cisco Identity Bot for Slack. * To select a different workspace, use the drop-down menu in the upper right corner of the browser window.
- The browser will redirect back to the Cisco Identity console and the name of your Slack workspace will now show in the Notification Target configuration screen. Select a target Channel or an individual user (required).
-
Channel can be either a public channel OR a private channel the Cisco Identity Bot for Slack was added to already.
-
If you do not see the name of a private channel, add the Cisco Identity Bot to the channel first and then use the Please refresh channel button show below.
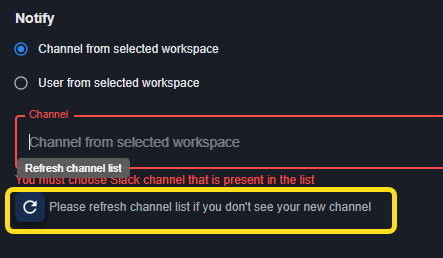
-
You can only add the Cisco Identity Bot for Slack to channels that your user on the Slack workspace can access.
- User is the email address of a member of the Slack workspace.
-
- As mentioned above, the "Use this target for" can be a combination of Failed Check and/or Data Collection.
- Failed Check means the notification target will be notified after checks are evaluated with the failed check results.
- Data Collection means the notification target will be notified after a manually-triggered collection of an integration ends, or whenever a manual or scheduled data collection fails with an error. (shown below)
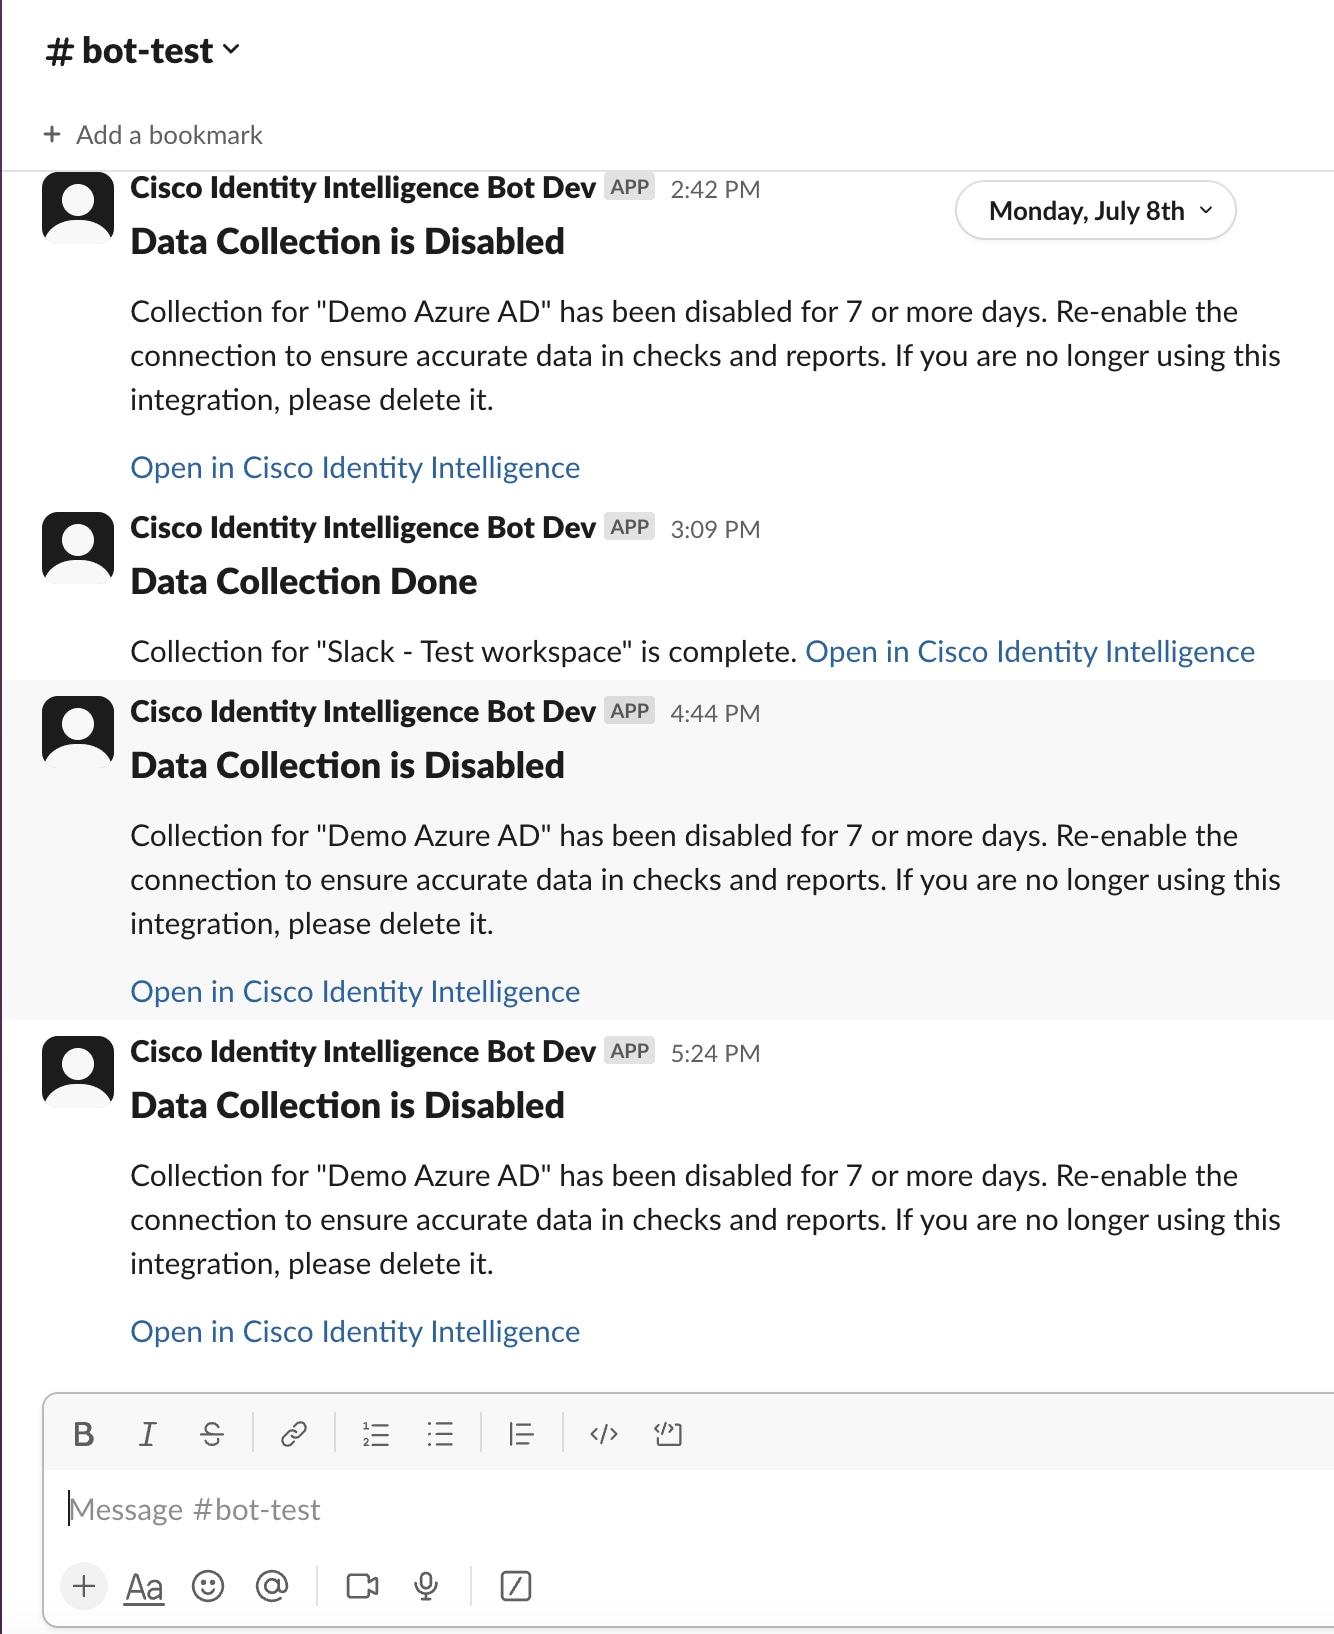
- Select checks manually: Check the box next to everything to check for. Use the search field to search for checks by name. When you're finished, click Add Checks
- Select checks by category: Check the box next to every Severity (or click All to select all severities), then check the box next to every Topic (or click All to select all topics).
- Click Save in the upper right corner of the screen. The new integration with Slack will now be shown on the main Integrations screen
-
Repeat this process for any other Slack orgs OR to create new notification target channels within the SAME Slack org. Cisco Identity can have multiple target notification channels configured for the same Slack org
As shown below, you can have multiple notification target types. To see the configured Checks for a particular target, click the blank space in that row to see the slide out on the right hand side.
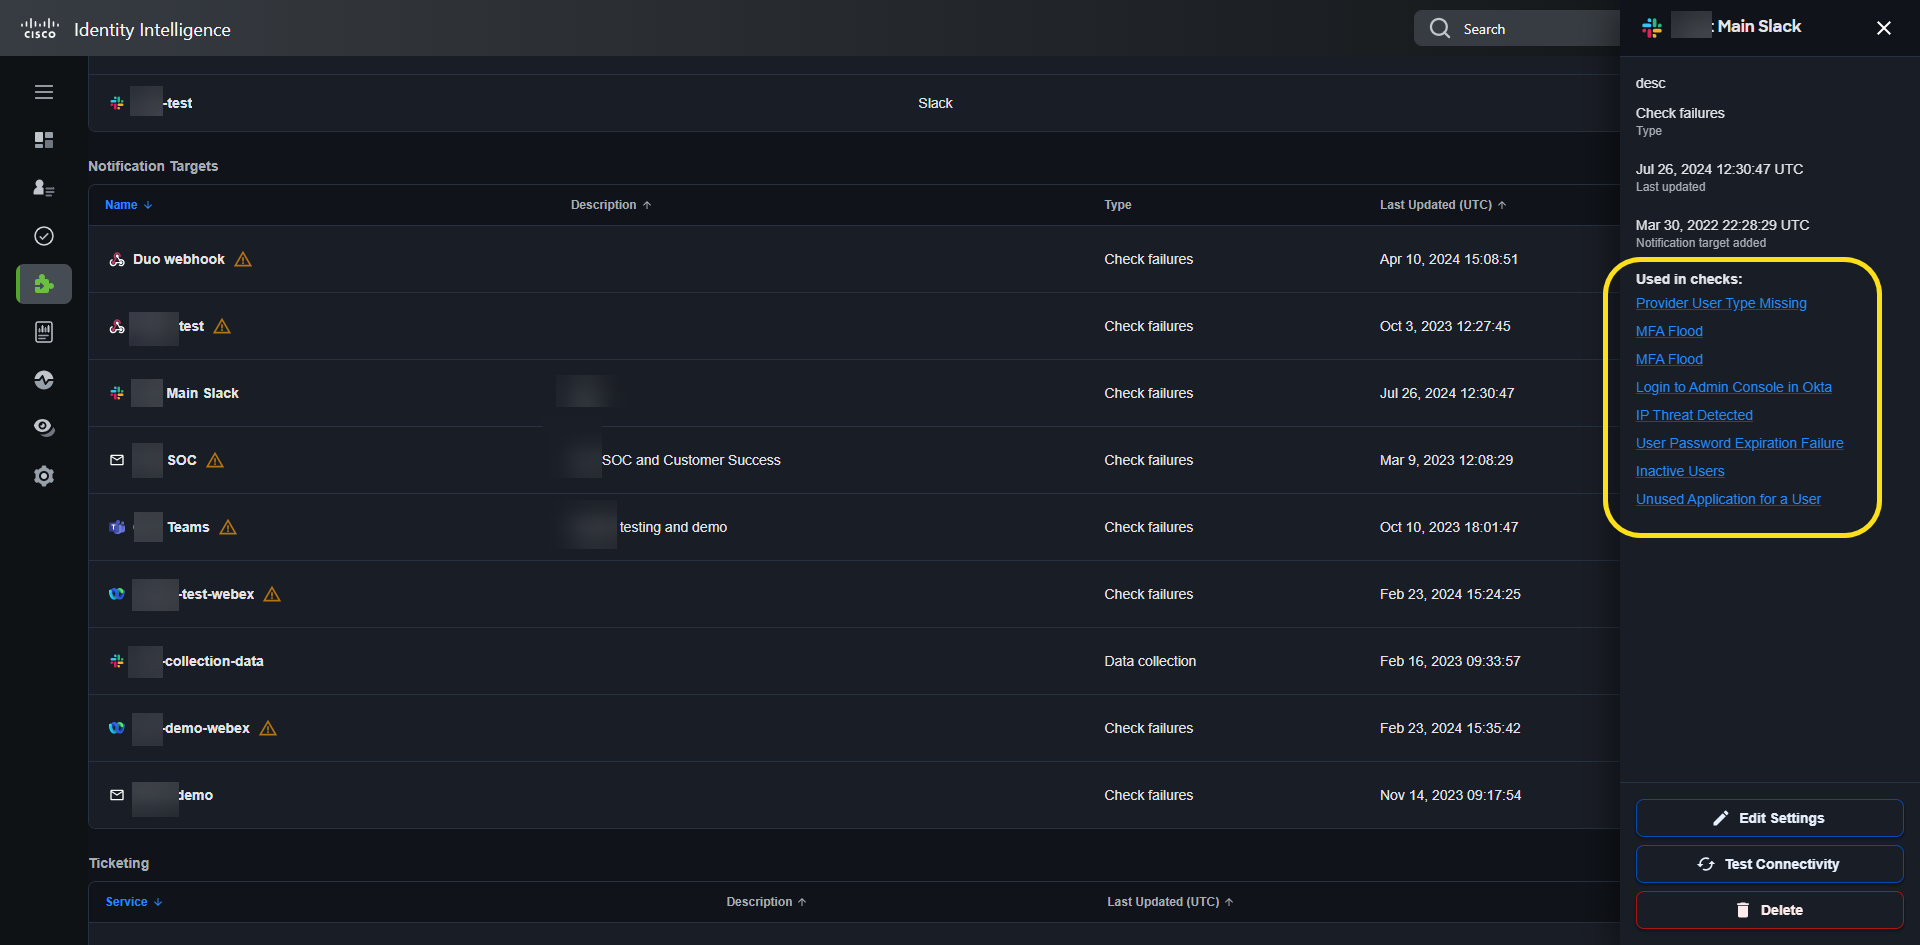
Enable Notifications via Slack for Checks
The next, optional, step is to enable Slack notifications for one or more checks. By default, a notification target configured for "Failed checks" will get a message for each check that has users failing the check conditions. A notification target can be configured to be notified only for specific checks.
Navigate to the Checks page from the left side menu and then click on a specific Check type, such as Weak MFA Configured.
On the right side of the page, check the box to enable notifications for the Slack workspace and channel you configured.
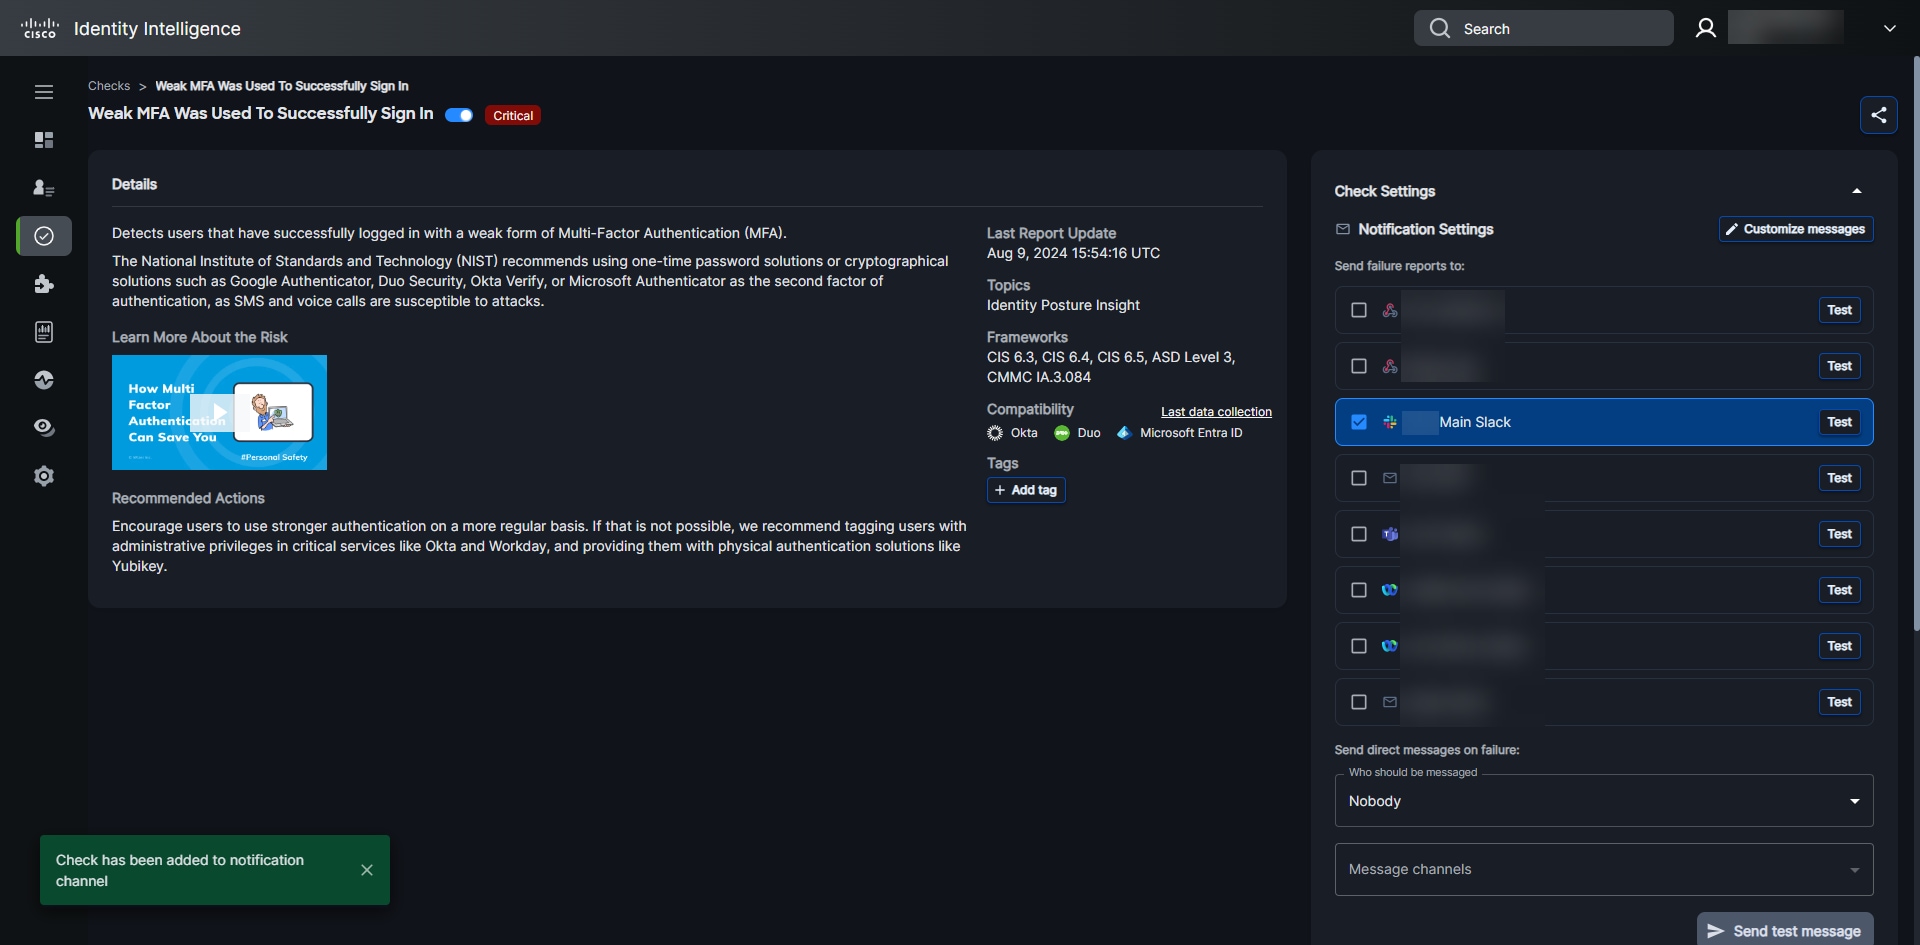
The Slack workspace will now show as enabled for that Check type.
Within each individual Check details pane, you will be able to pick one or more notification targets for Slack channels or individual users.
Test Slack Notifications
To test the connectivity of the Slack notifications app:
- Go to the Integrations page
- Select the Slack notification target or use the 3 dot menu button
- Select the Test Connectivity button in the side panel or the menu to send a "verification" test message to the configured Slack channel
To test what a custom message for a specific failing check will look like:
- Go to a specific check page and click Customize Messages
- Customize the message as desired and select Save
- Click the Test button for the Slack Notification Target to send a test message to the signed in user, NOT the configured channel, to verify the custom message looks as intended
Webex Notification
Overview
Cisco Identity can integrate with Webex to provide notifications and in some cases automation of frequently recurring identity tasks.
Goal
The goal of this document is to walk through configuration of a Webex space as a notification target and test notifications from one or more Cisco Identity identity health metrics.
Audience
This document is intended for identity security, IAM, and IT administrators responsible for integrations between identity, security, and collaboration platforms, including notifications, alerting, and incident remediation.
Next Steps
After Webex integration is complete, notifications can be tuned to meet your specific organizational needs.
Webex Integration
To enable Webex integration, you will need to add the Cisco Identity Bot for Webex to your Webex space and send an invite message to the bot.
Permission requirements within Webex
By default, any space moderator member can add people (and bots) to a space.
High-level Setup Steps
There are 3 steps you need to go through to set up the Webex integration with your Cisco Identity tenant
- Add the
Cisco Identity Botto your Webex space - Send an invite message to the bot from the Webex space
- Enable the Webex notification as a target in one or more Cisco Identity health checks
Add Cisco Identity Bot to Webex
To add the Cisco Identity Bot to Webex, perform the following steps.
- Login to the Cisco Identity Dashboard
- From the Integrations tab, click on Add Integration
- From the Notification Targets list, select Add Webex Target
- Copy the Cisco Identity Bot username
- Add the Cisco Identity Bot to your Webex space by inviting the bot username to the Webex space
- Click Generate Configuration Message to generate the bot invite message
- Copy the invite message shown on the page
- Mention the bot in your Webex space followed by the copied invite message
Configure Webex Notification Target Details
Webex will send the invite message to Cisco Identity, which will create a new Webex notification target, and send a message to the Webex space when setup is complete. The Webex notification target name will be the name of the Webex space it was added to.
After getting a message stating the notification target has been added to your Cisco Identity account, open the Integrations page in Cisco Identity to view the new Webex notification target. You may need to refresh the list of integrations to see the new notification target.
You can update the Webex notification target Name, Description (optional) and the use of this target.
- Uses can be a combination of Failed Check and Data Collection.
- Failed Check means the notification target will be notified after checks are evaluated with the failed check results.
- Data Collection means the notification target will be notified after a manually-triggered collection of an integration ends, or whenever a manual or scheduled data collection fails with an error.
Click Save in the upper right corner of the screen.
Enable Notifications via Webex for a Health Check
The next, optional, step is to enable Webex notifications for one or more checks. A notification target should be configured to be notified for specific checks to be operational.
Navigate to the Checks page from the left side menu and then click on a specific Check type, such as Weak MFA Configured.
On the right side of the page, check the box to enable notifications for the Webex notification target you configured.
The Webex workspace will now show as enabled for that Check type.
Test Webex Notifications
To test the connectivity of the Webex notification target:
- Go to the Integrations page
- Select the Webex notification target or use the 3 dot menu button
- Select the Test Connectivity button in the side panel or the menu to send a test "verification" message to the configured Webex space
To test what a custom message for a specific failing check will look like:
- Go to a specific check page and click Customize Messages
- Customize the message as desired and select Save
- Click the Test button for the Webex notification target to send a test message to the signed in user, NOT the configured space, to verify the custom message looks as intended
Adding Multiple Webex Spaces
To add more than one space as a notification target, repeat the process above starting with Add Integration to add a new Webex notification target.
Within each individual Check details pane, you will be able to pick one or more Webex target integrations.
Removing the Cisco Identity Bot from a Webex space
Should it be necessary to delete the Cisco Identity Bot from your Webex space follow the following steps:
- Login to the Cisco Identity Dashboard
- From the Integrations tab, click on the three dots menu next to the Webex notification target you with to delete
- Click Delete
- Remove the Bot from the space
Webhooks
Overview
In addition to notification destinations like Microsoft Teams, Slack channels, and email destinations, Cisco Identity supports webhooks as a target for Failed Check findings.
This article explains how to configure webhooks in Cisco Identity and provides several basic examples.
Requirements
The following is required to leverage webhooks with Cisco Identity -
- IMPORTANT: The webhook destination, such as a SIEM like Splunk Enterprise Security, must have a valid public trusted certificate. At this time, a certificate from a private PKI will not work.
- If you are filtering inbound network traffic to the destination, please add the AWS IP ranges for your specific Duo-Cisco Identity region (e.g. Europe) as outlined here.
- Moderate familiarity with webhooks (external overview) as a method of platform-to-platform communication
- A platform capable of receiving webhooks and ideally parsing a JSON payload for resulting categorization or desired action(s)
Design Considerations
To successfully leverage Cisco Identity webhooks, it is best to first fully conceptualize a desired outcome when a user object within the Cisco Identity platform is flagged for a particular Check.
A basic use case might be:
- Configure a webhook destination to an automation platform, such as Okta Workflows or a SOAR solution and assign it to a particular Cisco Identity Check, such as No MFA
- Once a day, Cisco Identity will send an event to a webhook with a payload including the list of new users failing this check
- For each user account in the list, send an email from a specific company-specific email address with instructions for the user to enroll in MFA
The possibilities are endless and very specific to the context of the Cisco Identity Check upon which you want to take action.
Also, we send test messages labeled DetailType:WebhookTest during the webhook connectivity test. You can see the value in the existing docs.
Consumers should filter these to prevent unintended actions.
API Authorization
One key design consideration is how the Cisco Identity webhook communication will authenticate and be authorized to the recipient platform. Cisco Identity supports the following methods:
- Basic (username and password)
- API Key
- OAuth Client Credentials
Each of these types are explored in more detail in the examples below. The main determining factor here is the type(s) of authorization supported by the target platform.
Cisco Identity Configuration
To create a webhook notification integration, perform the following steps:
-
Navigate to Integrations -> Add Integration -> Webhooks
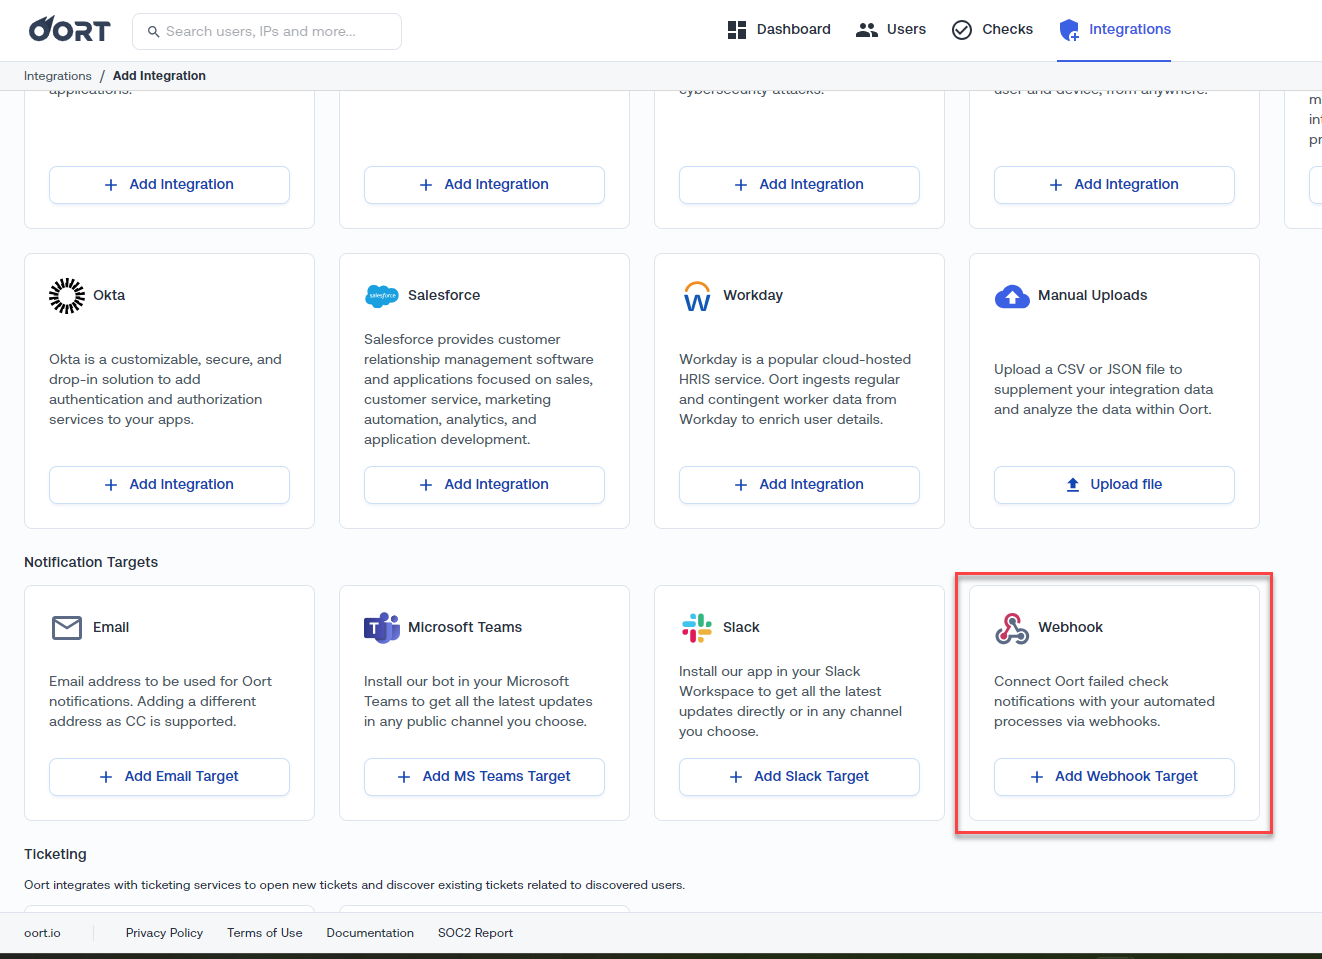
-
Provide the following:
- Display name
- Description (optional)
-
Webhook URL
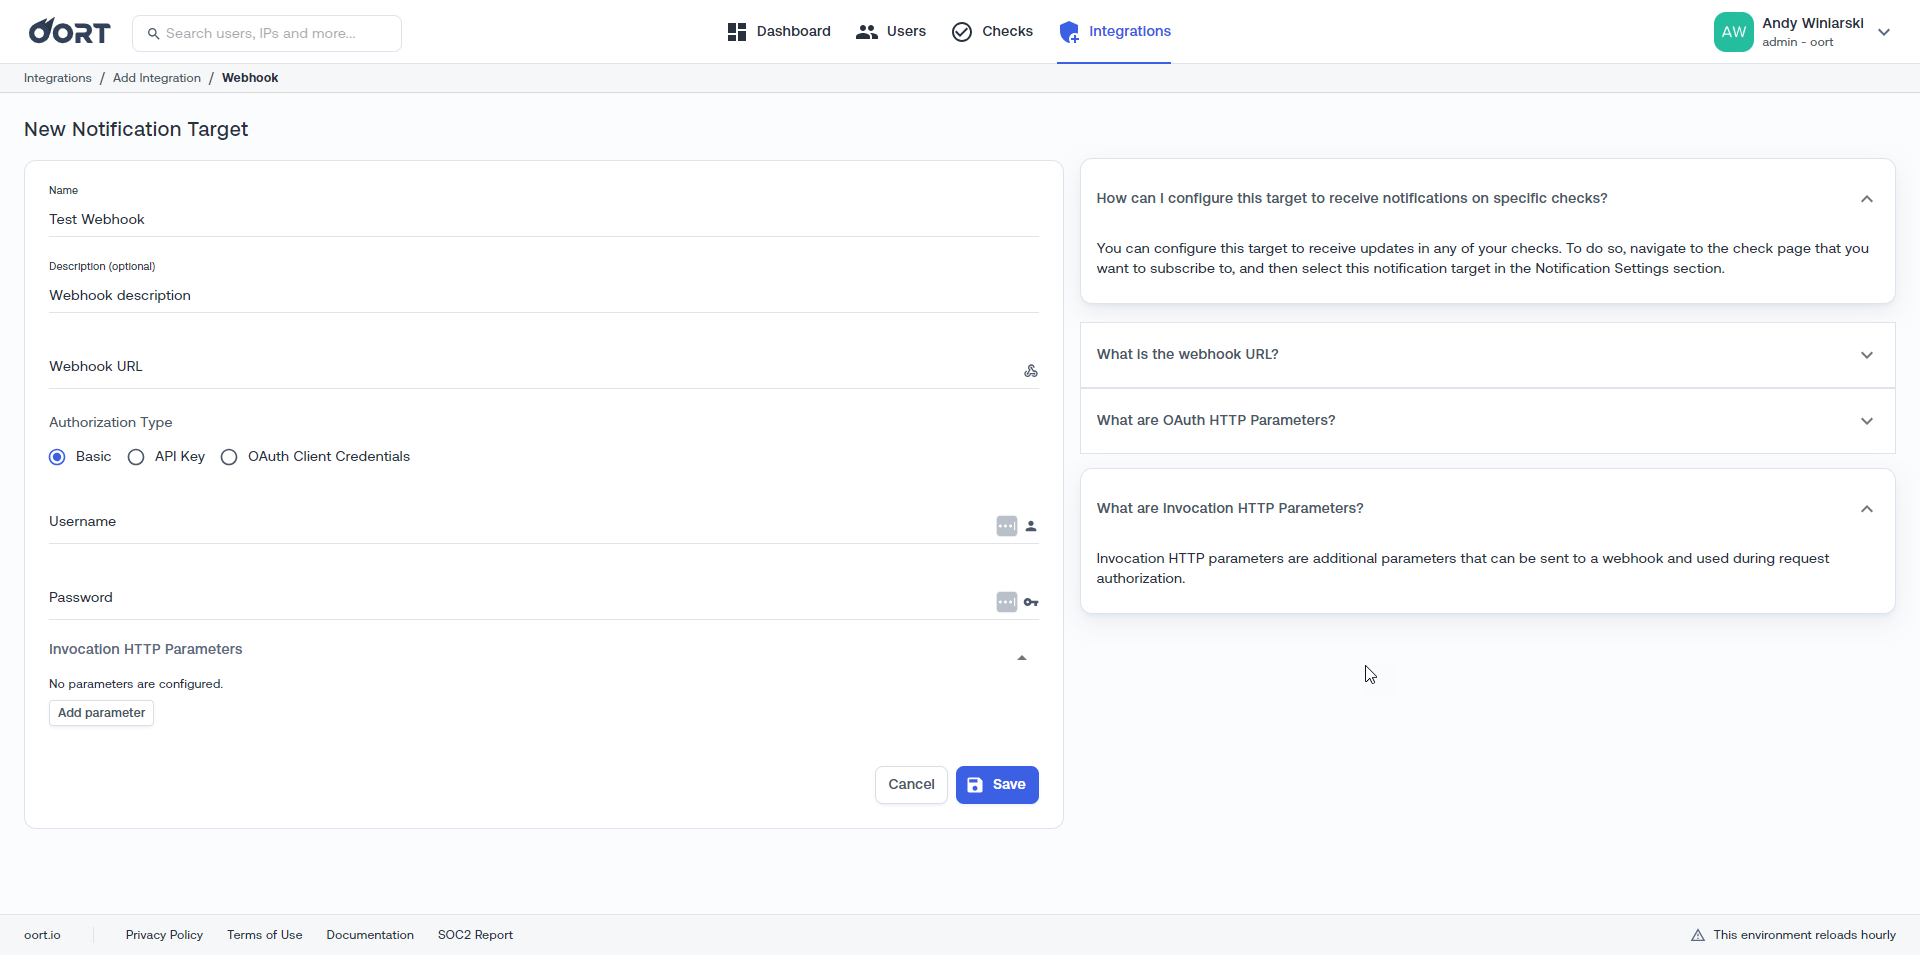
-
Choose the appropriate Authorization Type for your webhook integration
- Basic - provide the Username and Password, as shown above
-
API Key - provide the API key name and API key value
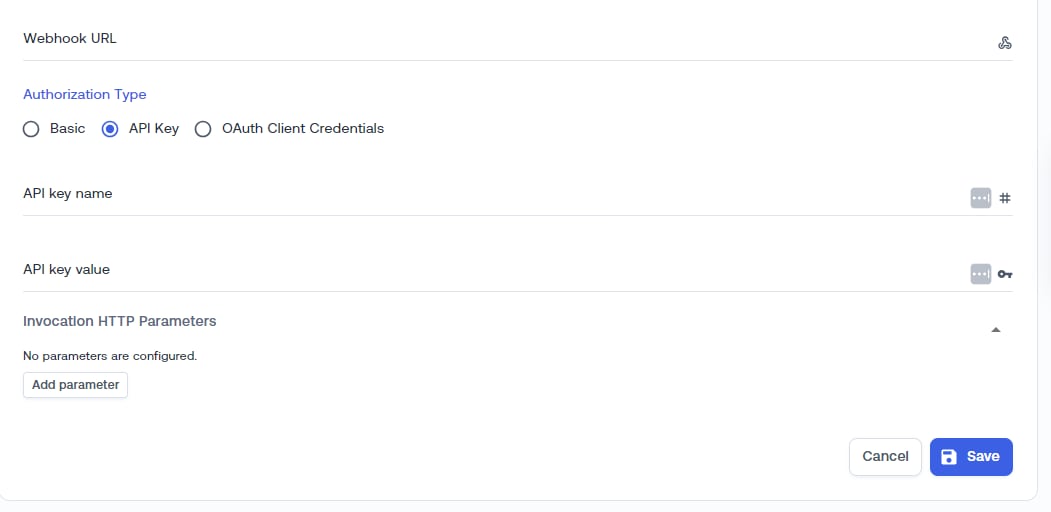
-
OAuth Client Credentials
- Enter the Authorization endpoint URL
- Select HTTP method - POST, PUT, GET
- Enter Client ID and Client secret
- Add any necessary OAuth HTTP Parameters - OAuth HTTP parameters are additional credentials used to sign the request to the authorization endpoint to exchange the OAuth Client information for an access token.
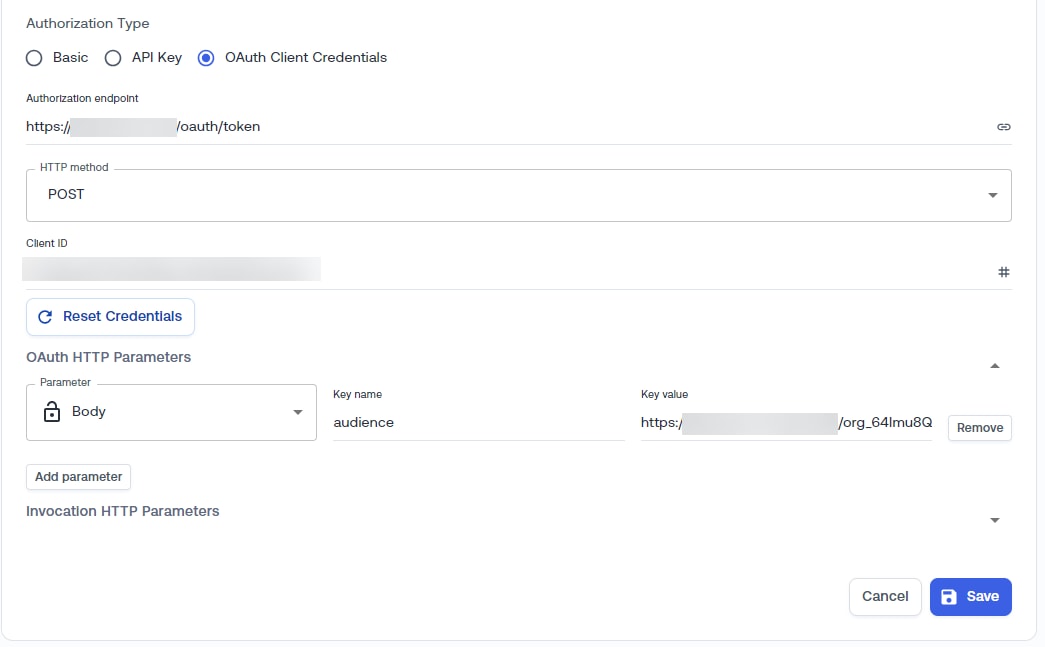
-
Add any necessary Invocation HTTP Parameters - Invocation HTTP parameters are additional parameters that can be sent to a webhook and used during request authorization.
Click one of the following:
-
Select checks manually: Check the box next to everything to check for. Use the search field to search for checks by name.
When you're finished, click Add Checks and select the check box next to each check to add. * Select checks by category: Check the box next to every Severity (or click All to select all severities), then check the box next to every Topic (or click All to select all topics). * Click All failed checks to limit notifications to failed checks only.
-
-
Click Save.
Testing the Webhook Integration
NOTE: we send test messages labeled DetailType:WebhookTest during the webhook connectivity test.
Consumers should filter these to prevent unintended actions.
To test the connectivity of the Webhook:
- On the Integrations page, find the row under Notifications section corresponding to the Webhook notification target you just created
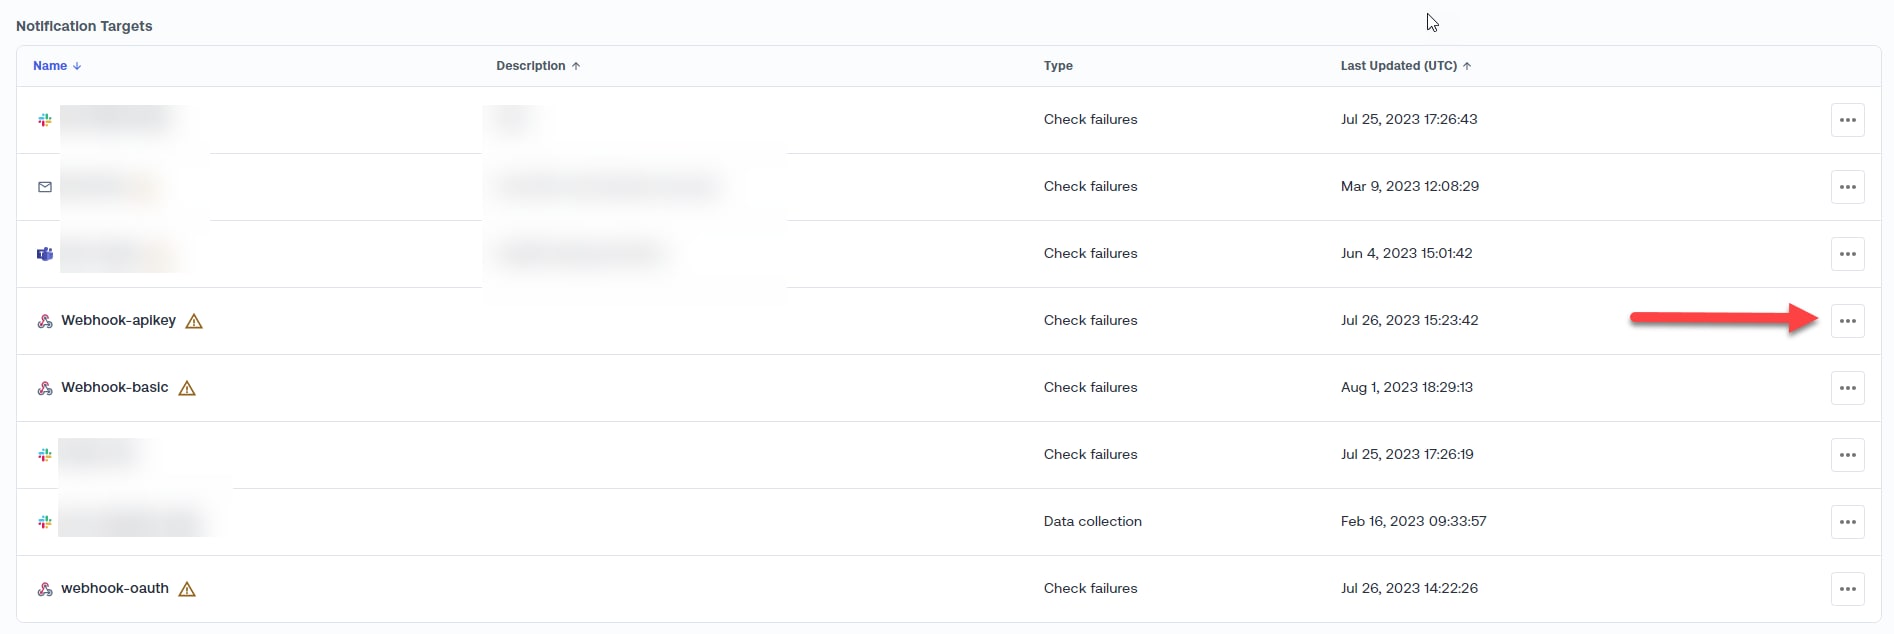
- Select the Webhook notification target or click 3-dot menu on the righthand side and select Test Connectivity
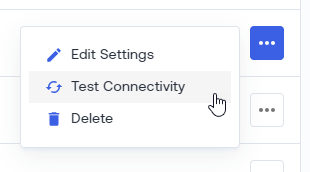
- This will send a basic test message to the webhook destination to confirm that connectivity is successful. The contents of the message will be:
{
  "version": "0",
  "id": "9d26ad04-2db5-e72c-db29-b5e4935e3ca0",
  "detail-type": "WebhookTest",
  "source": "ad4ccde2-4c41-45e5-92be-8e4af81a9796__5c836a54",
  "account": "227542035969",
  "time": "2025-04-20T07:06:56Z",
  "region": "us-east-2",
  "resources": [],
  "detail": {
    "id": "b54e4399-d7ad-45d3-9526-424a18c5ddd3",
    "checkId": "oort-test-check-id",
    "title": "Cisco Identity Failing Check Event Test",
    "severity": "critical",
    "login": "user1@example.com",
    "explainabilityDetails": [
      {
        "key": "userTitle",
        "value": "Tester"
      },
      {
        "key": "userTrustLevel",
        "value": "QUESTIONABLE"
      }
    ],
    "userTrustLevel": "QUESTIONABLE",
    "checkTopics": [
      "identity_threat_insight"
    ],
    "checkTags": [
      "tag1",
      "tag2"
    ],
    "frameworks": [
      "framework1",
      "framework2"
    ],
    "published": "2025-04-20T07:06:56.251Z"
  }
}
To test what a custom message for a specific failing check will look like:
- Go to a specific check page and click Customize Messages
- Customize the message as desired and select Save
- Click the Test button for the Webhook Notification Target to send a test message to verify the custom message looks as intended
Enabling Webhook Notifications for Checks
When the webhook integration is created, it is not assigned to any check notifications by default. Nothing will be sent via the webhook until it is enabled in the desired Cisco Identity Check(s).
To enable it, navigate to the desired Check details page and expand the dropdown next to Check Settings on the top-right corner of the page. Select the checkbox for the webhook target that you would like enabled for the given check.
New Features
2024.09.19
Cisco Identity has added `checkTags` to the webhook event payload. This allows organizations to add custom tags to specific checks (see below), and then pass these through the events to their webhook destination for further automation or classification.
Example Event Payload
As of April 17, 2025, we have added the following fields to the new payload:
• login - the login value of the user failing the check • userTrustLevel - the trust level of the user https://docs.oort.io/user-trust-level • checkTopics - as appears on the check page in Cisco Identity • frameworks - as appears on the check page in Cisco Identity • checkTags - tags added to the check by the customer
An example of the payload for new users failing the Unused Application for a User check would look as follows:
{
  "version": "0",
  "id": "3a9f6ca8-08af-43f0-827a-ceda239d16f9",
  "detail-type": "FAILED_CHECK",
  "source": "908040f3-da74-4a58-8029-e5b57f80c5e8__969f9802",
  "account": "227542035969",
  "time": "2025-04-10T06:26:40Z",
  "region": "us-east-2",
  "resources": [],
  "detail": {
    "id": "8ca60986-39ae-4b43-b512-f594271a3971",
    "checkId": "unused-user-apps",
    "title": "Unused Application for a User",
    "severity": "low",
    "login": "zdrojewski.ryker@simubiz.com",
    "checkTags": [],
    "checkTopics": [
      "compliance",
      "identity_posture_insight"
    ],
    "frameworks": [
      "nist_csf_pr_ac_4"
    ],
    "explainabilityDetails": [
      {
        "value": "devops engineer",
        "key": "userTitle"
      },
      {
        "value": "FAVORABLE",
        "key": "userTrustLevel"
      },
      {
        "value": "{\"applications\":[{\"name\":\"workday\"},{\"name\":\"five9 plus adapter for salesforce\"},{\"name\":\"workday sandbox\"}]}",
        "key": "context"
      }
    ],
    "userTrustLevel": "FAVORABLE",
    "published": "2025-04-10T06:26:40.577Z"
  }
}
In most cases, the receiving platform will need to do some level of parsing of this content, unless the intent is simply to store the information in a 3rd party SIEM or security data lake. (Note that Cisco Identity has direct integrations for [Azure Sentinel] or Snowflake security data lakes.)
Direct Message payload example
An example of the payload for a direct message to a specific end user, or the end user's manager, who is failing a check would look as follows:
{
  recipient: recipientEmail,
  checkId: checkMetadata.id,
  title: checkMetadata.title,
  severity: checkMetadata.severity,
  directMessage,
  referenceVideoUrls: WizerVideoUrl
}
Splunk
Overview
As organizations face growing complexity in identity management, Cisco Identity provides a centralized platform to detect, monitor, and gain actionable insights into identity-based threats. By correlating identity data and leveraging AI-powered Identity Threat Detection and Response (ITDR) and Security Posture Management, it offers deep visibility into user behaviors and risks, enabling security teams to mitigate threats proactively. To channel these critical insights directly into your security operations workflow, the Cisco Security Cloud application for Splunk offers a seamless integration engineered for reliability and actionability. It provides comprehensive event logging with assigned severity levels to help teams prioritize efforts, and crucially, it pinpoints the specific user information for each failed security check, delivering the granular, context-rich data needed to maintain operational integrity and accelerate response.
Why Is This Integration Useful for You?
Integrating Cisco Identity with Splunk empowers your security operations by centralizing critical identity context within your primary analysis platform. This provides two key benefits:
- Deeper User Insights: By sending Cisco Identity detections and events to Splunk, your security teams can correlate this data with other sources (e.g., firewall logs, endpoint data). This enables deeper analysis and helps you detect, investigate, and respond to sophisticated threats more effectively.
- Faster Incident Response: Centralizing identity data in Splunk allows you to leverage its powerful search capabilities and automate workflows. This accelerates investigations, reduces manual effort, and shortens the time from detection to remediation.
Prerequisites
Before you begin, please ensure you have the following:
- Administrative access to your Cisco Identity
- Administrative access to your Splunk Enterprise or Splunk Cloud (Minimum Cisco Security Cloud version 3.0.0, Splunk Enterprise & Splunk Cloud 9.4, 9.3, 9.2, 9.1)
- The Cisco Security Cloud application installed from Splunkbase
- Appropriate permissions to configure a Splunk HTTP Event Collector (HEC) or manage AWS S3 buckets and Splunk data inputs
Configuration Methods
There are two primary methods to forward data from Cisco Identity to Splunk. Choose the method that best fits your operational needs and infrastructure.
- Method 1: Webhooks
- Method 2: AWS S3 Bucket (Highly recommended for large-scale organizations)
Test Connectivity Between Splunk and Cisco Identity
In Splunk:
-
Verify Test Application in Splunk:
- Navigate to Splunk and ensure the test application (test_splunk_demo) is listed in the My Apps table.
- Go to App Analytics and select the Cisco Identity Dashboard from the list of available dashboards.
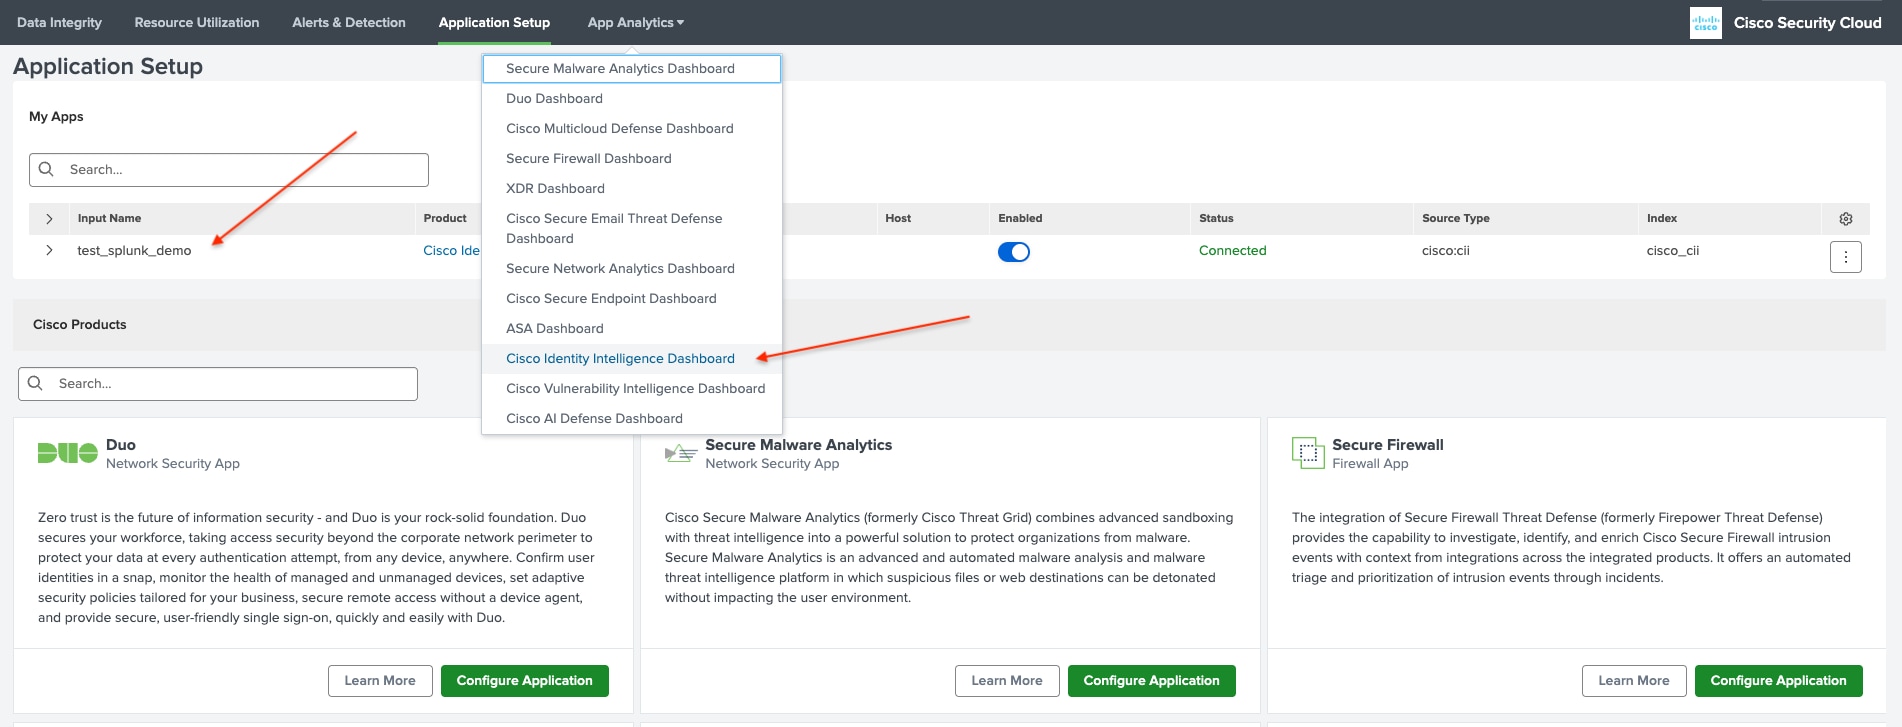
-
Check the Dashboard Data:
- If this is your first time using the dashboard, it is expected that no data will be displayed.
- If there is existing data, you could filter it by the index if you used a unique index during the setup process.
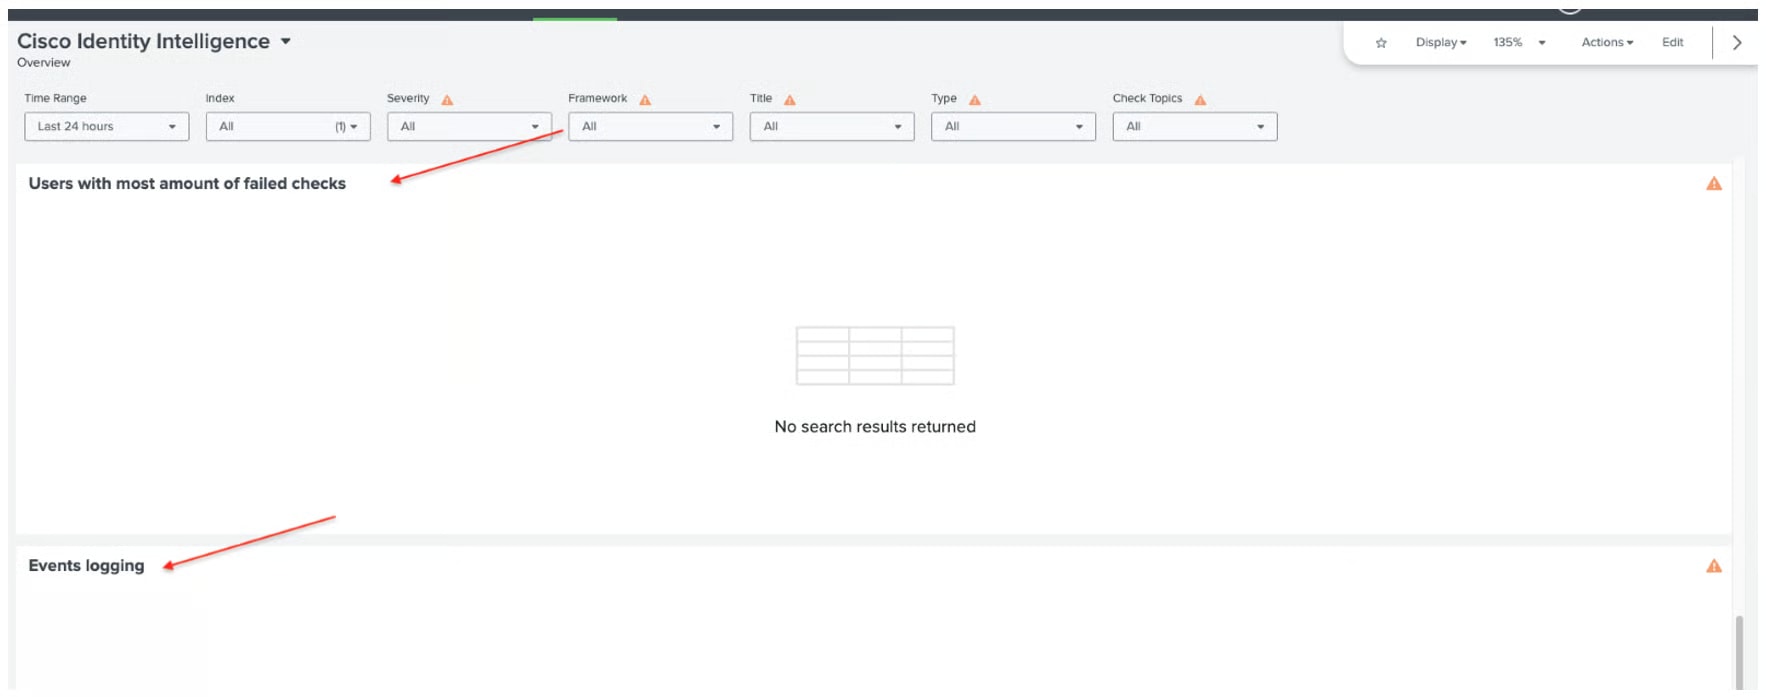
In Cisco Identity:
- Go to Cisco Identity and navigate to the Integrations section.
- Under Notifications Targets table locate the integration entry:
- If you are using Webhook, search for the input named test_splunk_demo
- If you are using AWS S3, search for the input name s3-splunk-cii-demo-set-up (or s3-\
) - Click on the three dots (menu icon) next to the integration entry.
- Select Test Connectivity from the menu options.
- A popup will appear in the lower left of the screen indicating the status Success
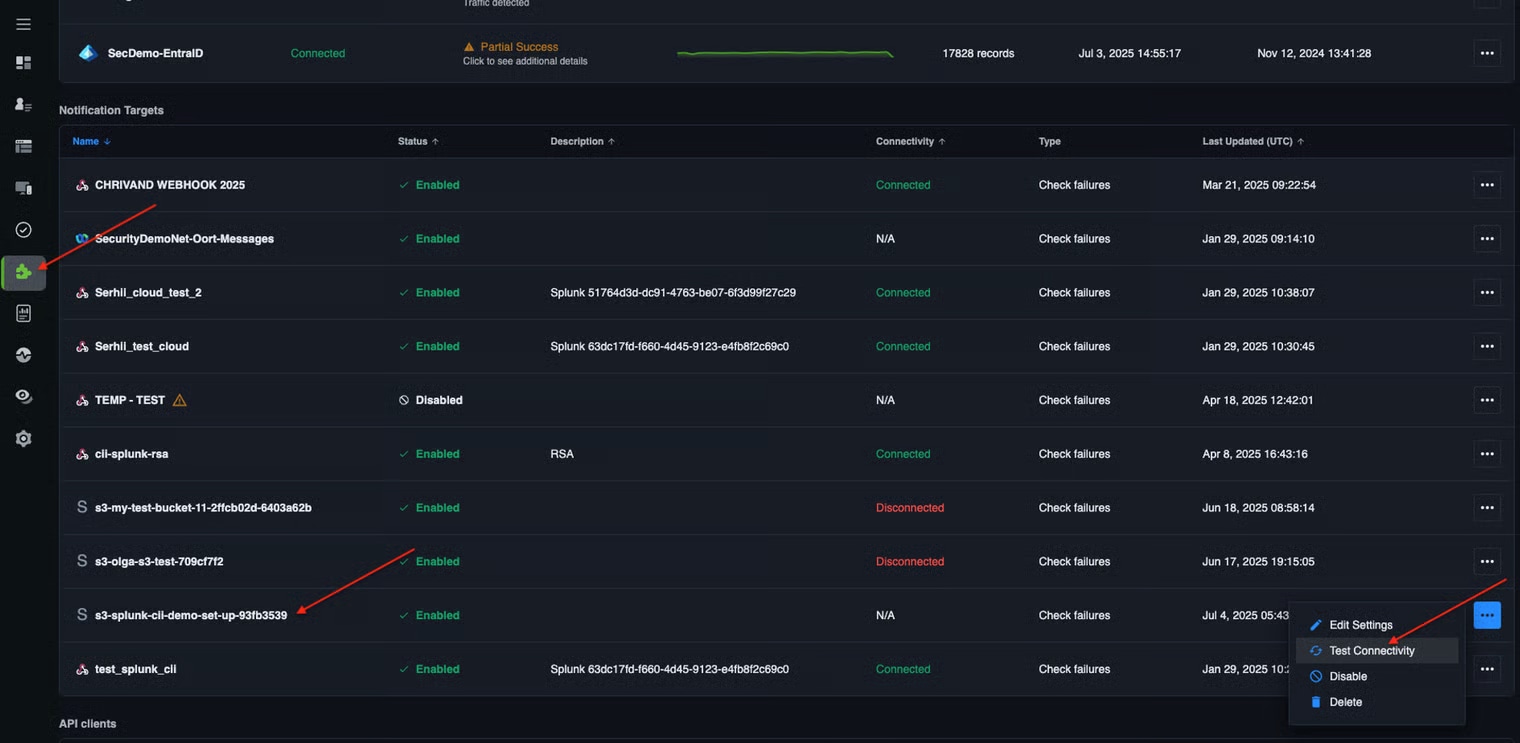
View the Test Event in Splunk
- Go back to the Cisco Identity Dashboard in Splunk.
- Look for the test event that was activated during the connectivity test.
- Upon successful integration, the test event should be visible within the dashboard.
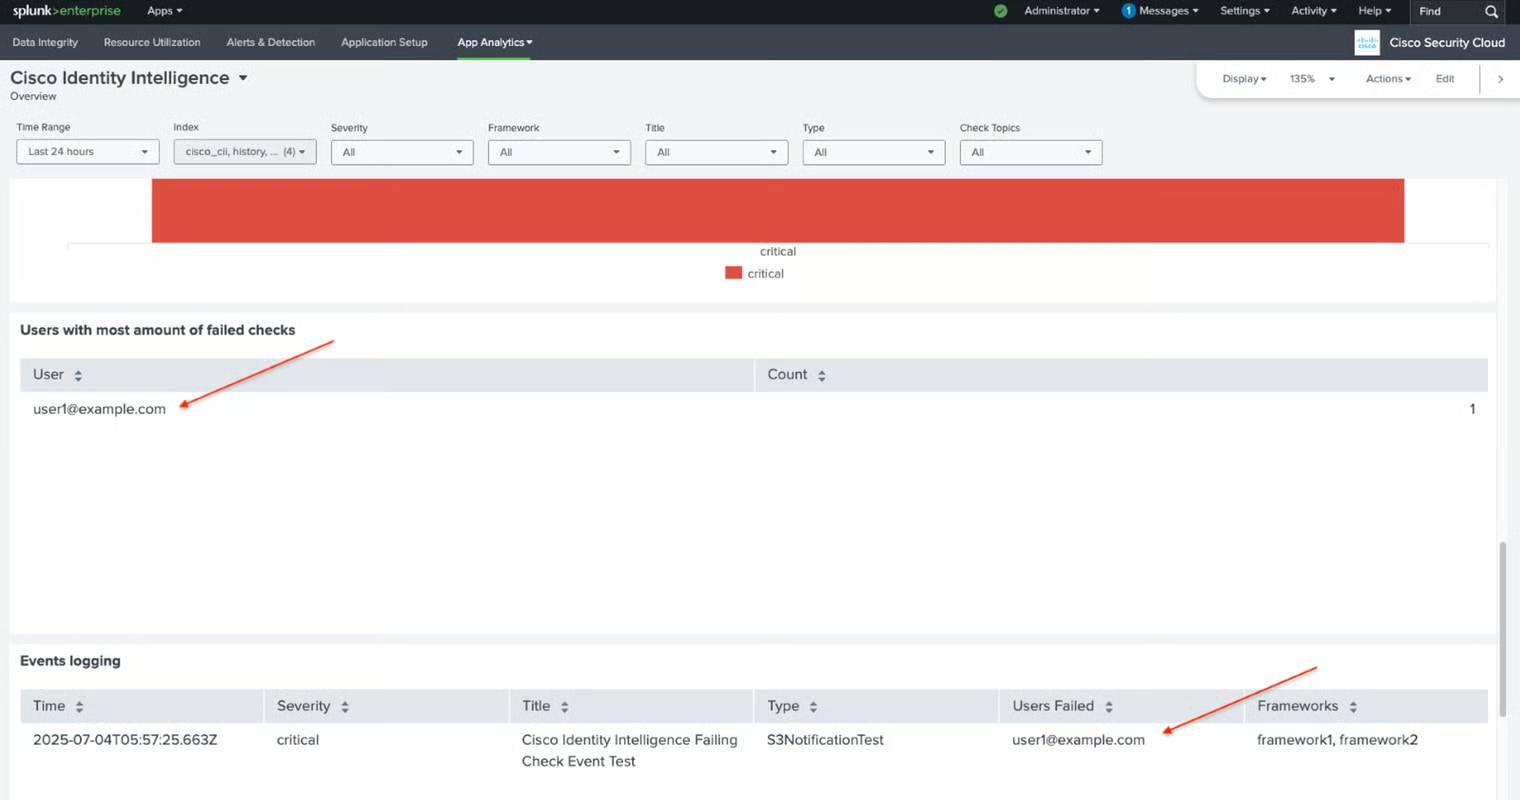
AWS S3 Splunk Integration
Overview
To establish an integration between Splunk and Cisco Identity, please refer to the setup guide section in this document. This integration method utilizes the Splunk Add-on for AWS to ingest log data from your AWS S3 bucket. This method is frequently employed for batch processing of historical or high-volume log data for large organizations. It requires setting up AWS credentials and the accurate specification of the SQS queue region and URL.
Prerequisites
Before you begin, please ensure you have the following:
- Administrative access to your Cisco Identity
- Administrative access to your Splunk Enterprise or Splunk Cloud
- The Cisco Security Cloud application installed from Splunkbase
Note: The minimum required version of the Cisco Security Cloud application is 3.4.0 or higher
- The Splunk Add-on for AWS application installed from Splunkbase
- Appropriate permissions to manage AWS S3 buckets and Splunk data inputs
Setup Guide
Generate External ID
- In Cisco Identity, create/select an S3 notification target.
- On Initial Setup, click Generate External ID.
- Copy/save that value.
- Use a fresh generated ID per S3 notification target
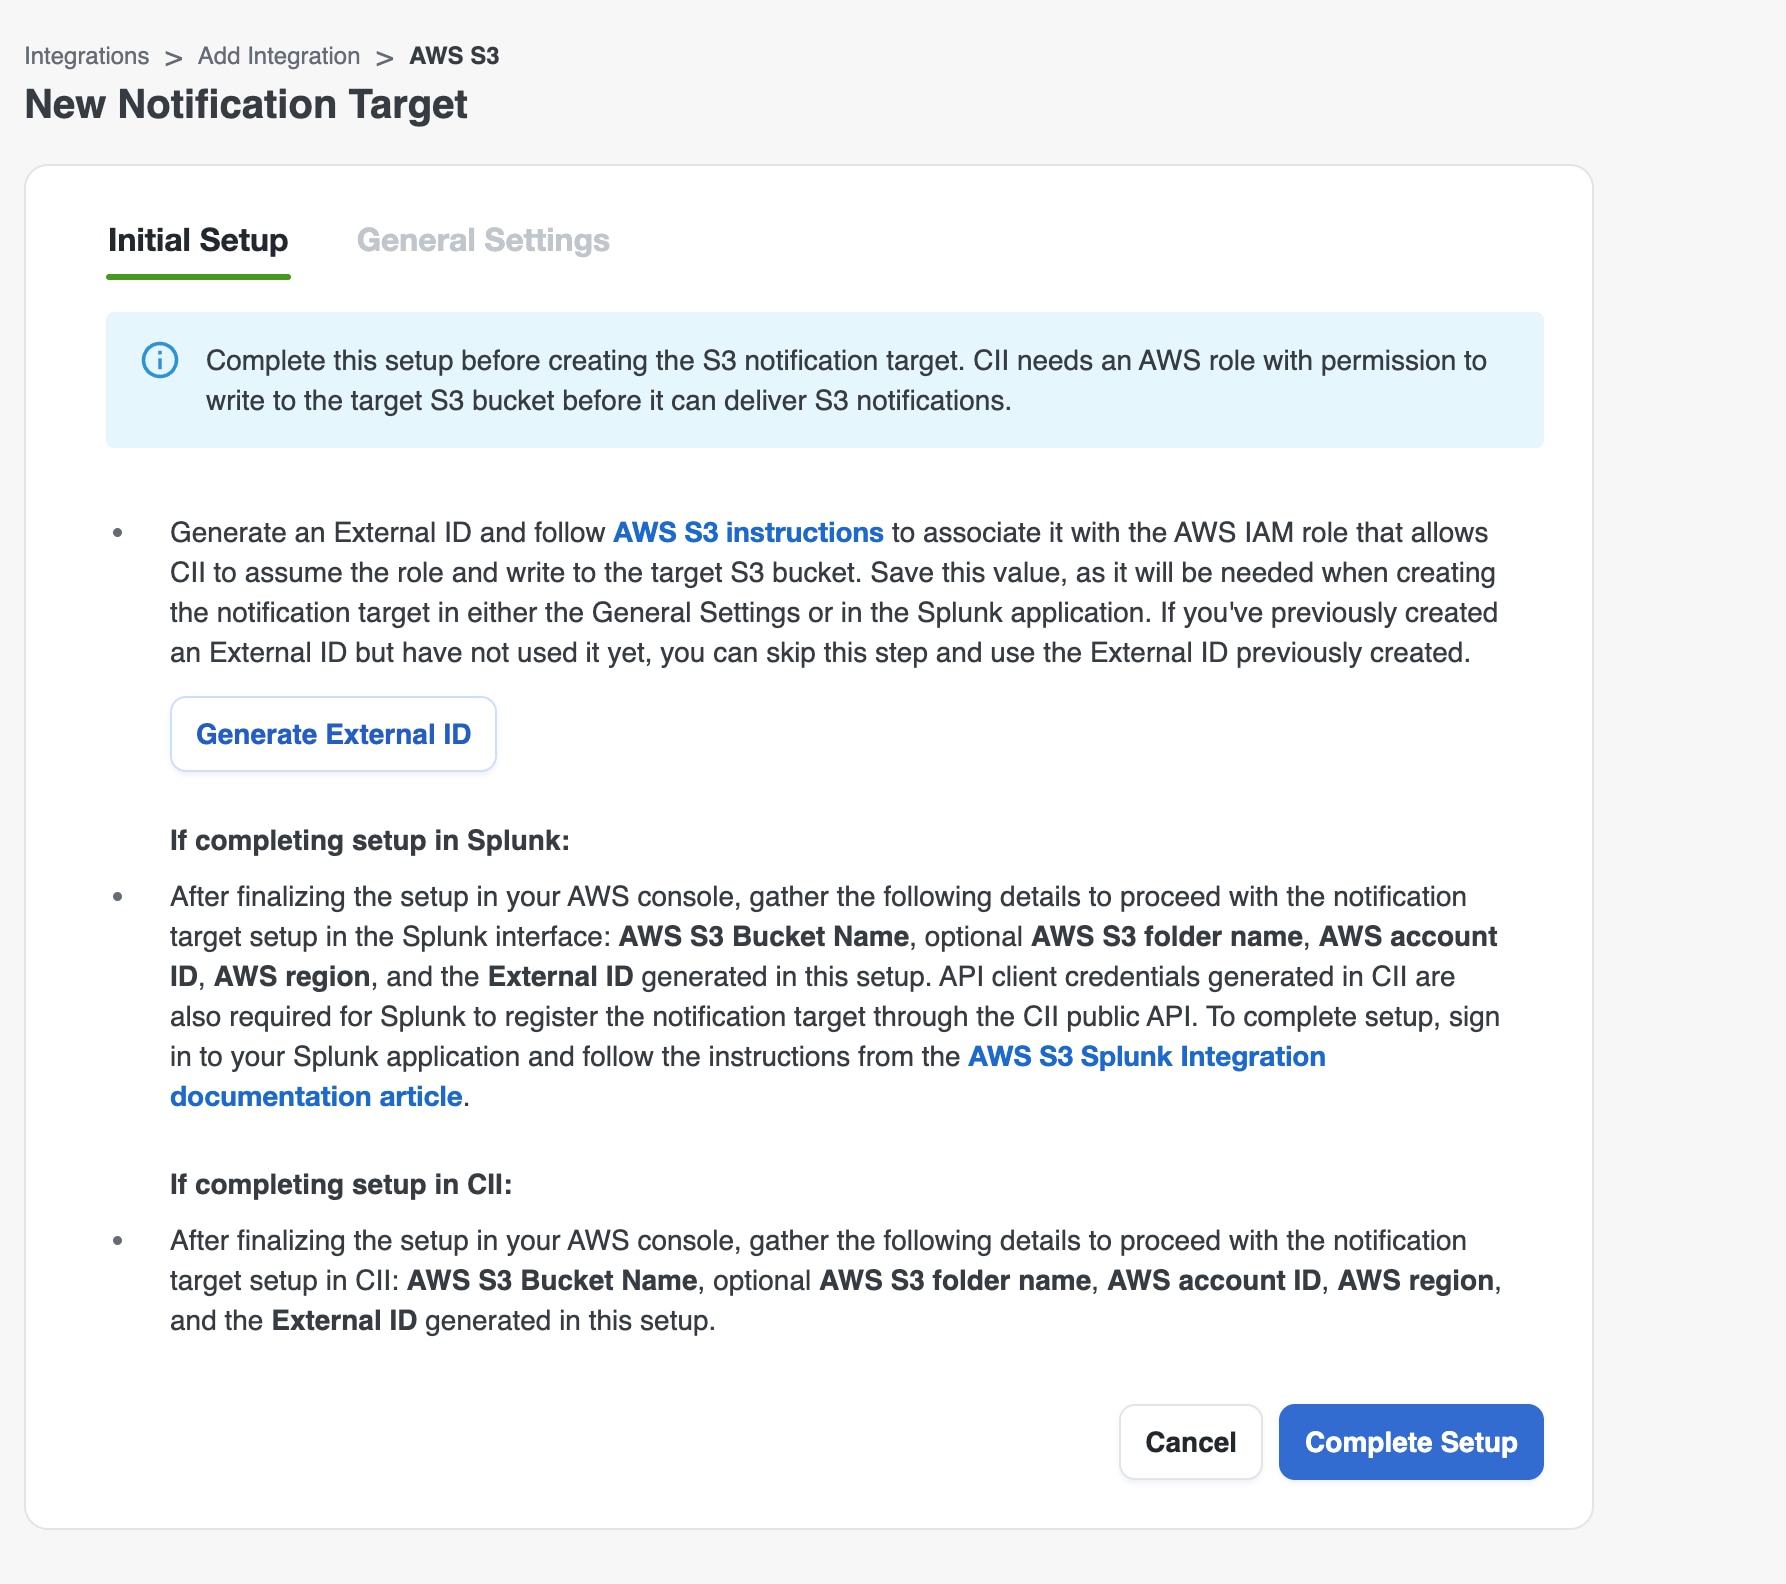
Configure AWS S3
-
Create an S3 Bucket
a. Go to the Amazon S3 console
b. Click Create bucket
c. Provide a name for the bucket, such as "splunk-cii-demo-set-up"for this example. Keep this name handy, it will be used throughout the setup process.
d. Click Create bucket to complete the process
-
Create an IAM Policy
a. Navigate to IAM > Policies > Create Policy
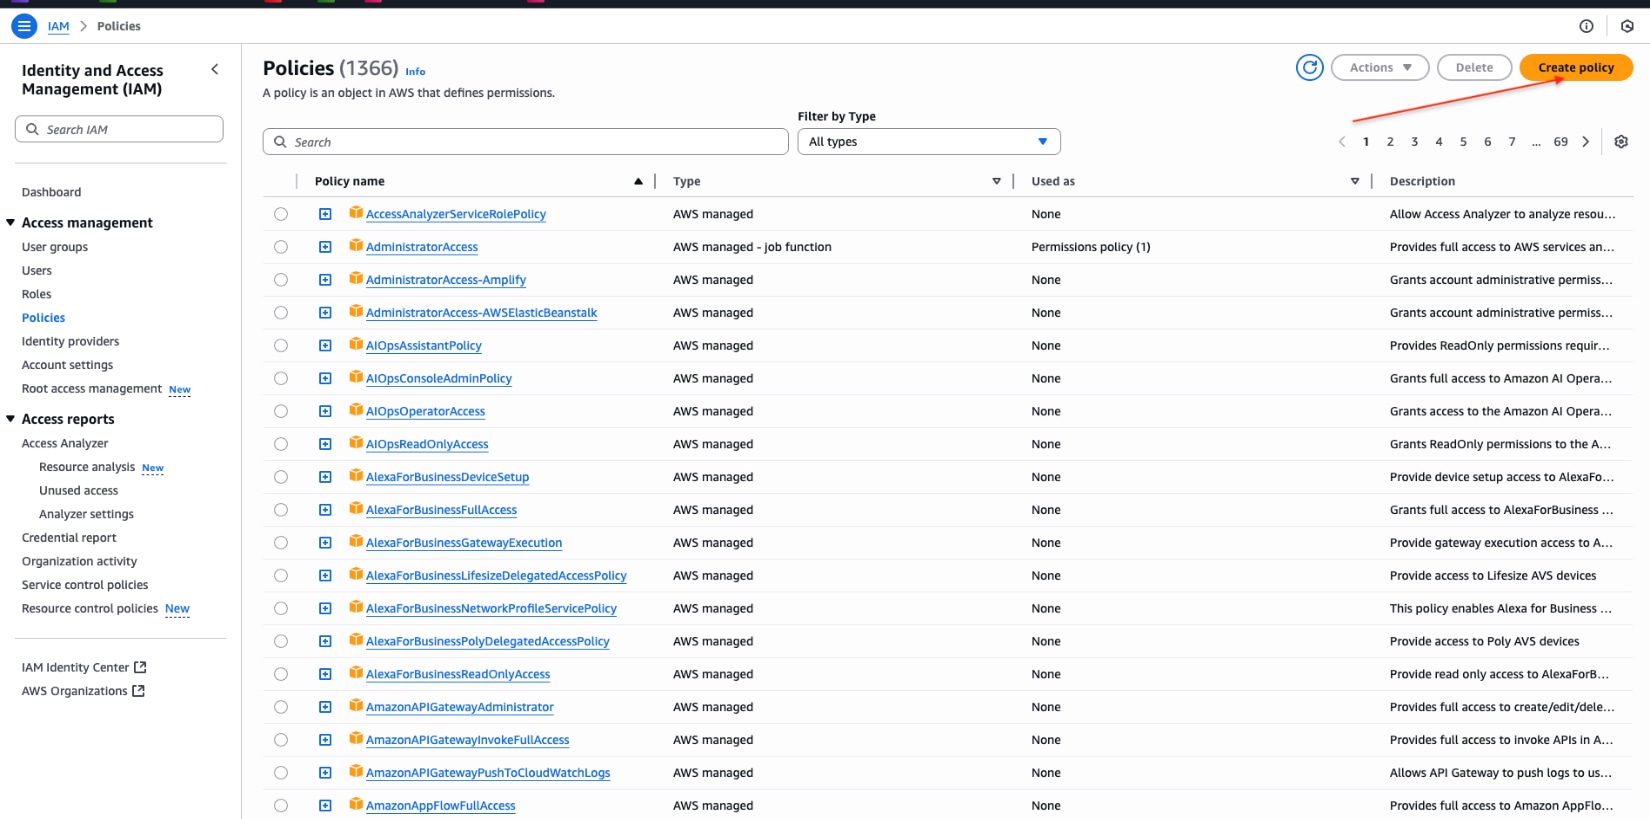
b. Select JSON in the policy editor and paste the following JSON:
Note: Note: Replace
${BUCKET_NAME}with a suitable name, such assplunk-cii-demo-set-up
{
  "Version": "2012-10-17",
  "Statement": [
    {
      "Effect": "Allow",
      "Action": [
        "s3:PutObject"
      ],
      "Resource": "arn:aws:s3:::${BUCKET_NAME}/*"
    }
  ]
}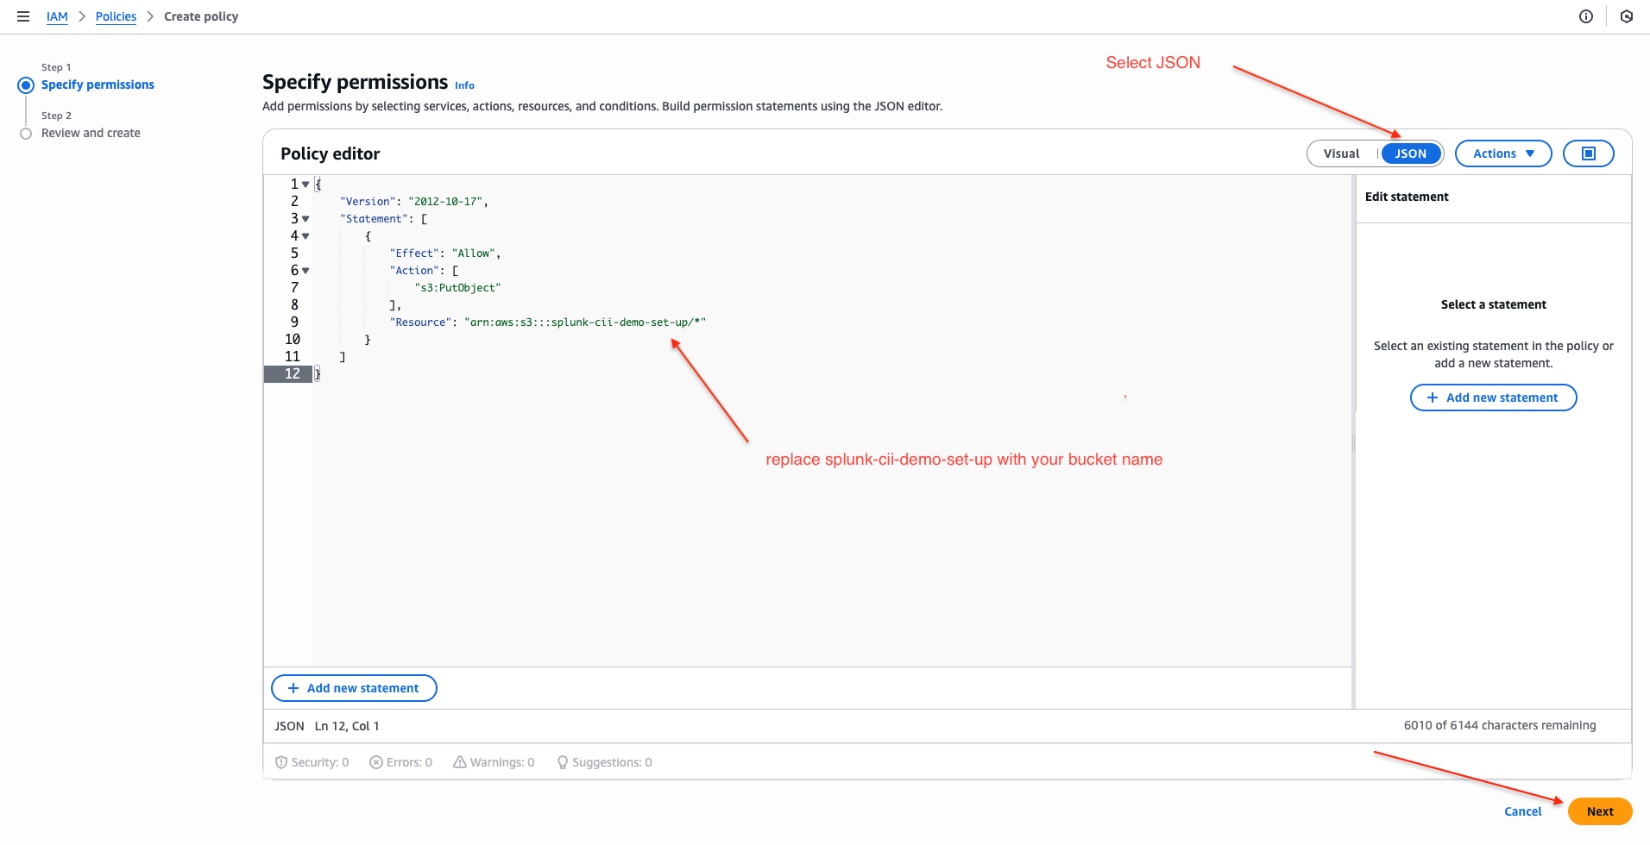
c. Click Next and provide the policy with a name (In this example, we will use S3WritePolicy)
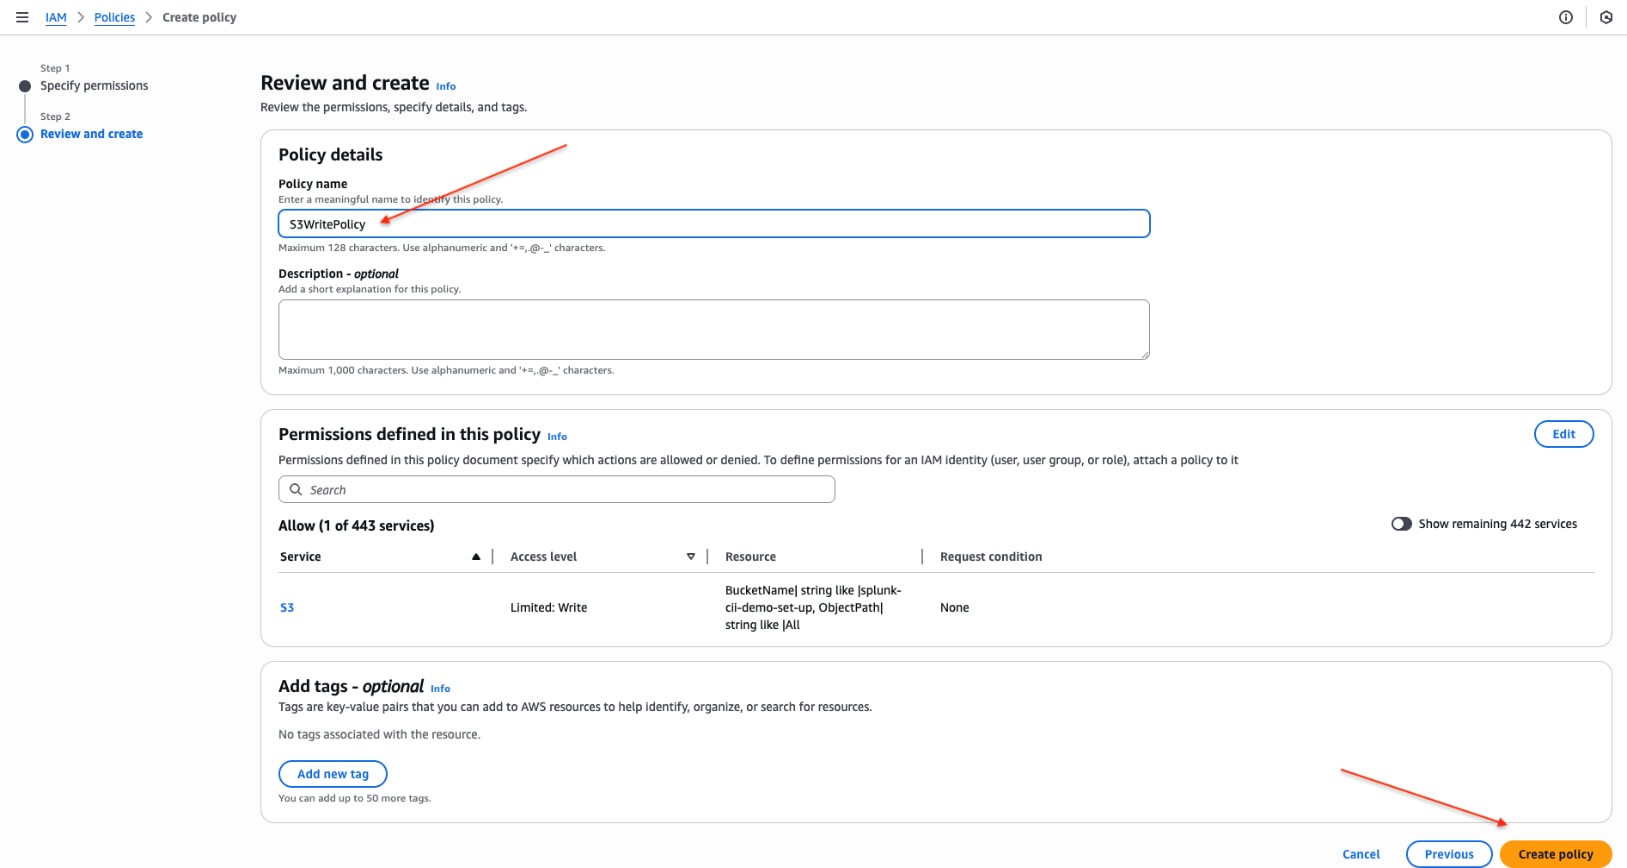
d. Click Create policy
-
Create an IAM Role
a. Navigate to IAM > Roles > Create Role
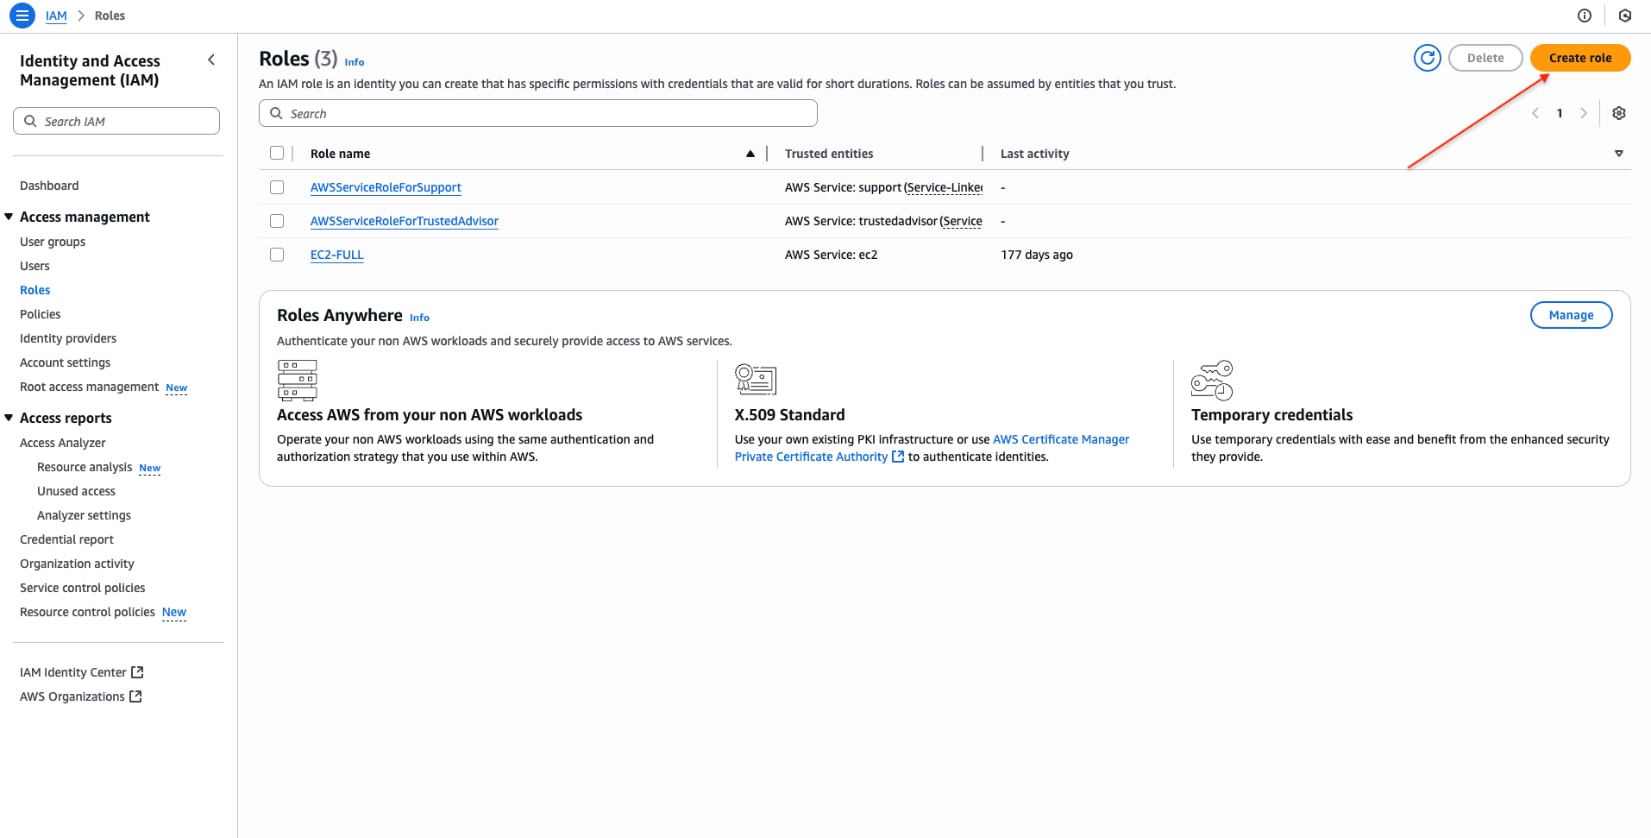
b. Select Custom trust policy and paste the following JSON:
Note: Notes:
- Replace
${CII_ACCOUNT_ID}with the Cisco Identity account ID for Splunk 988897525199- Replace
${UNIQUE_EXTERNAL_ID}with the External ID generated in Cisco Identity for this S3 notification target
{
  "Version": "2012-10-17",
  "Statement": [
    {
      "Effect": "Allow",
      "Principal": {
        "AWS": "arn:aws:iam::${CII_ACCOUNT_ID}:root"
      },
      "Action": "sts:AssumeRole",
      "Condition": {
        "ForAnyValue:StringEquals": {
          "sts:ExternalId": "${UNIQUE_EXTERNAL_ID}"
        }
      }
    }
  ]
}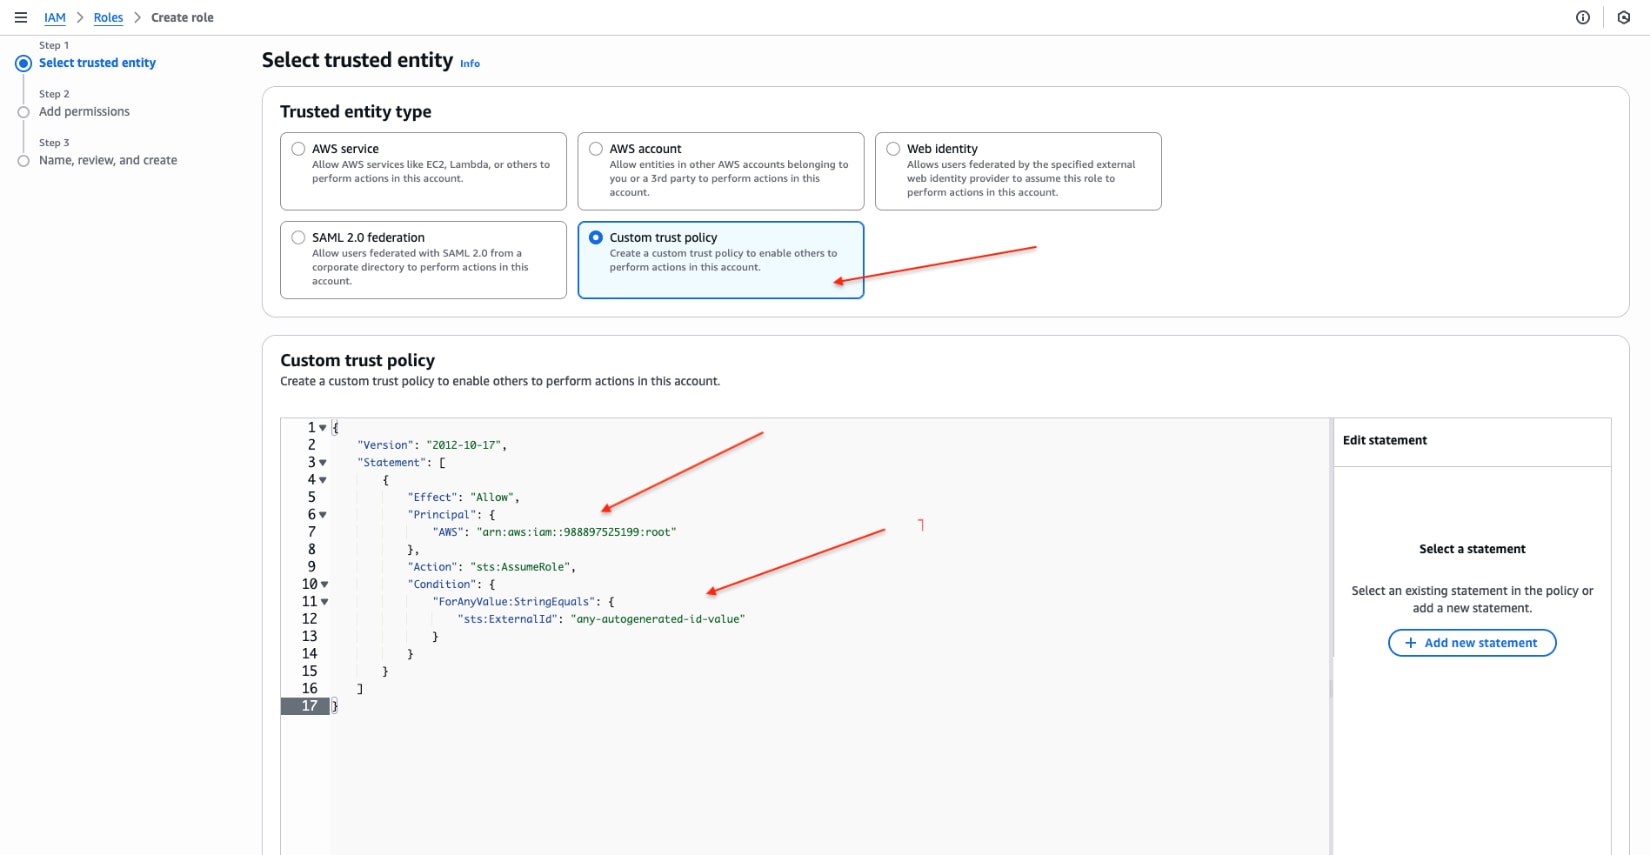
c. Click Next.
d. Attach the (S3WritePolicy) policy (created earlier)
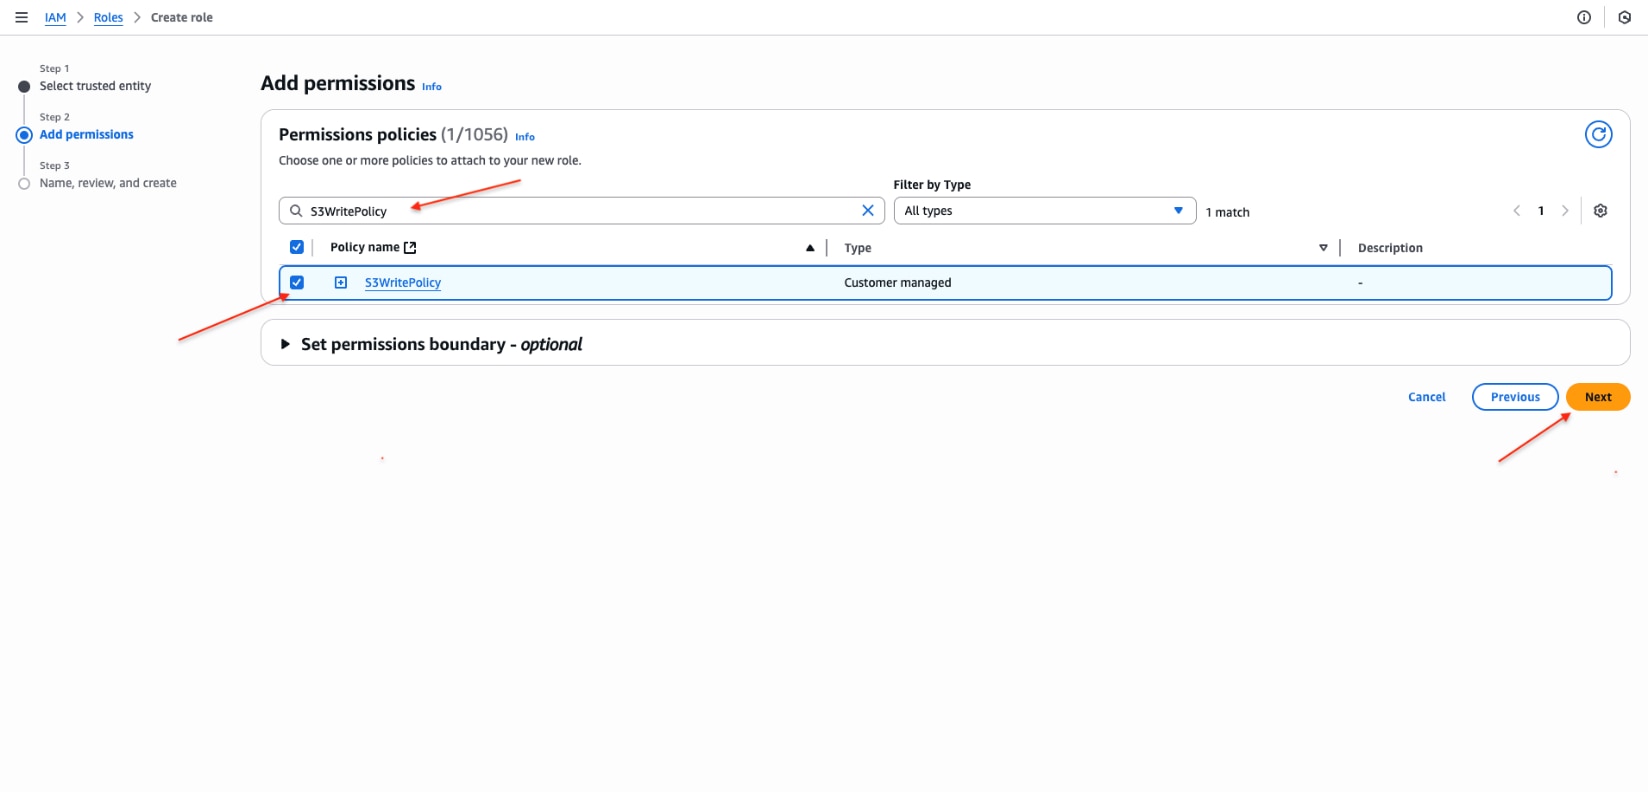
e. Provide the role with the name CrossAccountS3WriteRole (This name is required and must not be changed)
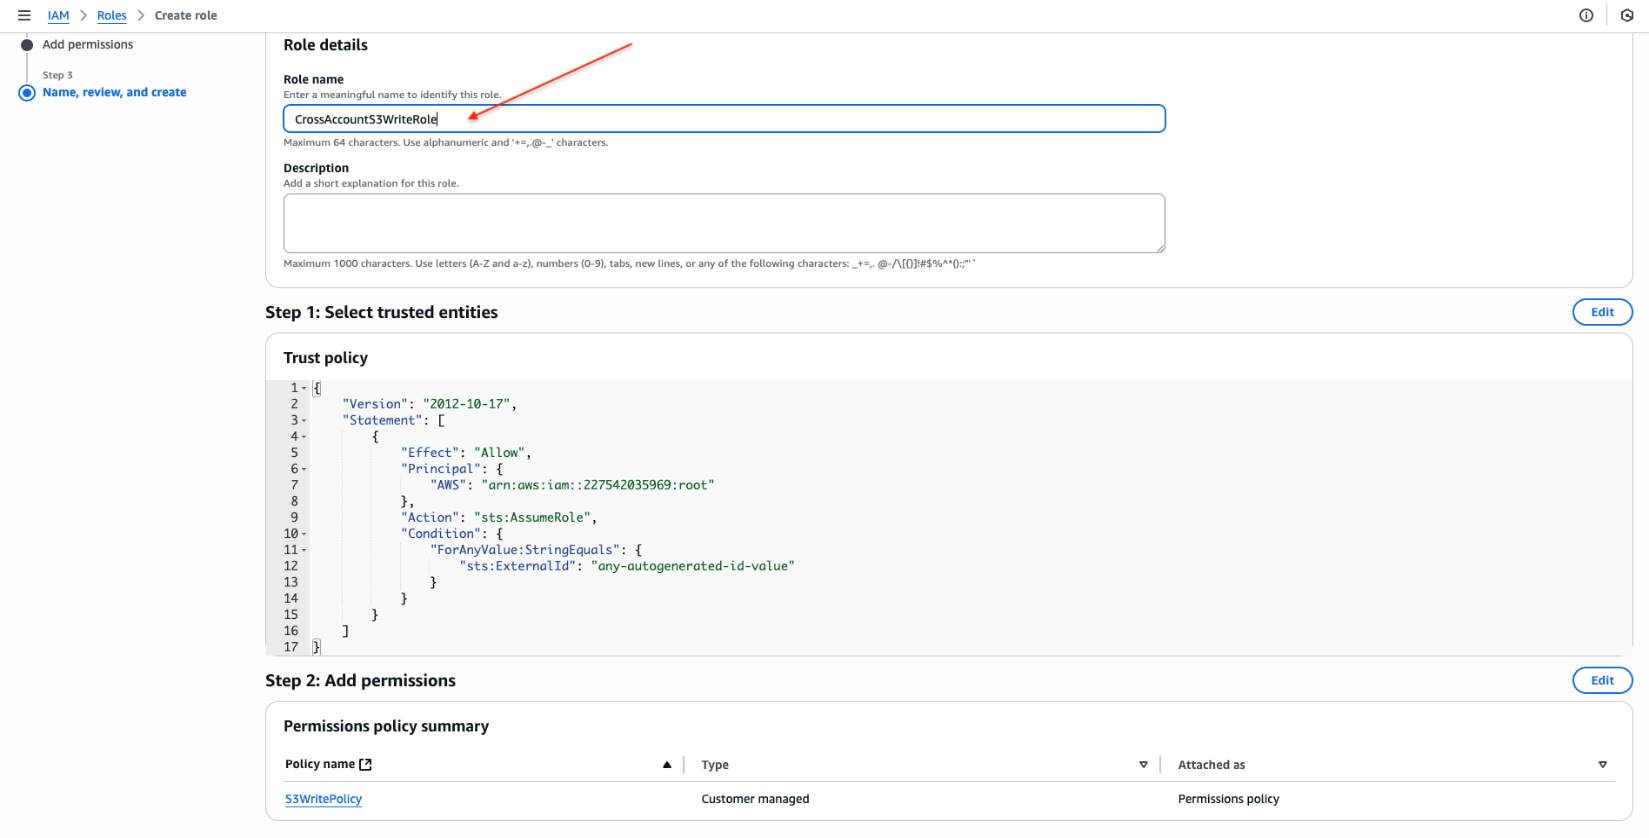
f. Click Create role
-
Update the S3 Bucket Policy
a. Go to the Amazon S3 console and select the splunk-cii-demo-set-up bucket.
b. Navigate to the Permissions tab > Bucket Policy > Edit
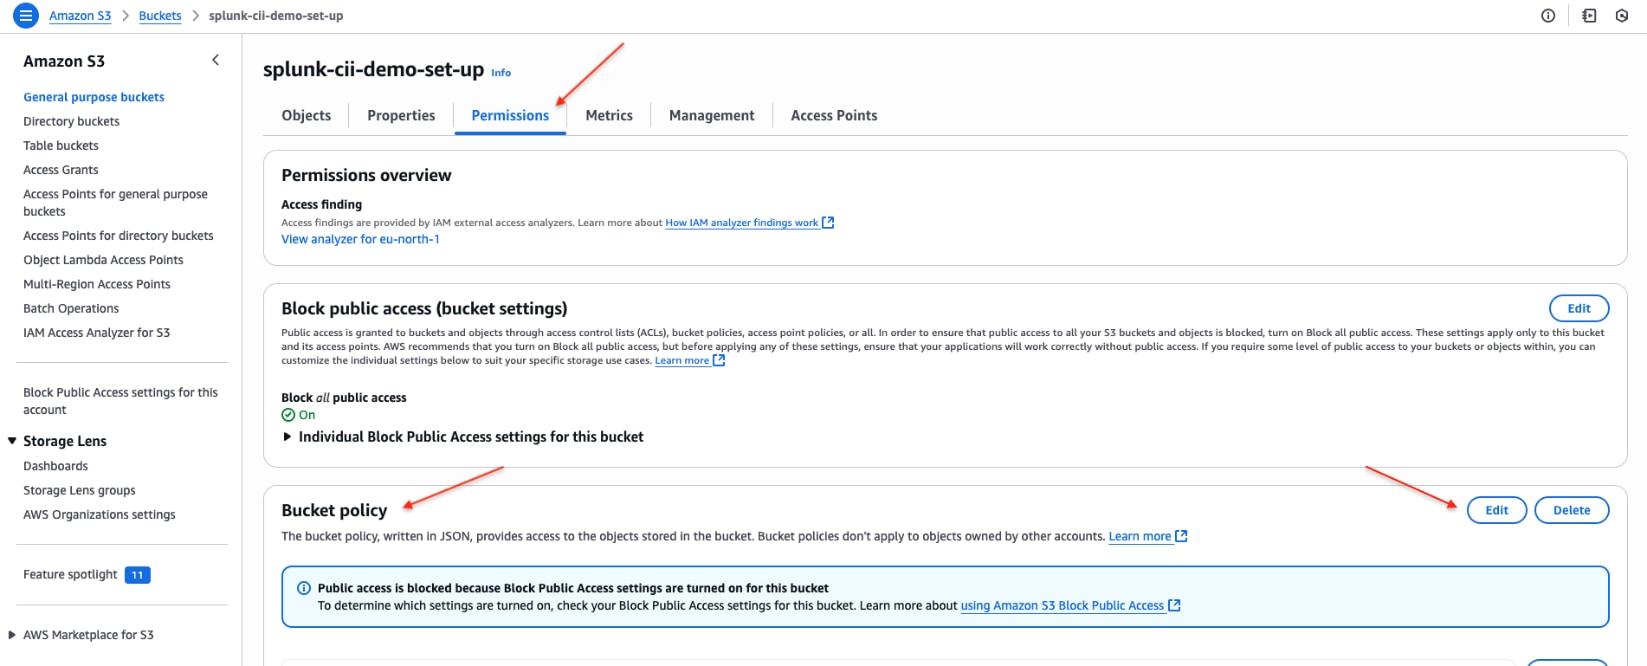
c. Paste the following JSON into the bucket policy editor:
Notes:
- Replace ${S3_ACCOUNT_ID} with your AWS account ID
- Replace ${ROLE_NAME} with CrossAccountS3WriteRole
- Replace ${BUCKET_NAME} with your bucket name, e.g. splunk-cii-set-up
{
  "Version": "2012-10-17",
  "Statement": [
    {
      "Effect": "Allow",
      "Principal": {
        "AWS": "arn:aws:iam::${S3_ACCOUNT_ID}:role/${ROLE_NAME}"
      },
      "Action": [
        "s3:PutObject"
      ],
      "Resource": "arn:aws:s3:::${BUCKET_NAME}/*"
    }
  ]
}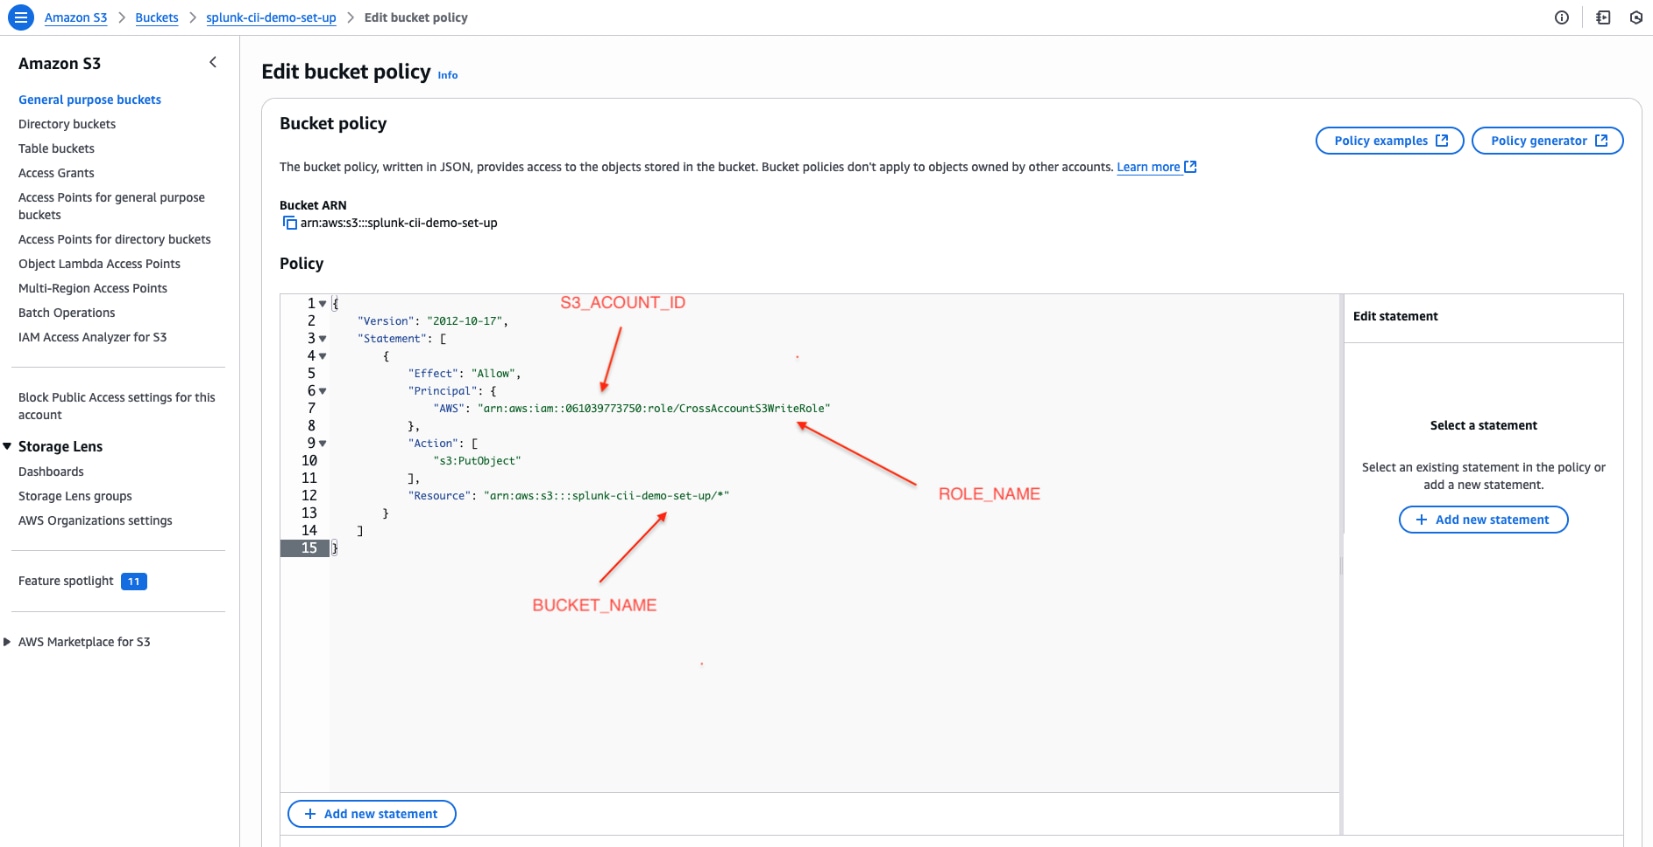
d. Save changes
-
Create an SNS Topic
a. Go to the Amazon SNS console > Create Topic
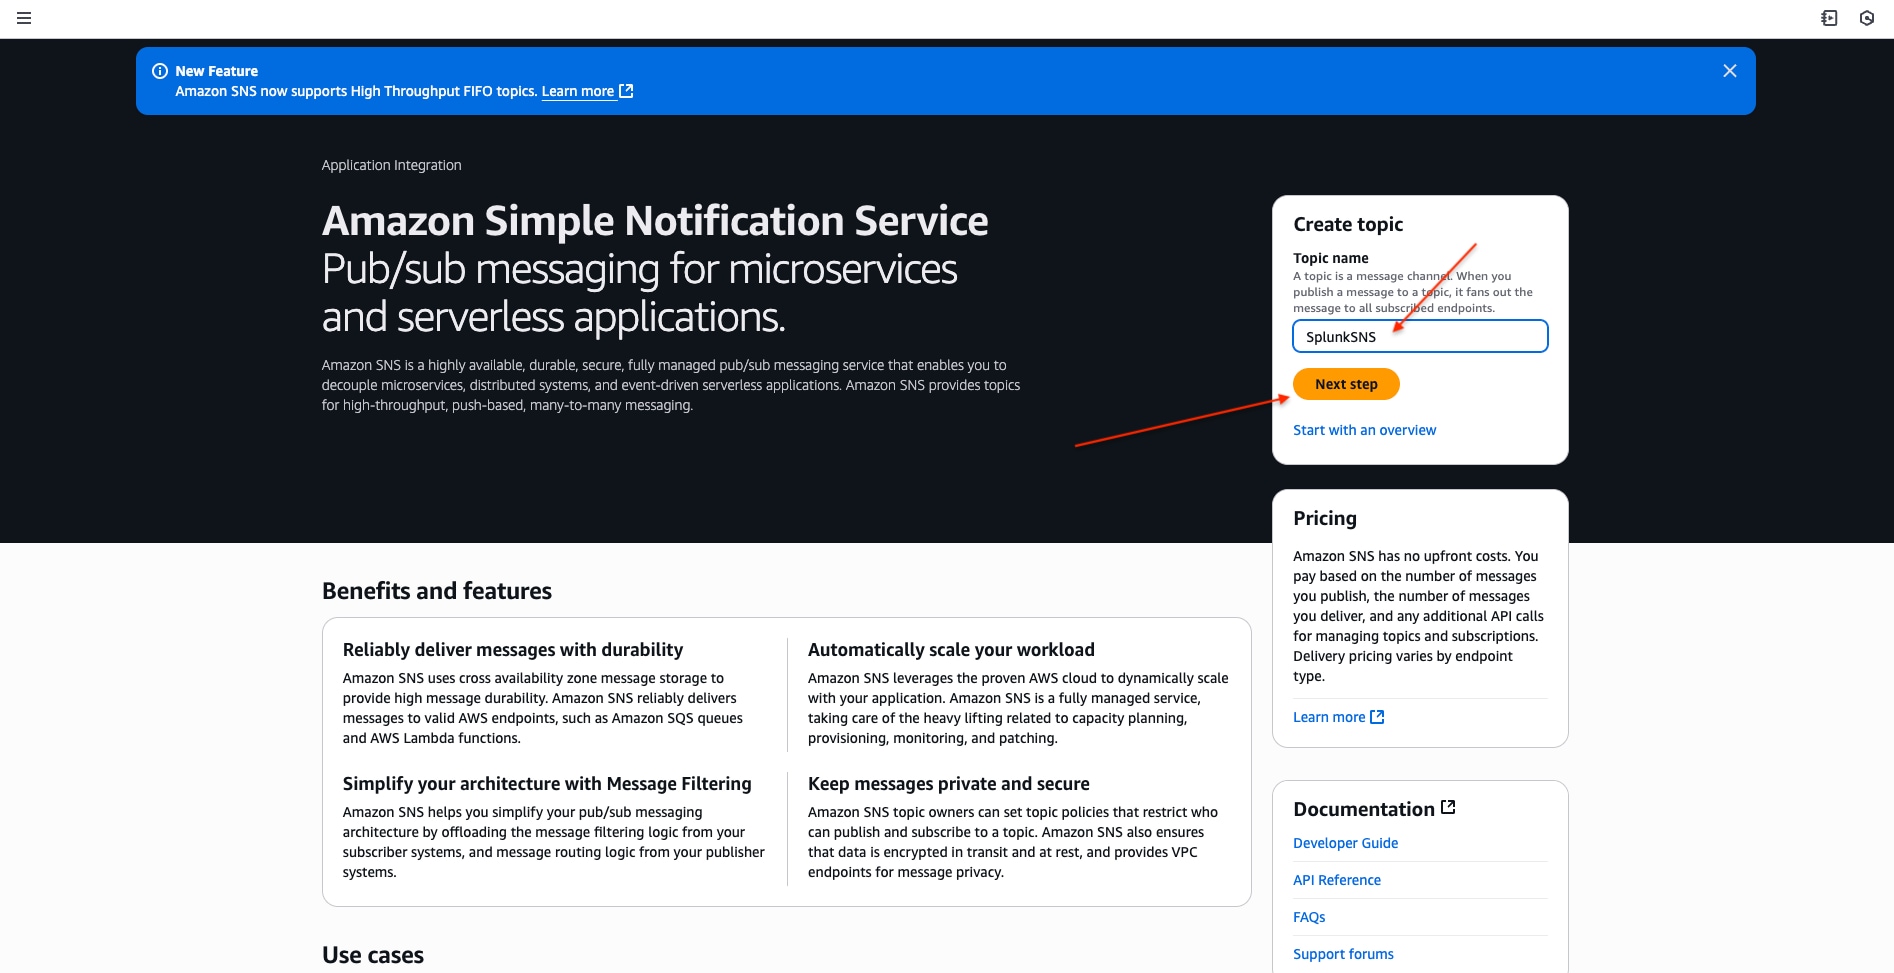
b. Provide a name: SplunkSNS
c. In the Access Policy, select Advanced and paste the following JSON:
Note: Replace ${BUCKET_NAME} with your bucket name, e.g. splunk-cii-set-up
{
  "Version": "2008-10-17",
  "Id": "PolicyForS3Access",
  "Statement": [
    {
      "Sid": "AllowS3Publish",
      "Effect": "Allow",
      "Principal": {
        "AWS": "*"
      },
      "Action": "SNS:Publish",
      "Resource": "*",
      "Condition": {
        "ArnLike": {
          "aws:SourceArn": "arn:aws:s3:::${S3 BUCKET NAME}"
        }
      }
    }
  ]
}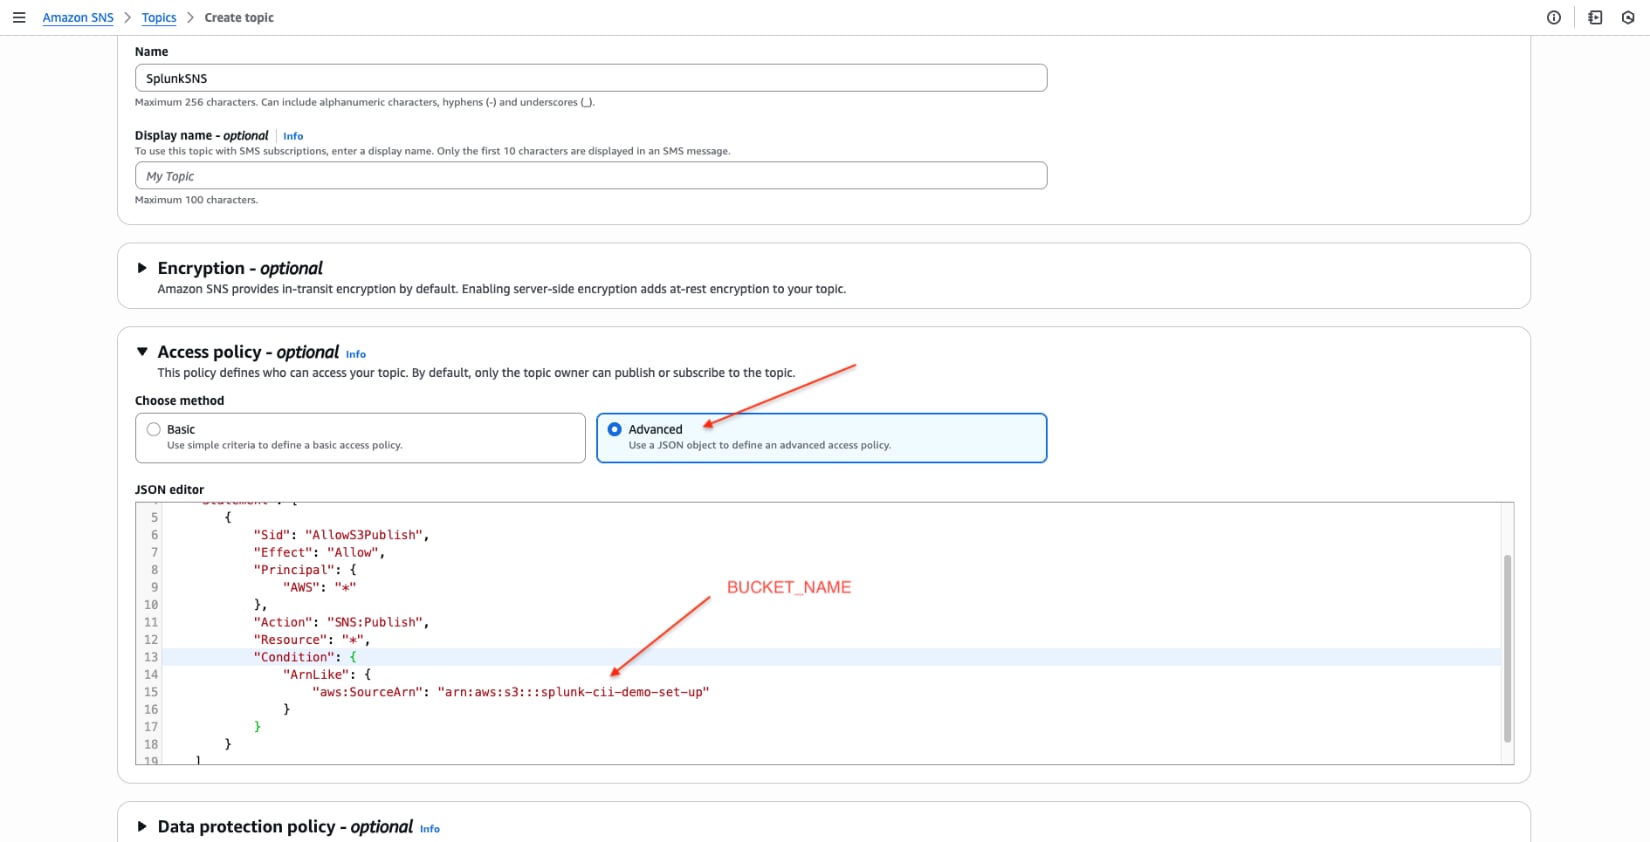
d. Click Create topic
6. Configure S3 Event Notifications for the SNS Topic
- Go to the Amazon S3 console and select your splunk-cii-set-up bucket.
- Navigate to the Properties tab > Event Notifications
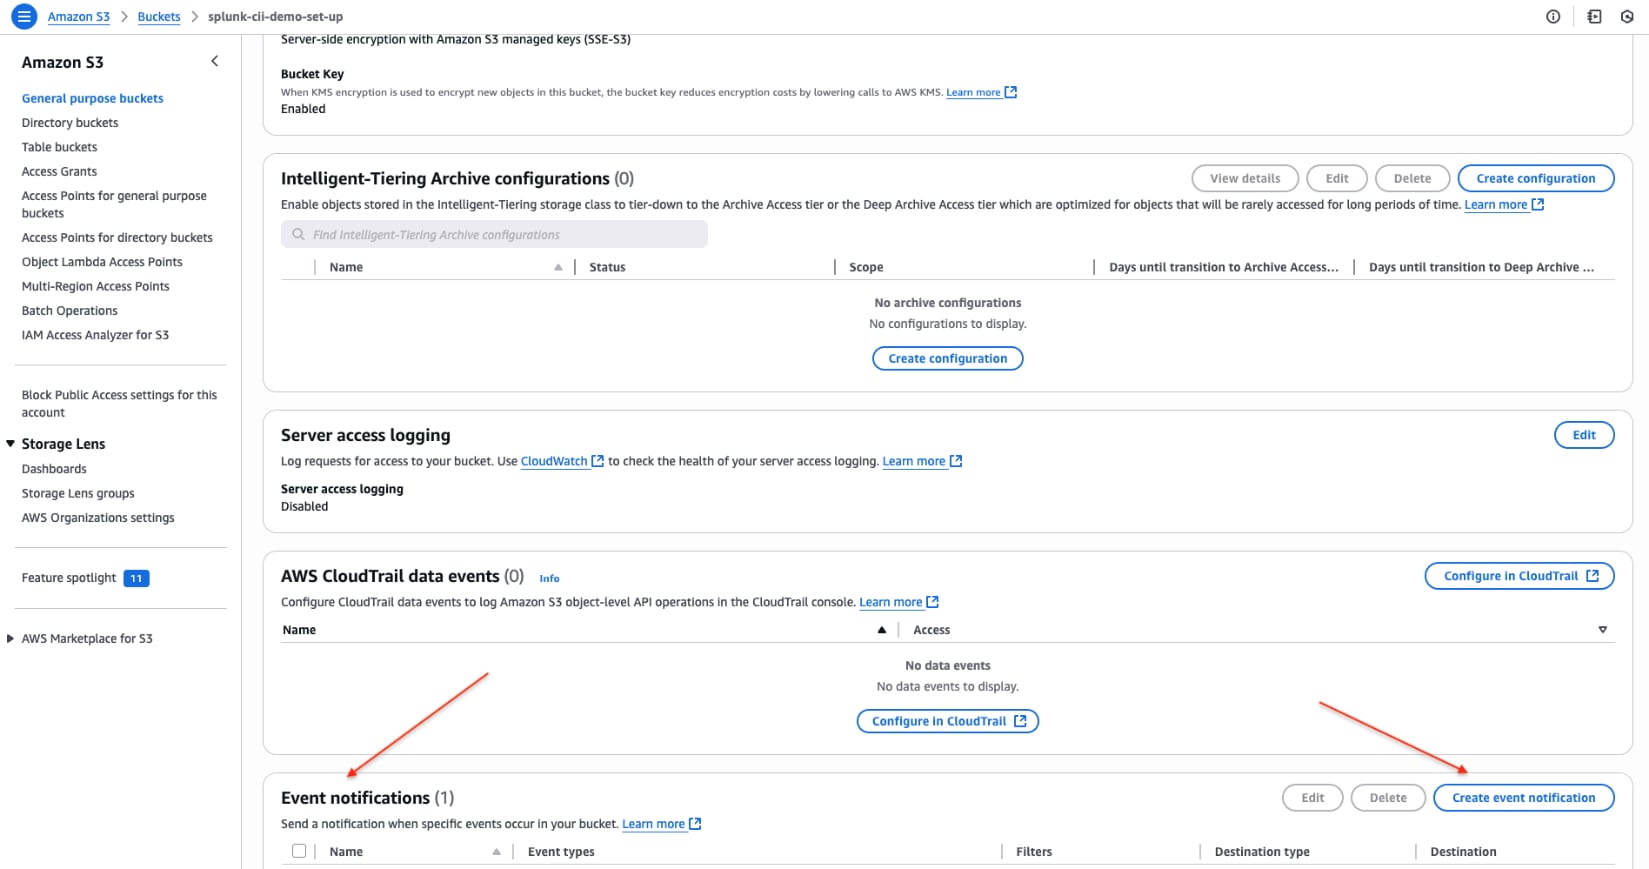
- Click Create event notification
- Configure the event notification:
- Event name: Provide any name.
- Prefix (optional): Use if you want to trigger events for specific folders.
- Event types: Select Put and Post.
- Destination: Select SNS Topic and choose SplunkSNS.
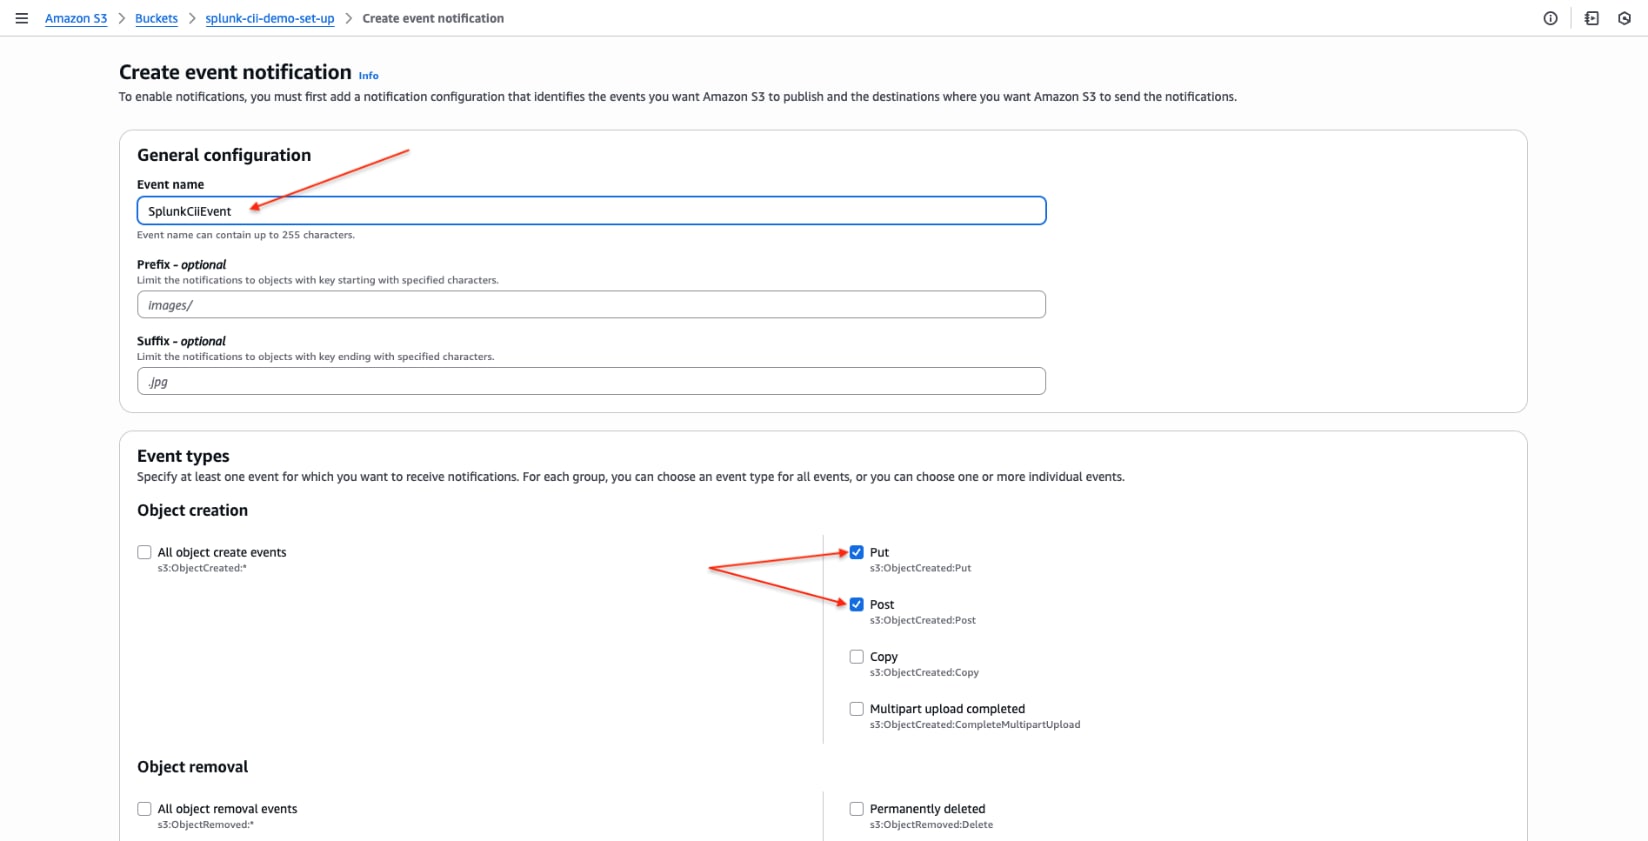
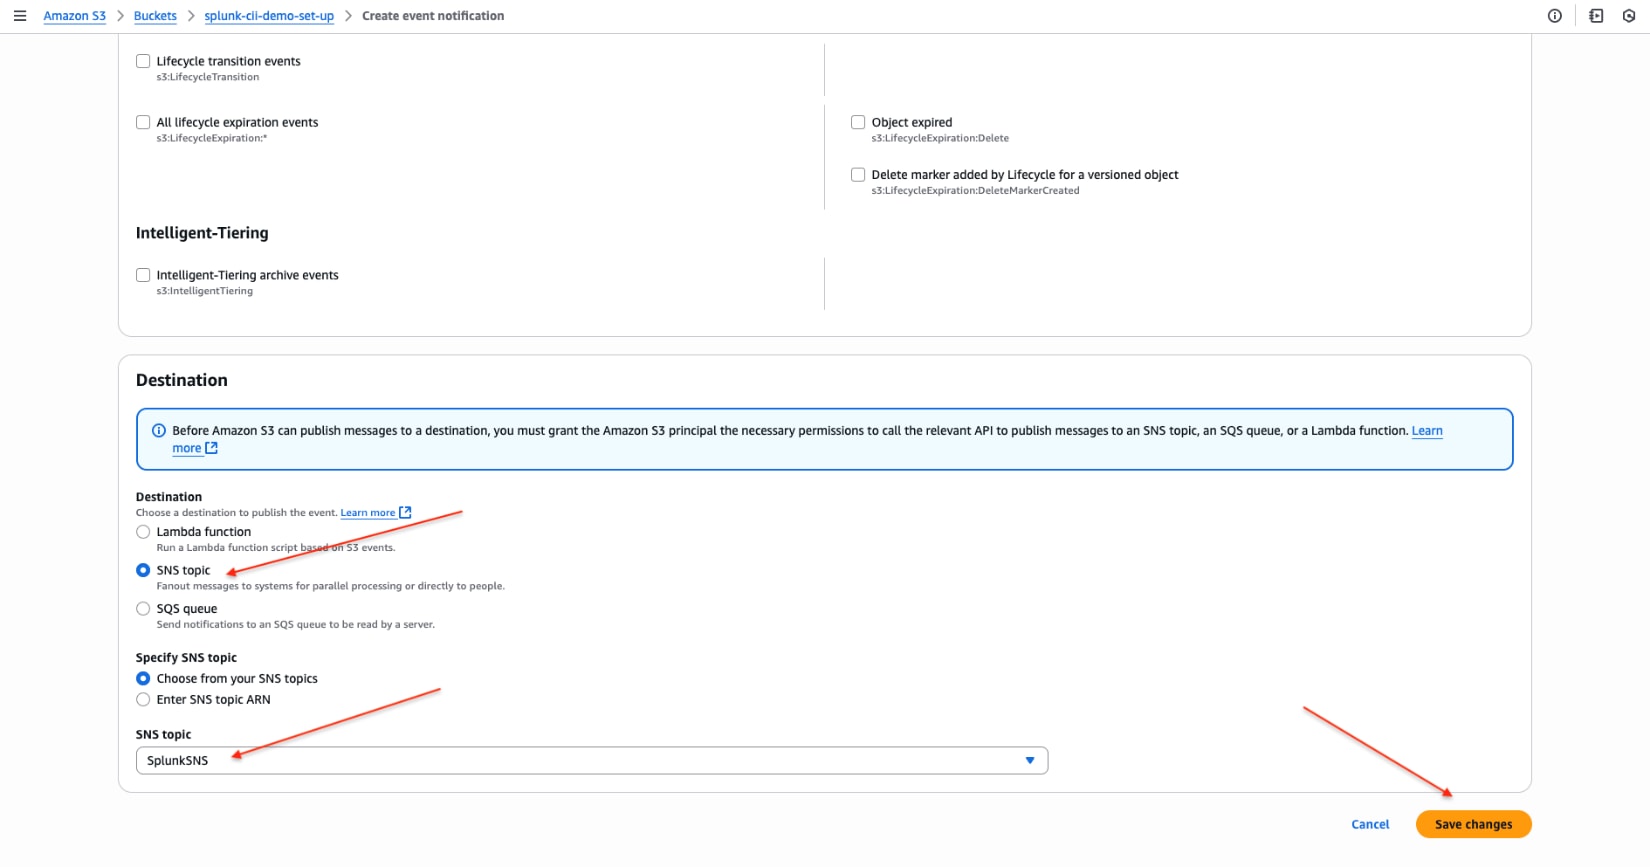
- Save changes
7. Create Two SQS Queues
- Create Dead-Letter Queue (DLQ):
- Go to the Amazon SQS console > Create Queue
- Provide the name: SplunkDLQ
- Set Visibility Timeout to 300 seconds
- Click Create Queue
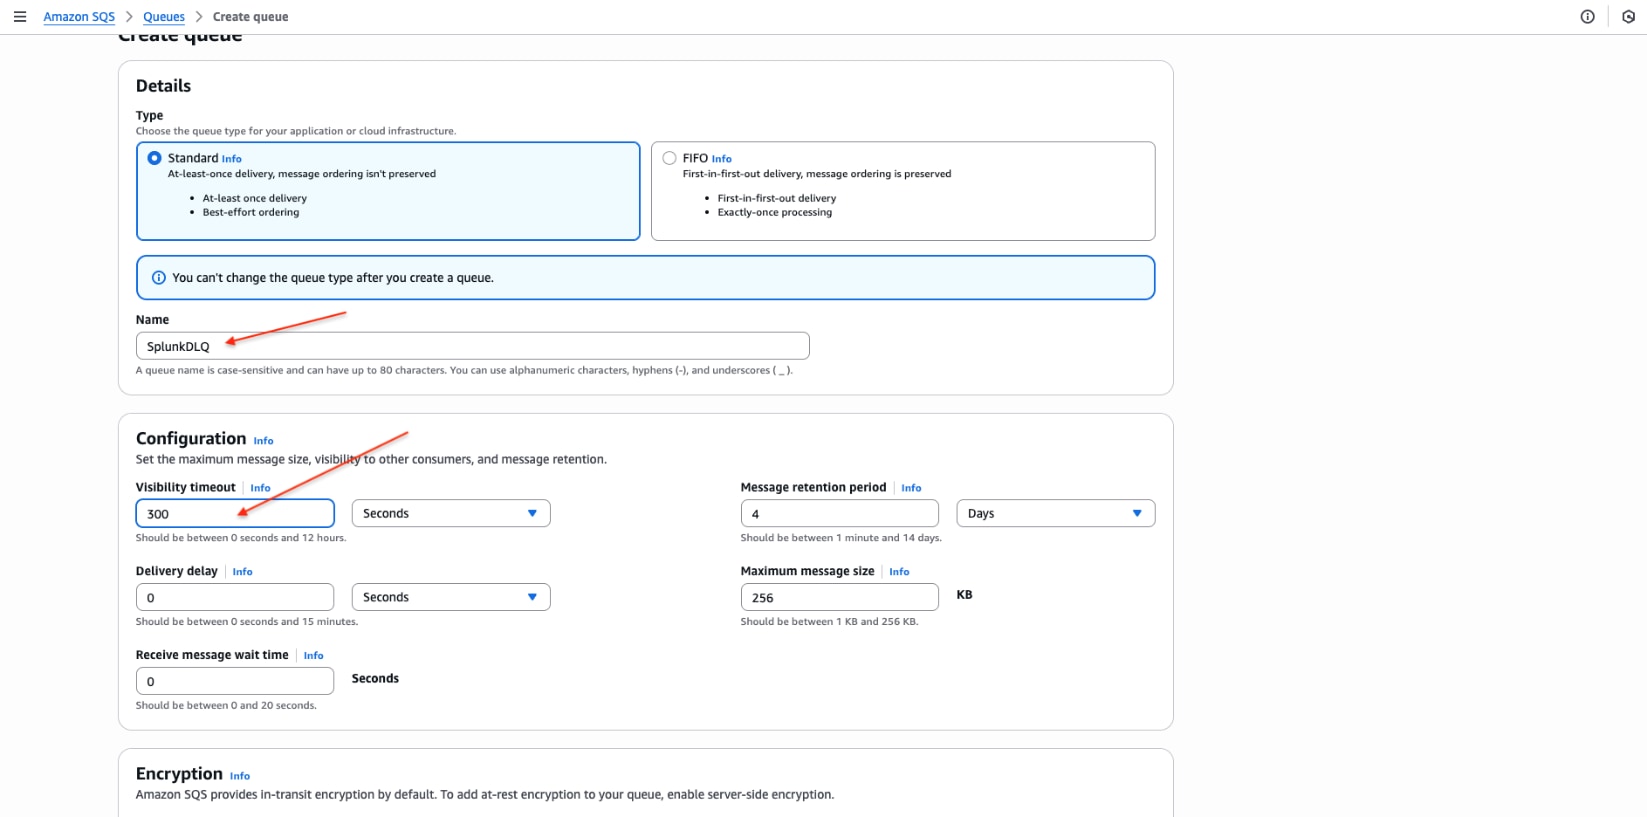
- Create Main Queue:
- Go to the Amazon SQS console > Create Queue
- Provide the name: SplunkMain
- Set Visibility Timeout to 300 seconds
- Under Dead-letter queue, select Enable and choose SplunkDLQ
- Click Create Queue
Important: Configure the SQS visibility timeout to prevent multiple inputs from receiving and processing messages in a queue more than once. Set your SQS visibility timeout to 5 minutes or longer. If the visibility timeout for a message is reached before the message is fully processed by the SQS-based S3 input, the message reappears in the queue and is retrieved and processed again, resulting in duplicate data)
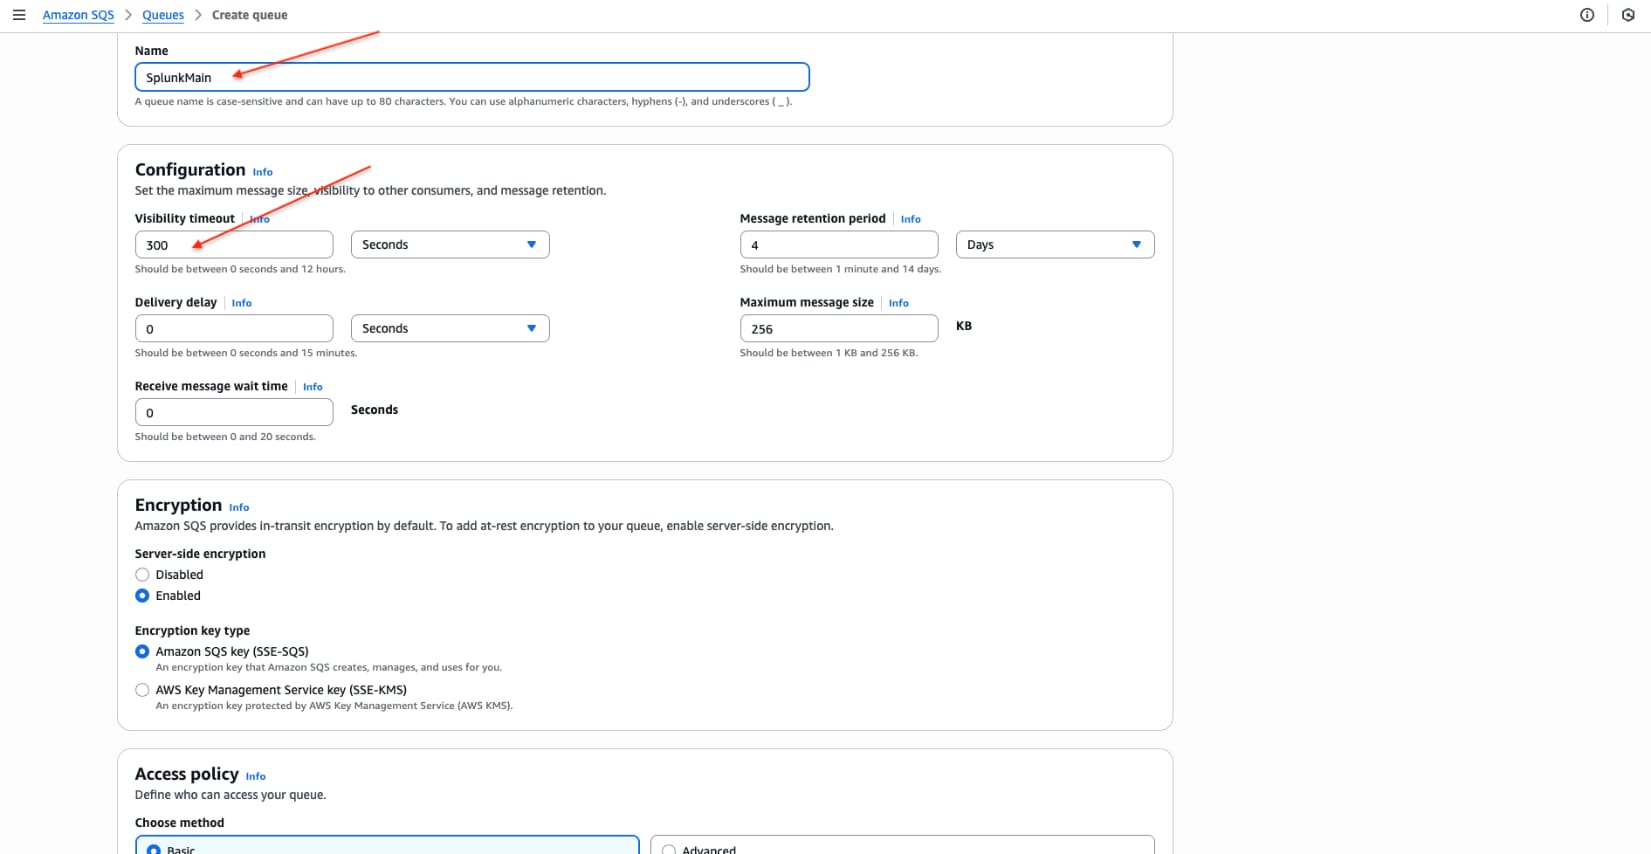
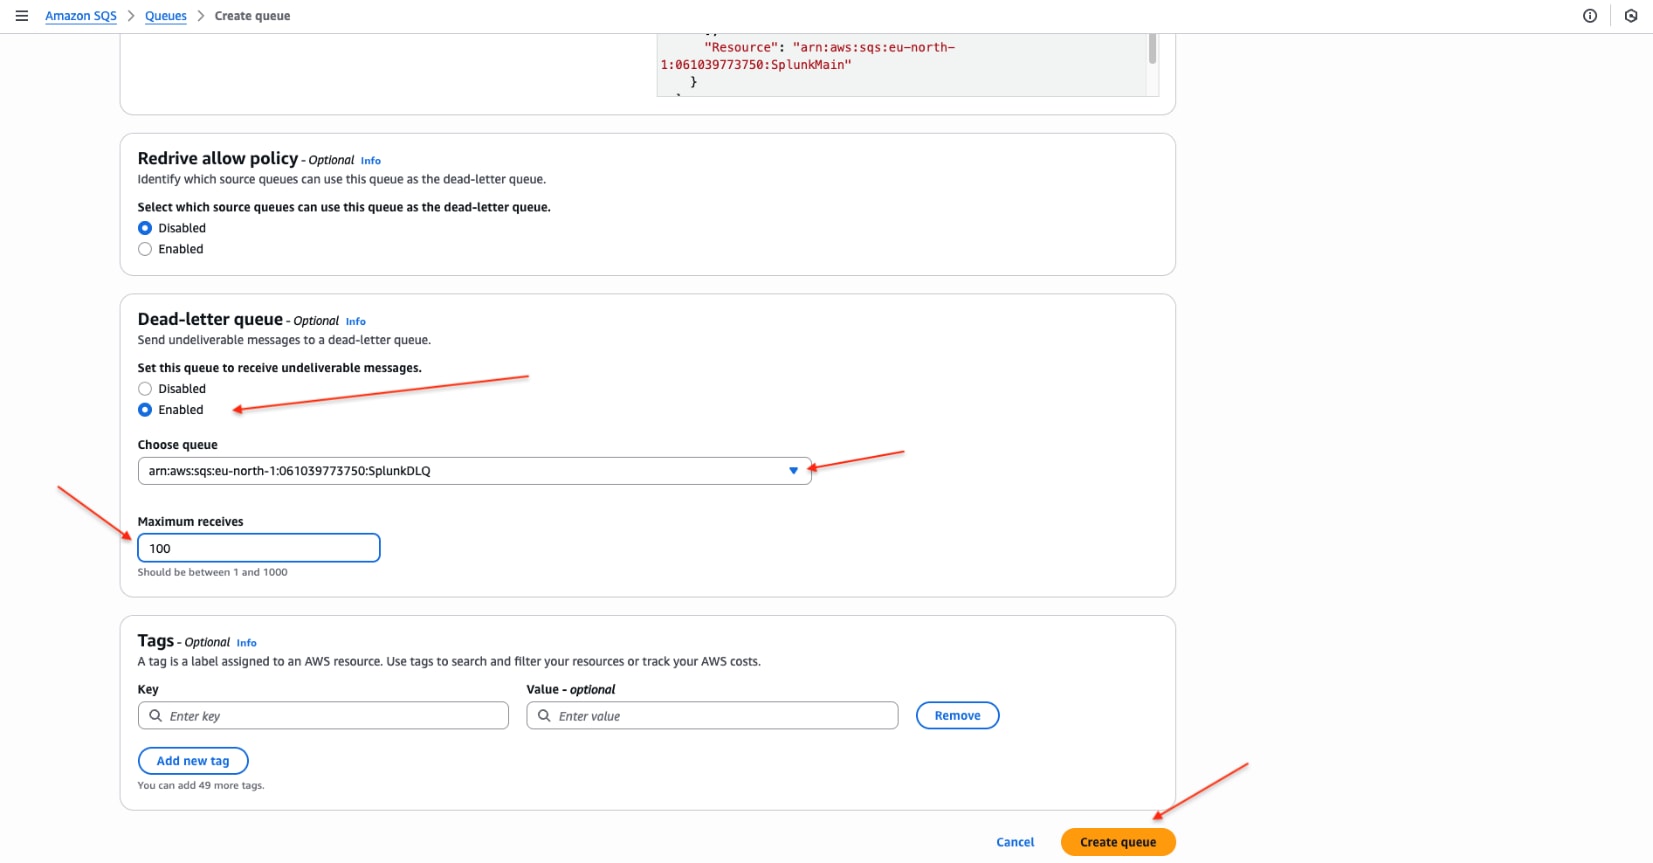
9. Create an SNS Subscription for SQS
- Go to the Amazon SNS console > Subscriptions > Create Subscription.

- Configure the subscription:
- Topic ARN: Select SplunkSNS (created earlier)
- Protocol: Select Amazon SQS
- Endpoint: Select SplunkMain
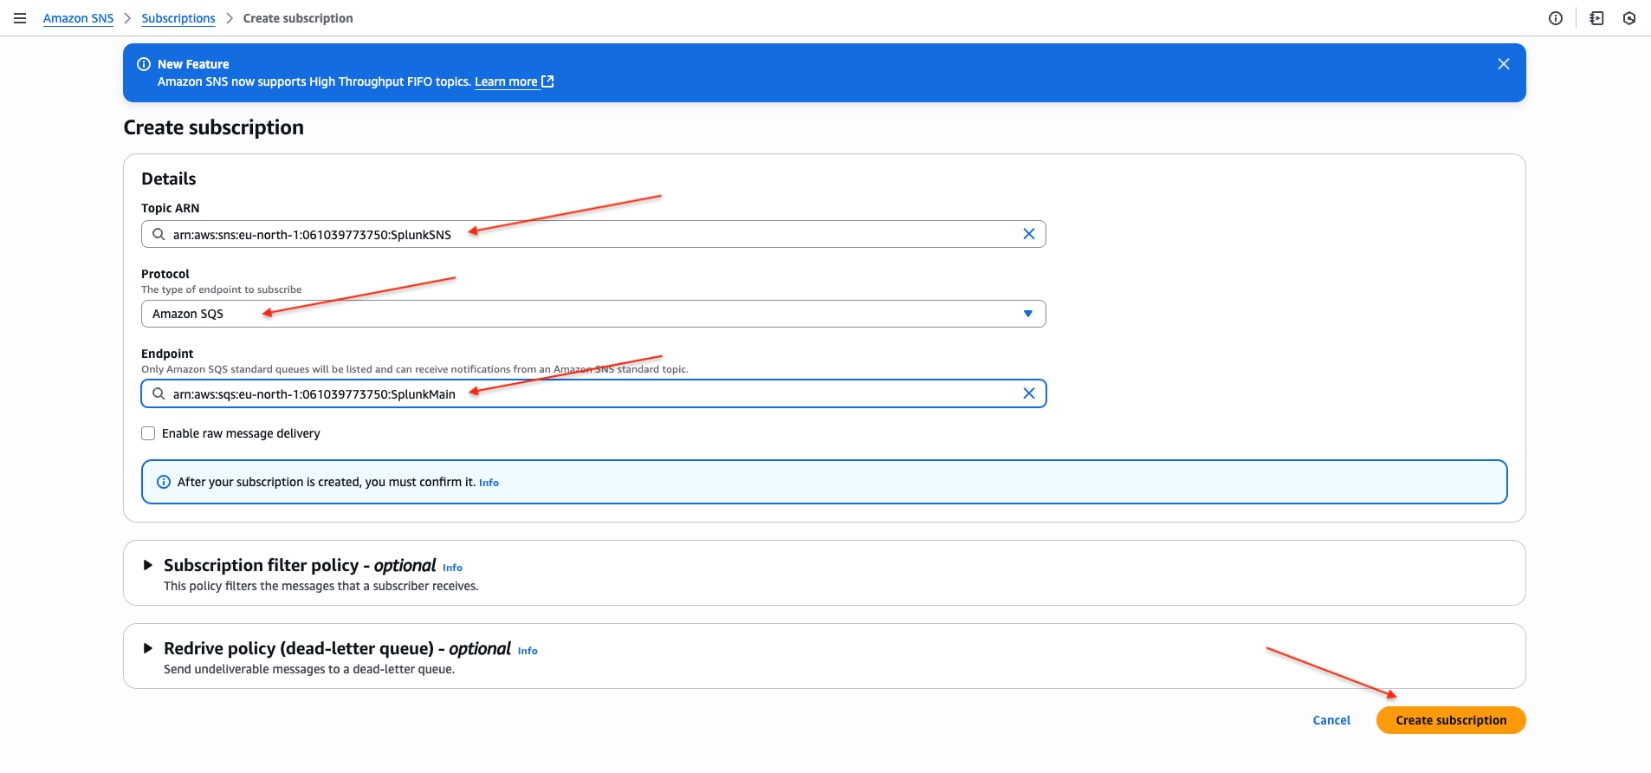
- Click Create Subscription.
10. Generate Access Key and Secret Key
- Go to IAM > Users and select your user.
- Navigate to the Security Credentials tab.
- Under Access Keys, click Create Access Key.
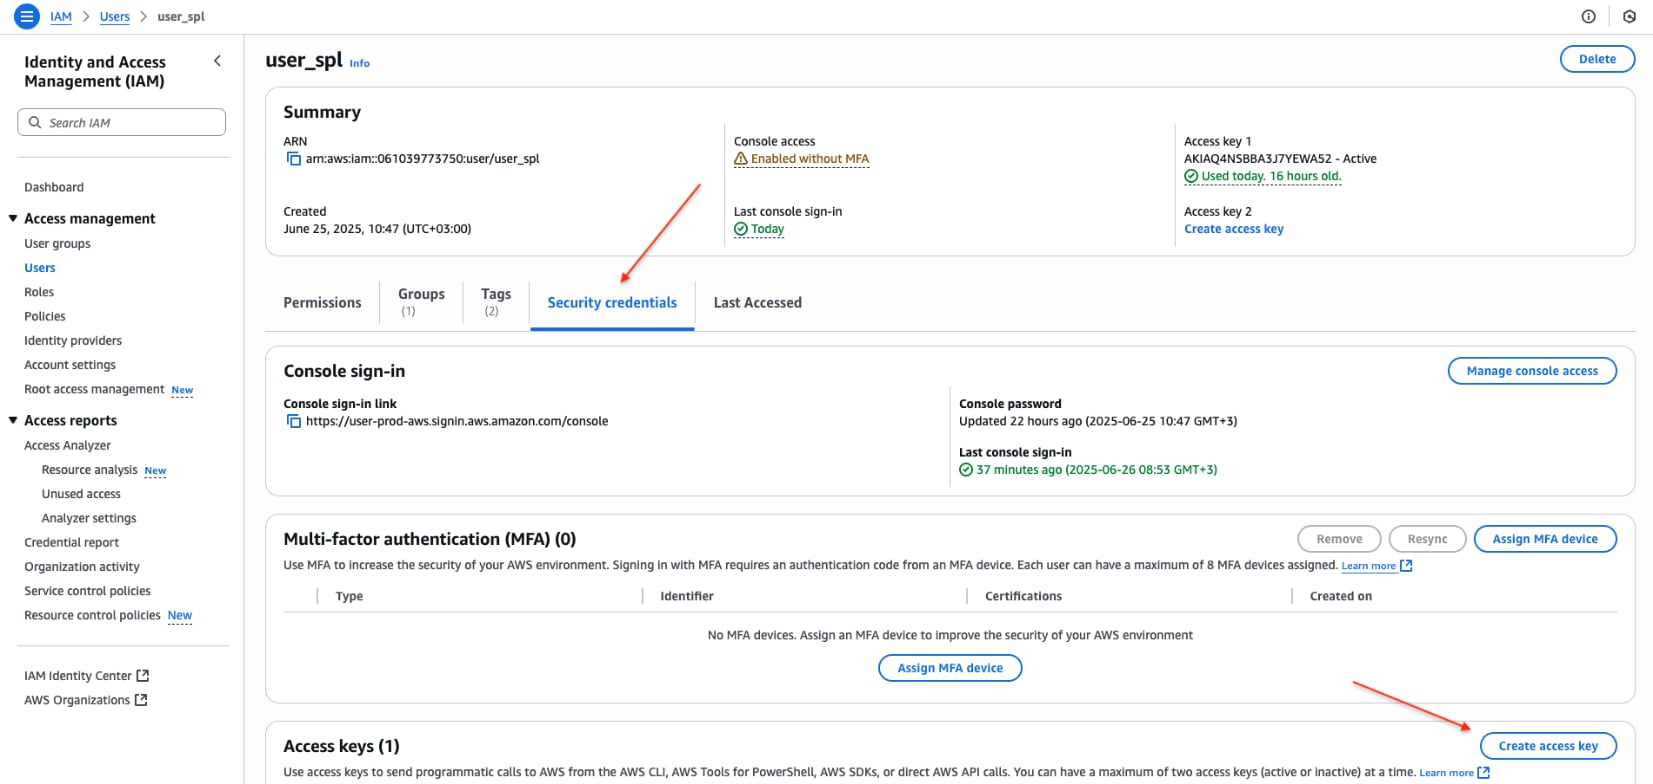
- Select Command Line Interface (CLI) and follow the instructions.
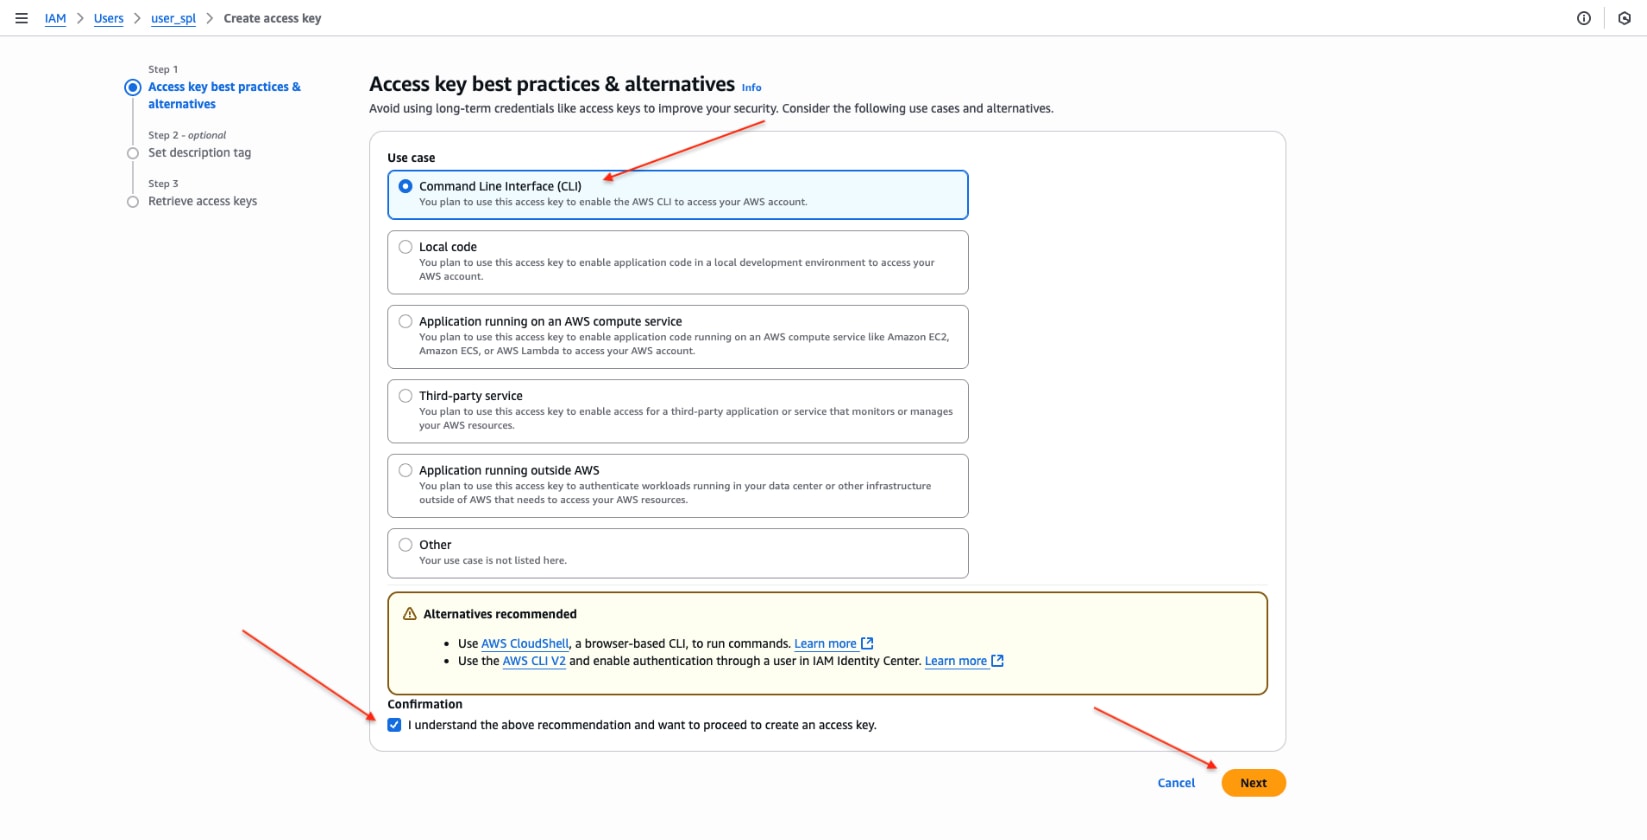
- Download the .csv file containing the Access Key ID and Secret Access Key.
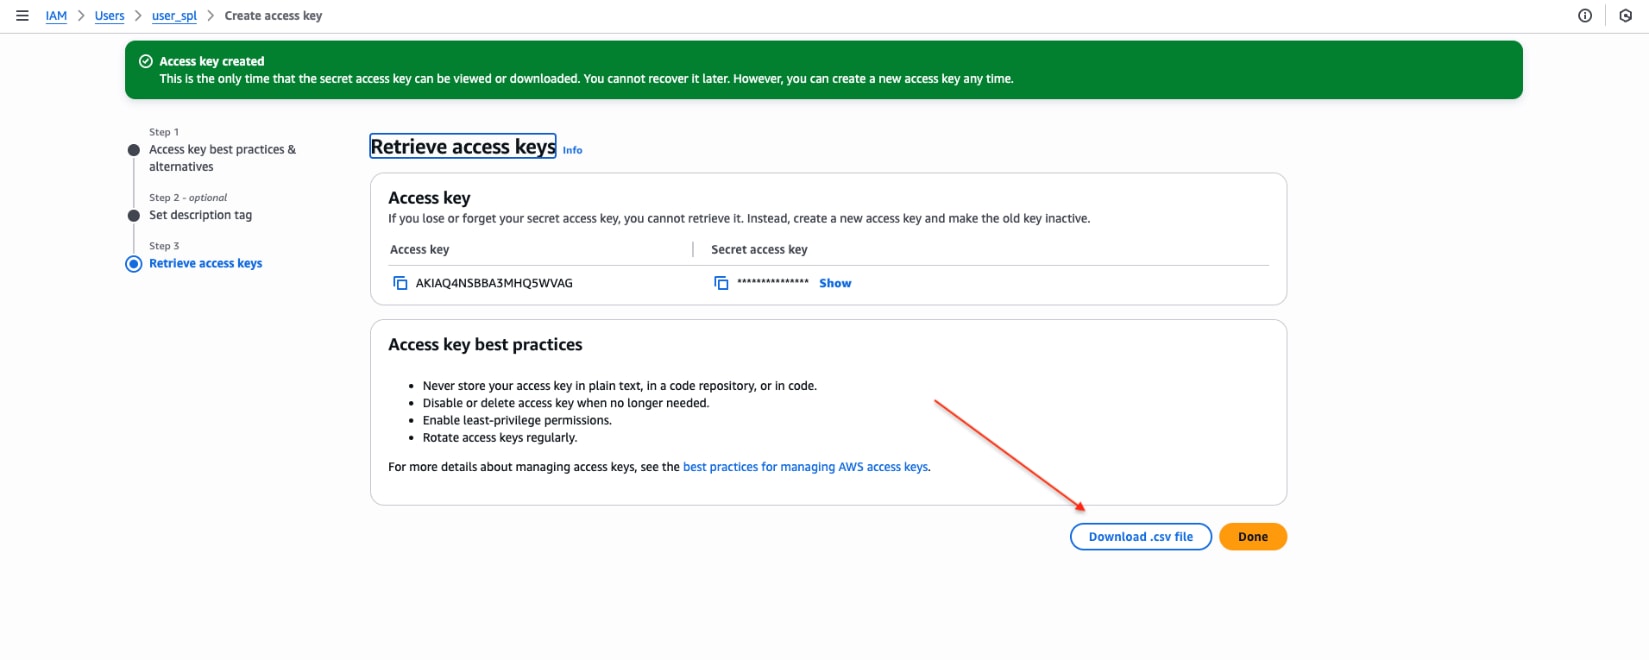
Configure Splunk
Note: Starting September 2025, Cisco Identity no longer provides the audience value when creating an API client. However, the audience field is still required in the Splunk application. Until the application is updated, please use the default audience value https://api.oort.io for this field. We will update this documentation once the application no longer requires an audience value.
- Log in to Splunk.
- Under Apps, click Cisco Security Cloud.
- On the Application Setup page, click Configure Application.
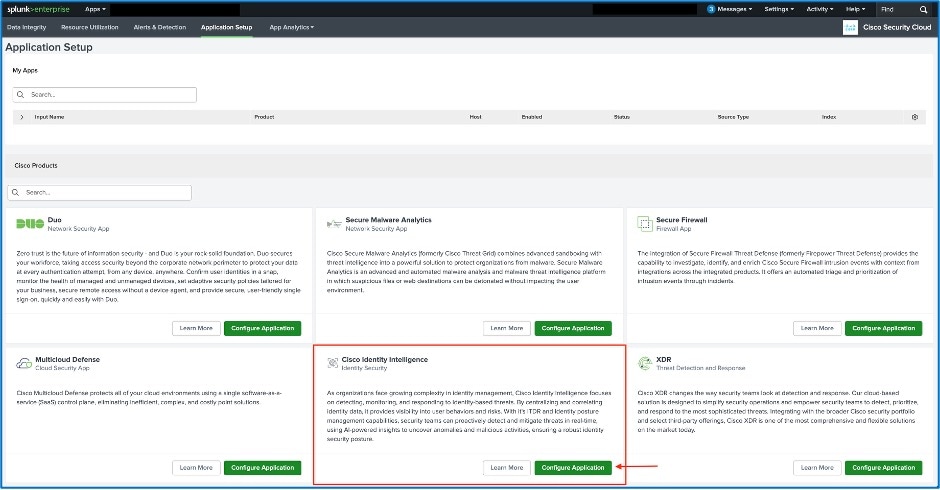
- When prompted, enter the following values:
- AWS Access Key ID: From the .csv file.
- AWS Secret Access Key: From the .csv file.
- SQS Queue URL: Go to the Amazon SQS console, select SplunkMain, and copy the queue URL.
- External ID: Use the same Cisco Identity-generated External ID that you added to the AWS IAM role trust policy.
- S3 Bucket URL: Enter a value in the format s3:// bucket-name.s3. region-code.amazonaws.com. You got this value in the previous section.
- S3 Bucket Region: The AWS region where your S3 bucket is hosted (e.g., us-east-1).
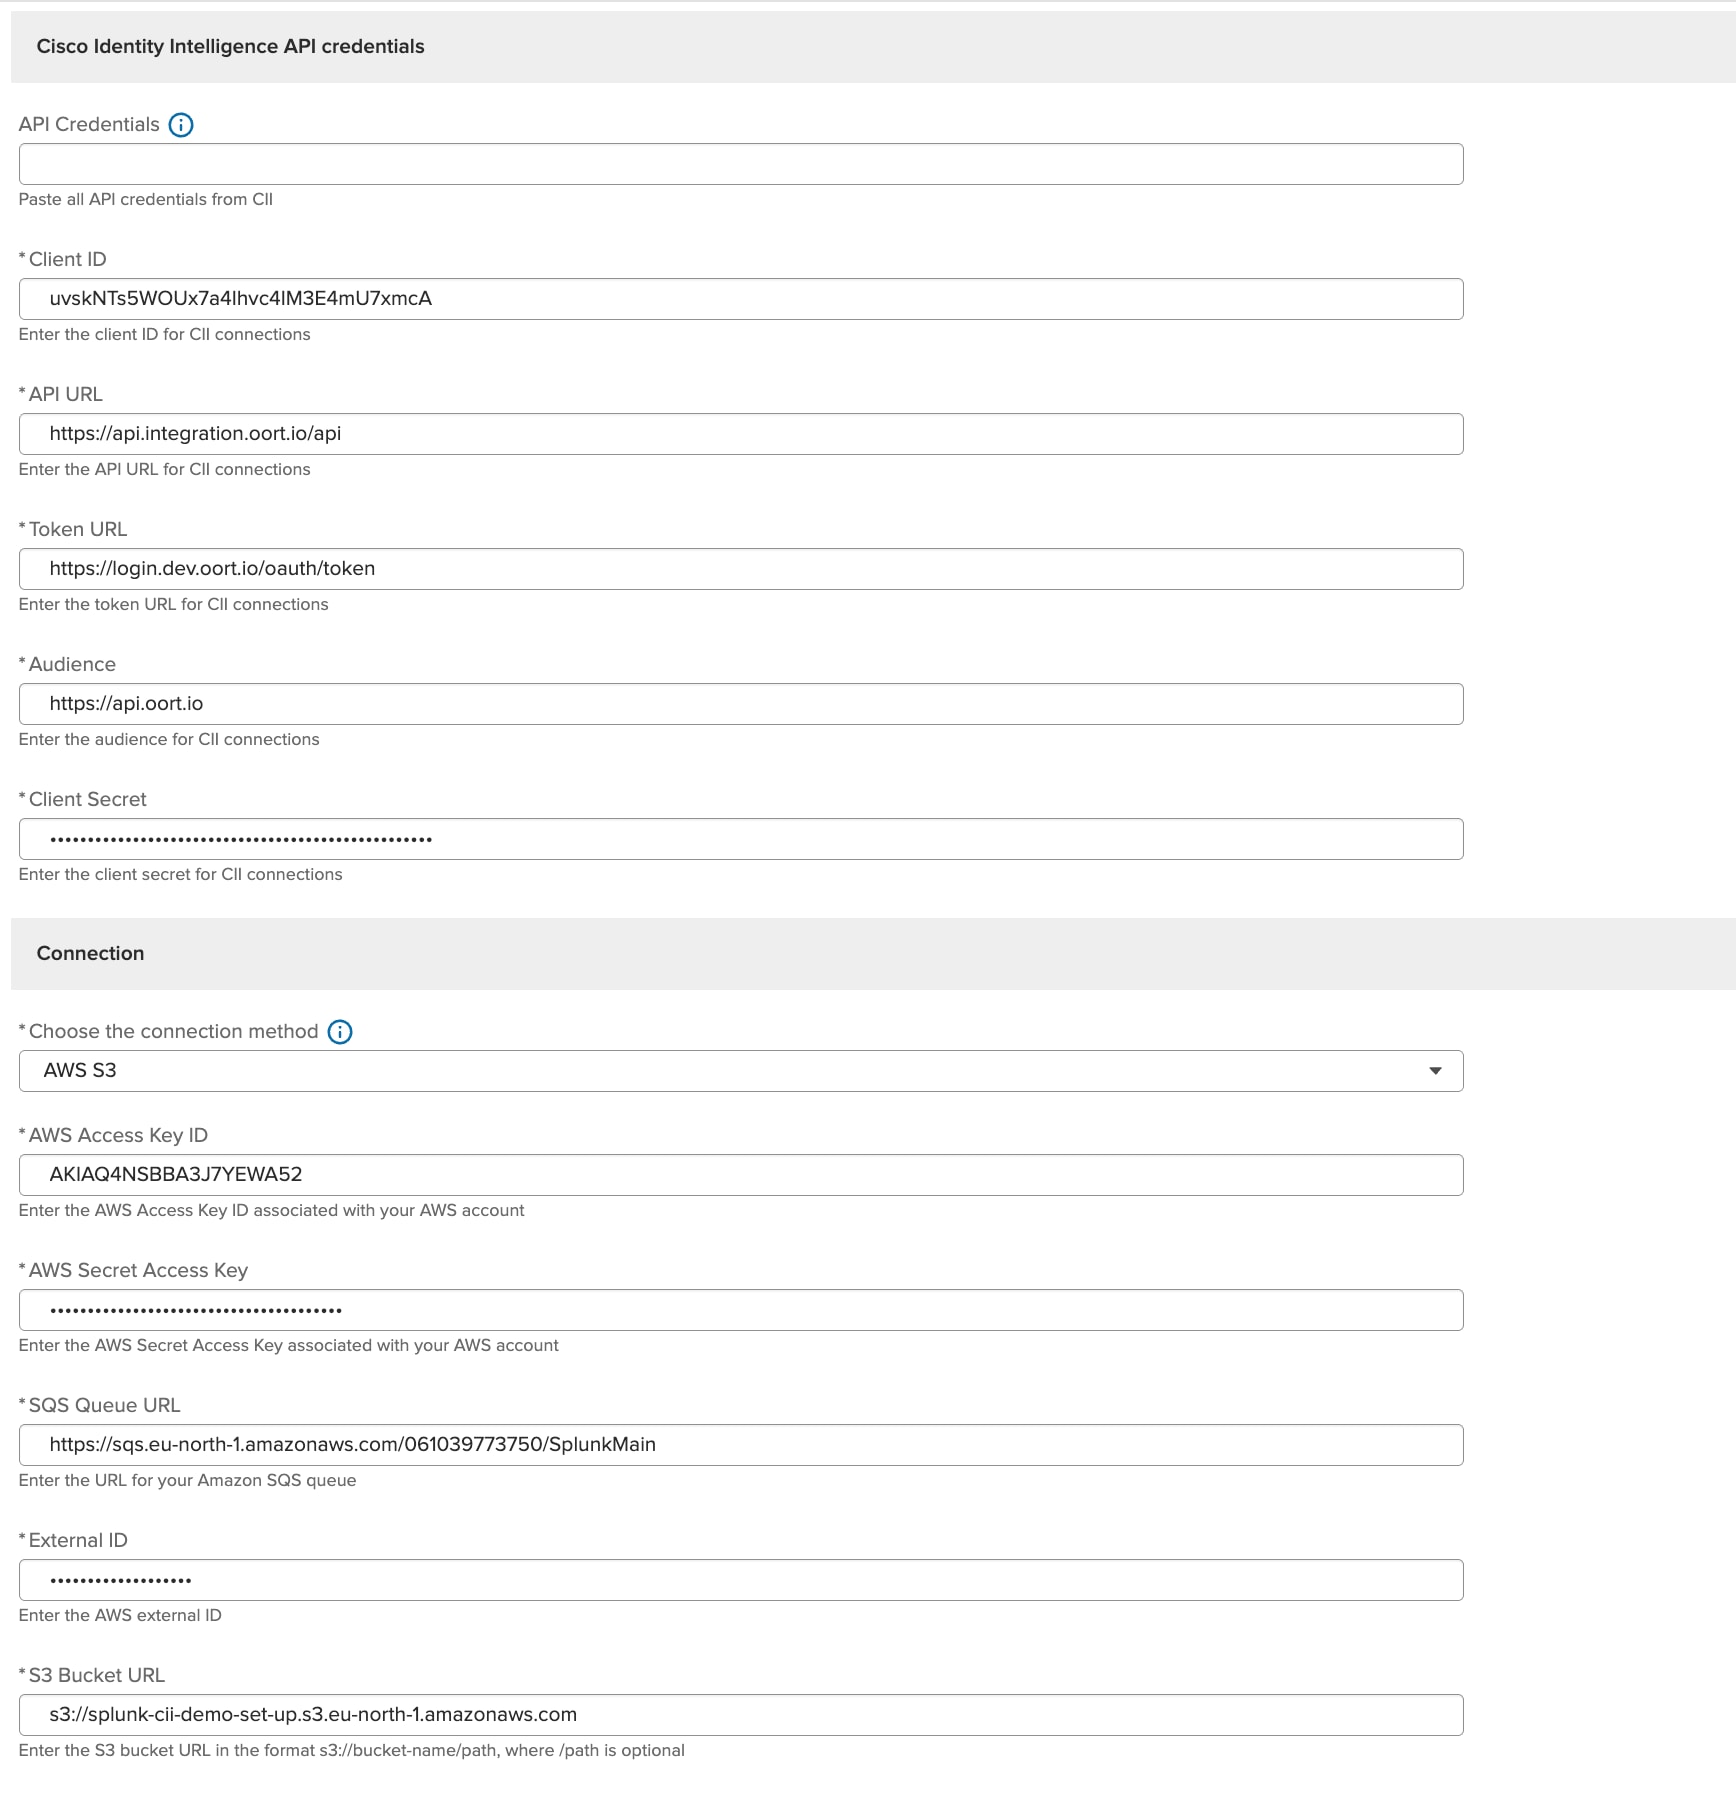
Troubleshooting
In Splunk:
- Navigate to Apps in Splunk and open the Splunk Add-on for AWS.
- Go to the Inputs tab and verify if a new input named test_splunk_demo has been created.

-
Select the Account tab and find the entry for test_splunk_demo.
a. Ensure the account details are correct and match the credentials used during the integration setup.

In AWS S3:
-
Check the S3 Bucket:
a. Log in to your AWS console and go to the S3 service.
b. Locate the bucket named splunk-cii-demo-set-up (or the bucket name used during the integration setup).
-
Verify Data in the S3 Bucket:
a. Check if data appears in the bucket after clicking Test Connectivity in Cisco Identity.
Webhook Splunk Integration
Overview
To establish an integration between Splunk and Cisco Identity, please refer to the setup guide section in this document. This integration method, the Splunk HTTP Event Collector (HEC), is utilized to receive event data as Cisco Identity publishes it, making it suitable for streaming event data directly from Cisco Identity to Splunk and getting notified quickly about Near-Time Compatible detections. Prior to implementation, it is important to construct the appropriate HEC URL and ensure robust authentication and endpoint configuration.
Prerequisites
Before you begin, please ensure you have the following:
- Administrative access to your Cisco Identity
- Administrative access to your Splunk Enterprise or Splunk Cloud (Minimum Cisco Security Cloud version 3.0.0, Splunk Enterprise & Splunk Cloud 9.4, 9.3, 9.2, 9.1)
- The Cisco Security Cloud application installed from Splunkbase
- Appropriate permissions to configure a Splunk HTTP Event Collector (HEC)
Warning: If your organization has a large number of users or non-human identities, it is HIGHLY encouraged to use the S3 bucket solution instead of webhooks. This ensures that you can receive all data associated with failing detections. Webhooks are susceptible to hitting maximum thresholds which can cause errors or unexpected data loss
Setup Guide
- Login to your Splunk Enterprise or Splunk Cloud instance and select Cisco Security Cloud from the Apps section
-
Under Cisco Products section go to Cisco Identity and click Configure Application
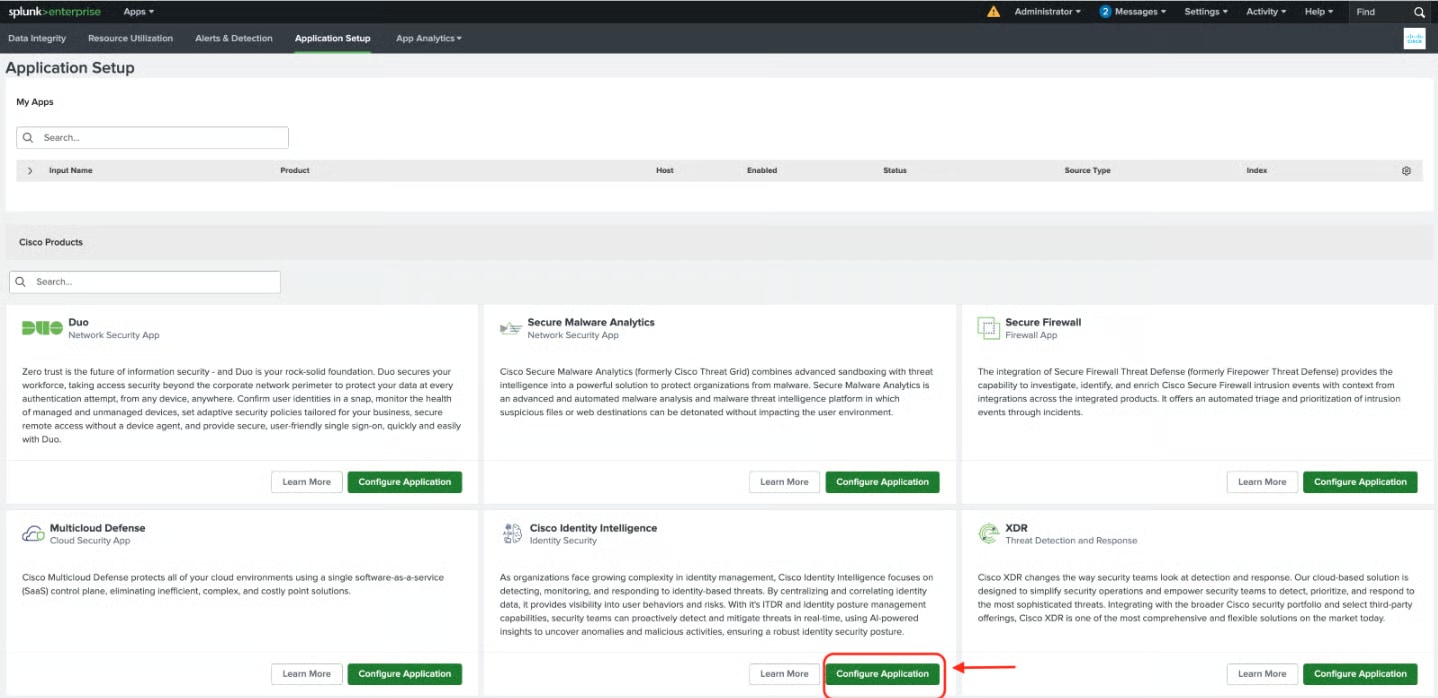
-
To get the HTTP Event Collector parameters, follow the instructions under the Set up Guide in the Splunk app for Cisco Identity section.
Cisco Identity API Credentials
You will need API credentials from Cisco Identity to complete the setup. To generate Cisco Identity API credentials, follow below steps
- Sign in to Cisco Identity
- Go to the Integrations tab and click Add Integration
- Scroll down and click Add API Client
- Provide a Name and Description
-
Click Save and generate credentials
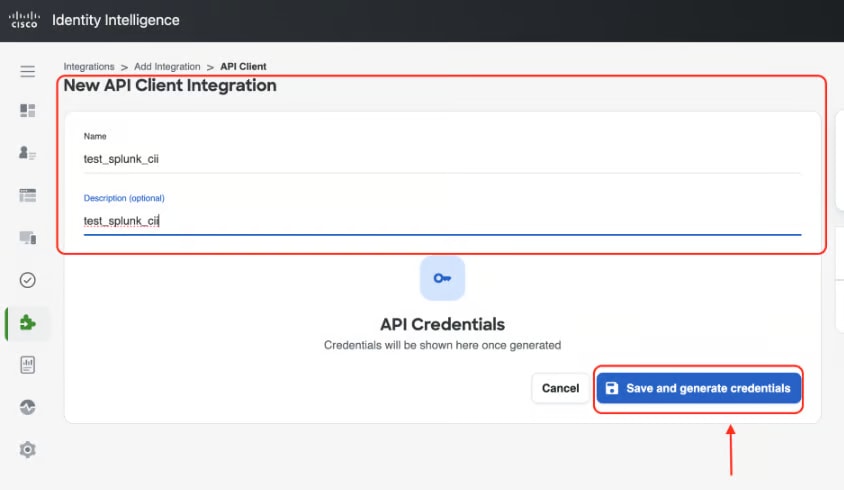
-
Once saved, click Copy all to copy the credentials to a secure location for use in the Splunk app.
-
Go back to Splunk and paste the copied credentials under the Cisco Identity API Credentials section
Note: Starting September 2025, Cisco Identity no longer provides the audience value when creating an API client. However, the audience field is still required in the Splunk application. Until the application is updated, please use the default audience value
https://api.oort.iofor this field. We will update this documentation once the application no longer requires an audience value.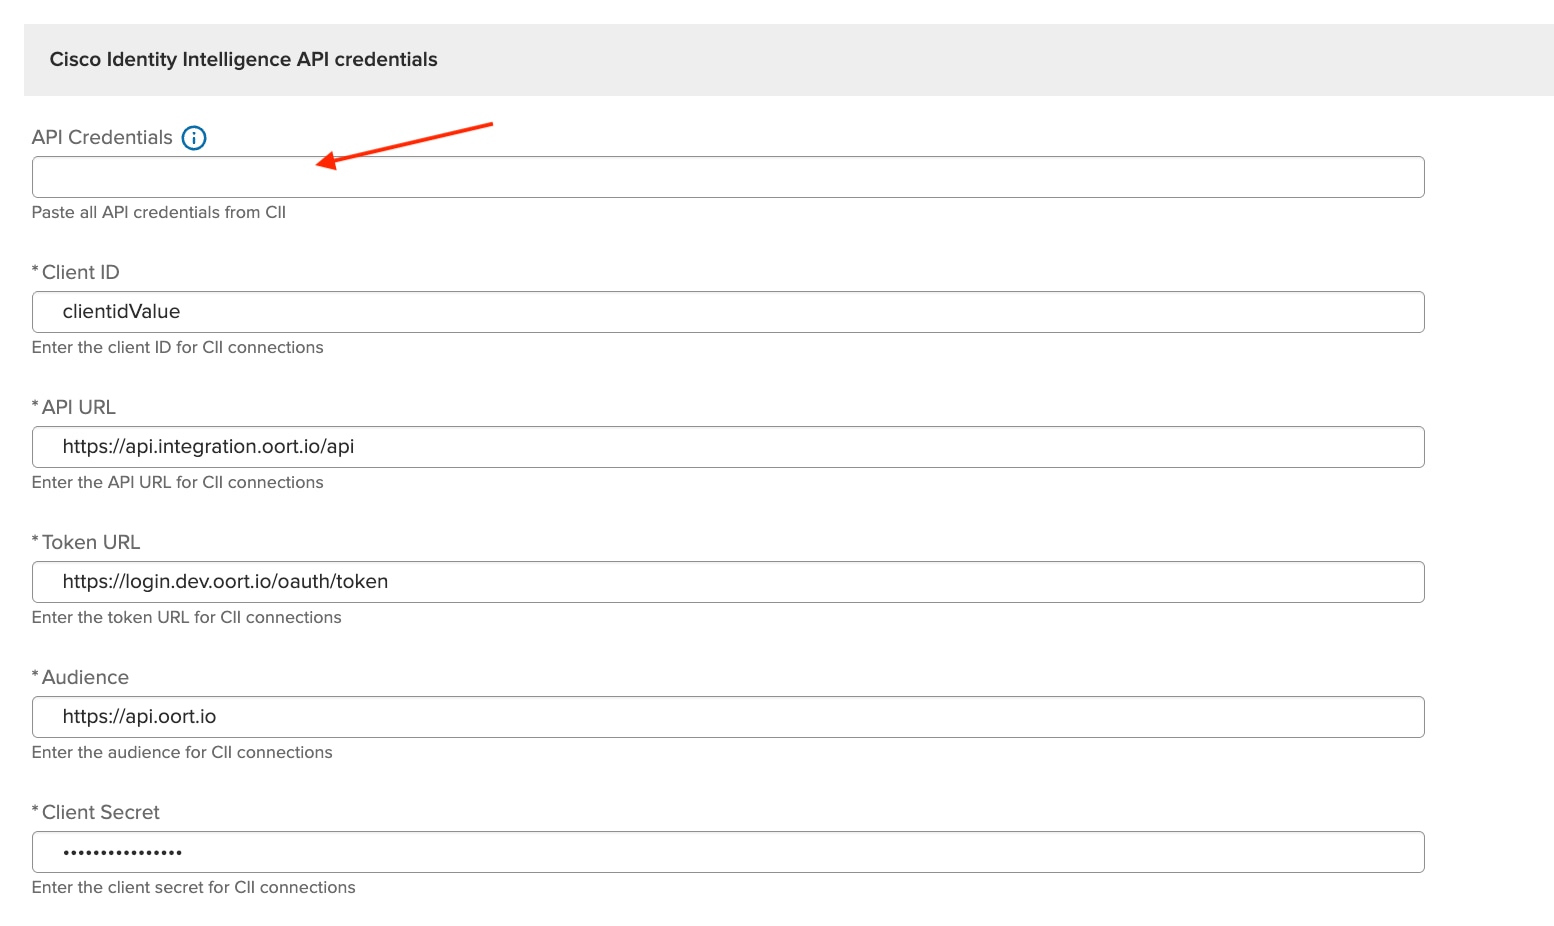
-
Once API credentials are entered, the next step is to select the connection method. Select Webhook as the connection method from the drop down.
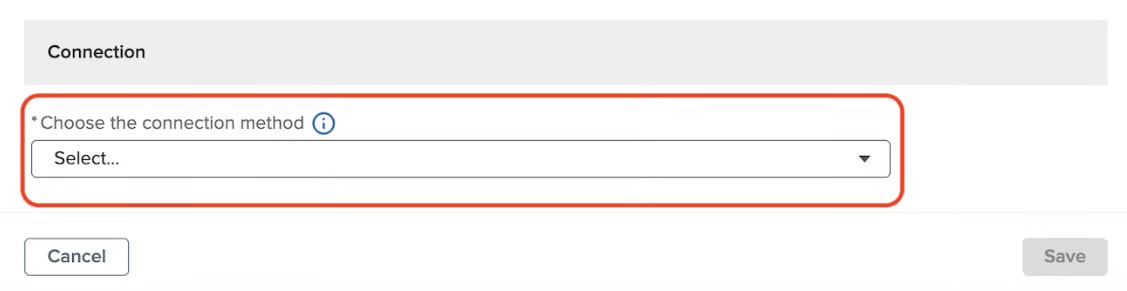
-
Next, enter the Splunk HTTP Event Collector (HEC) URL. This URL will handle incoming events from Cisco Identity. Please ensure that the URL is correct and properly formatted. Once confirmed, click Save.
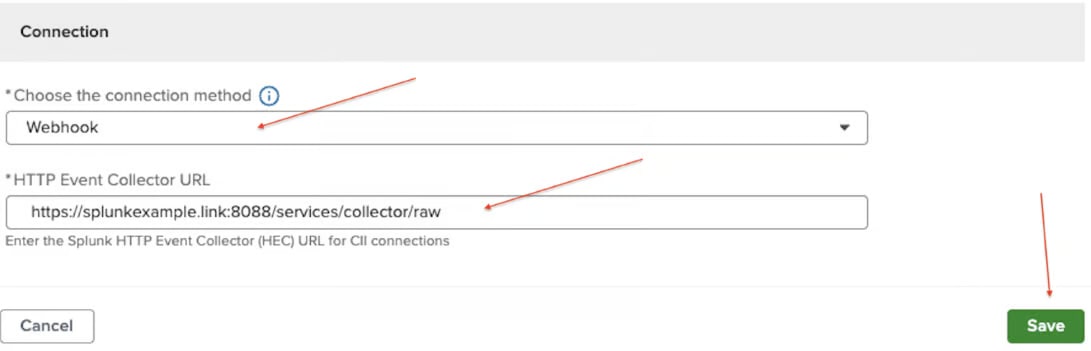
Troubleshooting
Required Permissions: Ensure you have sc_admin or equivalent permissions in Splunk.
Part 1: Basic HEC Setup and Direct curl Test
This checks if your Splunk HEC is configured and listening.
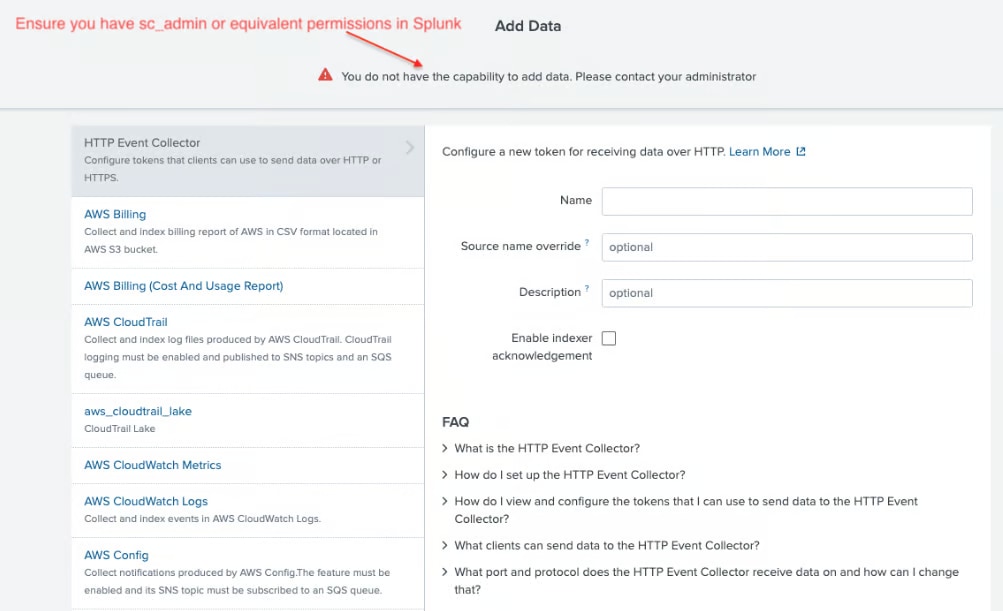
Enable and Configure HTTP Event Collector (HEC) in Splunk
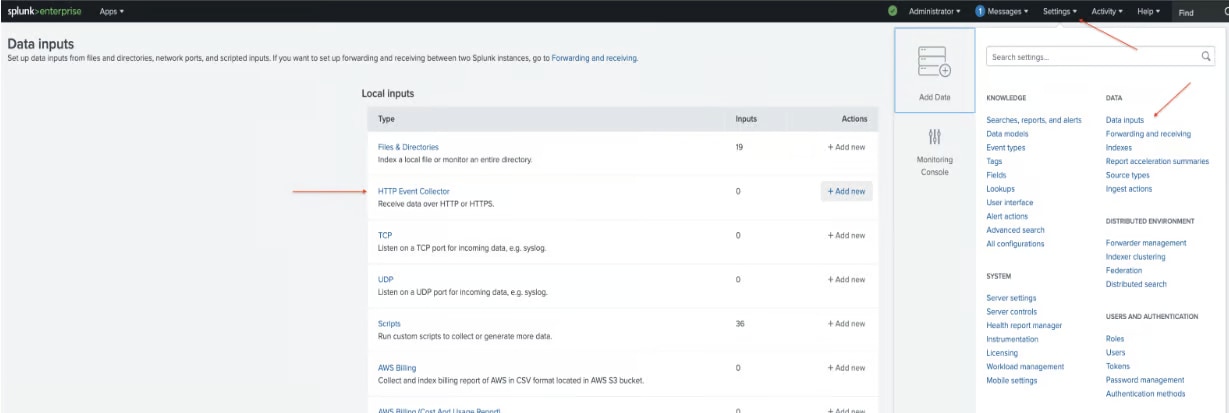
- Navigate to Settings > Data Inputs.
- Under "Local Inputs", click on HTTP Event Collector.
- If HEC is not enabled, click Global Settings in the top right.
- Toggle All Tokens to "Enabled".
- Optionally, set a Source type and Default index for all HEC inputs.
- Click Save.
- Back on the HTTP Event Collector page, click New Token to create a new HEC token.
- Give your token a Name (e.g., HEC_Test_Token).
- (Optional) Set Source type, Input settings (e.g., index, host field value). For a basic test, default settings are often fine.
- Click Review, then Submit.
- After the token is created, Splunk will display the Token Value. Copy Token Value.
Construct Your HEC Endpoint URL
- The HEC endpoint URL typically follows this format: https://\
:8088/services/collector/event - Replace \
with the hostname or IP address of your Splunk instance. - The default HEC port is 8088. Ensure this port is open on your Splunk server and accessible from where you are running the curl command.
- For example, if your Splunk host is splunk.example.com, your URL would be https://splunk.example.com:8088/services/collector/raw
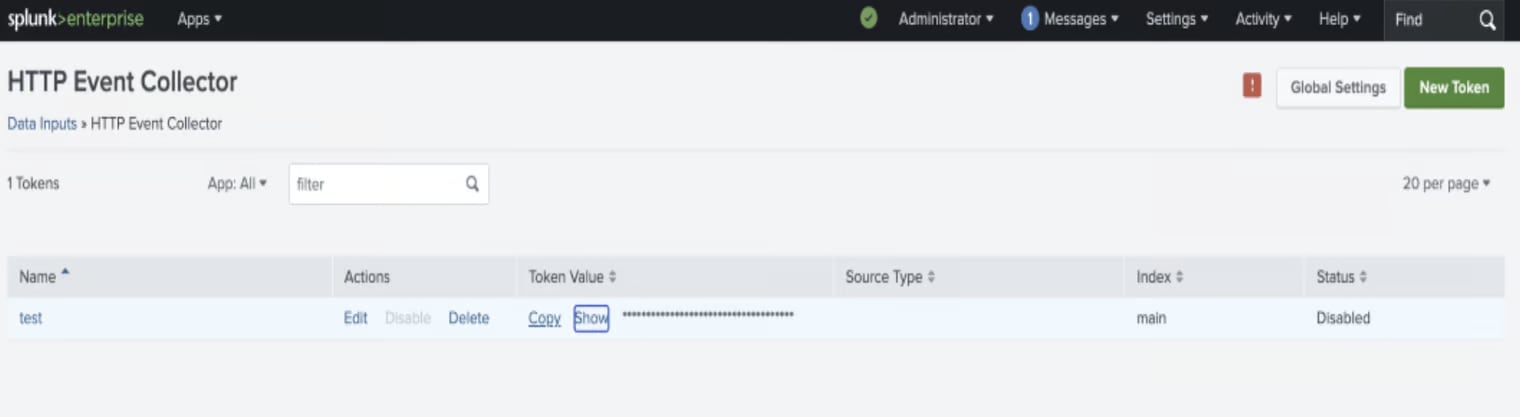
Send a Test Event using curl
- Open a terminal or command prompt on a machine that has network access to your Splunk instance.
- Use the following curl command, replacing {Token Value} and {HEC URL} with your specific details:
curl -k -H "Authorization: Splunk {Token Value}" -d '{"event": "Hello, Splunk HEC Test!"}' {HEC URL}
- URI Formats for Splunk Cloud Platform:
- Standard URI format for Splunk Cloud Platform free trials: https://http-inputs-example.splunkcloud.com:8088/services/collector/raw
- Standard URI format for Splunk Cloud Platform: https://http-inputs-example.splunkcloud.com:443/services/collector/raw
- Standard URI format for Splunk Cloud Platform on Google Cloud: https://http-inputs.example.splunkcloud.com:443/services/collector/raw
-
Standard URI format for Splunk Cloud Fedramp Moderate on AWS Govcloud: https://http-inputs.example.splunkcloudgc.com:443/services/collector/raw
-
URI Formats for Splunk Enterprise: Standard URI format: https://splunkexample.link:8088/services/collector/raw
Example:

Verify Success
- A successful response is {"text":"Success","code":0}.
- Search in Splunk for the event: index=\
Part 2: Troubleshooting External System Integration
- If the Splunk input was successfully created and the webhook on Cisco Identity was also created, you can proceed with a connectivity test.
- However, if no data appears in Splunk after the test, a potential issue could be associated with IP allowlisting.
- To enable incoming data, Splunk may require the inclusion of the Cisco Identity IP address within its allowlist (whitelist).
- In some cases, adding a broad range such as 0.0.0.0/0 to the allowlist might be considered temporarily for testing, but this is not recommended for production due to security risks.
- To secure and for successful data ingestion, it is advisable to obtain the precise Cisco Identity cloud IP addresses or ranges from Cisco and include only those in the Splunk allowlist. (https://docs.oort.io/integrations/webhooks). Specifically, please add the AWS IP ranges for your specific Duo-Cisco Identity region (e.g. Europe) as outlined here.
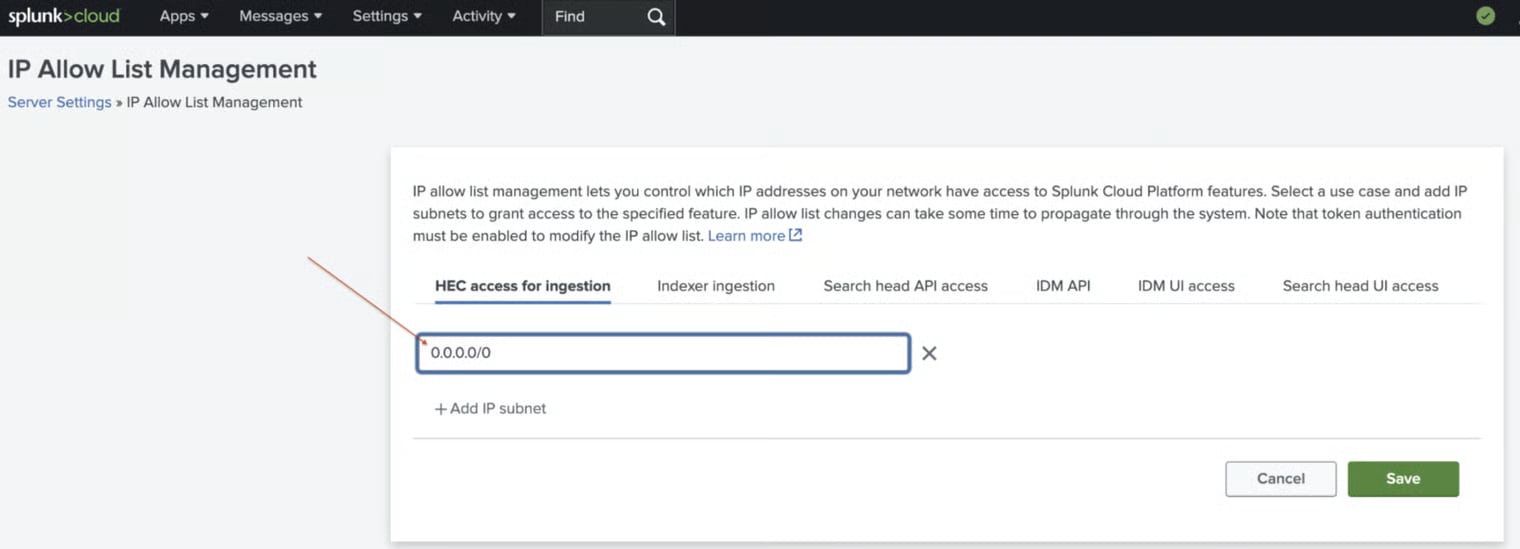
Jira Integration
Overview
The Cisco Identity security platform can integrate with Atlassian Jira to open tickets in response to failed Checks for various security configuration and identity threat events.
This document will walk you through the process of setting up access to Jira and will also walk you through the setup inside of the Cisco Identity console.
Jira Configuration
To add the necessary configuration in Jira, you need to have admin access to create a service account for the integration.
From the Jira admin console, create a new user account that will act as the dedicated service account for the integration following this article.
Set the password according to your organization’s service account password policy and store it securely.
Add this user account to the Jira project where you intend to send Cisco Identity related issues and tasks.
Provide the user account that you created with a role or permissions that allow it to create, read, and modify issues.
This article covers the various permission schemes available in Jira.
The next step is to login with that user account and create an API token.
Copy the API token to a secure location for input into the Cisco Identity console below.
Cisco Identity Configuration
Within the Cisco Identity console, navigate to -
Integrations -> New Integration -> Jira
Enter the following information according to the instructions below:
Enter an integration name and description.\
Enter your Jira instance URL. \
Enter the Project Key for the Jira project where you wish to open Cisco Identity related issues. The project key can be obtain in Jira by navigating to the Project page -> Project Settings.
Enter the email address of the service account you created.
Enter the API token created above.
Click Save.
Test the Jira Integration
To test the integration, navigate to a user that is failing a particular check, such as Inactive Users. Go to the Checks tab for that user.
Click the three dot option menu for a failing check and select Open Ticket.
Select your Jira ticketing service instance and click Confirm.
The ticket will appear in the lower section.
ServiceNOW Integration
Overview
The Cisco Identity security platform can integrate with ServiceNOW to open tickets in response to failed Checks for various security configuration and identity threat events.
This document will walk you through the process of setting up access to ServiceNOW and will also walk you through the setup inside of the Cisco Identity console.
ServiceNOW Configuration
To add the necessary configuration in ServiceNOW, you need to have admin access to the following:
From the ServiceNOW admin console, select User Administration.
Create a new account for the Cisco Identity integration. Set the password according to your organization’s service account password policy and store it securely.
Check the Web service access only option.
Give it the incident_manager role.
Click Save.
Cisco Identity Configuration
Within the Cisco Identity console, navigate to -
Integrations -> New Integration -> ServiceNOW
Enter the following information:
Enter a name and description. Enter your ServiceNOW instance URL. It may be a custom URL if you have that configured. Enter the username and password of the account that you created.
Click Save.
To test the integration, navigate to a user that is failing a particular check, such as Inactive Users. Go to the Checks tab for that user.
Click the three dot option menu for a failing check and select Open Ticket. The ticket will appear in the lower section.
After testing successfully, click the Collect Now button to begin initial data collection immediately.
Data Payload Details
The following table shows an overview of JSON styled payload that will be sent from Cisco Identity out to ServiceNow
| Field | Description | Type | Is Required |
|---|---|---|---|
| login | end user login | string | true |
| displayName | User's Display Name | string | true |
| status | Status, such as Active or Inactive | string | true |
| userTypeClassification | Valid values: INTERNAL, EXTERNAL, MISSING, UNCLASSIFIED, INCONSISTENT, SERVICE_ACCOUNT | string | true |
| ipAddresses | Up to 5 IP addresses recently used by the user | list of IP addresses along with geo location | false |
| lastSignInLocation | Last geolocation the user signed in from | city, country, state if available | false |
| managerLogin | Manager LoginID | string | false |
| phoneNumber | Phone Number | string | false |
| unusedApplications | Up to 2 applications the user is assigned to but not using | CSV | false |
| usedApplications | Up to 5 applications used by the user | CSV | false |
| usedFactors | Up to 5 factors used by the user | CSV string | false |
Example Ticket Description with End User Digest
karsch.heuck@simubiz.com failing Cisco Identity Check: IP Threat Detected
User Details:
Display Name          : Karsch Heuck
Login                 : karsch.heuck@simubiz.com
Status                : ACTIVE
Type                  : INTERNAL
Manager               : N/A
Phone                 : N/A
Used IP Addresses     : 2600:1017:b808:d190:4641:e114:b3a1:430a (US:New York:New York) 2601:280:5b7f:4cf0:d17a:44b4:6c75:4e4 (US:Arvada:Colorado) 50.229.84.62 (US:Stamford:Connecticut) 24.38.70.198 (US:Belleville:New Jersey) 198.55.26.62 (US:Stamford:Connecticut)
Used Applications     : cisco asa vpn (burlington), Cisco Identity Corp Okta instance, logmein rescue, atlassian cloud, microsoft office 365 for simubiz
Unused Applications   :
Used Factors          : push, totp
Last Sign-in Location : US

Recommended Actions:
We recommend contacting the end-user to purge the machine originating the traffic. We only tag successful logins to reduce false positives.

See user in Cisco Identity:
https://dashboard.ci.oort.io/go?org=Hh8hsedcx4CqYJOp&type=users&login=karsch.heuck%40simubiz.com