Cisco IOS XRv 9000 Appliance

This chapter introduces Cisco IOS XRv 9000 as an Appliance and describes the concepts associated with Appliance. This chapter also talks about tasks required to upgrade, downgrade and reinstall the IOS XRv 9000 software on Appliance.


Note


Cisco IOS XRv 9000 Appliance is introduced in Cisco IOS XR Release 6.1.2


Introducing Cisco IOS XRv 9000 Appliance

Cisco IOS XRv 9000 Appliance is a package of UCS hardware and Cisco XRv 9000 Router software with all applicable licenses. The Appliance package enables you to virtualize your network routing function without having operational concerns about ownership of hardware and software.

Cisco IOS XRv 9000 Appliance is the pre-installed Cisco IOS XRv 9000 Router software that is sent from the factory on a bare metal UCS server hardware. It supports hyper scalability as it can scale to 70 Million route prefixes when run as a Virtual Route Reflector. Therefore, the extra layer of software (hypervisor) is not required.

The Appliance also supports Zero Touch Provisioning (ZTP) which allows easier insertion into existing networks.

A single PID for the Appliance is inclusive of hardware, software, licenses, and services. The single PID for the Appliance simplifies the support and service experience as it eliminates the need to have separate service contract for software and hardware.


Note


  • Licensing is disabled.

  • Adding and removing any hardware is not supported.


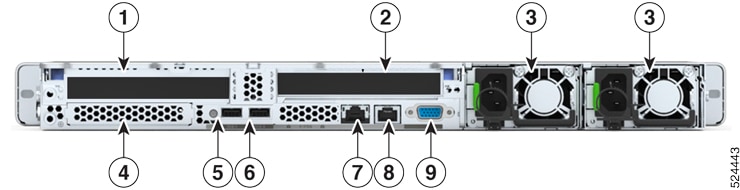
The below table lists supported UCS server and Appliance PID:

Table 1. Supported UCS Server and Appliance PIDs

Cisco IOS XR Release

Supported UCS Server Model

PIDs for Appliance

Release 6.1.2 and until Release 7.2.2

UCS C220 M4S

ASR-XRV9000-APLN

Release 6.6.2 to Release 24.3.x

UCS C220 M5SX

(UCSC-C220-M5SX)

XRV9000-APLN-ROUT

Release 24.4.2

UCS C220 M7

XRV-M7-APLN-25G

XRV-M7-APLN-100G

Default Console Settings for UCS C220 M7 Appliance

Table 2. Required Default Console Settings for UCS C220 M7 Appliance

Parameter

Default Setting

Boot Mode

EFI

Serial-over LAN

Disabled

Serial-over LAN Baud Rate

115200

Serial-over LAN COM Port

COM 0

CIMC

  • Uses UCS default password.

  • Password policy is enabled and one-time password is enforced.

  • Network mode is shared ROM.

  • Network redundancy is active-active.

BIOS

  • UCS is default for others.

  • Boot-order sequence is CDROM and HDD.

  • Console redirection is disabled.

  • UEFI secure boot is enabled.

  • Hyperthreading is disabled.

Appliance Physical Connections Overview

Table 3. Feature History Table

Feature Name

Release Information

Feature Description

UCS C220 M7 based Appliance Support on XRv9000

Release 24.4.2

The Cisco UCS C220 M7 Rack Server is designed for high-density performance, catering to virtualization, collaboration, and bare metal applications. The M7 based appliance features a 4th Gen Intel Xeon Scalable CPU with 28 cores and 128GB of RAM. Key enhancements include PCIe Gen 5.0, a DDR5 memory bus, and the ability to utilize 480GB M.2 Bootable SATA Intel SSD drives. Furthermore, we now provide M7 appliance support for both 25G and 100G models, effectively succeeding the end-of-life M5 UCS Server.

The rare panel view of the Appliance is similar to UCS server. However, some interfaces that are available on the UCS server are not used in the Appliance. The below topics show the usage and mapping of the interfaces in Appliance.


Note


M5 is not supported starting from Release 24.4.2 onwards.


UCS M7 Based Appliance Chassis Rear View (two full-height, 3/4-length PCIe risers)

This figure shows an overview of UCS 25G M7 based Appliance rear view panel features for two full-height, ¾ length PCIe riser.

Table 4. Mapping of the Interfaces in Appliance

Interface Description

In Appliance

1.

Riser 1C PCIe Gen5 (CPU1 control)

  • Supports one PCIe slot (slot 1)

  • Slot 1 is full-height, 3/4 length, x16,NCSI, Single Wide GPU

Contains Intel E810 NIC with 4x25G ports

2.

Riser 3C PCIe Gen5 x16 (CPU2 control)

  • Supports one PCIe slot (slot 3)

  • Slot 3 is Full-height, 3/4 length, x16, NCSI, Single Wide GPU

-

3.

Power supplies (two, redundant as 1+1)

-

4.

Modular LAN on motherboard (mLOM)/OCP 3.0 slot

Used to connect Intel X710 OCP card for management connectivity.

5.

System ID pushbutton/LED

Mapped to Cisco Integrated Management Controller (CIMC)

6.

USB 3.0 ports (two)

Used as USB ports.

7.

1GBE dedicated Ethernet management port

Mapped to Cisco Integrated Management Controller (CIMC)

8.

COM port (RJ45 connector)

Mapped to XR console

The serial port should be cabled to a device that will allow you keyboard/video access over that serial port.

9.

VGA display port (DB15 connector)

Used as VGA display port

Interface Enumeration and Physical Mapping

3

2

1

0

PCIe01 4X25G E810

UCS M7 Based Appliance Chassis Rear View (three half-height, 3/4 length PCIe riser)

This figure shows the rear view of UCS 100G M7 based Appliance panel features for three half-height, ¾ length PCIe riser.

Table 5. Mapping of the Interfaces in Appliance

Interface Description

In Appliance

1.

There are two half height riser options:

  • Riser 1A PCIe Gen4 (CPU1control)

  • Supports one PCIe slot (slot 1)

  • Slot 1 is half-height, 3/4 length, x16, NCSI, Single Wide GPU

Contains Mellanox ConnectX-6 NIC with 2x100G ports.

2.

There are two half height riser 2 options:

  • Riser 2A PCIe Gen4 x16 (CPU1 control) -

    • Supports one PCIe slot (slot 2)

    • Slot 2 is half-height, 3/4 length, x16, Single Wide GPU

Contains Mellanox ConnectX-6 NIC with 2x100G ports.

3.

There is one half height riser 3 option: Riser 3A PCIe Gen4 x16 (CPU2control)

  • Supports one PCIe slot (slot 3)

  • Slot 3 is half-height, 3/4 length, x16, NCSI, Single Wide GPU

-

4.

Power supplies (two, redundant as 1+1)

-

5.

Modular LAN on motherboard (mLOM)/OCP 3.0 slot

Used to connect Intel X710 OCP card for management connectivity.

6.

System ID pushbutton/LED

Mapped to Cisco Integrated Management Controller (CIMC)

7.

USB 3.0 ports (two)

Used as USB ports.

8.

1GBE dedicated Ethernet management port

Mapped to Cisco Integrated Management Controller (CIMC)

9.

COM port (RJ45 connector)

Mapped to XR console

The serial port should be cabled to a device that will allow you keyboard/video access over that serial port.

10.

VGA display port (DB15 connector)

Used as VGA display port

Interface Enumeration and Physical Mapping

The PCIe02 adapter is physically inserted upside down relative to PCIe01. Therefore the last two ports of PCIe02 interface are upside down. Hence the physical to XR port mapping is from left to right as shown in the below table:

1

0

3

2

PCIe01 2X100G MLNX

PCIe02 2X100G MLNX

Configuring the Appliance

The Appliance can be configured in three ways:

Manual Configuration Using CLIs

To start the manual configuration:

  1. Connect to the XR console (or a controller) through the serial port (COM0) which connects directly to CIMC.

    Alternately, you can also access console output from CPU through CIMC, SOL, or KVM using a console redirection setting, which can be modified in BIOS. The same can be accessed at following path from the CIMC GUI: Compute > BIOS > Configure BIOS > Server Management.

    Once this setting is modified, reboot the host so that the new settings are applied. After the host reboot, all the output from BIOS, CPU is redirected to KVM or SOL (Serial-over LAN).

  2. Login to the XR console using admin password


    Note


    You can use default credentials username as <root> and password as <lab>. If you still cannot login, use <root> as the user name <Cisco123> as password.


  3. Configure the router manually using CLIs

    For information on specific IOS XR configuration refer, ASR 9000 System Management Configuration Guide.

    For information on specific IOS XR configuration CLIs refer, ASR 9000 System Management Command Reference.

IOS XRv 9000 does not support all the features supported on IOS XR. Refer the latest IOS XRv 9000 Router Release Notes to know the features supported on IOS XRv 9000 Router.

Automated Configuration Through Zero Touch Provisioning

Zero Touch Provisioning (ZTP) helps in auto provisioning after the software installation of the router.

ZTP boot modes

ZTP can be used to configure the router as a part of first boot in one of the following modes:

  • Appliance Mode

  • KVM mode on RHEL

  • ESXI mode on VMware

ZTP auto provisioning methods

ZTP on first boot from the factory can be initiated either using configuration or script files.

  • Configuration—Downloads and executes the configuration files. The first line of the file must contain the code !! IOS XR for ZTP to process the file as a configuration.

  • Script—Downloads and executes the script files. These script files include a programmatic approach to complete a task. For example, scripts created using IOS XR commands to perform patch upgrades. The first line of the file must contain the code #! /bin/bash or #! /bin/sh for ZTP to process the file as a script.

For ZTP to work, a DHCP server and a TFTP or HTTP-based file server containing Day-0 configuration should be present on the network interface being used for configuration.There should be a configuration on DHCP server for specific UID or MAC and path of a valid network file containing the Day-0 configuration.

ZTP priority on selection of interface

ZTP can be run on both management or data plane interfaces. Selection of an interface depends upon which interface is found as ACTIVE, however the selection is based on the order as specified.

  1. Management interface

  2. Data plane interface

For more information on auto provisioning using ZTP, refer Zero Touch Provisioning section.

Automated Configuration using CVAC and USB

The Cisco IOS XRv 9000 Appliance supports auto configuring using CVAC. You should supply a plain-text configuration file iosxr_config.txt that has standard XR configurations on a USB drive to CVAC and boot the Appliance. This only works if no other configuration, including initial username and password has been configured.

For more information on how to boot Appliance using CVAC, refer the section CVAC - Bootstrap Configuration Support.

Software Management

As an IOS XR based product, the IOS XRv 9000 Appliance inherits a lot of the capabilities for software management from IOS XR. This section describes the concepts and tasks necessary to upgrade, downgrade and reinstall the IOS XRv 9000 Router software.


Note


The FPD related commands are not supported on IOS XRv 9000 Appliance. That includes fpd auto-update command.


Software Management through UCS

The Appliance device comes with IOS XRv 9000 software preinstalled. User can reimage the device with the desired version of the software (Release 24.4.2 or later) anytime by one of these methods:

  • Reinstall the OS using CIMC

  • Reinstall the OS from the USB Port

  • Reinstalling the OS using a PXE Installation Server


Note


Reinstalling the OS will remove all the existing configurations and system information.


After the OS is installed perform the basic configuration as discussed in the Configuring the Appliance section.

Reinstall IOS XRv 9000 software using CIMC

Cisco Integrated Management Controller (CIMC) is used to manage the physical device and can be accessed through a web browser. CIMC is used to:

  • remotely power on/off the Appliance,

  • remotely access the console,

  • reinstall the software, and

  • upgrade firmware.

You can use CIMC to reinstall IOS XRv 9000 software remotely on the Appliance. By default CIMC has a dedicated GigE port on the Appliance. You must configure the CIMC port with an IP Address to access CIMC from a web browser. The option to configure CIMC port is available during power-on the device on the VGA console.

After configuring the IP Address on the CIMC port, log into CIMC from a web browser and use KVM (keyboard, video, and mouse) console.

When updating to Cisco IOS XRv version 24.4.2 or later on a UCS bare metal server, the KVM console is no longer available. Instead, you should use the telnet port, which allows access to both the XR and Calvados consoles.

Instead of using CD/DVD or floppy drives physically connected to the server, the KVM console uses virtual media, which are actual disk drives or disk image files that are mapped to virtual CD/DVD or floppy drives.

For more information on launching KVM console, refer KVM Console.


Note


The ISO version of the IOS XRv 9000 software must be used for software installation and reinstallation.


Reinstalling the OS using CIMC on M7 UCS based Appliance

Follow the below procedure to reinstall the OS on M7 UCS based Appliance:

Starting Cisco IOS XR Software Release, Xrv9000 OE Images (24.4.2 and higher version images) are able to load only on UCS M7 machines in Baremetal appliance deployment scenario.

Before you begin
  • Download the desired ISO image file (Release 24.4.2 or later version) to your machine

  • You must log in as the user with admin privileges to install the OS

  • You must be running CIMC latest version.

  • Before loading the IOS XRv9k image, ensure that you have the required UCS M7 BIOS and CIMC images running on the system.

Procedure

Step 1

Download the required standard image (new K9 VRR image) from CCO and proceed with the installation.

Step 2

Copy OS installation ISO disk image files to your computer.

Step 3

If CIMC is not open, then log in.

Step 4

From the CIMC portal, launch KVM from Actions > System > launch KVM.

Step 5

Select Virtual Media>Activate Virtual Device in the KVM console.

Step 6

Select Virtual Media>vKVM Mapped DVD. Then browse the ISO installation disk image stored locally and click Map Device.

Step 7

Select Power>Power cycle System (warm boot) in the KVM console.

Step 8

Press F6 to enter the boot menu. Once you are in the boot menu, select the first DVD which is nothing but the same iso you selected earlier, mounted as a virtual disk. (Eg: Cisco vKVM Mapped vDVD1).

When the server reboots, it begins the installation process. After the installation process completes, refer the section Configuring the Appliance to go through how to configure the device. To retain the console access you can check if COM0 is mapped to SOL. So, you can either disable SOL or map SOL to COM1. After this, the physical Serial Port is map to the XR Console.


Reinstalling the OS from a USB Port

The Appliance supports booting an operating system from any USB port. However, there are a few guidelines that you must keep in mind, prior to booting an BIOS from a USB port.

  • The BIOS installation process requires a bootable USB drive. Refer Creating a Bootable USB Drive section.

  • To maintain the boot order configuration, it is recommended that you use an internal USB port for booting an BIOS.

  • The USB port must be enabled prior to booting an OS from it.


    Note


    By default, the USB ports are enabled. If you have disabled a USB port, you must enable it prior to booting an BIOS from it.


  • After you boot the BIOS from the USB port, you must set the second-level boot order so that the server boots from that USB source every time.

Installing an operating system from a USB port:

  1. Power cycle the Appliance

  2. During boot process, select the USB Boot Option, and continue

  3. The system will install the image from USB drive to harddisk drive and then reboots.


    Note


    USB drive with large memory size won't boot. Hence, we recommend to use 8GB USB drive.


Reinstalling an OS Using a PXE Installation Server

Before you begin
  • Verify that the server can be reached over a VLAN.

  • You must log in as a user with admin privileges to install an OS.

Procedure

Step 1

Set the boot order to PXE first.

Step 2

Reboot the server.

If a PXE install server is available on the VLAN, the installation process begins when the server reboots. PXE installations are typically automated and require no additional user input. Refer to the installation guide for the OS being installed to guide you through the rest of the installation process.


What to do next

After the OS installation is complete, reset the LAN boot order to its original setting.

Creating a Bootable USB drive

To create a bootable USB drive you need UNetbootin-an external open source software.

Before you begin
  • Download the desired Cisco IOS XRv 9000 ISO installation file to your laptop or server.

  • Download the UNetbootin app from this link: https://unetbootin.github.io/

Procedure

Step 1

Copy the OS installation disk image files to your computer

Note


We recommend to use ISO version of the IOS XRv 9000 software installation file for reinstallation.

Step 2

Format the USB disk to fat32 format

Step 3

Run UNetbootin and load the ISO installation file

Step 4

Build the USB disk. Follow the instructions provided in this link: https://unetbootin.github.io/

By default, the BIOS displays the list of items that the user has to select.

For Mac OS users, use terminal to go to the mount point, and use Vi editor to edit the file. For example: /Volumes/MYDISK.


Software Management using IOS XR

The IOS XRv 9000 software can be upgraded or downgraded using any of these methods:

  • IOS XR CLI commands

  • ZTP bash scripting (of install commands)

  • IOS XR supported manageability interfaces

For information on the upgrade and downgrade procedures, see the upgrade document. It is available along with the software images.

Software Upgrade Using CLI

Before you begin
  • Download the desired ISO image file to your machine.

Procedure

Step 1

install commit

Example:
router# install commit

Commit the current version of IOS XRv 9000 software installed on the Appliance.

Step 2

install add source <filepath>

Example:
router# install add source tftp://192.0.2.4/fakepath/xrv9k-fullk9-x.iso

Locate the ISO disk image file that has to be installed on the Appliance.

Step 3

install activate <filename>

Example:
router# install activate xrv9k-fullk9-x.iso

Activates the IOS XRv 9000 new image version. The router reboots.

Step 4

show version

Example:
router# show version

Verify the new image version installed.

Step 5

install commit

Example:
router# install commit

Commits the new version.


Firmware Management

Firmware for the following individual components can be updated:

  • CIMC

  • BIOS

Updating the BIOS and Cisco IMC Firmware


Caution


When you upgrade the BIOS firmware, you must also upgrade the Cisco IMC firmware to the same version, or the server does not boot. Do not power off the server until the BIOS and Cisco IMC firmware are matching or the server does not boot.


UCS Server can be upgraded only to firmware obtained and certified by Cisco. Cisco provides release notes with each firmware image.

  • You can upgrade the Cisco IMC and BIOS firmware by using the Cisco IMC GUI interface.

Firmware Files

The latest version of firmware validated with 24.4.2 is bundled as part of following package:


xrv9k-ucs-c220m7-huu-container-4.3.5.250001.tar.gz

The bundle contains latest CIMC and BIOS firmware which needs to be upgraded on the system as described below. There is a mandatory security fix in CIMC image and hence would require the system to be upgrade with packaged CIMC and BIOS versions.

The CIMC and BIOS firmware can be extracted after downloading the TAR ball from the CCO site, as mentioned in the following steps.

  1. Copy the tar ball to a laptop connected on the same network as UCS management network.

  2. Untar the package.

  3. In the untarred directory, check for bios.pkg and cimc.bin in following directory:

    
    <untar dir>/firmware/bios/bios.pkg
    <untar dir>/firmware/cimc/cimc.bin
    
  4. Confirm that the checksum for both the files using sha256sum command matches as per the hashes specified in the respective release notes.

    Use the firmware package cimc.bin for upgrading CIMC version and bios.pkg for BIOS as provided in the following procedure.

Upgrading via the CIMC UI

Viewing Firmware Components

Procedure

Step 1

From the Apps drop-down list, select Administration.

Step 2

In the Navigation pane, click Firmware Management menu.

Step 3

In the Firmware Management area, review the following information for CIMC, BIOS, and other components:

Table 6. Firmware Management

Name

Description

Component checkbox

Allows you to select one ore more components.

Upload button

Opens a dialog box that allows you to install a firmware image file that is available to your local machine or on a remote server.

Note


Upload button is visible only when you select a component.

Activate button

Allows you to activate the firmware for the selected component.

Note


Activate button is visible only when you select a component.

Component column

List of components available for which you can update the firmware.

Running Version column

The firmware version of the component that is currently active.

Backup Version column

The alternate firmware version installed on the server, if any. The backup version is not currently running. To activate it, click Activate.

Note


When you install new firmware, any existing backup version is deleted and the new firmware becomes the backup version. You must manually activate the new firmware if you want the server to run the new version.

Bootloader Version column

The bootloader version associated with the boot-loader software of the component.

Status column

The status of the firmware activation on this server.

Progress in % column

The progress of the operation, in percentage.


Updating the Firmware

You can install the firmware package from a local disk, remote server, or a USB storage device connected to a server. After you confirm the installation, BMC replaces the firmware version in the component's backup memory slot with the selected version.

Procedure

Step 1

From the Apps drop-down list, select Administration.

Step 2

In the Navigation pane, click Firmware Management menu.

Step 3

In the Firmware Management area, select a component from the Component column and click Upload.

The Update Firmware dialog box appears.

Step 4

In the Update Firmware dialog box, update the following properties:

Table 7. Remote
Name Description

Remote button

Select this option when you want to upload the firmware from a remote location.

Server IP/Hostname

Server details from where you want to download the client certificate.

Upload Protocol button

Select one of the following protocols.

  • TFTP

  • FTP

  • SCP

  • SFTP

  • HTTP

Note


If you select FTP, SCP or SFTP, you will be prompted to enter your username and password.

  • Note


    Front Panel USB option is visible only if Smart Access USB is enabled and a USB storage device is connected to the server.

    Front Panel USB—This allows you to install the firmware through a USB storage device connected to the server.

    Enter the firmware file name and location in the Image Path and Filename field, and click Install Firmware.

Path and Filename field

File path where the firmware file resides on the server along with the filename.

Username field

User name for your remote server.

Password field

Password for your remote server.

Upload button

Allows you to upload the firmware file.

Note


If you chose SCP or SFTP as the remote server type while performing this action, a pop-up window is displayed with the message Server (RSA) key fingerprint is <server_finger_print _ID> Do you wish to continue?. Click Yes or No depending on the authenticity of the server fingerprint.

The fingerprint is based on the host's public key and helps you to identify or verify the host you are connecting to.

Table 8. Local
Name Description

Local button

Select this option when you want to updated the firmware from your local machine.

Click Browse and navigate to the firmware file you wish to use.

Upload button

Allows you to upload the firmare file.


Activating the Firmware

Procedure


Step 1

From the Apps drop-down list, select Administration.

Step 2

In the Navigation pane, click Firmware Management menu.

Step 3

In the Firmware Management area, select a component from the Component column and click Activate.

The Activate Firmware dialog box appears.

Step 4

In the Activate Firmware dialog box, update the following properties:

Table 9. Activate Firmware

Name

Description

Firmware Version list

A list of the firmware versions available for activating the firmware.

Activate Firmware button

Activates the selected firmware version depending on the component you choose.

Important


While the activation is in progress, do not:

  • Reset, power off, or shut down the server

  • Reboot or reset BMC

  • Activate any other firmware

  • Export technical support or configuration data

Note


You can activate the BIOS firmware when the host is On. When you do this, Activation Pending is displayed in the Status field. After the next host boot, the BIOS activation that is in the pending state is activated.


Cancelling Firmware Activation

Before you begin

BIOS firmware must be in Activation Pending state for you to cancel the activation.

Procedure


Step 1

From the Apps drop-down list, select Administration.

Step 2

In the Navigation pane, click Firmware Management menu.

Step 3

In the Firmware Management area, select the firmware for which you want to cancel the activation.

Step 4

Click Cancel Activation.

Cancel Activation button is displayed only when you choose a firmware that is in Activation Pending state.


Cisco IOS XRv 9000 Appliance Hardware Monitoring

The hardware monitoring on Cisco IOS XRv 9000 Appliance enables you to view harware environmental parameters of the Appliance in the same way as you would see on a conventional hardware router. Based on the interfaces involved in retrieving information, the Appliance hardware information is grouped into these three sections:

  • Hardware Environment Monitoring—This includes power supply unit, fan, voltage, current, and temperature information; also includes hardware failure warning and alarms information.

  • Host OS Level Monitoring—This includes processor, core, memory, and HDD utilization information.

  • SFP Optic Monitoring—This includes optical diagnostics and SFP OIR (online insertion and removal) monitoring information.

Hardware Environment Monitoring

In Cisco IOS XRv 9000 Appliance, the system continuosly monitor hardware to collect information on power consumption and report hardware failure. You can view these information using below commands in system admin mode.

Task

Use this command

To view the chassis fan information.


sysadmin-vm:0_RP0#show environment fan
Mon Mar  17 10:19:04.846 UTC+00:00
=============================================================================================
			Fan speed (rpm)
Location     FRU Type           FAN_0   FAN_1   FAN_2   FAN_3   FAN_4   FAN_5   FAN_6   FAN_7
---------------------------------------------------------------------------------------------
0/FT0        XRV-FAN-C220M7=     5200    5330    5330    5330    5330    5330    5330    5330

There are six fans in the Cisco IOS XRv 9000 Appliance. These fans do not support OIR, hence you must shut down the Appliance in order to replace fans.

Unlike other hardware platforms, the Cisco IOS XR software running on the Appliance does not manage the fan speed. Instead, they are controlled by UCS Cisco Integrated Management Controller (CIMC) system.

To view the power tray information.


sysadmin-vm:0_RP0#show environment power
Mon Mar  17 10:19:12.380 UTC+00:00
================================================================================
CHASSIS LEVEL POWER INFO: 0
================================================================================
   Total output power capacity (-)                 :       0W +       0W
   Total output power required                     :       0W
   Total power input                               :       0W
   Total power output                              :     206W

Power Shelf 0:
================================================================================
   Power       Supply     ------Input----   ------Output---      Status
   Module      Type        Volts     Amps    Volts     Amps
================================================================================
   0/PT0-PM0   Cisco         0.0      0.0     12.1      9.0    OK
   0/PT0-PM1   Cisco         0.0      0.0     12.1      8.0    OK

Total of Power Shelf 0:          0W/  0.0A       206W/ 17.0A

================================================================================
   Location     Card Type            Power       Power       Status
                                     Allocated   Used
                                     Watts       Watts
================================================================================
   0/0          R-IOSXRV9000-LC-A        0           -       -
   0/RP0        R-IOSXRV9000-RP-A        0           -       -
   0/FT0        XRV-FAN-C220M7=          0           -           -

In the above command output, only the highlighted field information (Power Module and Output) has a meaningful readings for the Cisco IOS XRv 9000 Appliance.

The Total Power output is the sum of power output (power output = Volts*Amps) of each power module.

There are no input Volt/Amp sensors in the Appliance and there are no capacity, required, allocated, and used power data available for the Appliance.

To view the temperature information.

sysadmin-vm:0_RP0# show environment temperature
  ================================================================================
  Location  TEMPERATURE                 Value   Crit Major Minor Minor Major  Crit
            Sensor                    (deg C)   (Lo) (Lo)  (Lo)  (Hi)  (Hi)   (Hi)
  --------------------------------------------------------------------------------
  0/RP0
            Front (FP_TEMP_SENSOR)         27    -10    -5     0    40    45    50
            Hub (PCH_TEMP_SENS)            37    -10    -5     0    80    85    90
            Inlet (RISER1_INLET_TMP)       34    -10    -5     0    60    70    80
            Outlet (RISER1_OUTLETTMP)      34    -10    -5     0    60    70    80
            Inlet (RISER2_INLET_TMP)       35    -10    -5     0    60    70    80
            Outlet (RISER2_OUTLETTMP)      38    -10    -5     0    60    70    80
            Processor (P1_TEMP_SENS)       39    -10    -5     0    92    97   100
            Processor (P2_TEMP_SENS)       46    -10    -5     0    92    97   100
            Memory (DDR4_P1_A1_TEMP)       33    -10    -5    -1    65    85    90
            Memory (DDR4_P1_A2_TEMP)        0    -10    -5    -1    65    85    90
            Memory (DDR4_P1_A3_TEMP)        0    -10    -5    -1    65    85    90
...
  0/PT0-PM0
            PM0-Supply (PSU_TEMP)          33    -10    -5    -1    60    65    70
  0/PT0-PM1
            PM1-Supply (PSU_TEMP)          28    -10    -5    -1    60    65    70

Note


Few temperature readings for memory slots are zero because there are no DDR memory inserted in those memory slots.

To view the voltage information.


sysadmin-vm:0_RP0#show environment voltages
Mon Mar  17 10:19:02.224 UTC+00:00
================================================================================
Location  VOLTAGE                     Value   Crit Minor Minor  Crit
          Sensor                      (mV)    (Lo) (Lo)  (Hi)   (Hi)
--------------------------------------------------------------------------------
0/RP0
          Board (PSU1_VOUT)           12100  10150 10788 14000 15000
          Board (PSU2_VOUT)           12100  10150 10788 14000 15000
          Board (P12V)                11890  10150 10788 13166 13804
          Board (P3V_BAT_SCALED)       3088   2246  2543  3588  3760

To view hardware failure information

sysadmin-vm:0_RP0# show logging | i envmon

Mon Oct  2  09:38:06.390 UTC
0/RP0/ADMIN0:Oct  1 16:58:44.394 : envmon[2332]: %PKT_INFRA-FM-6-FAULT_INFO : Power Module insertion :INFO :0/PT0-PM0:
0/RP0/ADMIN0:Oct  2 09:26:37.657 : envmon[2332]: %PKT_INFRA-FM-6-FAULT_INFO : Power Module insertion :INFO :0/PT0-PM1:
0/RP0/ADMIN0:Oct  2 09:37:03.605 : envmon[2332]: %PKT_INFRA-FM-6-FAULT_INFO : Power Module removal :INFO :0/PT0-PM1:
0/RP0/ADMIN0:Oct  2 09:37:50.221 : envmon[2332]: %PKT_INFRA-FM-6-FAULT_INFO : Power Module insertion :INFO :0/PT0-PM1:

Before executing the above command, remove and re-insert power module (0/PT0-PM1). The power module supports OIR.

In the above command output the highlighted row captures the power module removal and insertion information.

Note


The first two insertions in the above command output are from the system boot.

To view alarms

sysadmin-vm:0_RP0# show alarms

Thu Oct  19 12:28:59.400 UTC

-------------------------------------------------------------------------------
Active Alarms
-------------------------------------------------------------------------------
Location          Severity      Group           Set time            Description
-------------------------------------------------------------------------------
0/PT0-PM0         major         environ         10/19/17 12:27:34   Power Module Error (PM_OUTPUT_STAGE_OT).
0/PT0-PM0         major         environ         10/19/17 12:27:34   Power Module Shutdown (PM_OC_SHUTDOWN).
0/PT0-PM1         major         environ         10/19/17 12:27:34   Power Module Fault (PM_VOUT_VOLT_OOR).
0/RP0             major         environ         10/19/17 12:27:34   Processor (P1_TEMP_SENS): temperature alarm.
0/RP0             major         environ         10/19/17 12:27:40   Board (P3V3_AUX): low voltage alarm.

To view the current environmemt information.


sysadmin-vm:0_RP0#show environment current
Mon Mar  17 10:18:59.260 UTC+00:00
================================================================================
Location  CURRENT                     Value
          Sensor                      (mA)
--------------------------------------------------------------------------------
0/RP0
          Board (PSU1_IOUT)            9000
          Board (PSU2_IOUT)            8000

To view consolidated information of temperature, voltage, power, fan, and current sensor values.


sysadmin-vm:0_RP0#show environment all
Mon Mar  17 10:19:16.731 UTC+00:00

================================================================================
   Location     Card Type            Power       Power       Status
                                     Allocated   Used
                                     Watts       Watts
================================================================================
   0/0          R-IOSXRV9000-LC-A        0           -       -
================================================================================
Location  TEMPERATURE                 Value   Crit Major Minor Minor Major  Crit
          Sensor                    (deg C)   (Lo) (Lo)  (Lo)  (Hi)  (Hi)   (Hi)
--------------------------------------------------------------------------------
0/RP0
          Front (TEMP_SENS_FRONT)        19    -10    -5     0    40    45    50
          Processor (P1_TEMP_SENS)       80    -10    -5     0    92    97    98
          Memory (DDR5_P1_A1_TMP)        33    -10    -5    -1    65    85    90
          Memory (DDR5_P1_B1_TMP)        31    -10    -5    -1    65    85    90
          Memory (DDR5_P1_C1_TMP)        29    -10    -5    -1    65    85    90
          Memory (DDR5_P1_D1_TMP)        27    -10    -5    -1    65    85    90
          Memory (DDR5_P1_E1_TMP)        34    -10    -5    -1    65    85    90
          Memory (DDR5_P1_F1_TMP)        31    -10    -5    -1    65    85    90
          Memory (DDR5_P1_G1_TMP)        29    -10    -5    -1    65    85    90
          Memory (DDR5_P1_H1_TMP)        27    -10    -5    -1    65    85    90
================================================================================
Location  VOLTAGE                     Value   Crit Minor Minor  Crit
          Sensor                      (mV)    (Lo) (Lo)  (Hi)   (Hi)
--------------------------------------------------------------------------------
0/RP0
          Board (PSU1_VOUT)           12100  10150 10788 14000 15000
          Board (PSU2_VOUT)           12100  10150 10788 14000 15000
          Board (P12V)                11890  10150 10788 13166 13804
          Board (P3V_BAT_SCALED)       3088   2246  2543  3588  3760
================================================================================
Location  CURRENT                     Value
          Sensor                      (mA)
--------------------------------------------------------------------------------
0/RP0
        Board (PSU1_IOUT)            9000
        Board (PSU2_IOUT)            8000

================================================================================
   Location     Card Type            Power       Power       Status
                                     Allocated   Used
                                     Watts       Watts
================================================================================
   0/RP0        R-IOSXRV9000-RP-A        0           -       -
=============================================================================================
			Fan speed (rpm)
Location     FRU Type           FAN_0   FAN_1   FAN_2   FAN_3   FAN_4   FAN_5   FAN_6   FAN_7
---------------------------------------------------------------------------------------------
0/FT0        XRV-FAN-C220M7=     5330    5330    5330    5330    5330    5330    5330    5330


================================================================================
   Location     Card Type            Power       Power       Status
                                     Allocated   Used
                                     Watts       Watts
================================================================================
   0/FT0        XRV-FAN-C220M7=          0           -           -

Power Shelf 0:
================================================================================
   Power       Supply     ------Input----   ------Output---      Status
   Module      Type        Volts     Amps    Volts     Amps
================================================================================
   0/PT0-PM0   Cisco         0.0      0.0     12.1      9.0    OK
   0/PT0-PM1   Cisco         0.0      0.0     12.1      8.0    OK
================================================================================
Location  TEMPERATURE                 Value   Crit Major Minor Minor Major  Crit
          Sensor                    (deg C)   (Lo) (Lo)  (Lo)  (Hi)  (Hi)   (Hi)
--------------------------------------------------------------------------------
0/PT0-PM0
          PM0-Supply (PSU_TEMP)          24    -10    -5    -1    60    65    70
================================================================================
Location  TEMPERATURE                 Value   Crit Major Minor Minor Major  Crit
          Sensor                    (deg C)   (Lo) (Lo)  (Lo)  (Hi)  (Hi)   (Hi)
--------------------------------------------------------------------------------
0/PT0-PM1
          PM1-Supply (PSU_TEMP)          22    -10    -5    -1    60    65    70
================================================================================
CHASSIS LEVEL POWER INFO: 0
================================================================================
   Total output power capacity (-)                 :       0W +       0W
   Total output power required                     :       0W
   Total power input                               :       0W
   Total power output                              :     206W
================================================================================
   Location      Altitude Value (Meters)     Source
--------------------------------------------------------------------------------
   0             0                           config

Host Level Monitoring Information

You can monitor the host OS level utilization information for the Appliance and XRv 9000 VM as well. Use the below show commands in system admin mode to view the information.

Task

Use this command

To view the CPU information.

sysadmin-vm:0_RP0# show virtual-platform cpu
System CPU utilization
----------------------------------------------------------------------------------
Linux 3.14.23-WR7.0.0.2_standard (host)         11/27/17        _x86_64_        (16 CPU)

02:27:49     CPU    %usr   %nice    %sys %iowait    %irq   %soft  %steal  %guest  %gnice   %idle
02:27:49     all    4.06    0.00    4.66    0.01    0.00    0.06    0.00    0.00    0.00   91.21
02:27:49       0    0.84    0.00    1.72    0.02    0.00    0.30    0.00    0.00    0.00   97.12
02:27:49       1    2.08    0.00    2.31    0.01    0.00    0.10    0.00    0.00    0.00   95.50
02:27:49       2    0.99    0.00    1.73    0.01    0.00    0.05    0.00    0.00    0.00   97.22
...
02:27:49      14    2.40    0.00    1.64    0.00    0.00    0.00    0.00    0.00    0.00   95.96
02:27:49      15    1.24    0.00    1.41    0.00    0.00    0.00    0.00    0.00    0.00   97.35

To view disk information

sysadmin-vm:0_RP0# show virtual-platform disk

System Disk Utilization
----------------------------------------------------------------------------------
Filesystem                                       1K-blocks    Used Available Use% Mounted on
/dev/mapper/panini_vol_grp-host_lv0                 991512  425304    498624  47% /
...
/dev/mapper/panini_vol_grp-host_data_scratch_lv0   2007248    3036   1884200   1% /misc/scratch
/dev/mapper/panini_vol_grp-host_data_config_lv0      95088      44     87876   1% /misc/config
/dev/mapper/panini_vol_grp-host_data_log_lv0        479560    8080    435640   2% /var/log
none                                                   512       0       512   0% /mnt
/dev/loop5                                         6060604 1330192   4399508  24% /lxc_rootfs/panini_vol_grp-xr_lv0

To view memory information

sysadmin-vm:0_RP0# show virtual-platform memory
System Memory Usage
----------------------------------------------------------------------------------
MemTotal:       131982032 kB
MemFree:        109636132 kB
MemAvailable:   111675924 kB
...
HugePages_Total:      12
...
Hugepagesize:    1048576 kB
...

In the above command output, the MemFree information is helpful to check if the Cisco IOS XRv 9000 system is experience memory exhaustion. The Hugepages field values help triage for VPE issue.

To view processor information

sysadmin-vm:0_RP0# show virtual-platform processor
System Processor Information
----------------------------------------------------------------------------------
processor       : 0
vendor_id       : GenuineIntel
cpu family      : 6
...
flags           : fpu vme de pse tsc msr pae mce cx8 apic sep mtrr pge mca cmov pat pse36 clflush dts acpi mmx fxsr sse sse2 ss ht tm pbe syscall nx pdpe1gb rdtscp lm constant_tsc arch_perfmon pebs bts rep_good nopl xtopology nonstop_tsc aperfmperf eagerfpu pni pclmulqdq dtes64 monitor ds_cpl vmx smx est tm2 ssse3 fma cx16 xtpr pdcm pcid dca sse4_1 sse4_2 x2apic movbe popcnt tsc_deadline_timer aes xsave avx f16c rdrand lahf_lm abm 3dnowprefetch ida arat epb xsaveopt pln pts dtherm tpr_shadow vnmi flexpriority ept vpid fsgsbase tsc_adjust bmi1 hle avx2 smep bmi2 erms invpcid rtm rdseed adx smap
... 
processor       : 1
...

The above command displays the detailed information of twenty eight cores in the Appliance. The flags information are useful to check if the CPU is properly set in a XRv9000 VM hypervisor settings.

Environmental Monitoring through UCS Cisco Integrated Management Controller (CIMC)

In Release prior to 6.4.1 , there is no XR based environment monitoring capability in the Appliance.

However, since the Appliance is built on a UCS server, server environmental monitoring can also be done through SNMP or IPMI interfaces directly through CIMC. Refer to the Cisco UCS Server documentation on how to configure and use SNMP or IPMI monitoring via CIMC.

SFP Optic Monitoring Information

Cisco IOS XRv 9000 extracts optic health information from SFPs plugged into a NIC. The information includes vendor name, part number, current receiving power and transmiting power. To view the information use show controllers <interface> physicalcommand in XR EXEC mode:

RP/0/RP0/CPU0:SS_Node1# show controllers TenGigE 0/0/0/1 physical
SFP EEPROM  port:1
        Xcvr Type: SFP
        Xcvr Code: SFP-10G-SR
        Encoding: 64B66B
        Bit Rate: 10300 Mbps
        Link Reach 50u fiber: 80 meter
        Link Reach 62.5u fiber: 20 meter
        Vendor Name: CISCO-JDSU     
        Vendor OUI: 00.01.9c
        Vendor Part Number: PLRXPL-SC-S43-CS (rev.: 1   )
        Laser wavelength: 850 nm (fraction: 0.00 nm)
        Optional SFP Signal: Tx_Disable, Tx_Fault, LOS
        Vendor Serial Number: JUS1734G1L5    
        Date Code (yy/mm/dd): 13/10/13  lot code:  
        Diagnostic Monitoring: DOM, Int. Cal.,
        Enhanced Options: SW RX LOS Mon., SW TX Fault Mon, SW TX Disable, Alarm/Warning Flags
 
...
 
        Temperature: 28.445
        Voltage: 3.300 Volt
        .

SFP OIR (online insertion and removal) information is monitored by polling the status of all SFPs every 5 seconds. The change in state is captured and reflected in a syslog message.

RP/0/RP0/CPU0:SS_Node1# show logging | i envmon