Managing Work Orders

The chapter describes using the Device Manager opening page with the CGR 1000, IR800, or IR500 to connect to IoT-FND and manage work orders.

Work Orders

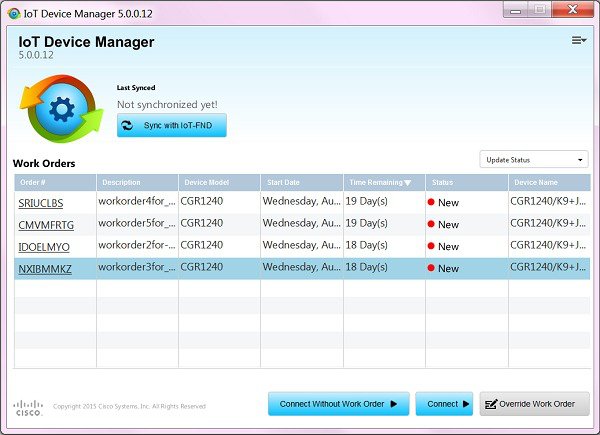
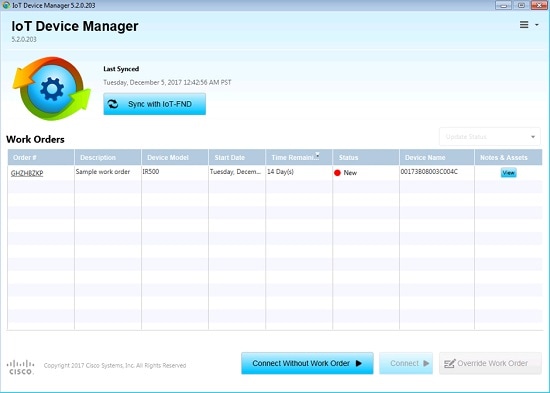
When you first start Device Manager, the opening page displays a list of work orders, if any are available.

Whenever work or direct inspection of a CGR 1000 or IR500 is necessary by a field technician, an administrator generates a work order in IoT-FND. Work orders include the encrypted credentials necessary for the technician to connect to the router.

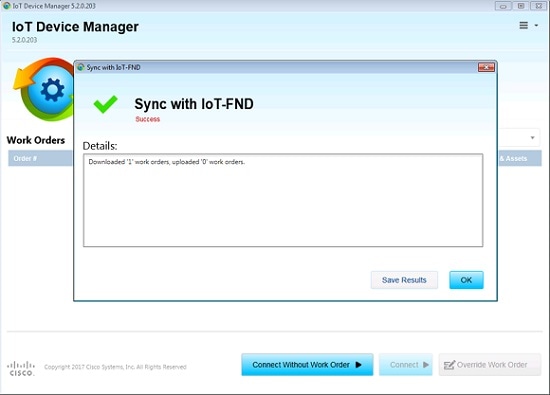
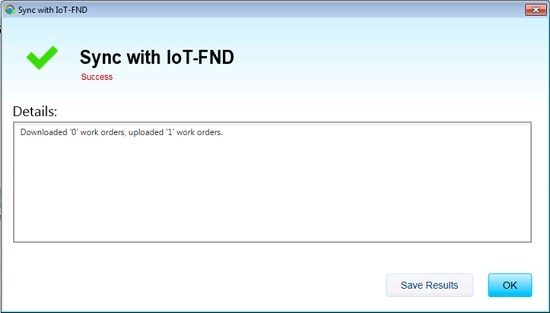
You must synchronize Device Manager with IoT-FND to download the latest work orders from IoT-FND and upload status of the work orders to IoT-FND. See Synchronizing With IoT-FND.

Each work order shows the following information:

  • Work order number

  • Description

  • Device model

  • Start date

  • Time remaining on the work order


Note

When no time remains on the work order, Time Remaining displays “Expired”. If you attempt to connect to the router with an Expired work order, Device Manager displays an error message.
  • Status of the work order: New, In Service, Completed, or Incomplete

  • Device name

Importing Certificates

IoT-DM can connect with FND by FND’s web UI cert SHA256 fingerprint or CA certificate and connect with IOS devices by CA certificate.

As admin, you can import certificates through the Device Manager opening page. You need to know the path to the certificate (.pfx). Generally, the admin downloads the .pfx file and password to the Device Manager laptop. All these certificates will be verified when being imported to IoT-DM.

To import a certificate:

SUMMARY STEPS

  1. On the Device Manager opening page, select Import Certificate from the drop-down menu on the upper right.
  2. In the Import Certificate dialog box, browse to the location of the certificate file on your laptop and enter the password for the pfx certificate file.
  3. Choose the certificate type.
    • If FND and device are using the CA certificates issued from different CA, choose FND while importing certificate to communicate with FND, and choose Device while importing certificate for device.

    • If FND and Device are both using the CA certificate issued from the same CA, choose Common . The certificate will be available for the verification for both FND and Device certificate.
  4. Click Import . A dialog box displays a success message and informs you to restart Device Manager.
  5. Restart Device Manager.
  6. To view the certificate details, select View Certificate from the Device Manager opening page drop-down menu on the upper right.
  7. Click the tab for the certificate details you want to view.

DETAILED STEPS


Step 1

On the Device Manager opening page, select Import Certificate from the drop-down menu on the upper right.

Step 2

In the Import Certificate dialog box, browse to the location of the certificate file on your laptop and enter the password for the pfx certificate file.

Step 3

Choose the certificate type.

  • If FND and device are using the CA certificates issued from different CA, choose FND while importing certificate to communicate with FND, and choose Device while importing certificate for device.

  • If FND and Device are both using the CA certificate issued from the same CA, choose Common . The certificate will be available for the verification for both FND and Device certificate.
Note 

If you choose the FND option and import a device certificate instead of an FND certificate, the FND certificate will be replace with the device certificate. In that case, 2 copies of device certificates will be present, and you cannot connect to FND and will get an error. To connect with FND again, you need to properly choose the FND option and import the FND certificate.

If you upload a new certificate, the old certificate will be replaced, for both FND and devices.

Step 4

Click Import . A dialog box displays a success message and informs you to restart Device Manager.

Step 5

Restart Device Manager.

Step 6

To view the certificate details, select View Certificate from the Device Manager opening page drop-down menu on the upper right.

Step 7

Click the tab for the certificate details you want to view.


Setting Up the IoT-FND Connection

Before synchronizing with IoT-FND for the first time, configure Device Manager to connect to the IoT-FND application server.

SUMMARY STEPS

  1. On the Device Manager opening page, click Sync with IoT-FND , or select Change IoT-FND Connection Settings from the drop-down menu on the upper right of the page.
  2. In the IoT-FND Connection Settings dialog box, enter the username, password, and IP address for connecting to the IoT-FND application server.
  3. Confirm or change the server port number.
  4. Click Save .
  5. Click Test Connectivity to test connecting to the IoT-FND server.

DETAILED STEPS


Step 1

On the Device Manager opening page, click Sync with IoT-FND , or select Change IoT-FND Connection Settings from the drop-down menu on the upper right of the page.

Step 2

In the IoT-FND Connection Settings dialog box, enter the username, password, and IP address for connecting to the IoT-FND application server.

Step 3

Confirm or change the server port number.

Step 4

Click Save .

Step 5

Click Test Connectivity to test connecting to the IoT-FND server.


Synchronizing With IoT-FND

Synchronizing with IoT-FND is a two-way operation. All assigned work orders are downloaded from IoT-FND to CG-DM, and CG-DM updates IoT-FND with the status of complete and incomplete work orders.


Note

You can only download assigned work orders from IoT-FND.

To download the latest work orders from IoT-FND and upload the status of the work orders to IoT-FND:

SUMMARY STEPS

  1. On the Device Manager opening page, click Sync with IoT-FND . Device Manager verifies the authorization for connecting to the IoT-FND application server. If the connection is successful, a dialog box displays the message Sync Successful and the number of downloaded work orders.
  2. Click Close to close the dialog box and display the list of work orders. Proceed to Connecting to the Router with a Work Order or Connecting to the IR500 with a Work Order.

DETAILED STEPS


Step 1

On the Device Manager opening page, click Sync with IoT-FND . Device Manager verifies the authorization for connecting to the IoT-FND application server. If the connection is successful, a dialog box displays the message Sync Successful and the number of downloaded work orders.

Step 2

Click Close to close the dialog box and display the list of work orders. Proceed to Connecting to the Router with a Work Order or Connecting to the IR500 with a Work Order.


Updating Work Order Status

The work order number on the left of the Device Manager opening page corresponds to an existing work order within a utility management or operations system that the technician can access to get additional details on the work order.

Generally, a technician synchronizes with IoT-FND at the beginning of the day to download work orders before heading to the field and then again at the end of the day when back at the office to update IoT-FND with the changes.

The work order status can be New, Complete, or Incomplete.

To update the status of a work order:

SUMMARY STEPS

  1. Using the Order number that appears on the left of the Device Manager opening page, locate the specific work details from the appropriate system and then do one of the following:
  2. Click Sync with IoT-FND to update IoT-FND.

DETAILED STEPS


Step 1

Using the Order number that appears on the left of the Device Manager opening page, locate the specific work details from the appropriate system and then do one of the following:

  • When you complete the work order, select Complete from the Status drop-down menu.
  • If you are not able to complete the work order, select Incomplete from the Status drop-down menu.

The work order reflects the status change.

Step 2

Click Sync with IoT-FND to update IoT-FND.

After synchronization with IoT-FND, all Complete, Incomplete, and Expired work orders are removed from the Device Manager display.


Override Work Order

Use the Override Work Order option when you need to use different login information than that provided in the work order.

For example, for connecting to the CGR 1000, the SSID or passphrase for a WiFi connection might have changed since the work order was first created, but a new work order was not issued. In this case, the field technician might call the administrator for that information and use Override Work Order to enter that new information to log in to the router. Optionally, the field technician can directly connect to the router over Ethernet with the Auto Discover IP address option.

To change the login information:

SUMMARY STEPS

  1. On the Device Manager opening page, click Override Work Order .
  2. Follow the steps in Manually Connecting to the Router for the CGR 1000 or Connecting to the IR500 Without a Work Order for the IR500.

DETAILED STEPS


Step 1

On the Device Manager opening page, click Override Work Order .

Step 2

Follow the steps in Manually Connecting to the Router for the CGR 1000 or Connecting to the IR500 Without a Work Order for the IR500.


Managing Notes and Assets of Work Order

From IoT Device Manager Release 5.2, you can display the assets and notes created in FND in IoT-DM, and add new notes to the work order. The added notes will be updated in FND via NB API. The assets created in FND cannot be modified in IoT-DM.

Follow these steps to add notes to the work order.

Procedure


Step 1

Click the Sync with IoT-FND button to download work orders from FND.

Step 2

When the work orders are displayed, click the View buttonn in the Notes & Assets column.

Step 3

The Notes and Assets window displays, which contains two tabs: Notes and Assets.

Step 4

On the Assets tab,click View Files to display the files for the assets. Files can be downloaded either by clicking on the file or clicking the download button.

Step 5

On the Notes tab, click the file name to download the notes.

Step 6

Click Add Notes on the Notes tab. The Add Notes pop-up window appears. Add note description and upload a file, then click the Save button. Either Description or File is mandatory. The notes added on IoT-DM can be deleted before the sync with IoT FND, by clicking the Recycle Bin icon.

Step 7

Click Sync with IoT FND to sync work orders with IoT-FND.