- Preface
- Scheduler Concepts
- Understanding Offset Concepts
- Creating your first job
- Using Scheduler Calendars
- Setting Up a Job Dependency
- Scheduling Jobs in Groups
- Creating a File Dependency
- Detecting Job Event Conditions
- Creating Variable Dependencies
- Managing Jobs in the Production Schedule
- Managing Command Parameters
- Setting Up Queues
- Using Scheduler Agents
Overview
Enteprise Scheduler lets you organize your jobs into job groups to make it easier to manage and control jobs, and to make it more efficient to set job attributes. Jobs can inherit characteristics such as dependencies and calendars from their associated job group, eliminating the need to specify common job details for each job.
When a job group is added to the schedule manually, all of its member jobs (called child jobs) are added as well, saving you additional work and reducing the potential for mistakes. A job group can be configured the way a single job can be to depend on another job or job group.
In this exercise, we will create a job group called apmonth. apmonth will consist of two jobs, Ap31 and Ap32. We will make the Ap32 job dependent on the Ap31 job completing successfully. Once the apmonth job group has completed normally, Glfinal will run.
Figure 6-1 Interdependency of Glfinal, apmonth, Ap31 and Ap32

This chapter describes how to:
- Define a job group
- Create jobs that belong to the group
- Schedule the job group
- Create a job that depends on a group
- Release the job group

Note To complete the exercises in this tutorial, you need to:
- Install Enteprise Scheduler in the default directory Scheduler (or the examples in this tutorial will not work properly)
- Select the Super User option in your User definition
- Configure a default agent
- Create and have available the work day calendar
Job Group Hierarchy
A job group is represented with a colored background. All of a group’s child jobs are indented underneath the group name. Each job group can include jobs and other job groups, which in turn can include other jobs and job groups. The window helps you visualize and navigate through the hierarchy of job groups. When you click the symbol to the left of a job group name, the display expands to show all of the jobs and job groups within the selected job group.
Job Group Scheduling
In this chapter we will develop a set of jobs under a job group, then schedule the jobs by submitting the job group only. We will do this by initially setting up the job group and its jobs as unscheduled (without an assigned calendar). This will prevent the jobs from entering the schedule before all the definitions are complete. We will then give the job group a calendar. We will set the child jobs to inherit the calendar so that all the jobs in the job group will be scheduled in one step.
Adding a Job Group
1.![]() From the Navigator pane, select Definitions>Jobs to display the Jobs pane.
From the Navigator pane, select Definitions>Jobs to display the Jobs pane.
2.![]() Right-click in the Jobs pane of the console and select Add Job Group from the context menu.
Right-click in the Jobs pane of the console and select Add Job Group from the context menu.
The Job Group Definition dialog displays.
Figure 6-2 Job Group Definition Dialog
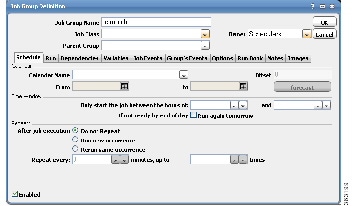
The Job Group Definition dialog is similar, but not the same, as the Job Definition dialog. The Job Group Definition dialog does not have a field for specifying the command to execute, because a job group is a container for jobs.
3.![]() In the
Job Group Name
field, enter
apmonth
.
In the
Job Group Name
field, enter
apmonth
.
4.![]() Click the
Options
tab, and select the
Require operator release
option. This causes the group to wait for a manual release before it will launch.
Click the
Options
tab, and select the
Require operator release
option. This causes the group to wait for a manual release before it will launch.
6.![]() Click
Yes
. The
apmonth
job group is added to the
Jobs
pane.
Click
Yes
. The
apmonth
job group is added to the
Jobs
pane.
Creating Jobs that Belong to a Job Group
Now, you will add child jobs within the job group that you just created. Because you are adding jobs within the job group, inheritable properties will be set for the jobs from the job group, such as the agent that the jobs will run on.
Creating the Ap31 Child Job
To create the Ap31 child job belonging to the apmonth job group:
1.![]() From the Navigator pane, select Definitions>Jobs to display the
Jobs
pane.
From the Navigator pane, select Definitions>Jobs to display the
Jobs
pane.
2.![]() Select the apmonth job group.
Select the apmonth job group.
3.![]() Click the Add Job button on the Enteprise Scheduler toolbar or right-click the
Jobs
pane and select
Add Job from the context menu to display the
Job Definition
dialog.
Click the Add Job button on the Enteprise Scheduler toolbar or right-click the
Jobs
pane and select
Add Job from the context menu to display the
Job Definition
dialog.
4.![]() Enter Ap31 in the Job Name field.
Enter Ap31 in the Job Name field.
Notice that the apmonth job group is displayed in the Parent Group field. You can also specify apmonth as the job group by selecting \apmonth from the Parent Group list.
5.![]() In the Command field enter the full path to Ap31.bat.
In the Command field enter the full path to Ap31.bat.
9.![]() Now, when the apmonth job group is displayed in the jobs window, it will have a
Now, when the apmonth job group is displayed in the jobs window, it will have a  icon to the left of it. This icon indicates there are jobs and/or more job groups underneath it that are not currently visible. Clicking the
  icon expands the selected job group, showing the child jobs and/or job groups belong to it. Clicking the
  icon again collapses the job group.
Jobs do not have the  icon next to them because a job is singular and cannot have child jobs
Note Ap31 is identified as a Level 2 job, meaning it is nested on the next level below apmonth. The indentation of the job name also serves as a visual cue of the hierarchy. Apmonth is at Level 1 (or root) level.

Creating the Ap32 Child Job with a Dependency
Now, we will create the Ap32 child job that depends on the Ap31 job. This job also belongs to the apmonth job group.
To create the Ap32 child job with a dependency:
1.![]() From the Navigator pane, select Definitions>Jobs to display the Jobs pane.
From the Navigator pane, select Definitions>Jobs to display the Jobs pane.
2.![]() Select the apmonth job group.
Select the apmonth job group.
3.![]() Click the Add Job button on the Enteprise Scheduler toolbar or right-click the
Jobs
pane and select
Add Job from the context menu to display the Job Definition dialog.
Click the Add Job button on the Enteprise Scheduler toolbar or right-click the
Jobs
pane and select
Add Job from the context menu to display the Job Definition dialog.
4.![]() In the Job Name field, enter the job name Ap32. The apmonth job group should be displayed in the Parent Group field. If it does not appear, select \apmonth from the Parent Group list.
In the Job Name field, enter the job name Ap32. The apmonth job group should be displayed in the Parent Group field. If it does not appear, select \apmonth from the Parent Group list.
5.![]() In the Command field, enter the full path to Ap32.bat.
In the Command field, enter the full path to Ap32.bat.
6.![]() Click the Dependencies tab.
Click the Dependencies tab.
7.![]() Click Add and select Add Job Dependency to display the Job Dependency Definition dialog.
Click Add and select Add Job Dependency to display the Job Dependency Definition dialog.
8.![]() Click the down-arrow button in the Job/Group list and select the Ap31 job.
Click the down-arrow button in the Job/Group list and select the Ap31 job.
Figure 6-4 Making Ap31 a job dependency of Ap32
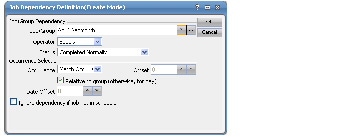
Ap31 is now displayed on the Dependencies tab of the Job Definition dialog. Notice that the Type of dependency is identified as JOB.
The Confirm dialog displays, reminding you that a calendar has not been specified.
11.![]() Click Yes to accept the job definition without assigning it a calendar.
Click Yes to accept the job definition without assigning it a calendar.
The Ap32 job appears along with Ap31 in the hierarchy under the apmonth job group.
Scheduling the Job Group
We have created two child jobs under the job group called apmonth , but no jobs have been scheduled. We will now assign a calendar to the job group, and when closed, the job group and all its child jobs will enter the schedule to run based on the calendar.
1.![]() Double-click the
apmonth
job group to open its definition.
Double-click the
apmonth
job group to open its definition.
2.![]() In the
Calendar Name
list, select the
Daily
calendar.
In the
Calendar Name
list, select the
Daily
calendar.
Since child jobs default to inheriting the parent group’s attributes, by setting this option for the group, you are effectively assigning a
Daily
calendar to each child job.
3.![]() Click
OK
. The
Effective Date
dialog appears.
Click
OK
. The
Effective Date
dialog appears.
4.![]() Accept the defaults and click
OK
.
Accept the defaults and click
OK
.
The job group and jobs are submitted and displayed in the Job Activity pane.
Scheduling a Job that Depends on a Group
One of the benefits of using job groups is that you can work with multiple jobs as though they were one big job. You can schedule jobs that depend on the status of the job group. You do not have to determine the order in which the jobs will complete, or set a dependency on each individual job.
The status of the job group is determined by its child jobs. For example, a job group cannot reach completed status until every job in the job group has completed.
To schedule a job that depends on a group:
1.![]() From the Navigator pane, select Definitions>Jobs to display the Jobs pane.
From the Navigator pane, select Definitions>Jobs to display the Jobs pane.
2.![]() Verify that no job group (such as apmonth) is highlighted, click the
Add
button on the Enteprise Scheduler toolbar or right-click in the
Jobs
pane and select
Add Job
from the context menu.
Verify that no job group (such as apmonth) is highlighted, click the
Add
button on the Enteprise Scheduler toolbar or right-click in the
Jobs
pane and select
Add Job
from the context menu.
The Job Definition dialog displays.
3.![]() In the Job Name field, enter Glfinal.
In the Job Name field, enter Glfinal.
4.![]() In the Command field, enter the full path to Glfinal.bat.
In the Command field, enter the full path to Glfinal.bat.
Adding a Job Group Dependency
Now, you can add the dependency that causes job Glfinal to wait until the apmonth job group completes normally.
To add a job group dependency:
1.![]() Click the
Dependencies
tab in the
Job Definition
dialog.
Click the
Dependencies
tab in the
Job Definition
dialog.
2.![]() Click
Add
, and select
Add Job Dependency
to display the
Job Dependency
dialog.
Click
Add
, and select
Add Job Dependency
to display the
Job Dependency
dialog.
3.![]() Go to the
Job/Group
field, and click the down-arrow button.
Go to the
Job/Group
field, and click the down-arrow button.
4.![]() Select the
apmonth
job group.
Select the
apmonth
job group.
The dependency will be met when the apmonth job group reaches Completed Normally status. Each job in the group must complete normally for apmonth to complete normally.
5.![]() Click OK to return to the Job Definition dialog. Notice that, to the right of apmonth, the Type of dependency is identified as JOB.
Click OK to return to the Job Definition dialog. Notice that, to the right of apmonth, the Type of dependency is identified as JOB.
6.![]() Click
OK
, then click
OK
again in the
Effective Date
dialog to accept the current production schedule.
Click
OK
, then click
OK
again in the
Effective Date
dialog to accept the current production schedule.
Releasing a Job Group
1.![]() From the
Navigator
pane, select
Operations>Job Activity
to display the
Job Activity
pane.
From the
Navigator
pane, select
Operations>Job Activity
to display the
Job Activity
pane.
The apmonth job group and the Glfinal job are now in the production schedule. apmonth is Waiting on Operator , and the Glfinal job is waiting for the normal completion of all the jobs in the apmonth group.
2.![]() Highlight and then right-click the
apmonth
job group to display the context menu.
Highlight and then right-click the
apmonth
job group to display the context menu.
3.![]() Select the
Job Control
option, then select the
Release/Resume
option to release the job group.
Select the
Job Control
option, then select the
Release/Resume
option to release the job group.
The Information dialog displays.
5.![]() Click
OK
in the
Information
dialog.
Click
OK
in the
Information
dialog.
Apmonth will enter Active status. Then, the Ap31 job runs, and Ap32 follows after Ap31 completes normally. When Ap32 completes, the apmonth job group shows a Completed Normally status. Then the Glfinal job runs. The total process should take a few minutes.
 Feedback