
New and changed information
The following table provides an overview of the significant changes up to this current release. The table does not provide an exhaustive list of all changes or of the new features up to this release.
| Release Version | Feature | Description |
|---|---|---|
|
Nexus Dashboard 4.3.1 |
There were no major changes from the previous release. |
|
Understand tenants and tenant domains
Prior to Nexus Dashboard release 4.2.1, tenants have been available in the Nexus Dashboard Orchestrator and ACI products, but were not used in Nexus Dashboard. Beginning with Nexus Dashboard release 4.2.1, you can now use tenants and tenant domains in Nexus Dashboard to help in separating and isolating networking policy configurations that are applied to NX-OS or ACI fabrics into different administrative containers.
-
Since Orchestration (Nexus Dashboard Orchestrator in previous releases) works exclusively with ACI fabrics, configuring and using tenants and tenant domains is a mandatory task for any configuration on an ACI fabric.
-
However, for NX-OS fabrics, configuring and using tenants and tenant domains is an optional task, not a mandatory one. You can continue to configure users, roles and security, as described in Configuring Users, Roles, and Security, without using tenants. Configure and use tenants and tenant domains for NX-OS fabrics only if you want to take advantage of the functionality as described in the following sections.
Support is also available for importing tenant policies from ACI fabrics using Nexus One, which allows you to integrate both ACI and NX-OS fabrics into a single VXLAN-ACI fabric group.
-
For more information on Nexus One and VXLAN-ACI fabric groups, see Creating Fabrics and Fabric Groups.
-
For more information on importing tenant policies from ACI fabrics, see Understanding the process for importing tenant policies from ACI fabrics into VXLAN-ACI fabric groups.
Key terms
These are the key terms that you should be familiar with when configuring multi-tenancy in Nexus Dashboard.
-
Tenant: A logical entity representing a group of resources/users. It is associated with specific fabrics (ACI or NX). A tenant is a logical container that represents an independent space for managing and isolating logical network resources and their configurations.
-
Tenant Domain: A logical construct representing a group of tenants. It simplifies user access management across multiple tenants.
-
User Mapping: Users are assigned to a Security Domain (defines physical resource access) and a Tenant Domain (defines logical resource access).
-
Security Domain: A Role Based Access Control collection of fabrics. When a user is assigned access to a security domain they can see and manage the physical fabrics and resources (switches, links, interfaces, etc.) that belong to that domain.
-
Fabric: A set of devices working together as if they were a single multi-module chassis by way of a single controller and consistent configuration. Generally, fabrics share a coordinated control plane through protocols like BGP or OSPF to share state.
-
Node: A single physical or virtual instance of Nexus Dashboard
-
Cluster: A single instance of Nexus Dashboard made up of one or three nodes each running microservices
-
Federation: Multiple Nexus Dashboard clusters integrated through a Federation Primary cluster with consistent AAA, Security domain, Tenant, and Tenant domains synchronized between them to allow for scale-out above single cluster capabilities.
-
Tenant Fabric Associations: Tenant association allows creation of tenant specific objects including VRFs and Security Groups inside that fabric.
-
User Mapping: Users are assigned to a Security Domain (defines physical resource access) and a Tenant Domain (defines logical resource access). Ultimate access is restricted to the intersection of these two types of mappings.
Understand tenants
A tenant is a logical entity that represents a group of resources that share the same physical infrastructure but are isolated from other tenants.
These are the characteristics of a tenant:
-
A tenant acts as a filter for policies and allows you to exercise tenant-based access control.
-
A tenant represents a unit of isolation from a policy perspective, but it does not represent a private network.
-
Tenants are associated with specific fabrics.
-
A tenant can be a member of multiple tenant domains. See Understand tenant domains for description of tenant domains.
You would use tenants in Nexus Dashboard for these reasons:
-
Policy isolation: Tenants act as a container for networking policies, ensuring that policies applied to one tenant do not interfere with another. This is particularly important for multi-customer or multi-department environments.
-
Access control: Tenants enable tenant-based access control, allowing administrators to define who can manage resources.
-
Interconnection of ACI and NX-OS fabrics: Stretching a policy across fabrics does not normally require tenants. However, because Nexus Dashboard now supports the interconnection of ACI and NX-OS fabrics, and since ACI has always supported tenants, it is now necessary for tenants to exist on NX-OS fabrics as well. Because of this, tenants are required in order to support the interconnection of ACI and NX-OS fabrics.
-
Organizational grouping: Tenants can represent a customer in an organization or domain in an enterprise, or simply a convenient grouping of policies.
A special system-created tenant called default-tenant is also available in Nexus Dashboard. These are the characteristics of the default-tenant:
-
The default-tenant is only applicable for NX-OS fabrics. The default-tenant has no role to play on ACI fabrics and should not be used in Orchestration configurations.
-
The default-tenant is used to manage virtual resources not assigned to any specific tenant.
-
All policies that were previously not associated to a tenant belong to the default-tenant on NX-OS fabrics.
-
The default-tenant becomes available when upgrading brownfield NDFC deployments to Nexus Dashboard release 4.2.1.
-
From the Nexus One perspective, the default-tenant, along with its NX-OS configurations, can be added to a VXLAN-ACI fabric group; however, the configurations from the default-tenant cannot be deployed to ACI fabrics. It’s only applicable to NX-OS fabrics, as mentioned previously. See Creating Fabrics and Fabric Groups for more information on Nexus One and VXLAN-ACI fabric groups.
Understand tenant domains
A tenant domain is a virtual construct that contains one or more tenants, grouping those tenants for the purpose of user association. Tenant domains are primarily used by Nexus Dashboard to manage user access to tenants across different ACI or NX-OS fabrics. Tenant domains offer a convenient way to associate a user with a profile that contains the list of tenants. When you add or delete tenants from a tenant domain, all users are automatically affected. This allows an administrator to make updates in one place instead of making changes to all users individually.
These are the characteristics of a tenant domain:
-
A user is associated to a tenant domain rather than tenants. Tenant domains are not directly associated with fabrics, but rather are associated with users and their av-pairs.
-
A tenant domain does not have a direct role association but it does restrict resource access.
You would use tenant domains in Nexus Dashboard for these reasons:
-
Simplified user access management: Tenant domains provide a convenient way to associate a user with a profile or template of tenants they can access. Instead of assigning multiple tenants to individual users, an administrator can assign a user to a tenant domain, which then grants access to all tenants within that domain.
-
Efficient policy changes: If an administrator needs to add or remove tenants from a group, they can modify the tenant domain, and all users associated with that domain are automatically affected. This centralizes management and reduces administrative overhead.
-
Logical access control: While security domains define user access to physical resources (such as fabrics or switches), tenant domains define access to logical entities (the tenants themselves). A user is assigned to a tenant domain in addition to security domains.
This special system-created tenant domain is available in Nexus Dashboard:
-
all-tenants-domain: Grants users access to all current and future tenants. Users without an explicit tenant domain association default to this tenant domain.
In addition:
-
Only users associated with the all-tenants-domain can manage physical resources. User-defined tenant domains restrict users to logical objects.
-
In a federation, tenant and tenant domains are always created on the federation primary even if executed on a different cluster.
-
Tenant fabric associations are always created at the individual cluster.
Understand how users work with tenants and tenant domains
The concept of a user in Nexus Dashboard, as described in Configuring Users, Roles, and Security, remains unchanged with the introduction of the tenants and tenant domains feature in Nexus Dashboard release 4.2.1, where a user is simply an individual or entity that interacts with Nexus Dashboard.
However, how users interact with tenants and tenant domains is new for Nexus Dashboard release 4.2.1. Users are now assigned to tenant domains along with security domains, but with these differences:
-
Assigning a user to a security domain defines user access to physical resources, such as fabrics and switches. Mapping a user to a security domain and a role determines that user’s access rights.
-
Assigning a user to a tenant domain defines user access to logical entities. Users can be associated with at most one tenant domain, which results in a list of tenants that they can access.
-
Orchestration requires access to all fabrics in order to orchestrate the stretching of policies across interconnected fabrics. Therefore, Orchestration users must use security domain
all.
These are additional ways that tenant domains work with users, roles, and security:
-
A tenant domain does not carry a role assignment.
-
If a user is not associated with a specific tenant domain, that user will be granted access to the
all-tenantstenant domain on Controller and Telemetry pages, but will not have access to tenants on Orchestration pages.
Tenants in Nexus Dashboard and ACI
As mentioned earlier, tenants have been available in ACI previously but were not used in Nexus Dashboard. Tenants and tenant domains are now available in Nexus Dashboard beginning with Nexus Dashboard release 4.2.1.
Because tenants have been available in ACI previously, existing ACI fabrics that are brought into Nexus Dashboard might already have tenants configured. In addition, it is possible that the same tenant name is used in different ACI fabrics that are not part of the same fabric group.
When these tenants are brought into Nexus Dashboard, in order to resolve name space collisions, Nexus Dashboard supports an ACI fabric tenant name (a local name) that is used in Nexus Dashboard. This allows different fabric groups to support tenants on the ACI fabric with the same name.

An import of policies from an APIC will not be allowed if that import causes the CLI_PREFIX:PolicyName to exceed the maximum length of the policy name on an NX-OS switch.
This table provides feature comparison information for tenants that have historically been available in ACI and tenants that are now available in Nexus Dashboard.
| Field | Nexus Dashboard | ACI |
|---|---|---|
|
Tenant |
Defined outside of the fabric |
Defined at the fabric level |
|
Tenant Fabric Association |
Required to associate any logical objects with that tenant |
Not Applicable |
|
VRF |
Defined inside a fabric group or fabric with an optional tenant association |
Defined inside a tenant |
|
Network/bridge domain (BD) |
Defined inside a fabric group or fabric with an optional tenant association |
Defined inside a tenant |
|
Security Group |
Defined inside a fabric group or fabric with an optional tenant association |
Defined inside a tenant |
AAA defined users
With the multi-tenancy feature in Nexus Dashboard 4.2.1, AAA users are still required to have RBAC set but the rules are a bit more complex.
NX-OS AAA users
-
If AAA users do not have a tenant-domain specified in their Av-pair, they are automatically placed in the all-tenants-domain
-
Similar to previous releases, a user might have multiple roles within a given security domain
-
Av-pairs are defined for users with different profiles:
-
shell:domains = <security-domain1>/<role>,<security-domain2>/<role>|<role> tenant-domain=<tenant-domain>For example:
shell:domains = SD1/fabric-admin,SD2/support-engineer|designer tenant-domain=all-tenants-domainThese are example entries for different users:
-
Sales admin:
shell:domains = SD1/fabric-admin tenant-domain=sales-dmz-domain -
Marketing admin:
shell:domains = SD1/fabric-admin tenant-domain=marketing-dmz-domain -
Sales admin in a fabric group:
shell:domains = all/fabric-admin tenant-domain=sales-dmz-domain -
Physical Infra admin:
shell:domains = all/fabric-admin -
DC admin:
shell:domains = all/super-admin
-
-
Fabric group admin: User must use security domain
all, such as this:shell:domains = all/fabric-admin,SD2/support-engineer|designer tenant-domain=all-tenants-domain* -
Orchestration users: User must use security domain
all, but with no tenant domain, such as this:shell:domains = all/designer tenant-domain=sales-dmz-domain
-
Orchestration AAA users
Orchestration has always supported tenancy. Prior to release 4.2, users could view all tenants but could only edit policies on the tenants that they were associated with. Starting with release 4.2, views are also tenant constrained.
To continue supporting tenancy constraints and prevent privilege escalation, it is important that remote users are associated with an appropriate tenant domain. An admin (remote or local) will continue to have access to the system and the admin should define appropriate tenant domains and update all remote users to their appropriate tenant domain.
Here is an example of a AV pair for a user who is a designer as well as an approver:
"avpair": "shell:domains=all/approver|designer tenant-domain=TD1",
-
If the tenant domain is not specified in the AV pair, the following behavior will be seen:
-
If it is an upgraded setup and the user previously had access to a tenant through a NDO tenant association, they will continue to have access. This cannot be modified within Nexus Dashboard; it can only be changed by association of a tenant domain in the AV pair.
-
If a remote user does not have a pre-upgrade association, they will not have functional access to Orchestration until an AV pair specifying the tenant domain is set.
-
If they are a super-admin, then they have access to the all-tenant-domain.
-
If they are a fabric-admin in the security domain all, then they have access to the all-tenant-domain.
-
Guidelines and limitations
These are the guidelines and limitations when configuring tenants and tenant domains.
General guidelines and limitations: Tenants and tenant domains
-
You are limited to 10 tenants or fewer in a tenant domain.
-
To create or manage resources within a tenant’s context, you must first associate a fabric with a tenant or a tenant with a fabric group. This association defines the operational scope of tenants, allowing each tenant to have distinct aliases when linked to various fabrics.
-
When you associate an ACI fabric with a tenant, if you delete that ACI fabric association with the tenant using the procedures in Edit fabrics that are associated with a tenant, this action only deletes the fabric association with the tenant and does not delete the tenant from the ACI fabric. You must manually delete the tenant from the ACI fabric afterward to avoid potential stale configurations on the APIC.
-
When a user is assigned to a tenant domain, telemetry data and views in the ACI fabric might show information for all tenants in the fabric instead of only those in the user’s assigned tenant domain.
-
A tenant can exist across multiple fabrics.
-
Tenant-fabric associations are cluster specific, whereas tenants and tenant domains are considered federation-wide resources and must have unique names throughout the federation.
-
These workflows require access to the
all-tenants-domaintenant domain:-
All configurations involving physical switches, links, and interfaces, as well as switch- and fabric-wide policies
-
Pre-change Analysis (fabric admin only, only users with all-tenant access)
-
Delta Analysis (aggregated, only users with all-tenant access)
-
Compliance rule
-
Anomaly rule
-
Explorer
-
Inter-fabric connections
-
Layer 3 neighbors that are underlay connections (L3Out-based neighbors can be filtered by their tenant association)
-
Physical (routed) interfaces (both eth and po)
-
Sustainability (including PDU)
-
Advisories
-
Integrations: VCenter (VM display), AppD
-
Hardware resources
-
Capacity dashboard
-
-
Tenants and tenant domains are supported in these areas:
-
Anomalies
-
Endpoints
-
Routes
-
Segmentation & security
-
Flow Telemetry / Traffic Analytics
-
Multicast group & Routes
-
Interfaces (Logical)
-
L3 Neighbors (overlay)
-
Topology
-
Search
-
Connectivity analysis (Source / dest selection based on endpoints)
-
Custom dashboards (Behavior defined by underlying APIs)
-
-
Tenants and tenant domains are not supported in these areas:
-
Co-located fabrics are not supported
-
You will not be able to enable change control if a fabric has tenants assigned to it
-
-
Anomaly levels located under Manage > Fabrics and Manage > Inventory are shown only to users who belong to the
all-tenants-domaintenant domain or are not associated with any tenant domain. -
If a VM is not associated to any tenant, then any user can view the VM details. Tenant association to a fabric does not restrict the entire fabric and integrations associated to the fabric to the users who have access to that tenant. Tenant association by way of having a specific VM connected to a network or VRF applies because the network or VRF are themselves associated to a tenant. When a VM is associated to a network or VRF in a tenant, only users who have that tenant in their tenant domain associations can view the VM.
Guidelines and limitations: Tenants and object names
-
Object names use the format
tenant_prefix:resource_name, where-
The
tenant_prefixportion has these characteristics:-
Is used to provide name-spacing to all named logical objects, which are written to the Nexus switches.
-
Is limited to no more than 10 characters, even though the tenant name could be up to 63 characters in length.
-
-
The combination of
tenant_prefix:resource_nameshould not exceed the character limit on the switches. These are the character limits on the switches:-
VRF: 32
-
SG (Policy Map, Class Map, SG Name): 40
-
L3Out (Route Map, ACL, Community List, Prefix List) : 63
-
-
-
Object creation will limit each object name length to the total allowed, as listed above:
-
Minus the
tenant_prefixlength, and -
Minus 1 for the colon (:) in the object name
For example, a fabric with a five character
tenant_prefixwould be limited to a VRF name (tenant_prefix:resource_name) for that tenant of no more than 26 characters:-
32 character limit for VRFs, as listed above,
-
Minus 5 (
tenant_prefix), and -
Minus 1 for the colon (:) in the object name
-
-
Object names will be limited by Nexus capabilities when used with a VXLAN-ACI fabric group.
-
Object names will be the natural name when deployed to ACI but the tenant in ACI might not be the same as the tenant name on Nexus Dashboard. This setting provides the mapping for VXLAN-ACI.
Guidelines and limitations: Tenants and VXLAN-ACI fabric groups
-
Deleting a tenant in Nexus Dashboard does not delete the corresponding tenant in the Cisco Application Policy Infrastructure Controller (APIC).
-
Policies defined within a user tenant are not accessible or referenceable by any other user tenant, including the
commontenant. -
Only users that are associated with the all-tenants-domain can view or access VXLAN-ACI fabric groups.
Upgrade considerations
This section provides information that you should understand when upgrading from a previous release to Nexus Dashboard 4.2.1.
Guidelines and limitations: Upgrades
These guidelines and limitations apply when you upgrade from a release prior to Nexus Dashboard release 4.1.1 (prior to the unification of services under Nexus Dashboard, such as NDO release 4.3.1):
-
In older NDO releases, all templates are associated with a tenant, except for fabric templates. After upgrading to Nexus Dashboard release 4.2.1, you will have visibility of those templates based on your tenant associations.
-
In Orchestration, the
commontenant is a special system-created tenant that is automatically created and associated with all of the ACI fabrics that it controls. All users have read access to thecommontenant, but only users that havecommontenant in their tenant domain can update thecommontenant. -
Orchestration will uplift tenants and their fabric and user association to Nexus Dashboard. Local users will be assigned their own tenant domains so that their functionality will not be affected on upgrade. The administrator can reconfigure the user to a tenant-domain configuration at a later date based on their design.
-
The administrator should also create appropriate tenant domains to accommodate remote users and update the AV pair of remote users to their appropriate tenant domains.
-
To ensure that remote users are not totally shut out on upgrade due to a lack of tenant domain association, remote users with admin and fabric-admin privileges will automatically be associated with the all-tenants-domain. Remote users with the designer role will have access to their old (pre-4.2) tenant associations and will continue to function. If a remote user does not have a pre-upgrade association, they will not have functional access to Orchestration until an AV pair specifying the tenant domain is set.
Understand tenant domains and upgrades
The information in this section is only applicable for situations where you are upgrading from an NDO release prior to the unification of services under Nexus Dashboard, such as NDO release 4.3.1, to Nexus Dashboard release 4.2.1.
Because tenant domains are a new concept in the Nexus Dashboard 4.2 release, Nexus Dashboard automatically creates tenant domains for users based on their existing configurations and roles, where Nexus Dashboard creates a tenant domain for each user as part of the upgrade process and associates the tenant domain with the existing tenants that the user is associated with.
System-created tenant domains serve as a temporary solution, allowing you to maintain and modify your existing configurations after an upgrade. After the upgrade is complete, you can create new tenant domains, then transfer users to these new tenant domains and delete the system-created tenant domains afterward.
These tables provide examples of how tenant domains are created for each user based on roles.
Prior to the upgrade
Assume that these user-role-tenant associations were set before the upgrade:
| User | Role | Tenant association | Notes |
|---|---|---|---|
|
User 1 |
Designer |
T1 |
|
|
User 2 |
Designer |
T2 |
|
|
User 3 |
Designer |
T1, T2 |
|
|
User 4 |
Fabric Admin |
All (view and update) |
Fabric admin is associated with all tenants on NDO. |
|
User 5 |
Observer |
All (view only) |
Observer can view all tenants. |
|
User 6 |
Approver |
See Notes |
Approver can view all tenants and approve any template belonging to any tenant; cannot update any template belonging to any tenant. |
|
User 7 |
Support Engineer (SE) |
See Notes |
Support Engineer can view all tenants and deploy any template belonging to any tenant; cannot update any template belonging to any tenant. |
|
User 8 |
Multiple roles; for example, Designer + SE (deployer) |
T1 |
For a user with Designer + SE (deployer) roles:
|
After the upgrade
After the upgrade, these tenant domains will be created:
| Tenant domain | Associated tenants | Associated user | Roles | Notes |
|---|---|---|---|---|
|
TD_User1 |
T1 |
User 1 |
Designer |
|
|
TD_User2 |
T2 |
User 2 |
Designer |
|
|
TD_User3 |
T1, T2 |
User 3 |
Designer |
|
|
All_tenant_domain |
All tenants |
User 4 |
Fabric Admin |
Fabric admin could update any fabric and any tenant, so is associated with All_tenant_domain. |
|
All_tenant_domain |
All tenants |
User 5 |
Observer |
Observer could observe any tenant and any template, so is associated with All_tenant_domain. |
|
All_tenant_domain |
All tenants |
User 6 |
Approver |
Approver could approve any tenant, so is associated with All_tenant_domain. |
|
All_tenant_domain |
All tenants |
User 7 |
Support Engineer (SE) |
Support Engineer could deploy any tenant, so is associated with All_tenant_domain. |
|
TD_User8 |
T1 |
User 8 |
Multiple roles; for example, Designer + SE (deployer) |
Nexus Dashboard cannot associate the user with the All_tenant_domain because, as a Designer, they previously were associated only with tenant T1, so associating the user with the All_tenant_domain would result in a privilege escalation. In these situations, Nexus Dashboard restricts the user to the lowest common denominator. So, in this example, the user loses certain privileges as an SE and is restricted to deploying only on the tenants that they have access to (in this case, T1). |
Navigate to the Multi-tenancy page
Click Admin > Multi-tenancy.
-
Click Tenants to configure tenants.
-
Click Tenant domains to configure tenant domains.
Configuring tenants
These sections describe how to configure tenants.
Understand the Tenants page
-
Click Tenants.
Previously-configured tenants are displayed in the Tenants page, with this information.
Field Description Name
Provides the name of the tenant. For user-created tenants, click the entry in the Name column to bring up detailed information on a tenant.
Description
Provides the description information for the tenant.
Associated fabrics
Shows the fabrics that are associated with each tenant. For user-created tenants, click the entry in the Associated fabrics column to bring up detailed information on an associated fabric.
Create a tenant
You can create a tenant on an individual cluster or in a federated cluster. Note that creating a tenant in a federated cluster might take longer as it will always be proxied to the federation primary and synced to all the other clusters.
-
Click Tenants.
Previously-configured tenants are displayed in the Tenants page.
-
Click Actions > Create tenant.
The Create tenant page is displayed.
-
Enter a name and description for the tenant, then click Save.
A confirmation window appears, with these options:
-
Click View tenant to see information on this configured tenant. See View tenant information.
-
Click Associate fabrics to associate one or more fabrics with this tenant. See Associate fabrics with a tenant.
-
Click Create tenant to create another tenant.
-
View tenant information
-
Click Tenants.
Previously-configured tenants are displayed in the Tenants page.
-
Locate the tenant that you want to view information for and click the link in the Name column for that tenant.
The View <tenant-name> details page is displayed, with this information.
Field Description General
Name
Provides the name of the tenant.
Description
Provides the descriptive text associated with this tenant.
Associated fabrics
Fabric name
Displays the fabric that is associated with this tenant.
Note that if the tenant is associated with a fabric group, as described in Associate fabrics with a tenant, then two entries are displayed in the Fabric name column:
-
The fabric group that is associated with the tenant
-
The member fabric within that fabric group that is associated with the tenant
An arrow next to the fabric group name expands or collapses the displayed fabric and fabric group information.
ACI tenant name
For ACI fabrics. Displays the entry that is used to create the tenant on the ACI fabric.
Tenant prefix
For NX-OS fabrics. Displays the entry that is a unique identifier that is applied to the switch CLI configuration to distinguish tenant-specific policies for NX-OS VXLAN fabrics.
Allowed VLANs
For NX-OS fabrics. Displays the VLANs that can be used by the tenant.
-
-
Perform additional actions on this tenant using the Actions drop-down list, if necessary.
-
To edit the configuration for this tenant, click Actions > Edit tenant. See Edit a tenant.
-
To edit the fabric association for this tenant, click Actions > Edit fabric association. See Edit fabrics that are associated with a tenant.
-
To associate a fabric with this tenant, click Actions > Associate fabrics. See Associate fabrics with a tenant.
-
Edit a tenant
-
Click Tenants.
Previously-configured tenants are displayed in the Tenants page.
-
Click the circle next to the tenant that you want to edit, then click Actions > Edit tenant.
You can also click on the configured tenant in the Tenants page, then click Actions > Edit tenant in the tenant-specific page.
The Edit tenant page is displayed.
-
Make the necessary changes to the tenant, then click Save.
Associate fabrics with a tenant
These procedures describe how to associate fabrics with a specific tenant. To associate tenants with a specific fabric group, see Associate tenants with a fabric group.
-
You must associate a fabric with a tenant on either the controller or the Orchestration cluster.
-
VLAN restrictions and tenant prefix are applicable to VXLAN fabrics, as well as VXLAN and VXLAN-ACI fabric groups.
-
Allowed VLANs may overlap with other tenants. VLAN restriction applies to network and VRF VLANs and network attachment.
-
You can modify allowed VLANs for the tenant within a fabric.
-
You cannot modify the ACI tenant name or tenant prefix after associating a fabric with a tenant. Because you can add VXLAN fabrics to VXLAN-ACI fabric groups, this restriction for ACI mapping in case future normalization is needed.
-
When a fabric is added to a fabric group, if there is no conflict, all objects, including tenant associations, VRFs, networks, security groups, and contracts, are copied up to the fabric to the fabric group, then down to all fabrics in the fabric group.
-
For Orchestration, only consistent tenant names between Nexus Dashboard and APIC are supported.
-
See Guidelines and limitations: Tenants and object names for a list of guidelines and limitations around object names.
To associate fabrics with a tenant:
-
Click Tenants.
Previously-configured tenants are displayed in the Tenants page.
-
Click the circle next to the tenant that you want to associate with a fabric, then click Actions > Associate fabrics.
You can also click on the configured tenant in the Tenants page, then click Actions > Associate fabrics in the tenant-specific page.
The Associate fabrics for <tenant-name> page is displayed.
-
Choose the type of fabric that you want to associate with this tenant.
For ACI fabrics, only ACI fabrics that are orchestration-enabled or are part of a VXLAN-ACI fabric group can be associated with a tenant.
-
ACI fabrics
-
VXLAN fabrics
-
Fabric groups
-
-
In the Fabrics/Fabric groups field, choose the fabrics or fabric groups that you want to associate with this tenant.
-
You can associate more than one fabric or fabric group with each tenant.
-
Supported fabric groups include multi-cluster fabric groups, including multi-cluster fabric groups with ACI and VXLAN fabrics in a single fabric group.
-
-
Enter the necessary information to associate the fabrics with the tenant.
Field Description ACI tenant name
Accept the default entry or change the entry. This is the local ACI tenant name to create the tenant on the ACI fabric if this association is ever inherited into a VXLAN-ACI fabric group.
Tenant prefix
Accept the default entry or change the entry. This entry is a unique identifier that is applied to the switch CLI configuration to distinguish tenant-specific policies for NX-OS VXLAN fabrics.
The switch software limits some policy names to just 32 characters. Because of this character limitation, you can configure a tenant prefix (essentially, a shortened tenant name) that is used on NX-OS switches. There is a character limit of 10 for this field. See Guidelines and limitations: Tenants and object names for more information.
Allowed VLANs
Specify the VLANs that can be used by the tenant.
-
Click Save.
The View <tenant-name> details page appears with the fabric now associated with this tenant.
Associate tenants with a fabric group
These procedures describe how to associate tenants with a specific fabric group. To associate fabrics with a specific tenant, see Associate fabrics with a tenant.
-
Navigate to Manage > Fabric Groups, then click the fabric group where you want to associate a tenant.
That fabric group’s Overview page is displayed.
-
Click Actions > Associate tenants.
Previously-configured tenants are displayed in the Associate tenants page, with this information.
Field Description Tenant
Provides the name of the tenant. For user-created tenants, click the entry in the Tenant column to bring up detailed information on a tenant. See View tenant information.
ACI tenant name
For ACI fabrics. Displays the entry that is used to create the tenant on the ACI fabric.
Tenant prefix
For NX-OS fabrics. Displays the entry that is a unique identifier that is applied to the switch CLI configuration to distinguish tenant-specific policies for NX-OS VXLAN fabrics.
Allowed VLANs
For NX-OS fabrics. Displays the VLANs that can be used by the tenant.
-
Click + Associate tenants.
-
Make the necessary choices in the Associate tenants page.
-
In the Tenant field, choose the tenant that you want to associate with this fabric group.
-
For ACI fabrics, in the ACI tenant name field, accept the default entry or change the entry.
This entry is used to create the tenant on the ACI fabric.
-
For NX-OS fabrics:
-
In the Tenant prefix field, accept the default entry or change the entry.
This entry is a unique identifier that is applied to the switch CLI configuration to distinguish tenant-specific policies for NX-OS VXLAN fabrics.
The switch software limits some policy names to just 32 characters. Because of this character limitation, you can configure a tenant prefix (essentially, a shortened tenant name) that is used on NX-OS switches. There is a character limit of 12 for this field.
-
In the Allowed VLANs field, specify the VLANs that can be used by the tenant.
-
-
Click Save in the row where you are entering the information for the tenant that you are associating with this fabric group.
The information for the newly-associated tenant is displayed.
-
-
Click + Associate tenants to associate additional tenants with this fabric group, or click Save if you have associated all of the necessary tenants with this fabric group.
Edit fabrics that are associated with a tenant
-
Click Tenants.
Previously-configured tenants are displayed in the Tenants page.
-
Click the circle next to the tenant that has a fabric association that you want to edit.
-
Click Actions > Edit associated fabrics.
The Edit associated fabrics page is displayed.
-
Choose the appropriate fabric and make the necessary fabric association edits.
-
If you want to associate a different fabric with this tenant, click Actions > Associate fabrics. See Associate fabrics with a tenant.
-
If you want to edit an existing fabric association, click Actions > Edit, then make the necessary modifications to this fabric association.
-
If you want to delete an existing fabric association, click Actions > Delete.
-
Import a tenant from ACI
This process creates an ACI tenant in the Nexus Dashboard as a Nexus Dashboard tenant, and associates that tenant with the fabric that you provide in the Fabric field below and any fabric group that this fabric is a member of.
-
Click Tenants.
Previously-configured tenants are displayed in the Tenants page.
-
Click Actions > Import tenant (ACI).
The Import tenant (ACI) page is displayed.
-
In the Fabric field, choose the ACI fabric where you want to import the tenant.
-
In the ACI tenants on fabric field, choose the tenant that you want to import from the ACI fabric.
Only tenants that are importable are listed. This associates the tenant that you enter in the ACI tenants on fabric field with the fabric that you chose in the Fabric field.
-
In the Tenant actions field, determine if you want to:
-
Associate the ACI tenant with an existing Nexus Dashboard tenant, or
-
Create a new Nexus Dashboard tenant for this ACI tenant.
-
-
If you chose to associate the ACI tenant with an existing Nexus Dashboard tenant, in the Nexus dashboard tenant name field, choose the existing Nexus Dashboard tenant that you will associate the ACI tenant with.
-
In the Tenant prefix field, enter a prefix for the Nexus Dashboard tenant.
This entry is a unique identifier that is applied to the switch CLI configuration to distinguish tenant-specific policies for NX-OS VXLAN fabrics.
The switch software limits some policy names to just 32 characters. Because of this character limitation, you can configure a tenant prefix (essentially, a shortened tenant name) that is used on NX-OS switches. There is a character limit of 12 for this field.
-
In the Allowed VLANs field, specify the VLANs that can be used by the tenant.
Enter the VLANs as ranges (for example,
100-200) or as individual IDs, separated with commas (for example,100, 150, 200). -
Click Save.
A confirmation window appears.
Delete a tenant
-
Click Tenants.
Previously-configured tenants are displayed in the Tenants page.
-
Click the box next to the tenant that you want to delete.
-
Click Actions > Delete.
The tenant is now deleted from the list of tenants displayed in the in the Tenants page.
Working with tenants under Segmentation and security
-
Navigate to the main Fabrics page.
Manage > Fabrics
-
Locate the VXLAN fabric where you want to work with tenants under Segmentation and security.
-
Single-click the appropriate VXLAN fabric.
The Summary page for that VXLAN fabric appears with the Overview tab selected by default.
-
Click Segmentation and security.
-
On the Segmentation and security tab, click the Tenants subtab.
-
Review the information on the Tenants page.
View tenants information
This page shows tenant fabric associations.
-
You can deploy individual tenants (including all pending logical objects for that tenant across all switches or fabrics) from this page.
-
The default tenant is always present but not shown if there are no other tenant fabric associations.
-
The default tenant might not be deployed from here as other VRF and network options exist for these deployments.
To view tenants information:
-
Review the information provided on the Tenants page.
The table provides information on tenants in the fabric.
Field Description Name
Provides the name of the tenant.
ACI tenant name
For ACI fabrics. Displays the entry that is used to create the tenant on the ACI fabric.
Tenant prefix
For NX-OS fabrics. Displays the entry that is a unique identifier that is applied to the switch CLI configuration to distinguish tenant-specific policies for NX-OS VXLAN fabrics.
VLANs
For NX-OS fabrics. Displays the VLANs that can be used by the tenant.
Config status
Displays the configuration status for the tenant.
-
Click the table header to sort the entries in alphabetical order for the selected parameter.
-
Perform any of the listed actions on the Tenants page.
The table describes the action items that are available in the Actions drop-down list.
Tenants actions and descriptions Action Item Description Deploy
Allows you to deploy the tenant in the fabric. See Deploy tenants.
Import tenant policies
Allows you to import the tenant policies. See Import tenant policies.
Deploying tenants
Types of deployment
Before deploying a tenant, it’s useful to understand the different types of deployment that are available in Nexus Dashboard as related to multi-tenancy.
-
Recalculate and deploy:
-
Primarily used for inter-fabric connectivity and for updating the infra-tenant.
-
Also deploys all user tenant’s objects in pending state.
-
-
VRF deploy
-
Network deploy: Not supported on VXLAN-ACI fabric groups.
-
Tenant deploy: Described in these procedures.
-
All objects within a specific tenant are deployed.
-
You can select and deploy multiple tenants at once.
-
Deployment dependencies
-
VRF deployment requires the VRF to be in the attached state.
-
Network deployment requires both the network and the VRF to be in the attached state.
-
Security group deployment requires both the security group and the VRF to be in the attached state.
-
Security association deployment requires the security group to be in the attached state.
-
The network selector of a security group requires the network attachment to be in the attached state.
-
If a network in a user tenant references a VRF in the
commontenant, the VRF in thecommontenant must be deployed first. -
If a child network in a user tenant references a normal network in the
commontenant, thecommontenant must be deployed first.
Deploy tenants
-
In the Tenants page, choose one or more tenants to deploy into the fabric.
-
Click Actions > Deploy.
The Deploy configuration page appears.
-
Verify the information in the Deploy configuration page.
-
For NX-OS fabrics, the entry in the Pending config column displays the number of lines that have changed as part of the preview.
-
For ACI deployments, the entry in the Pending config column displays the total number of objects in APIC that have been added, modified, or deleted.
Click the entry in the Pending config column to bring up the Pending config page.
-
The Pending config tab on this page displays the pending configurations on the fabric.
-
The Side-by-side comparison tab on this page displays the running configuration and expected configuration in a side-by-side representation.
-
-
Click Deploy all.
Import tenant policies
-
In the Tenants page, choose a tenant that contains the policies that you want to import.
-
Click Actions > Import tenant policies.
The Import tenant policies from import page appears.
-
Navigate through the import steps.
1. Select fabric
-
In the Select fabric step, choose the appropriate ACI fabrics to be imported into your Nexus Dashboard fabric group.
-
Click Next.
You advance to the 2. Select VRFs step.
2. Select VRFs
The VRFs that you choose in this step influences the verification information that is presented later in this workflow. If you find issues with that verification information, you might have to return to this page and modify the choices that you made here.
-
In the Select VRFs step, choose the appropriate VRFs from the ACI fabric that will be imported into your Nexus Dashboard fabric group.
If a VRF belongs to the common tenant, you will see the text
commonunderneath the VRF name. -
Click Next.
You advance to the 3. Select networks/BDs step.
3. Select networks/BDs
The networks and bridge domains that you choose in this step influences the verification information that is presented later in this workflow. If you find issues with that verification information, you might have to return to this page and modify the choices that you made here.
-
In the Select networks/BDs step, choose the appropriate networks and bridge domains from the ACI fabric that will be imported into your Nexus Dashboard fabric group.
-
If you want to import the network or bridge domains and all EPGs that are associated with that network or bridge domain, click the box next that network or bridge domain.
All EPGs that are associated with the network or bridge domain are automatically imported when you choose the upper-level network or bridge domain.
-
If you want to import only specific EPGs, click the arrow next to a bridge domain or network to show any associated children EPGs, then choose the specific EPGs that you want to import.
-
-
Click Next.
You advance to the 4. Map EPGs to security groups step.
4. Map EPGs to security groups
The 4. Map EPGs to security groups step in the process is a verification step; you cannot make changes on this page. However, if you see any issues with the information that is presented on this page, click Back to return to the 3. Select networks/BDs or 2. Select VRFs step, then correct the issue and move forward to this verification stage in the process again.
-
In the Map EPGs to security groups step, verify that the EPGs have been mapped to the intended ESGs (security groups) correctly.
-
Click Next.
You advance to the 5. Map ACI contracts to ND step.
5. Map ACI contracts to ND
The Map ACI contracts to ND step in the process is a verification step; you cannot make changes on this page. However, if you see any issues with the information that is presented on this page, click Back to return to the 3. Select networks/BDs or 2. Select VRFs step, then correct the issue and move forward to this verification stage in the process again.
-
In the Map ACI contracts to ND step, verify that the ACI contracts will be mapped to the Nexus Dashboard correctly.
The contracts listed in this step will be uplifted from ACI and will be used to create contracts in Nexus Dashboard.
-
Each ACI contract consists of the following pieces of information:
-
Source and destination (also known as consumer and provider) information.
-
Filter information, including vzSubject information, which is a component of a contract that groups together one or more filters defining the types of traffic allowed or denied between EPGs.
-
For more information on ACI contracts, see Cisco ACI Contract Guide White Paper.
-
When the ACI contracts are mapped to the Nexus Dashboard, the process essentially performs a one-to-one mapping of the vzSubject information from the ACI contract to a Nexus Dashboard contract. In addition, filters within the ACI contract become protocol definitions within the Nexus Dashboard contract.
For more information on Nexus Dashboard contracts, see Working with security contracts.
-
-
Click Next.
You advance to the 6. Review security associations step.
6. Review security associations
In the Review security associations step, verify that the source and destination pairs are associated with the uplifted contracts correctly.
-
If any information on this page is incorrect, click Back to repeat any procedures that were not configured correctly.
-
Click Next if all of the information on this page is correct.
You advance to the 7. Summary step.
7. Summary
-
In the Summary step, verify that all of the information from the Import tenant policies from import steps are configured correctly.
-
If any information on this page is incorrect, click Back to repeat any procedures that were not configured correctly.
-
Click Submit if all of the information on this page is correct and you are ready to import the ACI tenant policies to your Nexus Dashboard.
A progress screen appears.
-
-
When you see the message
Successfully imported selected policies, click Done.You are returned to the Tenants tab under Segmentation and security.
-
Click VRFs to see the new Nexus Dashboard VRFs that were created from the 2. Select VRFs step.
-
Click Networks to see the new Nexus Dashboard networks that were created from the 3. Select networks/BDs step.
-
Click Security groups to see the new Nexus Dashboard security groups that were created from the 4. Map EPGs to security groups step.
-
Click Security contracts, Security associations, and Protocol definitions to see the new Nexus Dashboard security components that were created from the 5. Map ACI contracts to ND step.
-
Understanding the process for importing tenant policies from ACI fabrics into VXLAN-ACI fabric groups
This feature provides the ability to migrate endpoint groups (EPGs) on APIC to endpoint security groups (ESGs) using the EPG-to-ESG migration workflow, and import those ESGs, as well as VRFs, bridge domains, and so on, into Nexus Dashboard.
Mapping between ACI and Nexus Dashboard policies
Use the information in this table to understand how ACI components map to Nexus Dashboard components when importing tenant policies from existing ACI fabrics into Nexus Dashboard VXLAN-ACI fabric groups. For a more extensive set of mapping information, see Mapping between ND, NX-OS and ACI policies for VXLAN-ACI fabric groups.
| ACI (before import) | Nexus Dashboard (after import) |
|---|---|
|
Bridge domain (BD) + 1 endpoint group (EPG) (Network-centric design) |
Network (normal) |
|
BD + 2 or more EPGs (Application-centric design) |
Normal network + child networks:
|
|
EPG contract (original EPG contract, pre-migration) |
Security contract |
|
ESG contract |
Security association |
Import tenant policies from ACI fabrics
This section provides information and procedures for importing tenant policies from ACI fabrics into Nexus Dashboard for use with a VXLAN-ACI fabric group.
Guidelines and limitations: Importing tenant policies from ACI fabrics
-
To ensure a successful import of the tenant policies from the ACI fabrics, perform the tasks in the order listed above, which allows for less restrictive name lengths on the tenant policies. Performing the tasks out of order could force more restrictive, shorter name lengths.
-
Using the EPG-to-ESG migration workflow, as described in Use the EPG-to-ESG migration workflow, may be disruptive: either a temporary disruption in communication might occur or, if the migration does not respect the contracts, an impact might be seen on application flows. We recommend that you implement the EPG-to-ESG migration workflow during a maintenance window to minimize issues with any potential disruptions.
-
Migrating the EPGs on the ACI fabric to ESGs using the EPG-to-ESG migration workflow will cause traffic disruptions because the pcTag associated to the classified resources will change as part of the process. If you do not want to have that traffic impact, you can temporarily "open up" the security policies in a VRF by creating a vzAny-to-vzAny permit-all contract.
-
ACI contracts should have only one subject. When importing tenant policies from ACI fabrics, Nexus Dashboard only supports importing ACI contracts with one subject.
-
You must enable a global AES strong encryption key in the ACI fabric before going through the snapshot creation step in the EPG-to-ESG migration workflow. This setting is necessary so that APIC uses the key to encrypt secure fields, such as passwords. Refer to Encrypting Configuration Files Using the GUI in the appropriate Cisco APIC Basic Configuration Guide for those procedures.
Additional important information
These sections provide additional important information that is helpful when you go through the process of importing tenant policies from ACI fabrics.
Object name-length limits and automatic name shortening
When Nexus Dashboard generates the migration plan, each ESG, security association (contract clone), and Nexus Dashboard contract name is checked against a maximum length. Because Nexus Dashboard adds a tenant prefix to imported objects, the prefix consumes part of the budget for some object types. Generated names that would exceed the limit are shortened automatically, which allows for the analysis to succeed without manual intervention.
The migration plan applies the following limits:
-
The ESG name (stored in the ESG name field of the plan) has a maximum length of 61 characters, which includes the tenant prefix. When the tenant prefix length is 10 (the default fallback), the effective maximum for the ESG name itself is 52 characters.
-
The security-association name for each contract clone (the cloneName field of the plan) has a maximum length of 64 characters. The tenant prefix is not counted against this limit, so the effective maximum remains 64 characters regardless of the tenant prefix length.
-
The Nexus Dashboard contract name (the ndContractName field of the plan) has a maximum length of 38 characters, which includes the tenant prefix. When the tenant prefix length is 10 (the default fallback), the effective maximum for the Nexus Dashboard contract name itself is 29 characters.
-
For object types where the tenant prefix is counted, the effective maximum is computed as the total maximum (the tenant prefix length + 1). The "+1" accounts for the tenant/policy-name delimiter, which does not consume budget. The tenant prefix length comes from the per-tenant fabric configuration; when none is configured, Nexus Dashboard uses a fallback of 10 characters.
Shortened ndContractName: Each cloned ESG contract carries two related names in the migration plan:
-
cloneName: The security-association name (bounded by the 64-character security-association limit) -
ndContractName: The Nexus Dashboard contract policy name as it will appear in Nexus Dashboard (bounded by the 38-character Nexus Dashboard-contract limit, with the tenant prefix counted)
Nexus Dashboard seeds ndContractName from the original ACI contract name. If that name would exceed the effective Nexus Dashboard-contract budget, Nexus Dashboard shortens it by preserving the leading portion of the original, truncating the middle, and appending a deterministic 4-character hash of the full original name. The hash makes the shortening reproducible — a given source contract always produces the same shortened name — and prevents collisions when two original contracts share the same leading characters. Any prefix or suffix configured for ESG contract naming during the Create the migration record and APIC snapshot steps is preserved in the shortened result.
Verifying a shortened name: To identify the source of a shortened ndContractName, read the cloneFromDn field of the same contract clone entry in the migration plan; it preserves the full distinguished name of the original ACI contract even after shortening. Final names — shortened or not — also appear in the Map EPGs to ESGs and Review ESG contracts steps and in the Bulk edit YAML downloaded during analysis, so you can confirm them before proceeding to Conversion. If you edit a name in the Bulk edit YAML, keep it within the maximums listed above; otherwise, Nexus Dashboard re-shortens the value or rejects the upload during validation.
Inter-VRF global contracts and automatic scope expansion
If an endpoint group (EPG) or external EPG in one of the selected VRFs consumes or provides an inter-VRF global contract, the corresponding provider or consumer may reside in a VRF that you did not choose. Converting only one side of that relationship would leave broken contract references in the resulting ESG-based configuration, so Nexus Dashboard treats the selection as incomplete.
Before the migration plan is generated, Nexus Dashboard analyzes inter-VRF contract relationships across the in-scope tenants. If one side of an inter-VRF global contract is missing from your selection, Nexus Dashboard automatically adds the missing VRF or VRFs to the selection so that all VRFs that participate in the same contract are migrated together. The Select tenants/VRFs step then updates the VRF list to show both the VRFs that you originally selected and the VRFs that were added automatically.
Review the updated VRF list, including any VRFs that Nexus Dashboard added automatically, before you continue.
TCAM utilization and conversion mode
The migration workflow uses each leaf node’s policy TCAM utilization — measured by APIC as a 5-minute moving average — to choose between two conversion modes and, when utilization is too high, to block the conversion entirely. The check is applied per leaf node. A VRF inherits the highest TCAM band of any leaf node on which it is deployed, and the conversion mode is then selected globally from the worst band of any VRF included in the conversion scope.
-
Below 50% TCAM utilization: All in-scope VRFs are deployed on nodes with healthy TCAM. Conversion runs in TCAM non-optimized mode (ESG contract mappings are installed before EPG and external-EPG selectors). This temporarily uses additional TCAM during migration but minimizes traffic loss because contracts are in place before endpoints reclassify into ESGs.
-
Between 50% and 80% TCAM utilization: At least one node on which an in-scope VRF is deployed is in the warning band. Conversion proceeds, but it runs in TCAM optimized mode (EPG and external-EPG selectors are installed before ESG contract mappings). This conserves TCAM during migration, but you might see additional transient traffic loss while contracts are still being applied. The workflow lists the affected nodes and VRFs as warnings during the Analysis phase in the migration process.
-
At or above 80% TCAM utilization: At least one node on which an in-scope VRF is deployed is in the critical band. The workflow blocks the conversion and lists the critical nodes and VRFs so that you can identify the cause. To proceed, free TCAM on the affected nodes — for example, by removing unused contracts, filters, or rules — or remove the affected VRFs from the conversion scope and run the analysis again. The conversion remains blocked while any in-scope VRF is deployed on a leaf node at or above 80% TCAM utilization, and re-running the conversion without changing either the TCAM state or the conversion scope produces the same critical outcome.
TCAM utilization is sampled during the Analysis phase so that warning and critical conditions are visible before you reach the Conversion phase, and the same check is repeated in the Conversion phase before deployment so that recent changes in TCAM utilization are not missed.
For detailed information about TCAM-related migration behavior in the underlying ESG Migration Assistant process, see the Cisco APIC Security Configuration Guide, Release 6.2(x).
To review TCAM information in Nexus Dashboard:
-
Navigate to Analyze > Analysis Hub > Conformance > Scale.
-
In the Scale conformance last 6 months area, click Switch level, then, under All scale metrics > Fabrics, click on an entry in the ACI fabric in the Switch metrics conformance column.
-
In the Switch Scalability Metrics on Fabric aci-fabric-name page, look for information that contains TCAM in the Metric column (enter
Metric contains TCAMin the filter results field).
Because the underlying APIC measurement is a 5-minute average, transient TCAM spikes may not be reflected immediately, and TCAM that you free up on a node is not reflected in the workflow’s view until the next 5-minute sample is published.
Deleting a migration
Use Delete migration when you want to permanently remove a migration record and the per-migration state that Nexus Dashboard tracks. Delete is appropriate for migration records that were created in error, that you no longer intend to run, or that you have completed and verified and no longer need for audit purposes.
Delete operates on the migration record, not on the migrated configuration. It does not undo any ESG, contract, or selector changes that Conversion has already applied to APIC, and it does not restore the APIC fabric to an earlier configuration. If you want to revert the APIC fabric, perform a snapshot rollback before you delete the migration. After a successful delete, the migration cannot be recovered, and the rollback snapshots associated with that migration are no longer reachable from Nexus Dashboard. See About snapshot rollback for more information.
What delete affects: When delete completes successfully, Nexus Dashboard performs the following on the migration record and its associated artifacts, in this order:
-
On APIC, Nexus Dashboard requests deletion of each configuration snapshot that the migration created. Snapshot deletion is best-effort: if APIC is unreachable or rejects the request for an individual snapshot, that snapshot file remains on APIC and the migration delete continues. You can remove residual snapshot files manually on APIC if they are no longer needed.
-
In Nexus Dashboard, the migration record is removed, along with all child state: phase data, per-VRF analysis output, deployment results, cleanup results, status, and the migration’s tracked snapshot metadata.
-
On the helper component, the per-migration artifact directory (analysis output, cleanup plan, and similar generated files) is removed. This step is best-effort and does not affect the success of the delete.
When a delete is allowed or rejected: Delete is rejected when an operation is currently in progress for the migration record — for example, analysis, deployment, cleanup, or rollback. Wait for the operation to complete or fail before you delete. A migration record in any other state, including pending, successful, and failed, can be deleted.
Force delete: A force option is available for every migration scenario, but is necessary for migration records that are stuck in the in-progress state because of an earlier helper or APIC failure. Force delete bypasses the in-progress check and removes the migration record in the same way as a normal delete. Use force delete only when you are certain that no operation is actively running for the migration, because deleting a record while an operation is genuinely in flight can leave the APIC fabric in a partial state. After a force delete, verify the APIC fabric state against the most recent successful snapshot for that migration; if one exists, reconcile any differences manually or by means of a separate rollback.
How to delete a migration: To delete a migration:
-
In the EPG to ESG migration page for the member ACI fabric, locate the migration record.
-
From the Actions menu, choose Delete migration.
-
Confirm the action when prompted.
Nexus Dashboard performs the snapshot, record, and artifact cleanup described above and displays the result. The delete action is also recorded in the Nexus Dashboard audit log under the migration’s name and fabric.
What is preserved or deleted: Tenants, VRFs, ESGs, contracts, contract clones, selectors, and any other APIC objects created or modified by the migration remain in place after the migration record is deleted. The same applies to objects that were not part of the migration scope. Delete only removes Nexus Dashboard’s record of the migration workflow itself.
Restriction of one active migration per VRF
Each VRF on an ACI fabric can be a member of at most one migration that has not yet reached the successful terminal state. While a migration is still pending, in progress, or failed, the VRFs assigned to it remain reserved for that migration, and Nexus Dashboard prevents the same VRF from being included in any other migration on the same fabric. The reservation is released only in these conditions:
-
When the migration completes successfully and reaches the terminal Successful state
-
When the migration is deleted
-
When the migration is rolled back to the Analysis target (which clears the migration’s tenant and VRF selection entirely)
The constraint is enforced per fabric. A VRF with the same tenant name and VRF name on a different ACI fabric is a different VRF for migration purposes and is not affected.
Nexus Dashboard checks for VRF conflicts in two places during Phase 1: Analysis:
-
When you submit the tenant and VRF selection in the Select tenants/VRFs step. If any selected VRF is already a member of another active migration on the same fabric, the submission is rejected before analysis runs. The workflow displays the conflicting VRFs grouped by tenant and by the migration that already owns them, with instructions to complete, delete, or roll back the conflicting migration before selecting the VRF again. The migration record remains at the Select tenants/VRFs step; the analysis is not started.
-
When Nexus Dashboard automatically expands the migration scope to include a VRF on the other side of an inter-VRF global contract (see Inter-VRF global contracts and automatic scope expansion for more information). If the auto-added VRF is already a member of another active migration on the same fabric, the analysis cannot complete, and Nexus Dashboard returns the migration record to the Select tenants/VRFs step with the message that the required VRF dependencies could not be automatically selected because they are already included in active migrations. Delete or complete the migration that owns the required VRFs and run analysis again.
Resolving a VRF conflict: When a conflict is reported, choose one of the following actions on the migration that currently owns the conflicting VRFs:
-
Complete the migration: Drive it through Conversion and Cleanup to the Successful terminal state. Successful migrations release their VRFs immediately.
-
Delete the migration: Delete is the right action when the other migration is no longer needed or was created in error. See Deleting a migration for more information.
-
Roll back the migration to the Analysis target: An Analysis-target rollback clears the migration’s tenant and VRF selection, which releases all VRFs that the migration was holding. Rolling back to Conversion or Cleanup does not release the VRFs, because the migration’s tenant and VRF selection is preserved across those rollbacks. See About snapshot rollback for more information.
After the conflict is resolved on the other migration, retry the Select tenants/VRFs step, or, when the conflict was triggered by auto-expansion, retry analysis. Nexus Dashboard rechecks the constraint each time and proceeds when the conflict has cleared.
About snapshot rollback
Snapshot rollback is available as part of the migration lifecycle. Use rollback when you need to return the migration to a previously captured state after a migration step has been performed.
During the migration workflow, APIC snapshots are created at key stages such as Analysis, Conversion, and Cleanup. These snapshots provide recovery points that you can use if you need to revert changes after reviewing the migration outcome or after identifying an issue during a maintenance window.
Preserve the snapshot created at the beginning of each phase until you have verified the results of that phase. If a problem is identified during conversion or cleanup, use the APIC built-in configuration rollback capability to return to the appropriate snapshot before continuing with additional migration actions.
For detailed information about rollback behavior and verification guidance for the underlying ESG Migration Assistant process, see the Cisco APIC Security Configuration Guide, Release 6.2(x).
Snapshot rollback returns both sides of the migration to a previously captured point in a single action:
-
On APIC, Nexus Dashboard restores the fabric configuration from the snapshot associated with the target phase. The restore is an atomic, replace-style import of the snapshot file, so the resulting APIC state is identical to the state captured when that snapshot was taken.
-
In Nexus Dashboard, the migration record is reverted to the start of the target phase. The current phase, current operation, per-VRF status, and per-VRF counts are all reset to the values that were applied when that phase began, and any data, snapshots, and per-VRF results accumulated after the target phase are deleted.
Use rollback when, after reviewing the outcome of a migration step, you decide to revert that step before continuing. Because rollback affects the APIC fabric as well as the migration record, perform it during a maintenance window when possible.
Snapshots that are eligible as rollback targets: During the migration workflow, Nexus Dashboard creates three APIC configuration snapshots, one at the start of each phase. The snapshot is the rollback point for that phase:
-
The Analysis snapshot is created in Phase 1: Analysis, in the Create APIC snapshot step. Rolling back to Analysis returns the APIC fabric to the state captured before the migration plan was generated, and resets the migration record so that no tenants or VRFs are selected and no grouping strategy or editing mode is chosen. After the rollback, you must re-run the Select tenants/VRFs and Select grouping strategy steps.
-
The pre-conversion snapshot is created in Phase 2: Conversion, in the Create APIC snapshot step. Rolling back to Conversion returns the APIC fabric to the state captured before the ESG and contract changes were deployed, and resets the migration record so that the conversion can be reviewed and deployed again. The original tenant and VRF selection from Analysis is preserved, but per-VRF deployment and conversion results are cleared.
-
The pre-cleanup snapshot is created in Phase 3: Cleanup, in the Create APIC snapshot step. Rolling back to Cleanup returns the APIC fabric to the state captured before legacy EPG-based policy artifacts were removed, and resets the migration record so that the cleanup review and execution can be repeated. The original tenant and VRF selection is preserved, and per-VRF cleanup results are cleared.
When rollback is allowed: Rollback can be started from the migration record only when all of the following are true:
-
The migration record exists and is not in a terminal phase.
-
No operation is currently in progress for the migration record. If a phase action such as analysis, deployment, or cleanup is running, wait for it to complete or fail before starting rollback.
-
The selected target phase is at or before the current phase of the migration record. Rolling forward is not supported.
When any of these conditions is not met, Nexus Dashboard rejects the rollback request and the migration record state is left unchanged.
If a period of time has passed between the point that you went through a migration workflow and the point when you decide to perform a rollback, be aware of any changes that might have been made on the APIC side in that timeframe before performing a rollback. For example, if snapshots were taken during a particular migration workflow, and then you decide to perform a rollback at a later date using a snapshot from that earlier migration workflow, verify that changes have not been made on the APIC side during that timeframe because you might lose any configurations that were made in that timeframe when you perform the rollback.
How to perform a rollback: To perform a rollback:
-
In the EPG to ESG migration page for the member ACI fabric, open the migration record.
-
From the Actions menu, choose the rollback action for the desired target phase.
Nexus Dashboard lists the rollback snapshots that exist for that phase; select the snapshot to use. Nexus Dashboard then performs the APIC configuration restore and, when it completes successfully, applies the migration-record reset for that phase.
Rollback runs as a single operation on the migration record. While it is running, the record is marked in progress and no other phase action can be started against it.
What happens after a successful rollback: When rollback succeeds:
-
The APIC fabric configuration matches the snapshot you selected.
-
The migration record’s current phase is set to the target phase, its status is set to pending, and its current operation is set to the Create APIC snapshot step of the target phase. You are positioned to repeat the phase from its first step, including taking a new snapshot.
-
All snapshots that were created after the target phase are deleted from the migration record. The corresponding APIC snapshot files are not deleted automatically; you can remove them from APIC if they are no longer needed.
-
All migration-record data captured for phases after the target phase is deleted, including per-VRF analysis output, deployment results, and cleanup results.
-
For an Analysis-target rollback only, the tenant and VRF selection and the grouping strategy are also cleared. You must re-select them before proceeding.
What happens if rollback fails: If the APIC configuration restore does not succeed, Nexus Dashboard marks the migration record as failed and records the error returned by APIC. The migration record’s current phase is left at its pre-rollback value so that you can inspect the prior state. To recover, address the underlying APIC condition reported in the error, then either retry the rollback to the same target phase or open the migration record and use Resume to continue from the pre-rollback phase. Snapshots and migration-record data are not deleted on a failed rollback.
Per-fabric restriction on operations that actively modify the ACI fabric
In addition to the per-VRF restriction described in Restriction of one active migration per VRF, Nexus Dashboard enforces a per-fabric restriction on operations that actively modify the ACI fabric. For a given ACI fabric, at most one migration on that fabric can have any of the following operations in progress at the same time:
-
A Conversion deploy in the Deploy ESG & clone contracts step or the Conversion step of Phase 2: Conversion,
-
a cleanup execution in the Cleanup step of Phase 3: Cleanup, or
-
a snapshot rollback that is targeting Conversion, Cleanup, or any later phase of the migration record.
The restriction applies even when the migrations have non-overlapping tenant and VRF scopes because each of these operations changes the APIC fabric state that is shared across migration records.
The restriction does not apply to Phase 1: Analysis. Multiple migrations on the same fabric can run Analysis simultaneously, subject to the per-VRF restriction. The restriction also does not apply to snapshot creation, plan editing, or any other read-only step in the workflow.
Nexus Dashboard checks the restriction immediately before it starts a deploy, cleanup, or rollback. If another migration on the same fabric already has one of those operations in progress:
-
The new request is rejected,
-
the migration record is left in its current state with no operation started, and
-
Nexus Dashboard returns a message that names the operation that is in progress and the migration record that owns it.
Wait for the in-progress operation to finish or fail before you retry the rejected operation. If you need to stop the in-progress operation rather than wait for it, complete or roll back that migration first, then retry.
The restriction is per-fabric. A migration on a different ACI fabric is not affected, and operations on different fabrics can proceed concurrently.
Examples of Bulk edit YAML files
At a certain point in the Phase 1: Analysis stage of the EPG-to-ESG migration workflow, you will be given the option to Bulk edit the migration plan as a YAML file. Following are examples of Bulk edit YAML files for your reference.
vrfs:
    - vrf: uni/tn-foo/ctx-vrf-1
      esgs:
        - name: ESG_foo_ap-1_1
          applicationProfile: ap-1
          epgs:
            - uni/tn-foo/ap-ap-1/epg-epg-1
            - uni/tn-foo/ap-ap-1/epg-epg-3
          prov:
            - uni/tn-foo/brc-ct-1
          cons: []
        - name: ESG_foo_ap-1_2
          applicationProfile: ap-1
          epgs:
            - uni/tn-foo/ap-ap-1/epg-epg-2
            - uni/tn-foo/ap-ap-1/epg-epg-4
          prov: []
          cons:
            - uni/tn-foo/brc-ct-1
        - name: ESG_foo_ap-1_3
          applicationProfile: ap-1
          epgs:
            - uni/tn-foo/ap-ap-1/epg-epg-5
            - uni/tn-foo/ap-ap-1/epg-epg-7
          prov:
            - uni/tn-foo/brc-ct-2
          cons: []
        - name: ESG_foo_ap-1_4
          applicationProfile: ap-1
          epgs:
            - uni/tn-foo/ap-ap-1/epg-epg-6
            - uni/tn-foo/ap-ap-1/epg-epg-8
          prov: []
          cons:
            - uni/tn-foo/brc-ct-2
      leakInternalSubnets: []
      leakExternalPrefixes: []
contractClones:
    - cloneName: ct-1_e_1
      cloneFromDn: uni/tn-foo/brc-ct-1
      ndContractName: ct-1
      providerESG: uni/tn-foo/ap-ap-1/esg-ESG_foo_ap-1_1
      consumerESG: uni/tn-foo/ap-ap-1/esg-ESG_foo_ap-1_2
    - cloneName: ct-2_e_1
      cloneFromDn: uni/tn-foo/brc-ct-2
      ndContractName: ct-2
      providerESG: uni/tn-foo/ap-ap-1/esg-ESG_foo_ap-1_3
      consumerESG: uni/tn-foo/ap-ap-1/esg-ESG_foo_ap-1_4
contractIfClones: []
vrfs:
    - vrf: uni/tn-foo/ctx-vrf-1
      esgs:
        - name: esg-1
          applicationProfile: ap-1
          epgs:
            - uni/tn-foo/ap-ap-1/epg-epg-1
          prov:
            - uni/tn-foo/brc-ct-1
          cons: []
        - name: esg-2
          applicationProfile: ap-1
          epgs:
            - uni/tn-foo/ap-ap-1/epg-epg-2
          prov: []
          cons:
            - uni/tn-foo/brc-ct-1
        - name: esg-3
          applicationProfile: ap-1
          epgs:
            - uni/tn-foo/ap-ap-1/epg-epg-3
          prov:
            - uni/tn-foo/brc-ct-1
          cons: []
        - name: esg-4
          applicationProfile: ap-1
          epgs:
            - uni/tn-foo/ap-ap-1/epg-epg-4
          prov: []
          cons:
            - uni/tn-foo/brc-ct-1
        - name: esg-5
          applicationProfile: ap-1
          epgs:
            - uni/tn-foo/ap-ap-1/epg-epg-5
          prov:
            - uni/tn-foo/brc-ct-2
          cons: []
        - name: esg-6
          applicationProfile: ap-1
          epgs:
            - uni/tn-foo/ap-ap-1/epg-epg-6
          prov: []
          cons:
            - uni/tn-foo/brc-ct-2
        - name: esg-7
          applicationProfile: ap-1
          epgs:
            - uni/tn-foo/ap-ap-1/epg-epg-7
          prov:
            - uni/tn-foo/brc-ct-2
          cons: []
        - name: esg-8
          applicationProfile: ap-1
          epgs:
            - uni/tn-foo/ap-ap-1/epg-epg-8
          prov: []
          cons:
            - uni/tn-foo/brc-ct-2
      leakInternalSubnets: []
      leakExternalPrefixes: []
contractClones:
    - cloneName: ct-1_e_1
      cloneFromDn: uni/tn-foo/brc-ct-1
      ndContractName: ct-1
      providerESG: uni/tn-foo/ap-ap-1/esg-esg-1
      consumerESG: uni/tn-foo/ap-ap-1/esg-esg-2
    - cloneName: ct-1_e_2
      cloneFromDn: uni/tn-foo/brc-ct-1
      ndContractName: ct-1
      providerESG: uni/tn-foo/ap-ap-1/esg-esg-1
      consumerESG: uni/tn-foo/ap-ap-1/esg-esg-4
    - cloneName: ct-1_e_3
      cloneFromDn: uni/tn-foo/brc-ct-1
      ndContractName: ct-1
      providerESG: uni/tn-foo/ap-ap-1/esg-esg-3
      consumerESG: uni/tn-foo/ap-ap-1/esg-esg-2
    - cloneName: ct-1_e_4
      cloneFromDn: uni/tn-foo/brc-ct-1
      ndContractName: ct-1
      providerESG: uni/tn-foo/ap-ap-1/esg-esg-3
      consumerESG: uni/tn-foo/ap-ap-1/esg-esg-4
    - cloneName: ct-2_e_1
      cloneFromDn: uni/tn-foo/brc-ct-2
      ndContractName: ct-2
      providerESG: uni/tn-foo/ap-ap-1/esg-esg-7
      consumerESG: uni/tn-foo/ap-ap-1/esg-esg-6
    - cloneName: ct-2_e_2
      cloneFromDn: uni/tn-foo/brc-ct-2
      ndContractName: ct-2
      providerESG: uni/tn-foo/ap-ap-1/esg-esg-7
      consumerESG: uni/tn-foo/ap-ap-1/esg-esg-8
    - cloneName: ct-2_e_3
      cloneFromDn: uni/tn-foo/brc-ct-2
      ndContractName: ct-2
      providerESG: uni/tn-foo/ap-ap-1/esg-esg-5
      consumerESG: uni/tn-foo/ap-ap-1/esg-esg-6
    - cloneName: ct-2_e_4
      cloneFromDn: uni/tn-foo/brc-ct-2
      ndContractName: ct-2
      providerESG: uni/tn-foo/ap-ap-1/esg-esg-5
      consumerESG: uni/tn-foo/ap-ap-1/esg-esg-8
contractIfClones: []
vrfs:
    - vrf: uni/tn-tn-apic-94-11/ctx-vrf-1
      esgs:
        - name: esg-1
          applicationProfile: ap-1
          epgs:
            - uni/tn-tn-apic-94-11/ap-ap-1/epg-epg-1
          prov:
            - uni/tn-tn-apic-94-11/brc-ct-icmp
            - uni/tn-tn-apic-94-11/brc-ct-web
          cons: []
      leakInternalSubnets: []
      leakExternalPrefixes: []
    - vrf: uni/tn-tn-apic-94-11/ctx-vrf-2
      esgs:
        - name: esg-2
          applicationProfile: ap-1
          epgs:
            - uni/tn-tn-apic-94-11/ap-ap-1/epg-epg-2
          prov:
            - uni/tn-tn-apic-94-11/brc-ct-https
          cons:
            - uni/tn-tn-apic-94-11/brc-ct-web
      leakInternalSubnets: []
      leakExternalPrefixes: []
    - vrf: uni/tn-tn-apic-94-11/ctx-vrf-3
      esgs:
        - name: esg-3
          applicationProfile: ap-1
          epgs:
            - uni/tn-tn-apic-94-11/ap-ap-1/epg-epg-3
          prov: []
          cons:
            - uni/tn-tn-apic-94-11/brc-ct-https
            - uni/tn-tn-apic-94-11/brc-ct-icmp
      leakInternalSubnets: []
      leakExternalPrefixes: []
contractClones:
    - cloneName: ct-https_e_1
      cloneFromDn: uni/tn-tn-apic-94-11/brc-ct-https
      ndContractName: ct-https
      providerESG: uni/tn-tn-apic-94-11/ap-ap-1/esg-esg-2
      consumerESG: uni/tn-tn-apic-94-11/ap-ap-1/esg-esg-3
    - cloneName: ct-icmp_e_1
      cloneFromDn: uni/tn-tn-apic-94-11/brc-ct-icmp
      ndContractName: ct-icmp
      providerESG: uni/tn-tn-apic-94-11/ap-ap-1/esg-esg-1
      consumerESG: uni/tn-tn-apic-94-11/ap-ap-1/esg-esg-3
    - cloneName: ct-web_e_1
      cloneFromDn: uni/tn-tn-apic-94-11/brc-ct-web
      ndContractName: ct-web
      providerESG: uni/tn-tn-apic-94-11/ap-ap-1/esg-esg-1
      consumerESG: uni/tn-tn-apic-94-11/ap-ap-1/esg-esg-2
contractIfClones: []
vrfs:
    - vrf: uni/tn-coke/ctx-vrf-coke-2
      esgs:
        - name: ESG_instp-vrf-coke-2
          applicationProfile: l3out-vrf-coke-2
          epgs:
            - uni/tn-coke/out-l3out-vrf-coke-2/instP-instp-vrf-coke-2
          externalSubnets:
            - ip: 0.0.0.0/16
              scope: private
          prov:
            - uni/tn-coke/brc-ctr-new
          cons: []
      leakInternalSubnets: []
      leakExternalPrefixes: []
    - vrf: uni/tn-coke/ctx-vrf-coke
      esgs:
        - name: esg-coke-2
          applicationProfile: anp-coke
          preExisting: true
          epgs: []
          prov: []
          cons: []
      leakInternalSubnets: []
      leakExternalPrefixes: []
contractClones:
    - cloneName: ctr-new_e_1
      cloneFromDn: uni/tn-coke/brc-ctr-new
      ndContractName: ctr-new
      providerESG: uni/tn-coke/ap-l3out-vrf-coke-2/esg-ESG_instp-vrf-coke-2
      consumerESG: uni/tn-coke/ap-anp-coke/esg-esg-coke-2
contractIfClones: []
Understanding ACI fabric configurations that are skipped during the import process
When you start the process of importing tenant policies from ACI, as described in Import tenant policies from ACI into Nexus Dashboard, certain policies might not be compatible with Nexus Dashboard. In those situations, Nexus Dashboard skips those policies during the import process and imports only the supported policies. When this happens, a message is displayed with this information:
-
The policies that were skipped during import,
-
the reason each policy was skipped, and
-
the actions required for you to make the policies compatible and successfully import them into Nexus Dashboard.
These are examples of situations where an ACI fabric configuration might be skipped during the import process:
-
Objects that are created by default in APIC but are not eligible for import (for example, the
defaultandcopyVRFs in tenant-common) -
Preferred groups that are enabled on VRF
-
Object names that exceed the Nexus Dashboard maximum length after tenant prefixing
-
Subnet scopes that are not Nexus Dashboard-compatible
-
Subnets with prefix length of /32 or /128
-
Contracts with more than one subject
-
Contracts that have more than one consumer or one provider
-
Contracts that have missing consumer or provider
-
Contracts that have consumer interface
-
Consumer or provider other than ESG or vzAny
-
Consumer, provider, and contract not in same tenant
-
Consumer and provider are in different VRF
-
ESG with intra-isolation enabled
-
Unsupported selectors in ESG (for example: Tag Selector)
Create the VXLAN-ACI fabric group and associate fabrics
In Nexus Dashboard:
-
If the ACI fabric is not already added to Nexus Dashboard, onboard it to Nexus Dashboard using multi-cluster connectivity.
See Connecting Clusters for more information.
-
Create the fabric group and associate the fabrics.
You will import tenant policies from ACI fabrics and you will integrate both ACI and NX-OS fabrics into a single VXLAN-ACI fabric group. For more information, see Creating Fabrics and Fabric Groups.
-
Create a VXLAN-ACI fabric group.
-
Add the ACI and VXLAN fabrics to the VXLAN-ACI fabric group in the correct order.
You must add the ACI and VXLAN fabrics to the VXLAN-ACI fabric group in this order:
-
First, add the ACI fabric to the new VXLAN-ACI fabric group.
-
Then add the VXLAN fabric to the new VXLAN-ACI fabric group.
-
-
What’s next: Import tenants from ACI into Nexus Dashboard.
Import tenants from ACI into Nexus Dashboard
Use these procedures to create an ACI tenant in Nexus Dashboard and associate the tenant to the ACI fabric.
Because the ACI fabric is a member of the VXLAN-ACI fabric group, these procedures associate the tenant to the VXLAN-ACI fabric group as well.
In Nexus Dashboard:
-
Import the first tenant from ACI into Nexus Dashboard.
-
Follow the procedures provided in the "Import a tenant from ACI" section in Configuring Tenants and Tenant Domains to complete this task.
Enter these values in this procedure:
-
Fabric: Choose the ACI fabric that you added to the VXLAN-ACI fabric group in Create the VXLAN-ACI fabric group and associate fabrics.
-
ACI tenants on fabric: Choose the first tenant from ACI that you want to import into Nexus Dashboard.
-
-
Enter the necessary values for the remaining fields in the Import tenant (ACI) page, then click Save.
-
-
Repeat this step to import the remaining tenants from ACI into Nexus Dashboard, if necessary.
Once you have imported all the necessary tenants from ACI into Nexus Dashboard, navigate into the VXLAN-ACI fabric group and click Segmentation and security > Tenants to verify that all of the imported tenants are associated with this fabric group.
What’s next: Use the EPG-to-ESG migration workflow.
Use the EPG-to-ESG migration workflow
Beginning with Nexus Dashboard Release 4.3.1, you can migrate endpoint groups (EPGs) in a Cisco ACI fabric to endpoint security groups (ESGs) by using an integrated workflow in Nexus Dashboard for VXLAN-ACI fabric groups. This workflow provides a guided Nexus Dashboard experience for the ESG Migration Assistant process that is available in Cisco APIC.
The migration workflow is organized into Analysis, Conversion, and Cleanup phases. These phases help you define the migration scope, review the proposed ESG-based configuration, apply the required changes, and remove obsolete EPG-related artifacts after conversion is complete.
Outside the phase flow, the migration lifecycle also supports migration-level actions such as starting a migration, resuming a migration, and rolling back to an earlier snapshot when needed. Previews are also available at various stages during the deploy, conversion, and cleanup stages to verify the payload being pushed to the ACI fabric as a part of those operations.
For detailed information about the underlying ESG Migration Assistant behavior, see the Cisco APIC Security Configuration Guide, Release 6.2(x).
EPG-to-ESG migration phases in Nexus Dashboard
The EPG-to-ESG migration workflow is available in ACI fabrics that are members of the VXLAN-ACI fabric group under Segmentation and security > EPG to ESG migration. Nexus Dashboard uses a phased workflow so that you can review the migration scope, validate the proposed changes, and proceed in a controlled manner.
The workflow is organized into three phases:
-
Analysis, which corresponds to the migration assistant analysis or dry-run stage.
-
Conversion, which applies the reviewed migration plan.
-
Cleanup, which removes obsolete legacy policy artifacts after conversion is complete.
Tenant policy import is not part of the ESG Migration Assistant phase flow. Treat it as a separate post-migration task after you have completed and verified the migration workflow.
Complete migration verification and any required rollback decisions before you begin tenant policy import.
These phases describe the guided migration workflow in Nexus Dashboard. Additional lifecycle actions, such as resume and snapshot rollback, are available from the migration context outside the phase sequence.

-
As you proceed through the three phases, click the Learn more link in the upper right corner to get additional information about what happens in each phase of the migration process.
-
If you navigate away from the EPG-to-ESG migration workflow at any point during the migration process, you can return to the migration and resume your EPG-to-ESG migration workflow by navigating back to the EPG to ESG migration page in the ACI fabric, then choosing your migration workflow and clicking Actions > Resume.
Phase 1: Analysis
Use the Analysis phase to create the migration record, capture the initial APIC state, choose the migration strategy, and review the proposed EPG-to-ESG mappings and ESG contract relationships before proceeding to the Conversion phase. Only analysis is performed at this phase; there is no change of configurations on the member ACI fabric in this phase.
During analysis, Nexus Dashboard generates the migration plan used by the later phases. Review this plan carefully before conversion so that the resulting ESG groupings and contract relationships match the intended security policy model.
This step creates the migration record and captures the initial APIC state before the migration plan is generated. The snapshot created during this step provides the recovery point for the beginning of the migration workflow.
-
Navigate to Manage > Fabrics > Fabric groups.
-
Locate the VXLAN-ACI fabric group in the table, then, in the Member fabrics column, click the ACI fabric that is a member of the VXLAN-ACI fabric group.
The Overview for that member ACI fabric is displayed.
-
Choose Segmentation and security > EPG to ESG migration.
-
From the Actions menu, choose Create migration.
-
In the Create APIC snapshot step, enter the migration name.
See About snapshot rollback for more information on snapshots and rollbacks.
If migration creation succeeds but snapshot creation fails, the workflow can enter a partial state and allow the snapshot to be created afterward.
-
(Optional) Enter a snapshot name or use the system-generated value if that option is available.
-
Choose the ESG contract naming option for generated ESG contract objects.
You must choose to use a prefix, a suffix, or both so that cloned ESG contract names do not conflict with the original EPG contract names. For example, if the original contract name is
web, using a prefix such asecreatese_web, and using a suffix such asecreatesweb_e.-
Use prefix only
-
Use suffix only
-
Use prefix and suffix
-
-
Click Create snapshot.
-
Click Next.
-
In the Select tenants/VRFs step, select the tenants and VRFs to include in the migration.
This defines the migration scope and limits the plan to the VRFs that you want to analyze and convert.
If you have inter-VRF global contracts in the ACI fabric, see Inter-VRF global contracts and automatic scope expansion for important information before continuing with the migration.
-
Click Next.
-
In the Select grouping strategy step, choose the grouping strategy for the migration plan.
-
Optimized: Groups EPGs with similar contract patterns into fewer ESGs. Use Optimized when you want Nexus Dashboard to reduce the number of ESG groupings based on similar policy relationships.
-
One-to-one: Preserves a one-to-one mapping between each EPG and a corresponding ESG. Use One-to-one when you want to preserve the original EPG grouping structure more directly.
Review the generated mappings carefully, especially when you use the Optimized strategy, because the resulting grouping can change how policy relationships are represented after migration.
-
-
Run the analysis by clicking Analyze for the grouping strategy that you chose.
See Object name-length limits and automatic name shortening for information on name-length restrictions and shortening.
-
After the analysis is complete, choose the appropriate editing mode.
The analysis phase generates the migration plan that is used by the later phases.
-
In-UI configuration: Use this option for simpler adjustments, such as reviewing generated names and making focused changes in the workflow. With this option, you can make the necessary edits through the UI as you proceed through the workflow.
-
Bulk edit: Use this option when you need to make structural changes to the generated migration plan. For example, use Bulk edit when you want to:
-
change how EPGs are grouped into ESGs,
-
move an EPG to a different ESG, or
-
further refine the generated grouping before conversion.
To use the Bulk edit option:
-
Click Download the optimized YAML to download the YAML file.
-
Use a text editor to edit the YAML file offline to update your mappings.
See Examples of Bulk edit YAML files for examples of Bulk edit YAML files.
-
Upload the updated YAML file by clicking the upload box area and navigating to the file or by dragging the file to the upload box area.
User-edited YAML file are validated by Nexus Dashboard to ensure that no spurious entries are present.
-
-
-
-
Click Next.
After you update the migration plan, review the resulting EPG-to-ESG mappings and ESG contract relationships carefully before you proceed to the Conversion phase.
-
In the Map EPGs to ESGs step, review the proposed EPG-to-security-group mappings.
This confirms that the generated ESG structure matches the intended security grouping before deployment.
-
Make any necessary edits through the UI if you chose In-UI configuration as the editing mode earlier in these procedures.
-
Click Next when you are finished reviewing or editing the content on the Map EPGs to ESGs step.
-
-
In the Review ESG contracts step, review the generated ESG contract relationships.
This validates how the existing contract relationships will be represented after migration.
-
Make any necessary edits through the UI if you chose In-UI configuration as the editing mode earlier in these procedures.
-
Click Next when you are finished reviewing or editing the content on the Review ESG contracts step.
-
-
In the Summary step, review the proposed migration results.
-
Click Proceed Phase 2: Conversion.
After the analysis is complete:
-
the migration record appears in the migration pipeline
-
the selected tenants and VRFs are associated with the migration
-
the proposed EPG-to-ESG mappings are available for review
-
the proposed ESG contract relationships are available for review
-
the summary page is displayed
-
the migration is ready to proceed to the Conversion phase
-
Create an APIC snapshot before the analysis begins so that the workflow can evaluate the current EPG and contract relationships.
-
Review TCAM information during migration planning and conversion, especially when you use the Optimized grouping strategy. TCAM is a hardware resource used for policy and contract processing, and the resulting ESG grouping can affect how efficiently those resources are used.
The migration workflow can identify resource conditions that require additional review before conversion proceeds. In some environments, the migration process can continue with warnings, while in other cases conversion can be blocked if hardware resource utilization exceeds supported thresholds. See TCAM utilization and conversion mode for more information.
If the workflow displays TCAM utilization information or resource warnings, review that information before continuing with deployment or conversion actions. This is especially important when planning migrations for environments that are already operating near hardware policy limits.
-
If you use Bulk edit, review the updated plan carefully before you continue in the workflow.
Phase 2: Conversion
Use the Phase 2: Conversion phase to apply the reviewed migration plan, create the pre-conversion snapshot, review the proposed ESG and contract changes, deploy the configuration, monitor progress, and review the summary before proceeding to the Cleanup phase. This phase applies the configuration changes to the ACI fabric and may be disruptive, so we recommend that you perform this phase during a maintenance window to minimize issues with any potential disruptions.
Before conversion begins, preserve a rollback point by creating the pre-conversion snapshot. During this phase, Nexus Dashboard validates the reviewed migration plan, applies the ESG-based configuration, and reports status for the conversion workflow.
Create the pre-conversion snapshot to preserve the current APIC state before active ESG-based changes are applied. Keep this snapshot available until you have verified the conversion results.
-
Open the migration record and proceed to the Phase 2: Conversion phase.
-
In the Create APIC snapshot step, review or enter the pre-conversion snapshot name.
-
Click Create snapshot.
-
Click Next.
Before conversion is applied, review the proposed migration results and any workflow warnings. If the workflow displays validation, resource, or deployment warnings, resolve them before you continue.
-
In the Preview ESG & contract clones step, review the proposed ESG and contract changes.
-
If the workflow provides a configuration preview, review the generated configuration details.
-
Click Next.
-
In the Deploy ESG & clone contracts step, deploy the configuration for the selected scope.
-
If you want to delete a migration afterward, see Deleting a migration for those procedures.
-
You can have only one active migration per VRF. See Restriction of one active migration per VRF for more information.
-
-
If the workflow supports VRF-level actions, choose the appropriate deployment method:
-
Click Deploy all to deploy all VRFs, or
-
For each VRF that you want to deploy, click Deploy to deploy individual VRFs.
-
-
Monitor the deployment status for the included VRFs.
-
If any items fail and the workflow provides retry actions, retry the failed items as needed.
-
Click Next after deployment is complete.
-
In the Conversion step, review conversion progress and status.
-
Complete the conversion workflow.
-
In the Summary step, review the conversion results.
-
Click Proceed to Cleanup.
After the conversion is complete:
-
the pre-conversion snapshot is created,
-
the ESG and contract changes are deployed,
-
VRF-level status is displayed for the deployment and conversion workflow,
-
completed and failed items, if any, are visible in the workflow,
-
the conversion summary page is displayed, and
-
the migration is ready to proceed to the Cleanup phase.
Before you proceed to cleanup, verify that the expected EPG-to-ESG mappings, cloned contract relationships, and VRF-level results match the reviewed migration plan.
-
Create a pre-conversion snapshot so that the current state is preserved before the ESG-based configuration is deployed.
-
If the workflow displays TCAM utilization information or other resource warnings during conversion, review that information before proceeding with additional deployment actions.
-
If the workflow supports per-VRF deployment, use that option when you want to stage the conversion in smaller units.
Phase 3: Cleanup
Use the Cleanup phase to review the obsolete legacy policy artifacts identified after conversion, perform the cleanup actions, and review the final summary to complete the migration workflow.
Cleanup removes legacy EPG-based policy artifacts that are no longer needed after the ESG-based configuration is in place. Even after cleanup is complete, snapshot rollback may still be available from the migration context when rollback conditions are met.
Review the cleanup candidates before deletion so that you can confirm which legacy objects are no longer needed after conversion. Preserve the cleanup snapshot until you have verified the cleanup results for the selected scope.
-
Open the migration record and proceed to the Phase 3: Cleanup phase.
-
In the Create APIC snapshot step, review or enter the cleanup snapshot name.
-
Click Create snapshot.
-
Click Next.
-
In the Cleanup review step, review the objects identified for cleanup.
This lets you confirm which legacy objects are candidates for removal before you delete them.
-
Review the cleanup categories and object counts.
-
Click Next to proceed with the cleanup, or click Save & Exit if you don’t want to proceed with the cleanup at this time.
-
In the Cleanup step, perform the cleanup for the selected scope.
-
If the workflow supports VRF-level actions, choose the appropriate cleanup method.
-
Click Cleanup all to clean up all eligible VRFs, or
-
For each VRF that you want to clean up, click Cleanup to clean up individual VRFs.
-
-
Monitor cleanup status for the included VRFs.
-
Click Next after cleanup is complete.
-
In the Summary step, review the cleanup results.
-
Click Done.
After cleanup is complete:
-
the cleanup snapshot is created,
-
the identified obsolete artifacts are removed,
-
cleanup status is displayed for the selected scope,
-
the cleanup summary page is displayed, and
-
the migration workflow is complete.
After cleanup is complete, confirm that the expected legacy contracts and other obsolete migration-related artifacts were removed and that the intended ESG-based policy remains in place.
If a problem is identified during cleanup verification, use the APIC built-in configuration rollback capability to return to the cleanup snapshot before continuing with additional cleanup actions.
-
Review the cleanup categories before you proceed so that you understand which legacy objects are being removed.
-
If the workflow supports VRF-level cleanup, use that option when you want to complete cleanup in smaller units.
-
Review the cleanup summary to confirm that the expected objects were processed.
What’s next: Import tenant policies from ACI into Nexus Dashboard.
Import tenant policies from ACI into Nexus Dashboard
Use these procedures to import tenant policies from the ACI fabric.
In Nexus Dashboard:
-
Choose the first tenant that you imported from ACI into Nexus Dashboard in Import tenants from ACI into Nexus Dashboard.
-
Import the tenant policies from the ACI fabric.
Follow the procedures provided in the section "Import tenant policies" in Working with Segmentation and Security for Your Nexus Dashboard VXLAN Fabric to complete this task.
Certain ACI fabric configurations might get skipped during the import process. When this happens, Nexus Dashboard displays information on which ACI fabric configurations were skipped and why. See Understanding ACI fabric configurations that are skipped during the import process for more information.
-
Review or edit the policies that you’ve created.
Once you have completed all of the tasks in this Import tenant policies from ACI fabrics section, you can now review the policies that you’ve created and edit them, if necessary (for example, you might want to stretch a VRF from the policy). Refer to these sections in the Working with Segmentation and Security for Your Nexus Dashboard VXLAN Fabric for more information:
-
Deploy the tenant, if necessary.
After importing the tenant policies, you can deploy the tenant that you used when you imported the policies. See the section "Deploy tenants" in Working with Segmentation and Security for Your Nexus Dashboard VXLAN Fabric for more information.
Repeat these procedures to import tenant policies for any additional tenants that you imported from ACI into Nexus Dashboard.
Configuring tenant domains
These sections describe how to configure tenant domains.
Understand the Tenant domains page
-
Click Tenant domains.
Previously-configured tenant domains are displayed in the Tenant domains page, with this information.
Field Description Name
Provides the name of the tenant domain. For user-created tenant domains, click the entry in the Name column to bring up detailed information on a tenant domain.
Description
Provides the description information for the tenant domain.
Member tenants
Shows the tenants that are members of each tenant domain. For user-created tenant domains, click the entry in the Member tenants column to bring up detailed information on a member tenant.
Create a tenant domain
-
You can create a tenant domain on an individual cluster or federated cluster.
-
In a federation, the creation may take longer as it will always be proxied to the federation primary and synced to all other clusters.
-
Tenant domains reference tenants but are not exclusive containers.
-
Many tenant domains may include a given tenant.
To create a tenant domain:
-
Click Tenant domains.
Previously-configured tenant domains are displayed in the Tenant domains page.
-
Click Actions > Create tenant domain.
The Create tenant domain page is displayed.
-
Enter a name and description for the tenant domain.
-
In the Tenants area:
-
Choose an already-configured tenant from the list of tenants, or
-
Click +Create tenant to create a new tenant for this tenant domain.
See Create a tenant for more information.
-
-
Click Save.
The newly-configured tenant domain is displayed in the Tenant domains page.
Edit a tenant domain
-
Click Tenant domains.
Previously-configured tenant domains are displayed in the Tenant domains page.
-
Click the box next to the tenant domain that you want to edit.
-
Click Actions > Edit.
The Edit tenant domain page is displayed.
-
Make the necessary changes to the tenant domain, then click Save.
Delete a tenant domain
-
Click Tenant domains.
Previously-configured tenant domains are displayed in the Tenant domains page.
-
Click the box next to the tenant domain that you want to delete.
-
Click Actions > Delete.
The tenant domain is now deleted from the list of tenant domains displayed in the in the Tenant domains page.
Information that is displayed or not displayed
With multi-tenancy enabled, you might see information, and information might not be displayed to you, based on several factors.
Information that is displayed or not displayed based on tenant and tenant domain associations
When you have tenants and tenant domains configured, information may or may not be displayed to you in certain pages, depending on the associations that you set between the tenants, tenant domains, and users in your Nexus Dashboard.
The best way to describe this concept is to first provide an example Nexus Dashboard configuration:
| User | Associated tenants | Associated tenant domains | Notes |
|---|---|---|---|
|
admin |
Tenant1-1 Tenant1-2 Tenant1-3 Tenant2-1 Tenant3-1 |
all-tenants-domain |
Because the admin user is able to create and edit tenants and tenant domains, all of these tenants in the Nexus Dashboard are essentially associated with the admin user. However, each user is only allowed to be associated with a single tenant domain, so the admin user is associated with the all-tenants-domain in this situation. |
|
User1 |
Tenant1-1 Tenant1-2 Tenant1-3 |
TenantDomain1 |
User1 is associated with TenantDomain1, and Tenant1-1, Tenant1-2, and Tenant1-3 are members of TenantDomain1. |
|
User2 |
Tenant2-1 |
TenantDomain2 |
User2 is associated with TenantDomain2, and Tenant2-1 is a member of TenantDomain2. |
|
User3 |
Tenant1-1 Tenant2-1 Tenant3-1 |
TenantDomain3 |
User3 is associated with TenantDomain3, and Tenant1-1, Tenant2-1, and Tenant3-1 are members of TenantDomain3. |
and then to describe what tenant- and tenant domain-based information is shown or hidden when you log in as any of these users:
Information displayed and hidden: Admin user role
In this scenario, you are logged into the Nexus Dashboard as admin.
As admin, you are able to see all of the tenants and tenant domains that are configured under Admin > Multi-tenancy, and nothing is hidden from you. In addition, you are also able to see all tenant- and tenant domain-based information, as described in Additional areas affected by tenant and tenant domain creation.
Information displayed and hidden: User1 user role
In this scenario, you are logged into the Nexus Dashboard as User1.
Because User1 is associated with TenantDomain1, you are only able to see tenant-based information for these tenants that are associated with TenantDomain1:
-
Tenant1-1
-
Tenant1-2
-
Tenant1-3
and you are not able to see any tenant- or tenant domain-based information for these tenants or tenant domains:
-
TenantDomain2, TenantDomain3
-
Tenant2-1, Tenant3-1
Information displayed and hidden: User2 user role
In this scenario, you are logged into the Nexus Dashboard as User2.
Because User2 is associated with TenantDomain2, you are only able to see tenant-based information for these tenants that are associated with TenantDomain2:
-
Tenant2-1
and you are not able to see any tenant- or tenant domain-based information for these tenants or tenant domains:
-
TenantDomain1, TenantDomain3
-
Tenant1-1, Tenant1-2, Tenant1-3, Tenant3-1
Information displayed and hidden: User3 user role
In this scenario, you are logged into the Nexus Dashboard as User3.
Because User3 is associated with TenantDomain3, you are only able to see tenant-based information for these tenants that are associated with TenantDomain3:
-
Tenant1-1
-
Tenant2-1
-
Tenant3-1
and you are not able to see any tenant domain-based information for these tenant domains, even though Tenant1-1, Tenant2-1, and Tenant3-1 are also members of each of these tenant domains:
-
TenantDomain1, TenantDomain2
This is because, while a tenant can be a member of multiple tenant domains as described in Understand tenant domains, the tenant- or tenant domain-based information that is displayed is based on the tenant domain that User3 is associated with, which is TenantDomain3.
In addition, you are not able to see any tenant-based information for these tenants because they are not associated with TenantDomain3:
-
Tenant1-2, Tenant1-3
Anomalies information that is displayed or not displayed
As they relate to tenants and tenant domains, anomalies are broken down into these categories:
-
Infra anomalies (anomalies at the Nexus Dashboard system level)
-
Tenant-level anomalies
In the Anomalies areas in the GUI, users can only view the portion of the graph that they have access to.
For example, here are two areas in the GUI where you can view anomaly information:
-
In the main Anomalies page (Analyze > Anomalies), where you might see root (Infra) level anomalies, as well as anomalies associated with specific tenants.
-
By choosing the Root cause and uncorrelated anomalies option in the Anomalies page, where you would see correlated anomalies associated with all tenants collapsed into a single row. In addition, if you were to click on a root level anomaly, you would see a graph that would display the correlated anomalies based on the tenant relations with this user.
In addition:
-
In the analyze anomalies list, users can view the list of anomalies that are either classified as Infra or affecting the tenants that they have access to.
-
Similarly, when looking at a graph, users can only view the portion of the graph that they have access to.
-
Users can only update anomalies that they have access to. They cannot update Infra level anomalies unless they are associated with the
all-tenants-domain.
These figures provide examples of situations where Anomalies areas in the GUI might be displayed or might not be displayed to certain users. In each of these figures:
-
R signifies a root (Infra) anomaly or event
-
C signifies a correlated anomaly or event
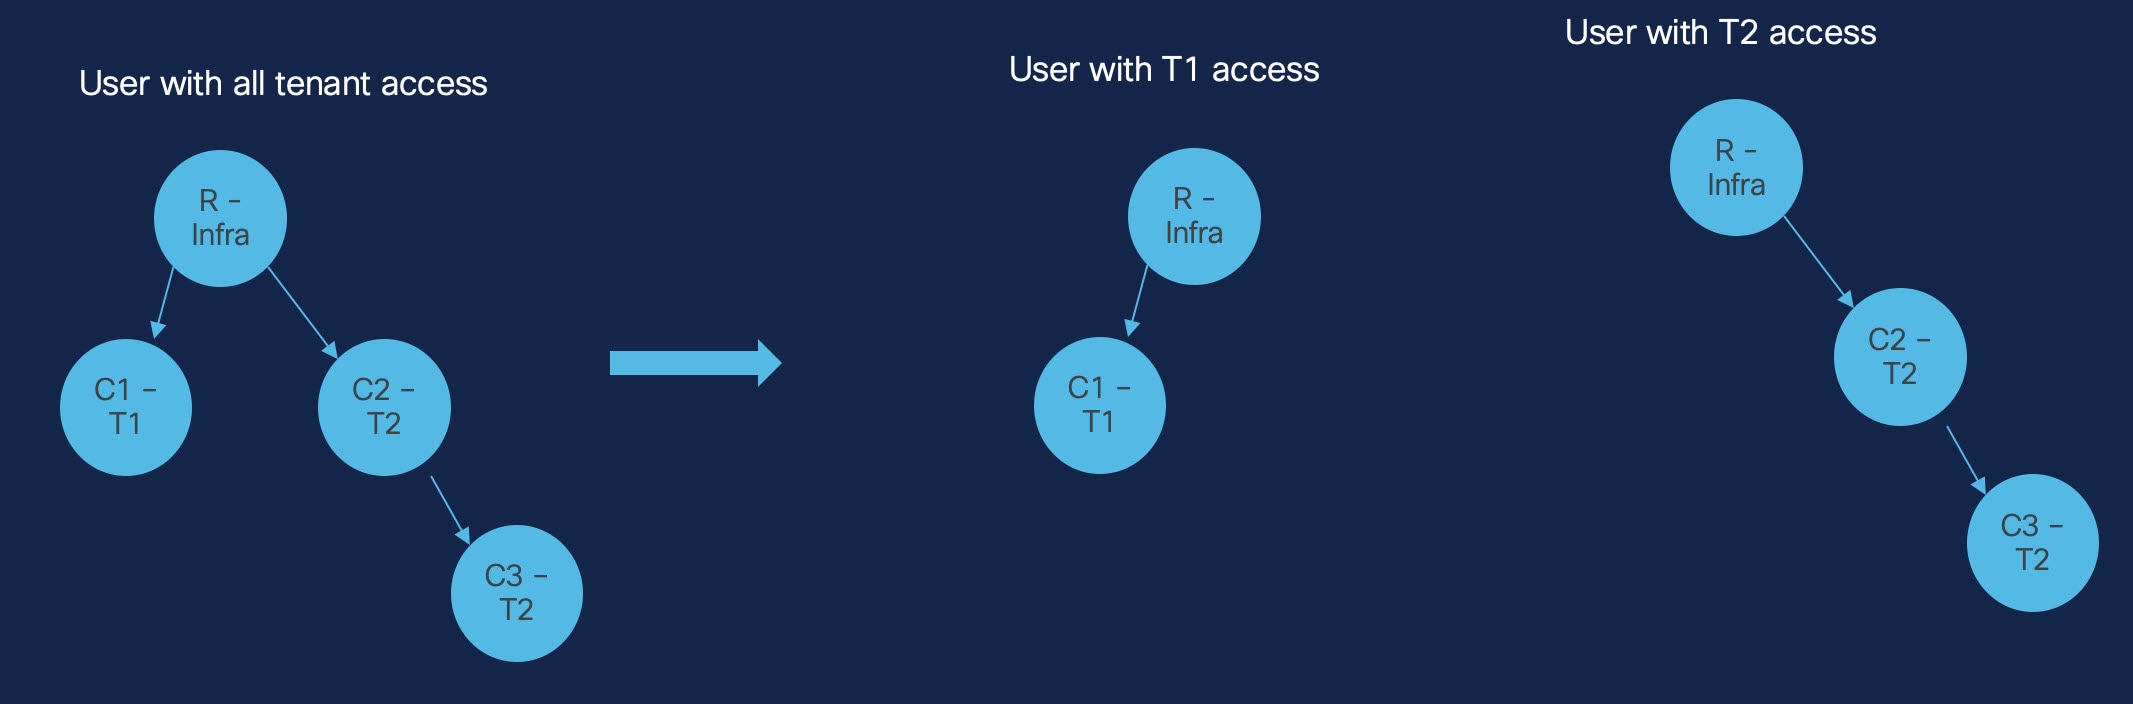
In this figure:
-
The user at the far left of the figure (User1) is associated with the
all-tenants-domainand is able to see Infra (Nexus Dashboard-level) anomalies, as well as correlated anomalies associated with tenants T1 (C1) and T2 (C2 and C3). -
The user in the middle of the figure (User2) is associated only with the
T1tenant, and:-
Is able to see Infra level anomalies
-
Is able to see correlated anomalies where the impact is seen at the
T1tenant level (C1) -
Is not able to see correlated anomalies where the impact is seen at the
T2tenant level (C2 or C3)
-
-
The user in the far right of the figure (User3) is associated only with the
T2tenant, and:-
Is able to see Infra level anomalies
-
Is able to see correlated anomalies where the impact is seen at the
T2tenant level (C2 and C3) -
Is not able to see correlated anomalies where the impact is seen at the
T1tenant level (C1)
-
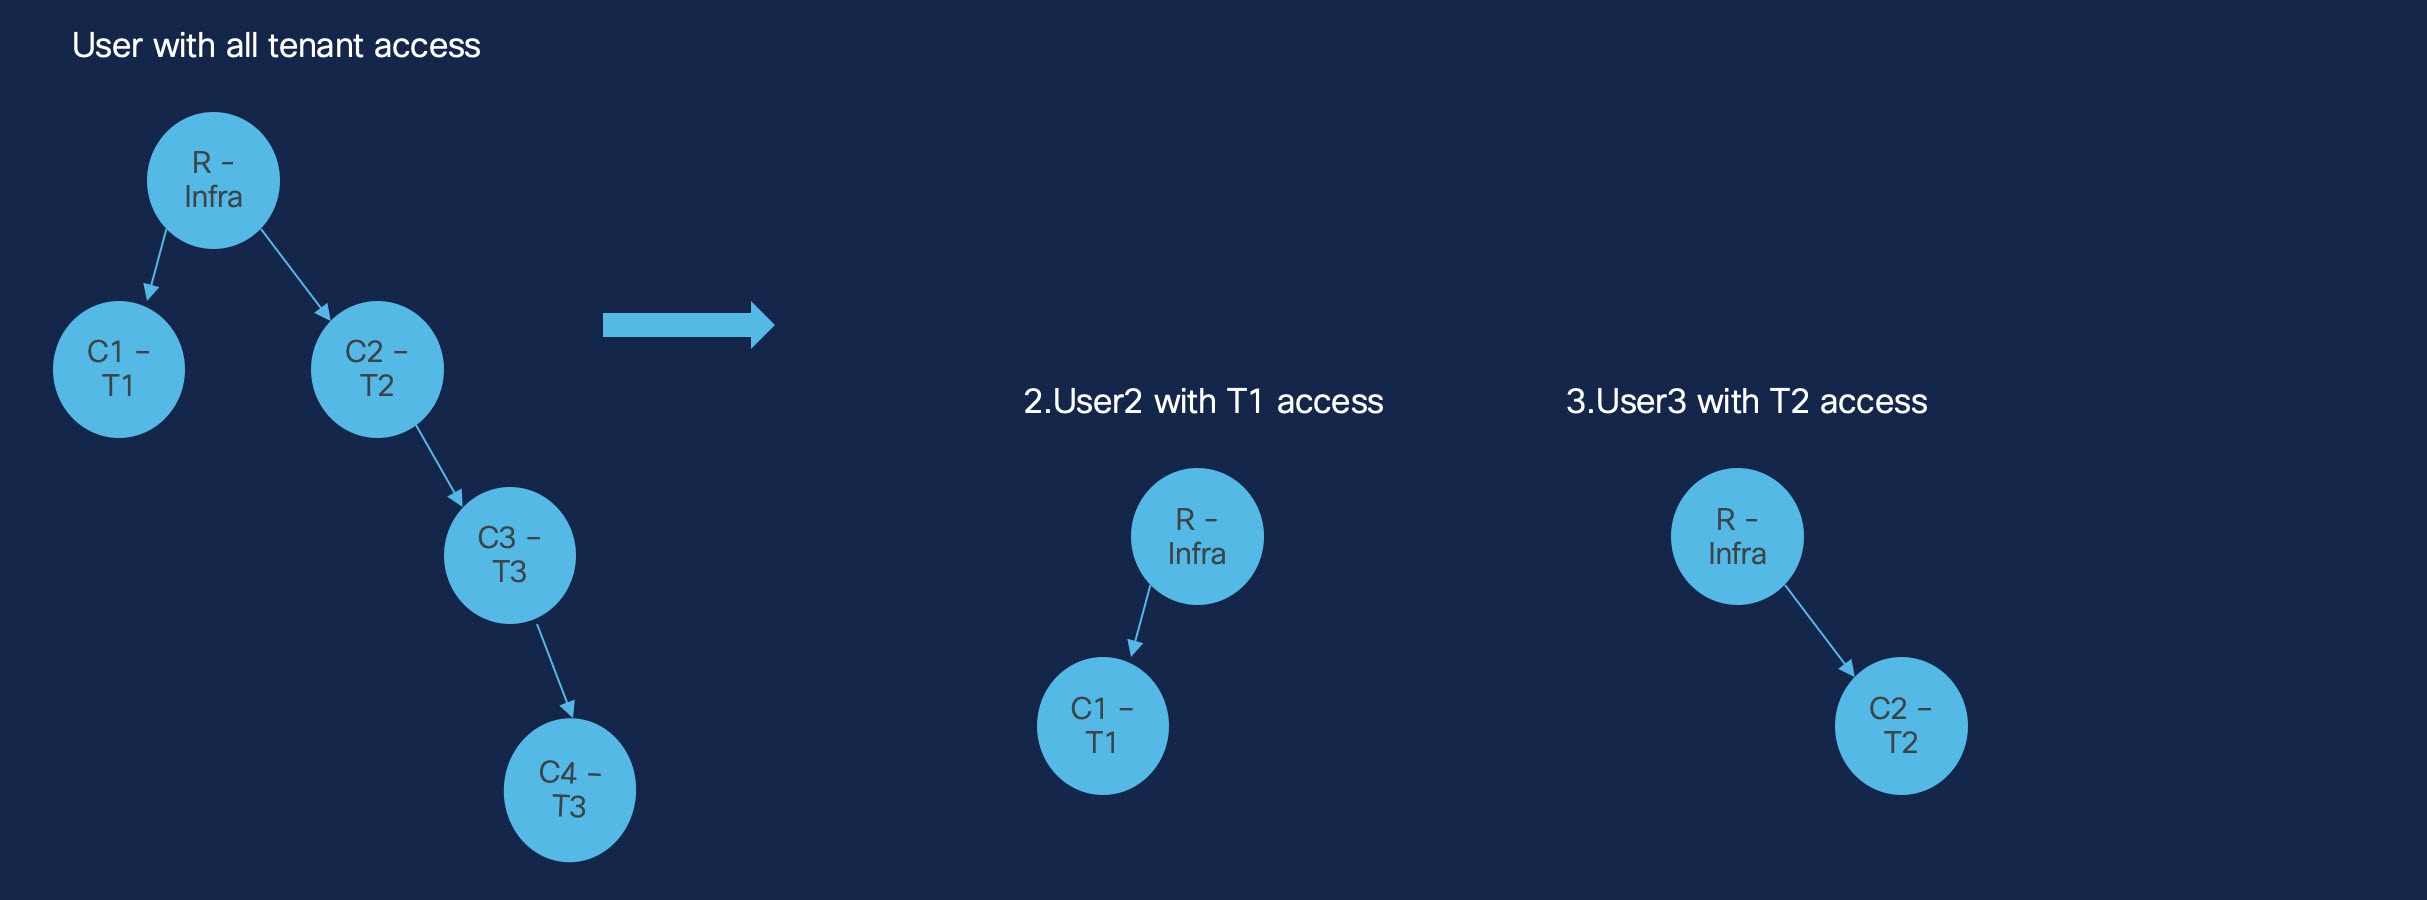
In this figure:
-
The user at the far left of the figure (User1) is associated with the
all-tenants-domainand is able to see Infra (Nexus Dashboard-level) anomalies, as well as Infra anomalies related to tenants T1 (C1), T2 (C2), and T3 (C3 and C4). -
The user in the middle of the figure (User2) is associated only with the
T1tenant, and:-
Is able to see Infra level anomalies
-
Is able to see correlated anomalies where the impact is seen at the
T1tenant level (C1) -
Is not able to see correlated anomalies where the impact is seen at the
T2tenant level (C2) or at theT3tenant level (C3 and C4)
-
-
The user in the far right of the figure (User3) is associated only with the
T2tenant, and:-
Is able to see Infra level anomalies
-
Is able to see correlated anomalies where the impact is seen at the
T2tenant level (C2) -
Is not able to see correlated anomalies where the impact is seen at the
T1tenant level (C1) or at theT3tenant level (C3 and C4)
-
Note that the user that is associated with the T3 tenant (User4) can see tenant-level anomalies for the tenant T3 (C3 and C4), as well as the root Infra anomalies; however, User4 is not able to see anomalies associated with tenants T1 (C1) or T2 (C2). In addition, User4 is not able to see that certain Infra anomalies are correlated to C3 through C2.
With regards to the information displayed in the Anomalies tables:
-
There is no change for users who are associated with the
all-tenants-domain. -
Users with tenant-specific access will not see a count value for the Correlated anomalies/events column, and sorting will be disabled. This is applicable to both ungrouped and root events views.
Endpoints
The active endpoints count that is displayed in the global view shows the number of endpoints based on the tenants that a user has access to across all fabrics in the cluster.
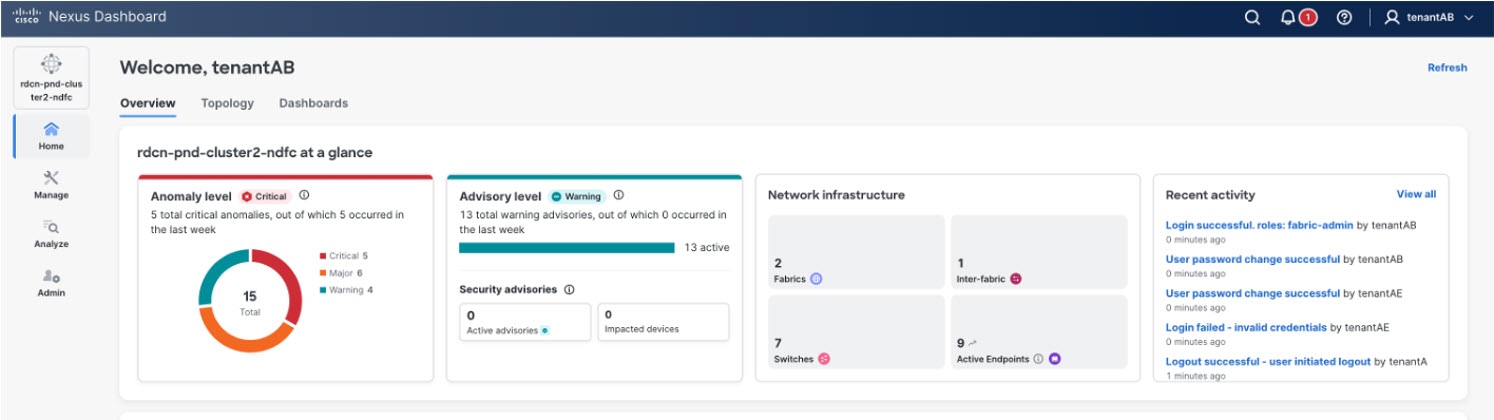
In the fabric view, endpoints are listed based on user access in the tenant-associated fabric.
In the following figure, the user tenantAB has access to tenantA and tenantB only.
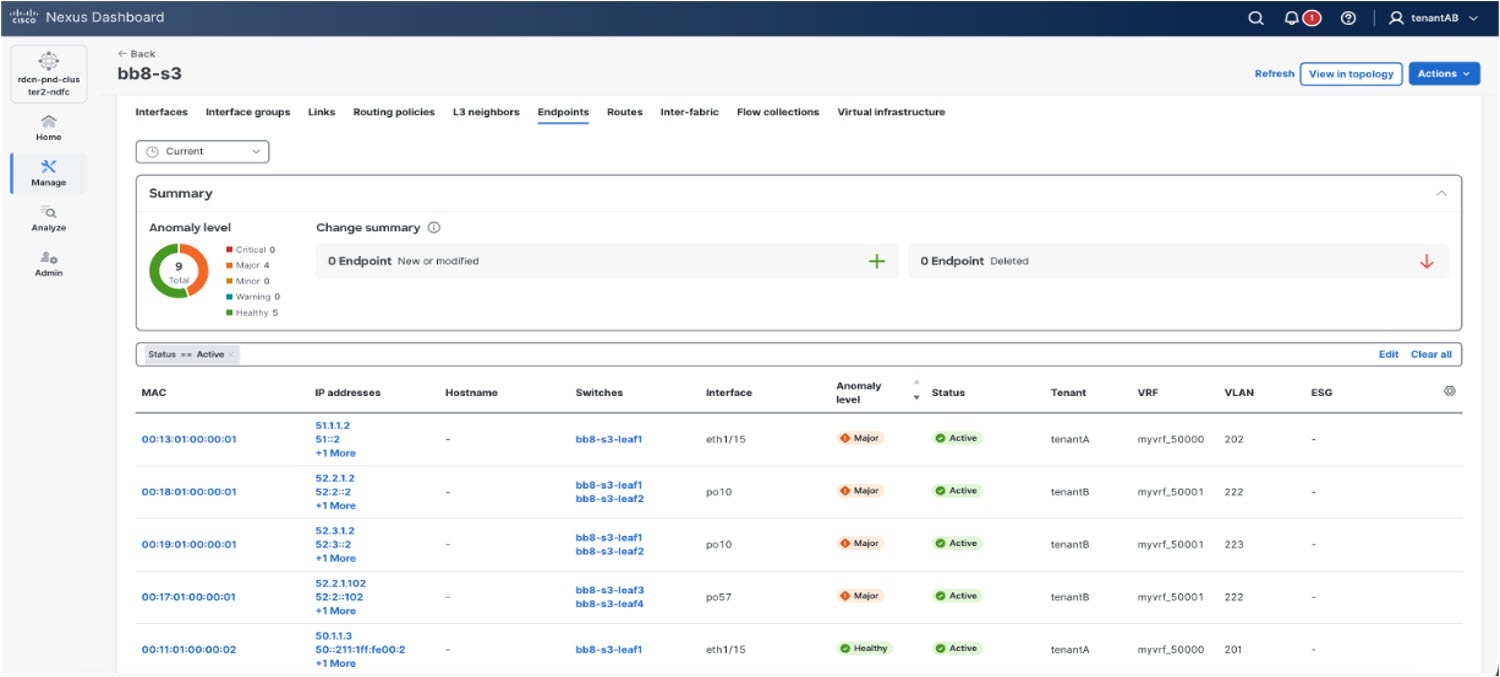
The Endpoint details page shows tenant information for specific endpoints.
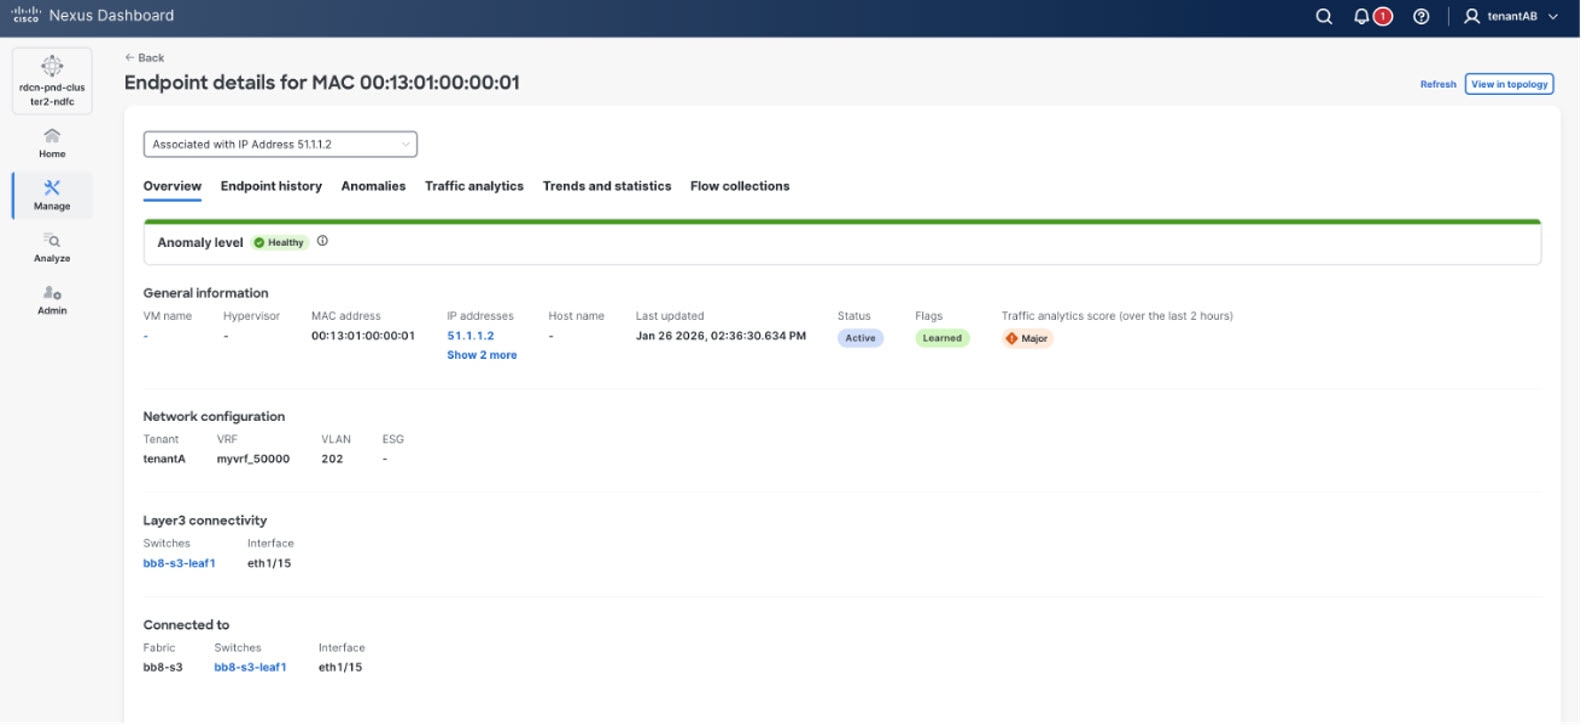
These endpoint anomalies are tenant-scoped and are filtered based on user access:
-
ENDPOINT_DUPLICATE_MAC
-
ENDPOINT_DUPLICATE_IP
-
ENDPOINT_PRIVATE_SUBNET_IP
-
ENDPOINT_MOVE_BETWEEN_LEAFS
The following figure shows anomalies that have endpoints in affected entities that are tenant-scoped. For example, the interface anomaly shown in the figure lists affected endpoints based on user access.
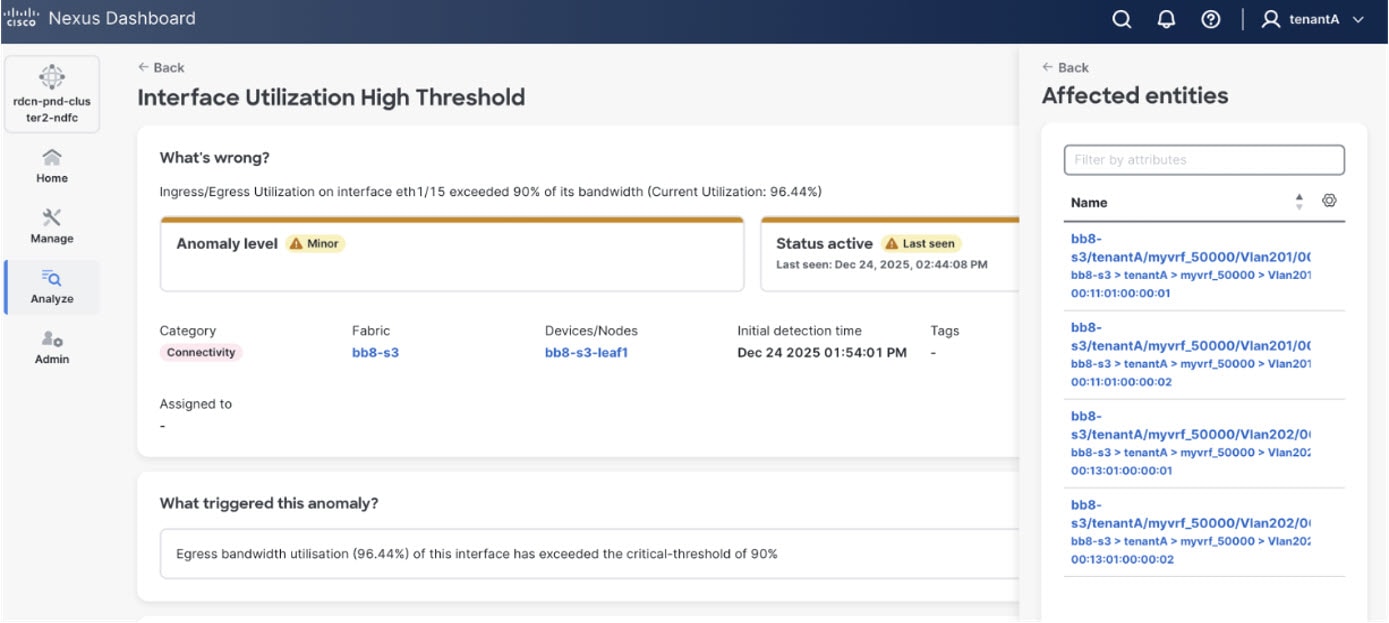
Connectivity analysis
When starting a new connectivity analysis job, only endpoints in the tenants that a user has access to are listed in the source and destination drop-down lists for both IP and MAC.
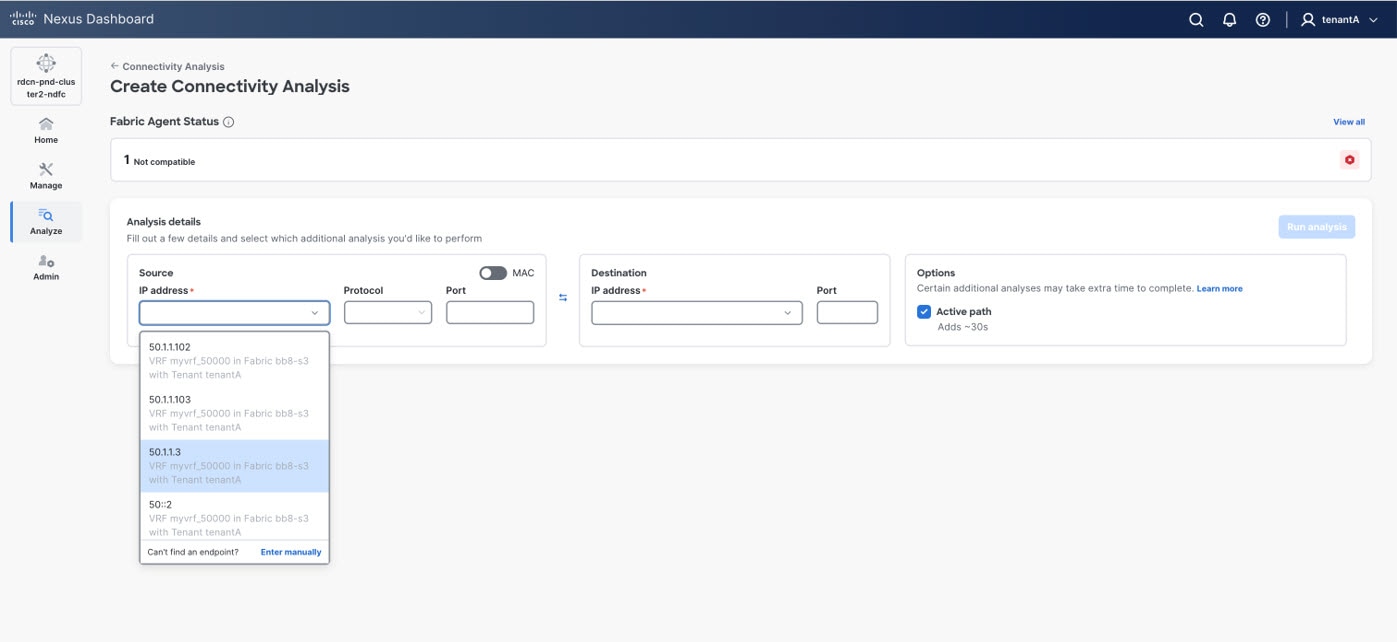
-
Connectivity analysis jobs created by a user with
tenantAaccess is not visible to thetenantBuser. -
When a user starts a multi-site job across tenants, the job fails to reach a tenant that the user doesn’t have access to.
L3 neighbors
The following figure shows an example of L3 neighbors in a tenant-associated fabric. In this page, the tenant and VRF fields are added for L3 neighbors.
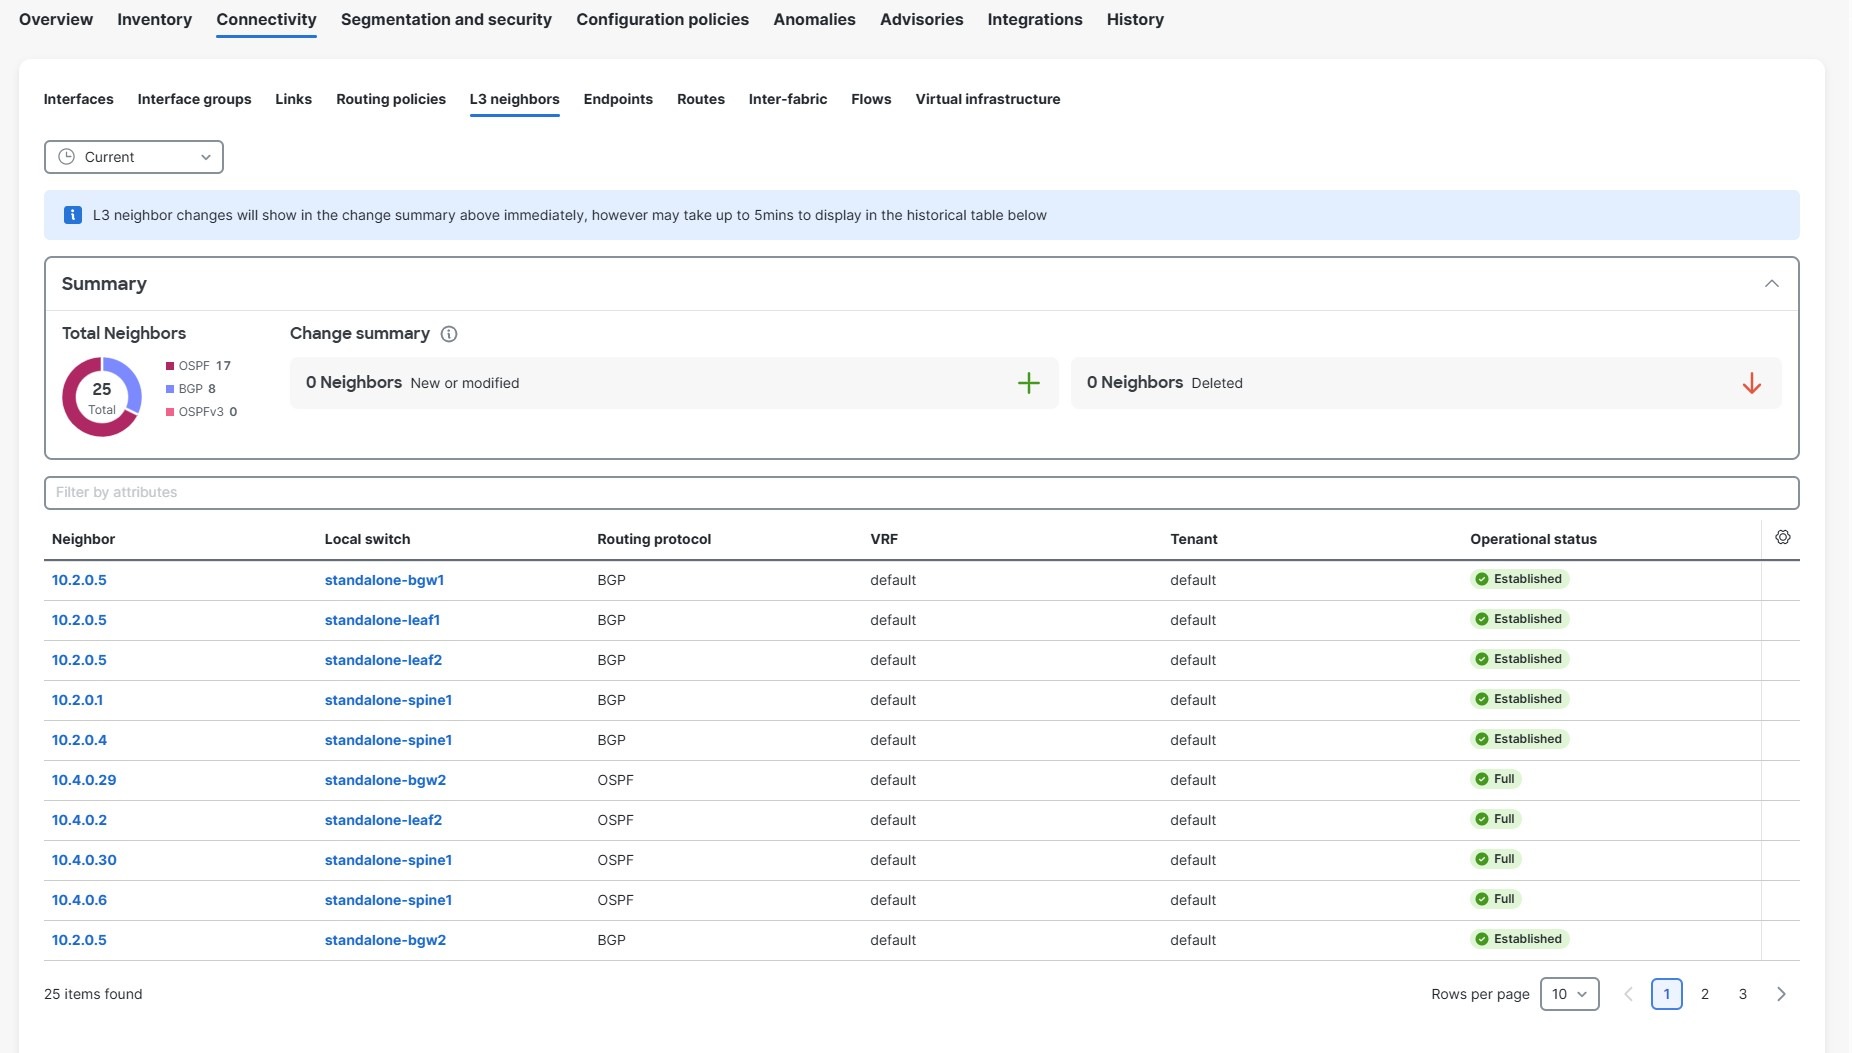
Routes
The following figure shows an example of IPv4/IPv6 routes in a tenant-associated fabric.
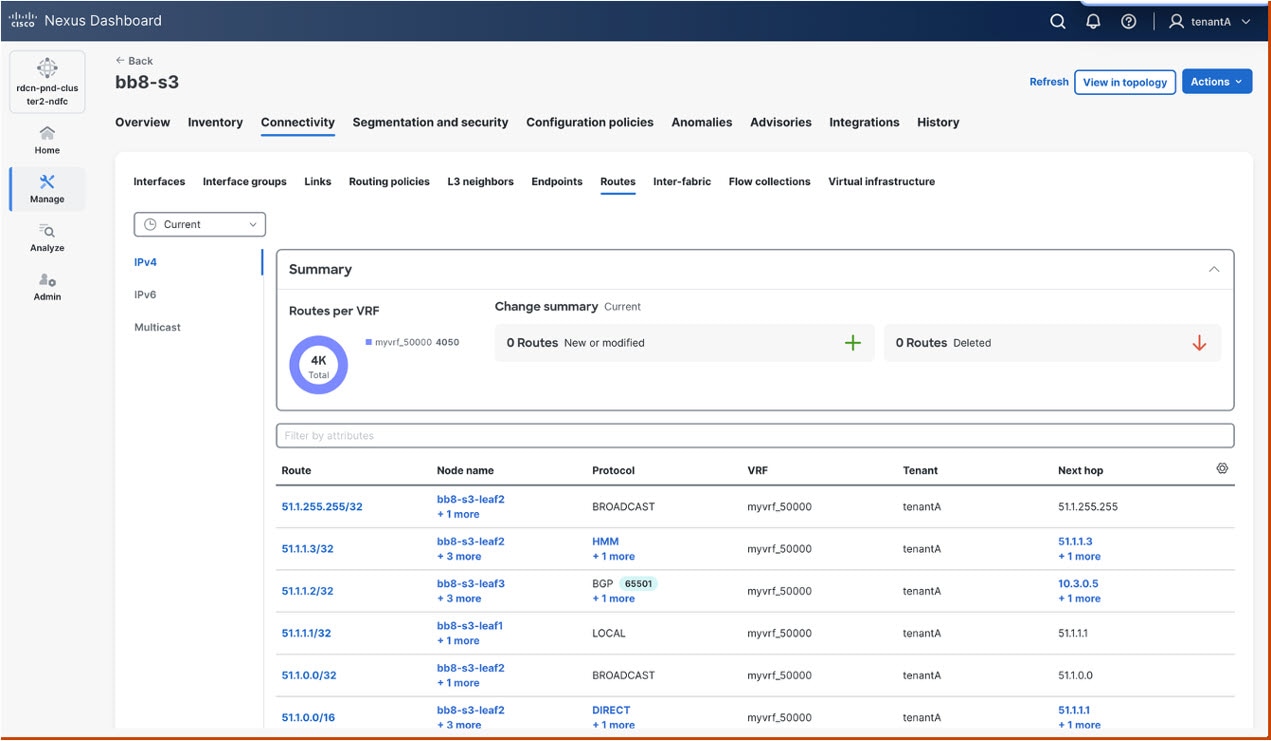
The following figure shows an example of multicast routes in a tenant-associated fabric.
-
The multicast routes table view lists the routes based on a user’s tenants access.
-
In this page, the tenant column is added in the browse table.
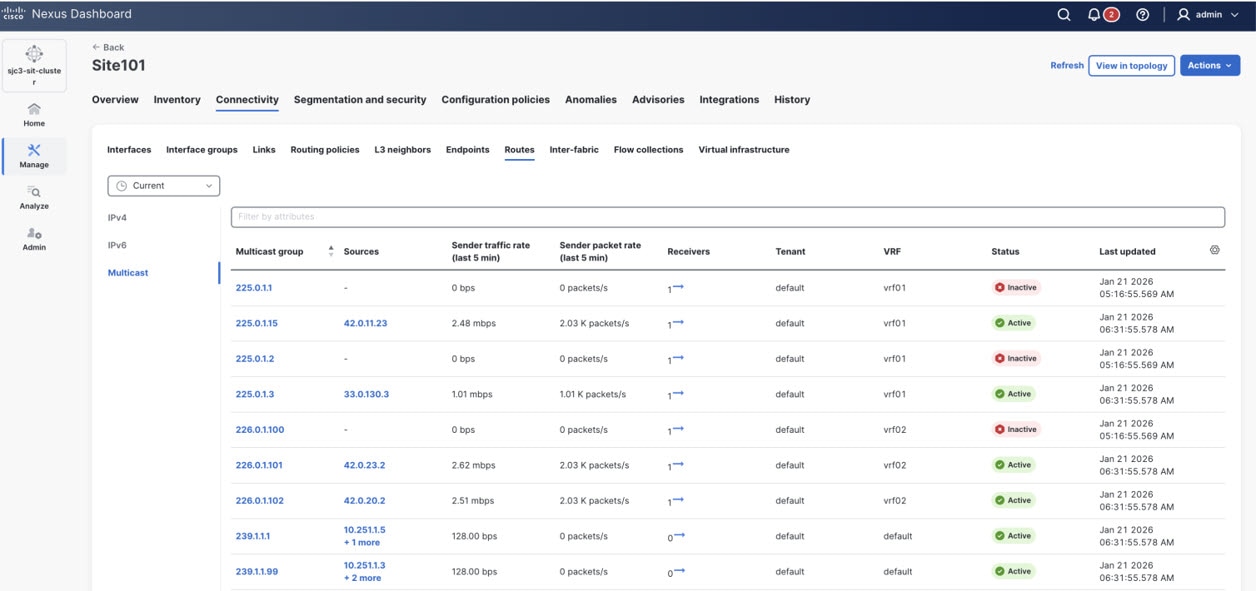
Switch view: Multicast
The following figures show examples of PIM/IGMP/IGMP snooping protocols tables that show the tenant field in the tenant associated NX-OS fabrics.
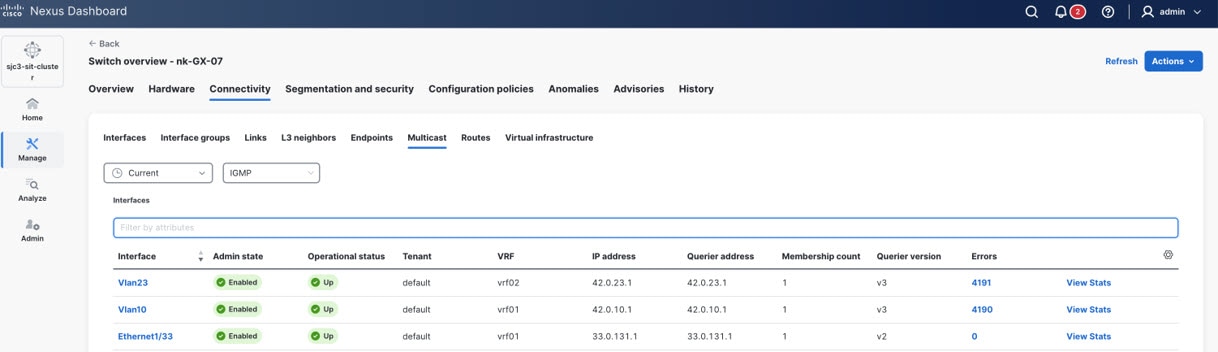
Additional areas affected by tenant and tenant domain creation
After you create a tenant or a tenant domain, and after you perform additional tenant-related configurations, such as associating fabrics with a tenant or importing a tenant from ACI, certain tenant- and tenant domain-based information also becomes available in these areas.
In each of these areas, you will only see information based on the associations that you set between the tenants, tenant domains, and users in your Nexus Dashboard, as described in Information that is displayed or not displayed based on tenant and tenant domain associations.
For example, assume you have these user, tenant, and tenant domains configured on your Nexus Dashboard:
| User | Associated tenants | Associated tenant domains |
|---|---|---|
|
User1 |
Tenant1-1, Tenant1-2 |
TenantDomain1 |
|
User2 |
Tenant2-1, Tenant2-2 |
TenantDomain2 |
-
If you are logged in User1, you will only see tenant- and tenant domain-based information for other tenants in TenantDomain1 (Tenant1-1, Tenant1-2) and you will not see any tenant- and tenant domain-based information for users or tenants in TenantDomain2 because User1 is not associated with TenantDomain2.
-
Similarly, in some configuration pages, you might see only tenant- and tenant domain-based information that are related to your tenant or tenant domain, and other tenants or tenant domains are not displayed.
For example, assume that you create a VRF and you associate Tenant1-1 (from TenantDomain1) with that VRF. Then, if you were to create a network next and you associated Tenant1-1 with that network, in the VRF name field, only VRFs associated with Tenant1-1 are available to choose from. You will not see any options associated with different tenants.
-
When you add local users: You can associate a tenant domain with a local user in the Create local user page. See Configuring Users, Roles, and Security for more information.
-
Under Connectivity:
-
For tenant-based overlays: Tenant-based overlays are attached to interfaces. Overlays that you see as a tenant-specific user are restricted to the tenants that you have access to. See Working with Connectivity in Your Nexus Dashboard LAN Fabrics for more information.
-
To display endpoints associated with a tenant: Within a fabric that has tenants associated with it, navigate to Connectivity > Endpoints to view endpoints associated with a tenant. See Working with Connectivity in Your Nexus Dashboard LAN Fabrics for more information.
-
To display L3 neighbors associated with a tenant: Within a fabric that has tenants associated with it, navigate to Connectivity > L3 neighbors to view L3 neighbors associated with a tenant. See Working with Connectivity in Your Nexus Dashboard LAN Fabrics for more information.
-
VMs shown based on tenancy: VMs are filtered in the Virtual infrastructure page based on tenancy. See Working with Connectivity in Your Nexus Dashboard LAN Fabrics for more information.
-
-
Under Segmentation and security:
-
In the Segmentation and security area for your fabric: The Tenants tab becomes available under the Segmentation and security area for your fabric, allowing you to view segmentation and security information at the tenant level. See Working with Segmentation and Security for Your Nexus Dashboard VXLAN Fabric or Working with Segmentation and Security for Your Nexus Dashboard ACI Fabric for more information.
-
When you create or view a VRF: You can associate a tenant with a VRF in the Create a VRF page if a tenant is associated with the fabric that is associated with a VRF. See Working with Segmentation and Security for Your Nexus Dashboard VXLAN Fabric or Working with Segmentation and Security for Your Nexus Dashboard ACI Fabric for more information.
-
When you create or view a network: You can associate a tenant with a network in the Networks page. See Working with Segmentation and Security for Your Nexus Dashboard ACI Fabric for more information.
-
When you create or view an ESG/security group: You can associate a tenant with an ESG/security group in the Security groups page. See Working with Segmentation and Security for Your Nexus Dashboard VXLAN Fabric or Working with Segmentation and Security for Your Nexus Dashboard ACI Fabric for more information.
-
When you create or view a security contract: You can associate a tenant with a security contract in the Security contracts page. See Working with Segmentation and Security for Your Nexus Dashboard ACI Fabric for more information.
-
When you create or view a security association: You can associate a tenant with a security association in the Security associations page. See Working with Segmentation and Security for Your Nexus Dashboard VXLAN Fabric for more information.
-
When you create or view an L3Out: You can associate a tenant with an L3Out in the L3Outs page. See Working with Segmentation and Security for Your Nexus Dashboard VXLAN Fabric or Working with Segmentation and Security for Your Nexus Dashboard ACI Fabric for more information.
-
-
Under Configuration policies:
-
Policies and Resources are filtered under the Configuration policies based on tenancy. For example, resources are VLANs. A VLAN might be associated with a specific overlay network and that overlay network might be for a specific tenant, so VLAN information under Resources might be shown or might not be shown based on tenancy.
-
-
Under Anomalies and Advisories: Anomalies and advisories that are displayed are also based on tenancy. See Multi-tenancy considerations for flow telemetry and traffic analytics for more information.
-
Under History: For example, audit logs are filtered in the History page based on tenancy. See Reviewing History and Logs in Your Nexus Dashboard for more information.
Multi-tenancy considerations for flow telemetry and traffic analytics
There are four areas where flow telemetry and traffic analytics are affected by multi-tenancy.
-
Ingest (including enrichment and processing)
Flow configuration
Flow configuration can be broken down into these two levels:
-
Feature configurations — This is where you enable and disable flow telemetry, Netflow, SFlow, and traffic analytics features. Configurations done at this level are fabric-wide configurations.
-
Flow rule configurations — Flow rule configurations take place at these levels:
-
Global — These configurations take place under a tenant. The configuration of these rules are scoped to users with access to the specific tenant. However, due to the interaction with interface rules as described below, the scope is restricted to users with access to ALL tenants.
-
Interface — These configurations take place under an interface. While interfaces are not tenant-scoped, there is a limitation with respect to the co-existence of interface and global rules.
-
In ACI fabrics, a switch can be configured in one of two modes:
vrf-scopeorintf-scope. If an interface rule is configured on a switch, all VRF rules on it are deleted from the switch. -
In NX fabrics, interface and VRF rules co-exist but interface rules take precedence over VRF rules in the programmed ACLs.
-
-
Since the configuration of interface flow rules can impact the operational functionality of existing and future configured VRF rules, Nexus Dashboard limits the configuration of all flow rules to users with access to ALL tenants.
Users that are tenant-scoped have a view-only access and will be able to view only certain pages.
Ingest
The flow record exported from a switch contains the numerical representation of the tenant/VRF, along with other fields. The mapping of the numerical values to human understandable names that you have configured happens through the enrichment stage of the flow processing pipeline.
-
ACI fabrics have had support for tenants prior to Nexus Dashboard release 4.2.1. Nexus Dashboard subscribes the relevant objects from the APIC/switches to derive the necessary enrichment mappings.
-
Tenant support for NX-OS fabrics is new to Nexus Dashboard and is part of the multi-tenancy feature introduced in Nexus Dashboard release 4.2.1. Nexus Dashboard pushes the tenant configurations to the switches as part of the VRF configuration, prefixing the VRF names with the corresponding tenant name, separated by a “:”. Switches export the VRF ID to VRF name (including the tenant name) mappings to Nexus Dashboard.
The multi-tenancy core layer also maintains a mapping between the Nexus Dashboard tenant names and fabric tenant names, which can be different.
The enriched data, along with tenant info, is then queried through the Nexus Dashboard for the analysis/visualization step, described below.
Analysis/visualization
In the analysis/visualization point in the process, based on the tenant domains (which translates to tenants) that the user has access to, Nexus Dashboard filters the API/GUI response only to the user-accessible tenant list.
-
For Flow Telemetry, a user can view a flow only if they have access to the tenants on both ends (source and destination) of the flow.
-
For Traffic Analytics, a user is able to view all services within tenants that they have access to. This is regardless of whether they have access to the tenants on the client-side of the conversation. The data for each service (health score, client, SYN, RST counts, and so on) will only aggregate conversations for which the user has access to the tenants on the client-side.
The filter for aggregation of conversations does not apply to the Tx (total), Rx (total), Tx Rate (total), and Rx Rate (total) columns.
-
The service detail page will only show clients within tenants to which a user has access. Consequently, a flow troubleshoot job for a conversation can only be triggered if the user has access to tenants on both ends of the conversations.
Anomalies
Configuration anomalies are not tenant-scoped and do not go through the tenant filters when queried by a user. Flow and traffic analytics anomalies are tagged with the tenant fields and are filtered based on a user access list.
Multi-tenancy considerations for endpoints and multicast routes
Similar to flow, any endpoint and multicast records that are received from the switch contains the numerical representation of the tenant/VRF and tenant/VLAN information, which are then mapped to the user-configured Nexus Dashboard tenant names.
Endpoint and multicast anomalies are enriched to include tenant information to facilitate the tenant filtering based on user access.
Multi-tenancy considerations for connectivity analysis
Connectivity analysis (CA) supports multi-tenancy by enforcing tenant-specific validations for both VRF and VLAN contexts, but only for VXLAN fabrics. User inputs are ingested through two primary mechanisms:
-
Auto-population: From the endpoint database (EP DB).
-
Manual entry: The source VRF is mandatory, but the destination VRF is optional.
IP-based Flows
-
Known Source and Destination VRFs: When both source and destination VRFs are provided, CA validates these VRFs against the allowed tenant list (as provided by infra). If the validation fails, CA terminates the analysis for non-compliant flows.
-
Unknown Destination VRF: If the destination VRF is not specified, CA retrieves the VRF from the RPM response received from each switch. The retrieved VRF is then validated against the allowed tenant list before proceeding.
MAC-based Flows
-
Known Source and Destination VLANs: CA queries the infra-provided API to obtain the list of allowed VLANs per tenant. When both source and destination VLANs are known, CA validates both against the tenant’s allowed VLAN list and takes the appropriate action (continue or abort).
-
Unknown Destination VLAN: If the destination VLAN is not provided, CA extracts the next-hop neighbor VLAN from the RPM response of each switch and performs validation against the allowed VLANs per tenant. Flow analysis proceeds only if the VLAN is permitted.
All tenant validation logic is dynamically referenced from infra-provided lists as part of the on-demand CA job, ensuring compliance with tenant-specific access policies throughout the analysis process. The "default” VRF is exempted from the interim validation check.
GUI changes
Starting with Nexus Dashboard release 4.2.1, the tenant field is shown in the GUI for NX-OS fabrics as well as ACI fabrics (which had tenant-related fields prior to Nexus Dashboard release 4.2.1), making the behavior consistent across fabric types.
These are the tenant-related changes now shown in the GUI for both NX-OS and ACI fabrics:
-
CUD operations, allowed only for users with ALL-tenant access:
-
Tenant-scoped users have view-only permissions and can view the configurations.
-
Feature level configuration
-
Flow rules
-
-
Certain tables to show the tenant field for NX-OS fabrics (was previously shown only for ACI fabrics)
-
Tables where changes are required in these areas:
-
Service endpoint tables for traffic analytics.
-
Client details table for traffic analytics.
-
Flow collections table for traffic analytics flow troubleshooting. This table is also used for the Flow browse page in flow telemetry/netflow/SFlow.
-
-
If appropriate tenant-related information is available, then that table will display the relevant tenant field; otherwise, the tenant field will display in the table with an empty value (
-). -
Users are shown tenant-related information and are allowed to edit fields when they have access to view, edit, create, or delete tenant-related configurations.
Legacy Tenant CRUD APIs
Prior to Nexus Dashboard release 4.2.1, Orchestration (NDO) was the only app that supported multi-tenancy. NDO has always supported the ability to create tenants, and to associate tenants to fabrics and users. This functionality has now been consolidated under the Nexus Dashboard platform. Starting with Nexus Dashboard release 4.2.1, the tenant CRUD (Create, Read, Update, and Delete) APIs and GUI are now available at the platform level.
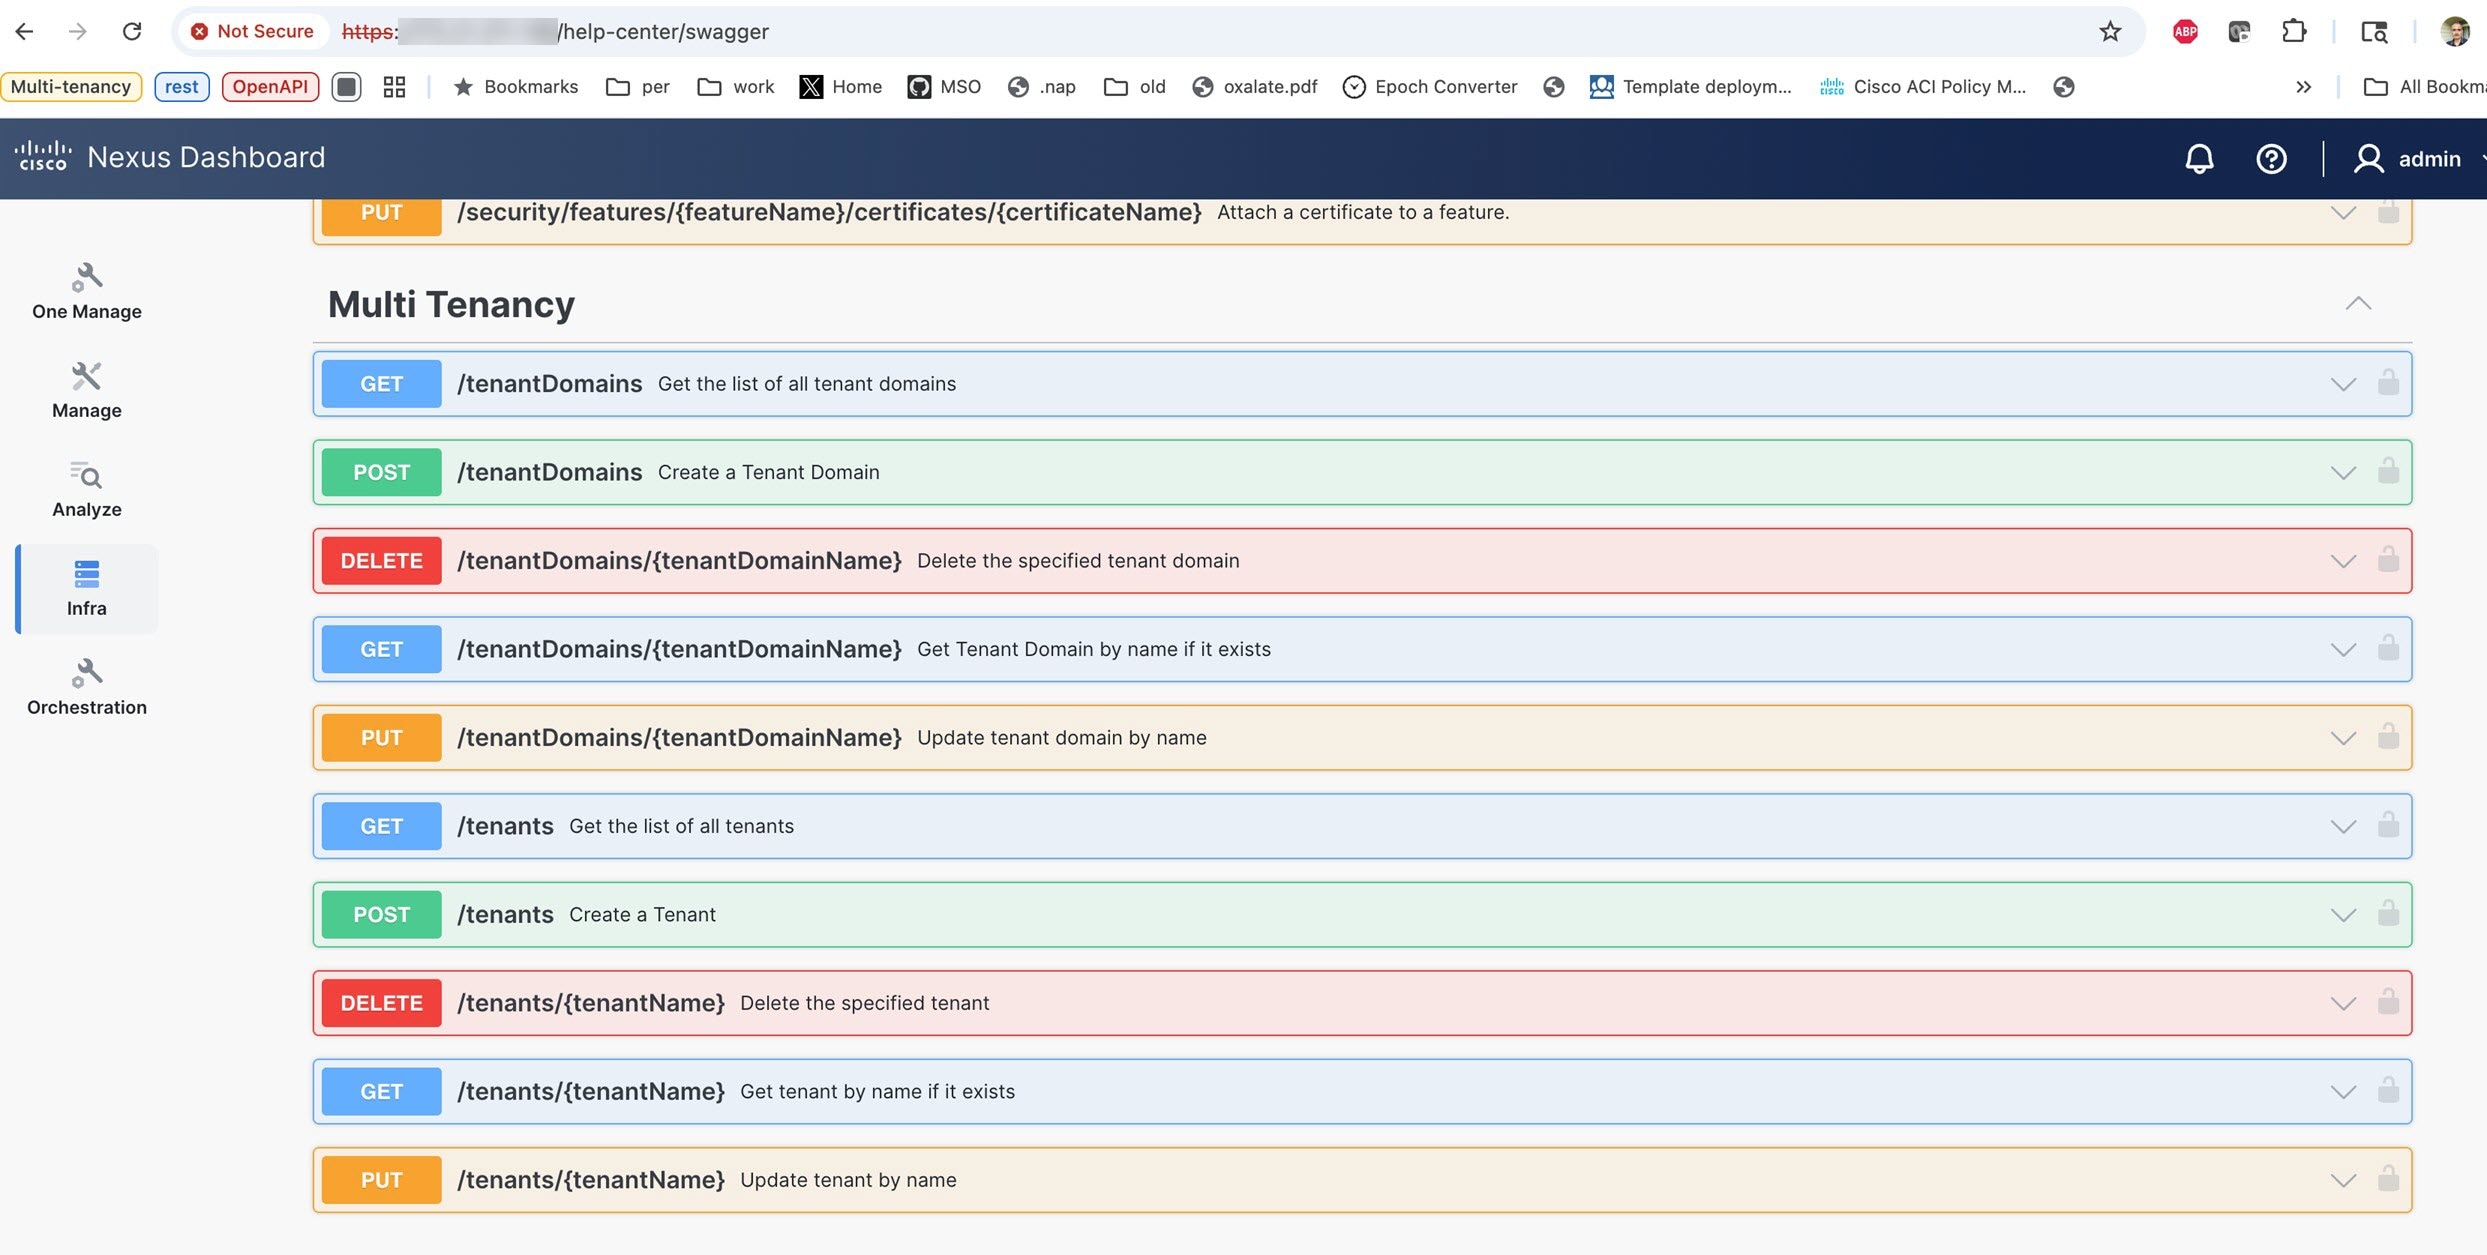
In order to be backwards compatible for automation, Nexus Dashboard release 4.2.1 continues to support the older tenant CRUD APIs that were available under NDO. However, the NDO GUI pages that are used to help with tenant management are not available in Nexus Dashboard, since those pages are now provided in the unified Nexus Dashboard platform.
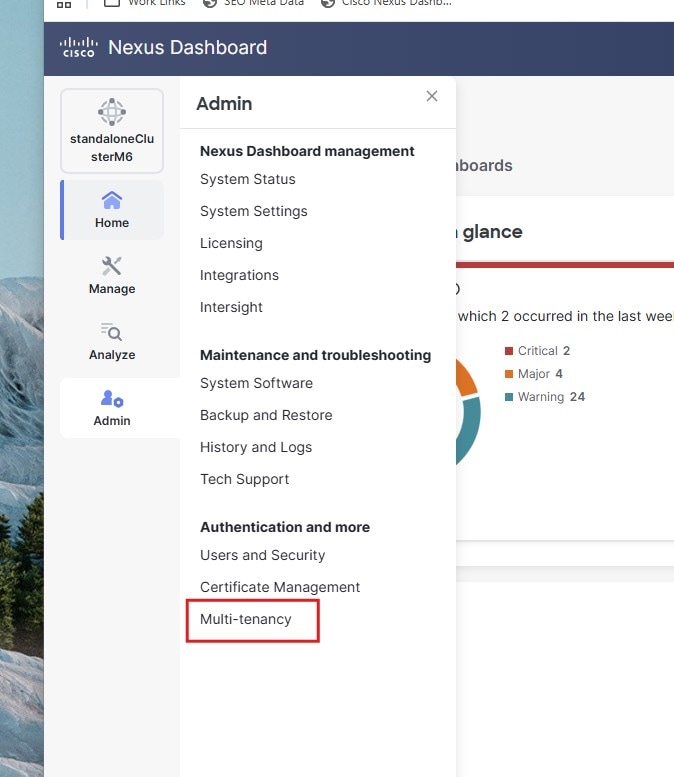
There are no changes to the tenant management APIs that were available in NDO. With regards to tenant management, the only difference between Nexus Dashboard release 4.2.1 and prior releases is that release 4.2.1 introduces the concept of a tenant domain. Users are now associated with a tenant domain that contains tenants rather than the older mechanism of associating each tenant with a user.
To accommodate this change and still be backwards compatible with the older NDO tenant CRUD APIs, Orchestrator in Nexus Dashboard performs the tenant domain management for the user association to tenants.
When upgrading from a previous release, each existing local user is assigned their own tenant domain, named sys_<UserName>. If the legacy tenant CRUD APIs are used for tenant management, then the user’s tenant domain is updated according to the API requirements.
Alternatively, when upgrading from a previous release, we recommend that the admin reconfigures the users tenant domain according to their needs, and switches over to the Nexus Dashboard platform APIs and GUI for tenant management and its association with fabrics and users.
Legacy tenant CRUD APIs perform a one-to-one mapping of users to tenant domains. On Nexus Dashboard, if a tenant domain is shared among multiple users and any changes are made to any user association for any of those tenants from legacy APIs, Nexus Dashboard will split them and create separate tenant domains for each of the users, named sys_<UserName>. So the original tenant domain is left with only one user associated with it and the remaining users are associated to their individual tenant domains with respective tenants.
You can use either the legacy NDO APIs for tenant management for the NDO application or the Nexus Dashboard platform APIs in a mixed fashion. However, there is a limitation on the mixed use of these APIs in that you cannot use them simultaneously. If you are using the NDO legacy APIs, you should wait for 30 seconds to switch over to using the Nexus Dashboard platform APIs.
For remote users, you should update the users AV pair to include the tenant domain. If the tenant domain is not specified in the AV pair, NDO will attempt to provide the user with tenant access based on the information stored in NDO for the remote user from the previous release. When upgrading from a previous release, we strongly recommend that you define new tenant domains as required and that you add tenant domains to the remote user’s AV pair.
An example of the AV pair for a user is:
shell:domain=all/designer tenant-domain=TD_engineering
Copyright
THE SPECIFICATIONS AND INFORMATION REGARDING THE PRODUCTS IN THIS MANUAL ARE SUBJECT TO CHANGE WITHOUT NOTICE. ALL STATEMENTS, INFORMATION, AND RECOMMENDATIONS IN THIS MANUAL ARE BELIEVED TO BE ACCURATE BUT ARE PRESENTED WITHOUT WARRANTY OF ANY KIND, EXPRESS OR IMPLIED. USERS MUST TAKE FULL RESPONSIBILITY FOR THEIR APPLICATION OF ANY PRODUCTS.
THE SOFTWARE LICENSE AND LIMITED WARRANTY FOR THE ACCOMPANYING PRODUCT ARE SET FORTH IN THE INFORMATION PACKET THAT SHIPPED WITH THE PRODUCT AND ARE INCORPORATED HEREIN BY THIS REFERENCE. IF YOU ARE UNABLE TO LOCATE THE SOFTWARE LICENSE OR LIMITED WARRANTY, CONTACT YOUR CISCO REPRESENTATIVE FOR A COPY.
The Cisco implementation of TCP header compression is an adaptation of a program developed by the University of California, Berkeley (UCB) as part of UCB’s public domain version of the UNIX operating system. All rights reserved. Copyright © 1981, Regents of the University of California.
NOTWITHSTANDING ANY OTHER WARRANTY HEREIN, ALL DOCUMENT FILES AND SOFTWARE OF THESE SUPPLIERS ARE PROVIDED “AS IS" WITH ALL FAULTS. CISCO AND THE ABOVE-NAMED SUPPLIERS DISCLAIM ALL WARRANTIES, EXPRESSED OR IMPLIED, INCLUDING, WITHOUT LIMITATION, THOSE OF MERCHANTABILITY, FITNESS FOR A PARTICULAR PURPOSE AND NONINFRINGEMENT OR ARISING FROM A COURSE OF DEALING, USAGE, OR TRADE PRACTICE.
IN NO EVENT SHALL CISCO OR ITS SUPPLIERS BE LIABLE FOR ANY INDIRECT, SPECIAL, CONSEQUENTIAL, OR INCIDENTAL DAMAGES, INCLUDING, WITHOUT LIMITATION, LOST PROFITS OR LOSS OR DAMAGE TO DATA ARISING OUT OF THE USE OR INABILITY TO USE THIS MANUAL, EVEN IF CISCO OR ITS SUPPLIERS HAVE BEEN ADVISED OF THE POSSIBILITY OF SUCH DAMAGES.
Any Internet Protocol (IP) addresses and phone numbers used in this document are not intended to be actual addresses and phone numbers. Any examples, command display output, network topology diagrams, and other figures included in the document are shown for illustrative purposes only. Any use of actual IP addresses or phone numbers in illustrative content is unintentional and coincidental.
The documentation set for this product strives to use bias-free language. For the purposes of this documentation set, bias-free is defined as language that does not imply discrimination based on age, disability, gender, racial identity, ethnic identity, sexual orientation, socioeconomic status, and intersectionality. Exceptions may be present in the documentation due to language that is hardcoded in the user interfaces of the product software, language used based on RFP documentation, or language that is used by a referenced third-party product.
Cisco and the Cisco logo are trademarks or registered trademarks of Cisco and/or its affiliates in the U.S. and other countries. To view a list of Cisco trademarks, go to this URL: https://www.cisco.com/go/trademarks. Third-party trademarks mentioned are the property of their respective owners. The use of the word partner does not imply a partnership relationship between Cisco and any other company. (1110R)
© 2017-2026 Cisco Systems, Inc. All rights reserved.
Americas Headquarters
Cisco Systems, Inc.
170 West Tasman Drive
San Jose, CA 95134-1706
USA
https://www.cisco.com
Tel: 408 526-4000
800 553-NETS (6387)
Fax: 408 527-0883