Change Management and Telemetry IP Addresses in Cisco Telemetry Broker
Available Languages
Contents
Introduction
This document describes the process for changing the management and telemetry IP addresses for Cisco Telemetry Broker (CTB) Manager and Broker nodes.
Prerequisites
- Access: Console access to the Command Line Interface (CLI) of the appliance is required to modify management IP settings.
- Knowledge: Familiarity with basic Linux administration and Cisco Telemetry Broker architecture.
- Environment: This procedure applies to CTB Manager and Broker nodes running release 2.2.1.

Warning: This process involves modifying network configurations and removing Broker nodes. Ensure you understand the potential impact on live traffic before proceeding.
Solution
This process is used when migrating appliances to a new network segment or updating infrastructure configurations.
The process requires updating the Manager node first, and then each Broker node individually.
High-Level Workflow:
- Remove all Broker nodes from the Manager.
- Update the Manager node’s management IP.
- Generate and upload a new certificate.
- Update each Broker node’s management IP.
- Associate the Broker nodes with the Manager.
- Reconfigure rules and telemetry interfaces.
Configure
Step 1: Remove all Broker nodes
- Log in to the CTB Manager web interface.
- Navigate to Explorer.
- Select a Broker node, then click Broker Node Details > Remove Broker Node.
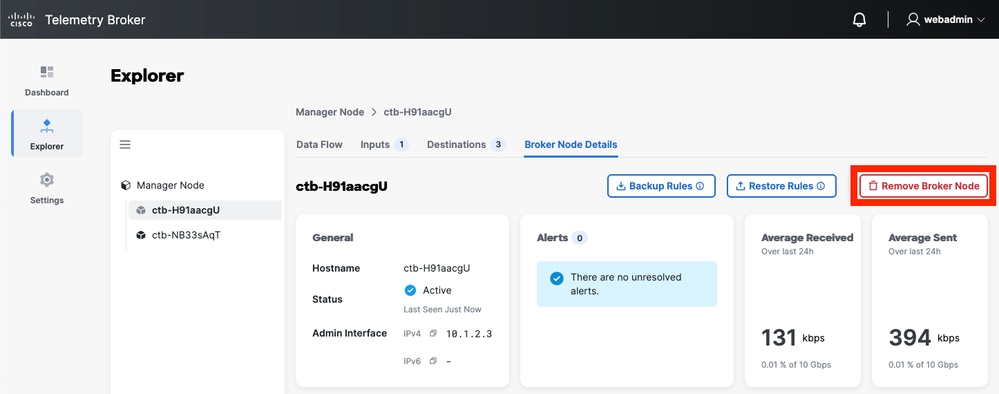
4. Repeat for all Broker nodes.

Tip: Broker nodes do not forward traffic while removed from the Manager.
Step 2: Update the Manager node management IP
- Connect to the Manager node console and log in as
admin. - Launch the configuration utility:
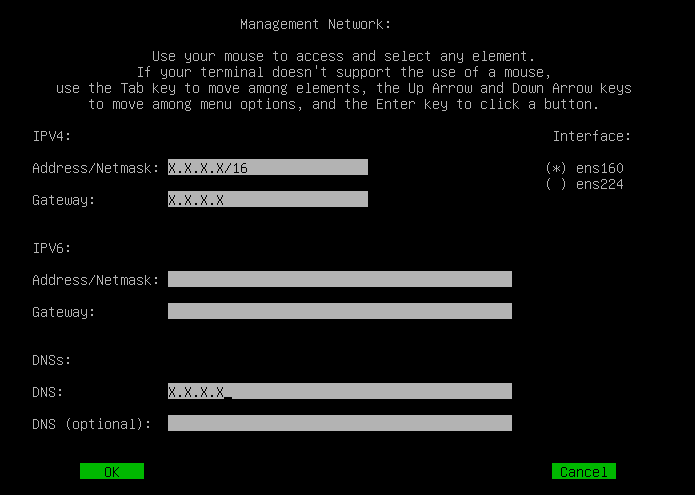
sudo ctb-install --config - Navigate to Management Network, select OK, and press Enter.
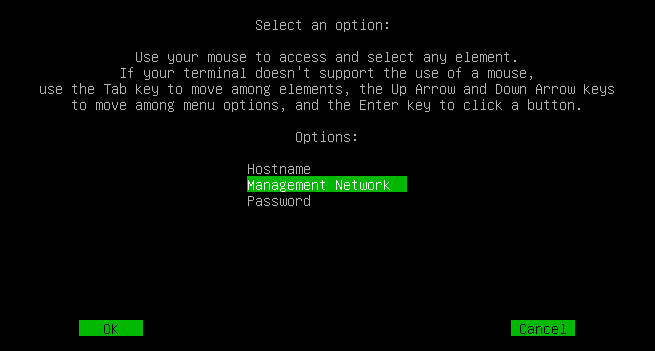
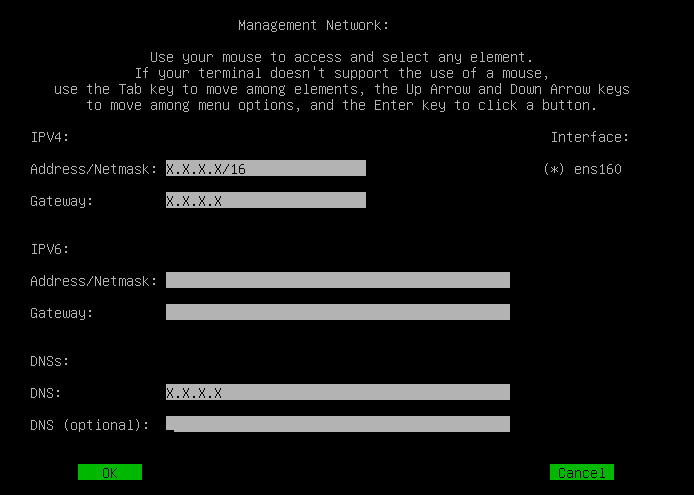
- Update the IP address, gateway, and DNS settings.
- Use the Tab key to highlight the OK option and press Enter. This restarts Manager services but does not reboot the appliance.
- Access the Manager web interface at the new IP address after a few minutes.
Step 3: Generate and upload a new certificate
After changing the IP, you must generate a new certificate for the Manager that includes the new IP in the Common Name (CN) field.
- Refer to the Cisco Telemetry Broker Certificate Replacement Guide.
Step 4: Update the Broker node management IP
- Connect to the Broker node console and log in as
admin. - Launch the utility:
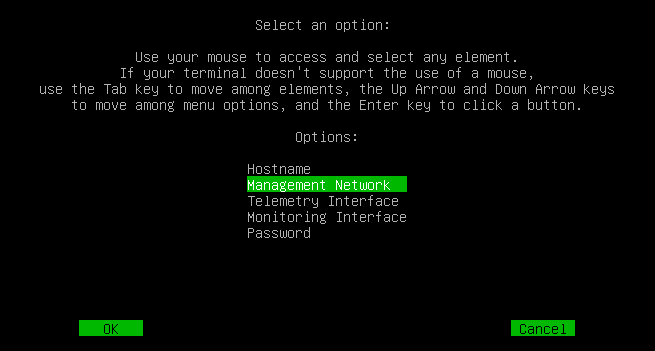
sudo ctb-install --config - Navigate to the Management Network section using the Tab key, select OK and press Enter.
- Update the IP address, gateway, and DNS settings.

Caution: Do not change the Telemetry interface IP in this menu; that is managed via the Manager web interface.
5. Press the Tab key to select OK and press Enter. This restarts certain Broker node services but does not reboot the appliance.
Step 5: Associate the Broker nodes to the Manager
- On the Broker node console, run:
sudo ctb-manage - Select option "o" to associate the Broker node with the new Manager.
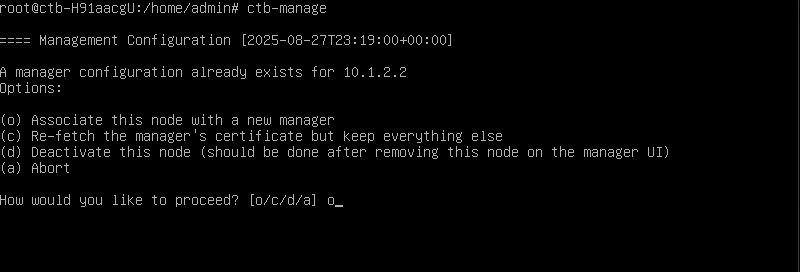
3. Follow the prompts to complete the association. Ensure the Manager’s new certificate is trusted.
4. Repeat these steps for each Broker node in your deployment.
Step 6: Reconfigure rules and telemetry
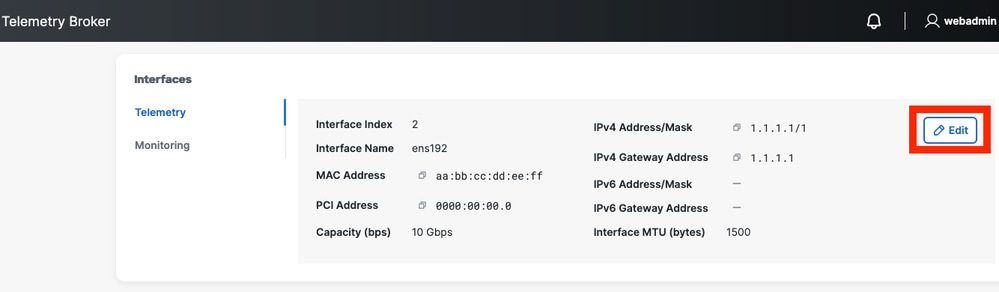
- Log in to the Manager web interface and navigate to Explorer.
- Select the Broker node and click Edit for the Telemetry interface to assign the appropriate IP.
- Navigate to the Inputs tab and re-assign the Broker node to each input.
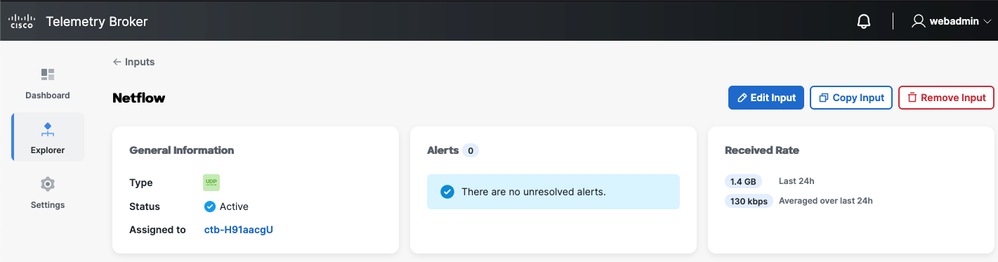
- In the Data Flow tab, verify that each input is connected to the designated destination and that telemetry data is forwarding correctly.
Troubleshooting & Diagnostics
- Linux Basics: The appliance uses a standard Debian OS.
- Management Network: Configured via
systemd-networkd. Settings are located in/etc/systemd/network/management.network. - Packet Capture: Refer to the CTB Packet Capture Guide.
- Mayday Diagnostics: To collect logs for TAC, run
sudo mayday. The output is saved as a.tar.gzfile in the location specified in the command output.
$ ssh admin@<ctb-node-ip>
ctb-node> sudo mayday
<output-redacted>
2020/08/05 19:04:45 Output saved in /tmp/mayday-ctb-5SWVTpSx-202008051904.677025165.tar.gz
2020/08/05 19:04:45 All done!Tip: If issues persist, please contact Cisco TAC or your local partner for further assistance.
Revision History
| Revision | Publish Date | Comments |
|---|---|---|
1.0 |
30-Sep-2025
|
Initial Release |
 Feedback
Contact Cisco
- Open a Support Case

- (Requires a Cisco Service Contract)