How to Add a Cisco Service Contract Access to a Cisco.com Account
Available Languages
Introduction
This article describes the process of adding a Cisco service contract access to Cisco.com account.
Prerequisites
Before you start, ensure that you have the following data at your disposal:
Adding a Cisco Service Contract Access to a Cisco.com Account
Step 1:
Go to Cisco Software Central and log in with your Cisco.com account.
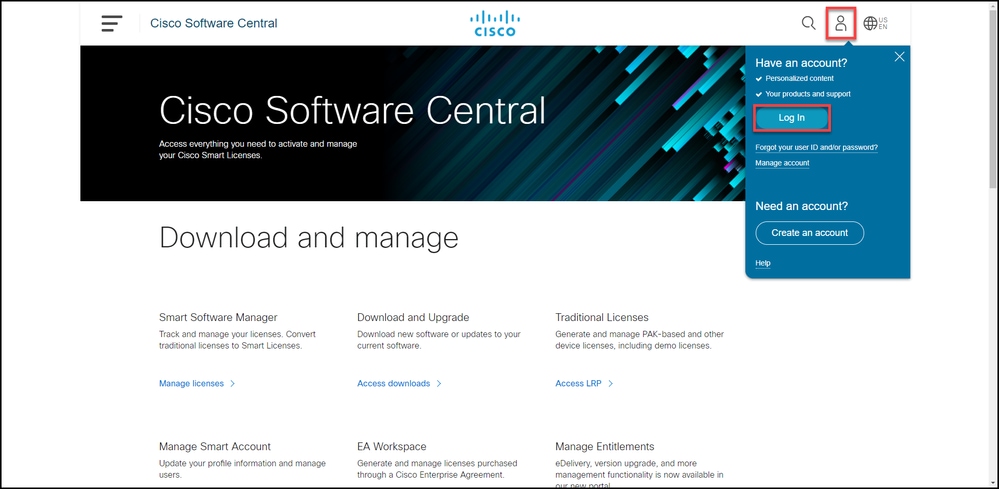
Step 2:
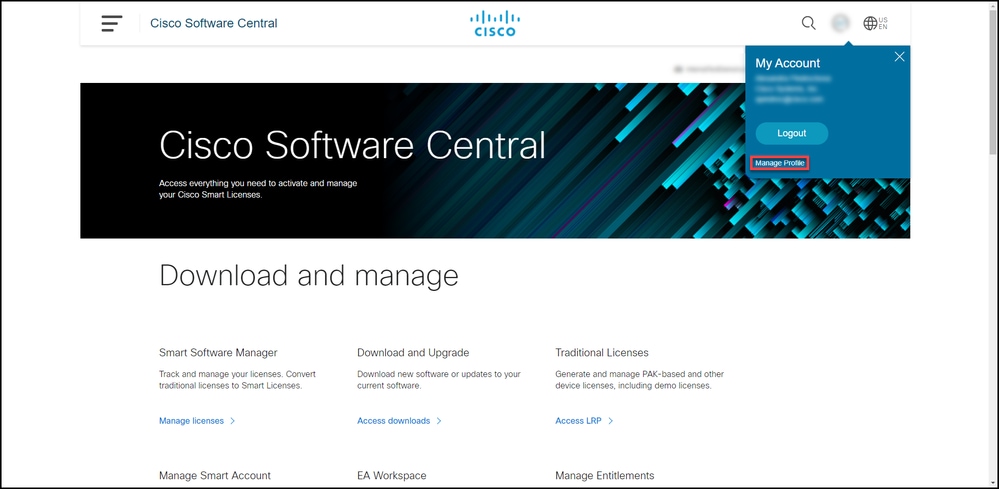
Click the profile button, and then select Manage Profile.
Step 3:
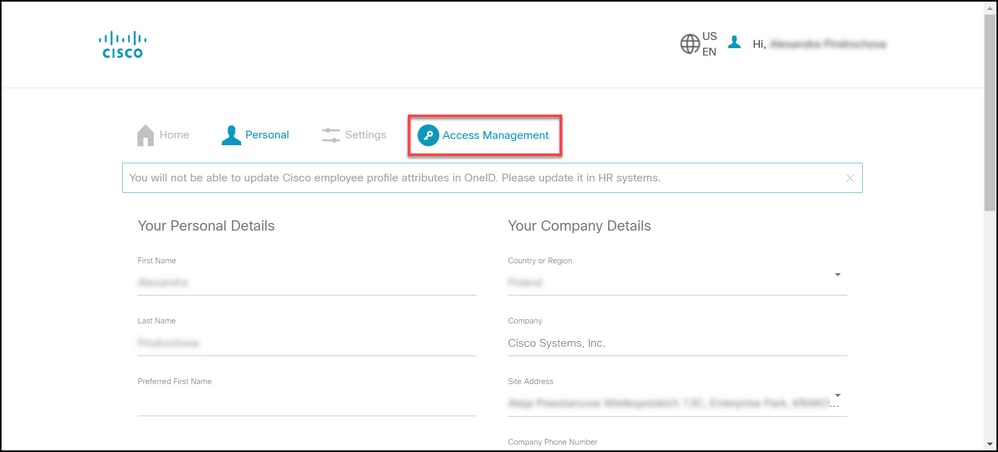
On the Profile Management page, click Access Management.
Step 4:
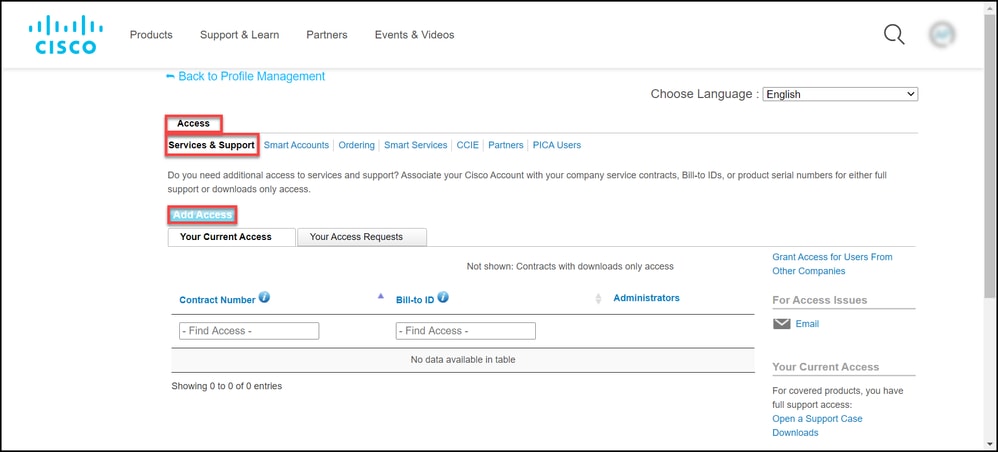
On the Access tab, under Services & Support, click Add Access.
Step 5:
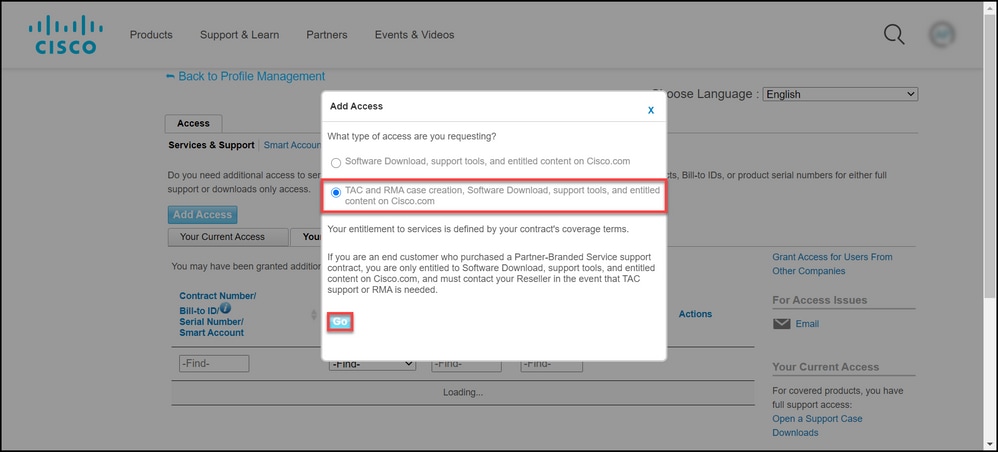
In the Add Access dialog box, select TAC and RMA case creation, Software Download, support tools, and entitled content on Cisco.com, and then click Go.
Step 6:
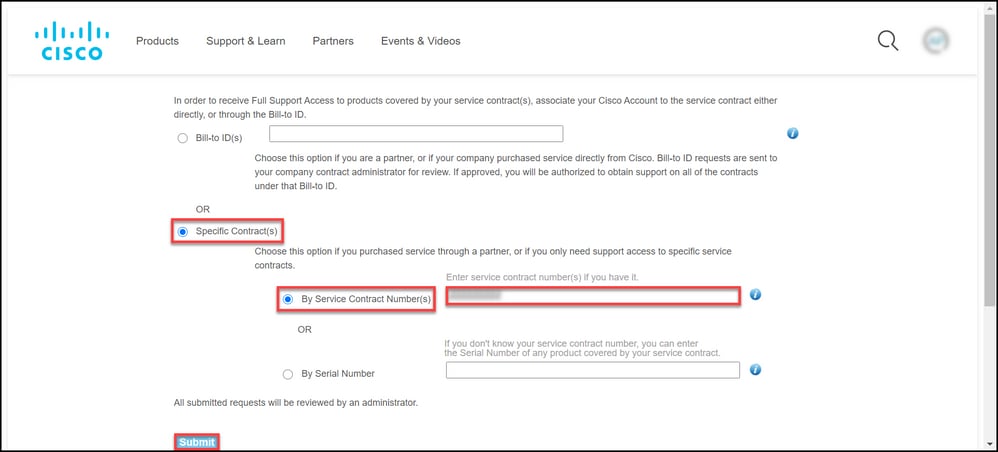
Select the Specific Contract(s) radio button, and then select By Service Contract Number(s) and enter the service contract number(s) in the field next to it. Click Submit.
Step result: If the information on your contract (for example, a company name) matches the information on your Cisco.com account, then the contract is automatically added to your Cisco.com account. If the automation fails due to the information mismatch, then the entitlement needs to be further verified manually. If that's the case, you will be contacted by Cisco for further clarification within the next two hours.
Troubleshooting
To manage the contracts associated with your account, visit https://samt.cisco.com/am/accessmanager/currentaccess . If you need further assistance with your contracts, you can find more information at https://web-help.cisco.com/.
Related Information
How to Convert a Fulfilled PAK to a Smart License for CUCM
Revision History
| Revision | Publish Date | Comments |
|---|---|---|
3.0 |
24-Jan-2024
|
Category Updated |
1.0 |
26-Mar-2021
|
Initial Release |
 Feedback