Switch Stacks

Switch stacks

A switch stack is a network system that

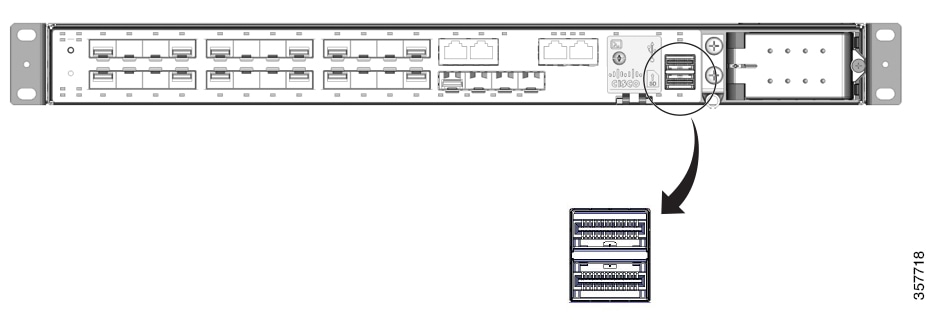
  • connects multiple stacking-capable switches through StackWise ports

  • enables stack members to work together as a unified system, and

  • presents the entire switch stack as a single entity to the network for layer 2 and layer 3 protocols.

Switch stack member roles

A switch stack has these roles.

  • Active switch: Controls the operation of the switch stack, and is the single point of stack-wide management.

    From the active switch, you can configure

    • System-level (global) features that apply to all stack members

    • Interface-level features for each stack member

    The active switch contains the saved and running configuration files for the switch stack. The configuration files include the system-level settings for the switch stack and the interface-level settings for each stack member. Each stack member has a current copy of these files for back-up purposes.

  • Standby switch: Backup to the active switch.

  • Member switch: Neither an active nor a standby switch.

Stacking interface on Cisco Catalyst IE9300 Rugged Series Switches

A stacking interface is a switch hardware feature that

  • allows multiple Cisco Catalyst IE9300 rugged series switches to act as a single switch, and

  • provides two stack interface connectors per switch, each with its own LED

Supported IE9320 switch models

Table 1. IE9320 stacking supported models

Model group

Model numbers

IE9320 GE Fiber switch

IE-9320-26S2C-A, IE-9320-26S2C-E

IE9320 Fiber switch with 10 GE uplinks

IE-9320-22S2C4X-A, IE-9320-22S2C4X-E

IE9320 10 GE Copper Data switch

IE-9320-24T4X-A, IE-9320-24T4X-E

IE9320 10 GE PoE switch

IE-9320-24P4X-A, IE-9320-24P4X-E

IE9320 10 G mGig 4PPoE switch

IE-9320-16P8U4X-A, IE-9320-16P8U4X-E

IE9320 GE PoE switch

IE-9320-24P4S-A, IE-9320-24P4S-E


Note


The number of switches supported in a stack depends on the Cisco IOS XE. For information, refer to Feature history and information for switch stacks


The IE9320 GE Fiber stacking interface image shows the stacking interface on the front panel of a IE9320 GE Fiber ((IE-9320-26S2C-A and IE-9320-26S2C-E) switch. The interface is the same across all IE9320 models.

Figure 1. IE9320 GE Fiber stacking interface

You can mount the switches in 19- or 23-inch racks. Install the switches with the correct clearances. To install each switch, follow the instructions for the appropriate rack in the Cisco Catalyst IE9300 Rugged Series Switch Hardware Installation Guide.

Stack interfaces can be connected to form a ring. For example, stack-port-1 of switch 1 connects to stack-port-2 of the next switch, and so on. The last switch’s stack-port-1 connects back to stack-port-2 of the first switch to form a full ring.

Switches without stacking interfaces cannot be connected to operate as a single switch.

Switch stack configuration restrictions

  • Only Cisco Catalyst IE9300 Rugged Series Switches supported for stacking can be used in stacks. See the section Stacking interface on Cisco Catalyst IE9300 Rugged Series Switches in this guide for the list of switches.

  • A switch stack can have multiple stacking-capable switches connected through their StackWise ports. Stacks must be homogenous: That is, a stack must consist only of IE9320 switches that support stacking.

    For information about how many switches are supported in each release, refer to Feature history and information for switch stacks.

  • REP over stacking is supported. When a stack-member REP port goes down, it results in an increased convergence time (3 seconds to 20 seconds).

  • A switch stack cannot contain a mix of different license levels.

    In a stack configuration, use Network Advantage licenses and Network Essentials license for the devices.

    Before Release 16.9.1, a new switch must have the same license as the stack to join it. If the switch has a different license, it is discovered but does not join the stack, and a license mismatch is reported. The logs on the new switch display a message indicating a license mismatch: Logs on the newly added switch with license mismatch.

    Starting with Release 16.9.1, Smart Licensing is mandatory. If a license mismatch occurs when adding a new switch to the stack, the EVAL license is automatically enabled on the new switch, and data programming completes once the switch joins the stack. You can verify this using the show license usage command.

    For more details, refer to the CDET CSCwo97273.

  • A switch stack does not support these features (which are supported by standalone switches):

    • Dying gasp

    • Management through PROFINET or CIP

    • Modicon Communication Bus (MODBUS)

    • Parallel Redundancy Protocol (PRP)

  • Starting with release 26.1.1, Cisco IE9300 Rugged Series Switches support Precision Time Protocol (PTP) over stack.

IOx on Cisco Catalyst IE9300 Rugged Series Switches

  • IOx HA is not supported.

  • To enable the iox-service, the SD card is needed on active and member devices.

  • When IOx is enabled, the service executes on the active switch of the stack.

  • The IOx service and metadata do not sync with the standby.

  • Only the active switch uses sdflash for IOx storage.

  • The system syncs app-related configuration with the standby, and after switchover, the apps require a fresh installation.

  • On the new active device, if sdflash is not partitioned, disable IOx and partition sdflash as described in Formatting an SD Card and Enabling IOx.

Switch stack bridge IDs and MAC addresses

A switch stack bridge ID and MAC address is a network identification mechanism that

  • identifies a switch stack in the network using its bridge ID and its router MAC address (if operating as a layer 3 device)

  • derives both the bridge ID and router MAC address from the MAC address of the active switch, and

  • If the entire switch stack reloads, the switch stack uses the MAC address of the active switch.

Persistent MAC addresses on switch stacks

A persistent MAC address is a switch stack feature that

  • sets a time delay before the stack MAC address changes

  • allows the switch stack to take the MAC address of the new active switch as the stack MAC address, when the previous active switch does not rejoin the stack during the delay,

  • ensures the stack MAC address defaults to the first active switch even if a new active switch takes over.

Stack MAC address persistency

You can configure stack MAC persistency so that the stack MAC address never changes to the new active switch MAC address.

Use the stack-mac persistent timer 0 command to configure persistency and avoid Link Aggregation Control Protocol (LACP) and Port Aggregation Protocol (PAgP) flaps or inconsistencies.

Auto-upgrade stack operations

An auto-upgrade stack operation is a StackWise feature that

  • increases the number of ports in the wiring closet without needing to configure the management plane or upgrade the newly installed switch manually

  • automatically upgrades newly added switches to the software version currently running on the stack

  • ensures IE9320 GE Fiber switches provide backward compatibility for dynamic switch insertion without network disruption, and

  • maintains transparent system and management operation, network configuration, and topology during network upgrades.

Manage software version for stack members

StackWise architecture allows newly joined switches to automatically receive consistent software versions from an active switch and bring the system online without user intervention.

Procedure


Step 1

Use the enable command to enter privileged EXEC mode.

Example:

Switch> enable

Enter your password if prompted.

Step 2

Use the configure terminal command to enter global configuration mode.

Example:

Switch# configure terminal

Step 3

Use the software auto-upgrade enable command to enable automatic software upgrades for newly joined switches.

Example:

Switch(config)# software auto-upgrade enable
IOS loaded on Switch1 & Switch2:
==========================
Switch-1 (Active): BLD_DEV_LATEST_20220418_072148_V17_9_0_3
Switch-2 (Standby): BLD_DEV_LATEST_20220325_072116_V17_9_0_13

Note


The auto-upgrade feature is not supported in bundled mode.

Step 4

(Optional) Use the show switch command to verify the software version and auto-upgrade status on stack members.

Example:

Switch-1 log:

Switch# show switch
Switch/Stack Mac Address : 6c03.09a0.1d00 - Local Mac Address
Mac persistency wait time: Indefinite
H/W   Current
Switch#   Role    Mac Address     Priority Version  State
-------------------------------------------------------------------------------------
*1       Active   6c03.09a0.1d00     1      V00     Ready
 2       Member   84eb.efd2.d100     1      V00     V-Mismatch
Switch# show running-config | i auto
software auto-upgrade enable

This example shows logs for a two-member stack, including software version checks and auto-upgrade initiation.

Step 5

Use the show running-config | i auto command to review the auto-upgrade process and logs for a newly joined stack member.

Example:

Switch-2 log

Switch# show running-config | i auto
software auto-upgrade enable
Switch number is 2
All switches in the stack have been discovered. Accelerating discovery
Chassis is declared incompatible.
FAILED: Version 'BLD_DEV_LATEST_20220325_072116_V17_9_0_13' mismatch with Active's running version 'BLD_DEV_LATEST_20220418_072148_V17_9_0_3' for package: 'rp_base'
Autoupgrade Log:
=============
*Apr 21 08:34:44.269: %STACKMGR-6-STACK_LINK_CHANGE: Switch 1 R0/0: stack_mgr: Stack port 1 on Switch 1 is up
*Apr 21 08:34:44.277: %STACKMGR-6-STACK_LINK_CHANGE: Switch 1 R0/0: stack_mgr: Stack port 2 on Switch 1 is up
*Apr 21 08:34:46.731: %STACKMGR-4-SWITCH_ADDED: Switch 1 R0/0: stack_mgr: Switch 2 has been added to the stack.
*Apr 21 08:34:51.496: %STACKMGR-4-SWITCH_ADDED: Switch 1 R0/0: stack_mgr: Switch 2 has been added to the stack.
 *Apr 21 08:34:51.855: %BOOT-3-BOOTTIME_INCOMPATIBLE_SW_DETECTED: Switch 1 R0/0: issu_stack: Incompatible software detected. Details: Active's subpackage boot mode does not match with member's super boot mode. Please boot switch 2 in subpackage mode.
 *Apr 21 08:34:52.901: %AUTO_UPGRADE-5-AUTO_UPGRADE_START_CHECK: Switch 1 R0/0: auto_upgrade_client_helper: Auto upgrade start checking for incompatible switches.
*Apr 21 08:34:53.919: %AUTO_UPGRADE-5-AUTO_UPGRADE_INITIATED: Switch 1 R0/0: auto_upgrade_client_helper: Auto upgrade initiated for switch 2/R0.
*Apr 21 08:34:53.982: %AUTO_UPGRADE-5-AUTO_UPGRADE_SEARCH: Switch 1 R0/0: auto_upgrade_client_helper: Searching stack for software to upgrade switch 2/R0.
*Apr 21 08:34:53.993: %AUTO_UPGRADE-5-AUTO_UPGRADE_FOUND: Switch 1 R0/0: auto_upgrade_client_helper: Found donor switch 1 to auto upgrade switch 2/R0.
*Apr 21 08:34:54.002: %AUTO_UPGRADE-5-AUTO_UPGRADE_START: Switch 1 R0/0: auto_upgrade_client_helper: Upgrading switch 2/R0 with software from switch 1.
*Apr 21 08:34:57.610: %IOSD_INFRA-6-IFS_DEVICE_OIR: Device sdflash-2 added
 *Apr 21 08:34:57.776: %IOSD_INFRA-6-IFS_DEVICE_OIR: Device sdflash-2 added
 *Apr 21 08:35:33.132: %SMART_LIC-3-COMM_FAILED: Communications failure with the Cisco Smart License Utility (CSLU) : Unable to resolve server hostname/domain name
 *Apr 21 08:35:44.454: %AUTO_UPGRADE_MODULAR-5-SMU_AUTO_UPGRADE_INITIATING: Switch 1 R0/0: auto_upgrade_client_helper: Initiating SMU autoupgrade for switch 2/R0
 *Apr 21 08:35:45.784: %AUTO_UPGRADE-5-AUTO_UPGRADE_FINISH: Switch 1 R0/0: auto_upgrade_client_helper: Finished installing software on switch 2/R0.
 *Apr 21 08:35:45.825: %AUTO_UPGRADE-5-AUTO_UPGRADE_RELOAD: Switch 1 R0/0: auto_upgrade_client_helper: Reloading switch 2 to complete the auto upgrade.            

Switch stack management connections

A switch stack management connection is a network management method that

  • enables centralized management of the entire switch stack through the active switch

  • prevents individual management of stack members, and

  • supports multiple management interfaces, including WebUI, DNAC, CiscoWorks, CLI, and SNMP.

Configure switch stacks

Before you begin

  • all Cisco Catalyst IE9300 Rugged Series Switches with IE9320 model numbers are supported for stacking. For the list of stacking switches, refer to the section Stacking interface on Cisco Catalyst IE9300 Rugged Series Switches

  • switches that are running must have compatible software versions.

  • switches must have the same license level.

A switch stack is a network device group that enables monitoring of multiple switches as a single unit, supports various configuration scenarios, and provides configuration examples for stack management.

Procedure


Step 1

Monitor the device stack

Step 2

Switch stack configuration scenarios

Step 3

Example scenarios

  1. Enable the persistent MAC address example

  2. Show switch stack-ports summary example

  3. Show switch stack-ports detail command

  4. Stack operations examples


Monitor device stack

This reference provides the available commands to display and monitor stack information, redundancy, and status for device stacks. Each command includes a description and example output to assist with device stack monitoring and troubleshooting.
  • Use the show module command to display summary information of the stack.

    Switch# show module
    Switch  Ports    Model                Serial No.   MAC address     Hw Ver.       Sw Ver. 
    ------  -----   ---------             -----------  --------------  -------       --------
     1       29     IE-9320-22S2C4X       FDO2637J1UF  dc05.39c7.2e00  V00           17.12.01      
     2       29     IE-9320-24T4X         FDO2701J7LD  5cb1.2ec8.e280  V00           17.12.01      
     3       29     IE-9320-24P4X         FDO2701JB7J  5cb1.2ec8.e580  V00           17.12.01      

    Use the show switch detail command to displays detailed information of the stack.

    Switch# show switch detail
    Switch/Stack Mac Address : dc05.39c7.2e00 - Local Mac Address
    Mac persistency wait time: Indefinite
                                                 H/W   Current
    Switch#   Role    Mac Address     Priority Version  State 
    -------------------------------------------------------------------------------------
    *1       Active   dc05.39c7.2e00     15     V00     Ready                               
     2       Standby  5cb1.2ec8.e280     10     V00     Ready                               
     3       Member   5cb1.2ec8.e580     5      V00     Ready                               


             Stack Port Status             Neighbors     
    Switch#  Port 1     Port 2           Port 1   Port 2 
    --------------------------------------------------------
      1         OK         OK               3        2 
      2         OK         OK               1        3 
      3         OK         OK               2        1 
  • Use the show switch neighbors command to display the stack neighbors.

    Switch# show switch neighbors 
      Switch #    Port 1       Port 2
      --------    ------       ------
          1         3             2  
          2         1             3  
          3         2             1  switch#
    
  • Use the show switch stack-ports [summary] command to displays port information for the stack. Use the summary keyword to display the stack cable length, the stack link status, and the loopback status.

    Switch# show switch stack-ports summary 
    Sw#/Port#  Port Status  Neighbor/Port  Cable Length   Link OK   Link Active   Sync OK   #Changes to LinkOK  In Loopback 
    -------------------------------------------------------------------------------------------------------------------
    1/1        OK           3/2            50cm           Yes       Yes           Yes       1                   No           
    1/2        OK           2/1            100cm          Yes       Yes           Yes       1                   No           
    2/1        OK           1/2            100cm          Yes       Yes           Yes       1                   No           
    2/2        OK           3/1            50cm           Yes       Yes           Yes       1                   No           
    3/1        OK           2/2            50cm           Yes       Yes           Yes       1                   No           
    3/2        OK           1/1            50cm           Yes       Yes           Yes       1                   No           
    
    
  • Use the show switch stack-ports [detail] command to display the stack link status and information for each stack member. Use the detail keyword to display the stack interface status, errors, drops, packet transmission and bandwidth details.

    Switch# show switch stack-ports detail 
    1/1 is OK Loopback No
    Cable Length 50cm     Neighbor 3
    Link Ok Yes Sync Ok Yes Link Active Yes
    Changes to LinkOK 1
     Five minute input rate  1062 bytes/sec
     Five minute output rate 778 bytes/sec
         8377526285 bytes input
         1164675742 bytes output
     CRC Errors
                  Data CRC 0 
              Ringword CRC 0 
               InvRingWord 0 
               PcsCodeWord 0 
    1/2 is OK Loopback No
    Cable Length 100cm    Neighbor 2
    Link Ok Yes Sync Ok Yes Link Active Yes
    Changes to LinkOK 1
     Five minute input rate  1325 bytes/sec
     Five minute output rate 1016 bytes/sec
         8727757021 bytes input
         1634152515 bytes output
     CRC Errors
                  Data CRC 0 
              Ringword CRC 0 
               InvRingWord 0 
               PcsCodeWord 0 
    2/1 is OK Loopback No
    Cable Length 100cm    Neighbor 1
    Link Ok Yes Sync Ok Yes Link Active Yes
    Changes to LinkOK 1
     Five minute input rate  445 bytes/sec
     Five minute output rate 539 bytes/sec
         652376830 bytes input
         7590551492 bytes output
     CRC Errors
                  Data CRC 0 
              Ringword CRC 0 
               InvRingWord 0 
               PcsCodeWord 0 
    2/2 is OK Loopback No
    Cable Length 50cm     Neighbor 3
    Link Ok Yes Sync Ok Yes Link Active Yes
    Changes to LinkOK 1
     Five minute input rate  561 bytes/sec
     Five minute output rate 720 bytes/sec
         912545469 bytes input
         7918619712 bytes output
     CRC Errors
                  Data CRC 0 
              Ringword CRC 0 
               InvRingWord 0 
               PcsCodeWord 0 
    3/1 is OK Loopback No
    Cable Length 50cm     Neighbor 2
    Link Ok Yes Sync Ok Yes Link Active Yes
    Changes to LinkOK 1
     Five minute input rate  356 bytes/sec
     Five minute output rate 551 bytes/sec
         543539448 bytes input
         818158430 bytes output
     CRC Errors
                  Data CRC 0 
              Ringword CRC 0 
               InvRingWord 0 
               PcsCodeWord 0 
    3/2 is OK Loopback No
    Cable Length 50cm     Neighbor 1
    Link Ok Yes Sync Ok Yes Link Active Yes
    Changes to LinkOK 1
     Five minute input rate  485 bytes/sec
     Five minute output rate 627 bytes/sec
         773201871 bytes input
         843637340 bytes output
     CRC Errors
                  Data CRC 0 
              Ringword CRC 0 
               InvRingWord 0 
               PcsCodeWord 0 
  • Use the show redundancy command to display the redundant system and the current processor information. The redundant system information includes:

    • System uptime

    • Standby failures

    • Switchover reason

    • Hardware

    • Configured mode

    • Operating redundancy mode

    The current processor information displayed includes the active location, the software state, the uptime in the current state and so on.

    Switch# show redundancy 
    Redundant System Information :
    ------------------------------
           Available system uptime = 6 days, 5 hours, 54 minutes
    Switchovers system experienced = 0
                  Standby failures = 0
            Last switchover reason = none
    
                     Hardware Mode = Duplex
        Configured Redundancy Mode = sso
         Operating Redundancy Mode = sso
                  Maintenance Mode = Disabled
                    Communications = Up
    
    Current Processor Information :
    -------------------------------
                   Active Location = slot 1
            Current Software state = ACTIVE
           Uptime in current state = 6 days, 5 hours, 54 minutes
                     Image Version = Cisco IOS Software [Dublin], Catalyst L3 Switch Software (IE9K_IOSXE), Experimental Version 17.12.20230419:095045 [BLD_POLARIS_DEV_LATEST_20230419_085112:/nobackup/mcpre/s2c-build-ws 101]
    Copyright (c) 1986-2023 by Cisco Systems, Inc.
    Compiled Wed 19-Apr-23 02:52 by mcpre
                              BOOT = flash:packages.conf;
            Configuration register = 0x102
                 Fast Switchover   = Enabled
                    Initial Garp   = Enabled
    
    Peer Processor Information :
    ----------------------------
                  Standby Location = slot 2
            Current Software state = STANDBY HOT 
           Uptime in current state = 6 days, 5 hours, 51 minutes
                     Image Version = Cisco IOS Software [Dublin], Catalyst L3 Switch Software (IE9K_IOSXE), Experimental Version 17.12.20230419:095045 [BLD_POLARIS_DEV_LATEST_20230419_085112:/nobackup/mcpre/s2c-build-ws 101]
    Copyright (c) 1986-2023 by Cisco Systems, Inc.
    Compiled Wed 19-Apr-23 02:52 by mcpre
                              BOOT = flash:packages.conf;
            Configuration register = 0x102
    
    
    switch#
  • Use the show redundancy states command to display all the redundancy states of the active and standby devices.

    Switch# show redundancy states 
           my state = 13 -ACTIVE 
         peer state = 8  -STANDBY HOT 
               Mode = Duplex
               Unit = Primary
            Unit ID = 1
    
    Redundancy Mode (Operational) = sso
    Redundancy Mode (Configured)  = sso
    Redundancy State              = sso
         Maintenance Mode = Disabled
        Manual Swact = enabled
     Communications = Up
    
       client count = 90
     client_notification_TMR = 30000 milliseconds
               RF debug mask = 0x0   
    
    switch#
    
  • Use the show switch stack-bandwidth command to display the bandwidth and state of each switch.

    Switch# show switch stack-bandwidth
    Stack Current
    Switch#    Role      Bandwidth    State
    ------------------------------------------------------------
    1          Standby   160G         Ready
    2          Member    160G         Ready
    3          Member    160G         Ready
    *4         Active    160G         Ready
  • Use the show switch stack-mode command to display the version, mode, and state of each switch.

    Switch# show switch stack-mode
    Switch# Role      Mac Address     Version Mode  Configured   State
    --------------------------------------------------------------------------------------------------------------------
    1       Standby   dc0b.093f.4b00   V00    N+1   None         Ready
    2       Member    dc0b.093f.3a80   V00    N+1   None         Ready
    3       Member    dc0b.093f.5f00   V00    N+1   None         Ready
    *4      Active    dc0b.093f.4100   V00    N+1   None         Ready
  • Use the switch stack-ring speed command to display the ring speed, configuration, and protocol of the stack.

    Switch# show switch stack-ring speed
    
    Stack Ring Speed : 160G
    Stack Ring Configuration: Full
    Stack Ring Protocol : StackWise
Table 2. Commands for displaying stack information

Command

Description

show module

Displays summary information about the stack.

show switch detail

Displays detailed information about the stack.

show switch neighbors

Displays the stack neighbors.

show switch stack-ports [summary]

Displays port information for the stack. Use the summary keyword to display the stack cable length, the stack link status, and the loopback status.

show switch stack-ports [detail]

Displays the stack link status and information for each stack member. Use the detail keyword to display the stack interface status, errors, drops, packet transmission and bandwidth details.

show redundancy

Displays the redundant system and the current processor information. The redundant system information includes the following:

  • System uptime

  • Standby failures

  • Switchover reason

  • Hardware

  • Configured mode

  • Operating redundancy mode

The current processor information displayed includes the active location, the software state, the uptime in the current state and so on.

show redundancy states

Displays all the redundancy states of the active and standby devices.

show switch stack-bandwidth

Displays the bandwidth and state of each switch.

show switch stack-mode

Displays the version, mode, and state of each switch.

switch stack-ring speed

Displays the ring speed, configuration, and protocol of the stack.

Switch stack configuration scenarios

This reference provides scenarios for configuring switch stacks, including the steps required and the resulting behavior for each scenario.

This section lists switch stack configuration scenarios and steps, and the step results.


Note


In the following table, the active switch is the switch member that operates the control plane. The active switch is also the interface point for all configuration management operations (CLI, SNMP, and WEB).


Table 3. Switch stack configuration scenarios

Scenario

Task

Result

Active switch election determined by existing active switches.

Connect two powered-on switch stacks through the StackWise ports.

Only one of the two active switches becomes the new active switch.

Active switch election determined by the stack member priority value.

  1. Connect two switches through their StackWise ports.

  2. Use the switch stack-member-number priority new-priority-number command to set one stack member with a higher member priority value.

The stack member with the higher priority value is elected active switch.

Active switch election determined by the MAC address.

Assuming that both member switches have the same priority value, configuration file, and license level, restart both member switches at the same time.

The stack member with the lower MAC address is elected active switch.

Stack member number conflict.

Assuming that one stack member has a higher priority value than the other stack member:

  1. Ensure that both member switches have the same stack member number. If necessary, use the switch current-stack-member-number renumber new-stack-member-number command.

  2. Restart both member switches at the same time.

The stack member with the higher priority value retains its stack member number. The other stack member has a new stack member number.

Add a stack member.

  1. Power off the new switch.

  2. Through their StackWise ports, connect the new switch to a powered-on switch stack.

  3. Power on the new switch.

The active switch is retained. The new switch is added to the switch stack.

Active switch failure.

Remove (or power off) the active switch.

One of the remaining member switches becomes the new active switch. All other member switches in the stack remain as member switches and do not reboot.

Remove member switches.

  1. Through their StackWise ports, disconnect the devices.

  2. Power on all devices.

Two devices become active switches. One active switch has member switches. The other active switch remains as a standalone device.

Use the Mode button and port LEDs on the device to identify which devices are active switches and which devices belong to each active switch.

Enable the persistent MAC address

Configure the persistent MAC address feature to maintain MAC address consistency during stack operations with a customizable timer setting.

The persistent MAC address feature allows the stack to continue using the base MAC address of the previous active switch after a switchover until the MAC persistency timer expires. During this time, you must ensure that the old stack MAC address does not appear elsewhere in the network domain to prevent traffic blackholing.

Procedure


Step 1

Use the stack-mac persistent timer 7 command to configure the persistent MAC address feature with the desired time delay in minutes.

Example:

Switch (config)# stack-mac persistent timer 7
WARNING: The stack continues to use the base MAC of the old active
WARNING: as the stack-mac after a active switchover until the MAC
WARNING: persistency timer expires. During this time the Network
WARNING: Administrators must make sure that the old stack-mac does
WARNING: not appear elsewhere in this network domain. If it does,
WARNING: user traffic may be blackholed.

Step 2

(Optional) Use the show switch command to verify the persistent MAC address configuration.

Example:

Switch# show switch
Switch/Stack Mac Address : 6c03.09a0.0f80 - Local Mac Address
Mac persistency wait time: Indefinite
                                                 H/W        Current
Switch#  Role       Mac Address       Priority   Version    State 
--------------------------------------------------------------------
*1       Active     6c03.09a0.0f80    1          V00        Ready                               
 2       Standby    6c03.09a0.1200    1          V00        Ready

Show switch stack-ports summary example

Provides an example output and explanation of the show switch stack-ports summary command, which displays stack port status, neighbor information, cable length, and link details for each switch in the stack.
Switch# show switch stack-ports summary

SW#/Port#  Port    Neighbor/ Cable     Link   Link    Sync   #Changes    In            
           Status  Port      Length    OK     Active  OK     To LinkOK   Loopback      
--------   ------  --------  --------  ----  ------   ----   ---------   --------
1/1        OK      2/1       50 cm     Yes    Yes     Yes       1        No 
1/2        OK      2/2       50 cm     Yes    Yes     Yes       1        No 
2/1        OK      1/1       50 cm     Yes    Yes     Yes       1        No 
2/2        OK      1/2       50 cm     Yes    Yes     Yes       1        No

Switch#
Table 4. Show switch stack-ports summary fields

Field

Description

Switch#/Port#

Member number and its stack port number.

Stack port status

Status of the stack port:

  • Absent: No cable is detected on the stack port.

  • Down: A cable is detected, but either no connected neighbor is up, or the stack port is disabled.

  • OK: A cable is detected, and the connected neighbor is up.

Neighbor

Switch number of the active member at the other end of the stack cable.

Cable length

Valid lengths are 50 cm or 1 m.

Link OK

Whether the stack cable is connected and functional. There may or may not be a neighbor connected on the other end.

The link partner is a stack port on a neighbor switch.

  • No: There is no stack cable connected to this port or the stack cable is not functional.

  • Yes: There is a functional stack cable connected to this port.

Link Active

Whether a neighbor is connected on the other end of the stack cable.

  • No: No neighbor is detected on the other end. The port cannot send traffic over this link.

  • Yes: A neighbor is detected on the other end. The port can send traffic over this link.

Sync OK

Whether the link partner sends valid protocol messages to the stack port.

  • No: The link partner does not send valid protocol messages to the stack port.

  • Yes: The link partner sends valid protocol messages to the port.

# Changes to LinkOK

The relative stability of the link.

If this counter is incrementing, stack link flapping may be occurring, which affects the stack functionality and performance. A cable or port issue may be possible.

In Loopback

Whether the stackports on the member are in loopback.

  • No: At least one stack port on the member has an attached stack cable.

  • Yes: On a standalone switch, when no stack cable is connected to the switch, stack ports are put in software Loopback mode.

Show switch stack-ports detail command

This reference lists sample outputs and describes the fields for the show switch stack-ports detail command, helping users interpret stack port status, neighbor information, cable length, link activity, and error counters.

Use the show switch stack-port detail command to monitor the stack status.

Switch# show switch stack-port detail
1/1 is OK Loopback No
Cable Length 50cm     Neighbor 2
Link Ok Yes Sync Ok Yes Link Active Yes
Changes to LinkOK 1
 Five minute input rate  435 bytes/sec
 Five minute output rate 423 bytes/sec
     6064931845 bytes input
     516798417781 bytes output
 CRC Errors
              Data CRC 7 
          Ringword CRC 8882 
           InvRingWord 0 
           PcsCodeWord 274 
1/2 is OK Loopback No
Cable Length 50cm     Neighbor 2
Link Ok Yes Sync Ok Yes Link Active Yes
Changes to LinkOK 1
 Five minute input rate  389 bytes/sec
 Five minute output rate 376 bytes/sec
     5123997908 bytes input
     458569034166 bytes output
 CRC Errors
              Data CRC 0 
          Ringword CRC 0 
           InvRingWord 0 
           PcsCodeWord 0 
2/1 is OK Loopback No
Cable Length 50cm     Neighbor 1
Link Ok Yes Sync Ok Yes Link Active Yes
Changes to LinkOK 1
 Five minute input rate  371 bytes/sec
 Five minute output rate 475 bytes/sec
     60933821787 bytes input
     463001301291 bytes output
 CRC Errors
              Data CRC 3 
          Ringword CRC 1 
           InvRingWord 1 
           PcsCodeWord 0 
2/2 is OK Loopback No
Cable Length 50cm     Neighbor 1
Link Ok Yes Sync Ok Yes Link Active Yes
Changes to LinkOK 1
 Five minute input rate  328 bytes/sec
 Five minute output rate 417 bytes/sec
     52317602279 bytes input
     399572815361 bytes output
 CRC Errors
              Data CRC 0 
          Ringword CRC 0 
           InvRingWord 0 
           PcsCodeWord 0 
Table 5. show switch stack-ports detail fields

Field

Description

Neighbor

Switch number of the active member at the other end of the stack cable.

Cable Length

Valid lengths are 50 cm or 1 m.

If the switch cannot detect the cable length, the value is Unknown. The cable might not be connected, or the link might be unreliable.

Link OK

Whether the stack cable is connected and functional. There may or may not be a neighbor connected on the other end.

The link partner is a stack port on a neighbor switch.

  • No: There is no stack cable connected to this port or the stack cable is not functional.

  • Yes: There is a functional stack cable connected to this port.

Link Active

Whether a neighbor is connected on the other end of the stack cable.

  • No: No neighbor is detected on the other end. The port cannot send traffic over this link.

  • Yes: A neighbor is detected on the other end. The port can send traffic over this link.

Sync OK

Whether the link partner sends valid protocol messages to the stack port.

  • No: The link partner does not send valid protocol messages to the stack port.

  • Yes: The link partner sends valid protocol messages to the port.

# Changes to LinkOK

The relative stability of the link.

If many changes occur in a short time, link flapping can occur.

Five minute input rate

The average rate (calculated over a 5-minute period) at which packets are received, measured in packets/sec. For example, in 5 minutes, 356 bytes per second would be 356 x 300 or 106,800 bytes.

Five minute output rate

The average rate (calculated over a five minute period) at which packets are transmitted, measured in packets/sec.

CRC Errors

Different types of CRC errors that are seen on a stack interface:

  • Data CRC: Stack interface data CRC error

  • Ringword CRC: Stack interface ring word CRC error

  • InvRingWord: Stack interface invalid ring word error

  • PcsCodeWord: Stack interface Physical Coding Sublayer (PCS) error

These errors normally occur when a stack interface state changes due to a switchover or a switch reload. You can ignore such errors.

However, when these error counters increase significantly or when they increase continuously over time, check the stack cable for issues.

Use the show switch stack-ports detail command to monitor the stack port flaps:
Switch# show switch stack-ports detail 
1/1 is DOWN Loopback No
Cable Length 50cm     Neighbor NONE
Link Ok Yes Sync Ok Yes Link Active No
Changes to LinkOK 1
 Five minute input rate  512 bytes/sec
 Five minute output rate 492 bytes/sec
     6068997305 bytes input
     516803876697 bytes output
 CRC Errors
              Data CRC 7 
          Ringword CRC 8906 
           InvRingWord 0 
           PcsCodeWord 274 
1/2 is OK Loopback No
Cable Length 50cm     Neighbor 2
Link Ok Yes Sync Ok Yes Link Active Yes
Changes to LinkOK 1
 Five minute input rate  410 bytes/sec
 Five minute output rate 454 bytes/sec
     5127433411 bytes input
     458573731026 bytes output
 CRC Errors
              Data CRC 0 
          Ringword CRC 0 
           InvRingWord 136 
           PcsCodeWord 139 
2/1 is OK Loopback No
Cable Length 50cm     Neighbor 1
Link Ok Yes Sync Ok Yes Link Active Yes
Changes to LinkOK 1
 Five minute input rate  354 bytes/sec
 Five minute output rate 537 bytes/sec
     60934298929 bytes input
     463006840274 bytes output
 CRC Errors
              Data CRC 3 
          Ringword CRC 1 
           InvRingWord 1 
           PcsCodeWord 0 
2/2 is DOWN Loopback No
Cable Length 50cm     Neighbor NONE
Link Ok Yes Sync Ok Yes Link Active No
Changes to LinkOK 1
 Five minute input rate  410 bytes/sec
 Five minute output rate 527 bytes/sec
     52318079851 bytes input
     399577555753 bytes output
 CRC Errors
              Data CRC 0 
          Ringword CRC 0 
           InvRingWord 0 
           PcsCodeWord 0 

Use the switch 1 stack port 1 enable command to monitor the status of switch reload.

Switch# switch 1 stack port 1 enable   
WARNING: Enabling the switch port may result in a configuration change for the stack. Do you want to continue?[y/n]? [yes]: yes
Switch#
*Jan 27 02:37:58.908: %STACKMGR-6-STACK_LINK_CHANGE: Switch 1 R0/0: stack_mgr: Stack port 1 on Switch 1 is up
*Jan 27 02:37:58.903: %STACKMGR-6-STACK_LINK_CHANGE: Switch 2 R0/0: stack_mgr: Stack port 2 on Switch 2 is up

Use the show switch stack-ports detail command to monitor the status of switch stack-ports.

Switch# show switch stack-ports detail 
1/1 is OK Loopback No
Cable Length 50cm     Neighbor 2
Link Ok Yes Sync Ok Yes Link Active Yes
Changes to LinkOK 2
 Five minute input rate  512 bytes/sec
 Five minute output rate 492 bytes/sec
     6069131764 bytes input
     516804010939 bytes output
 CRC Errors
              Data CRC 7 
          Ringword CRC 8908 
           InvRingWord 0 
           PcsCodeWord 274 
1/2 is OK Loopback No
Cable Length 50cm     Neighbor 2
Link Ok Yes Sync Ok Yes Link Active Yes
Changes to LinkOK 1
 Five minute input rate  410 bytes/sec
 Five minute output rate 454 bytes/sec
     5127456236 bytes input
     458573756883 bytes output
 CRC Errors
              Data CRC 0 
          Ringword CRC 0 
           InvRingWord 136 
           PcsCodeWord 139 
2/1 is OK Loopback No
Cable Length 50cm     Neighbor 1
Link Ok Yes Sync Ok Yes Link Active Yes
Changes to LinkOK 1
 Five minute input rate  354 bytes/sec
 Five minute output rate 537 bytes/sec
     60934319023 bytes input
     463006865289 bytes output
 CRC Errors
              Data CRC 3 
          Ringword CRC 1 
           InvRingWord 1 
           PcsCodeWord 0 
2/2 is OK Loopback No
Cable Length 50cm     Neighbor 1
Link Ok Yes Sync Ok Yes Link Active Yes
Changes to LinkOK 2
 Five minute input rate  410 bytes/sec
 Five minute output rate 527 bytes/sec
     52318195521 bytes input
     399577703600 bytes output
 CRC Errors
              Data CRC 0 
          Ringword CRC 0 
           InvRingWord 0 
           PcsCodeWord 0 

The following is a sample output after a member is reloaded:

Switch#sh switch stack-ports detail 
1/1 is OK Loopback No
Cable Length 50cm     Neighbor 2
Link Ok Yes Sync Ok Yes Link Active Yes
Changes to LinkOK 3
 Five minute input rate  9752 bytes/sec
 Five minute output rate 13982 bytes/sec
     6072578128 bytes input
     516808638473 bytes output
 CRC Errors
              Data CRC 37 
          Ringword CRC 8943 
           InvRingWord 22 
           PcsCodeWord 351 
1/2 is OK Loopback No
Cable Length 50cm     Neighbor 2
Link Ok Yes Sync Ok Yes Link Active Yes
Changes to LinkOK 2
 Five minute input rate  8918 bytes/sec
 Five minute output rate 11567 bytes/sec
     5130578537 bytes input
     458589810996 bytes output
 CRC Errors
              Data CRC 196 
          Ringword CRC 100 
           InvRingWord 240 
           PcsCodeWord 368 
2/1 is OK Loopback No
Cable Length 50cm     Neighbor 1
Link Ok Yes Sync Ok Yes Link Active Yes
Changes to LinkOK 1
 Five minute input rate  1178 bytes/sec
 Five minute output rate 9969 bytes/sec
     60934969353 bytes input
     463010330927 bytes output
 CRC Errors
              Data CRC 3 
          Ringword CRC 1 
           InvRingWord 1 
           PcsCodeWord 0 
2/2 is OK Loopback No
Cable Length 50cm     Neighbor 1
Link Ok Yes Sync Ok Yes Link Active Yes
Changes to LinkOK 1
 Five minute input rate  931 bytes/sec
 Five minute output rate 9113 bytes/sec
     52318756819 bytes input
     399580839136 bytes output
 CRC Errors
              Data CRC 0 
          Ringword CRC 0 
           InvRingWord 0 
           PcsCodeWord 0 

Switch# 

Stack operations examples

This reference provides examples of stack operations, including command outputs and system behavior when stack cables are connected or disconnected in a stack with two or more members.

In a stack with two members, stack cables connect all the members:

Use the show switch stack-ports summary command to monitor stack ports information.

Switch# show switch stack-ports summary

SW#/Port#  Port    Neighbor/ Cable     Link   Link    Sync   #Changes    In            
           Status  Port      Length    OK     Active  OK     To LinkOK   Loopback      
--------   ------  --------  --------  ----  ------   ----   ---------   --------
1/1        OK      2/1       50 cm     Yes    Yes     Yes       1        No 
1/2        OK      2/2       50 cm     Yes    Yes     Yes       1        No 
2/1        OK      1/1       50 cm     Yes    Yes     Yes       1        No 
2/2        OK      1/2       50 cm     Yes    Yes     Yes       1        No

If you disconnect the stack cable from Port 1 on Switch 1, these messages appear on the console:

*Jun 27 06:25:01.654: %STACKMGR-6-STACK_LINK_CHANGE: Switch 1 R0/0: stack_mgr: Stack port 1 on Switch 1 is cable-not-connected
*Jun 27 06:25:01.654: %STACKMGR-6-STACK_LINK_CHANGE: Switch 1 R0/0: stack_mgr: Stack port 2 on Switch 1 is down
*Jun 27 06:25:01.654: %STACKMGR-6-STACK_LINK_CHANGE: Switch 1 R0/0: stack_mgr: Stack port 2 on Switch 1 is cable-not-connected

Use the show switch stack-ports summary command to monitor the port status.

Switch# show switch stack-ports summary
 
SW#/Port#  Port    Neighbor/  Cable     Link   Link    Sync   #Changes    In            
           Status  Port       Length    OK     Active  OK     To LinkOK   Loopback      
--------   ------  --------   --------  ----  ------   ----   ---------   --------
1/1        DOWN    NONE/NONE  No cable  No     No      No        1        No 
1/2        OK      2/2        50 cm     Yes    Yes     Yes       1        No 
2/1        OK      1/1        50 cm     Yes    Yes     Yes       1        No 
2/2        OK      1/2        50 cm     Yes    Yes     Yes       1        No

Switch#

If you disconnect the stack cable from Port 2 on Switch 1, the stack splits.

Switch 1 is a standalone switch:

Switch#show switch stack-ports summary
 
SW#/Port#  Port    Neighbor/  Cable     Link   Link    Sync   #Changes    In            
           Status  Port       Length    OK     Active  OK     To LinkOK   Loopback      
--------   ------  --------   --------  ----  ------   ----   ---------   --------
1/1        DOWN    NONE/NONE  No cable  No     No      No        1        No 
1/2        DOWN    NONE/NONE  No cable  No     No      No        1        No Switch#

Software loopback examples with connected stack cables

This reference provides examples of software loopback with connected stack cables, demonstrating port status and physical loopback testing on Cisco switches.
  • On Port 1 on Switch 1, the port status is Down, and a cable is connected.

    On Port 2 on Switch 1, the port status is Down, and no cable is connected.

    Switch# show switch stack-ports summary<
     Sw#/Port#  Port    Neighbor/ Cable     Link  Link    Sync  #Changes   In
                Status  Port      Length    OK    Active  OK    To LinkOK  Loopback  
    		--------  ------  --------  --------  ---- ------  ----  ---------  --------
    		  1/1     Down      None    50 Cm      No     No     No       1          No   
    		  1/2     Down      None    No cable   No     No     No       1          No
    		
    		
  • In a physical loopback, a cable connects both stack ports on a switch. You can use this configuration to test

    • Cables on a switch that is running properly

    • Stack ports with a cable that works properly

    Switch# show switch stack-ports summary
     Sw#/Port#  Port    Neighbor/ Cable     Link  Link    Sync  #Changes   In
                Status  Port      Length    OK    Active  OK    To LinkOK  Loopback  
    		--------  ------  --------  --------  ----  ------  ----  ---------  --------
    		  2/1       OK       2      50 cm     Yes    Yes    Yes       1         No
    		  2/2       OK       2      50 cm     Yes    Yes    Yes       1         No


    The port status shows that

    • Switch 2 is a standalone switch.

    • The ports can send and receive traffic.

Software loopback example with no connected stack cable

This reference shows the output of the show switch stack-ports summary command when no stack cable is connected, highlighting port status and loopback information for software loopback scenarios.
Switch# show switch stack-ports summary
#SW#/Port#  Port    Neighbor/ Cable      Link   Link    Sync   #Changes    In            
            Status  Port      Length     OK     Active  OK     To LinkOK   Loopback      
--------    ------  --------  --------   ----  ------   ----   ---------   --------
1/1         Down    None      No cable   No     No      No     1           Yes
1/2         Down    None      No cable   No     No      No     1           Yes 

Disconnected stack cable identification

This reference describes how to identify a disconnected stack cable in a Cisco switch stack by examining port status, cable length, and diagnostic messages.

Stack cables connect all stack members. Port 2 on Switch 1 connects to Port 1 on Switch 2.

This is the port status for the members:

Switch# show switch stack-ports summary
 Sw#/Port#  Port    Neighbor/ Cable     Link  Link    Sync  #Changes   In
            Status  Port      Length    OK    Active  OK    To LinkOK  Loopback  
		--------  ------  --------  --------  ----  ------  ----  ---------  --------
		  1/1     OK       2/1      50 cm     Yes    Yes    Yes        1        No
		  1/2     OK       2/2      50 cm     Yes    Yes    Yes        1        No
		  2/1     OK       1/1      50 cm     Yes    Yes    Yes        1        No
		  2/2     OK       1/2      50 cm     Yes    Yes    Yes        1        No


If you disconnect the cable from Port 2 on Switch 1, these messages appear:

%STACKMGR-4-STACK_LINK_CHANGE: Stack Port 1 Switch 2 has changed to state DOWN
		
		%STACKMGR-4-STACK_LINK_CHANGE: Stack Port 2 Switch 1 has changed to state DOWN


This is now the port status:

Switch# show switch stack-ports summary
 Sw#/Port#  Port    Neighbor/ Cable     Link  Link    Sync  #Changes   In
            Status  Port      Length    OK    Active  OK    To LinkOK  Loopback  
		--------  ------  --------  --------  ----  ------  ----  ---------  --------
		  1/1       OK      2/1     50 cm     Yes    Yes    Yes        1        No  
		  1/2      Down     None    No cable   No     No     No        2        No   
		  2/1      Down     None    50 cm      No     No     No        2        No   
		  2/2       OK      1/2     50 cm     Yes    Yes    Yes        1        No   


Only one end of the cable connects to a stack port, Port 1 on Switch 2.

  • The Stack Port Status value for Port 2 on Switch 1 is Down, and the value for Port 1 on Switch 2 is Down.

  • The Cable Length value is No cable.

Diagnosing the problem:

  • Verify the cable connection for Port 2 on Switch 1.

  • Port 2 on Switch 1 has a port or cable problem if
    • The In Loopback value is Yes.

    or

    • The Link OK, Link Active, or Sync OK value is No.

Fixing bad connection between stack ports

Stack cables connect all members. Port 2 on Switch 1 connects to Port 1 on Switch 2. This reference provides information to diagnose a bad connection between stack ports.

This is the port status:

Switch# show switch stack-ports summary
 Sw#/Port#  Port    Neighbor  Cable     Link  Link    Sync  #Changes   In
            Status  Port      Length    OK    Active  OK    To LinkOK  Loopback  
		--------  ------  --------  --------  ----  ------  ----  ---------  --------
		  1/1       OK      2/1     50 cm     Yes    Yes    Yes       1          No   
		  1/2      Down     None    50 cm      No     No     No       2          No   
		  2/1      Down     None    50 cm      No     No     No       2          No   
		  2/2       OK      1/2     50 cm     Yes    Yes    Yes       1          No


Diagnosing the problem:

  • The Stack Port Status value is Down.

  • Link OK, Link Active, and Sync OK values are No.

  • The Cable Length value is 50 cm. The switch detects and correctly identifies the cable.

The connection between Port 2 on Switch 1 and Port 1 on Switch 2 is unreliable on at least one of the connector pins.

Additional references for switch stacks

Provides references to related documents, error message decoder tools, standards and RFCs, MIBs, and technical assistance resources for Cisco switch stacks.

Related documents

Related Topic

Document Title

Cabling and powering on a switch stack.

Cisco Catalyst IE9300 Rugged Series Switch Hardware Installation Guide

Error message decoder

Related Topic

Document Title

To help you research and resolve system error messages in this release, use the Error Message Decoder tool.

https://www.cisco.com/cgi-bin/Support/Errordecoder/index.cgi

Standards and RFCs

Standard/RFC

Title

None

—

MIBs

MIB

MIBs Link

All the supported MIBs for this release.

To locate and download MIBs for selected platforms, Cisco IOS releases, and , use Cisco MIB Locator found at the following URL:

http://www.cisco.com/go/mibs

Technical assistance

Description

Link

The Cisco Support website provides extensive online resources, including documentation and tools for troubleshooting and resolving technical issues with Cisco products and technologies.

To receive security and technical information about your products, you can subscribe to various services, such as the Product Alert Tool (accessed from Field Notices), the Cisco Technical Services Newsletter, and Really Simple Syndication (RSS) Feeds.

Access to most tools on the Cisco Support website requires a Cisco.com user ID and password.

http://www.cisco.com/support

PTP over stacks

A PTP over stack is a collection of switches that

  • operates as a single network entity for PTP

  • maintains consistent time information across all stack members, and

  • ensures synchronized PTP clocks to enable accurate timekeeping for network operations.

PTP over stack reference information

Starting with release 26.1.1, you can use PTP on Cisco IE9300 Rugged Series Switch stacks. This support lets the stack function as a unified network entity for time synchronization. PTP clocks stay precisely aligned and provide accurate time for your network.

Guidelines for PTP configuration on switch stacks

Guidelines for PTP GrandMaster role

If the stack acts as the GrandMaster (GM) for your network, the active switch automatically becomes the primary time source. This ensures that all time-aware systems connected across stack members synchronize with the active switch.

If the stack uses an external GrandMaster (GM) for your network, it automatically receives time from the GM. The stack member connected to the GM becomes the primary time receiver, ensuring all stack members synchronize with the external GM.

Guidelines for switch stack configuration

The switch stack configuration supports:

  • PTP over stack:

    • A maximum of four members for PTP operations.

    • PTP over stack is supported over full-ring.

  • PTP profiles:

    • Boundary Clock (BC): supports the IEEE1588 default profile and Power-2011 profiles.

    • Transparent Clock (TC): supports Power-2011 and Power-2017 profiles (point-to-point only).

  • IRIG-B and GNSS supports:

    • Only when all the stack members are IE-9320-22S2C4X , ensuring the stack is composed entirely of devices with the same PID.

    • PTP GrandMaster Clock Boundary Clock (GMC-BC) operation, where only the active node acts as the PTP time source.

    • Synchronization of virtual clocks on other nodes using IRIG-B and GNSS, without these nodes acting as PTP time sources.

Limitations for IE9300 stack

The IE9300 stack does not support:

  • PTP over HSR.

  • PTP management via WebUI.

  • Transparent Clock with the default profile (end-to-end).

  • Non-crisscross stack cabling configurations.

  • Stateful switchover

Configure PTP on the IE9300 switch stack

Configure and monitor PTP on an Cisco Catalyst IE 9300 Rugged Series Switch stack to ensure that all stack members operate as a single synchronized timing entity.

PTP enables precise time synchronization across all members in an IE9300 stack. It supports both BC and TC modes, as well as multiple PTP profiles.

Before you begin

  • Ensure the stack is fully formed and cabling is completed as supported by hardware guidelines.

  • Verify your intended PTP profile is supported in your software release using show version command. It should display 26.1.1 as the IOS XE software version.

  • Confirm you have the necessary privileges to configure and view PTP settings using show users or show privilege command in EXEC mode .

Follow these steps to configure and monitor PTP on the IE9300 switch stack:

Procedure


Step 1

Configure PTP on the stack using commands that match the required profile. For more information on PTP configuration, refer to the PTP configuration guide.

Step 2

(Optional) Use the show ptp [ clock running | lan switch switch_number port counters [ messages | errors ] ] command to monitor the clock PTP status.

Example:

Switch# show ptp clock running
PTP Boundary Clock [Domain 1]  [Profile: default]

         State          Ports          Pkts sent      Pkts rcvd      Redundancy Mode

         PHASE_ALIGNED  6              768            1233           Hot standby

                               PORT SUMMARY
                                                                        PTP Master
Name  Tx Mode      Role         Transport    State         Sessions     Port Addr

port1 mcast        negotiated   Gi1/0/7      Slave         1            UNKNOWN
port2 mcast        negotiated   Gi2/0/6      Passive       1            UNKNOWN
port3 mcast        negotiated   Gi3/0/12     Passive       1            UNKNOWN
port4 mcast        negotiated   Gi4/0/13     Passive       1            UNKNOWN
port5 mcast        negotiated   Gi1/0/2      Master        1            UNKNOWN
port6 mcast        negotiated   Gi3/0/2      Master        1            UNKNOWN

Switch# show ptp lan switch 3 port counters messages 

  GigabitEthernet3/0/7

         Transmit                                         Receive
          81339          Announce                         66563          Announce
          81334          Sync                             66563          Sync
          81334          Follow_Up                        66563          Follow_Up
              0          Delay_Req                            0          Delay_Req
              0          Delay_Resp                           0          Delay_Resp
         163173          Pdelay_Req                      147888          Pdelay_Req
         147888          Pdelay_Resp                     147890          Pdelay_Resp
         147888          Pdelay_Resp_Follow_Up           147890          Pdelay_Resp_Follow_Up
              0          Signaling                            0          Signaling
              0          Management                           0          Management
          

  GigabitEthernet3/0/8

         Transmit                                         Receive
          66577          Announce                         81325          Announce
          66573          Sync                             81325          Sync
          66573          Follow_Up                        81325          Follow_Up
              0          Delay_Req                            0          Delay_Req
              0          Delay_Resp                           0          Delay_Resp
         163150          Pdelay_Req                      147888          Pdelay_Req
         147888          Pdelay_Resp                     147888          Pdelay_Resp
         147888          Pdelay_Resp_Follow_Up           147888          Pdelay_Resp_Follow_Up
              0          Signaling                            0          Signaling
              0          Management                           0          Management
Switch# show ptp lan switch 3 port counters errors

  GigabitEthernet3/0/7

              0          Sanity check failed                  0          Blocked port
              0          Timestamp get failed                 0          ParentId invalid
              0          Vlan mismatch                        0          GmcId invalid
              0          Domain mismatch                      0          SequenceId invalid
              0          Sync fault                           0          Unmatched Follow_Up
              0          Duplicate Sync                       0          Unmatched Delay_Resp
              0          Duplicate Announce                   0          Unmatched Pdelay_Resp
              0          Send error                           0          Unmatched Pdelay_Resp_Follow_Up
              0          Misc error                           0          Rogue master Sync
              0          Rogue master Follow_Up               0          Rogue master Announce
          

  GigabitEthernet3/0/8

              0          Sanity check failed                  0          Blocked port
              0          Timestamp get failed                 0          ParentId invalid
              0          Vlan mismatch                        0          GmcId invalid
              0          Domain mismatch                      0          SequenceId invalid
              0          Sync fault                           0          Unmatched Follow_Up
              0          Duplicate Sync                       0          Unmatched Delay_Resp
              0          Duplicate Announce                   0          Unmatched Pdelay_Resp
              0          Send error                           0          Unmatched Pdelay_Resp_Follow_Up
              0          Misc error                           0          Rogue master Sync
              0          Rogue master Follow_Up               0          Rogue master Announce

Step 3

(Optional) Use the show ptp lan switch switch_number [ active | standby] sif [counters errors | counters messages] command to retrieve data from the switch.

Example:

Table 6. Syntax description

Keyword

Description

switch_number

Specifies a particular switch in a stack.

active

Current active switch.

standby

Current standby switch.

sif status | counters errors | counters messages

Displays the Switch Interconnect Fabric (SIF) operational status across the stack, error counters or messages.

Example:

Switch# show ptp lan switch active sif   
PTP SIF Info
============
Stack Clock Master: Yes
SCM Switch Number: 3
SCM Interface: GigabitEthernet3/0/17
Ring Status: Full
Clock Id: 0
      Port Num   Cable Length   Port Link Status   Port State
      =======================================================
             1          100cm   Link Up            Master    
             2          100cm   Link Up            Passive   
Switch# show ptp lan switch active sif counters errors 
SIF Port Errors Counters:
  Stack Port0                     
            0          Sanity check failed                  0          Blocked port
            0          Timestamp get failed                 0          ParentId invalid
            0          Vlan mismatch                        0          GmcId invalid
            0          Domain mismatch                      0          SequenceId invalid
            0          Sync fault                           0          Unmatched Follow_Up
            0          Duplicate Sync                       0          Unmatched Delay_Resp
            0          Duplicate Announce                   0          Unmatched Pdelay_Resp
            0          Send error                           0          Unmatched Pdelay_Resp_Follow_Up
            0          Misc error                           0          Rogue master Sync
            0          Rogue master Follow_Up               0          Rogue master Announce
          
SIF Port Errors Counters:
  Stack Port1                     
            0          Sanity check failed                  0          Blocked port
            0          Timestamp get failed                 0          ParentId invalid
            0          Vlan mismatch                        0          GmcId invalid
            0          Domain mismatch                      0          SequenceId invalid
            0          Sync fault                           0          Unmatched Follow_Up
            0          Duplicate Sync                       0          Unmatched Delay_Resp
            0          Duplicate Announce                   0          Unmatched Pdelay_Resp
            0          Send error                           0          Unmatched Pdelay_Resp_Follow_Up
            0          Misc error                           0          Rogue master Sync
            0          Rogue master Follow_Up               0          Rogue master Announce
Switch# show ptp lan switch active sif counters messages
SIF Port Message Counters:
  Stack Port1                     

       Transmit                                         Receive
            0          Announce                             0          Announce
         1411          Sync                                 0          Sync
         1411          Follow_Up                            0          Follow_Up
            0          Delay_Req                         1411          Delay_Req
         1411          Delay_Resp                           0          Delay_Resp
            0          Pdelay_Req                           0          Pdelay_Req
            0          Pdelay_Resp                          0          Pdelay_Resp
            0          Pdelay_Resp_Follow_Up                0          Pdelay_Resp_Follow_Up
            0          Signaling                            0          Signaling
            0          Management                           0          Management
SIF Port Message Counters:
  Stack Port2                     

       Transmit                                         Receive
            0          Announce                             0          Announce
            0          Sync                              1408          Sync
            0          Follow_Up                         1408          Follow_Up
         1408          Delay_Req                            0          Delay_Req
            0          Delay_Resp                        1408          Delay_Resp
            0          Pdelay_Req                           0          Pdelay_Req
            0          Pdelay_Resp                          0          Pdelay_Resp
            0          Pdelay_Resp_Follow_Up                0          Pdelay_Resp_Follow_Up
            0          Signaling                            0          Signaling
            0          Management                           0          Management
Switch# show ptp lan switch 1 sif
PTP SIF Info
============
Stack Clock Master: Yes
SCM Switch Number: 1
SCM Interface: GigabitEthernet1/0/2
Ring Status: Full
Clock Id: 0
      Port Num   Cable Length   Port Link Status   Port State
      =======================================================
             1          100cm   Link Up            Master    
             2           50cm   Link Up            Passive  
Switch# show ptp lan switch active sif status 
 Switch#    Role        State      
 -------        ----          -----         
       1    Active       Ready 
       

What to do next

  • Periodically check the synchronization status and error counters using show ptp lan switch active sif counters errors command .

  • If you change the stack topology by adding or removing members or changing roles, then re-verify PTP configuration and synchronization.

Feature history and information for switch stacks

Provides release information about features described in this module, including software release support for switch stacking functionality.

The following table provides release information about the feature or features described in this module. This table lists only the software release that introduced support for a given feature in a given software release train. Unless noted otherwise, subsequent releases of that software release train also support that feature.

Use the Cisco Feature Navigator to find information about platform support and Cisco software image support. To access Cisco Feature Navigator, go to www.cisco.com/go/cfn. An account on Cisco.com is not required.

Table 7. Feature History

Release

Feature

Feature Information

PTP over stack

26.1.1

This feature enables PTP for your stacked Cisco IE9300 Rugged Series switches so they function as a unified network entity. You receive consistent, synchronized timing across the stack, making network management simpler and ensuring precise timekeeping for your critical applications.

Cisco IOS XE Dublin 17.12.1

Stacking support for Cisco Catalyst IE9300 Rugged Series Switches

  • Stacking became supported for four-member stacks.

  • Switches introduced in this release:

    • IE-9320-24T4X-A and IE-9320-24T4X-E

    • IE-9320-24P4X-A and IE-9320-24P4X-E

    • IE-9320-16P8U4X-A and IE-9320-16P8U4X-E

    • IE-9320-24P4S-A and IE-9320-24P4S-E

Cisco IOS XE Dublin 17.11.1

Stacking support for Cisco Catalyst IE9300 Rugged Series Switches

The switch became available, with stacking supported for three-member stacks IE-9320-22S2C4X-A and IE-9320-22S2C4X-E

Cisco IOS XE Cupertino 17.8.1

Stacking support for Cisco Catalyst IE9300 Rugged Series Switches

The switch became available, with stacking supported for three-member stacks (IE-9320-26S2C-A and IE-9320-26S2C-E)

Cisco IOS XE Cupertino 17.7.1

Stacking support for Cisco Catalyst IE9300 Rugged Series Switches

The switch became available, with stacking supported for two-member stacks (IE-9320-26S2C-A and IE-9320-26S2C-E)