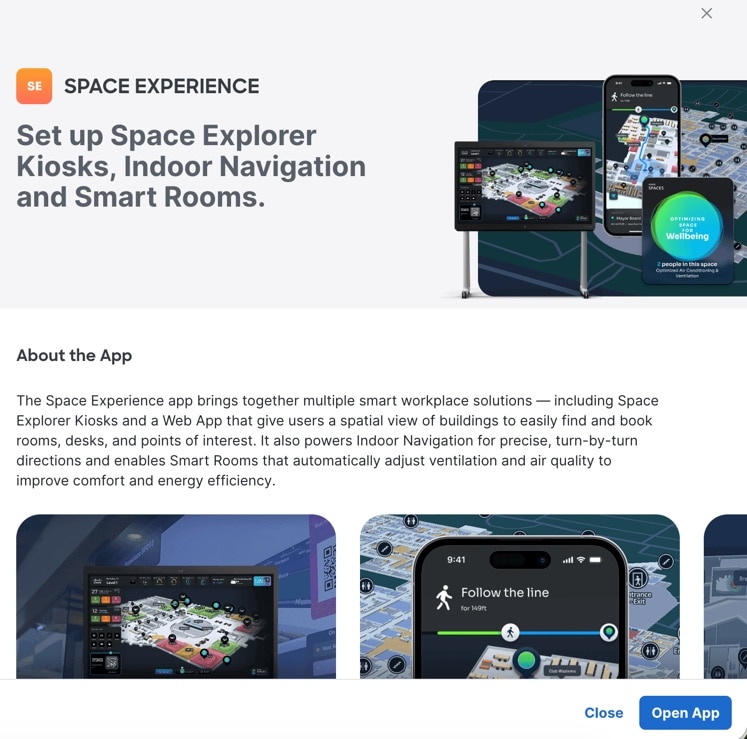
Overview of Space Experience
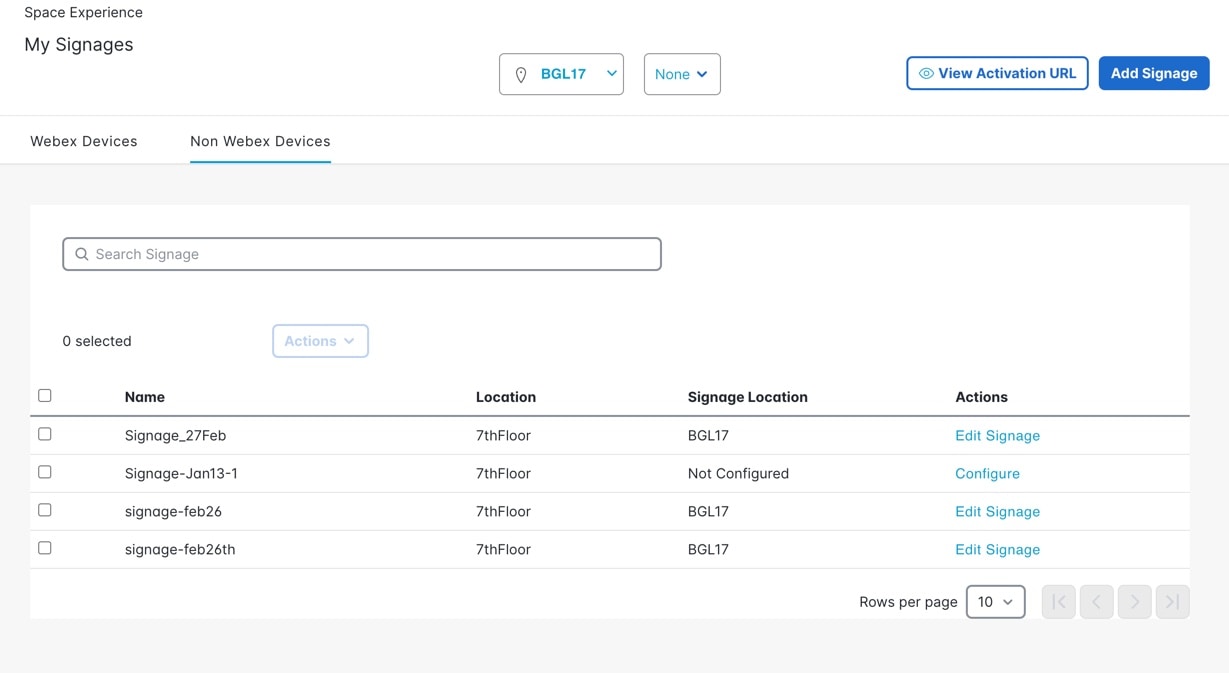
The Space Experience app enables you to onboard, configure, and manage digital signages across meeting rooms, floors, and buildings in the workplace using Cisco Spaces.
This app also helps you configure the telemetry parameters on Cisco Webex and non-Webex signages and publish them. These updates are auto-notified to the respective signages.
The Space Experience app is tied to these license types:
-
ACT (displayed in UI as Advantage)
-
UNLIMITED
-
PREMIER_W
-
PREMIER_CW
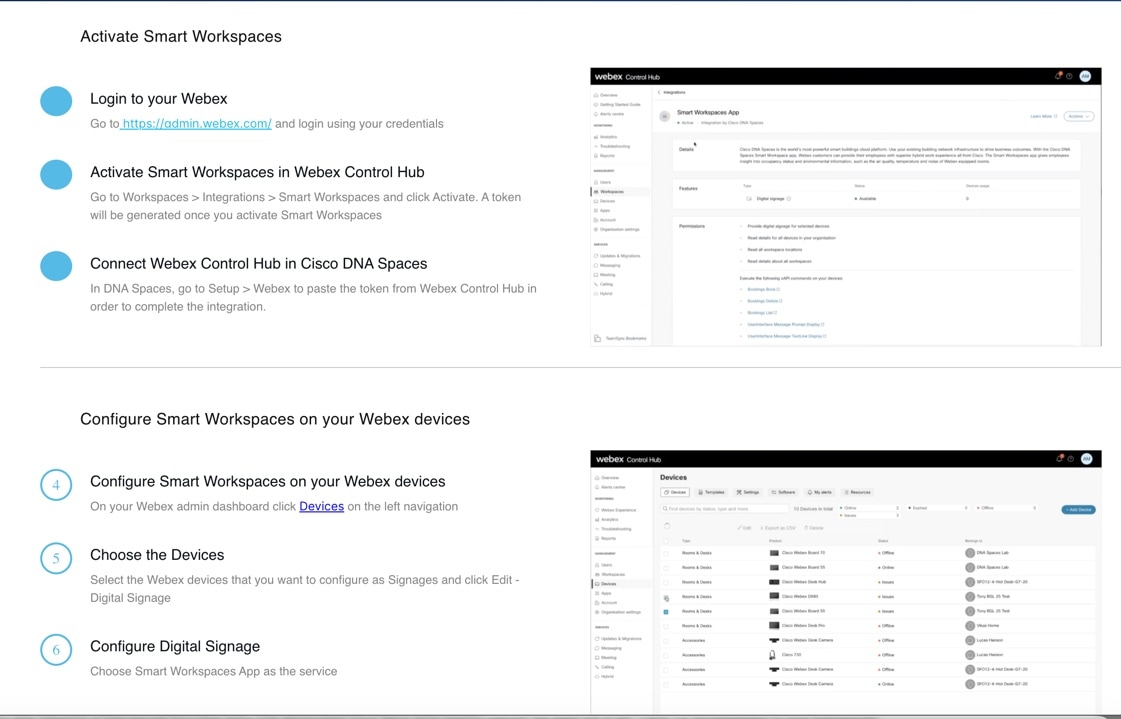
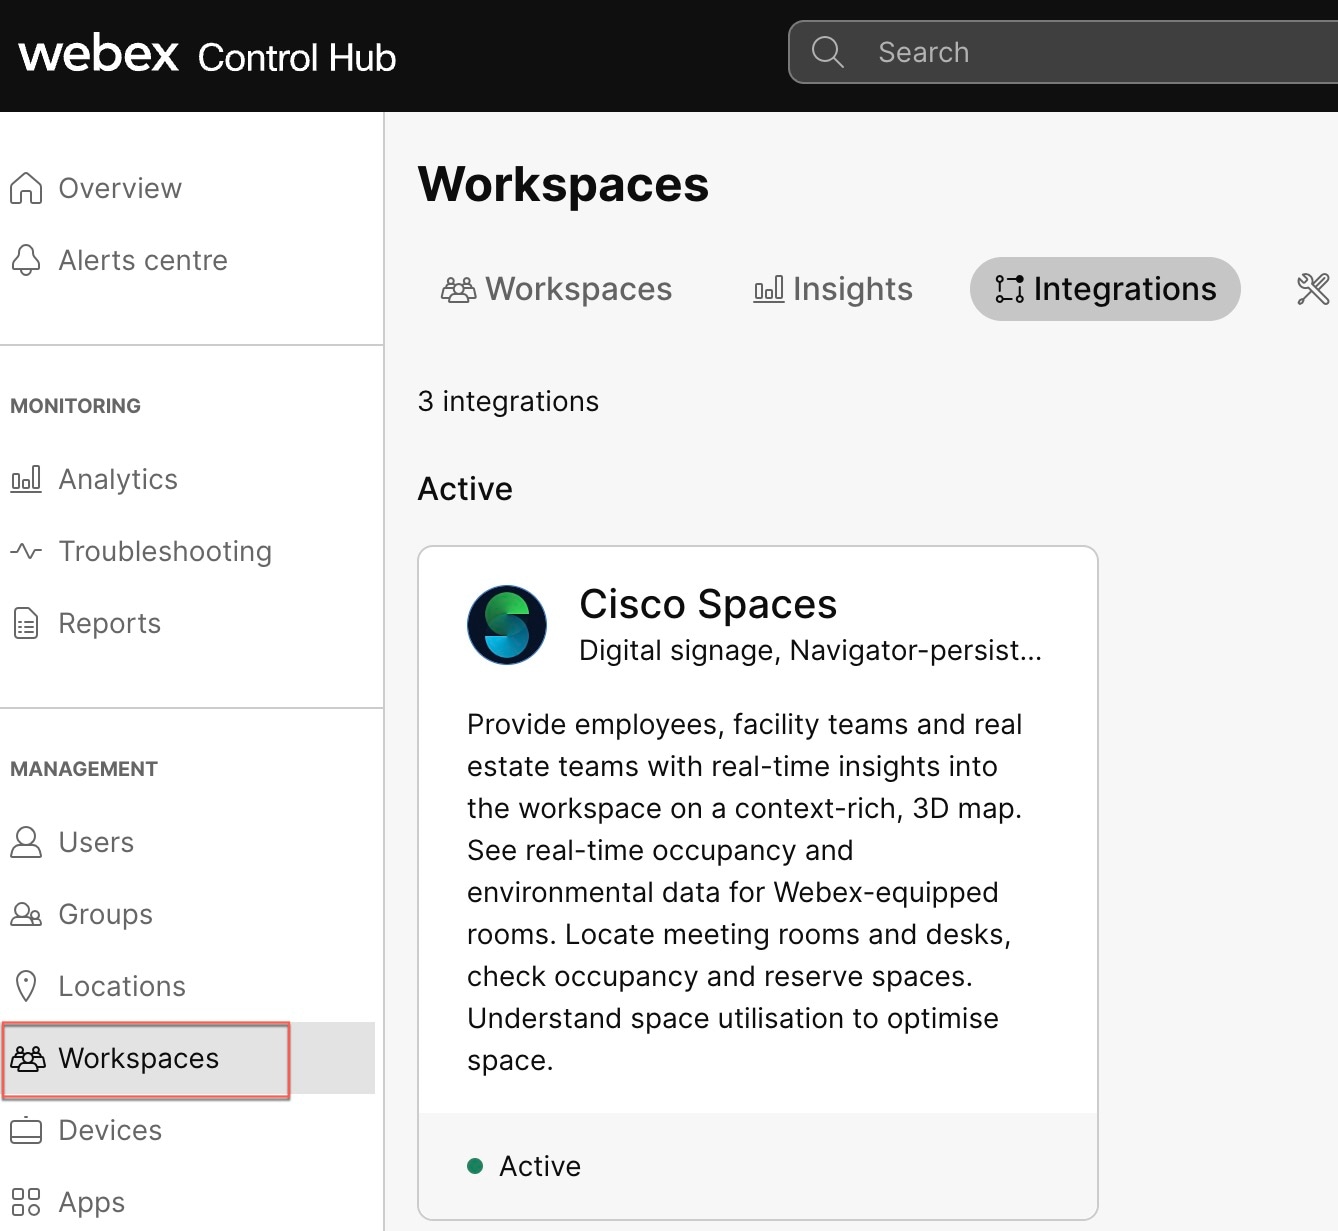
To get started with Space Experience, you need to connect your Webex Control Hub account, then configure Smart Workspaces signage.
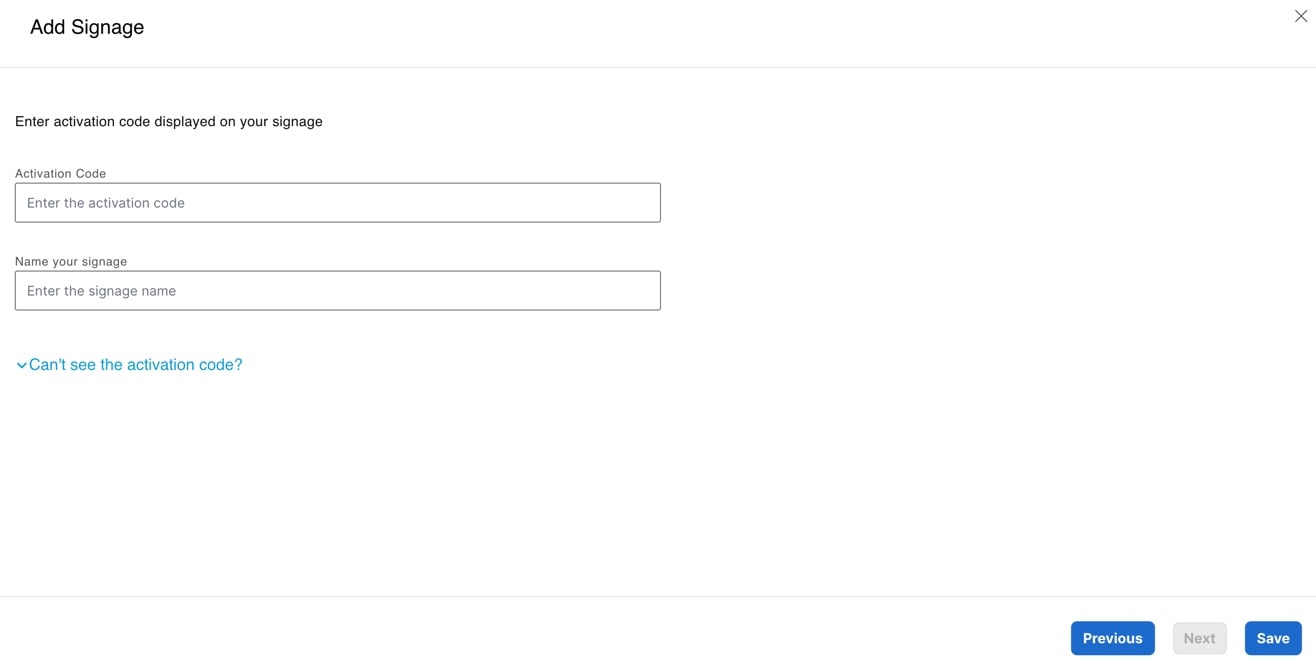
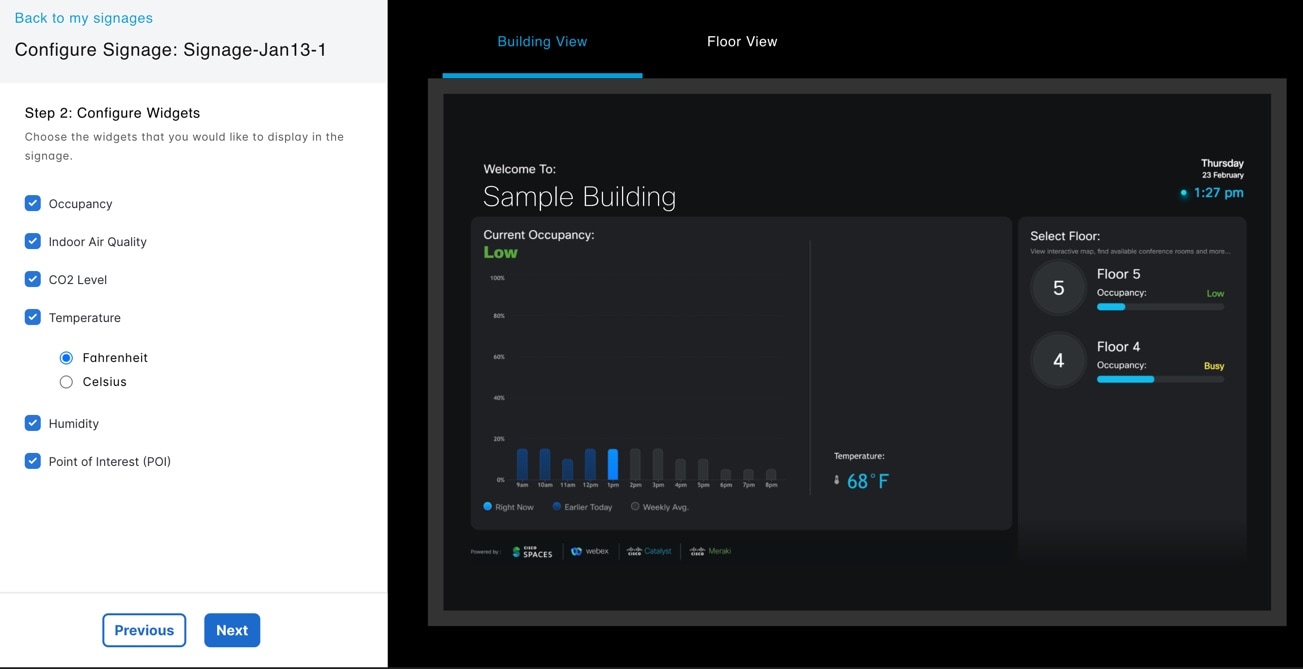
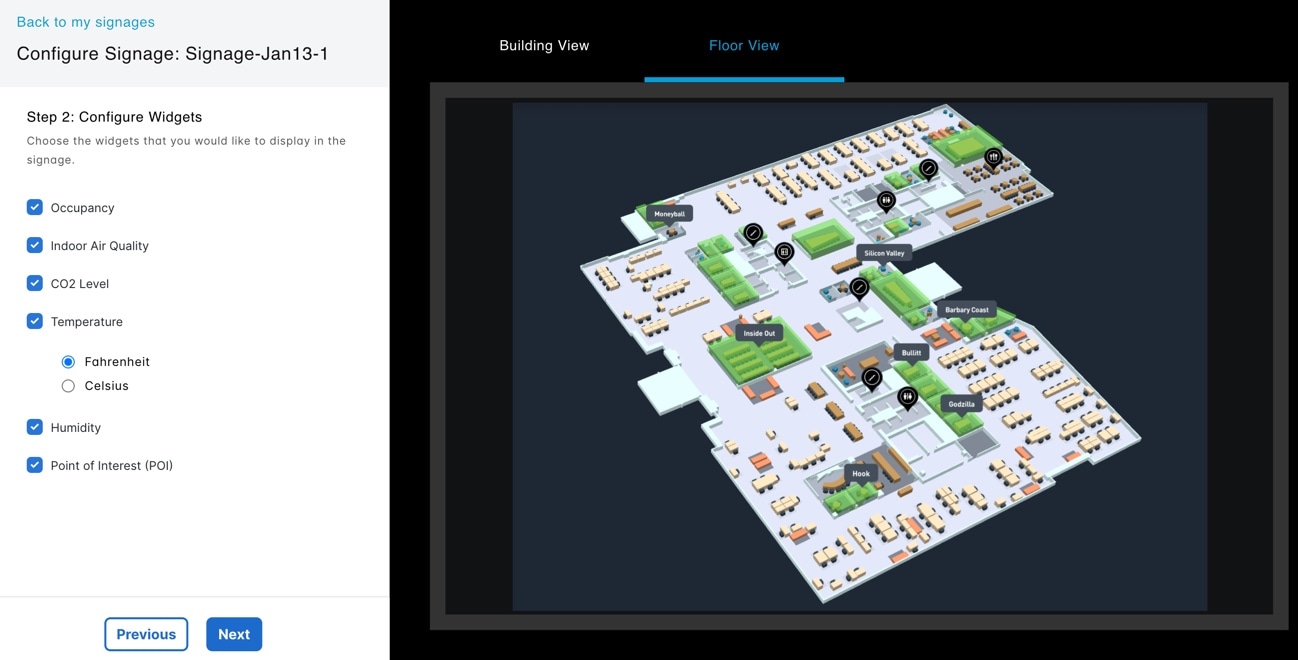
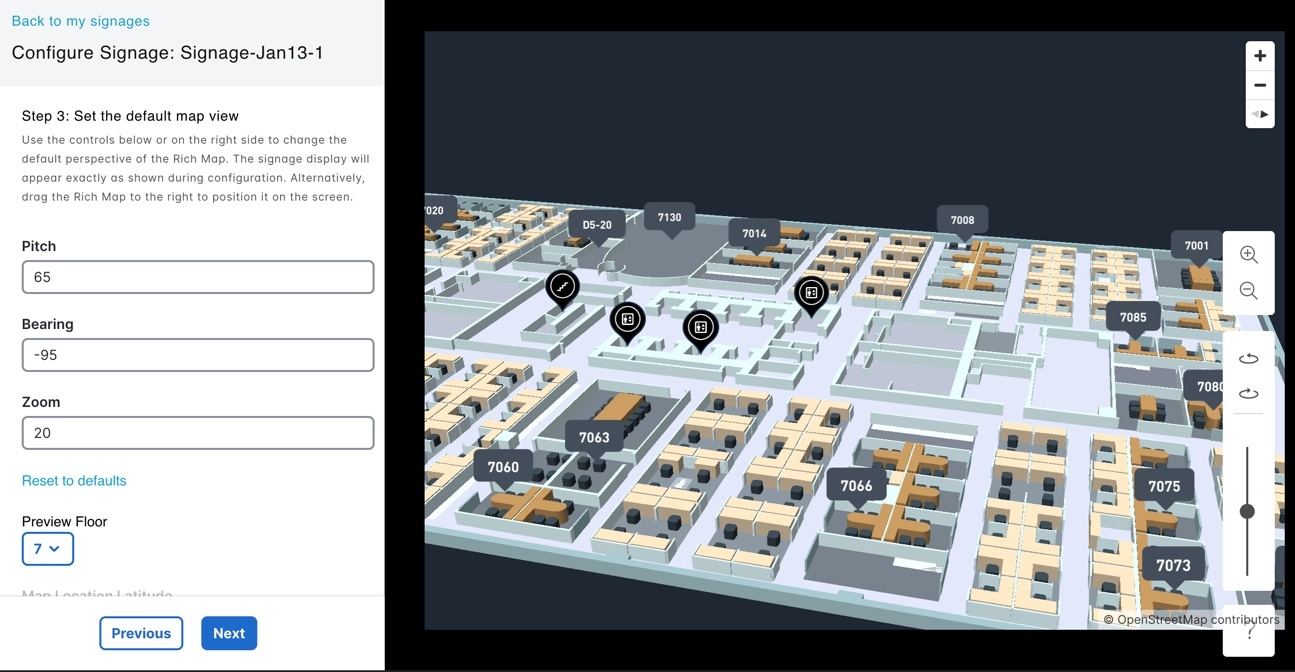
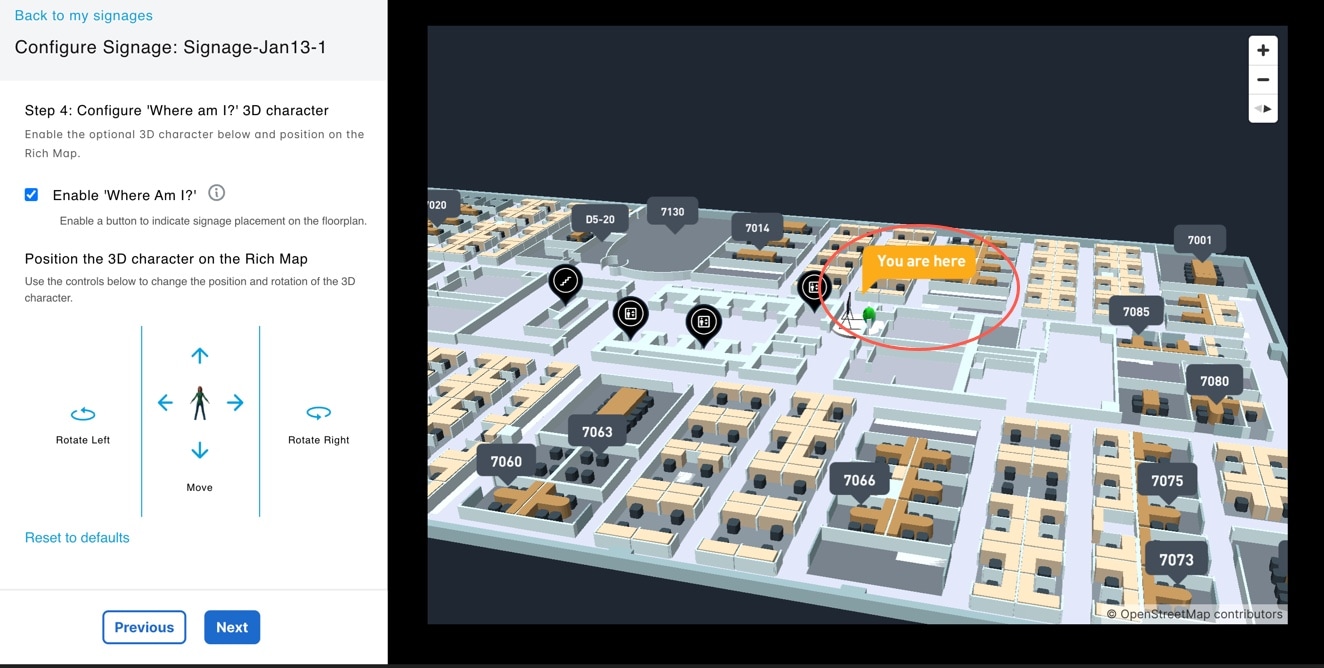
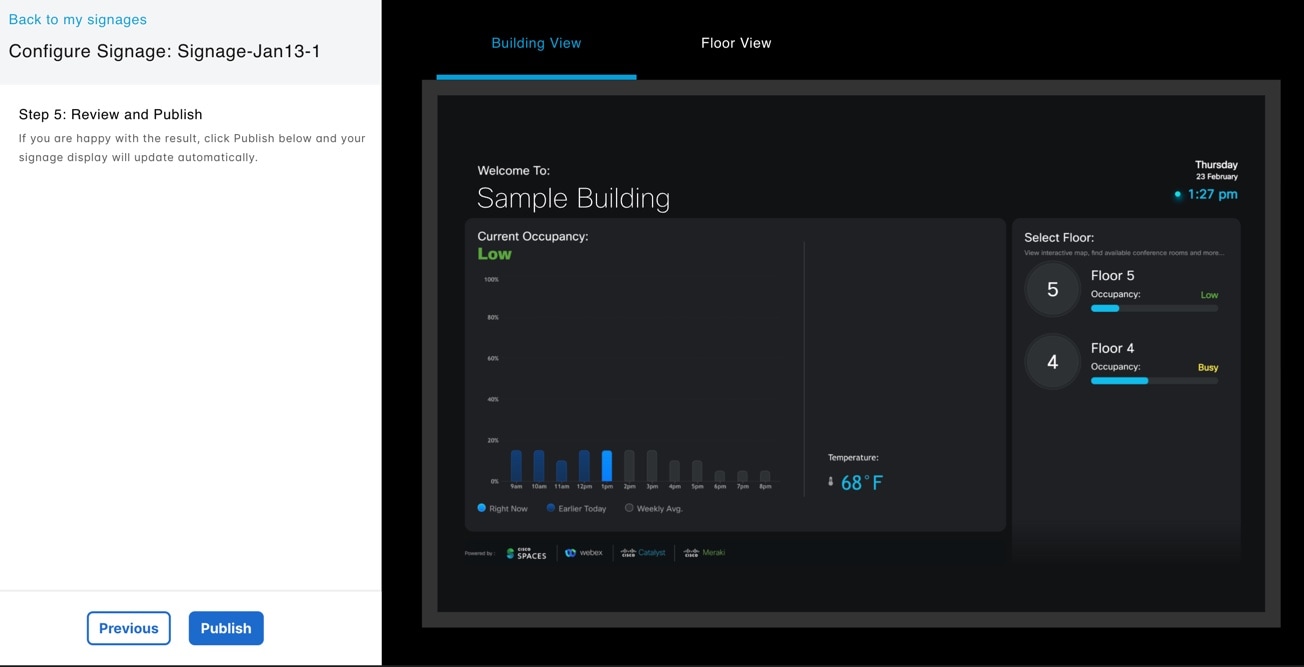
Follow the on-screen instructions to activate your first signage.


 Feedback