User Management

User Management

The User Management section in the Asset Tracker app allows administrators to manage user access, roles, and location permissions. Use this section to view existing users, create roles, invite users, assign role-based access, and control which asset categories and locations users can access.
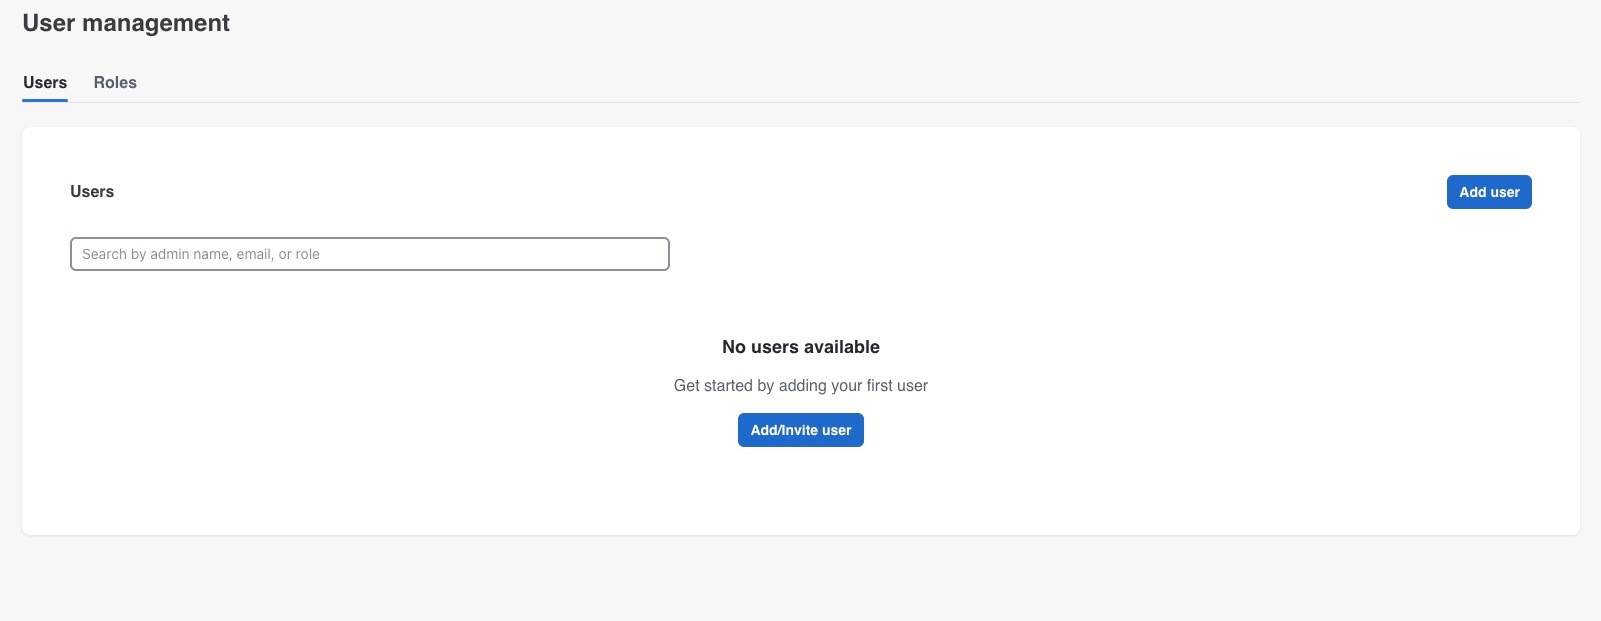
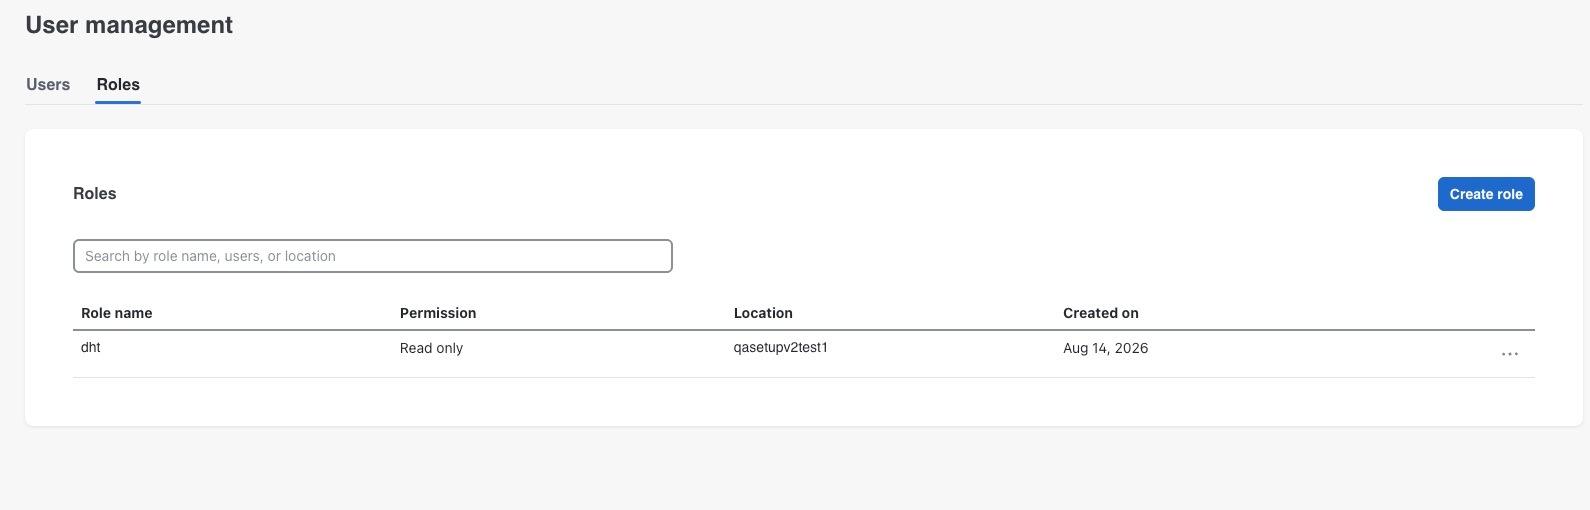
Figure 1. User Management
The User Management page lists users, roles, locations, and invitation status.

Key features

  • Search functionality: Use the Search bar to quickly search and filter users or roles.

  • Role management: Create roles and define access based on categories, locations, and permission levels.

  • New user invitation workflow: Invite users by entering the email address, selecting a role, and assigning location access.

  • User attributes: Displays user details such as Name, Email, Role, Location, and Invitation Status.

  • Pagination controls: Use pagination controls to navigate through the user list.

  • A+ user support: Displays users provisioned through Cisco Spaces A+ user management and applies their assigned Asset Tracker and location permissions.

A+ user support

Asset Tracker supports A+ users who are provisioned at the Cisco Spaces account level. An A+ user can access Asset Tracker when the user is assigned a Cisco Spaces role that includes access to the Asset Tracker app and the applicable locations.

A+ users appear in the Users tab in User Management. Their Asset Tracker access and location scope are derived from the role assigned in Cisco Spaces. Manage the account-level role and location access for an A+ user from Admin Management in Cisco Spaces.

Users invited directly from Asset Tracker are managed by using the roles, asset categories, locations, and permission levels configured in the Asset Tracker User Management section.

For information about creating Cisco Spaces roles and assigning account-level user access, refer to Managing Cisco Spaces Users and Accounts in the Cisco Spaces Configuration Guide.


Note


You cannot modify the account-level role or location access of an A+ user from Asset Tracker. To change this access, use Admin Management in Cisco Spaces.


Send a user invitation

Add a new user to the Asset Tracker app by sending an invitation with the appropriate role and location permissions.

Use this procedure when you need to add a new user to the Asset Tracker app and provide the appropriate access permissions.


Note


Use this procedure to invite a user who will be managed through Asset Tracker User Management. If the user is an A+ user, assign Asset Tracker access and the required location scope from Admin Management in Cisco Spaces. Do not send a second invitation from Asset Tracker to an existing A+ user.


Procedure


Step 1

On the Asset Tracker app, choose User Management from the left-navigation menu.

The Users tab window is displayed.

Step 2

In the Users tab, click Add user.

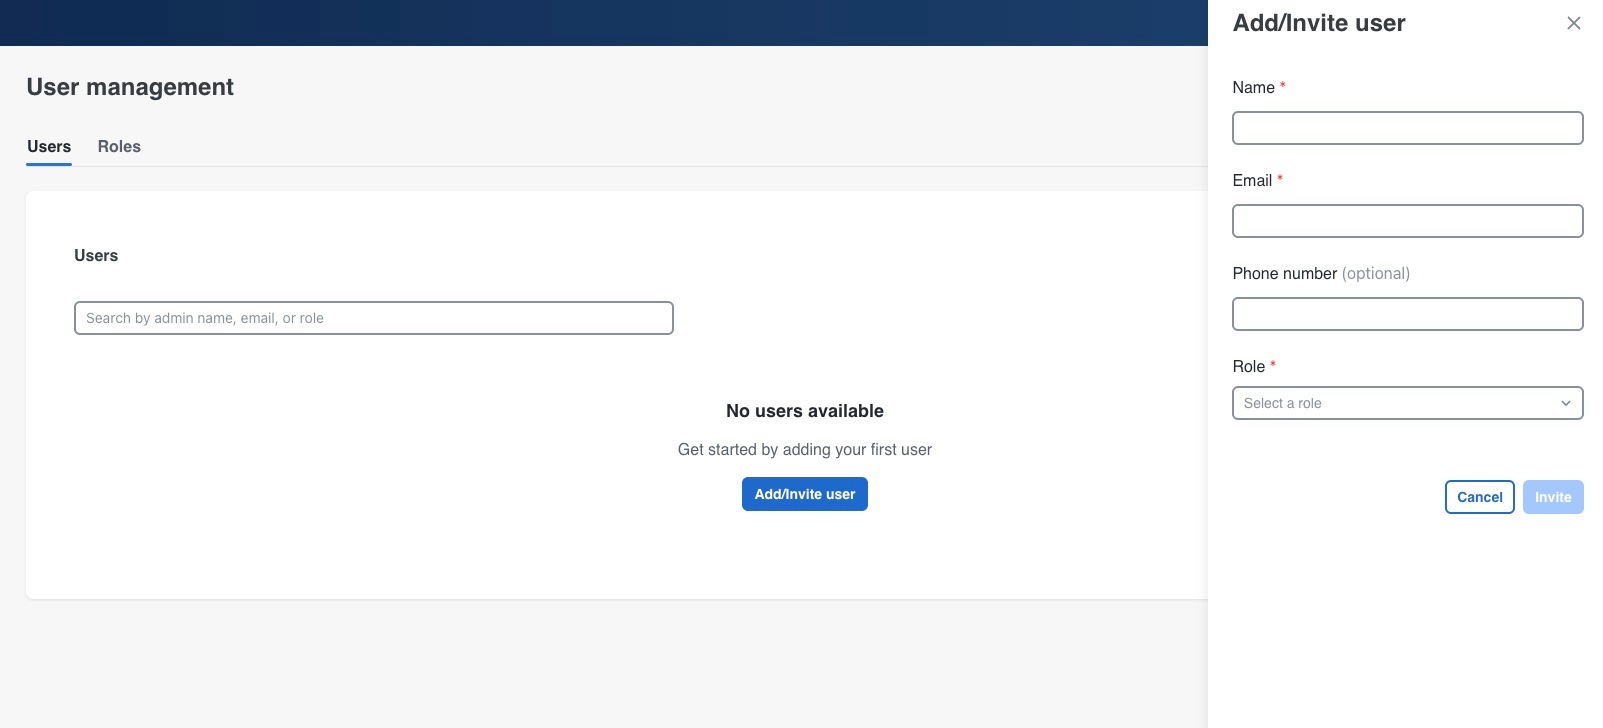
Figure 2. Add User
The Add User window shows fields to enter an email address and choose a role.
A slide panel appears on the right side of the window.

Step 3

In the Add/Invite user slide panel, complete these fields.

  1. Name: Enter the name.

  2. Email: Enter the email address.

  3. (Optional) Phone number: Enter the phone number.

  4. Role: Select a role from the drop-down list.

Step 4

Click Invite.


The invitation is sent to the user. After the user accepts the invitation, the user appears in the Users tab with the assigned Asset Tracker role and location access.

Create Role

Procedure


Step 1

On the Asset Tracker app, choose User Management from the left-navigation menu.

The Users Management window is displayed.

Step 2

In the Users Management window, click Roles tab.

Step 3

In the Roles tab, click Create Role.

Figure 3. Create Role
The Create Role workflow shows the steps to define role permissions and access.
The Create Role window is displayed.

Step 4

In the Role details section, complete these fields.

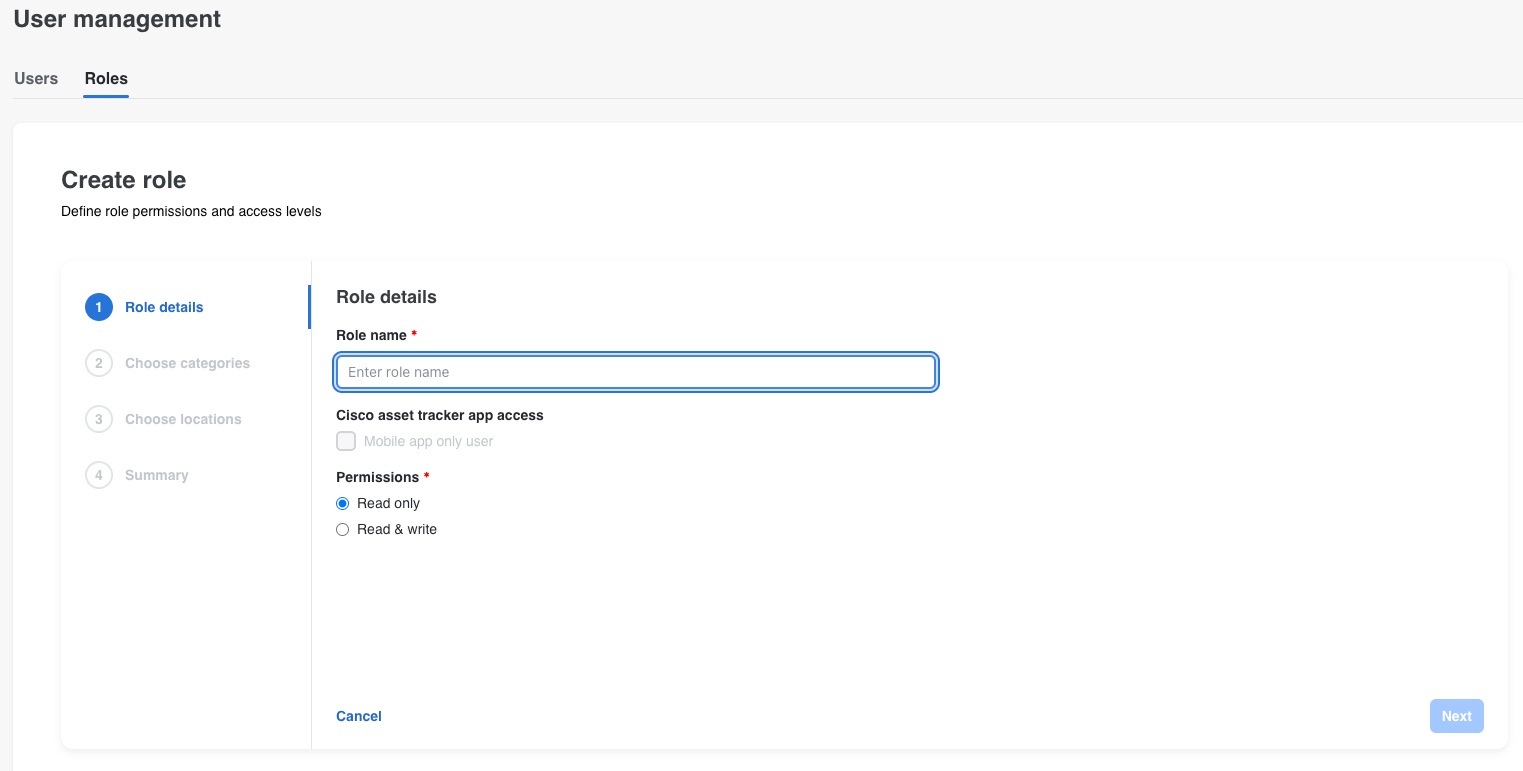
Figure 4. Role details
The Role details step shows role name, app access, and permission options.
  1. Role name: Enter the role name.

  2. Cisco asset tracker app access: Check the Mobile app only user check box.

    Note


    Users with this option can access only the Cisco Asset Tracker mobile app and cannot access the Asset Tracker web dashboard.

  3. Permissions: Choose Read only or Read & Write.

Step 5

Click Next.

Step 6

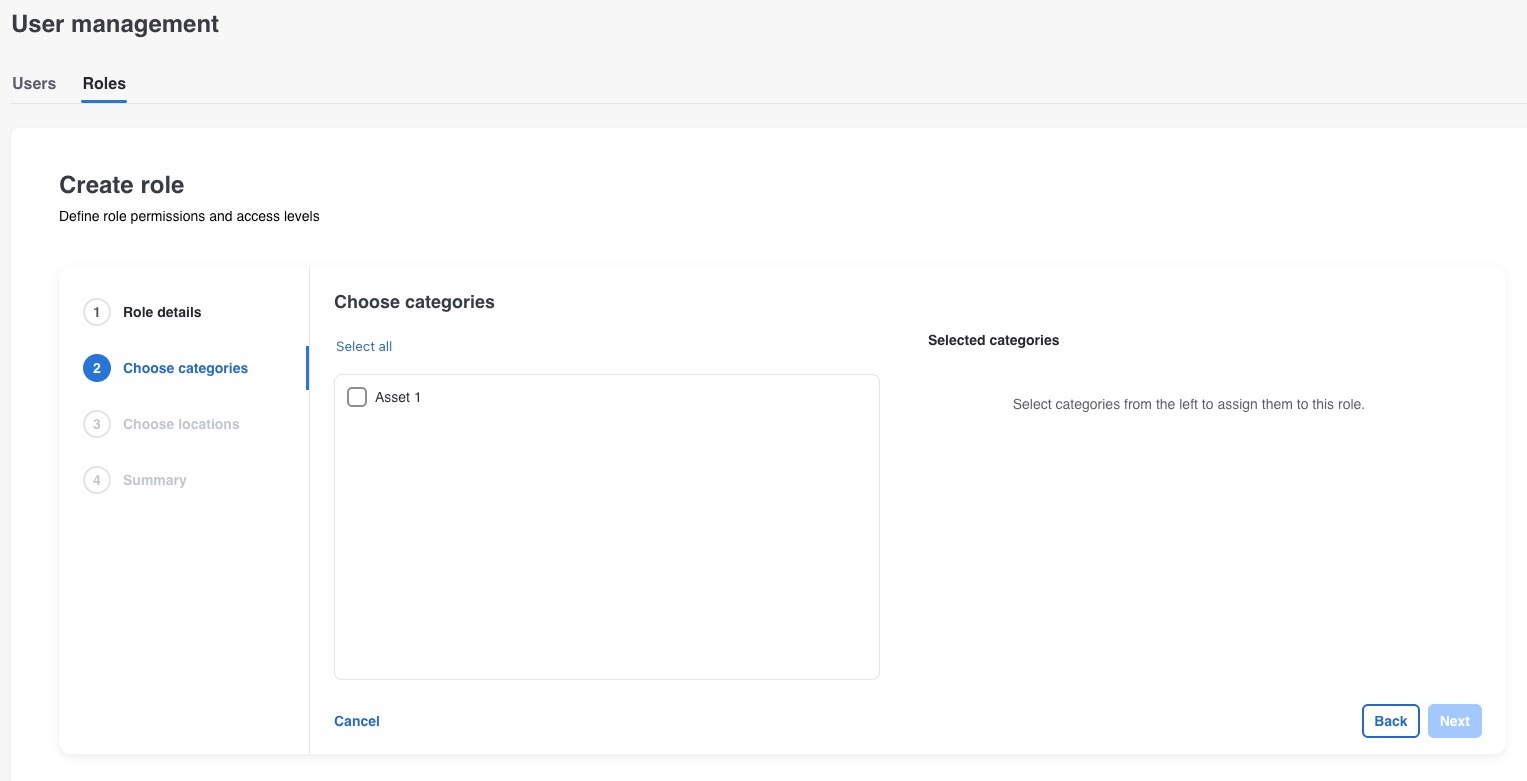
In the Choose categories section, select the asset categories from the list.

Figure 5. Choose categories
The Choose categories step shows the categories that can be assigned to the role.

Step 7

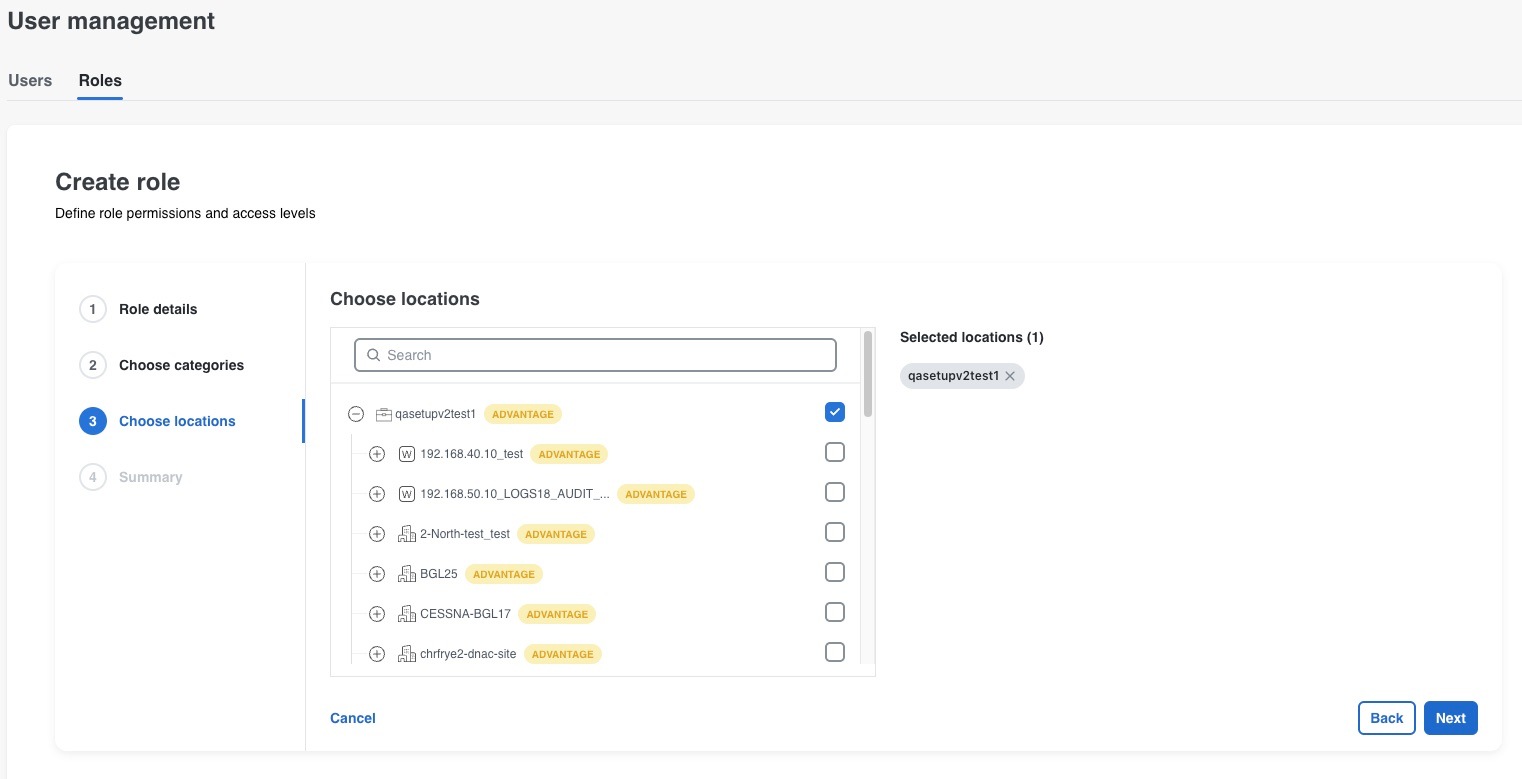
In the Choose locations section choose the locations that users with this role can access.

Figure 6. Choose locations
The Choose locations step shows the locations that can be assigned to the role.

Step 8

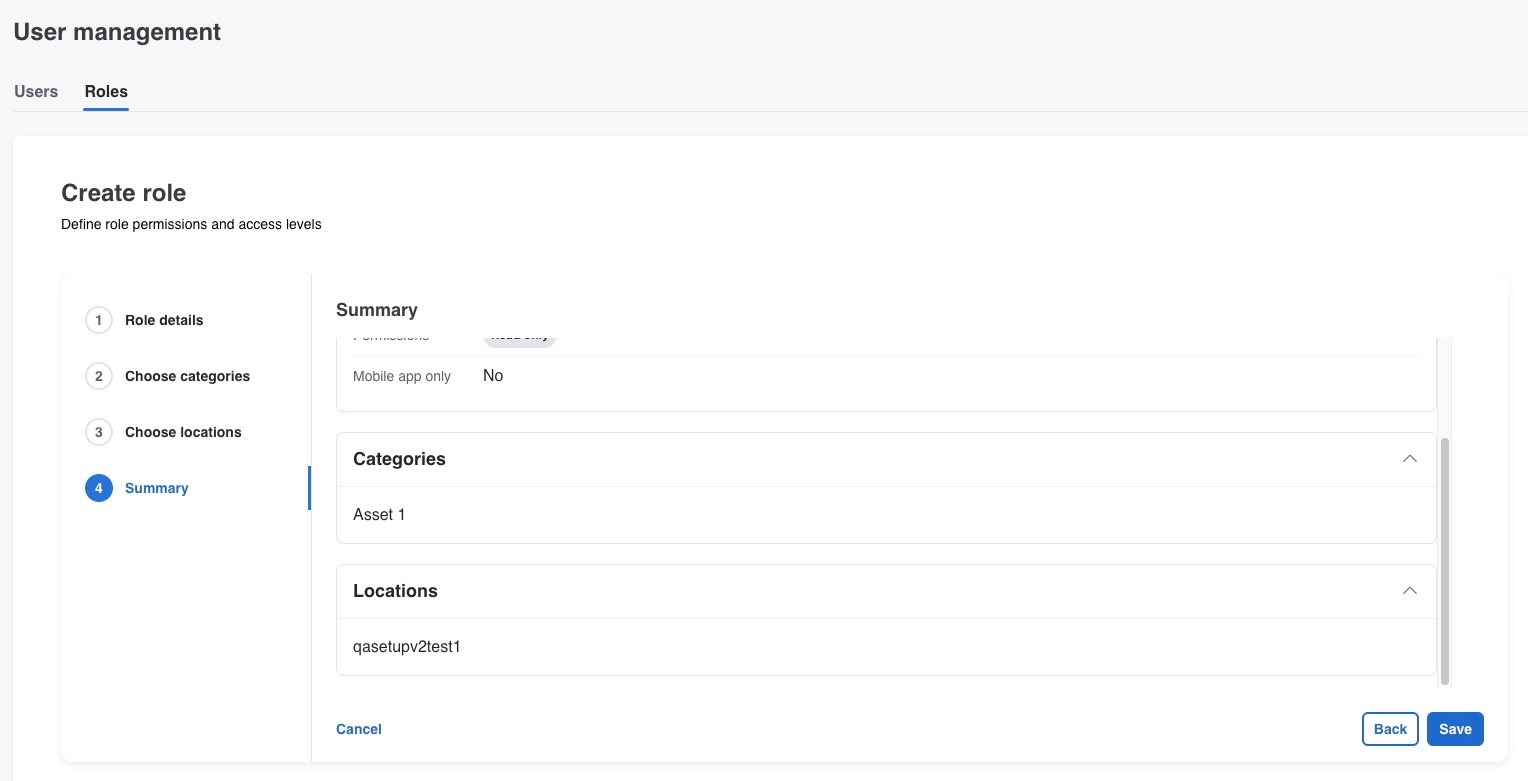
In the Summary section, review the role configuration.

Figure 7. Summary
The Summary step shows the role configuration before the role is created.

Step 9

Click Save.