
Mount the Cisco ISO image on an M6 appliance
You perform this task when installing Cisco CMX software on an M6 appliance. Mounting the ISO image enables the appliance to boot from the installation media and proceed with the Cisco CMX setup. This step ensures the correct operating environment is ready before starting the deployment process.
Before you begin
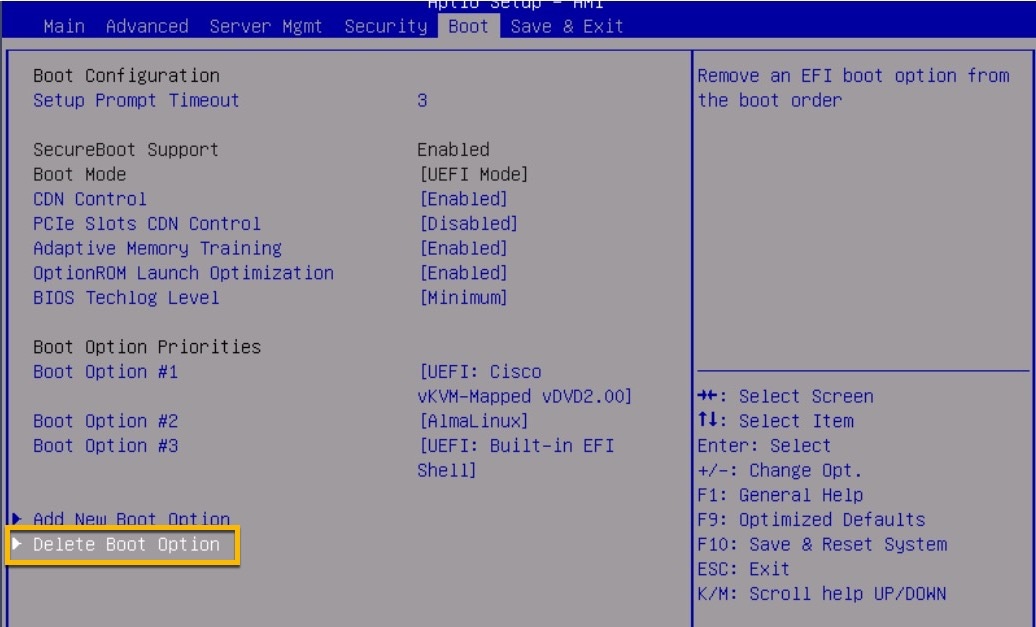
Before you start the installation, we recommend that you manually configure the boot order. The Cisco CMX ISO image deployment is supported only on M6 devices.
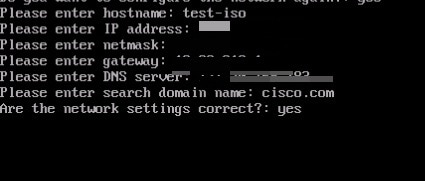
Follow these steps to mount the Cisco ISO image.
Procedure
|
Step 1 |
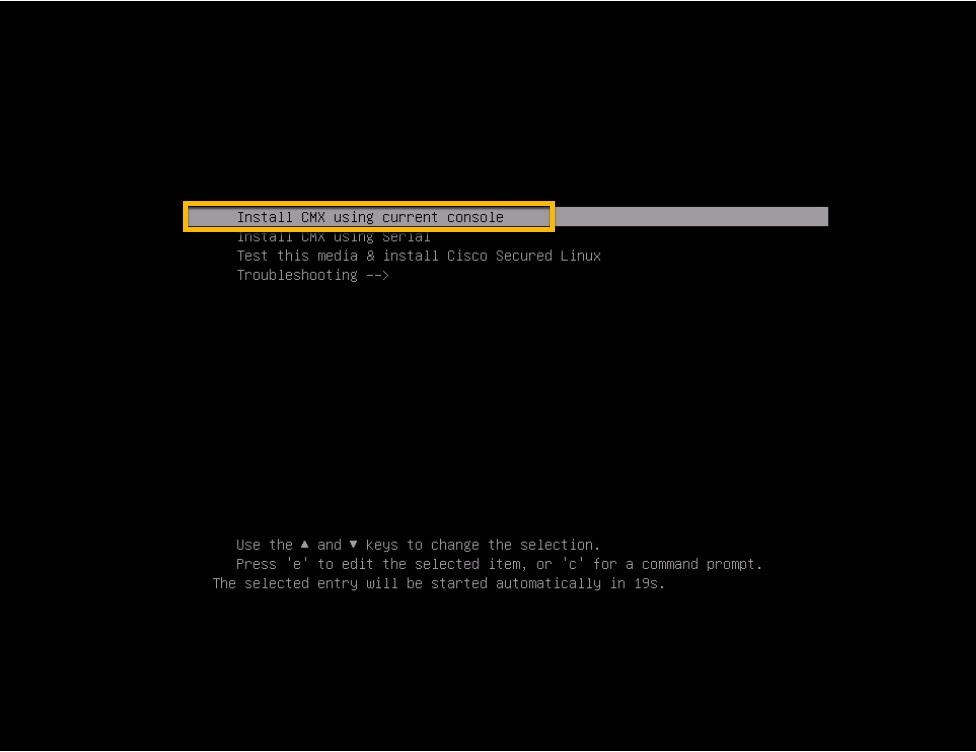
Download the Cisco CMX 11 image from Download Software page. |
|
Step 2 |
Power up the Cisco CMX M6 appliance and configure the CIMC IP Address and user credentials. |
|
Step 3 |
Log in to CIMC IP using Internert Explorer and from the left pane, click tab. |
|
Step 4 |
From the Configured Boot Mode drop-down list, choose:
|
|
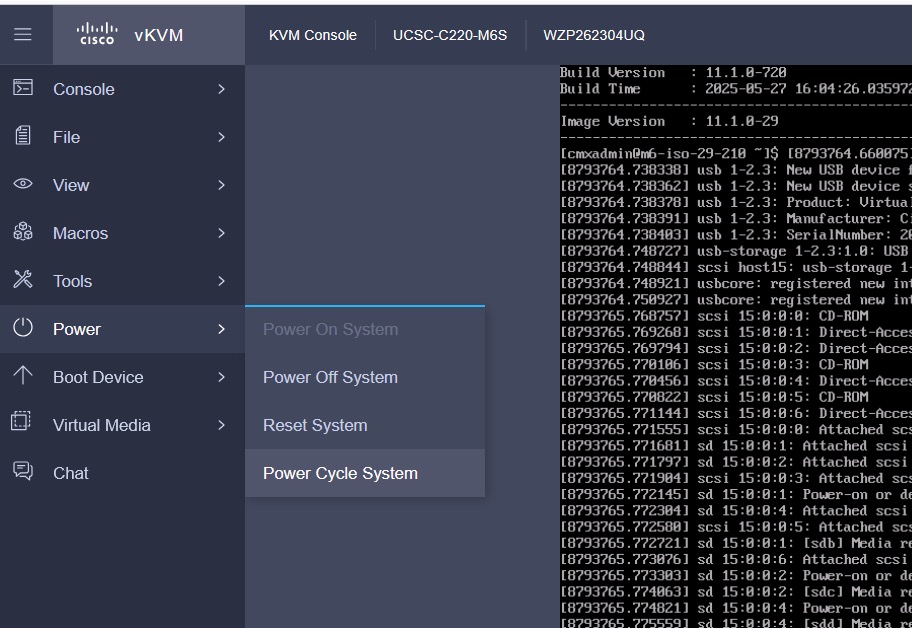
Step 5 |
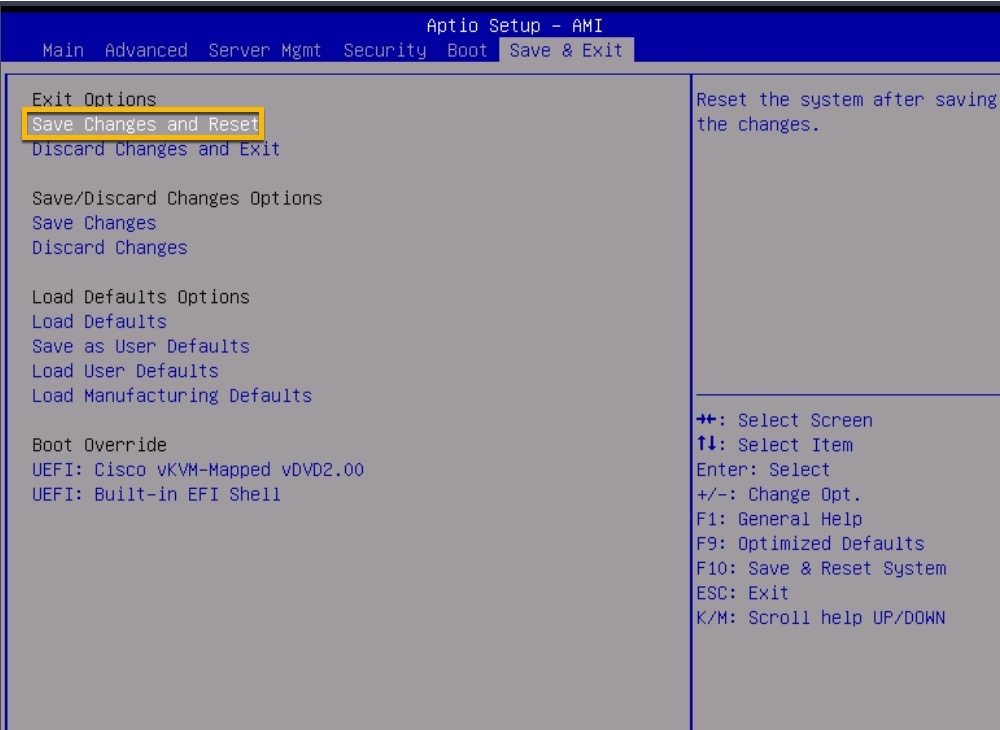
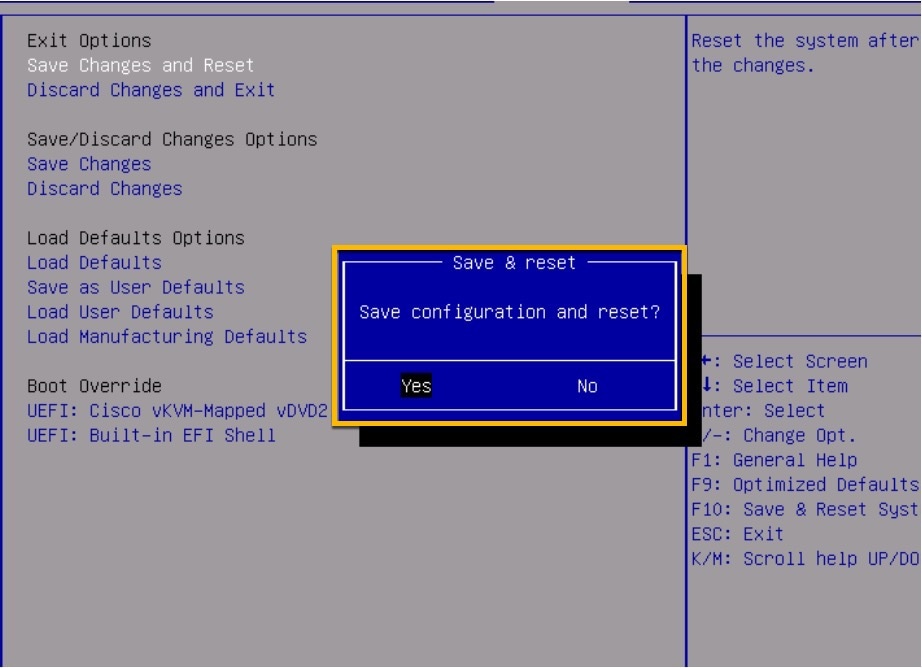
Follow the on screen instructions to reboot the system. 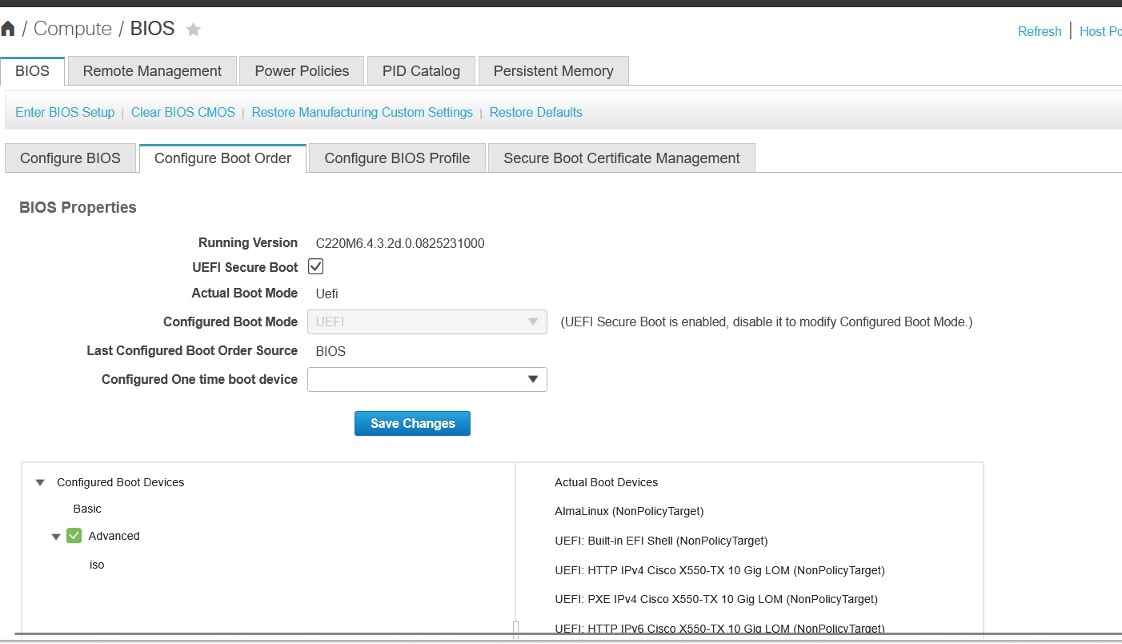
|
|
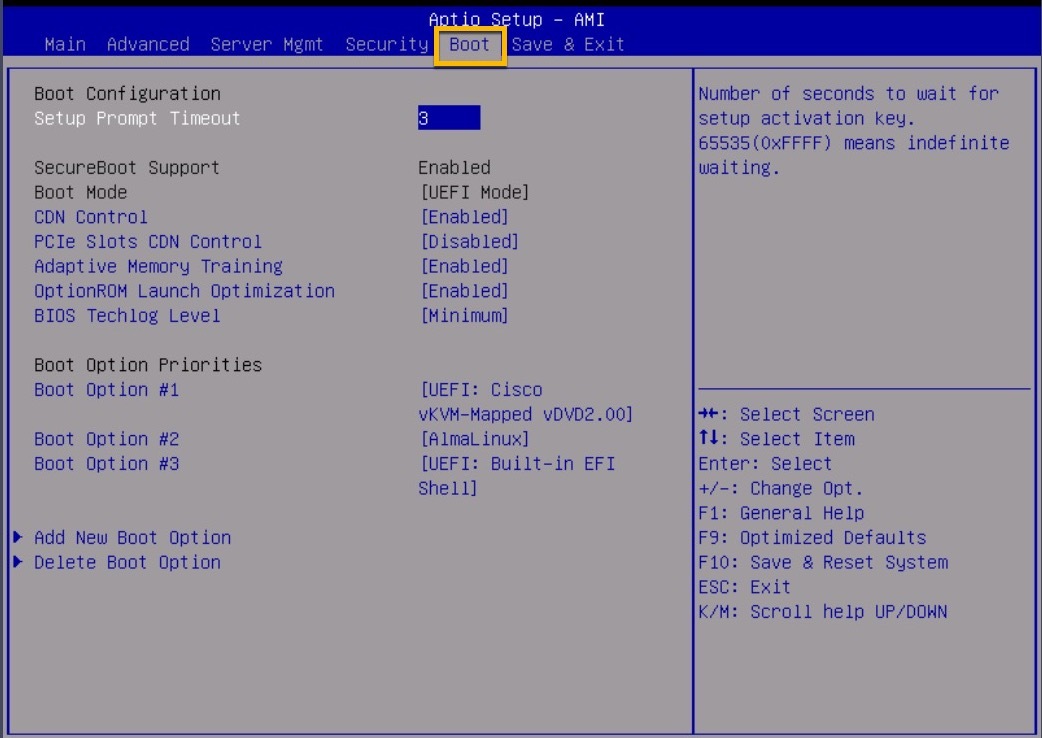
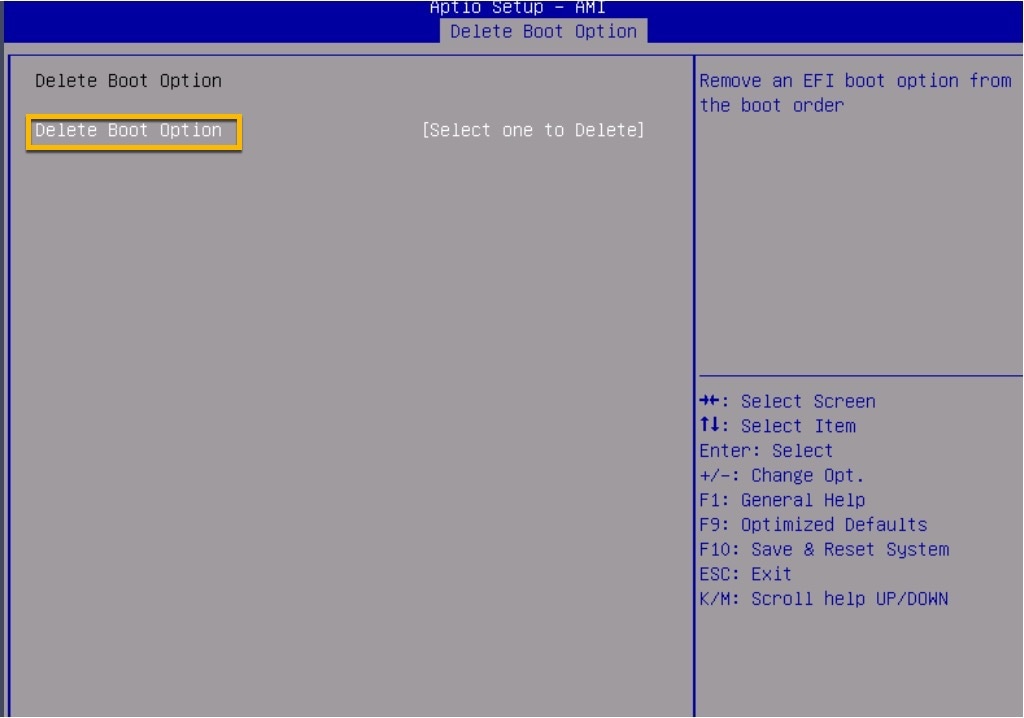
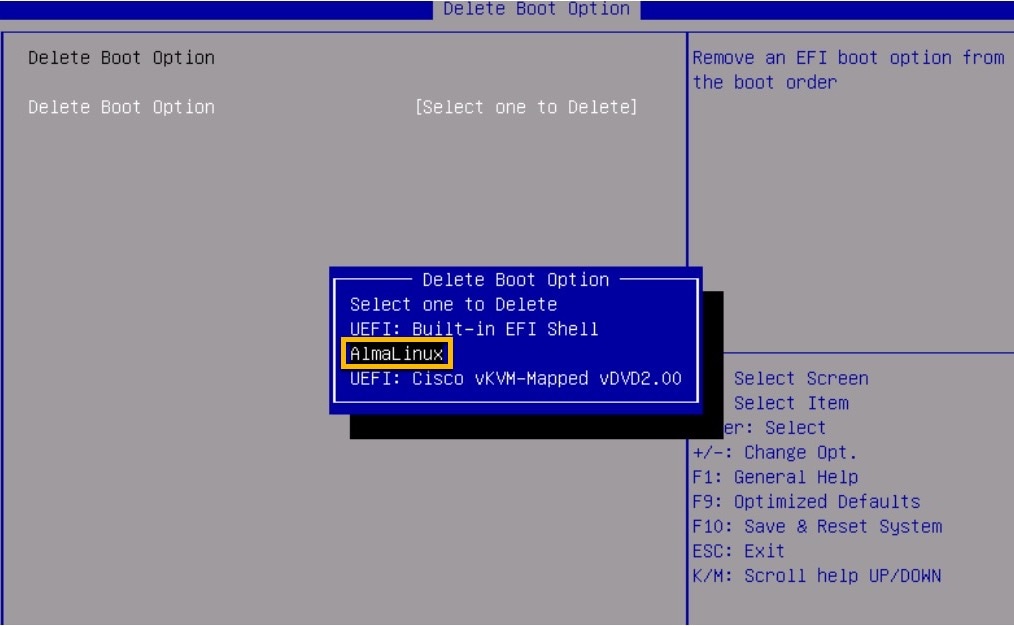
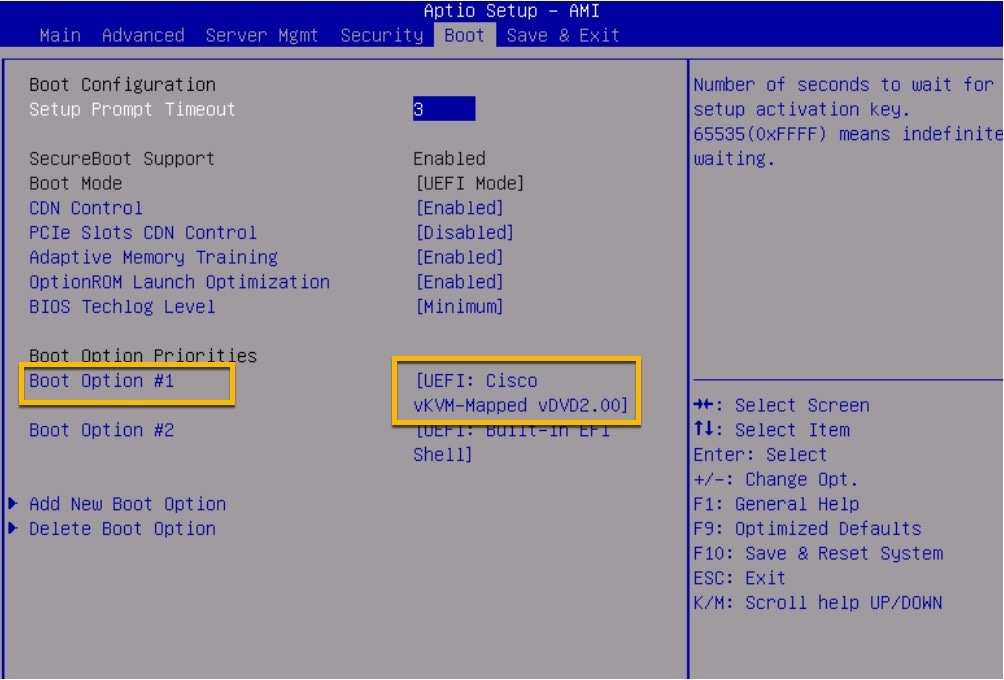
Step 6 |
Click Configure Boot Order. The option is displayed at the right end of the window.
|
|
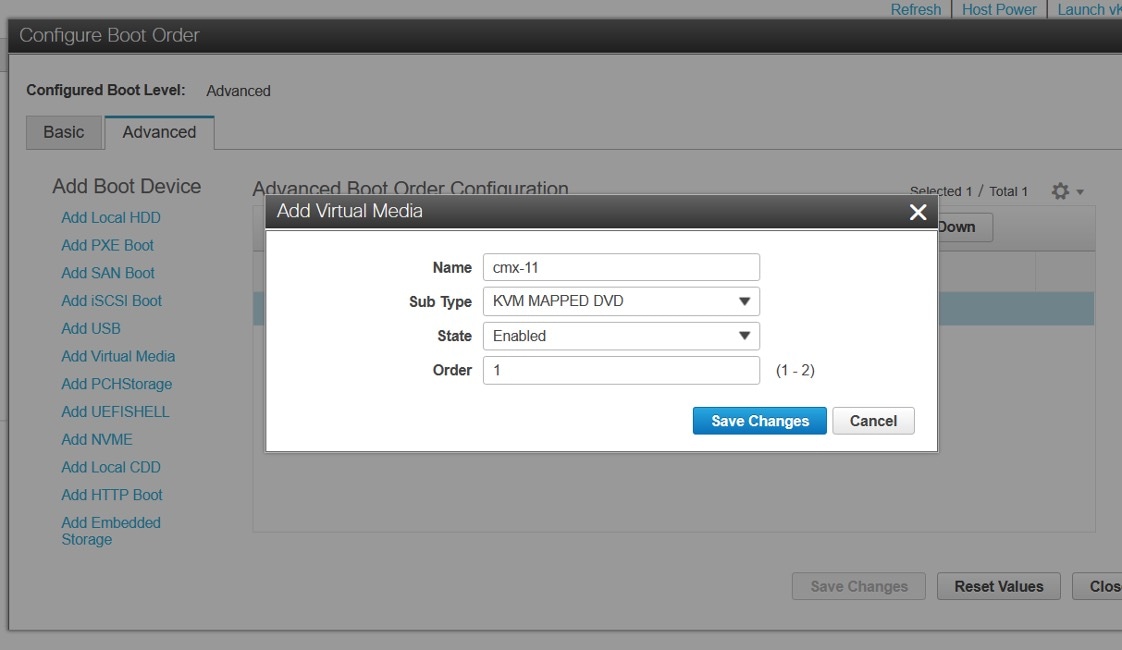
Step 7 |
To map the locally downloaded CMX ISO, click . 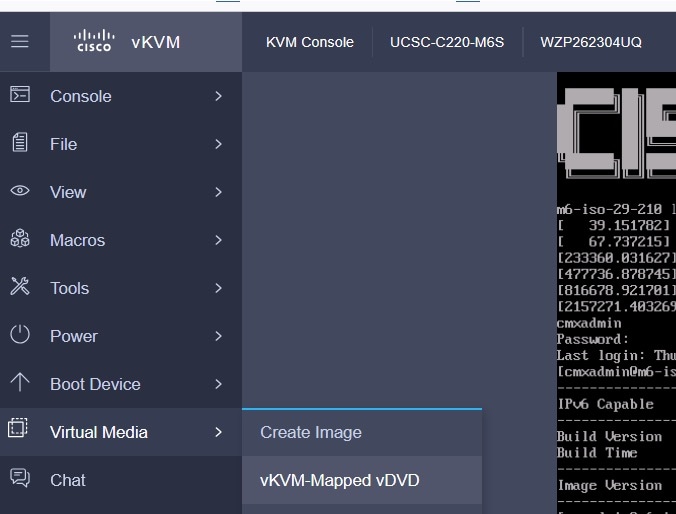
|
|
Step 8 |
Use the Browse option to select the ISO file. 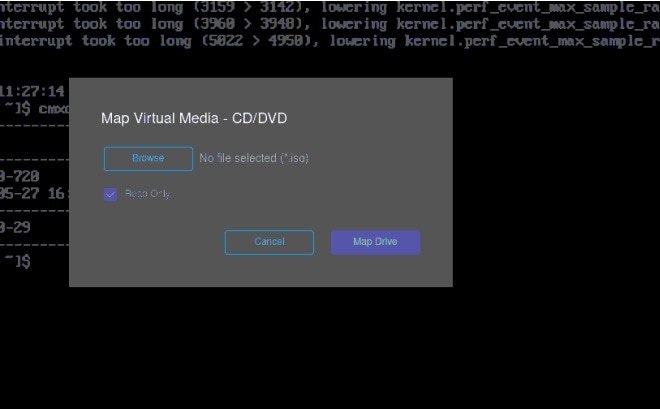
|
|
Step 9 |
To map the selected ISO file, click Map Drive. 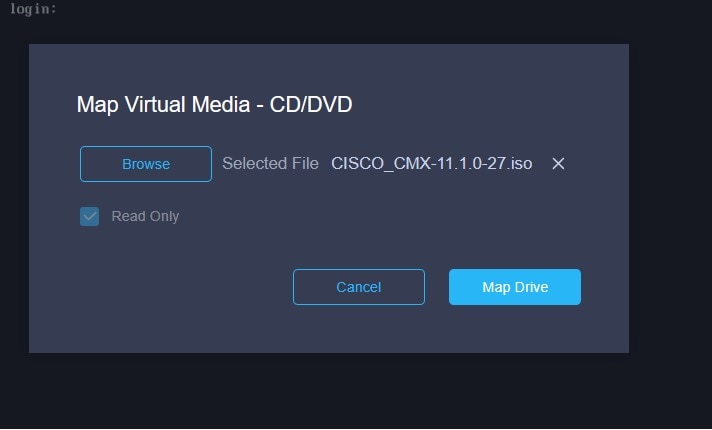
|


 Feedback