- DMM User's Guide Preface
- DMM User's Guide Overview
- Understanding the Digital Media Manager
- Managing User Accounts
- Create Content Offering
- Creating Playlists
- Categorizing Content
- Customizing Video Portal
- Managing Deployments
- Config Settings
- Linking to the Video Portal
- Setting Up the DME 1000 and DME 2000 Encoders
- Setting Up Live Events Using a DME 1000 or DME 2000 Encoder
- Setting Up Live Events Using Third-Party Live Streams
- Archive and Delete
- Video Reports Metrics Overview
- DMM User's Guide Glossary
Customizing the Video Portal
The Digital Media Manager allows you to design and control the user interface of the Video Portal. This includes customizing the Video Portal background and logos as well as ticker messages and interstitials for highlighting videos or communicating messages to the end user. The DMM manages this through the USER INTERFACES page.
Access the USER INTERFACES page using the user interfaces secondary navigation link under the VIDEO PORTAL tab of the primary navigation bar or using the User Interfaces link on the DMM home page.
Creating a New Video Portal Interface
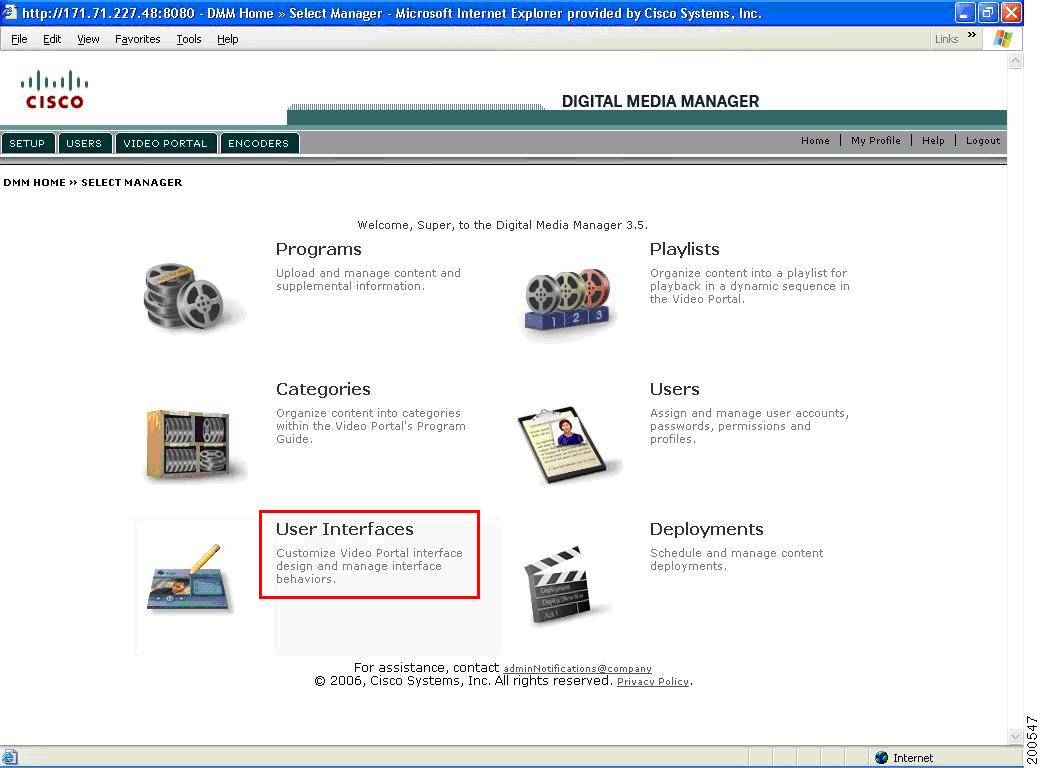
Step 1 ![]() Click on the user interfaces secondary navigation link or the User Interfaces link on the DMM Home Page to access the USER INTERFACES page (see Figure 7-1).
Click on the user interfaces secondary navigation link or the User Interfaces link on the DMM Home Page to access the USER INTERFACES page (see Figure 7-1).
Figure 7-1 Accessing the USER INTERFACES Page from the DMM Home Page
The Active Interface list opens by default sorted alphabetically by Name (see Figure 7-2).
Figure 7-2 Active Interface List
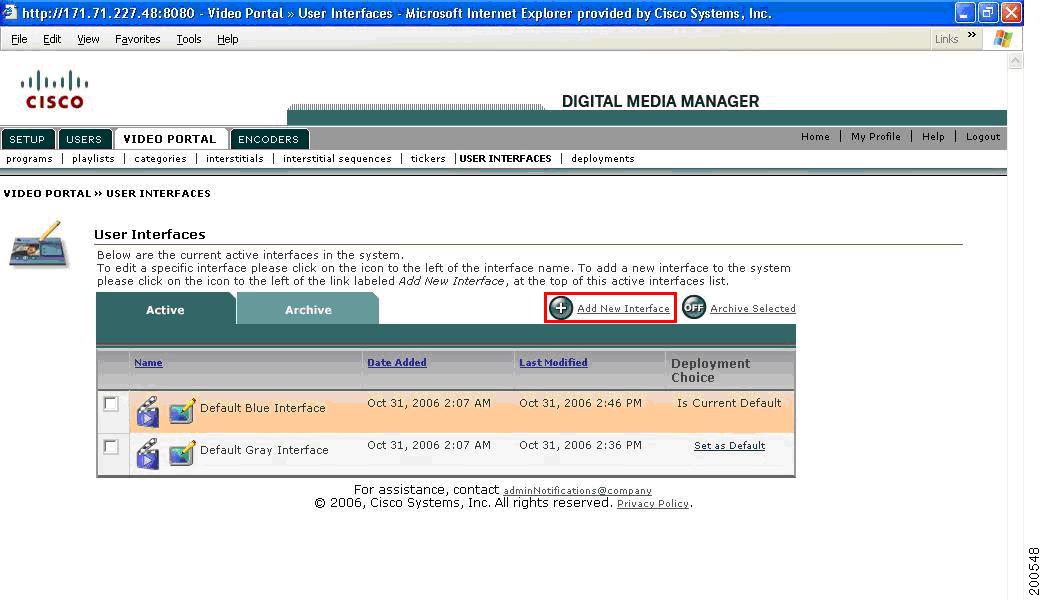
Table 7-1 describes the contents of this window:
Table 7-1 Field Description for Active Interface List
Step 2 ![]() Select Add New Interface from the upper right-hand corner of the Active Interface List (see Figure 7-3).
Select Add New Interface from the upper right-hand corner of the Active Interface List (see Figure 7-3).
Figure 7-3 Add a New Interface Window
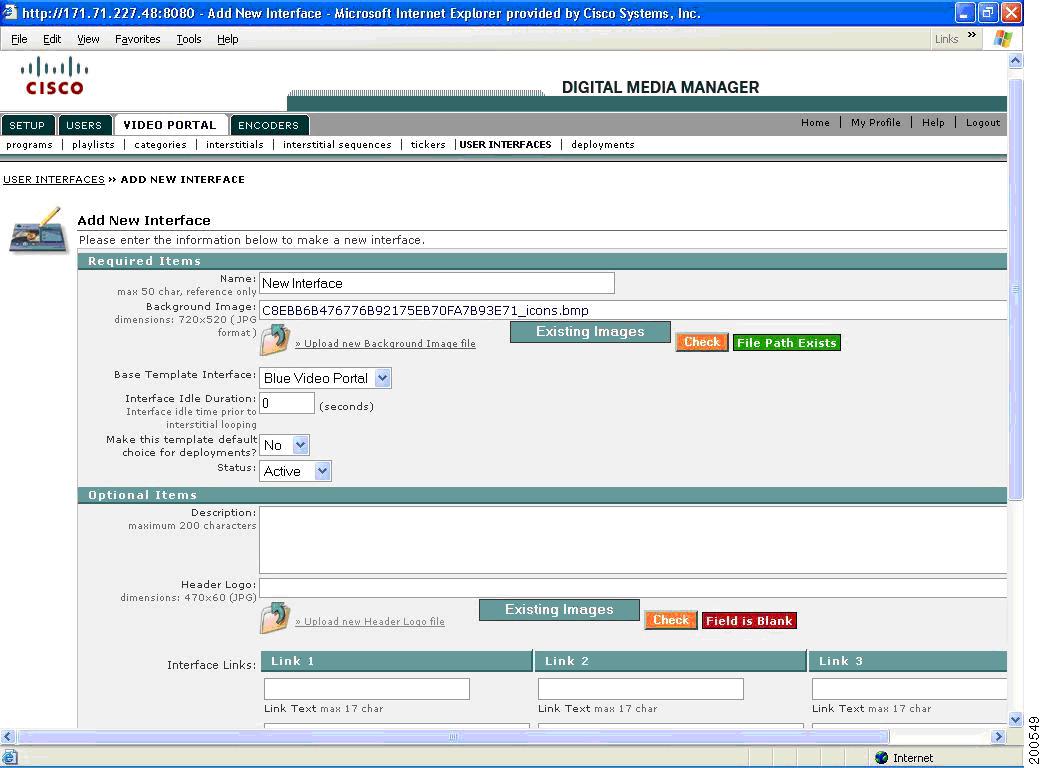
Step 3 ![]() Enter the Interface Name. The Interface Name can have a maximum of 50 characters and is for your reference only.
Enter the Interface Name. The Interface Name can have a maximum of 50 characters and is for your reference only.
Step 4 ![]() Select an Interface Background Image. You can use an existing image from the Image Library by clicking on the Image Library button, or click on the Upload icon to upload a new background image. Background images should be 720x520 pixel, non-progressive JPG format.
Select an Interface Background Image. You can use an existing image from the Image Library by clicking on the Image Library button, or click on the Upload icon to upload a new background image. Background images should be 720x520 pixel, non-progressive JPG format.
Step 5 ![]() Select the Check button to verify the Interface Background Image. If no file is given, the status message reads "Field is blank". If the field is invalid, the status message reads "File Path Does Not Exist". If the file is valid, the status message reads "File Path exists".
Select the Check button to verify the Interface Background Image. If no file is given, the status message reads "Field is blank". If the field is invalid, the status message reads "File Path Does Not Exist". If the file is valid, the status message reads "File Path exists".
Step 6 ![]() Select the Base Template Interface from the drop-down menu. This sets the template for the Video Portal's Playlist, Program Guide and Search Tabs, Viewing window, and other controls.
Select the Base Template Interface from the drop-down menu. This sets the template for the Video Portal's Playlist, Program Guide and Search Tabs, Viewing window, and other controls.
Step 7 ![]() Enter the time, in seconds, for which the interface must be idle before activating the interstitial sequence.
Enter the time, in seconds, for which the interface must be idle before activating the interstitial sequence.
Step 8 ![]() Select Yes or No to set this Interface as the default choice during deployment.
Select Yes or No to set this Interface as the default choice during deployment.
Step 9 ![]() Set the Interface Status. The default value is Active. Setting it to Inactive stores the new Interface in the Archived Interface List.
Set the Interface Status. The default value is Active. Setting it to Inactive stores the new Interface in the Archived Interface List.
Step 10 ![]() Enter the Interface Description. This field is for your reference only.
Enter the Interface Description. This field is for your reference only.
Step 11 ![]() Select a Header Logo to be displayed in the upper right corner of the Video Portal. Click on the Upload New icon or select an existing header logo. Logo images should be no larger than 470x60 pixel, non-progressive JPG format.
Select a Header Logo to be displayed in the upper right corner of the Video Portal. Click on the Upload New icon or select an existing header logo. Logo images should be no larger than 470x60 pixel, non-progressive JPG format.
Step 12 ![]() Select the Check button to verify the Header Logo. If no file is given, the status message reads "Field is blank". If the field is invalid, the status message reads "File Path Does Not Exist". If the file is valid, the status message reads "File Path exists".
Select the Check button to verify the Header Logo. If no file is given, the status message reads "Field is blank". If the field is invalid, the status message reads "File Path Does Not Exist". If the file is valid, the status message reads "File Path exists".
Figure 7-4 Header Logo and Web Links Page
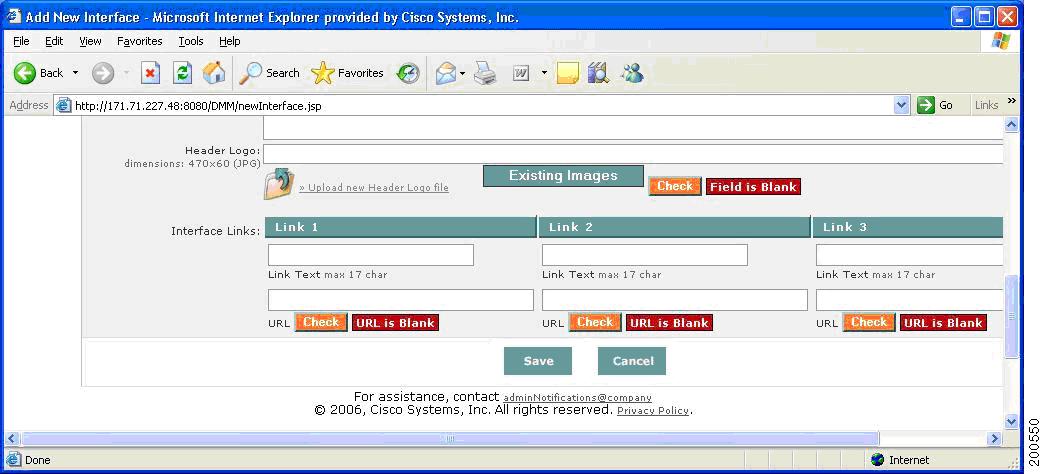
Step 13 ![]() The Video Portal supports up to three web Links, displayed in the lower right corner of the Video Portal. Enter the Link Text to be displayed, up to 17 characters. In the field below, enter the full URL path to the corresponding Link. These Link fields are optional.
The Video Portal supports up to three web Links, displayed in the lower right corner of the Video Portal. Enter the Link Text to be displayed, up to 17 characters. In the field below, enter the full URL path to the corresponding Link. These Link fields are optional.
Step 14 ![]() Click the Check button to verify the Web Link URLs. If no URL is given, the status message reads "URL is blank". If the URL is invalid, the status message reads "Server was not found" or "Cannot be verified". If the URL is valid, the status message reads "URL exists".
Click the Check button to verify the Web Link URLs. If no URL is given, the status message reads "URL is blank". If the URL is invalid, the status message reads "Server was not found" or "Cannot be verified". If the URL is valid, the status message reads "URL exists".
Step 15 ![]() Click on Save to submit and save all the metadata.
Click on Save to submit and save all the metadata.
The new Interface you just added appears in the Active Interface list (if the Interface Status was set to Active), or in the Archived Interface list (if the status was set to Inactive) in alphabetical order.
Creating a New Ticker
To create a new ticker, follow these steps:
Step 1 ![]() Click on the tickers secondary navigation link under the VIDEO PORTAL tab of the primary navigation bar to access the TICKERS page (see Figure 7-5).
Click on the tickers secondary navigation link under the VIDEO PORTAL tab of the primary navigation bar to access the TICKERS page (see Figure 7-5).
Figure 7-5 Accessing the Tickers from the Interface Manager
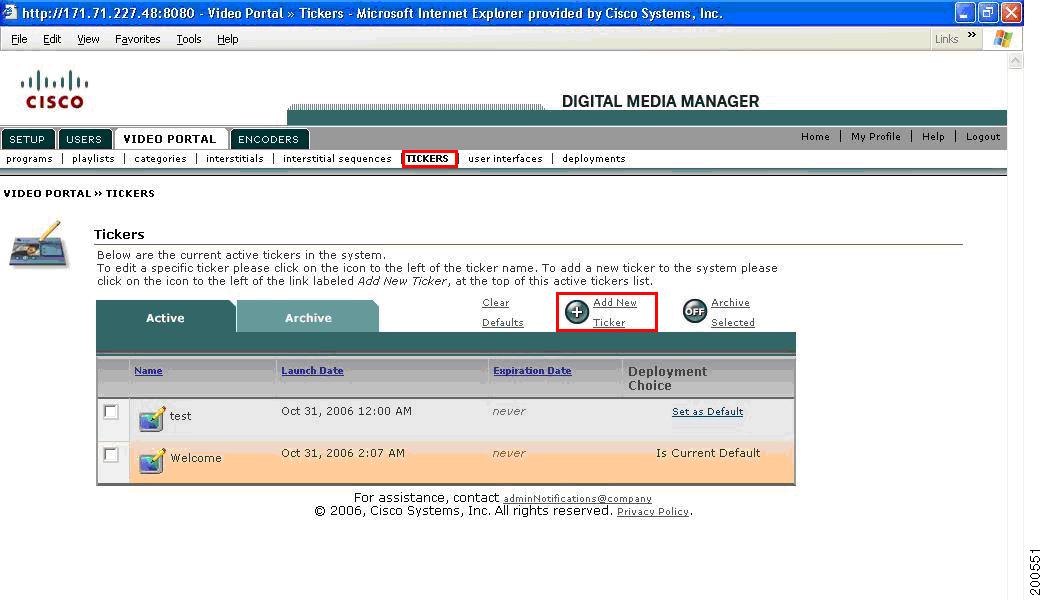
The Active Tickers list opensdisplaying the existing tickers in alphabetical order by Name. There are no active Tickers by default.
If there are existing Tickers, Table 7-2 describes the contents in this window:
Table 7-2
Field Descriptions for Active Tickers Window
Step 2 ![]() Select Add New Ticker from the upper right-hand corner of the Active Ticker List.
Select Add New Ticker from the upper right-hand corner of the Active Ticker List.
Figure 7-6 Add a New Ticker Window
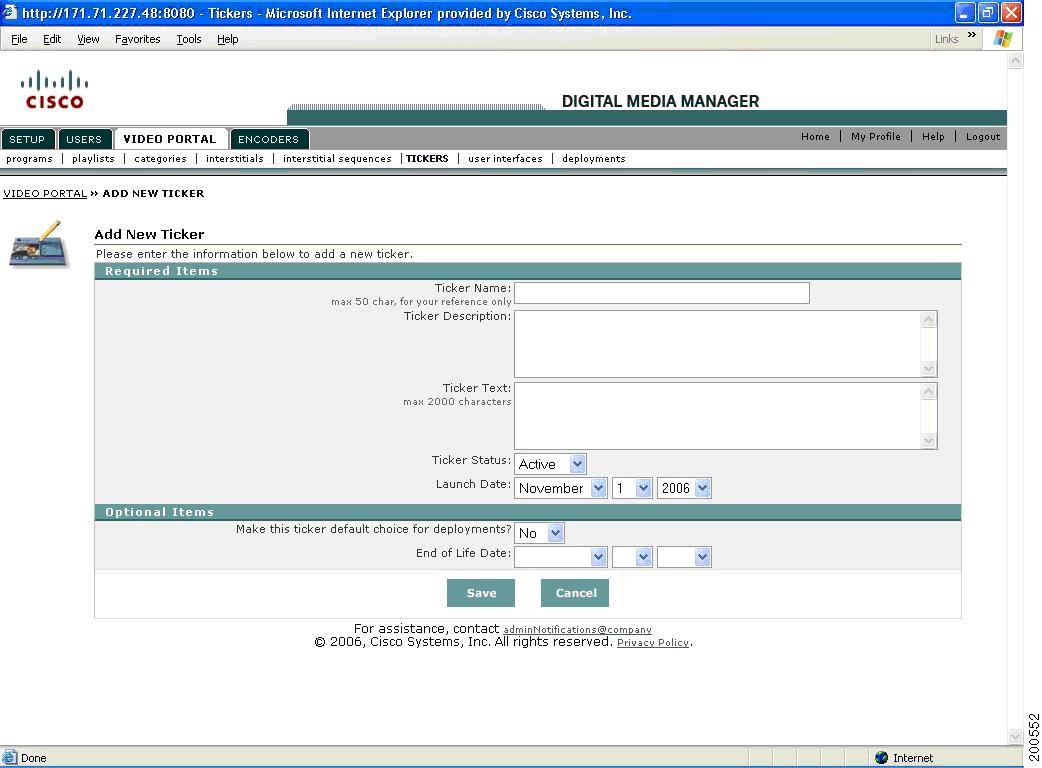
Step 3 ![]() Enter the Ticker Name. The Ticker Name can have a maximum of 50 characters and is for your reference only.
Enter the Ticker Name. The Ticker Name can have a maximum of 50 characters and is for your reference only.
Step 4 ![]() Enter the Ticker Description. This field is for your reference only.
Enter the Ticker Description. This field is for your reference only.
Step 5 ![]() Enter the Ticker Text. This text can be a maximum of 2000 characters; it will scroll across the bottom of the Video Portal.
Enter the Ticker Text. This text can be a maximum of 2000 characters; it will scroll across the bottom of the Video Portal.
Step 6 ![]() Set the Ticker Status. The default value is Active. Setting it to Inactive stores the new Ticker in the Archived Ticker List.
Set the Ticker Status. The default value is Active. Setting it to Inactive stores the new Ticker in the Archived Ticker List.
Step 7 ![]() Set the Launch Date for the Ticker to begin displaying in the Video Portal.
Set the Launch Date for the Ticker to begin displaying in the Video Portal.
Step 8 ![]() Select Yes or No to set this Ticker as the default choice during deployment.
Select Yes or No to set this Ticker as the default choice during deployment.
Step 9 ![]() Set the End of Life Date for the Ticker to no longer be visible in the Video Portal.
Set the End of Life Date for the Ticker to no longer be visible in the Video Portal.
Step 10 ![]() Click on Save to submit and save all the metadata.
Click on Save to submit and save all the metadata.
The new Ticker you just added appears in the Active Ticker list (if the Ticker Status was set to Active), or in the Archived Ticker list (if the status was set to Inactive) in alphabetical order.
Creating a New Interstitial
To create a new interstitial, follow these steps:
Step 1 ![]() Click on the interstitials secondary navigation link under the VIDEO PORTAL tab of the primary navigation bar to access the INTERSTITIALS page (see Figure 7-7).
Click on the interstitials secondary navigation link under the VIDEO PORTAL tab of the primary navigation bar to access the INTERSTITIALS page (see Figure 7-7).
Figure 7-7 Accessing the Interstitials from the USER INTERFACES Page
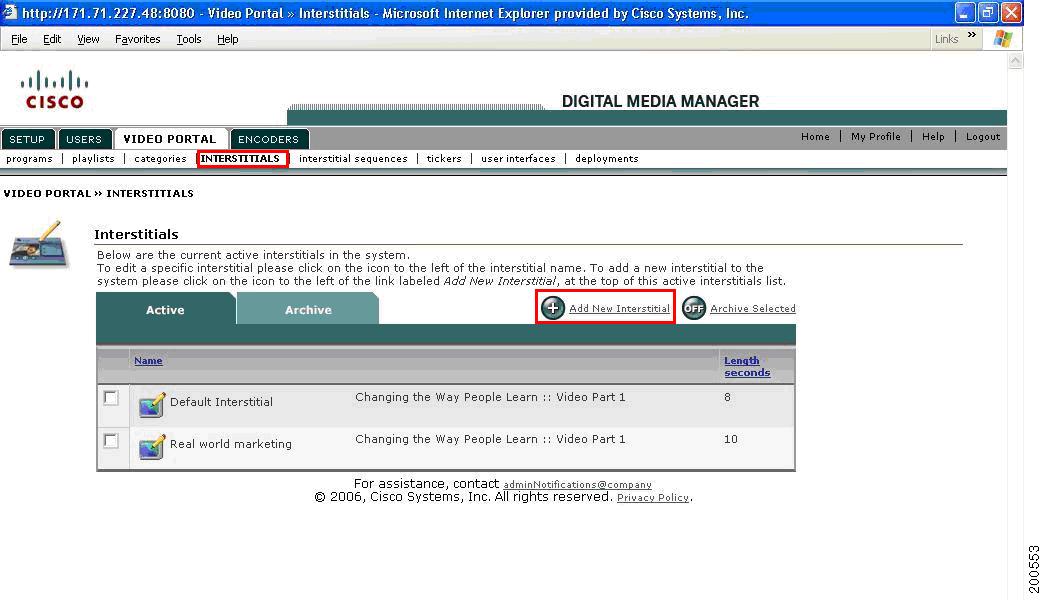
The Active Interstitials list opens displaying the existing Interstitials in alphabetical order by Name.
Table 7-3 describes the contents of this window:
Table 7-3 Button/Icon Field Descriptions
Step 2 ![]() Select Add New Interstitial from the upper right-hand corner of the Active Interstitial List.
Select Add New Interstitial from the upper right-hand corner of the Active Interstitial List.
Figure 7-8 Add a New Interstitial Window
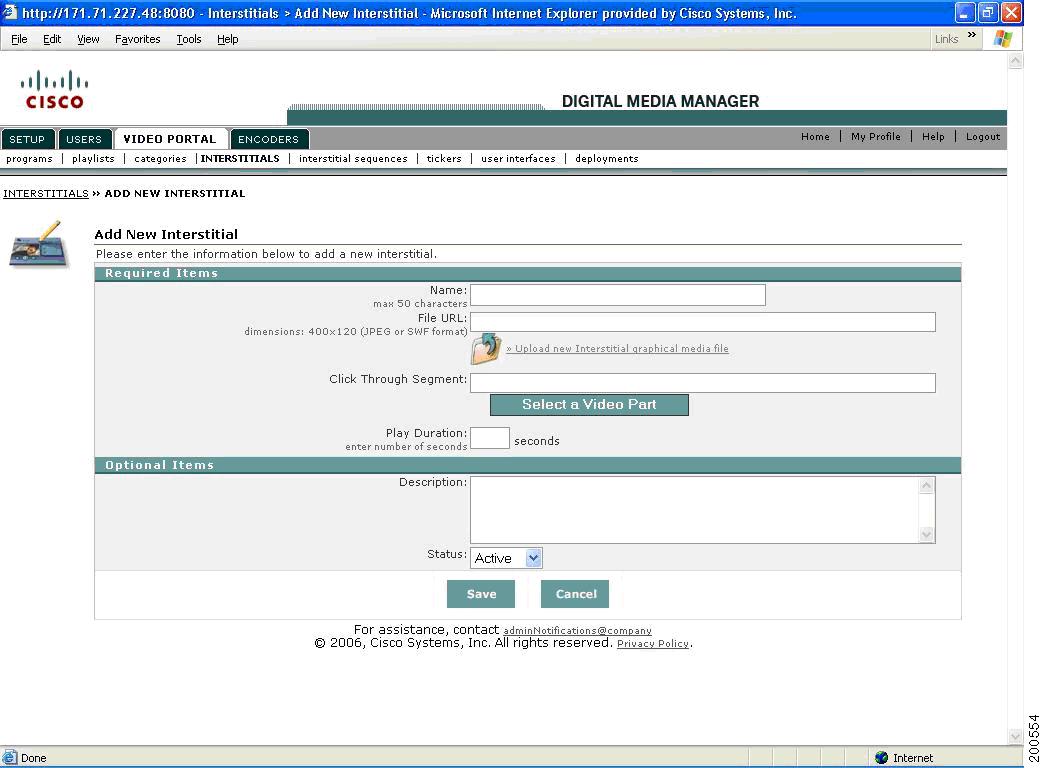
Step 3 ![]() Enter the Interstitial Name. The Interstitial Name can have a maximum of 50 characters and is for your reference only.
Enter the Interstitial Name. The Interstitial Name can have a maximum of 50 characters and is for your reference only.
Step 4 ![]() Select an Interstitial file. Click on the Upload icon to upload a new Interstitial image or file. The Interstitial should be a 400x120 pixel, non-progressive JPG or SWF format.
Select an Interstitial file. Click on the Upload icon to upload a new Interstitial image or file. The Interstitial should be a 400x120 pixel, non-progressive JPG or SWF format.
Step 5 ![]() Select a Video Part to be played when the Interstitial is clicked in the Video Portal.
Select a Video Part to be played when the Interstitial is clicked in the Video Portal.
Step 6 ![]() Enter the Play Duration, in seconds, of how long to display the Interstitial in the Video Portal.
Enter the Play Duration, in seconds, of how long to display the Interstitial in the Video Portal.
Step 7 ![]() Enter the Interstitial Description. This field is for your reference only.
Enter the Interstitial Description. This field is for your reference only.
Step 8 ![]() Set the Interstitial Status. The default value is Active. Setting it to Inactive stores the new Interstitial in the Archived Interstitial List.
Set the Interstitial Status. The default value is Active. Setting it to Inactive stores the new Interstitial in the Archived Interstitial List.
Step 9 ![]() Click on Save to submit and save all the metadata.
Click on Save to submit and save all the metadata.
The new Interstitial you just added appears in the Active Interstitial list (if the Interstitial Status was set to Active), or in the Archived Interstitial list (if the status was set to Inactive) in alphabetical order.
Creating a New Interstitial Sequence
To create a new interstitial sequence, follow these steps:
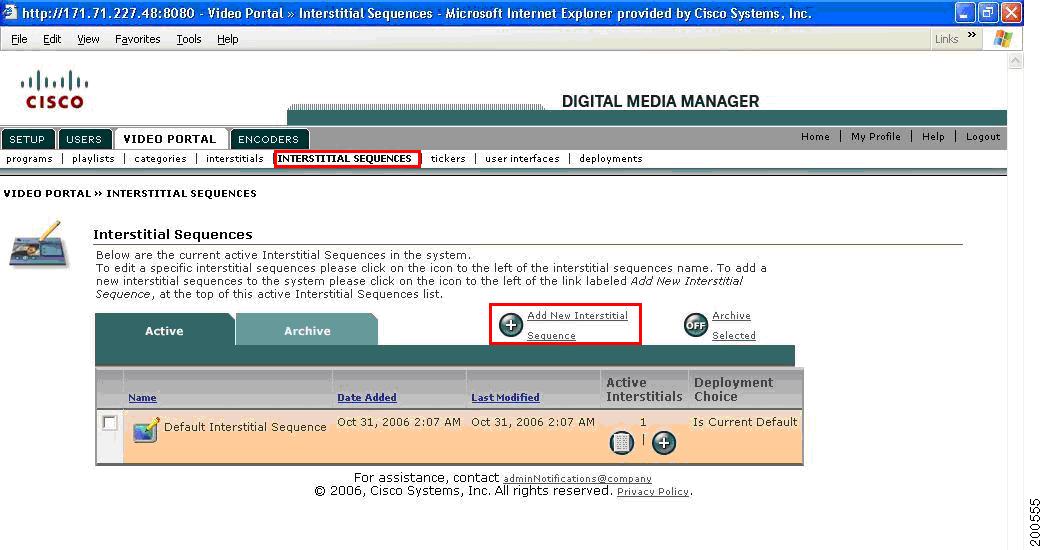
Step 1 ![]() Click on the interstitial sequences secondary navigation link under the VIDEO PORTAL tab of the primary navigation bar to access the INTERSTITIAL SEQUENCES page (see Figure 7-9).
Click on the interstitial sequences secondary navigation link under the VIDEO PORTAL tab of the primary navigation bar to access the INTERSTITIAL SEQUENCES page (see Figure 7-9).
Figure 7-9 Accessing the INTERSTITIAL SEQUENCES Page
The Active Interstitial Sequences list opens displaying the existing Interstitial Sequences in alphabetical order by Name.
Table 7-4 describes the contents of this window.
Table 7-4 Button/Icon Field Descriptions
Step 2 ![]() Select Add New Interstitial Sequence from the upper right-hand corner of the Active Interstitial Sequence List (see Figure 7-10).
Select Add New Interstitial Sequence from the upper right-hand corner of the Active Interstitial Sequence List (see Figure 7-10).
Figure 7-10 Add a New Interstitial Sequence Window
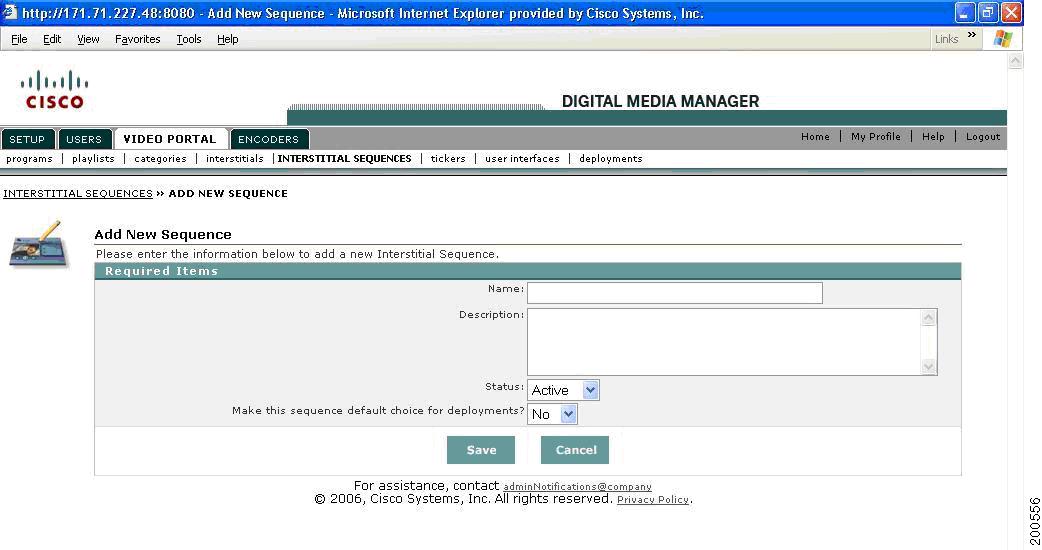
Step 3 ![]() Enter the Interstitial Sequence Name. This field is for your reference only.
Enter the Interstitial Sequence Name. This field is for your reference only.
Step 4 ![]() Enter the Interstitial Sequence Description. This field is for your reference only.
Enter the Interstitial Sequence Description. This field is for your reference only.
Set the Interstitial Sequence Status. The default value is Active. Setting it to Inactive stores the new Interstitial Sequence in the Archived Interstitial Sequence List.
Step 5 ![]() Select Yes or No to set this Interstitial Sequence as the default choice during deployment.
Select Yes or No to set this Interstitial Sequence as the default choice during deployment.
Step 6 ![]() Click on Save to submit and save all the metadata.
Click on Save to submit and save all the metadata.
The new Interstitial Sequence you just added appears in the Active Interstitial Sequence list (if the Interstitial Sequence Status was set to Active), or in the Archived Interstitial Sequence list (if the status was set to Inactive) in alphabetical order.
Adding an Interstitial to an Interstitial Sequence
To add an Interstitial to an Interstitial sequence, follow these steps:
Step 1 ![]() From the Active Interstitial Sequences list, find the row containing the Interstitial Sequence for which you want to add a new Interstitial and click on the Add New icon in the Active Interstitials column (see Figure 7-11).
From the Active Interstitial Sequences list, find the row containing the Interstitial Sequence for which you want to add a new Interstitial and click on the Add New icon in the Active Interstitials column (see Figure 7-11).
Figure 7-11 Adding an Interstitial to an Interstitial Sequence from the Interstitial Sequence List Window
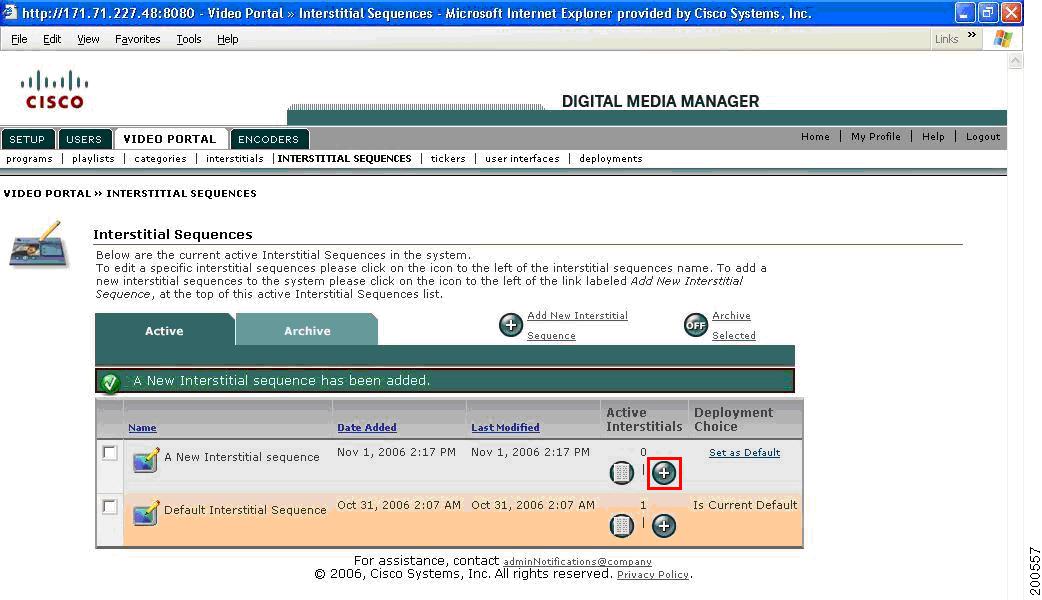
The number located in the Active Interstitials column above the List View and Add New icons indicates the current number of Active Interstitials belonging to the corresponding Interstitial Sequence in each row.
OR
Step 2 ![]() From the Active Interstitial Sequence Items listing, click on the Add New Interstitial to Sequence button located in the upper right-hand corner above the listing.
From the Active Interstitial Sequence Items listing, click on the Add New Interstitial to Sequence button located in the upper right-hand corner above the listing.
Figure 7-12 Adding an Interstitial to an Interstitial Sequence from the Active Interstitial Sequence Items List Window
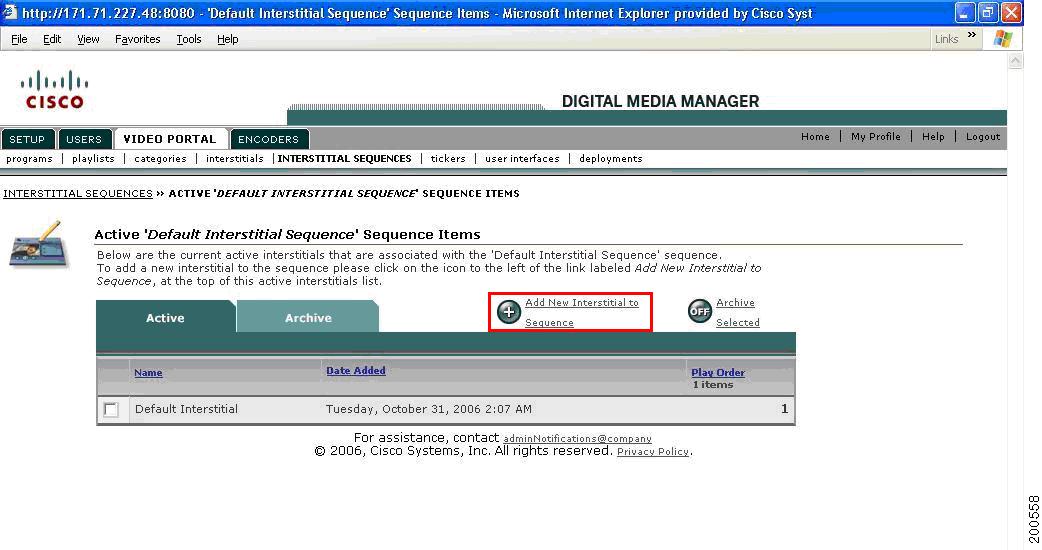
A newly added Interstitial Sequence does not have any Interstitials belonging to it. If an Interstitial Sequence has any existing Interstitials belonging to it, the Interstitials appear in play order.
Table 7-5 describes the contents of this window:
Table 7-5
Button/Icon Field Descriptions
Step 3 ![]() In the Interstitial Selector Popup Window (see Figure 7-13), select the Interstitial from the dropdown menu to add to this Interstitial Sequence.
In the Interstitial Selector Popup Window (see Figure 7-13), select the Interstitial from the dropdown menu to add to this Interstitial Sequence.
Figure 7-13 Add a New Interstitial to a Sequence Popup Window
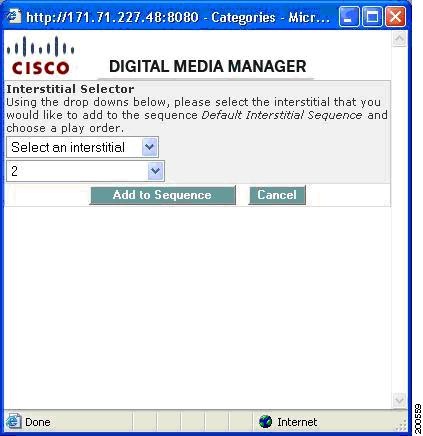
Step 4 ![]() Select the playback order in which you would like this Interstitial played in the Interstitial Sequence.
Select the playback order in which you would like this Interstitial played in the Interstitial Sequence.
Click the Add to Sequence button to submit the changes. The Interstitial you just selected appears in the Active Interstitial Sequence Items list.
 Feedback