- DMM User's Guide Preface
- DMM User's Guide Overview
- Understanding the Digital Media Manager
- Managing User Accounts
- Create Content Offering
- Creating Playlists
- Categorizing Content
- Customizing Video Portal
- Managing Deployments
- Config Settings
- Linking to the Video Portal
- Setting Up the DME 1000 and DME 2000 Encoders
- Setting Up Live Events Using a DME 1000 or DME 2000 Encoder
- Setting Up Live Events Using Third-Party Live Streams
- Archive and Delete
- Video Reports Metrics Overview
- DMM User's Guide Glossary
Cisco Digital Media Manager User Guide (version 3.5)
Bias-Free Language
The documentation set for this product strives to use bias-free language. For the purposes of this documentation set, bias-free is defined as language that does not imply discrimination based on age, disability, gender, racial identity, ethnic identity, sexual orientation, socioeconomic status, and intersectionality. Exceptions may be present in the documentation due to language that is hardcoded in the user interfaces of the product software, language used based on RFP documentation, or language that is used by a referenced third-party product. Learn more about how Cisco is using Inclusive Language.
- Updated:
- March 13, 2015
Chapter: Setting Up Live Events Using a DME 1000 or DME 2000 Encoder
Setting Up Live Events Using a DME 1000 or DME 2000 Encoder
This chapter describes how to set up live events within the DMS using a DME 1000 or DME 2000 Encoder..
Understanding Live vs. On-Demand
Live event offerings differ from on-demand offerings in the following ways:
•![]() Live events are scheduled to start and stop at a certain date/time. After a live event has started, end users who access the event late cannot start from the beginning of the event. All concurrent end users are accessing the same and current time point of the offering. End users cannot access a live stream before the event starts, go backwards, or skip ahead within the live offering. When the live event has concluded, it is no longer accessible to end users. Using the Video Part page, you may upload a Pre-Event image and Post-Event image. These will appear in the video frame before and after the live event.
Live events are scheduled to start and stop at a certain date/time. After a live event has started, end users who access the event late cannot start from the beginning of the event. All concurrent end users are accessing the same and current time point of the offering. End users cannot access a live stream before the event starts, go backwards, or skip ahead within the live offering. When the live event has concluded, it is no longer accessible to end users. Using the Video Part page, you may upload a Pre-Event image and Post-Event image. These will appear in the video frame before and after the live event.
•![]() Live events are generally recorded as they occur. At the conclusion of a live event, the recording is edited and then made available for on-demand access shortly thereafter. Using the DME 1000 and DME 2000, you can simultaneously stream a live event and save it to a file.
Live events are generally recorded as they occur. At the conclusion of a live event, the recording is edited and then made available for on-demand access shortly thereafter. Using the DME 1000 and DME 2000, you can simultaneously stream a live event and save it to a file.
•![]() On-demand offerings are scheduled to be available at a certain date and time and remain accessible for weeks or months, depending on the freshness or relevance of the content. Each end user who accesses an on-demand offering can start at the beginning of the event. Each end user can also rewind, skip ahead, or jump to different parts of the offering at any time, if these video controls are made available. As long as an on-demand offering is available, it can be accessed 24x7.
On-demand offerings are scheduled to be available at a certain date and time and remain accessible for weeks or months, depending on the freshness or relevance of the content. Each end user who accesses an on-demand offering can start at the beginning of the event. Each end user can also rewind, skip ahead, or jump to different parts of the offering at any time, if these video controls are made available. As long as an on-demand offering is available, it can be accessed 24x7.
•![]() On-demand offerings can be archived (made unavailable) at any time. After an offering is archived, no end user can access it.
On-demand offerings can be archived (made unavailable) at any time. After an offering is archived, no end user can access it.
Starting and Finishing a Live Event
Conducting a complete live event offering consists of the following four stages:
1. ![]() Adding the Live Event into the DMM and publishing.
Adding the Live Event into the DMM and publishing.
2. ![]() Testing the live stream before starting the live event.
Testing the live stream before starting the live event.
3. ![]() Starting and stopping the live Broadcast.
Starting and stopping the live Broadcast.
4. ![]() Removing the live event from the Video Portal or converting it into a VOD.
Removing the live event from the Video Portal or converting it into a VOD.
Adding a Live Event into the DMM and Publishing
To add a live event into the DMM and publish, follow these steps:
Step 1 ![]() Choose or add the Program and Video where your live event will reside, and open a new Video Part page.
Choose or add the Program and Video where your live event will reside, and open a new Video Part page.

Note ![]() Only one live Video Part is supported per Video in the DMM.
Only one live Video Part is supported per Video in the DMM.
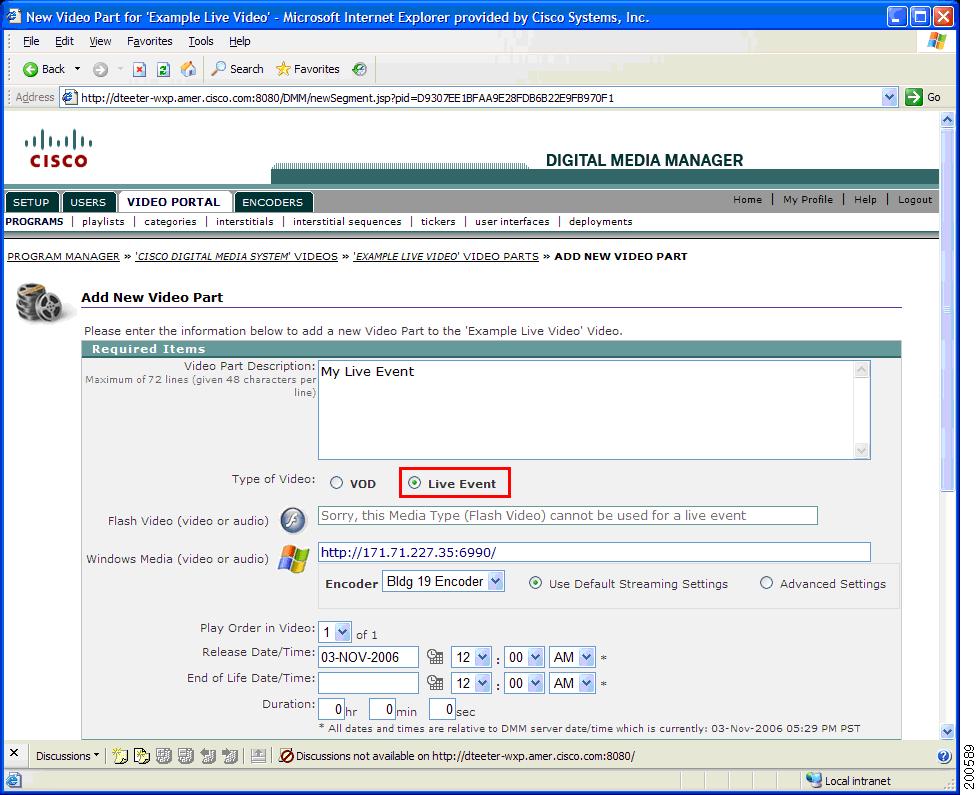
Step 2 ![]() Enter your Video Part Description and click the Live Event radio button. Choose the encoder to use for this event. If you have a default Encoding Format and Publishing configuration for the selected encoder, you may select Use Default Streaming Settings.
Enter your Video Part Description and click the Live Event radio button. Choose the encoder to use for this event. If you have a default Encoding Format and Publishing configuration for the selected encoder, you may select Use Default Streaming Settings.
Figure 12-1 Live Video Part (Using Defaults)
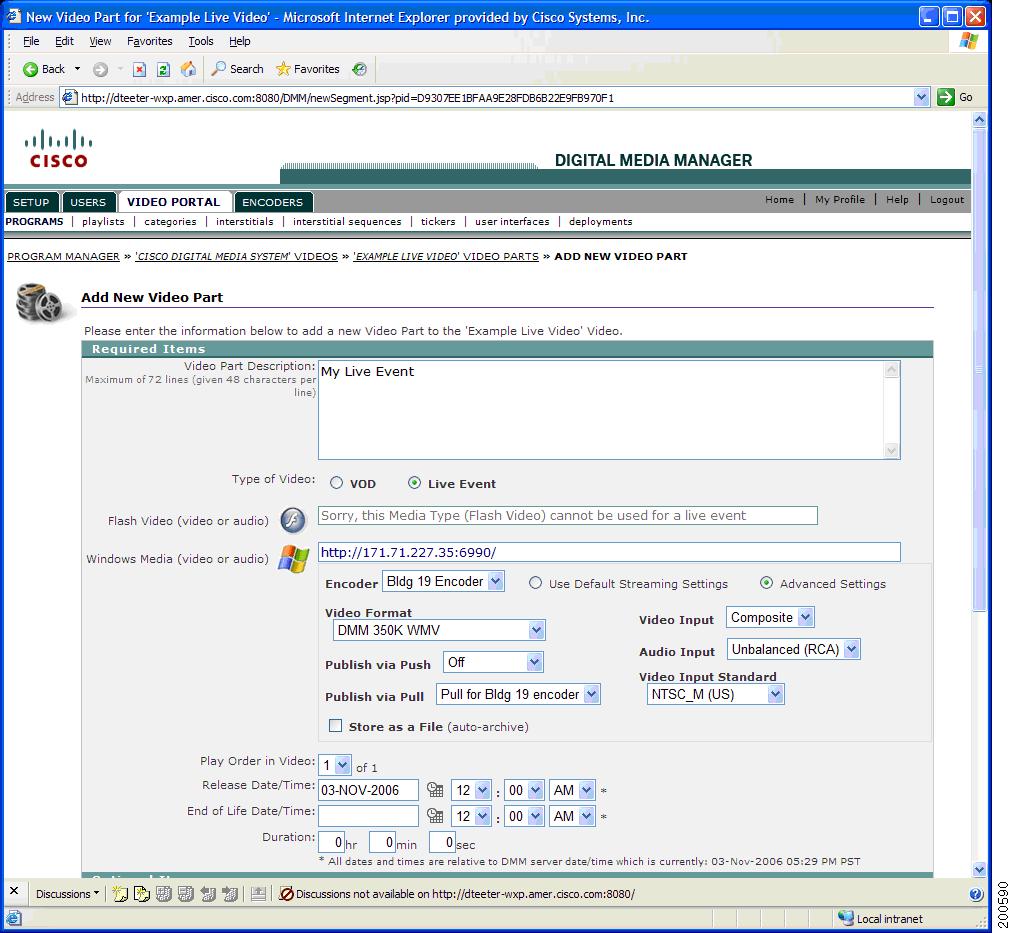
If all of the necessary defaults are not available, you must use Advanced Settings to set up the encoding properties for this live event. In this case, choose a Video Format, Publishing Configuration (Push or Pull), and the video and audio inputs being used, plus the video input standard.
Figure 12-2 Live Video Part (Advanced Settings)
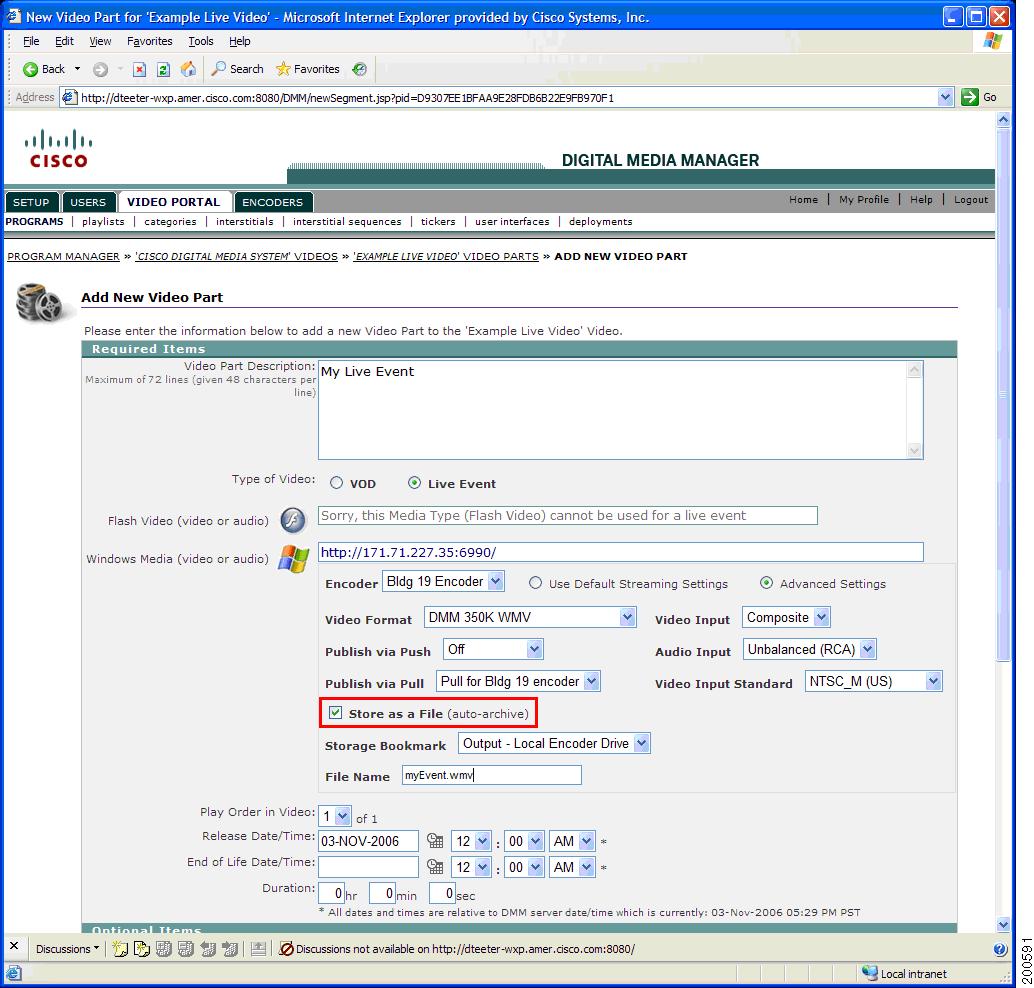
To store your live event to a file, click Store as a File and enter the name of the file to which your event should be saved.
Figure 12-3 Live Video Part (Store as a file)
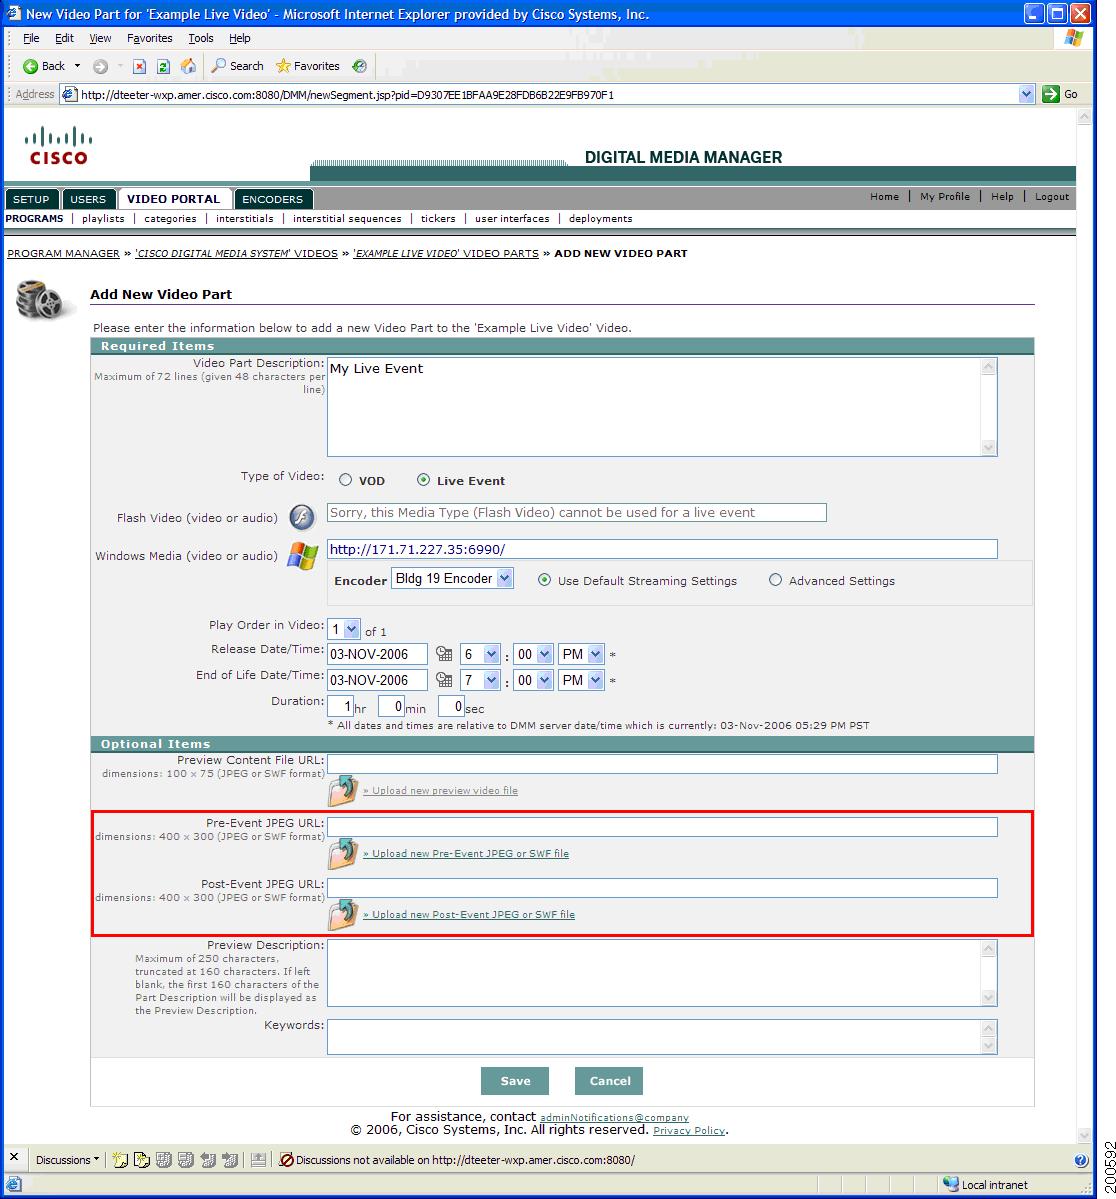
Step 3 ![]() Enter the Release Date/Time and the End of Life Date/Time. To enter the dates, click the calendar icon next to each date field and choose the desired date. When you choose the start and ending times, the duration field below is filled automatically.
Enter the Release Date/Time and the End of Life Date/Time. To enter the dates, click the calendar icon next to each date field and choose the desired date. When you choose the start and ending times, the duration field below is filled automatically.
Step 4 ![]() Recommended: In the optional items section, upload a Pre-Event and Post-Event JPEG image (400x300). These images will appear in the portal before your live event starts and after it ends.
Recommended: In the optional items section, upload a Pre-Event and Post-Event JPEG image (400x300). These images will appear in the portal before your live event starts and after it ends.
Figure 12-4 Live Video Part with Date/Times Complete
Step 5 ![]() Click the Save button to save your new Video Part.
Click the Save button to save your new Video Part.
Step 6 ![]() When you are ready for the program listing for this live event to appear on the Video Portal, follow instructions in "Managing Deployments" to deploy this live event.
When you are ready for the program listing for this live event to appear on the Video Portal, follow instructions in "Managing Deployments" to deploy this live event.
Testing a Live Stream and Starting a Live Event
To test a live stream and start a live event, follow these steps:
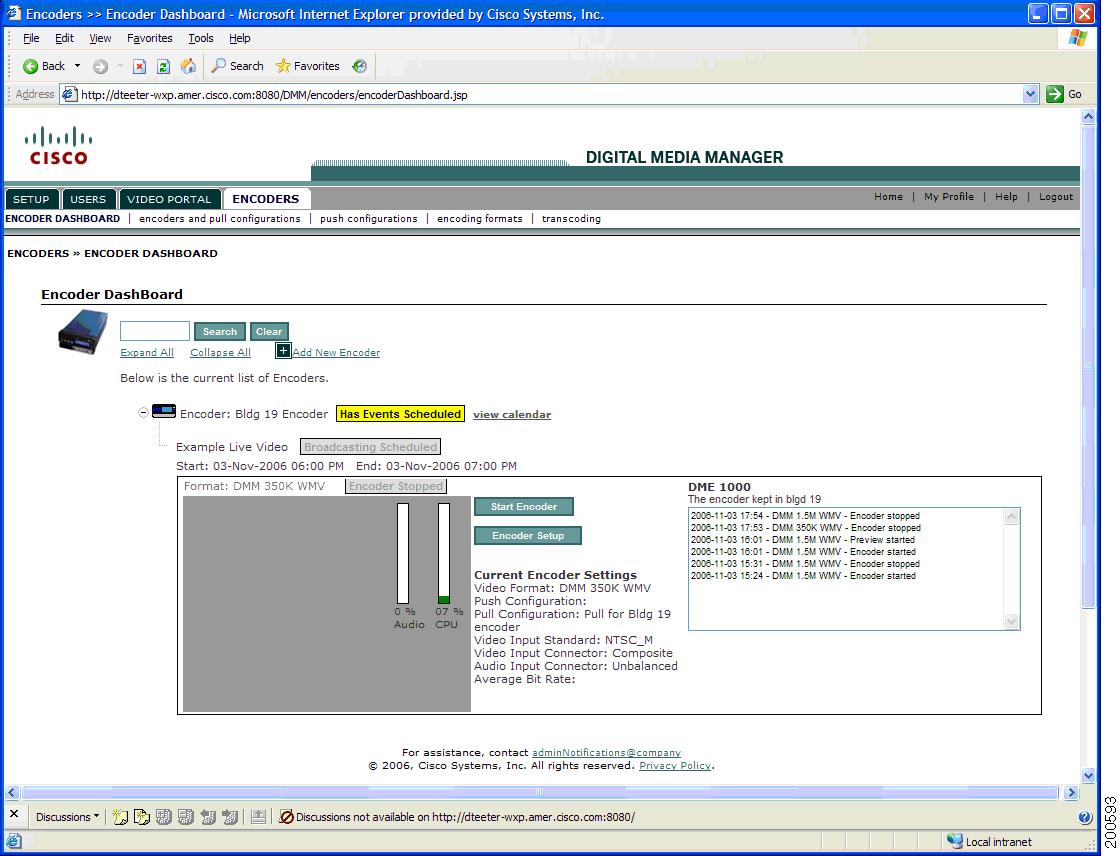
Step 1 ![]() Within a half-hour before the live event, click the ENCODERS tab in the primary navigation bar in the DMM. The ENCODER DASHBOARD page opens.
Within a half-hour before the live event, click the ENCODERS tab in the primary navigation bar in the DMM. The ENCODER DASHBOARD page opens.
Step 2 ![]() Expand the encoder section of the encoder being used for your event by clicking its adjacent + icon.
Expand the encoder section of the encoder being used for your event by clicking its adjacent + icon.
Figure 12-5 Encoder Dashboard with Live Event
Step 3 ![]() Click the Start Encoder button and wait for it to start (10 to 25 seconds).
Click the Start Encoder button and wait for it to start (10 to 25 seconds).
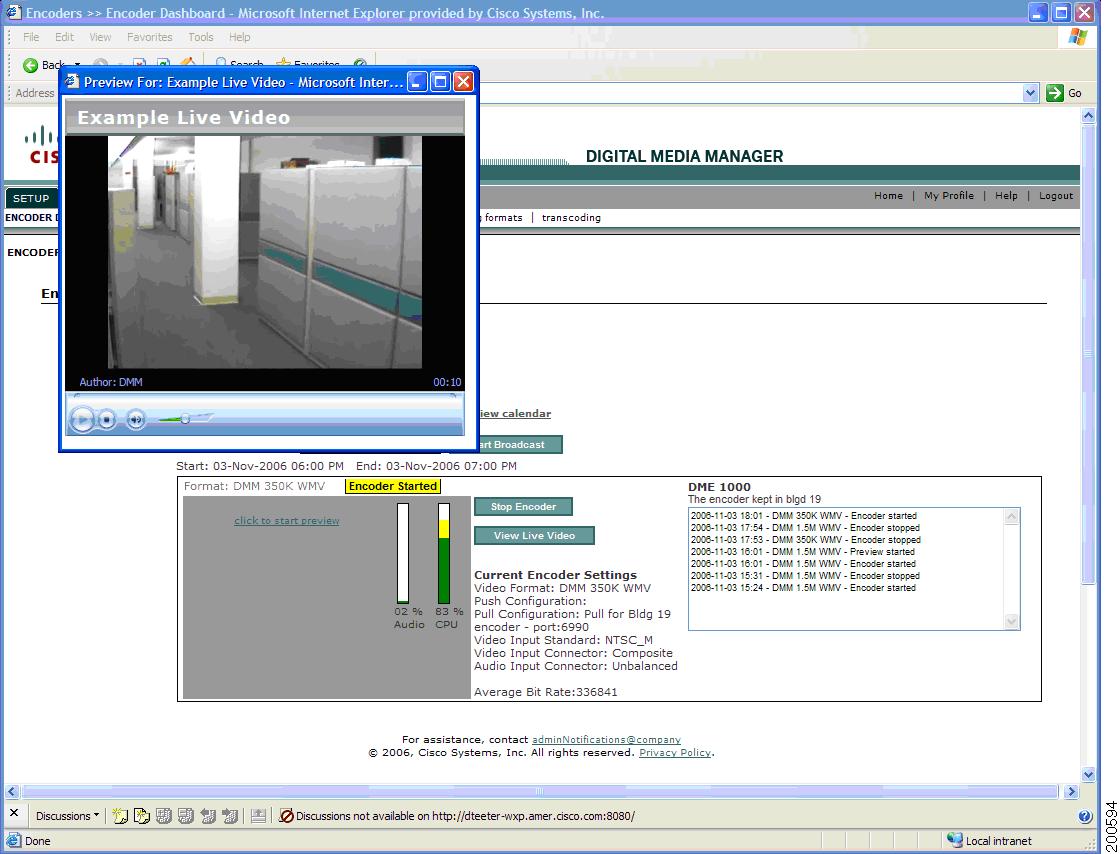
Step 4 ![]() When the encoder is started, a View Live Video button appears. Click the View Live Video button to open a preview window that should show the live stream from your encoder. If this step is successful, you have confirmed that your streaming server is successfully streaming the output from the encoder.
When the encoder is started, a View Live Video button appears. Click the View Live Video button to open a preview window that should show the live stream from your encoder. If this step is successful, you have confirmed that your streaming server is successfully streaming the output from the encoder.
Figure 12-6 Live Event with Video Preview Pop-up
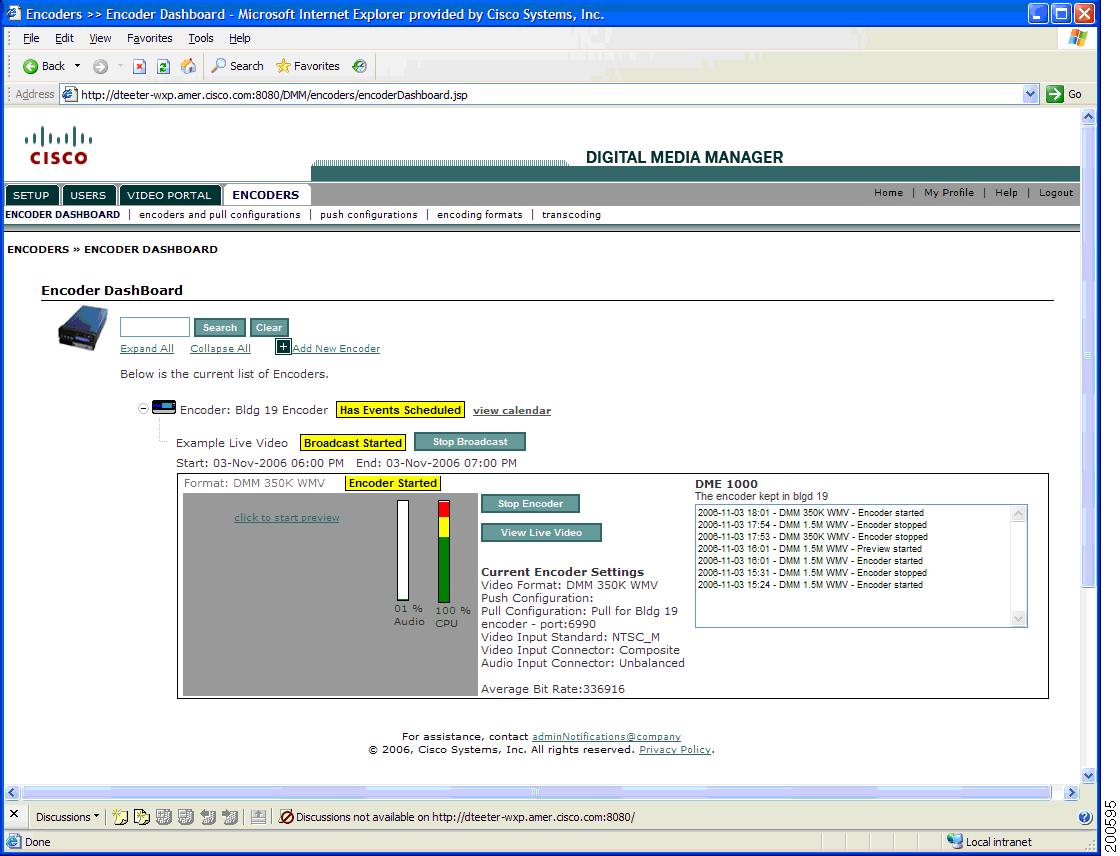
Step 5 ![]() Before this step, anyone who has selected this event will see the Pre-Event image uploaded in the Video Part. When you are ready for the live event to start, click on the Start Broadcast button. Within 5 to 20 seconds, the live event should appear on the Video Portal of anyone who has selected this event.
Before this step, anyone who has selected this event will see the Pre-Event image uploaded in the Video Part. When you are ready for the live event to start, click on the Start Broadcast button. Within 5 to 20 seconds, the live event should appear on the Video Portal of anyone who has selected this event.
Step 6 ![]() When you are ready to end the event, click the Stop Broadcast button. Next, stop the encoder (click the Stop Encoder button) after you stop the broadcast. After stopping the broadcast, anyone viewing the event from the Video Portal will see the Post-Event image uploaded in the Video Part.
When you are ready to end the event, click the Stop Broadcast button. Next, stop the encoder (click the Stop Encoder button) after you stop the broadcast. After stopping the broadcast, anyone viewing the event from the Video Portal will see the Post-Event image uploaded in the Video Part.
Note ![]() If necessary, it is possible to re-start the event by clicking the Start Broadcast button again, assuming the encoder is still started. The Pre-Event image is visible only until the first time the Start Broadcast button is clicked.
If necessary, it is possible to re-start the event by clicking the Start Broadcast button again, assuming the encoder is still started. The Pre-Event image is visible only until the first time the Start Broadcast button is clicked.
Figure 12-7 Live Event with Broadcast Started'
 Feedback