Configure a Center DPI

Configure a Center DPI

This section describes how to configure a Center DPI, that is, a virtual sensor in the Center.

Requirements:

Make sure an ethernet interface is available for the Center DPI traffic, depending on:

  • If the server has a dual interface, that is, the Administration interface is on eth0 and the Collection interface is on eth1, then eth2 will be used for the Center DPI.

  • If the server has a single interface, that is, the Administration and Collection interfaces are on the same interface, then eth1 will be used for the Center DPI.

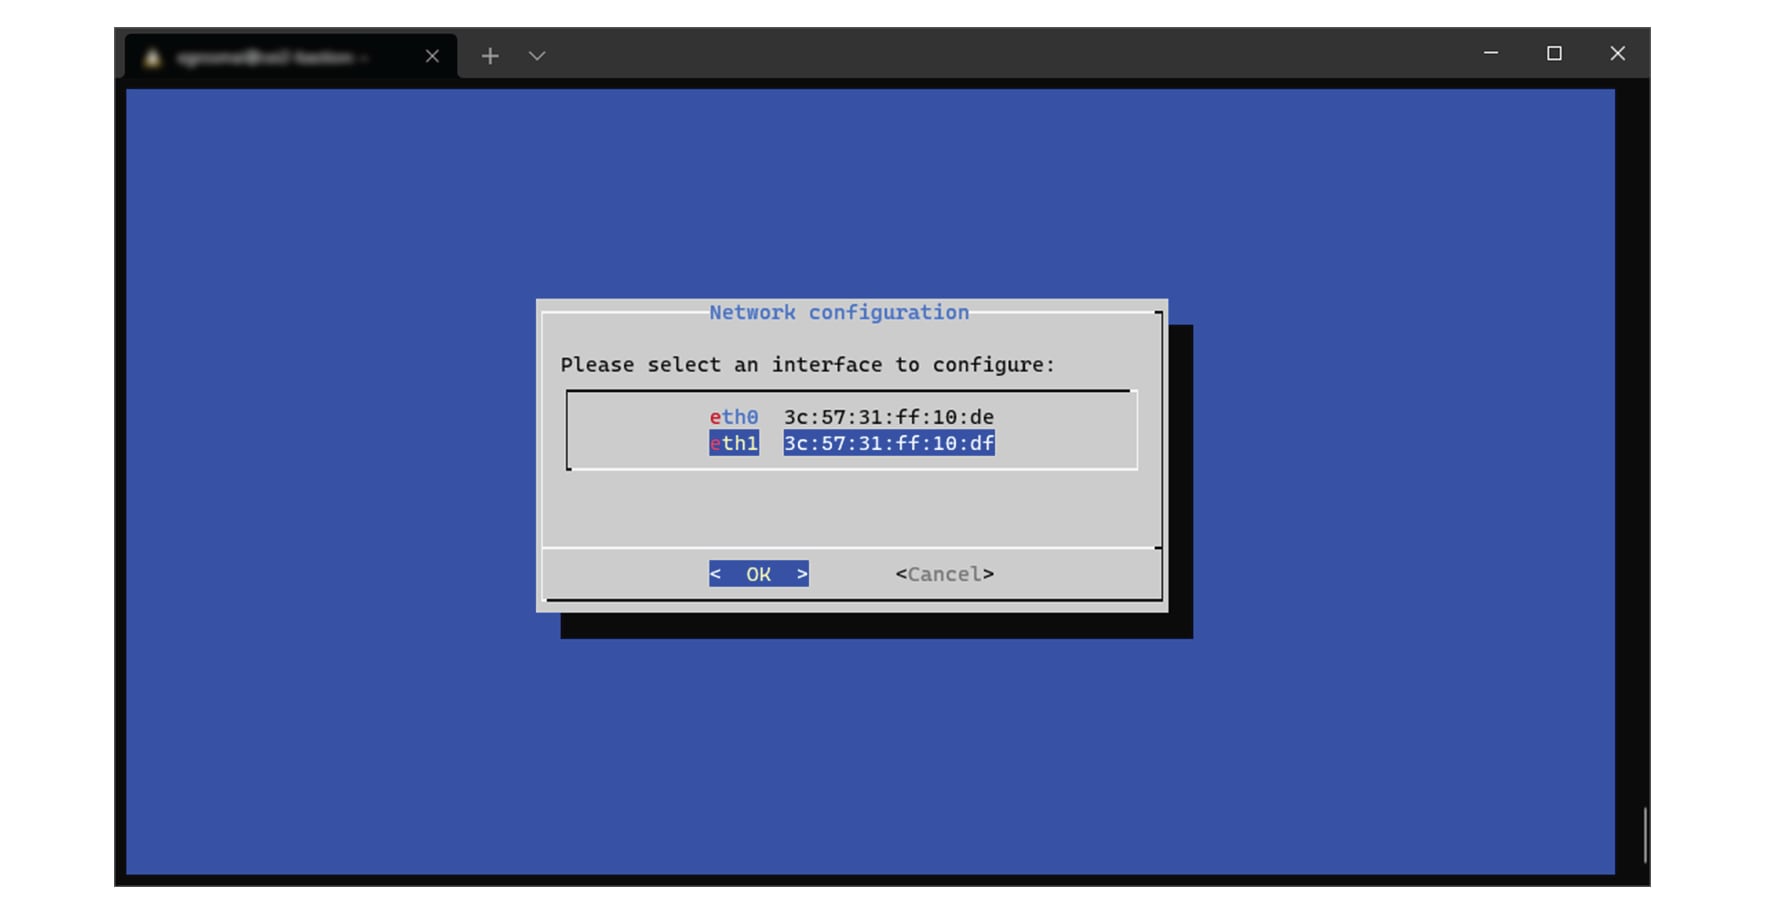
In the example below, the server has a single interface.

To configure a Center DPI:

Procedure


Step 1

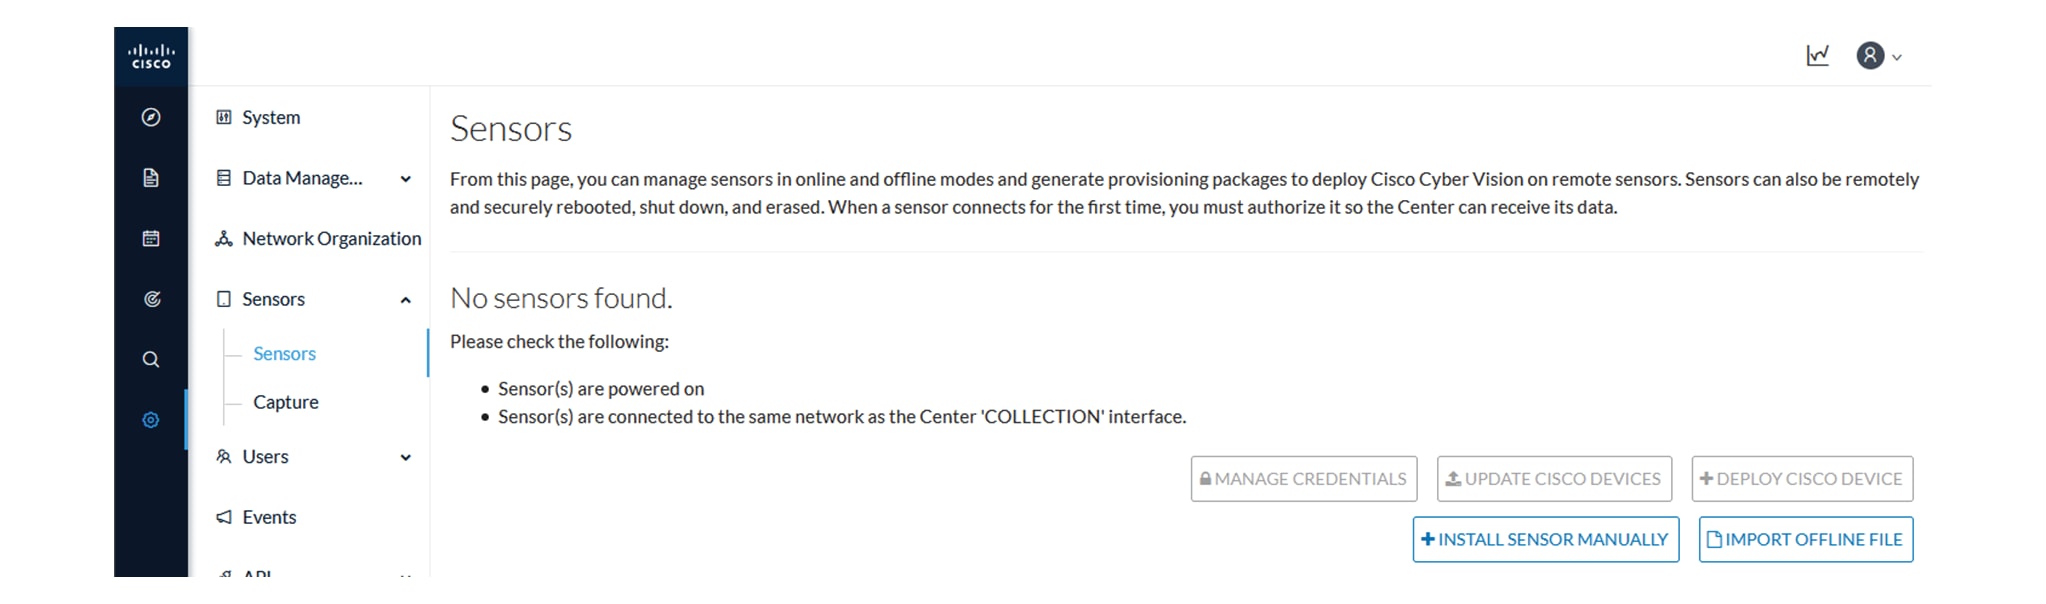
Access the sensors administration page.

Step 2

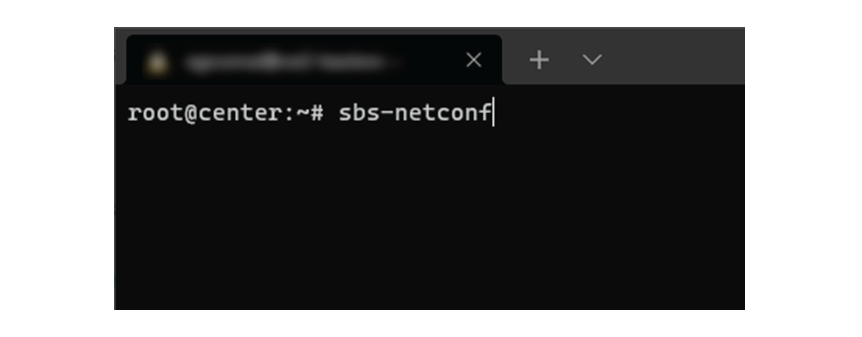
Open the Center shell prompt and type the following command:

sbs-netconf

Step 3

In the case of a single interface, select the eth1 interface.

In the case if a dual interface, select eth2.

Step 4

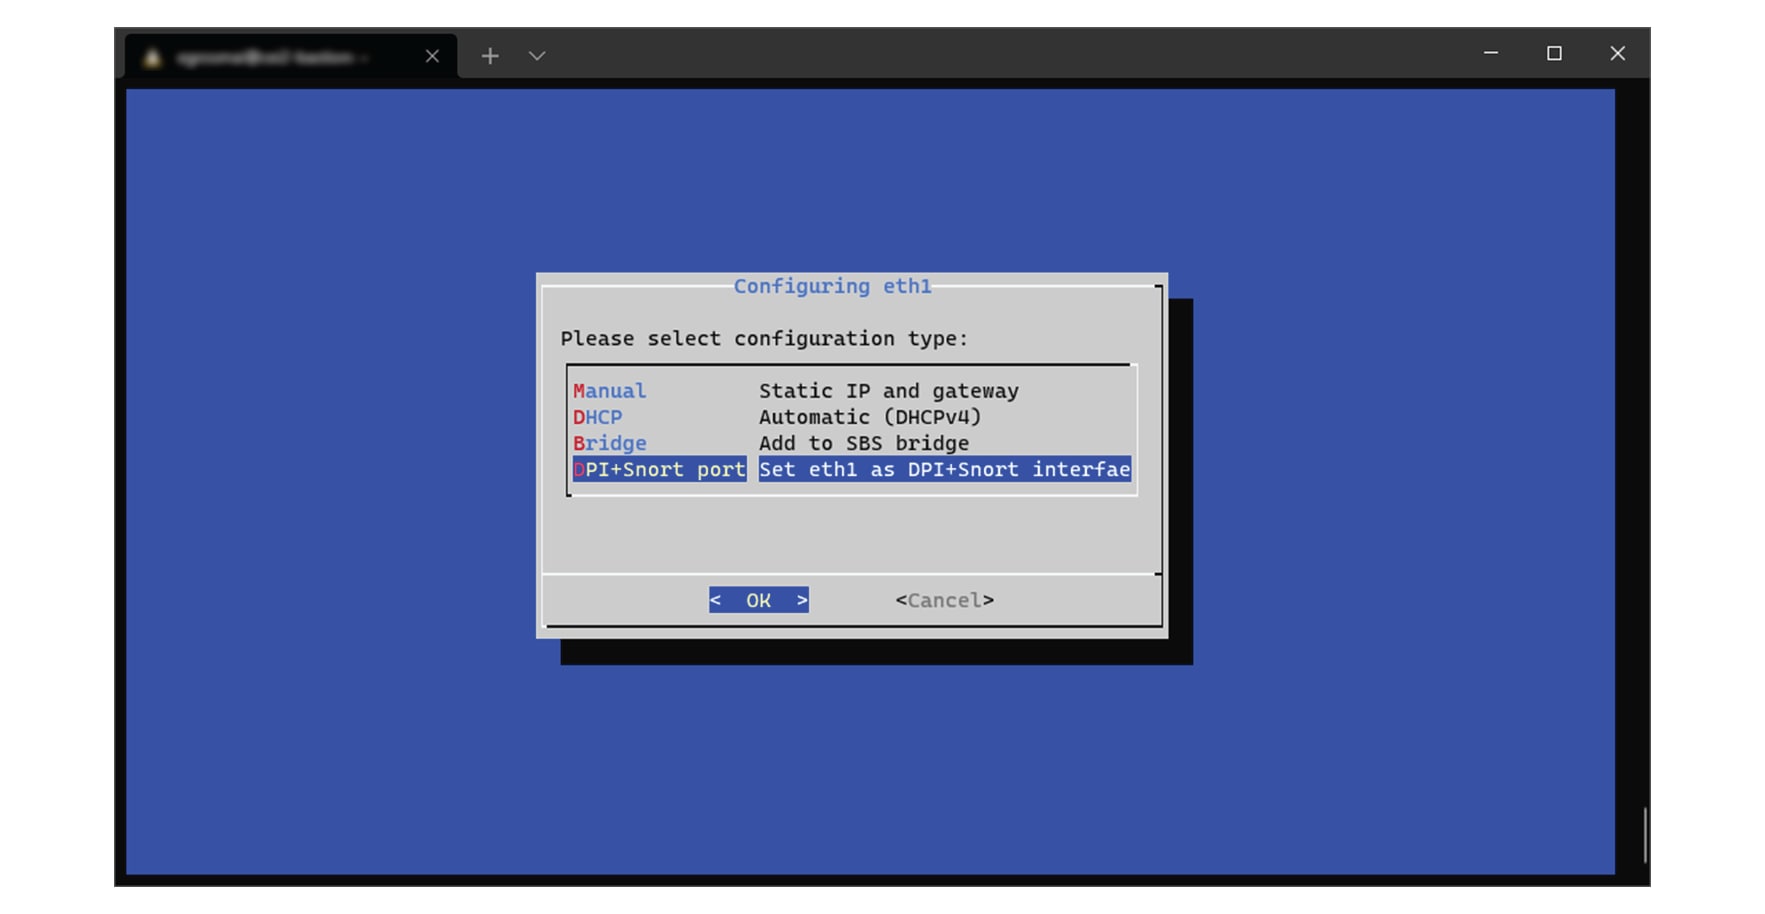
Select the interface as DPI+Snort port.
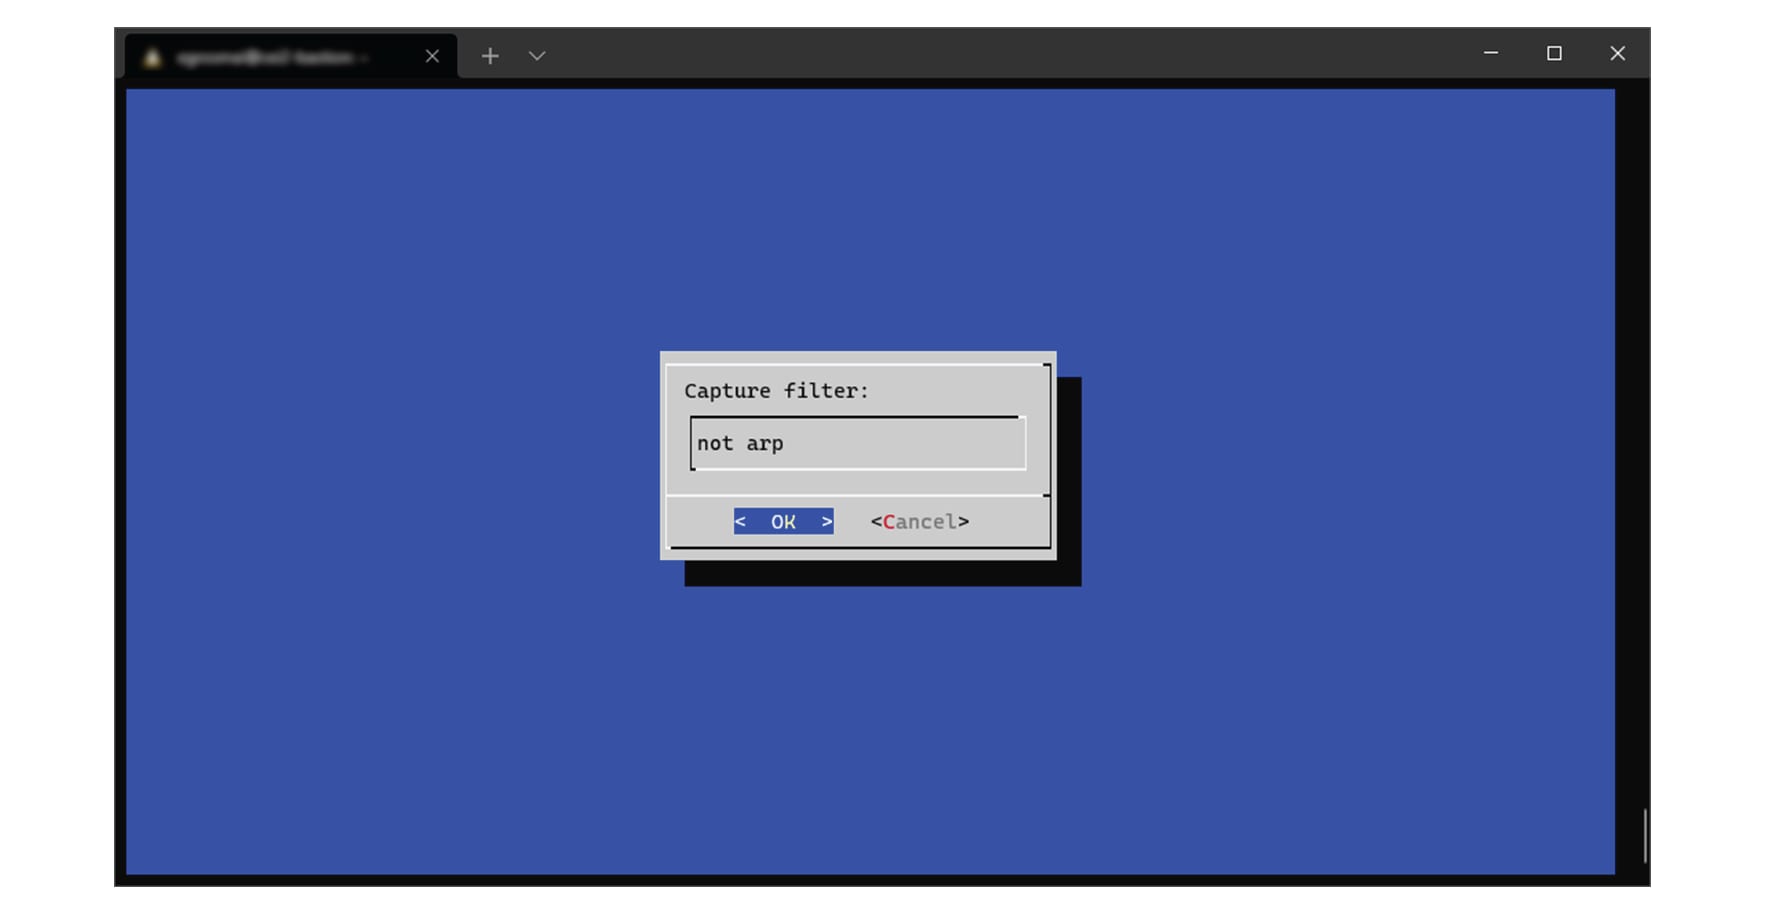
Step 5

Configure a capture filter mode. You can do that later in the sensor page clicking the Capture mode button.

For more information on how to configure a capture mode filter, refer to the GUI user guide.

For example, you can type "not arp".

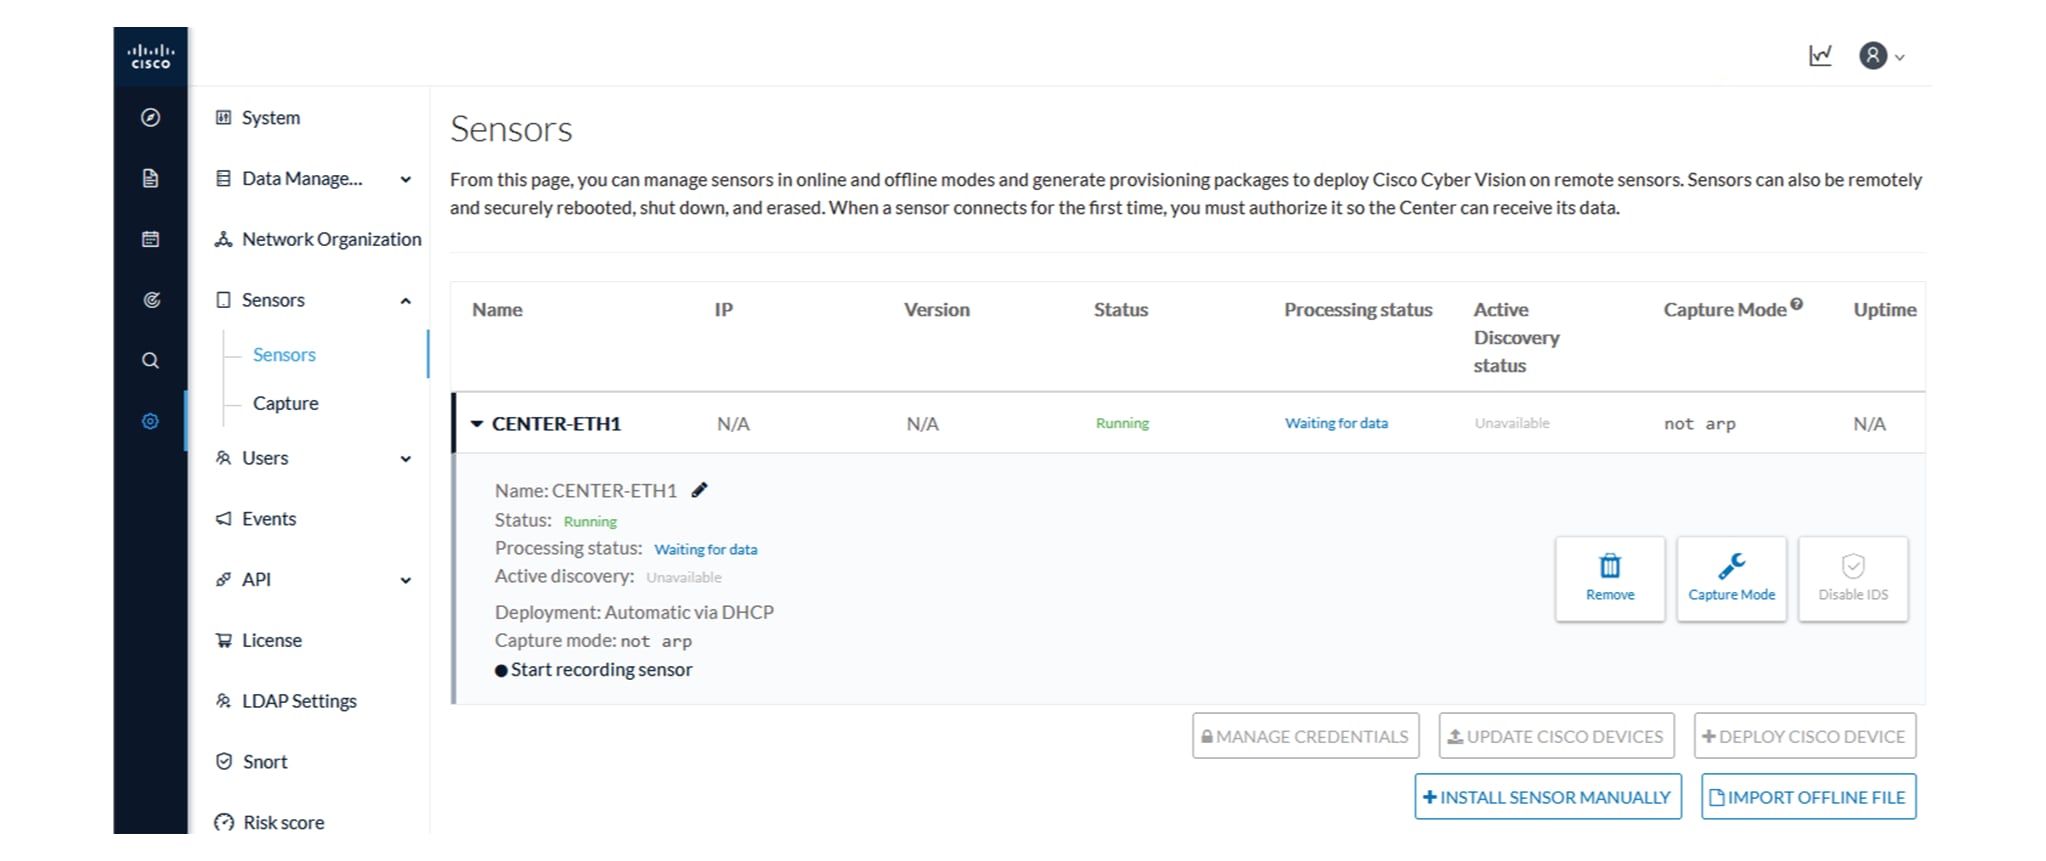
In the administration sensor page, the new virtual sensor appears and is ready to receive data.


Center DPI

Cyber Vision Center Deep Packet Inspection (DPI) is a virtual sensor that

  • operates within the center environment,

  • analyzes industrial network traffic at a granular level by inspecting application flows locally, and

  • adds metadata to the Cyber Vision Center for centralized storage, analytics, and visualization.

Configure Center DPI

Enable Center DPI to function as a virtual sensor in Center for monitoring and analyzing network traffic.

Before you begin

Ensure you have an available Ethernet interface for Center DPI traffic:

  • SPAN:

    • Single interface: eth1

    • Dual interfaces: eth2

  • ERSPAN:

    • Single interface: eth0

    • Dual interfaces: eth0 and eth1

    • For optimal performance, use a dedicated interface if possible.

Procedure


Step 1

Open the Center shell prompt and run the sbs-netconf command.

Step 2

Select the interface to configure, based on your SPAN or ERSPAN setup.

Step 3

Select the configuration type as DPI+Snort port.

Step 4

Select an encapsulation type.

  • None for SPAN configurations.

  • erspan2 for ERSPAN type 2 remote SPAN.

  • erspan3 for ERSPAN type 3 remote SPAN.

Step 5

If you select erspan2 or erspan3 as the encapsulation type, enter an IPv4 address to receive traffic.


A new sensor is created and appears in Admin > Sensors > Sensor Explorer, ready to monitor network traffic based on the chosen configuration.

What to do next

  • To view traffic statistics from the new sensor, navigate in the Center interface to Explorer > All Data > Device list and select the device for more details.

  • To disable Snort on the Center DPI interface, follow these steps.

    1. From the main menu, choose Admin > Sensors > Sensor Explorer.

    2. Select the sensor and click Disable IDS.