Configure general settings
Use to manage organization-wide settings that affect multiple managed devices and users in your managed organization.
 Note |
You do not see toggle buttons for features that are not enabled for your managed organization. |
Enable Change Request Tracking
Enabling change request tracking affects all users of your tenant. To enable change request tracking, perform these steps:
Procedure
|
Step 1 |
Choose . |
|
Step 2 |
Turn on the Change Request Tracking toggle button. Once confirmed, you see the Change Request toolbar appear in the lower left corner of the interface and the Change Request drop-down menu in the Change Log. |
Enable AI Assistant for Firewall
AI Assistant is an AI-driven virtual companion that provides contextual guidance and insights to manage security policies, troubleshooting issues, and optimizing configurations. For more information, refer to Onboard with Cisco AI Assistant.
By default, the AI Assistant is enabled. When you enable or disable the AI Assistant, the change affects all users in your tenant .
Procedure
|
Step 1 |
Choose . |
|
Step 2 |
Turn off the Enable AI Assistant for Firewall toggle button to disable the AI Assistant. |
Enable the option to auto-accept device changes
When this setting is enabled, Security Cloud Control Firewall Management automatically accepts changes that users make directly on the device. If you leave this setting disabled, or disable it later, you must review each device conflict before you accept it.
Follow these steps to enable automatic acceptance of device changes:
Procedure
|
Step 1 |
Choose . |
|
Step 2 |
Turn on the Enable the option to auto-accept device changes toggle button. |
Enable Multicloud Defense SCC features
When you enable this feature, you can configure site-to-site IPsec VPN tunnels between Multicloud Defense and your ASA and Firewall Threat Defense devices that are managed by Security Cloud Control Firewall Management. After you enable the feature, you can establish and deploy VPN configurations between these managed devices to improve secure connectivity across your multicloud infrastructure.
Follow these steps to enable Multicloud Defense Security Cloud Control Firewall Management features:
Procedure
|
Step 1 |
Choose Settings > General Settings. |
|
Step 2 |
Turn on the Enable Multicloud Defense SCC features toggle button. |
Enable object sharing with Multicloud Defense
Enable this setting to share Multicloud Defense network objects from Security Cloud Control Firewall Management.
Follow these steps to enable object sharing with Multicloud Defense:
Procedure
|
Step 1 |
Choose . |
|
Step 2 |
Turn on the Enable object sharing with Multicloud Defense toggle button. |
Enable ASA health monitoring
You must enable Device Health Metrics at the tenant level. For ASA devices managed by Secure Device Connector, you must also enable the feature at the individual device level. These steps ensure health data is collected and made available for analysis within the dashboard.
You must have the Super Admin user role to enable this feature.
Follow these steps to enable ASA health monitoring for the managed organization:
Procedure
|
Step 1 |
Choose . |
||
|
Step 2 |
Turn on the Enable ASA Health Monitoring toggle button to enable the Device Health Metrics feature for your tenant. Device Type Considerations
|
Set the default conflict detection interval
This interval determines the frequency at which Security Cloud Control polls onboarded devices for changes. The selection applies to all devices managed in this tenant. You can change this option at any time.
Note |
This selection can be overridden via the Conflict Detection option available from the Security Devices page after you have selected one or multiple devices. |
Follow these steps to set the default conflict detection interval:
Procedure
|
Step 1 |
Choose . |
|
Step 2 |
From the Default conflict detection interval drop-down list, select a time value. |
Enable scheduled automatic deployments
Enabling the option to schedule automatic deployments allows you to schedule future deployments at a date and time when it is convenient. Once you enable this option, you can schedule a single automatic deployment or set up recurring automatic deployments.
Changes you make on Security Cloud Control for a device are not automatically deployed to the device if it has pending changes  . If a device is not in the Synced state, such as Conflict Detected or Not Synced, scheduled deployments are not executed. The jobs page lists any instance where a scheduled deployment fails.
If you turn off Enable the Option to Schedule Automatic Deployments, all scheduled deployments are deleted.
Important |
If you use Security Cloud Control to create more than one scheduled deployment for a device, the new deployment overwrites the existing deployment. If you create more than one scheduled deployment for a device using the API, you must delete the existing deployment before scheduling the new deployment. |
Follow these steps to enable scheduled automatic deployments:
Procedure
|
Step 1 |
Choose . |
|
Step 2 |
Turn on the Enable the option to schedule automatic deployments toggle button to enable it. |
Manage web analytics
Web analytics provides anonymous product usage information to Cisco based on page hits. The information includes pages viewed, the time spent on a page, browser versions, product version, and device hostname. This data helps Cisco determine feature usage patterns and improve the product. All usage data is anonymous and no sensitive data is transmitted.
Web analytics is enabled by default. To disable web analytics or re-enable it in the future, complete these steps:
Procedure
|
Step 1 |
Choose . |
|
Step 2 |
Turn on the Web Analytics toggle button to enable it. |
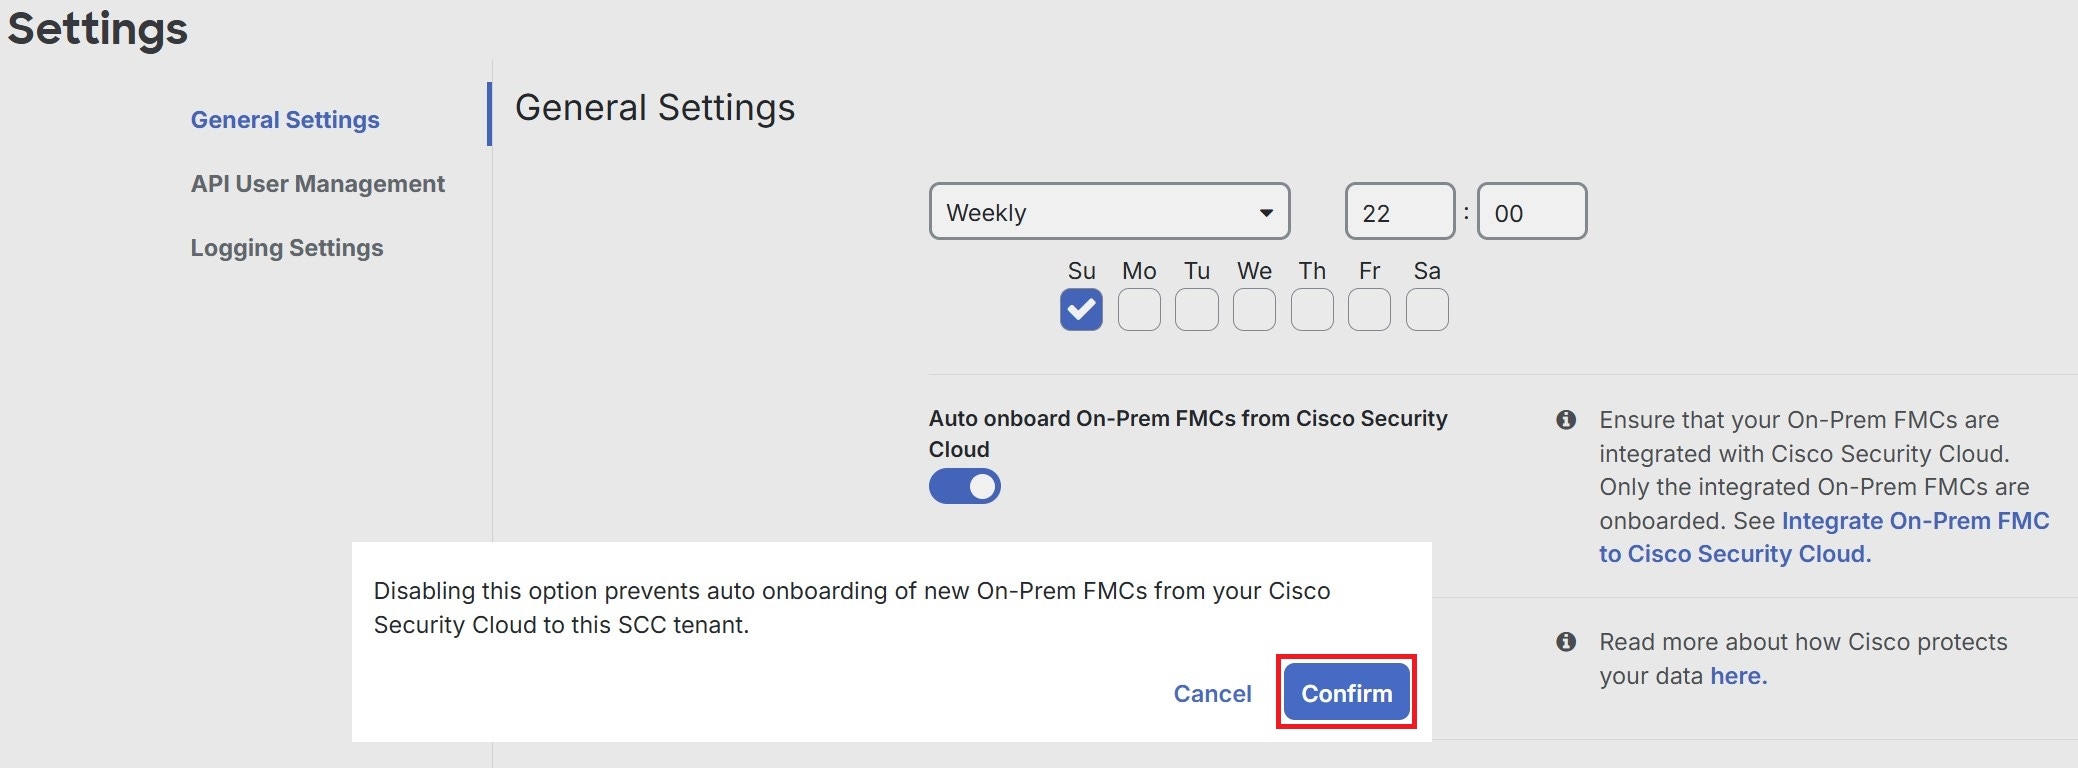
Auto onboard On-Prem FMCs from Cisco Security Cloud
Disabling the auto-onboarding functionality stops new on-premises Firewall Management Centers from being automatically added from your Cisco Security Cloud tenant.
Note |
Only a Super Admin or Admin can enable or disable this functionality on Security Cloud Control. |
Procedure
|
Step 1 |
Choose . |
|
Step 2 |
Turn off the Auto onboard On-Prem FMCs from Cisco Security Cloud toggle button to disable the auto-onboarding of on-premises Firewall Management Center. |
|
Step 3 |
Click Confirm.
|
Enable event data sharing with Talos
Share malicious event data from your device with Talos, Cisco's threat intelligence organization. Sharing event data allows Talos to improve threat detection and response capabilities, provide more targeted security updates for your network, and deliver better protection against emerging threats.
For more information about Talos, see the Cisco Talos product page.
Enabling the Enable event data sharing with Talos toggle button does not automatically activate the Talos Threat Hunting Telemetry feature in Cloud-Delivered Firewall Management Center. For the best results with this feature, also enable the Talos Threat Hunting Telemetry in Cloud-Delivered Firewall Management Center. For more information, see Set Intrusion Policy Preferences.
Sharing event data with Talos is enabled by default. To opt out, follow this procedure:
Procedure
|
Step 1 |
Choose . |
||
|
Step 2 |
Turn off the Enable event data sharing with Talos toggle button to disable this setting.
|
View firewall management instance details
Firewall Management Instance Details are helpful if you need to contact the Cisco Technical Assistance Center (TAC). You can copy these tenant details by clicking the copy icon.
-
Firewall Management Instance Name: The display name of the firewall management instance.
-
Firewall Management Instance ID: The system-generated unique identifier for the firewall management instance in Cisco Security Cloud Control.
-
Secure Services Exchange ID: The unique identifier for the firewall management instance in the Secure Services Exchange environment. Cisco uses this value for service integration and backend correlation across cloud services.
-
Security Cloud Control Organization ID: The unique identifier of the Security Cloud Control organization associated with the firewall management instance.
Use the Security Cloud Control Firewall Management platform navigator
The platform navigator is a nine-block applications cross-launcher ( ) that appears on the top-right corner of Security Cloud Control. You can readily cross-launch to these Cisco networking and security applications:
 ) icon to add a new user to your tenant.
 to view the most recent alerts that have occurred or affected the devices that you onboarded to your tenant. The settings
that you choose on the Notification Settings page determine the notification types that appear in
to view the most recent alerts that have occurred or affected the devices that you onboarded to your tenant. The settings
that you choose on the Notification Settings page determine the notification types that appear in 
 in the left-hand pane of the Security Devices, Policies, and Objects tabs.
 Feedback