Rack Mount the Chassis
The chassis can be mounted on a 4-post or a 2-post rack.
 Warning |
Statement 1032—Lifting the Chassis To prevent personal injury or damage to the chassis, never attempt to lift or tilt the chassis using the handles on modules, such as power supplies, fans, or cards. These types of handles are not designed to support the weight of the unit. |
Warning |
Statement 1006—Chassis Warning for Rack-Mounting and Servicing To prevent bodily injury when mounting or servicing this unit in a rack, you must take special precautions to ensure that the system remains stable. The following guidelines are provided to ensure your safety:
|
Rack-Mount the Chassis in a 4-Post Rack
This section describes how to install these switches in a 4-post rack:
-
Cisco 8102-64H-O
-
Cisco 8101-32H-O
-
Cisco 8111-32EH-O
-
Cisco 8122-64EH-O
-
Cisco 8102-28FH-DPU-O
-
Cisco 8122-64EHF-O
-
Cisco 8101-32FH-O-C01
 Caution |
If the rack is on wheels, ensure that the brakes are engaged or that the rack is otherwise stabilized. |
The following table lists the items that are contained in the rack-mount kit.
|
Quantity |
Part Description |
|---|---|
|
2 |
Rack-mount brackets |
|
18 |
M4 x 6-mm Phillips flat-head screws |
|
2 |
M4 x 6-mm Phillips pan-head screws |
|
2 |
Rack-mount guides |
|
2 |
Rack-mount guide rails, 2 lengths for different 4-post depths |
|
1 |
Grounding lug and screws |
 Note |
These switches do not support the Port-Side Exhaust (PSE) configuration:
|
Procedure
|
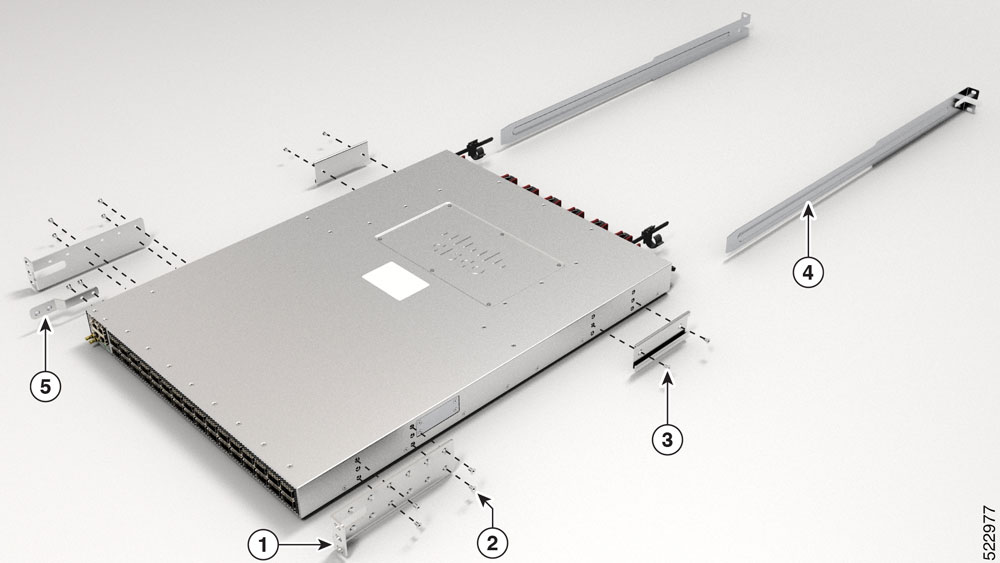
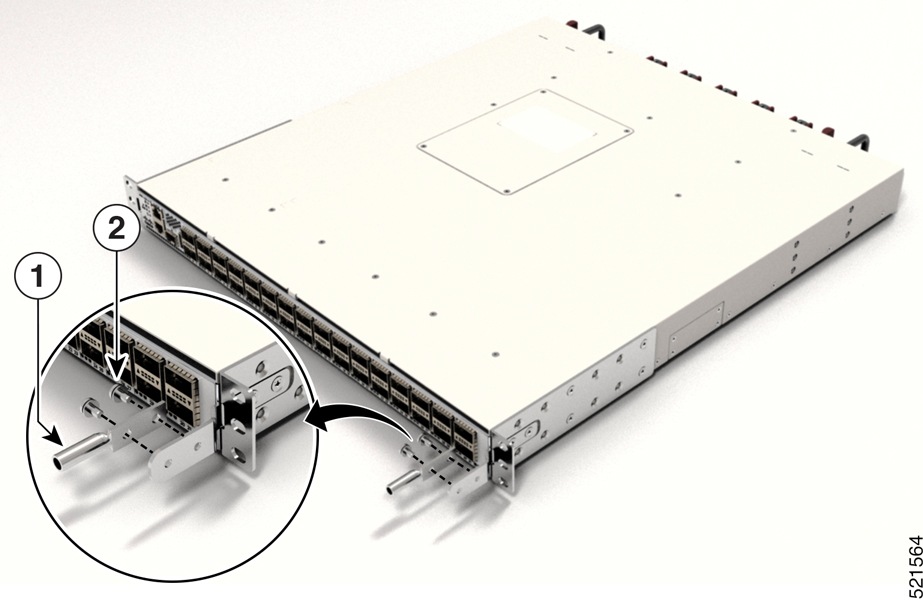
Step 1 |
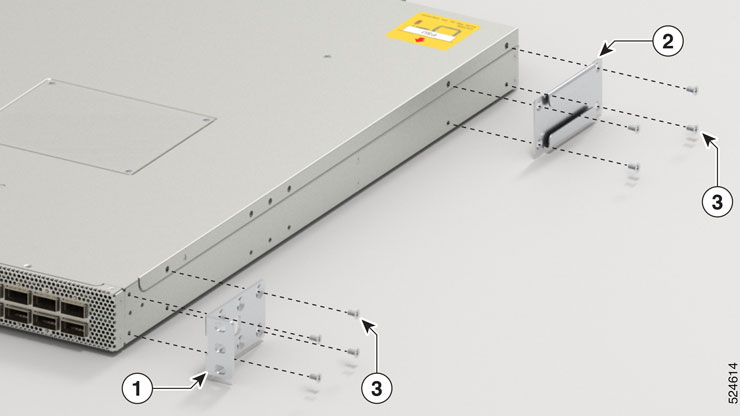
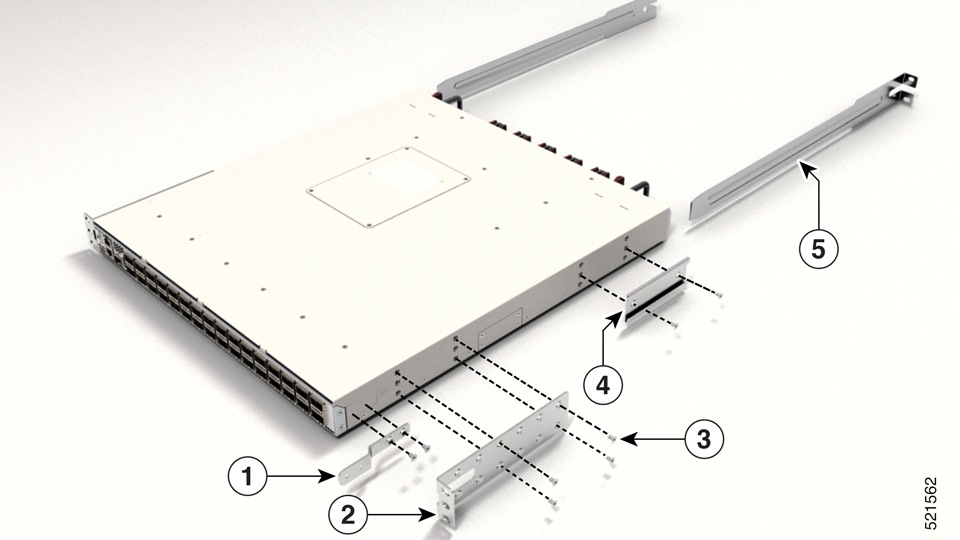
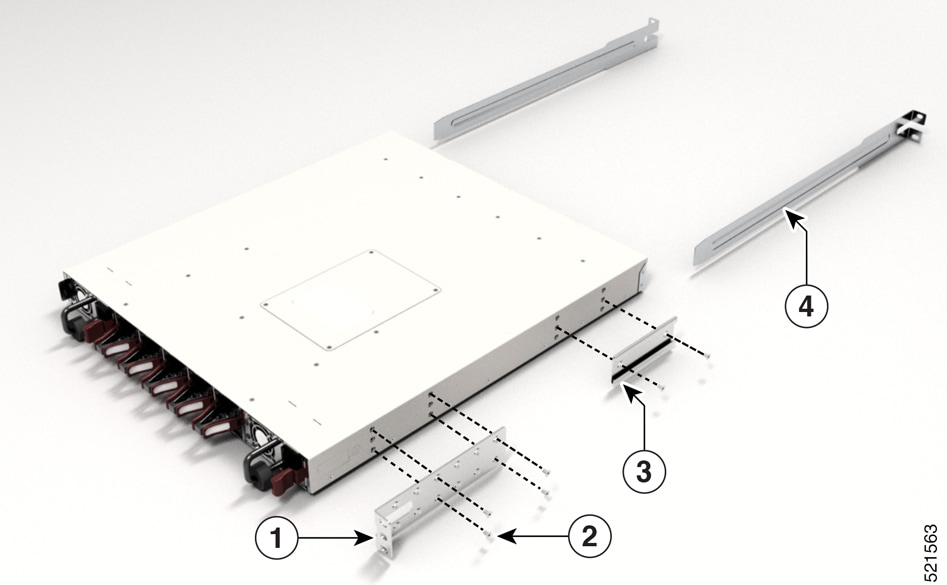
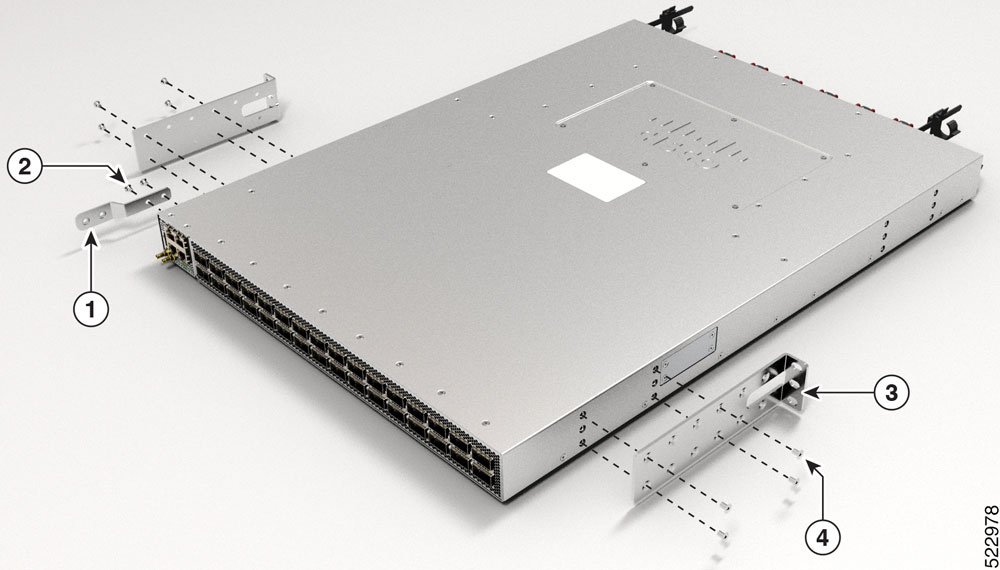
Install the rack-mount brackets to the switch as follows:
|
||||||||||||||||||||||||||||||||||||||||||||||||||||||||||||||||||
|
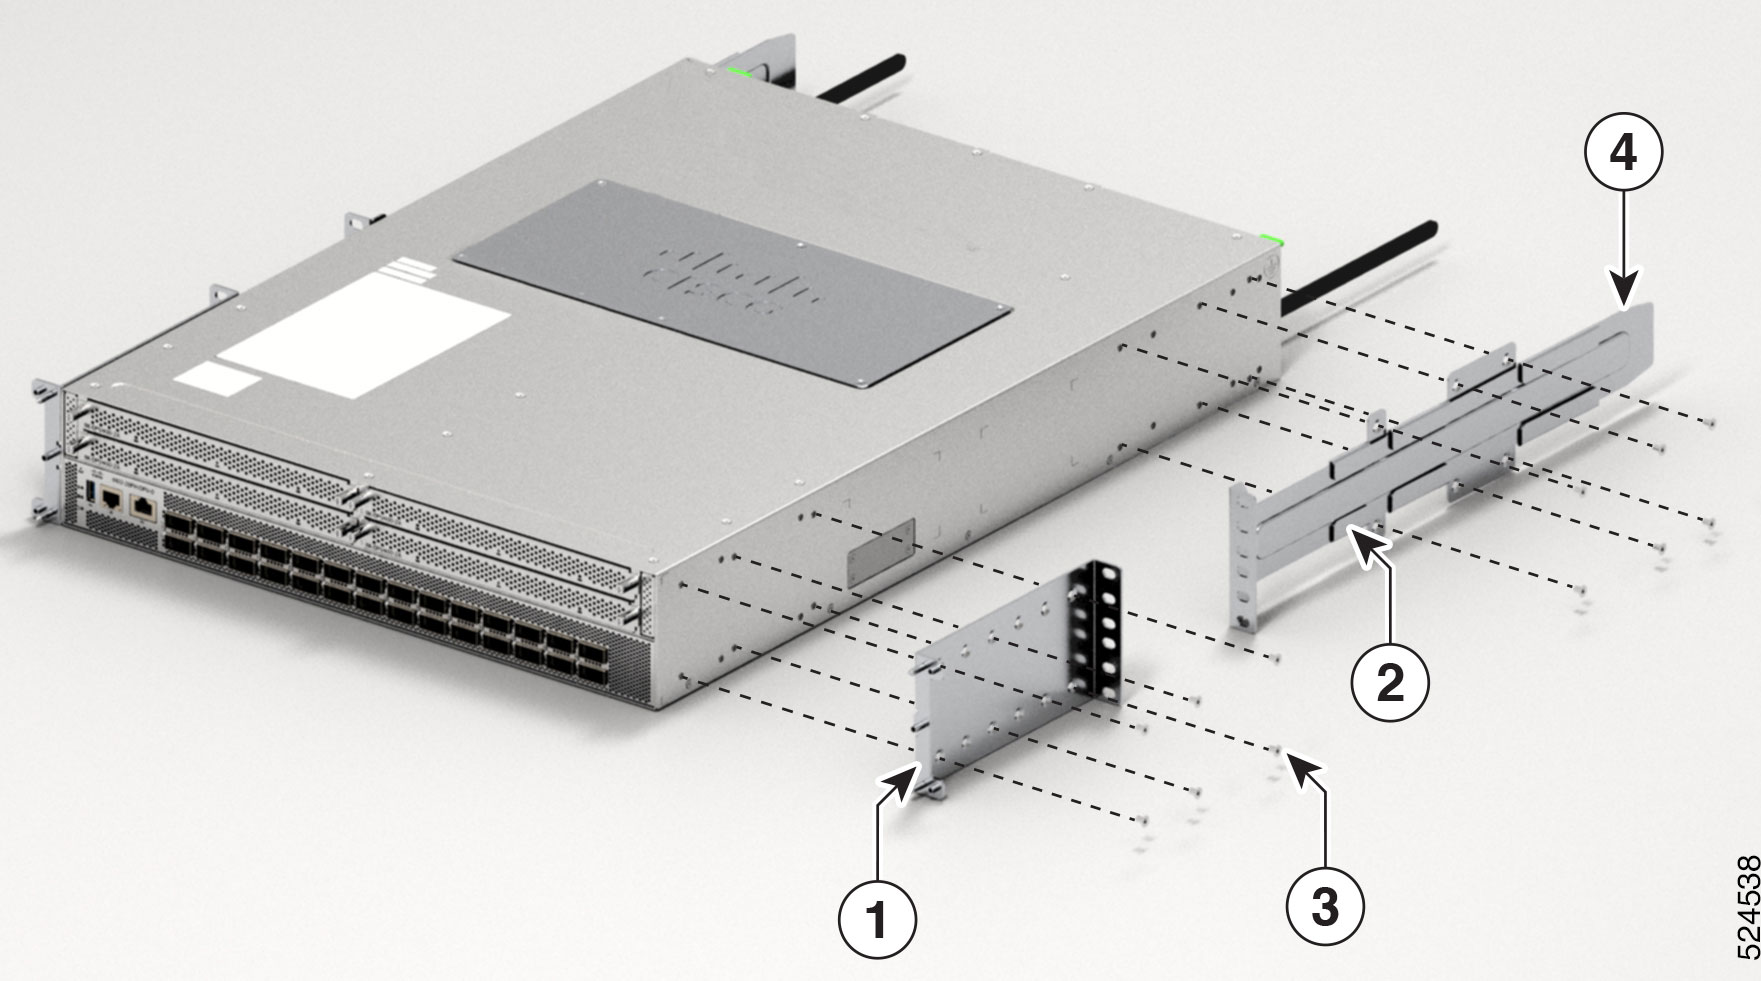
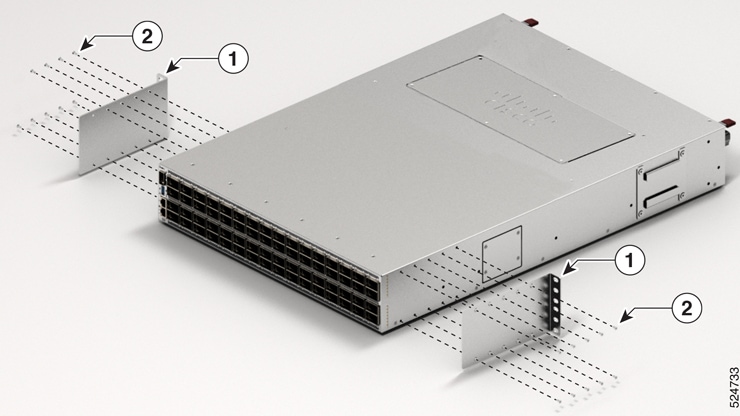
Step 2 |
Install the two rack-mount guides on the chassis:
|
||||||||||||||||||||||||||||||||||||||||||||||||||||||||||||||||||
|
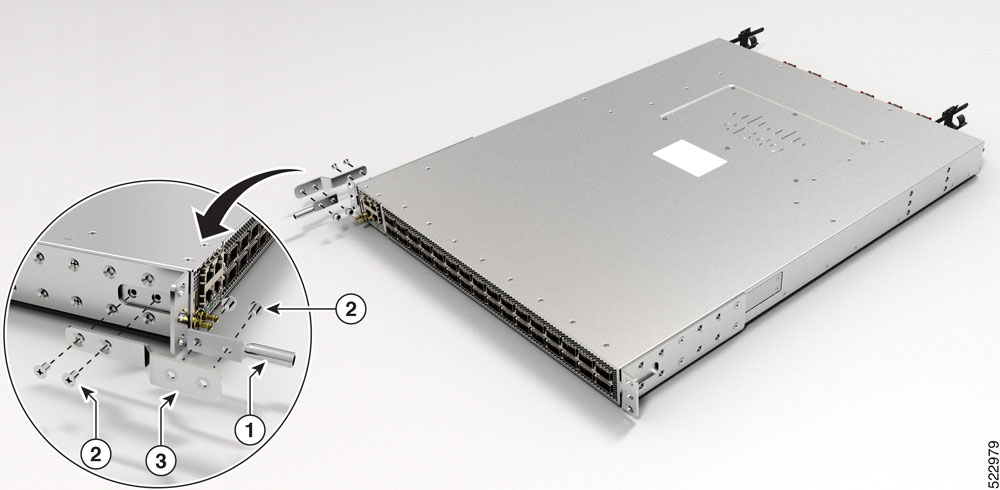
Step 3 |
Attach the ground lug bracket to the switch (refer to item 1 in Figure 8).
|
||||||||||||||||||||||||||||||||||||||||||||||||||||||||||||||||||
|
Step 4 |
Install the guide rails to the rack: 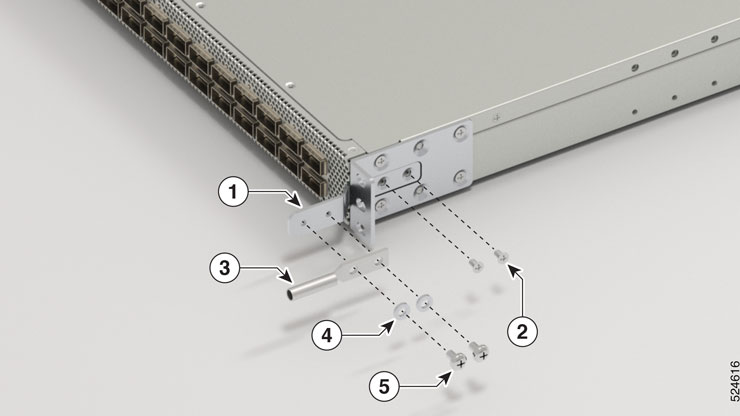
|
||||||||||||||||||||||||||||||||||||||||||||||||||||||||||||||||||
|
Step 5 |
Insert the switch into the rack and attach:
|
||||||||||||||||||||||||||||||||||||||||||||||||||||||||||||||||||
|
Step 6 |
Attach the ground lug to the ground lug bracket (refer to item 3 in Figure 8).
|
||||||||||||||||||||||||||||||||||||||||||||||||||||||||||||||||||
|
Step 7 |
Tighten the 10-32 screws to 20 in-lb (2.26 N.m) or tighten the 12-24 screws to 30 in-lb (3.39 N.m). |

Rack-Mount the Chassis in a 2-Post Rack
This section describes how to install these switches into a cabinet or in a 2-post rack:
-
Cisco 8101-32H-O
-
Cisco 8111-32EH-O
-
Cisco 8122-64EH-O
-
Cisco 8102-28FH-DPU-O
-
Cisco 8122-64EHF-O
Caution |
If the rack is on wheels, ensure that the brakes are engaged or that the rack is otherwise stabilized. |
The following table lists the items contained in the rack-mount kit that is provided with the switches.
|
Quantity |
Part Description |
|---|---|
| 2 |
Rack-mount brackets |
| 8 |
M4 x 0.7 x 6-mm Phillips flat-head screws |
Procedure
|
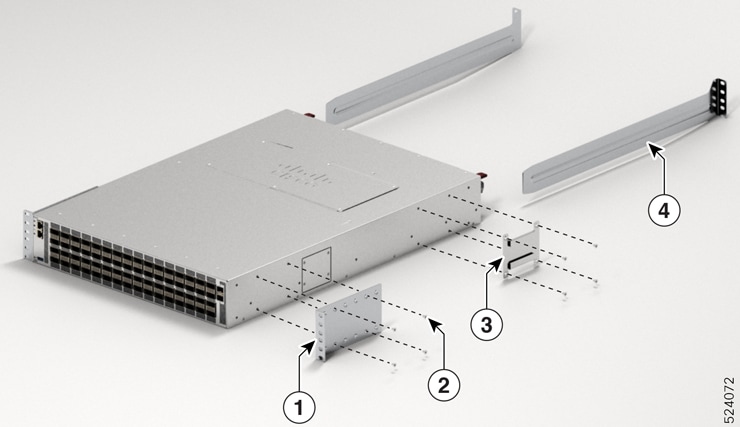
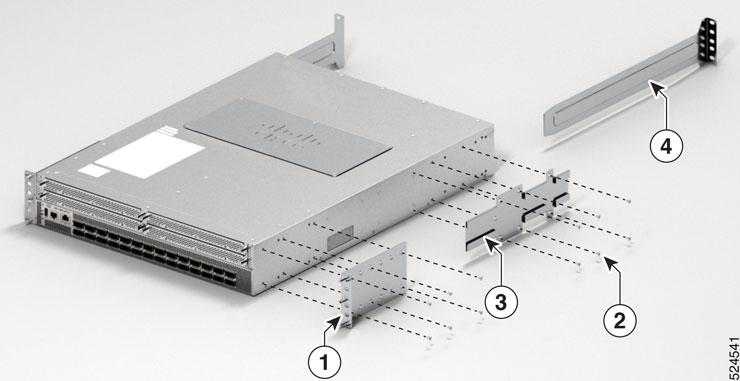
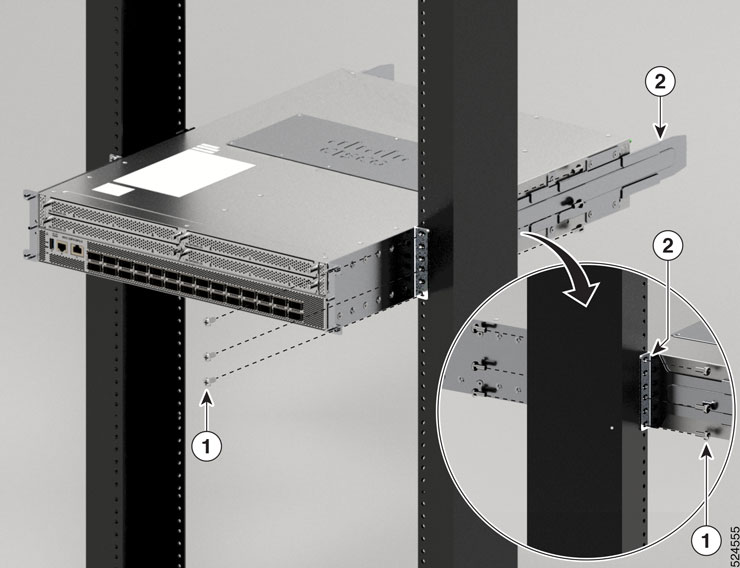
Step 1 |
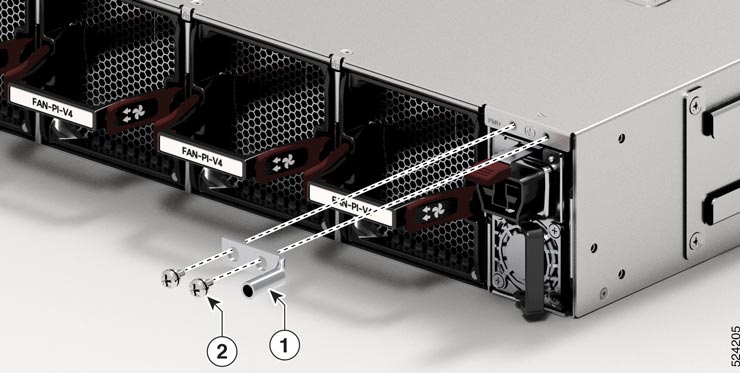
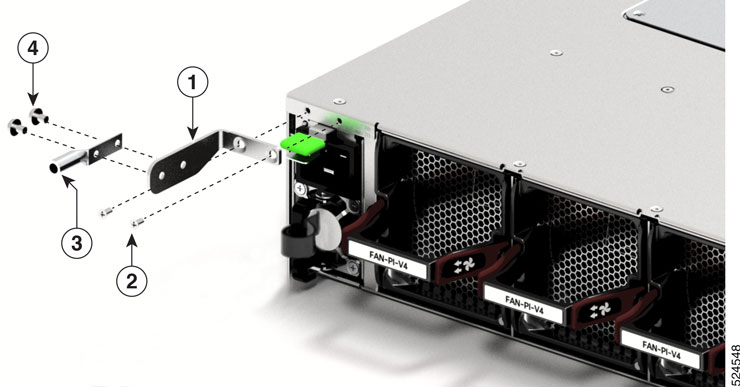
Install two rack-mount brackets to the switch:
|
||||||||||||||||||||||||||||||||
|
Step 2 |
Install the switch onto the 2-post rack:
|


Rack-Mount the Cisco 8111-32EH-O Switch in a 4-Post Guide Rail
Note |
The 4-post guide rail is designed only for a 19-inch, Electronic Industries Alliance (EIA) rack with square-hole vertical rails. |
-
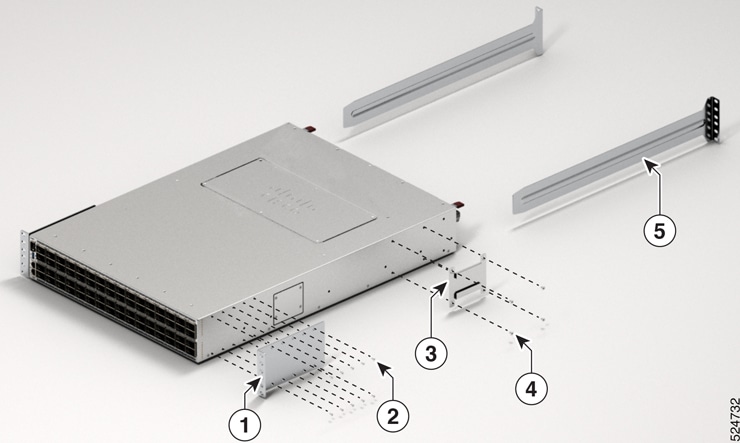
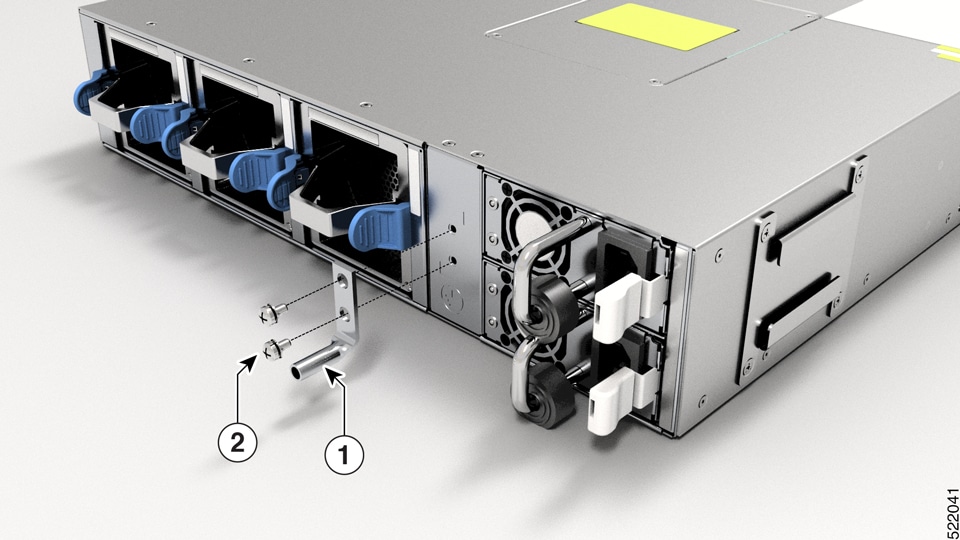
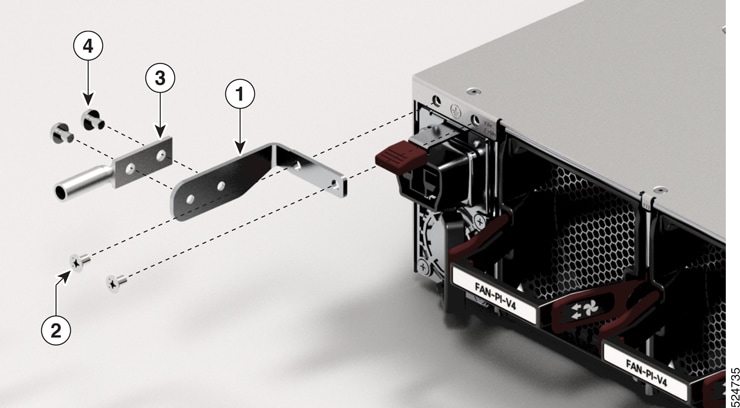
Install the ground lug to the chassis.
Figure 18. Install the Ground Lug 
1
Grounding plate
3
Ground lug 2
M4 x 6-mm Phillips flat-head screws
4
Captive screws
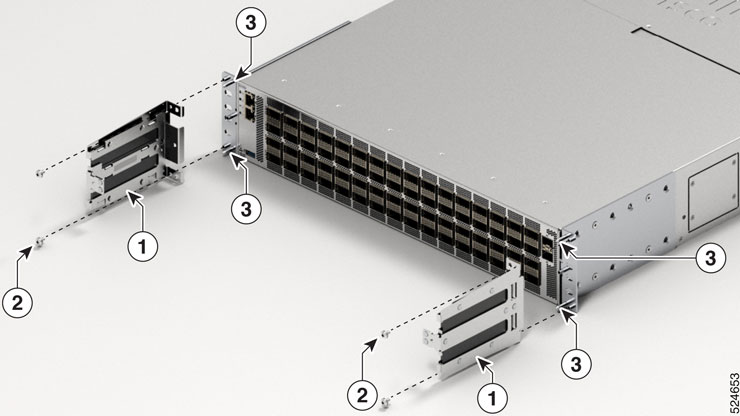
-
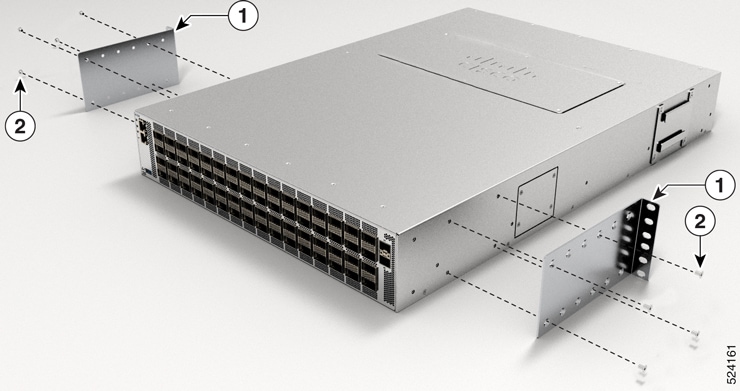
Install the side brackets on the left-side and right-side of the chassis.
Figure 19. Install Side Brackets to the Chassis 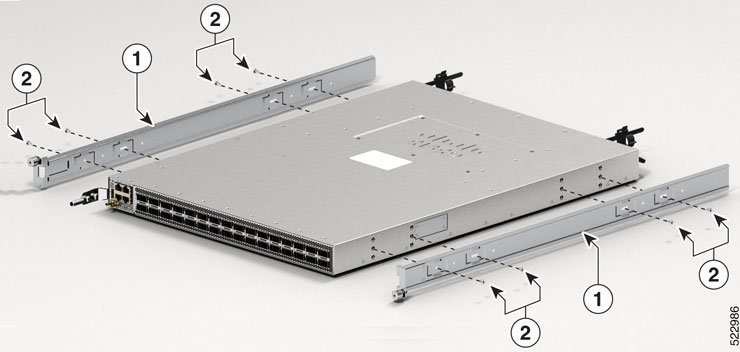
1
Side brackets
2
M4 x 6-mm Phillips flat-head screws
-
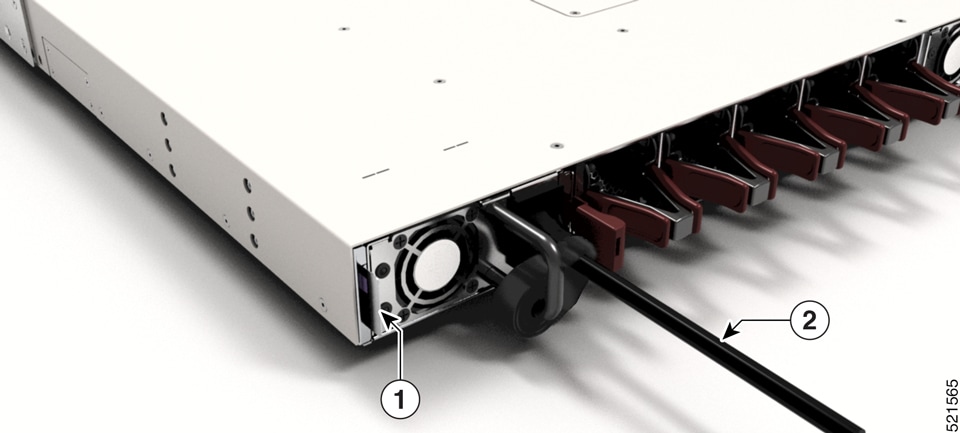
Secure the slide rails to each side of the square-hole vertical rails by using the latch.
Figure 20. Secure Slide Rails with the Latch 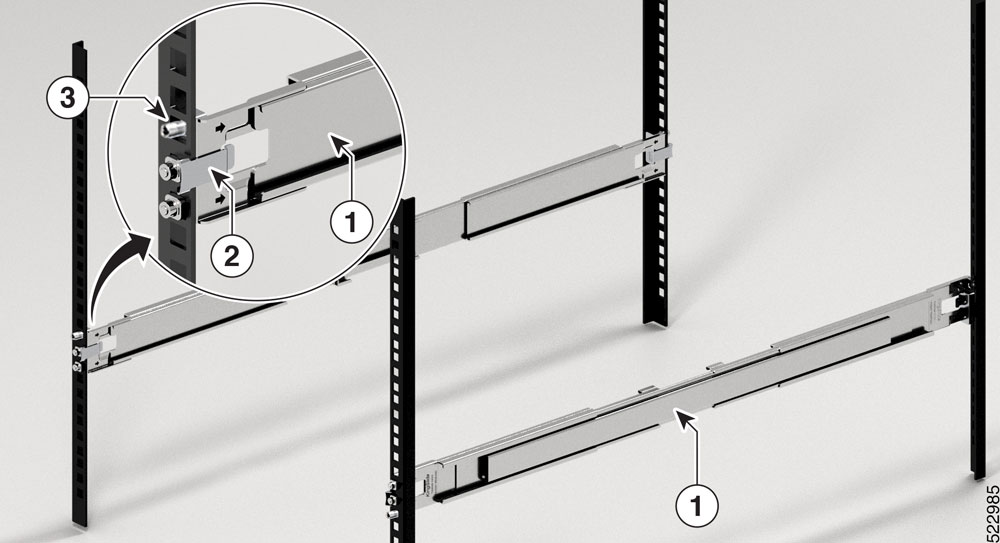
1
Slide rails
2
Latch
3
Thread for captive screws
Note
The two slide rails are identical and can be installed to either left or right vertical rails in any orientation.
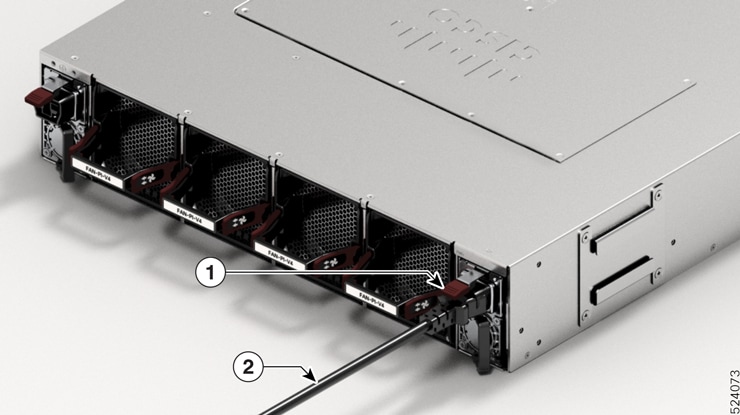
-
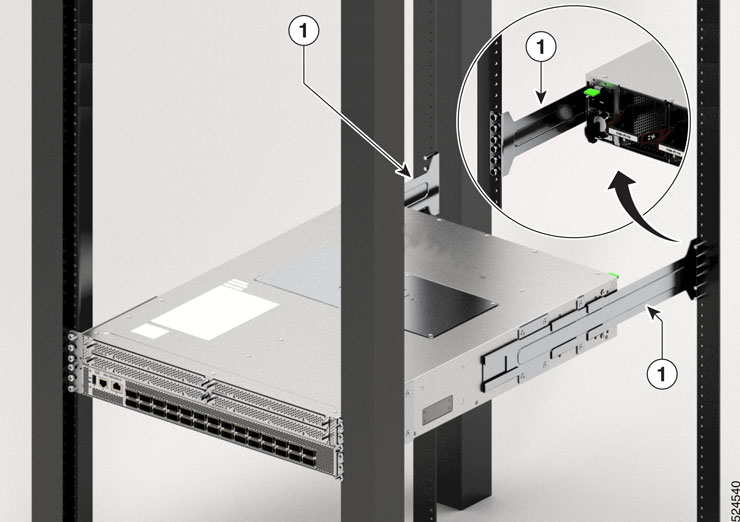
Slide the chassis into the mounted rack.
Figure 21. Slide Chassis into the Rack 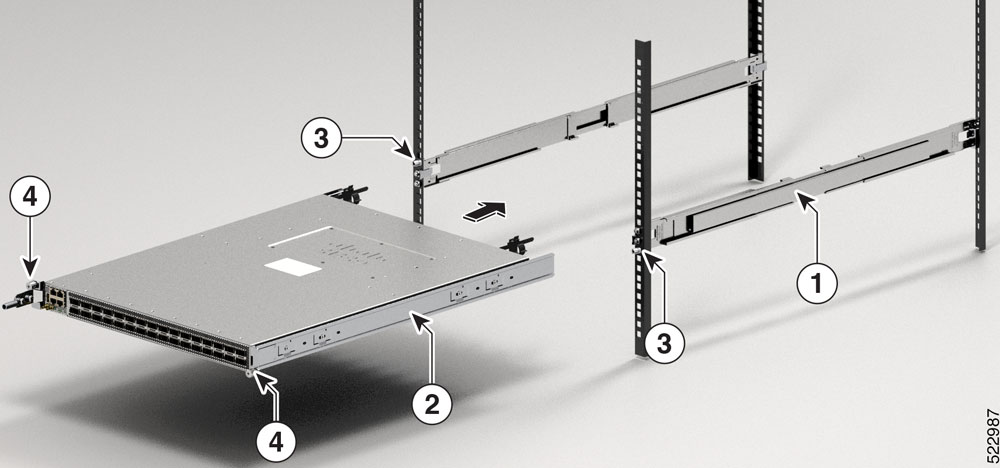
1
Slide rails
2
Chassis with side brackets
3
Thread for captive screws
4
Captive screws
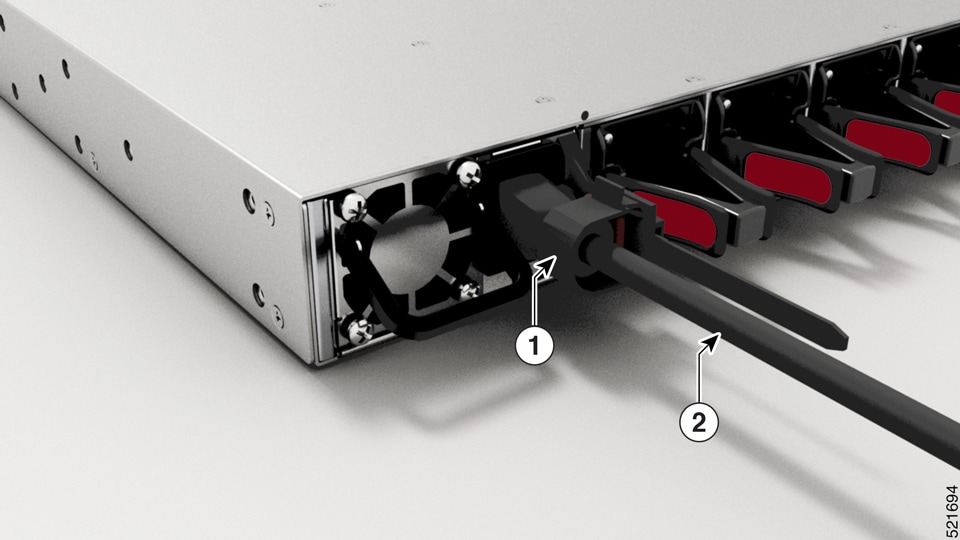
-
Tighten captive screws on front bracket (on each side) to secure chassis to the rack. Tighten the screws to a torque value of 14 in-lbs (1.58 N-m).
Figure 22. Tighten Captive Screws on the Front of the Chassis 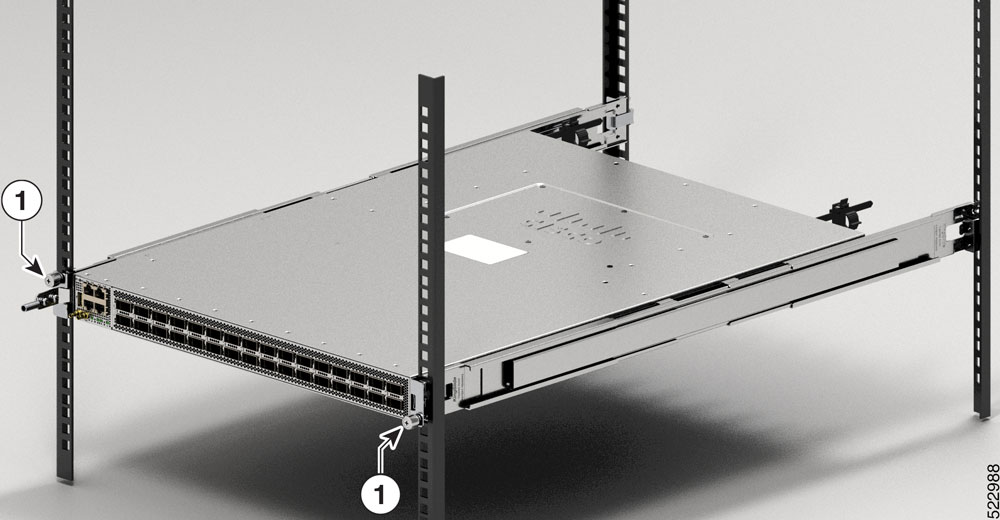
1
Captive screws


 Feedback