Getting Started Guide for Stack Automation by Quali
Available Languages
Bias-Free Language
The documentation set for this product strives to use bias-free language. For the purposes of this documentation set, bias-free is defined as language that does not imply discrimination based on age, disability, gender, racial identity, ethnic identity, sexual orientation, socioeconomic status, and intersectionality. Exceptions may be present in the documentation due to language that is hardcoded in the user interfaces of the product software, language used based on RFP documentation, or language that is used by a referenced third-party product. Learn more about how Cisco is using Inclusive Language.
- US/Canada 800-553-2447
- Worldwide Support Phone Numbers
- All Tools
 Feedback
 Feedback
Stack Automation
Stack Automation by Quali (co-developed by Cisco and Quali and offered exclusively by Cisco) is an agentic platform designed to bridge the gap between IT planning, implementation, and operations. It replaces weeks of manual configuration with automated, policy-driven deployments, allowing you to scale your infrastructure with confidence. Stack automation provides validated Cisco and third-party solutions for the entire lifecycle: planning (Day 0), implementation (Day 1), and operations (Day 2).
Stack Automation enables organizations to automate production, ready workloads at cloud speed, reduce manual errors, and focus IT teams on innovation rather than repetitive configuration tasks. The capabilities, benefits, initial steps and deployment details are discussed in detail in the subsequent pages.
Lifecycle capabilities
Stack Automation provides lifecycle management for the complete environment, from infrastructure and applications to dependencies and operational workflows. It enables you with governed self-service deployment while continuously managing state, policy, cost, Day-2 operations, and scheduling. It also ensures resource efficiency by automatically tearing down environments at the end of their defined TTL (Time to Live).
Stack Automation manages the environment through these features:
● Automated TTL (Time to Live) management.
◦ Enforces time-bound environments, allows controlled extensions, and automatically decommissions resources when the TTL expires to reduce cost and prevent environment sprawl.
◦ Supports both time-bound environments with automated TTL enforcement and decommissioning, as well as always-on environments for persistent workloads and shared services.
● Power management: Start, stop, restart, or retrieve the power state of VMs.
● Database management: Start, stop, restart, or delete database servers.
● Kubernetes operations: Pause or resume clusters, retrieve pod logs, inspect ConfigMaps, and manage secrets.
● Storage management: Attach or detach block-storage volumes from instances.
● Govern access and consumption
◦ Applies role-based access, approvals, deployment restrictions, location rules, instance-size controls, expected-cost limits, and other custom policies.
◦ Evaluates governance both before launch and throughout the environment lifecycle.
● Operate and maintain
◦ Monitors environment state, provisioning failures, configuration drift, and operational issues.
◦ Supports one-click, scheduled, recurring, and event-triggered Day-2 actions such as updates, maintenance, scaling, remediation, and configuration changes.
◦ Environment updates: Redeploy specific components using new IaC code or updated input values without rebuilding the entire environment.
◦ Health checks: Validate service, application, infrastructure, and environment health.
◦ Scaling and capacity changes: Add storage, resize resources, or adjust infrastructure based on workload needs.
◦ Troubleshooting: Collect logs, inspect runtime state, and execute diagnostic commands.
◦ Custom operational workflows: Execute organization-specific scripts.
● Schedule and reserve
◦ Schedules environments for future windows and reserves limited infrastructure or inventory such as GPUs, licenses, static VMs, and specialized assets.
◦ Helps coordinate shared capacity across development, testing, demonstrations, training, and AI workloads.
● Control cost and utilization
◦ Tracks deployment costs with user, team, project, and environment context.
◦ Enforces maximum duration, identifies idle environments, recommends termination opportunities, and automatically shuts down resources that are no longer required.
● Extend, reuse, and share
◦ Allows environments to be extended rather than rebuilt.
◦ Supports published environments that can be reused as shared services or dependencies while retaining independent lifecycle ownership and governance.
● Decommission cleanly
◦ Executes controlled teardown workflows to remove infrastructure and dependent resources.
◦ Supports custom cleanup logic, including Ansible on-destroy processes, to reduce orphaned resources and configuration residue.
Benefits
Stack Automation provides a validated deployment path for Cisco, ISV, and partner software. It reduces the time required to deploy complex solutions from weeks to minutes.
With Stack Automation, you can
● Customize existing blueprints: Start with proven, reusable blueprints and adapt infrastructure, applications, policies, inputs, and workflows to meet specific use cases.
● Bring your own automation: Integrate existing Terraform, Ansible, Helm, scripts, APIs, and CI/CD automation without rebuilding what already works.
● Extend with AI: Use AI to accelerate blueprint creation, generate or modify automation, troubleshoot deployments, and trigger intelligent lifecycle actions.
Blueprint management
Stack Automation provides a catalog of curated solutions. You can customize existing blueprints or create new ones. You can import your own code, use the embedded agentic co-pilot, or integrate agentic tools such as Claude Cowork, Codex, and NVIDIA Nemotron.
Stack Automation offers two types of curated solutions:
● Software-only: including OS provisioning, VMaaS, GPUaaS, and Cisco and 3rd party applications (such as Nexus Dashboard, NVIDIA NIMs, Proxmox, Splunk, and Isovalent).
● Full-Stack: complete solutions such as AI PODs, FlexPods and FlashStacks will be made available in the upcoming releases.
Deployment capabilities
Stack Automation supports these deployment requirements:
● Validated solutions: Provides a library of Cisco, ISV, and partner software.
● Deployment speed: Reduces manual configuration time to minutes.
● Infrastructure flexibility: Allows users to deploy solutions on their own infrastructure, cloud and heterogeneous infrastructure.
● Marketplace integration: Offers a streamlined path for customers to test or adopt new solutions.
Stack Automation platform components
The Stack Automation platform consists of two primary components: the Stack Automation portal and the management server.
Stack Automation portal
The portal is a SaaS-based interface. You can browse the catalog and initiate deployments through this portal.
Management server
The management server is a VM-based appliance that executes deployments. It performs these functions:
● Fetches automation artifacts based on catalog selections.
● Deploys runners that interpret infrastructure as code tools, such as Terraform, Ansible, Helm, and Shell.
● Applies automation to private infrastructure.
● Acts as a proxy to reach isolated environments that lack internet access.
● Provides utilities, such as HPING3, for smart defaults.
● Hosts and caches images as a local web repository.
Cloud communication
Communication between the portal and public clouds, such as AWS, Intersight, or Azure, does not route through the management server. You can spawn dedicated cloud management servers for public clouds to
manage accounting. The platform supports both traditional clouds and neoclouds.
Your Stack Automation journey
Your journey with Stack Automation is designed to take you from your first login to full-scale infrastructure management. Whether you are deploying on-premises or in the cloud, this roadmap breaks your path down into five clear phases. You will start by getting comfortable with the platform’s interface, move through the specific deployment path that matches your infrastructure, and ultimately master the lifecycle management tools you need to govern and scale your environment with confidence. Follow this journey to ensure you have everything you need to plan, implement, and operate your infrastructure efficient.
| Phase |
Goal |
Success Metric |
| Orientation |
Build your platform proficiency. |
You complete the Meet Stack Automation tour and select your deployment path. |
| Path Selection |
Align with your infrastructure needs. |
You identify the required setup (On-Prem or Cloud) for your specific environment. |
| Execution |
Build your environment. |
On-Prem: You provision the Management Server, manage your integrations (such as, Intersight/vCenter/Nexus) and deploy the required blueprints. Cloud: You onboard the cloud server (AWS) and deploy the required blueprints. |
| Active Management |
Maintain your services. |
On-Prem: You monitor service health, resolve configuration issues, and maintain uptime. Cloud: You monitor cloud resource utilization and ensure your services remain accessible. |
| Growth & Scale |
Optimize and expand your lifecycle. |
On-Prem: You manage infrastructure drift, version your blueprints, and add additional integrations. Cloud: You scale your AWS footprint by onboarding more accounts and sharing resources across spaces. |
The Stack Automation GUI
Before you choose either of these deployment paths, you need to login to the Stack Automation GUI to understand and get familiar with the product.
Log in to the GUI
1. In the address bar of a web browser, enter https://stackautomation.cisco.com
2. On the Welcome to Stack Automation screen, click Create an Account (below the blue Sign In with Cisco ID button).
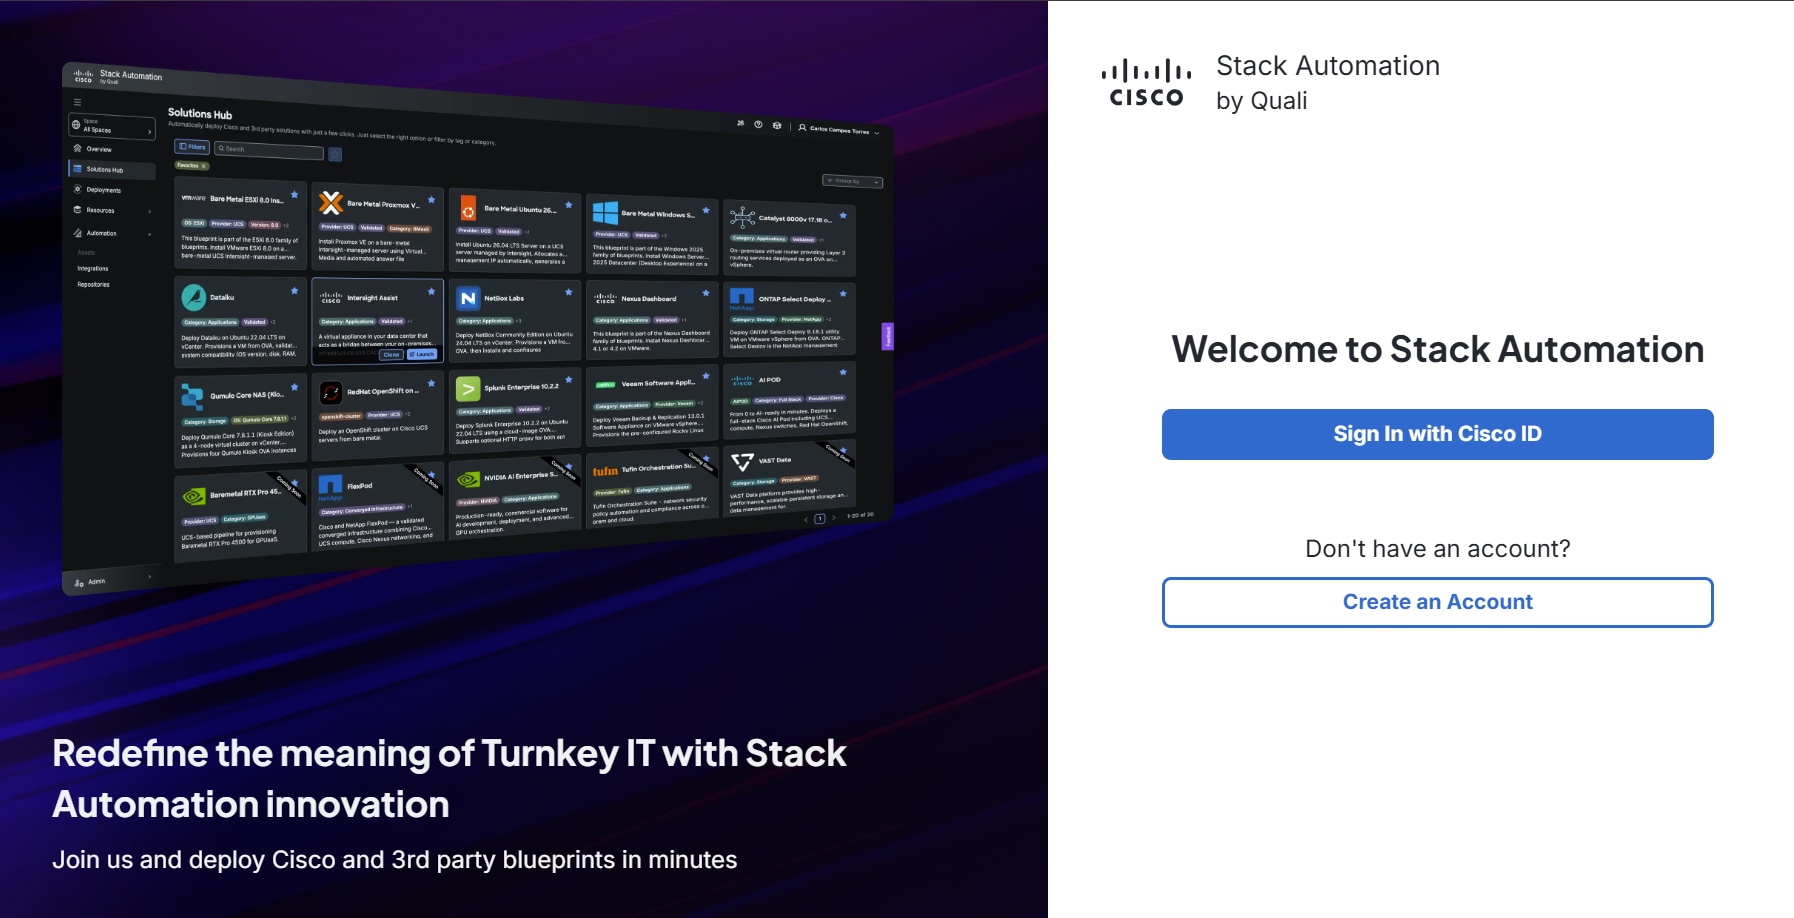
3. Select the check box indicating that you have read the Terms and Conditions, and click Sign-up with Cisco ID.
4. On the Create Account screen, your Cisco email ID is automatically made available, you will only need to enter a name for the Set Account Name field.
5. Click Register.
After the loading process is complete, you will be granted access to the portal.
Meet Stack Automation
The Journey section (which can be accessed at any time on the left navigation menu through Overview) loads by default, along with the Meet Cisco Stack Automation pop-up, which is the first step in your Journey.
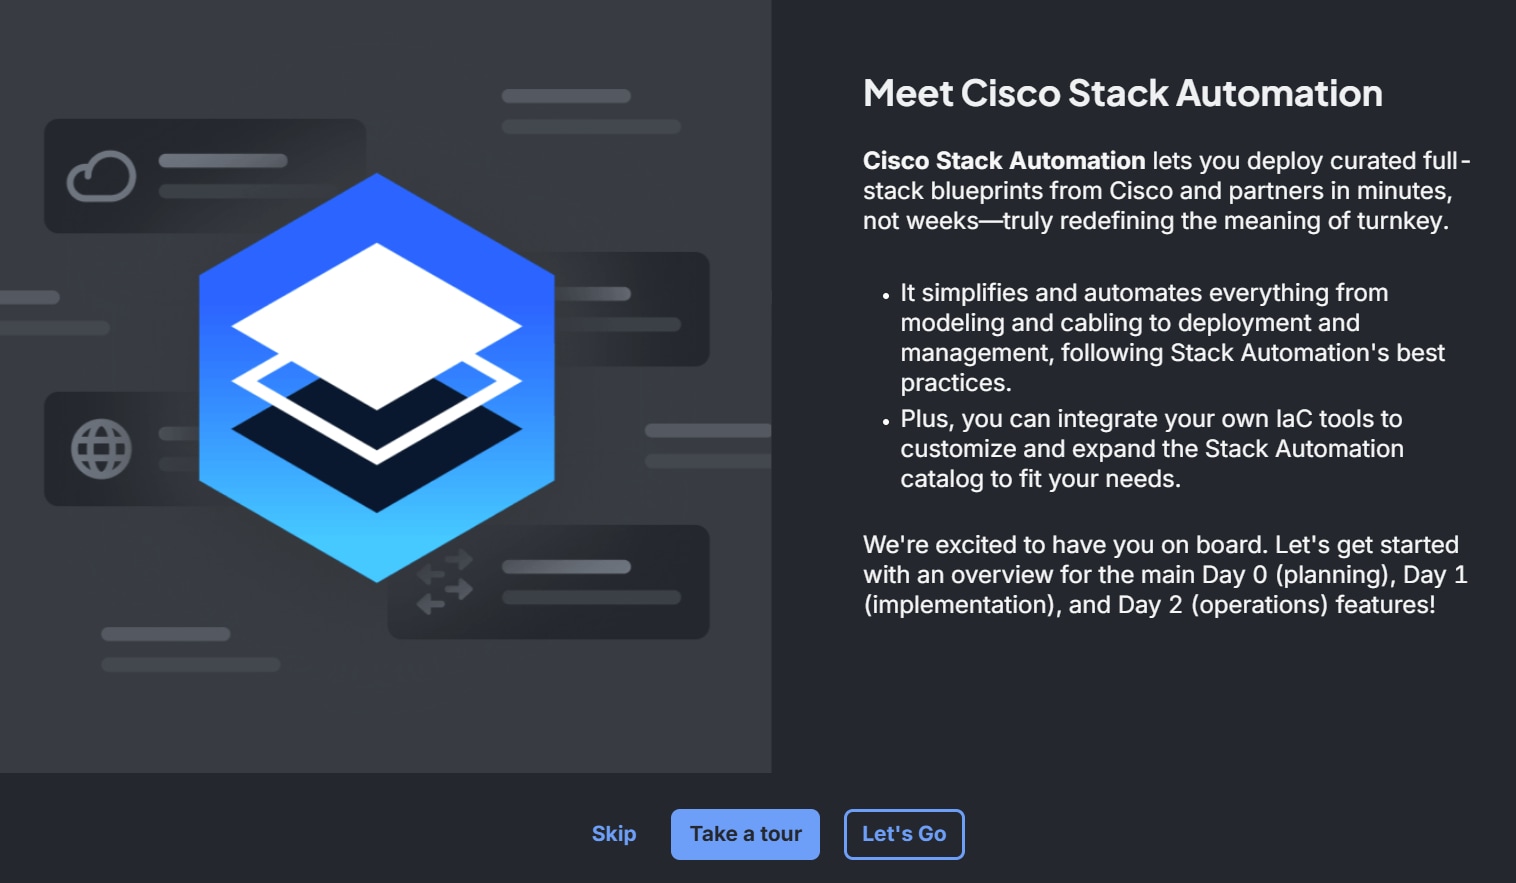
Your primary objective is to accelerate your Stack Automation proficiency as quickly and effectively as possible. Choose the path below that best matches your current goal:
Path Selection Details
· For guided learning: Select Let's Go to receive a structured walkthrough of the platform.
· For immediate action: Select Skip to proceed directly to the Management Server installation—ideal for users ready to configure their on-prem environments.
· For Hands-on Validation: Select Take a Tour to provision a sample Linux EC2 instance and S3 bucket. This is the best way to see the platform's power without needing your own infrastructure ready.
Recommended Starting Point: If you are new to Stack Automation, select Take a Tour. It provides a sandboxed environment in ten minutes, allowing you to validate your setup without risking your production infrastructure.
You have logged in to the Stack Automation GUI and have taken the tour. Do you have any questions?
Frequently Asked Questions (FAQs)
Q: If I choose to "Skip" now, can I go back to the guided overview later?
A: Yes. The Journey is designed to be flexible. You can revisit the "Getting Started" steps at any time to ensure you haven't missed any foundational knowledge.
Q: What is the benefit of the "Take a Tour" option?
A: It provides a risk-free, sandboxed environment. By deploying a sample Linux EC2 instance and S3 bucket, you can confirm that your connectivity and permissions are configured correctly before you start managing your own production equipment.
Q: Is the Management Server required for everyone?
A: It is primarily required for on-prem environments. If you are working exclusively in a managed cloud environment, the installation steps may differ. Follow the prompt in the Journey for specific instructions based on your setup.
Q: How is my progress tracked?
A: Your progress is tracked through the "Getting Started" completion percentage. As you finish tasks, the percentage increases, giving you a clear view of how close you are to mastering the foundational setup.
Deployment paths
Stack Automation supports two primary deployment paths:
● On-premises (on-prem): Deploy blueprints to on-premises environments, including vCenter, ESXi, UCS via Intersight, Nexus Dashboard, and Kubernetes.
● Cloud: Deploy blueprints to public cloud accounts, such as AWS or Azure.
● Optional path: you can enhance your deployment workflow by integrating GitOps repositories. This option allows you to customize or create blueprints using the embedded co-pilot or external agentic tools.
On-prem deployment
On-prem deployment includes these steps:
| Step |
Goal |
Success Metric |
| Deploy management server |
To establish the secure local bridge between the SaaS portal and your private infrastructure. |
Navigate to Resources > Management Servers. Confirm that the deployment status is Connected. |
| Add integrations |
To connect the platform to your existing infrastructure (vCenter, UCS, etc.) for discovery. |
Navigate to Resources > Inventory. Confirm that the account status is Connected and the resources are visible. |
| Deploy blueprints |
To automate the provisioning of your first OS, VM, or application solution. |
Deployment status in the Solutions Hub is Active. |
Deploy the management server
Before you deploy the management server, let us understand what a management server is and how to access it.
Management servers
A Management server is an on-premise virtual machine (or physical appliance) that fetches automation artifacts from the portal and deploys automation against targets based on your Solutions Hub selection.
In addition to the standard on-premises management server, the system supports an agent for Kubernetes clusters.
● Automatic deployment: The system automatically embeds this agent when you create Kubernetes clusters through Stack Automation.
● Manual installation: You can manually install the agent in any existing Kubernetes cluster (on-premise, public cloud, or neocloud) as part of the onboarding process. For more information, see the Add a Kubernetes or Openshift Account section.
You can manage and view your servers through the Overview > Journey page. When you select the Install Stack Automation Management Server step, the system directs you to the Resources > Management Servers section.
If you selected the Take a Tour option during your initial setup, you will see one management server in your list. This server is specifically used to deploy sample blueprints. You can click View More on any Journey step to open a slide in-pane containing a detailed explanation of that component.
Goal: Deploy the management server
Your objective is to provision and connect your on-premises management server using VMware. Completing this task enables the server to fetch automation artifacts and deploy them to your infrastructure.
Prerequisites
· Ensure you have your vCenter credentials ready.
· Verify your network connectivity to the Hypervisor.
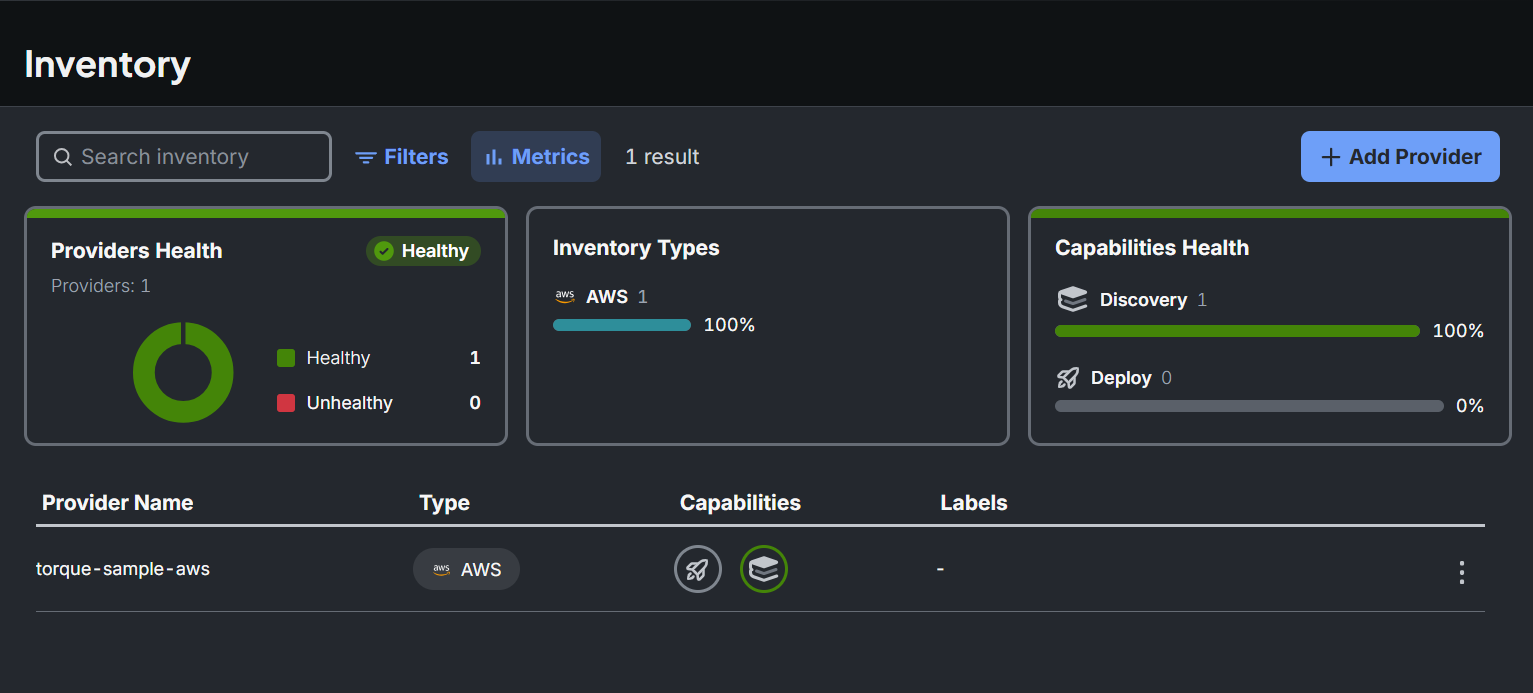
To check the connectivity, navigate to Resources > Inventory. For the provider, check the Capabilities column. Confirm that both the Deploy and Discover elements are indicated in green circles. Hover over the icons for details.
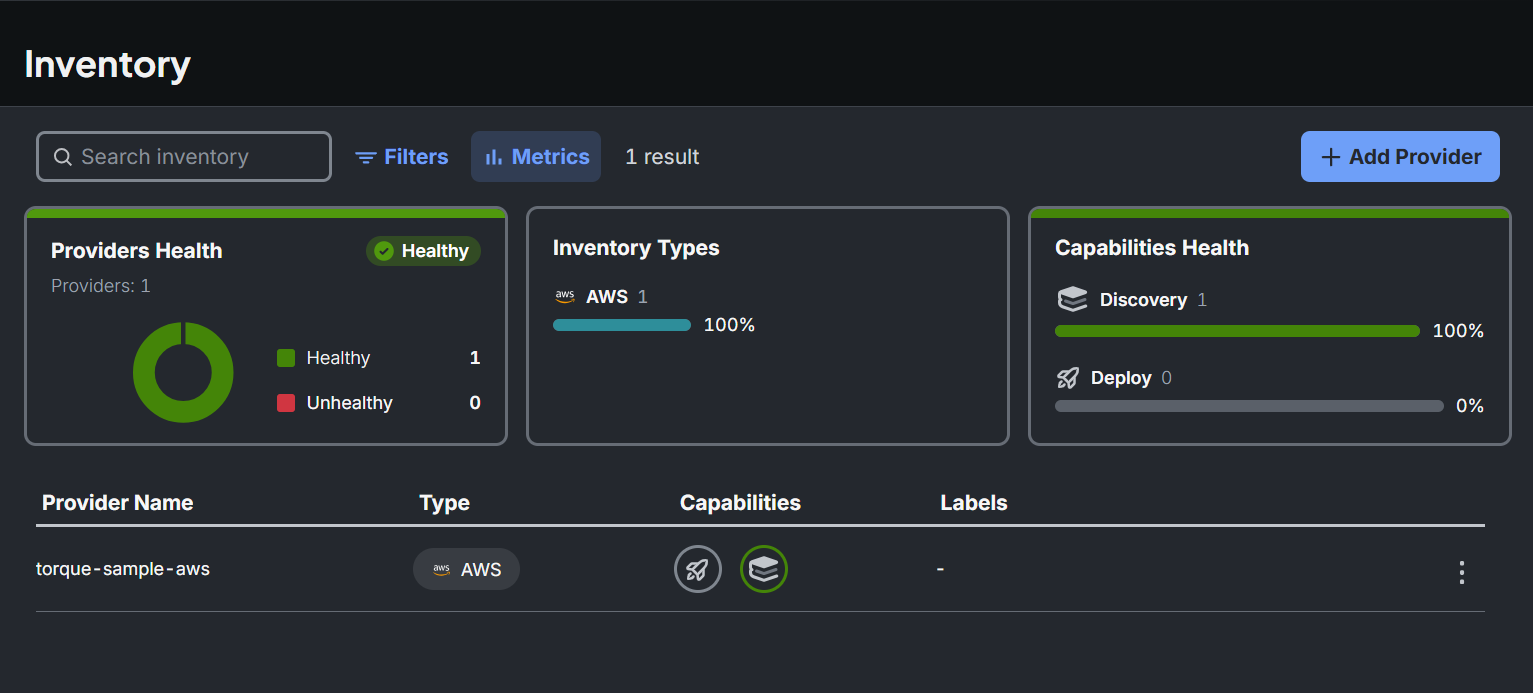
Procedure
· Provision the server: Generate the deployment file in the portal.
· Secure your credentials: Save and configure your SSH private key.
· Deploy the OVF template: Import and power on the virtual machine in VMware.
Provision the server
1. Click New Management Server.
2. Select On-Premises > VM > VMware.
Note: Nutanix AHV and RedHat KVM are not supported at this time.
3. Click Next.
4. Specify your management server details.
◦ NTP: Enter the NTP server details; this field is mandatory.
◦ Proxy: If using a proxy, configure the No proxy field with your vCenter/ESXi subnet to ensure the management server connects directly to the Hypervisor.
5. Click Next and wait for the system to generate the downloadable .ova file.
Secure your credentials
1. Copy the SSH private key provided; this is part of the management server configuration.
2. Paste the key into a new file using a text editor (e.g., Notepad, TextEdit, or nano).
3. On macOS or Linux, set the correct file permissions by running: chmod 600 demokey.pem.
Deploy the OVF template
1. Log in to your VMware vCenter.
2. Right-click the host, server, or cluster where you want to install the server.
3. Select Deploy OVF Template.
4. Follow the wizard to import the .ovf file you downloaded.
5. Power on the Management Server virtual machine.
Validation
Navigate to Resources > Management Servers. Verify that your deployment status is Connected.
Note: It may take approximately 5 minutes for the status update, depending on your bandwidth.
FAQs
Q: What should I do if I misplace the original .ovf file?
A: You do not need to recreate the server. Navigate to Resources > Management Servers, locate your server in the list, click the ... (more options) button, and select Download Management Server File to retrieve the file again.
Q: Why does my Management Server status show as Disconnected?
A: The server may take up to 5 minutes to establish a connection after powering on, depending on your network bandwidth. If the status remains "Disconnected" after 5 minutes, verify your NTP and proxy settings.
Q: Why is the No proxy field important?
A: Configuring the No proxy field with your vCenter/ESXi subnet ensures the Management Server bypasses the proxy to communicate directly with the Hypervisor. This is essential for successful deployment and ongoing management.
On-prem resources and integrations
A resource inventory is a management interface that connects infrastructure accounts, such as Intersight, Nexus Dashboard, Kubernetes, VCenter, AWS, and Azure, to the Stack Automation platform.
You can access the resource inventory from the Overview > Journey page by selecting the Add Resources Inventory step. This action redirects you to the Resources > Inventory section, where you can connect your specific infrastructure accounts.
The inventory includes a Cisco-managed AWS cloud account by default. This account provides the necessary environment to deploy sample blueprints during the Quick Tour.
On-prem deployment supports these five integrations, and the procedure for each has been discussed in detail.
● Add an Intersight account
● Add a vCenter account
● Add a Nexus Dashboard account
● Add a Kubernetes or OpenShift account
● Other integration(s)
Add an Intersight account
Goal: Add an Intersight account to test operating system and platform installation blueprints on UCS servers.
Prerequisites
Obtain your Access Key and Secret Key from your Intersight account (Settings → API Keys).
Create a Management Server (as discussed earlier in this document).
Procedure
1. Click Add Provider in the top-right corner.
2. Select Intersight and enter a name for the account in the Provider Alias Name field.
3. Select Single Credentials Set and click Next.
4. Select the appropriate Intersight region and enter your Access Key and Secret Key.
5. Select the Management Server that is closest to your resource location to maximize throughput and reduce deployment time.
6. Click Done.
The system redirects you to the Resources → Inventory section. The Intersight account status displays as Connected.
Validation
Click the “…” options for the Intersight account, select View Resources, and validate that the system retrieves the UCS servers registered in your Intersight account.
You have integrated the UCS server(s) with the platform, do you have any questions?
FAQs
Q: Where can I find my Access Key and Secret Key?
A: Log in to your Intersight account and navigate to Settings → API Keys. Detailed related information is available on the Intersight Help page.
Q: Why should I select a Management Server close to my resources?
A: Selecting a server geographically or logically close to your resources maximizes throughput and reduces the time required for blueprint deployment.
Q: What should I do if the account status does not change to "Connected"?
A: Verify that your Access Key and Secret Key are correct. Use the keys to connect to the management server and validate internet connectivity to Stack Automation.
Q: How do I verify that my UCS servers are successfully registered?
A: Navigate to the Resources > Inventory section, click the “…” icon next to your Intersight account, and select View Resources. If the servers appear in the list, the registration is successful.
Add a vCenter account
Goal: To add a vCenter account to deploy VMaaS blueprints and virtual appliances for Cisco and third-party solutions onto your VMware environment.
This task integrates your VMware environment, enabling the deployment of virtualized solutions. Keep your credentials ready before you begin.
Prerequisites
● The vCenter Server URL (formatted as https://[IP] or https://[domain]).
● The username and password with permission to discover inventory and deploy virtual machines.
● A Management Server.
Procedure
1. Click Add Provider in the top-right corner.
2. Select vCenter and enter a name for the account in the Provider Alias Name field.
3. Select Single Credentials Set and click Next.
4. Enter your vCenter Server URL, Username, and Password.
5. Configure the Validate Certificate toggle:
◦ Keep it enabled to verify the server’s certificate.
◦ Disable it only for lab environments using self-signed certificates.
6. Select the Management Server that is closest to your resource location to maximize throughput and reduce deployment time.
7. Click Done.
Validation
The vCenter account is added, and both status icons appear highlighted in green.
FAQs
Q: What permissions are required for the vCenter username?
A: The account must have permissions to discover inventory and deploy virtual machines within your VMware environment.
Q: How should I format the vCenter Server URL?
A: The URL must start with https:// followed by the IP address or the domain name (e.g. https://vcenter.example.com).
Q: When should I disable the "Validate Certificate" toggle?
A: You should only disable this toggle in lab environments that utilize self-signed certificates. For production environments, keep it enabled to ensure secure communication.
Q: How do I know if the account was added successfully?
A: The desired state is achieved when both status icons are highlighted in green.
Q: Why should I select a management server close to my resources?
A: Selecting a management server that is geographically or logically near your VMware resources maximizes throughput and reduces the time required for blueprint deployment.
Add a Nexus Dashboard account
Goal: To add a Nexus Dashboard account to deploy blueprints and integrations for your fabric infrastructure.
Prerequisites:
· Obtain your Nexus Dashboard URL.
· Generate an API Key: Log in to Nexus Dashboard, go to the admin menu (top-right) > Manage API keys > + Add API key. Copy the generated key.
Procedure:
1. Click Add Provider in the top-right corner.
2. Select Nexus Dashboard and enter a name for the account in the Provider Alias Name field.
3. Select Single Credentials Set and click Next.
4. Enter your Nexus Dashboard URL, Username, and API Key.
5. Configure the Validate Certificate toggle:
◦ Keep it enabled to verify the server’s certificate.
◦ Disable it only for lab environments using self-signed certificates.
6. Select the Management Server closest to your resource location to maximize throughput.
7. Click Done.
Validation
● The system redirects you to the Resources → Inventory section, and the Nexus Dashboard account status displays as Connected.
● Click the “…” options for the account, select View Resources, and validate that the system retrieves the switches managed by your Nexus Dashboard.
FAQs
Q: Where do I get the API Key for Nexus Dashboard?
A: Log in to your Nexus Dashboard, click the admin menu in the top-right corner, and select Manage API keys. Click + Add API key to generate and copy the key.
Q: Can I use the same management server for all spaces?
A: Yes, but for Nexus Dashboard, it is recommended to select a management server as close as possible to your resources to maximize throughput and reduce deployment time.
Add a Kubernetes or OpenShift cluster
Goal: To onboard an existing Kubernetes or OpenShift cluster into Stack Automation using an agent-based approach.
Kubernetes uses an agent-based approach where pods run inside your cluster to establish a connection back to Stack Automation.
Prerequisites
An existing Kubernetes or OpenShift cluster.
· Check you have kubectl access to the target cluster.
· Permissions to create namespaces, service accounts, and cluster roles. These are created in the Kubernetes/OpenShift cluster. Use the kubectl auth can-i command.
Procedure
1. Click Add Provider in the top-right corner.
2. Select Kubernetes and enter a name for the account in the Provider Alias Name field.
3. Copy the generated kubectl apply command from the All Capabilities step.
4. Log in to your target cluster and run the copied command to create the required resources.
5. Verify the agent installation by running kubectl get pod -A. Confirm that two torque-agent-rs pods are in the Running (1/1) state.
6. Return to Stack Automation, select the appropriate Service Account and Namespace from the dropdown lists, and click Done.
Validation
● The Connection Status bar turns green and displays "management server connected successfully." The account status in Resources → Inventory shows as Connected.
● Click the “…” options for the Kubernetes account, select View Resources, and validate that the system retrieves the resources from your cluster.
FAQs
Q: Why does the Kubernetes connection status show "Waiting for connection"?
A: This is normal until you run the kubectl apply command in your cluster. After the agent pods are ready and report back, the status is indicated in green.
Q: How do I verify the Kubernetes agent is running correctly?
A: Run kubectl get pod -A in your cluster. You should see two torque-agent-rs pods in the Running (1/1) state.
Add RedHat credentials for Stack Automation
Goal: To add the RedHat pull secret to the Stack Automation Credentials store, enabling the deployment of licensed OpenShift clusters.
Prerequisites
● An active RedHat account with access to the RedHat Hybrid Cloud Console.
● A valid RedHat pull secret obtained from the RedHat console.
● Access to the Automation menu in the Stack Automation interface.
Procedure
1. Obtain the pull secret.
a) Log in to the RedHat Hybrid Cloud Console.
b) Navigate to OpenShift > Downloads (or the cluster creation flow).
c) Locate Tokens > Pull secret and click Copy or Download.
2. Add the credential to Stack Automation.
a) Navigate to Automation > Integrations.
b) Click + Add Credentials in the top-right corner.
c) Select the appropriate Credential Type and click Next.
d) Under Licensing Subscriptions, select RedHat and click Next.
e) Enter a unique Name (Credential Alias) for the credential.
f) Paste the pull secret into the authentication field.
g) Review the Summary and click Done.
FAQs
Q: Why do I need to store this in the Stack Automation Credentials store?
A: Storing the secret in the Credentials store allows automation assets to retrieve and use your license credentials securely at runtime, ensuring your deployments remain compliant without manual intervention.
Q: How do I verify that the credential was added successfully?
A: After you click Done, the credential will appear in the Integrations list. If the integration is active, you will be able to select this credential alias when configuring your blueprint deployment.
Q: What if I have multiple RedHat accounts?
A: You can add multiple credentials by repeating this procedure. Ensure you provide a unique Credential Alias for each so you can easily distinguish between them during the deployment process.
Add an NVIDIA account
Goal: Add NVIDIA (NVAIE) credentials for Stack Automation
Prerequisites
● An active account on the NVIDIA developer portal (NGC).
● A generated GTC/NGC API Key.
● Access to the Automation menu in the Stack Automation interface.
Procedure
1. Obtain the NVIDIA GTC API key.
a) Log in to the NVIDIA developer portal (NGC) with your NVIDIA account.
b) Navigate to your account API Keys section.
c) Click Generate API Key (GTC / NGC API Key).
d) Copy the generated key and store it securely.
2. Add the credential to Stack Automation.
a) Navigate to Automation > Integrations.
b) Click + Add Credentials in the top-right corner.
c) Select the appropriate Credential Type and click Next.
d) Under Licensing Subscriptions, select NVAIE and click Next.
e) Enter a unique Name (Credential Alias) for the credential.
f) In Authentication field, paste your NVIDIA GTC API Key.
g) Review the Summary and click Done.
FAQs
Q: Why is the NVIDIA GTC API Key required for Stack Automation?
A: This key allows Stack Automation to authenticate with NVIDIA services, which is necessary to pull container images and deploy NVIDIA-specific blueprints like NIMs and GPUaaS.
Q: Is my NVIDIA API Key stored securely?
A: Yes. After you add the credential, the key is stored in the Stack Automation Credentials store, ensuring that automation assets can retrieve and use it securely at runtime without exposing the key in your blueprints.
Q: What should I do if my NVIDIA API Key is revoked or expires?
A: If your API key is no longer valid, blueprint deployments will fail. You must return to the Automation > Integrations menu, locate your existing NVIDIA credential, and update it with a new, active API key.
Deploy on-premises blueprints
On the Stack Automation GUI, navigate to Journey and click Deploy your first solution blueprint from Solutions Hub. You are free to experiment with any of the blueprints available, which include OS provisioning, VMs, Containers, and apps. Here is an example to understand how it generally operates.
Deploy a Bare Metal Windows solution
Goal: To configure and initiate the deployment of a Bare Metal Windows solution using either Intersight Managed Mode (IMM) or Intersight Standalone Mode (ISM).
Prerequisites:
● An Intersight account added to Stack Automation.
● A management server.
● A target server available for deployment.
Procedure:
1. Select the solution.
a) Navigate to the Solutions Hub.
b) Click the solution you wish to deploy (such as, Bare Metal Windows).
c) Select the implementation mode (Intersight Managed Mode or Intersight Standalone Mode). The workflow is identical for both the modes.
2. Configure the deployment settings.
a) Enter a Deployment Name.
b) Set the Duration for the deployment.
c) Keep the setting as Always On as OS provisioning is typically lasting.
d) Select your Target (the Intersight account that you have added earlier).
e) Select the Management Server configured in previous steps.
f) Select the Target Server from the list of available servers.
3. Set the server configuration.
In the Server Configuration section, enter an Administrator Password.
4. Configure network settings.
a) In the Network Configuration section, enter the Target Subnet.
b) Review network defaults: Providing a subnet enables smart defaults, which automatically configures the elements as indicated in this table:
| Setting |
Behavior |
| IP Address |
Assigned automatically from the target subnet. |
| Gateway |
Auto-discovered. |
| IMC IP Address |
Auto-calculated. |
| VLAN/vNICs (IMM only) |
Defaults to native uplink VLANs. |
5. (Optional) Specify manual network requirements.
Review the table below to determine if you need to manually specify additional settings:
| Setting |
Behavior |
| DNS Servers |
Specify manually as needed. |
| VLAN ID |
ISM: Tag management VLAN on Windows. IMM: Uplink VLAN; specify only if not using native. |
| vNIC A/B VLANs |
IMM only: specify only if a different VLAN is required. |
6. Complete the deployment; click Next to view the Summary.
Review your configuration and click Finish to deploy.
FAQs
Q: Does it matter if I choose Intersight Managed Mode or Standalone Mode?
A: The deployment workflow is identical for both. Choose the mode that aligns with your existing infrastructure management strategy.
Q: What happens if I don't provide a Target Subnet?
A: If you do not provide a subnet, you will need to manually configure the IP address, gateway, and IMC IP address, which increases the risk of network configuration errors or IP address overlaps.
Q: When should I manually specify the vNIC VLANs?
A: You only need to specify these manually if your environment requires a specific VLAN that differs from the native VLAN discovered on your uplinks. In most cases, the smart defaults will handle this automatically.
Cloud Deployment
Onboard AWS resources
Goal: To add their AWS account to the inventory, enabling the management and monitoring of AWS resources within the platform.
Prerequisites:
● A management server
● AWS account information:
◦ Account Number
◦ Access Key
◦ Secret Key
◦ View ARN
Procedure:
1. Initiate onboarding
a) Navigate to the left menu and select Resources > Inventory > AWS.
b) Enter a Provider Alias Name to identify the account.
c) Toggle Share with all spaces if you want this account to be accessible across all spaces.
d) Select Single Credentials Set and click Next.
2. Configure credentials.
a) Select the Basic radio button.
b) Enter these fields with your AWS account information:
◦ Account Number
◦ Access Key
◦ Secret Key
◦ View ARN
3. Select the Management Server created in previous steps.
4. Click Done to complete the wizard.
Verification
Navigate to Inventory. Confirm that your new provider name appears in the Provider Name list.
FAQs
Q: What is the "View ARN," and where do I find it?
A: The View ARN (Amazon Resource Name) is a unique identifier for your AWS resource. You can typically find this in your AWS IAM console under the specific role or policy associated with your account.
For ARN details, refer the official AWS documentation.
Q: What happens if I do not toggle "Share with all spaces"?
A: If you leave this toggled off, the AWS resources will only be visible and manageable within the specific space where you are currently working. Toggling it on makes the account available globally across all your spaces.
Q: I clicked "Done," but the provider name is not showing in the Inventory list. What should I do?
A: Refresh the Inventory page. If the provider still does not appear, verify that your AWS credentials (Access Key and Secret Key) are active and that the Management Server is correctly configured.
Deploy a Nexus blueprint
Goal: To deploy a Nexus blueprint from the Cloud category to their AWS environment and access the Nexus Dashboard UI.
Prerequisites
● Onboard the AWS resources in the Inventory (see the AWS Resource Onboarding procedure).
● Access to the Solutions Hub on the platform.
Procedure
1. Select the blueprint
◦ Navigate to the Solutions Hub.
◦ Filter the blueprints by selecting All Spaces and searching for the value Nexus.
◦ Open the Cloud category.
◦ Hover over the desired blueprint and click Launch.
2. Configure deployment settings.
◦ Enter a Name for the deployment.
◦ Select the Duration for the blueprint.
◦ Click Next.
3. Configure cloud parameters.
◦ Select the Region and VPC from the respective drop-down lists.
◦ Continue to fill out the remaining fields based on the values retrieved from your AWS environment.
◦ Click Next.
4. Validate and initiate deployment.
◦ Review the Blueprint configuration for accuracy.
◦ Click Finish to start the deployment.
5. Monitor and access the dashboard.
◦ Wait a few minutes for the deployment to complete; the checks will transition to an Active state.
◦ Click Overview to visualize deployment details.
◦ Locate the Access Details card and click the Login link.
◦ Log in to the Nexus Dashboard using the username admin and the password you defined during the configuration.
FAQs
Q: Why is the "Agent" field pre-populated?
A: For Beta deployments in the Cloud category, the system uses "hosted agent mode." This is a smart default that ensures Cloudformation automation is supported without requiring you to manually configure an agent.
Q: How long does it take for the "checks" to become active?
A: Typically, the deployment checks transition to an Active state within a few minutes. If they remain inactive for longer than 10 minutes, verify your AWS connectivity and ensure your VPC settings are correct.
Q: Can I change the deployment name after I click "Finish"?
A: No, after the deployment is initiated, the name is locked. If you need to change it, you must cancel the deployment and start the launch process again.
Appendix
The header icons
The header icons, indicated in the blue box, will make your tasks easier.
● Click the Copilot icon to invoke the copilot assistant which is part of the Stack Automation AI. Click Start a chat to get help.
● Click the AI integrations icon to connect your AI tools to Stack Automation.
Click the Support icon and select from the available options. Click Explore Documentation to get to the Stack Automation help page. The help page provides detailed information and resources for all aspects of Stack Automation.
Cisco and the Cisco logo are trademarks or registered trademarks of Cisco and/or its affiliates in the U.S. and other countries. To view a list of Cisco trademarks, go to this URL: www.cisco.com/go/trademarks. Third-party trademarks mentioned are the property of their respective owners. The use of the word partner does not imply a partnership relationship between Cisco and any other company. (1110R)
Any Internet Protocol (IP) addresses and phone numbers used in this document are not intended to be actual addresses and phone numbers. Any examples, command display output, network topology diagrams, and other figures included in the document are shown for illustrative purposes only. Any use of actual IP addresses or phone numbers in illustrative content is unintentional and coincidental.
© 2026 Cisco Systems, Inc. All rights reserved.
