Custom templates overview

Custom Templates are user-defined templates that

  • allow for the customization and automation of network services not supported by the function pack

  • define specific configurations and settings that can be applied to network devices and services, and

  • make deploying and managing network resources more efficient and consistent.

To use custom templates in Crosswork Network Controller, you must pre-configure them in Cisco Network Services Orchestration (NSO). Once configured in NSO, the Crosswork Network Controller will display your custom template for selection when you provision a device or a service. NSO uses XML-based configuration (config) templates, which you can invoke from provisioning code or link directly to devices or services. XML templates are snippets of configuration, similar to the CDB init files, but more powerful.

Create and load custom templates

To illustrate the capabilities of custom templates, we have provided an example that uses variable substitution to create an XML template. We then walk you through importing the template in NSO and referencing it in the L2VPN service in the Crosswork Network Controller.

To create and load custom templates:


Step 1

Create a sample instance with the desired device configuration on the router.

Example:

policy-map TEST-POLICY
class class-default
police rate 200 mbps
!
!
end-policy-map
                    

Step 2

Log in to NSO CLI and sync from that device.

Example:

admin@ncs# devices device PE99-55A1 sync-from

Step 3

In NSO CLI, get the running config for the policy map. Display the configuration in an XML format.

Example:

admin@ncs# show running-config devices device PE99-55A1 config policy-map | display
    xml
    <config xmlns="http://tail-f.com/ns/config/1.0">
        <devices xmlns="http://tail-f.com/ns/ncs">
            <device>
                <name>PE99-55A1</name>
                <config>
                    <policy-map xmlns="http://tail-f.com/ned/cisco-ios-xr">
                        <name>POLICYMAP_NAME</name>
                        <class>
                            <class-default>
                                <map>class-default</map>
                                <police-rate-unit>
                                    <police>
                                        <rate>
                                            <cir>250</cir>
                                            <cir-unit>mbps</cir-unit>
                                        </rate>
                                    </police>
                                </police-rate-unit>
                            </class-default>
                        </class>
                    </policy-map>
                </config>
            </device>
        </devices>
    </config>

Step 4

Copy the file output to a text or code editor. Specify the variables that can be substituted or parameterized according to your needs using curly braces and a dollar sign, {$VARIABLE}. You can keep the variable name uppercased to make it stand out from the other XML elements in the file. Here, we created two variables, $POLICY_VAR and $RATE_MBS, for our template.

Example:

<config xmlns="http://tail-f.com/ns/config/1.0">
    <devices xmlns="http://tail-f.com/ns/ncs">
        <template>
            <name>CT-TEMPLATE-INPUT</name>
            <ned-id>
                <id
 xmlns:cisco-iosxr-cli-7.52="http://tail-f.com/ns/ned-id/cisco-iosxr-cli-7.52">cisco-iosxr-cli-7.52:cisco-iosxr-cli-7.52</id>
                <config>
                    <policy-map xmlns="http://tail-f.com/ned/cisco-ios-xr">
                        <name>{$POLICY_VAR}</name>
                        <class>
                            <class-default>
                                <map>class-default</map>
                                <police-rate-unit>
                                    <police>
                                        <rate>
                                            <cir>{$RATE_MBS}</cir>
                                            <cir-unit>mbps</cir-unit>
                                        </rate>
                                    </police>
                                </police-rate-unit>
                            </class-default>
                        </class>
                    </policy-map>
                </config>
            </ned-id>
        </template>
    </devices>
</config>
                    

Step 5

Create a skeleton template package in NSO. This will help you generate the XML structure with the correct headers. Copy the <devices> code in the below example to your skeleton template.

 Note
The custom-templates name must start with either ct- or CT-.

Example:

admin@ncs(config)# devices template CT-SKELETON-POLICY
admin@ncs(config-template-CT-SKELETON-POLICY)# ned-id cisco-iosxr-cli-7.52
admin@ncs(config-ned-id-cisco-iosxr-cli-7.52)# config
admin@ncs(config-config)# hostname TEST
admin@ncs(config-config)# top
admin@ncs(config)# show configuration | display xml
<devices xmlns="http://tail-f.com/ns/ncs">
  <template>
    <name>CT-SKELETON-POLICY</name>
    <ned-id>
      <id
xmlns:cisco-iosxr-cli-7.52="http://tail-f.com/ns/ned-id/cisco-iosxr-cli-7.52">cisco-iosxr-cli-7.52:cisco-iosxr-cli-7.52</id>
      <config>
        <hostname xmlns="http://tail-f.com/ned/cisco-ios-xr">TEST</hostname>
      </config>
    </ned-id>
  </template>
</devices>
admin@ncs(config)#

Step 6

Copy the policy-map <config> code you created in step 4 from your text editor.

Example:

<policy-map xmlns="http://tail-f.com/ned/cisco-ios-xr">
  <name>{$POLICY_VAR}</name>
  <class>
    <class-default>
      <map>class-default</map>
      <police-rate-unit>
        <police>
          <rate>
            <cir>{$RATE_MBS}</cir>
            <cir-unit>mbps</cir-unit>
          </rate>
        </police>
      </police-rate-unit>
    </class-default>
  </class>
</policy-map>

Step 7

Paste it in your skeleton template.

Example:

<devices xmlns="http://tail-f.com/ns/ncs">
  <template>
    <name>CT-SKELETON-POLICY</name>
    <ned-id>
      <id
xmlns:cisco-iosxr-cli-7.52="http://tail-f.com/ns/ned-id/cisco-iosxr-cli-7.52">cisco-iosxr-cli-7.52:cisco-iosxr-cli-7.52</id>
      <config>
        <policy-map xmlns="http://tail-f.com/ned/cisco-ios-xr">
          <name>{$POLICY_VAR}</name>
          <class>
            <class-default>
              <map>class-default</map>
              <police-rate-unit>
              <police>
                <rate>
                  <cir>{$RATE_MBS}</cir>
                  <cir-unit>mbps</cir-unit>
                </rate>
              </police>
            </police-rate-unit>
          </class-default>
        </class>
      </policy-map>
    </config>
  </ned-id>
</template>
</devices>

Step 8

Save and import your new XML template into NSO using NSO web UI or CLI. This step allows you to load merge the custom templates to NSO before applying them.

  1. If using NSO CLI, load merge the template to NSO.

    Example:

    admin@ncs% load merge user-device-template.xml 
                                    [ok] 
                                    admin@ncs% 
                                    commit [ok]
                                

    For details on applying custom templates, refer to Using Custom-Templates – CFP Services in the Cisco NSO Transport SDN Function Pack Bundle 7.1 User Guide.

  2. When importing through the Web UI, use the Load/Save option and click Paste to load data by pasting it. The new changes must also be applied using Commit to apply the configuration.

Step 9

Validate the new template in NSO.

Example:
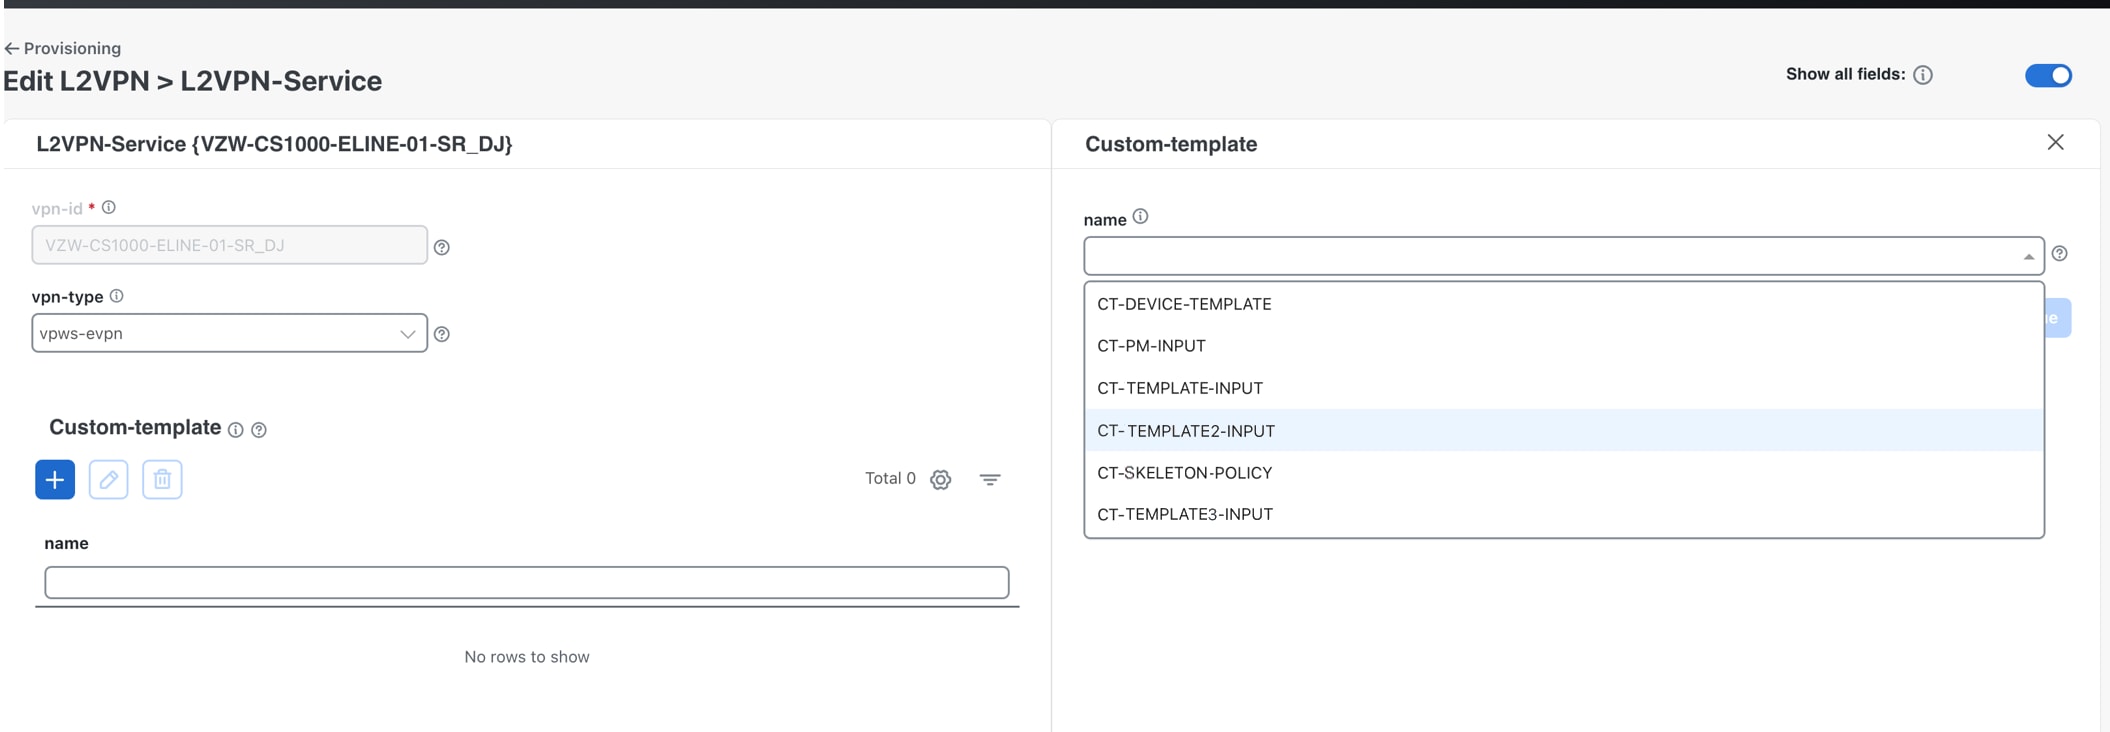
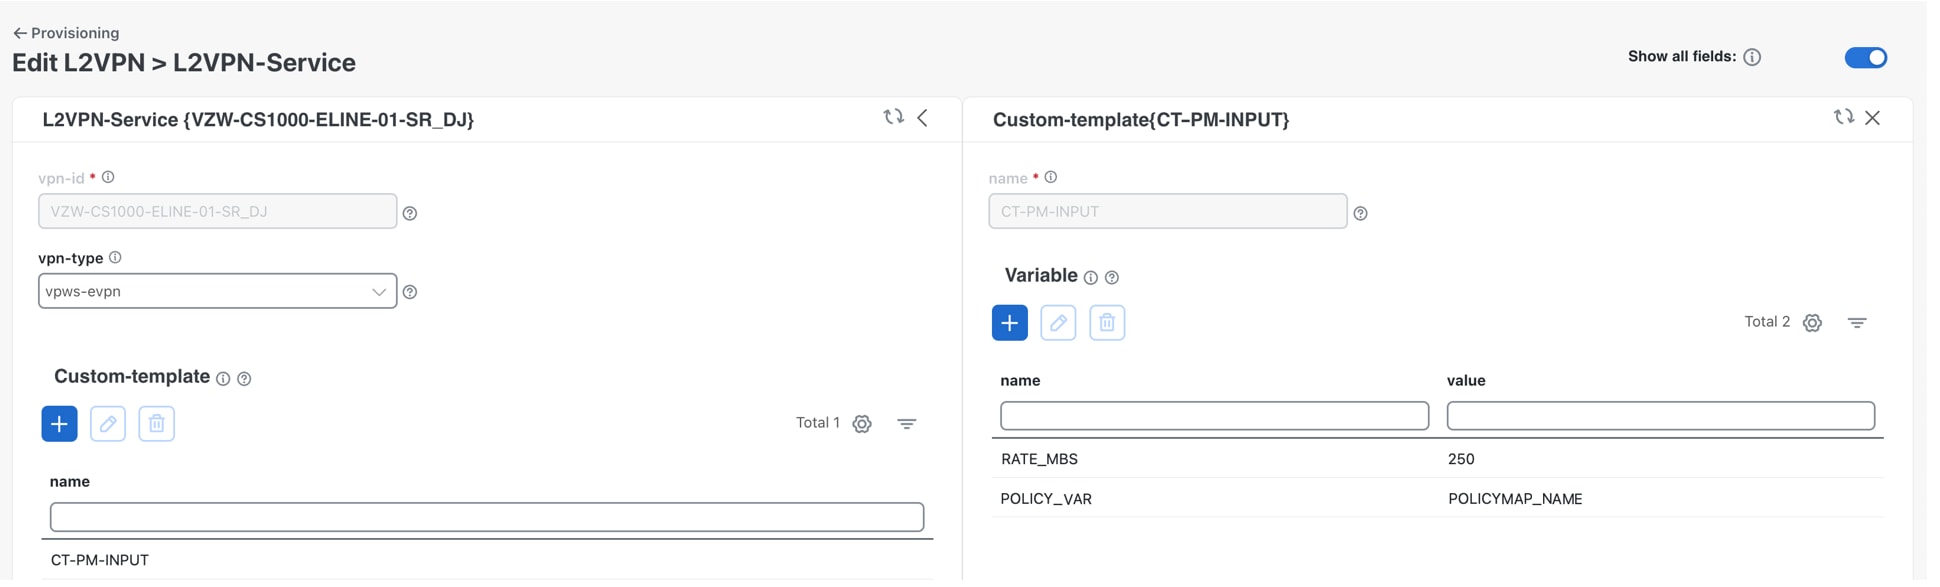
admin@ncs# show running-config devices template ?
Description: Named configuration templates for devices
Possible completions:
  CT-DEVICE-TEMPLATE   The name of a specific template configuration.
        CT-PM-INPUT    The name of a specific template configuration.
  CT-TEMPLATE-INPUT    The name of a specific template configuration.
  CT-TEMPLATE2-INPUT    The name of a specific template configuration.
  CT-SKELETON-POLICY    The name of a specific template configuration.
  CT-TEMPLATE3-INPUT    The name of a specific template configuration.
  |                      Output modifiers
  <cr>

Step 10

Add this template to the L2VPN service in the Crosswork Network Controller.

  1. Choose Services & Traffic Engineering > Provisioning (NSO) > L2VPN > L2VPN-Service.

  2. Click to create a new service. The L2VPN-Service page is displayed.

  3. Enter a name for the VPN Identifier and click Continue.

  4. Under Custom-templates, click to apply your custom template. The Crosswork Network Controller will display your custom template for selection.

  5. Select your custom template and apply the required variables. Click Commit Changes. Note that the router validation shows the policy map name and the police rate of 250 Mbps.

Step 11

Repeat the process for adding the policy to the interfaces. Ensure to add the policy at the device level, as the interface numbers may be different on each side of the L2VPN.

Example:

<config xmlns="http://tail-f.com/ns/config/1.0">
  <devices xmlns="http://tail-f.com/ns/ncs">
    <template>
      <name>CT-DEVICE-TEMPLATE</name>
      <ned-id>
        <id xmlns:cisco-iosxr-cli-7.52="http://tail-f.com/ns/ned-id/cisco-iosxr-cli-7.52">cisco-iosxr-cli-7.52:cisco-iosxr-cli-7.52</id>
        <config>
          <interface xmlns="http://tail-f.com/ned/cisco-ios-xr">
            <TenGigE-subinterface>
              <TenGigE>
                <id>{$INTERFACE}</id>
                <service-policy>
                  <input>
                    <name>{$SERVICE-POLICY}</name>
                  </input>
                </service-policy>
              </TenGigE>
            </TenGigE-subinterface>
          </interface>
        </config>
      </ned-id>
    </template>
  </devices>
</config>

For more examples of configuring custom templates, refer to Using Custom-Templates – CFP Services in the Cisco NSO Transport SDN Function Pack Bundle 7.1 User Guide.