Device Initial Configuration in Provisioning Mode

Provisioning mode

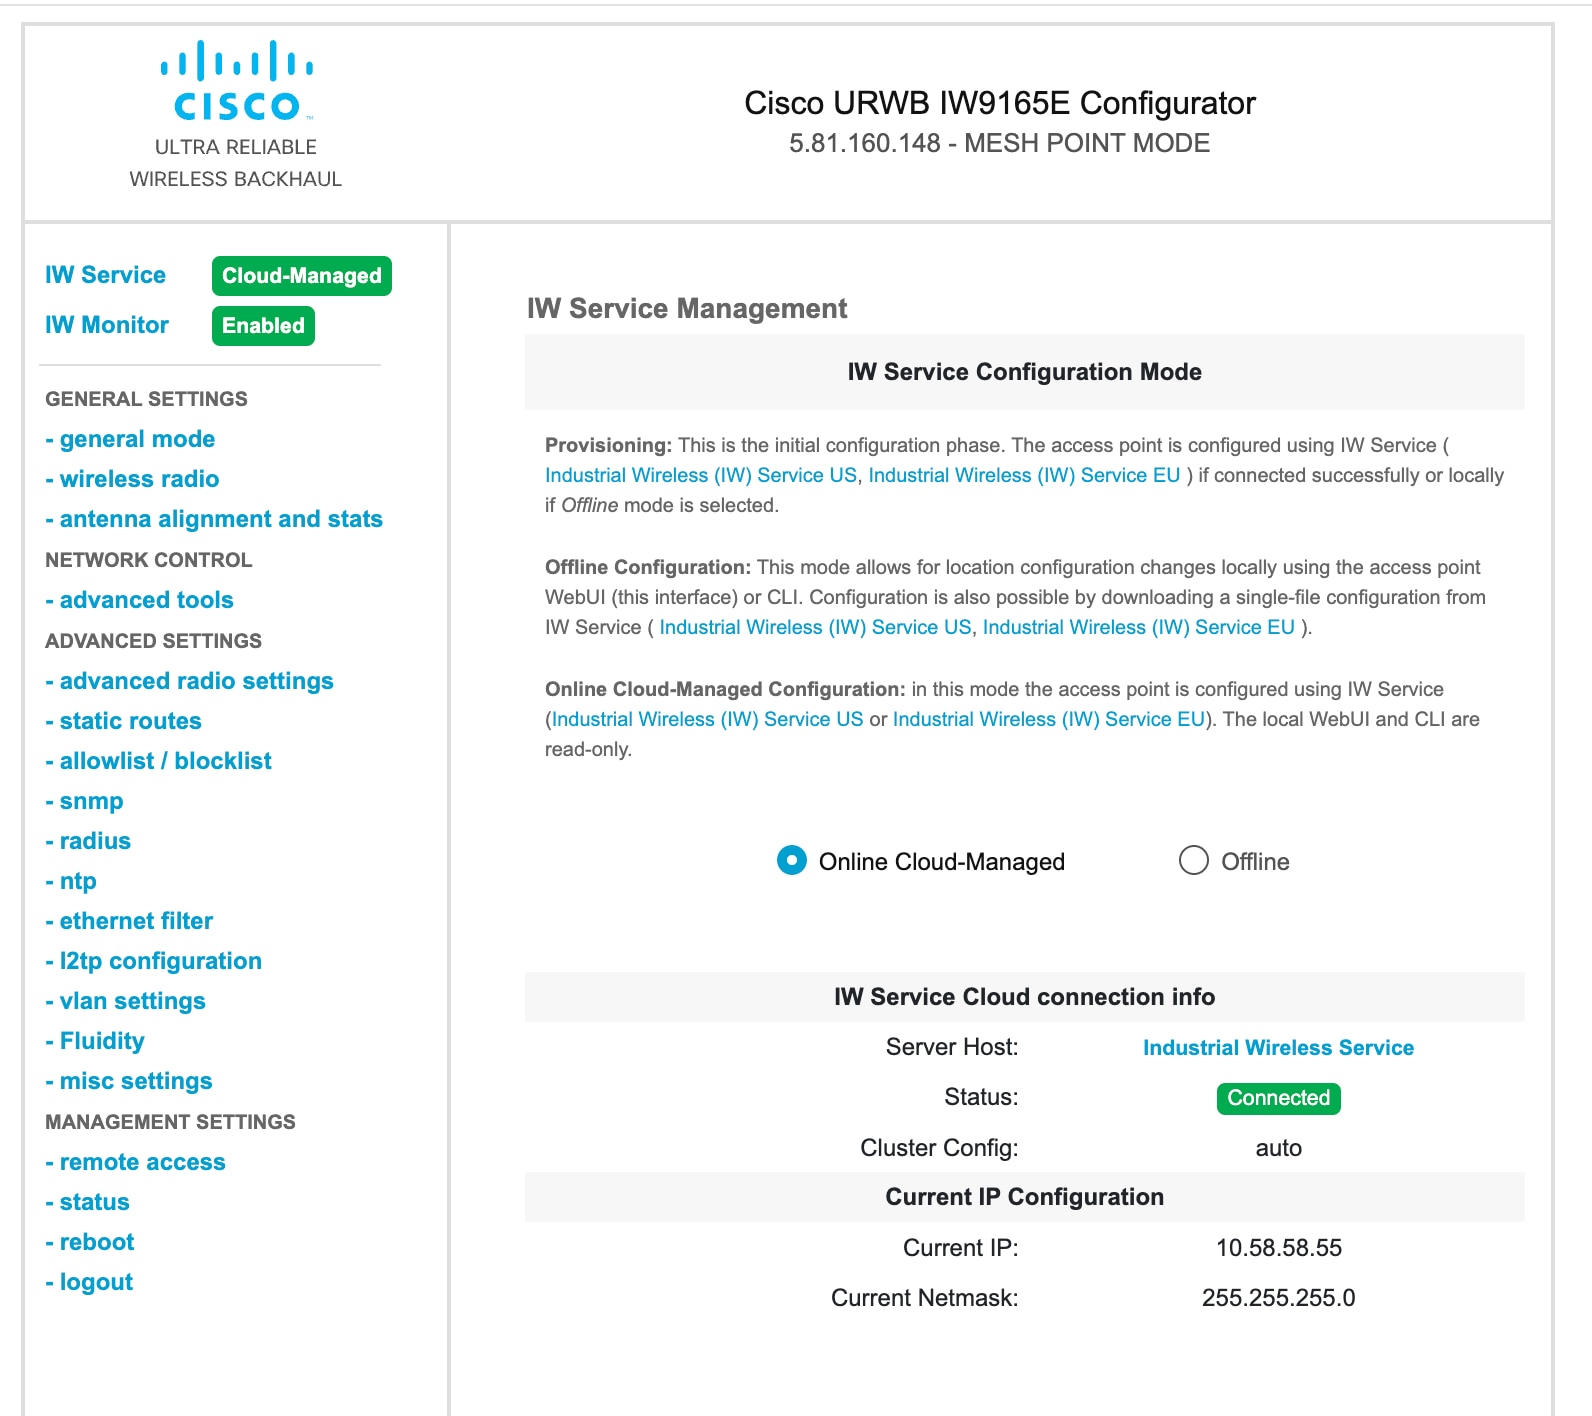
From UIW Release 17.16.1, IoT OD IW is changed and called as IW Service.Catalyst IW access point (AP) running in URWB mode supports configuration either from:

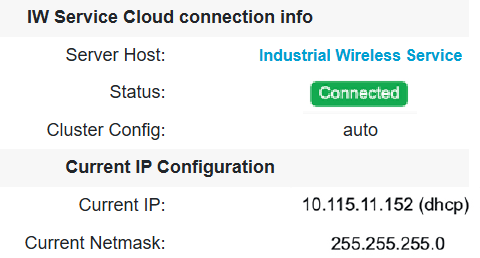
  • Online Cloud-Managed: configure the device using Industrial Wireless (IW) Service, or

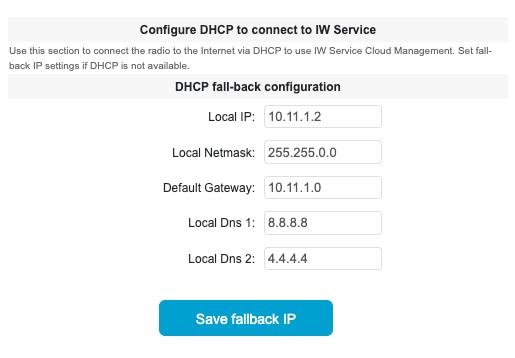
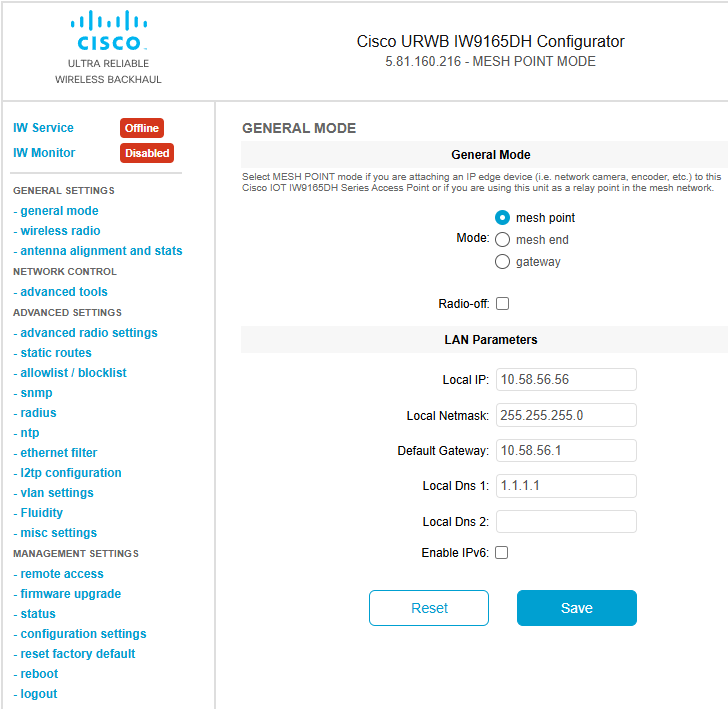
  • Offline: configure the device using local management interfaces (GUI or CLI).

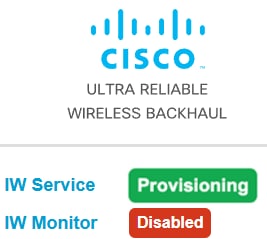
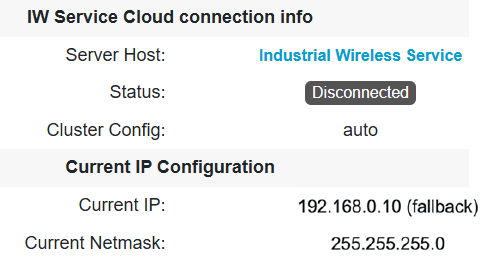
By default, an AP with no configuration starts in Provisioning mode. In this mode, the IW Service provides the initial configuration.

How Provisioning mode works

In Provisioning mode, an AP attempts to request the network configuration using DHCP and then connects to the IW Service.

  • If network connectivity exists, AP connects to the IW Service.

    • Configure AP using the IW Service: If the AP obtains network connectivity, it attempts to connect to IW Service. IW Service uses DNS geo-location to direct APs to the appropriate cluster (US or EU). Ensure your IW Service organization is configured to the correct cluster.

  • If there is no network connectivity, AP can be configured locally. Local management can be accessible using the console port or SSH.

    • Configure AP using the Local configuration: If network connectivity is unavailable, the AP can be configured locally via GUI or CLI, accessible through the console port or SSH.

Use these default credentials to log either into the GUI or CLI:

  • Username: Cisco

  • Password: Cisco

Handling DHCP and IP Address in Provisioning mode

When the device is in Provisioning mode, it tries to get an IP address from DHCP. If this process fails or DHCP is unavailable, these options apply:

  • If the device fails to receive an IP address through DHCP, it switches to the fallback IP address:192.168.0.10/24.

  • If DHCP is unavailable and configuration through IW Service is needed, then you can manually configure the IP address, subnet, default gateway, and DNS.


Note


DHCP is used only during provisioning mode. For regular tasks, use a static IP address.


Configure fallback IP address using GUI

Perform this task to configure a fallback IP address that the device will use if it fails to obtain an IP address from the DHCP server. This ensures continued device operation in the absence of dynamic IP assignment.

Before you begin

The fallback IP address acts as a static IP address that the device defaults to when DHCP fails to assign one. This feature is critical for maintaining connectivity in scenarios where the DHCP server is unavailable.

Procedure


Step 1

Launch the computer's web browser and enter the URL to open the URWB configurator login page.

Step 2

Enter the username and password in the respective fields.

Step 3

Click Login.

After successfully logging into the GUI, the URWB configurator page is displayed.

Step 4

Click IW Service on the URWB configurator page and navigate to Configure DHCP to connect to IW Service section.

Step 5

Enter the appropriate IP addresses in the respective fields:

  • Fallback Local

  • Local Netmask

  • Default Gateway

  • Local Primary DNS

  • Local Secondary DNS

Step 6

Click Save fallback IP to complete the configuration.


Configure fallback IP address using CLI

Before you begin

When an AP fails to obtain an IP address from a DHCP server, it reverts to a pre-configured fallback IP address.

Procedure


Perform this task to configure fallback IP address on the AP.

Use the configure ap address ipv4 static IP addressstatic netmask IP address of gatewaydns1 ip IP addressdns2 ip IP addresscommand to configurefallback IP address on the device.
Device#configure ap address ipv4 [ static IP address [ static netmask [ IP address of default gateway [ dns1 ip [ dns2 ip ] ] ] ] ] 

Example:

Device#configure ap address ipv4 static 192.168.10.2 255.255.255.0 192.168.10.1 192.168.10.200 192.168.10.201

Configure the AP using GUI (Offline)

Procedure


Step 1

Launch the computer's web browser and enter the URL to open the URWB configurator login page.

Step 2

Enter the username and password in their respective fields.

Step 3

Click Login.

After successfully logging into the GUI, the URWB configurator page is displayed.

Step 4

Click IW Service.

IW Service Configuration Mode page appears.

Step 5

Select Offline.

The device exits from Provisioning mode and switch to Fallback IP address.

Configure the AP using IW Service (Online Cloud-Managed)

This task explains how to configure the access point in online cloud-managed mode through the IW Service. This mode allows the device to be managed from the IW Service cloud server if connected to the internet.

Procedure


Step 1

Launch the computer's web browser and enter the URL to open the URWB configurator login page.

Step 2

Enter the username and password in their respective fields.

Step 3

Click Login.

After successfully logging into the GUI, the URWB configurator page is displayed.

Step 4

Click IW Service.

IW Service Configuration Mode page appears.

Step 5

By default, the device is shown as Online Cloud-Managed.

The device can be managed from IW Service cloud server (if it is connected to the internet). The device exits Provisioning mode only if the user pushes the configuration from IW service or switches to offline mode.


The device exits provisioning mode only when the configuration is pushed from IW Service or the mode is switched to offline.

Verify the AP status using GUI

Procedure


Step 1

Launch the computer's web browser and enter the URL to open the URWB configurator login page.

Step 2

Enter the username and password in their respective fields.

Step 3

Click Login.

After successfully logging into the GUI, the URWB configurator page is displayed.
  • Provisioning mode

  • Device configurator in connected status

    If the connection to IW Service is successful, status is shown as Connected.

  • Device configurator in disconnected status.

    If the connection to IW Service is failed, status is shown as Disconnected.

  • Offline mode

  • Online cloud-managed


Verify the AP status using CLI

Use this task to verify the current operational status of an AP within the URWB configurator.

Procedure


Use the show iw-service status command to verify the status of the device.

Device#show iw-service status

Example:

  • Device in Provisioning mode

    Device#show iw-service status 
    
    IW Service mode: Provisioning 
    
    Status: Connected 
    
  • Device in Offline mode

    Device#show iw-service status 
    
    IW Service mode: Offline
  • Device in Online Cloud-Managed

    Device#show iw-service status 
    
    IW Service mode: Online Cloud-Managed 
    
    Status: Connected 

Verify DHCP connection status using CLI

Procedure


Step 1

This CLI example shows that the device is in provisioning mode and retrieved the IP address from the DHCP server:

Use the show ip to view the status of DHCP.

  • Example: DHCP Success

Device#show ip 


IP: 192.168.0.10 

Network: 255.255.255.0 

Gateway: 

Nameservers: 

DHCP Address (PROVISIONING Mode): 

IP: 10.0.0.2 

Network: 255.255.255.0 

Gateway: 10.0.0.1 

Nameservers: 8.8.8.8 

Fallback Address (PROVISIONING Mode): 

IP: 169.254.201.72 

Network: 255.255.0.0 

Step 2

This CLI example shows the device is in provisioning mode fails to retrieve the IP address from the DHCP server and then device uses the default fallback IP address 192.168.0.10:

Use the show ip to view the status of DHCP.

  • Example: DHCP Failure (uses default Fallback IP)

Device#show ip 

IP: 192.168.0.10 

Network: 255.255.255.0 

Gateway: 

Nameservers: 

DHCP Address (PROVISIONING Mode): 

IP: 192.168.0.10 

Network: 255.255.255.0 

Gateway: 

Nameservers: 127.0.0.1 

Fallback Address (PROVISIONING Mode): 

IP: 169.254.201.72 

Network: 255.255.0.0 

Troubleshoot IW Service connectivity in Provisioning mode

If the device fails to connect to IW Service, try these steps:

Procedure


Step 1

Physical Connection: Verify the Ethernet cable is correctly connected.

Step 2

DNS Resolution: Ensures

  • device.ciscoiot.com

  • us.ciscoiot.com

  • eu.ciscoiot.com

Step 3

Outbound HTTPS: Confirm the access point allows outbound HTTPS connections on tcp/443 for the domains listed in step2.

Step 4

Local Configuration: If IW Service remains offline, perform a local (offline) configuration using the device's configurator interface.


Reset the Device to Factory Default using GUI

You can reset the device to factory default either by pressing a reset button for 30 seconds when power is supplied to the access point or through configurator interface. For more information about reset button, see Using the Reset Button.


Note


A hard reset reverts all device configuration settings, including the device IP address and administrator password to factory defaults. Instead if you want to reboot the device, see Reboot the Device using GUI.


  1. In the MANAGEMENT SETTINGS, click reset factory default.

  2. Click YES in the confirmation pop-up window. To abort the factory reset, click NO.

  3. If you have previously saved a configuration file for the device, you can restore the saved configuration settings to the device, see Save and restore the device settings.


Note


Do not perform a hard reset unless the device requires reconfiguration using its factory configuration as the starting point. Hard reset resets the device's IP address, administrator password, and it disconnects the device from the network.


Reset the Device to Factory Default using CLI

To reset of the device configuration, use the following CLI command:

device#configure factory reset config
WARNING: "configure factory reset config" will clear config and reboot.
Do you want to proceed? (y/n)

Enter y in the CLI command to start the device reset process or alternatively enter n to abort the process.

To reset the device configuration and data wipe, use the following CLI command:

Device#configure factory reset default
WARNING: "configure factory reset default" will take minutes to perform DATA WIPE.

The following files are cleared as part of this process:


1) Config, Bak config files
2) Crashfiles
3) syslogs
4) Boot variables
5) Pktlogs
6) Manually created files
Do you want to proceed? (y/n) 

Enter y in the CLI command to start the device reset of the configuration and data wipe or alternatively enter n to abort the process.

Reboot the Device using GUI

To reboot the device's operating system, follow these steps:

  1. In the MANAGEMENT SETTINGS, click reboot.

  2. In the confirmation pop-up window, click Yes. To abort the reboot, click No.

Reboot the Device using CLI

To perform reboot, use the following CLI command:

Device#reload
Proceed with reload command (cold)? [confirm] 

Enter confirm in the CLI command to start the device reboot process.

Save and restore the device settings

The LOAD OR RESTORE SETTINGS window allows you to perform the following tasks:

  • Save the device's existing software configuration as a configuration (*.conf) file.

  • Upload and apply a saved configuration file to the current device.


    Note


    Device software configuration (*.conf) files are not interchangeable with IW Service configuration setup (*.iwconf) files.


    Tip


    Saved configuration files are reused for all devices of the same type. These saved configuration files act as configuration backup files to speed up redeployment if you need to replace the damaged device with a new device of the same type.


To download the device's existing configuration settings to your computer, follow these steps:

  1. In the MANAGEMENT SETTINGS, click configuration settings.

    The LOAD OR RESTORE SETTINGS window appears.

  2. Click Save to download the device configuration (*.conf).

To upload a saved configuration file to the device, follow these steps:

  1. Click Browse to upload the configuration (*.conf) file to the device.

  2. Click Restore to apply the configuration settings to the device.

Configure general settings

To change the General Mode settings, follow these steps:

  1. In the GENERAL SETTINGS, click general mode.

The General Mode has the operational mode controls. Devices capable of operating in a mesh radio network are shipped in mesh point mode.


Note


When designing the required network layout, there must be at least one mesh end device. This device performs control and administrative functions, such as license management. This is necessary for correct network operation, even if the network consists of only two devices.


To change the device's operational mode, select any one of the following mode:

  • Gateway - This mode is applicable for advanced Layer 3 mobility deployments, and it is not used in most networks.

  • Mesh Point - This mode is applicable for the remaining access points in the network. These access points establish links to other access points with the same network passphrase configured as mesh end or mesh point using wireless links or wired links. In this scenario, the access point has Layer 2 visibility of other access points.

  • Mesh End - This mode configures the access point to perform control and administrative network functions. There must be at least one mesh end in each network. This access point is typically installed in the most central point where the wireless and wired networks converge.

Configure general settings using CLI

To configure general settings, use the following CLI command:
Device#configure modeconfig mode
  gateway    layer 3 global gateway mode
  meshend    mesh end mode
  meshpoint  mesh point mode 
Device#configure modeconfig mode meshend
  mpls       MPLS support
  radio-off  disable radio interfaces 

Change the LAN parameters

The LAN parameters has entry controls for local address setting. Perform the following to change the LAN parameters:

  1. Once the General Mode window is opened for the first time, the Local IP and Local Netmask LAN parameters are shown with factory-set default values.

  2. If needed, enter the local primary DNS address in the Dns 1 field, and enter the local secondary DNS address in the Dns 2 field.

  3. Click Save to save the LAN settings. To clear the settings, click Reset.

Configure LAN parameters using CLI

To configure LAN parameters, use the following CLI command:

Example:

device#configure ip address ipv4 static 
192.168.10.2 255.255.255.0 192.168.10.1 192.168.10.200 192.168.10.201

Connect to the Access Point Console Port

To configure the access point locally (without connecting to a wired LAN), connect the computer to the access point’s console port using a DB-9 to RJ-45 serial cable and to open the CLI by connecting to the access point’s console port, follow these steps:

  1. Connect a nine-pin, female DB-9 to RJ-45 serial cable to the RJ-45 serial port on the access point and to the COM port on a computer.

  2. Set up a terminal emulator to communicate with the access point. In the terminal emulator, use the following settings:

    Parameter

    Value

    Baud rate

    115200 bps

    Data

    Eight bits

    Parity

    No

    Stop

    One stop bit

    Flow Control

    No

  3. There are two available command-prompt modes: standard command prompt (>) and privileged command prompt (#). When logged in for the first time, it directs you to standard command prompt (>) mode to execute unprivileged commands.

    To access privileged command-prompt (#) mode, enter the enable command (abbreviated as en) and enter the enable password (the privilege mode login password is different from the standard login password).

    Use these default credentials to log in:

    • Username: Cisco

    • Password: Cisco


    Note


    Once the initial configuration completes, ensure to remove the serial cable from the access point.