Configure NFVIS-for-UC Management Network
Available Languages
Introduction
This document describes the steps required to setup NFVIS-for-UC Management network after install was successful.
Prerequisites
Requirements
Cisco recommends that you have knowledge of these topics:
- Supported Business Edition or Cisco Expressway hardware that supports NFVIS-for-UC.
- Business Edition 6000/7000 M5 or later
- Cisco Expressway C1400V M7 or later
- NFVIS-for-UC software installed.
Background Information
Enterprise Network Function Virtualization Infrastructure Software for Unified Communications (NFVIS-for-UC) is built on the Enterprise NFVIS platform from Cisco, which was originally designed for branch office network function virtualization. The default configuration uses Open vSwitch (OVS) to provide management and Virtual Machine network connectivity. Open vSwitch configuration is comprised of several components: Bridges, Networks, and Physical Nics (pnics). Unified Communications products are often deployed on VMware ESXi. This table provides a terminology mapping for the components that provide the same network connectivity functionality to the VMs as is seen in NFVIS-for-UC OVS configuration.
| NFVIS-for-UC Name | VMware ESXi Name | Description |
| Bridge | vSwitch | Connect VMs on the same host and to upstream network infrastructure through a physical NIC. |
| Network | Portgroup | Assigned to Bridge/vSwitch and to VMs. Connect VMs to Bridge/vSwitch. Can have VLAN ID that tags traffic. |
| Physical NIC (pnic) | vmnic | Software construct which maps to a physical NIC port on the host hardware. Set as an Uplink Port for Bridge/vSwitch. |
The default Bridges and Networks configured on NFVIS-for-UC:
- wan-br (WAN Bridge)
- lan-br (LAN Bridge)
- wan-net (WAN network)
- lan-net (LAN Network)
Before you can manage NFVIS-for-UC through the WebUI, SSH and APIs, you must assign it a management IP address from the CLI. The bridge-to-physical mapping can vary depending on the hardware platform. In this example, GE0-0 is mapped to the default lan-br bridge and is used for NFVIS-for-UC management. You can use either default bridge (lan-br or wan-br) and any port for management purposes.
Configure Management Network
Step 1: From the console, log in and enter configuration mode via config terminal.
Step 2: Set system hostname, via system settings hostname hostname.

Note: Saving a configuration change is done with the commit command. You can do this after each configuration or after several. This is also a good time to review the full default configuration via show running-config. Take particular note of the system settings, networks network, bridges bridge and pnic sections as these are the ones you modify during initial configuration.
Step 3: Set management IP address, system settings mgmt ip address ip-address ip-subnet-mask.
Step 4: Set default gateway, system settings default-gw ip-address
Step 5: Set source interface to originating traffic from NFVIS-for-UC, system settings source-interface ip-address
nfvis# config terminal
nfvis(config)# system settings hostname BE7KH2-NFVIS
nfvis(config)# commit
Commit complete.
BE7KH2-NFVIS(config)#
BE7KH2-NFVIS(config)# system settings mgmt ip address 10.0.101.10 255.255.255.0
BE7KH2-NFVIS(config)# system settings default-gw 10.0.101.1
BE7KH2-NFVIS(config)# system settings source-interface 10.0.101.10
BE7KH2-NFVIS(config)# commit
Commit complete.
BE7KH2-NFVIS(config)#
Example of the current running configuration.
BE7KH2-NFVIS(config)# show running-config
!
... Omitted configuration to focus on management network setup ...
!
system settings hostname BE7KH2-NFVIS
system settings mgmt ip address 10.0.101.10 255.255.255.0
system settings default-gw 10.0.101.1
system settings source-interface 10.0.101.10
!
networks network wan-net
 bridge wan-br
!
networks network lan-net
 bridge lan-br
!
... Omitted configuration to focus on management network setup ...
!
bridges bridge wan-br
!
bridges bridge lan-br
 ip address 10.0.101.10 255.255.255.0
 port GE0-0
!
Note: If you need to change the physical port that is used for NFVIS-for-UC management, the easiest way to do it is to modify the port configuration for the default bridge that is being used for management. In this lab, the default bridge is lan-br and the default port is set to GE0-0.
Step 5b (Optional): Change the physical port used for NFVIS-for-UC management. If a different port needs to be used for NFVIS-for-UC management than the default, simply change the port configuration in the default bridge used for management. In this example, the default lan-br is using GE0-0 for management the process to change it to use port GE2-0 is:
BE7KH2-NFVIS# config terminal
BE7KH2-NFVIS(config)# bridges bridge lan-br
BE7KH2-NFVIS(config-bridge-lan-br)# no port GE0-0
BE7KH2-NFVIS(config-bridge-lan-br)# port GE2-0
BE7KH2-NFVIS(config-port-GE2-1)# commit
Step 6: Upstream network configuration can optionally be done first. In this setup, GE0-0 is directly connected to our management switch as an access port with the VLAN set on the port. The port configuration on this Nexus switch is:
interface Ethernet1/10
  description BE7KH2-NFVIS GE0-0 Mgmt
  switchport access vlan 100
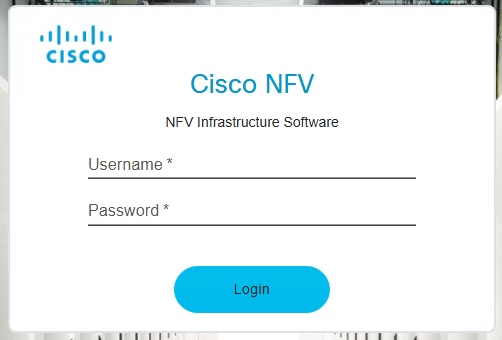
Step 7: Once committed, verify connectivity. Connectivity can be verified by accessing the WebUI login screen at https://<NFVIS Management IP or FQDN>.
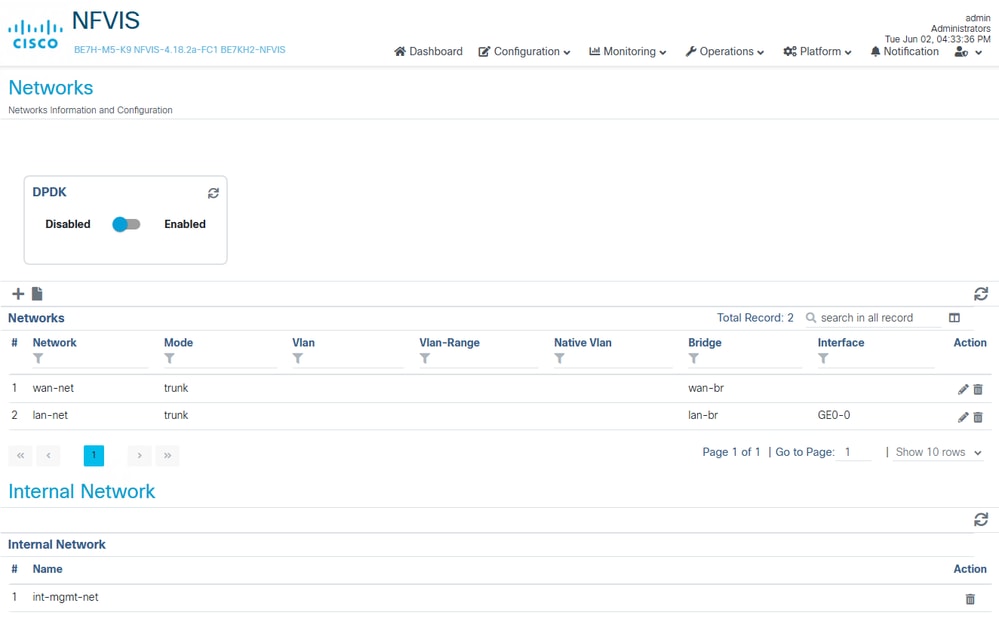
Step 8: Navigate to Network configuration page from drop Configuration > Virtual Machines > Networking > Networks.

Networks page default configuration (BE7H-M5-K9)
Related Articles and Documentation
- CIsco Virtualization Guide for Cisco On-premises Calling Applications
- Cisco Business Edition 6000/7000 Appliances Installation Guide
- Understanding NFVIS Networking
- NFVIS 4.x Getting Started Guide
- NFVIS 4.x Configuration Guide
Terminology Used
- BE6K/BE7K – Cisco Business Edition 6000/7000 series appliances
- CE1400V – Cisco Expressway appliance.
- NFV – Network Function Virtualization, VNF can be considered as an outcome of NFV
- VNF – Virtualized Network Function (such as virtual router, firewall)
- NFVIS-for-UC – NFV Infrastructure Software for Unified Communications
- pNIC – Physical Network Interface Card, physically installed in the appliance, managed by NFVIS-for-UC.
- OVS – Open Virtual Switch
Other Helpful Commands
- Bridges are what allow you to connect VMs and NFVIS to the outside world, wan-br and lan-br are the default bridges.
show running-config bridges
show running-config bridges bridge wan-br
show running-config bridges bridge lan-br
show bridge-settings | more
- Networks are what allow you to connect VMs to bridges, lan-net and wan-net are the default networks.
show running-config networks
show running-config networks network (tab to see all the options)
show running-config networks network lan-net
show running-config networks network wan-net
Revision History
| Revision | Publish Date | Comments |
|---|---|---|
1.0 |
08-Jul-2026
|
Initial Release |

 Feedback
Contact Cisco
- Open a Support Case

- (Requires a Cisco Service Contract)