Configure NFVIS-for-UC OVS
Available Languages
Introduction
This document describes the steps required to configure NFVIS-for-UC Open vSwitch (OVS) for Virtual Machine network connectivity.
Prerequisites
Requirements
- Supported Business Edition or Cisco Expressway hardware that supports NFVIS-for-UC.
- Business Edition 6000/7000 M5 or later
- Cisco Expressway C1400V M7 or later
- NFVIS-for-UC software installed with WebUI accessible for management.
Reference Setup
| Usage | VLAN | IP | Gateway | pNIC | Bridge | Network | Uplink Switch Name | Uplink Switch Port |
|---|---|---|---|---|---|---|---|---|
| Appliance OOB CIMC | 100 | 10.0.100.10/24 | 10.0.100.1/24 | CIMC Management | mgmt-switch | Eth1/1 | ||
| NFVIS-for-UC Management | 101 | 10.0.101.10/24 | 10.0.101.1/24 | GE0-0 | lan-br | lan-net | mgmt-switch | Eth1/10 |
| VM Data1 | 10 | N/A | 10.0.10.1/24 | GE1-0 | vm-br1 | vm-net-10 | vm-switch | Eth1/11 |
| VM Data2 | 20 | N/A | 10.0.20.1/24 | GE1-1 | vm-br2 | vm-net-20 | vm-switch | Eth1/12 |
Configure OVS for VM Connectivity
Once you are able to remotely manage NFVIS-for-UC, the next step is setting up networks for Virtual Machine connectivity. In this setup, GE1-0 and GE1-1 are used for VM data traffic.
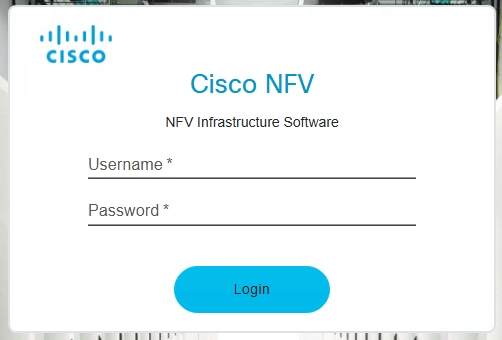
Step 1: Log in to NFVIS-for-UC WebUI at https://<NFVIS Management IP or FQDN> using credentials you set earlier.
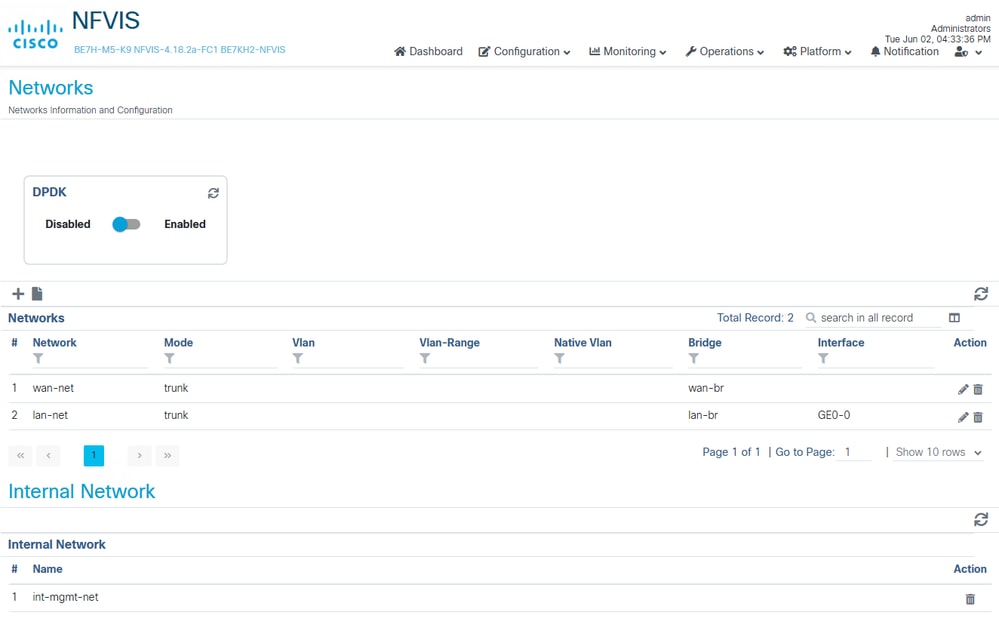
Step 2: Navigate to Network configuration page from drop Configuration > Virtual Machines > Networking > Networks.

Networks page default configuration (BE7H-M5-K9)
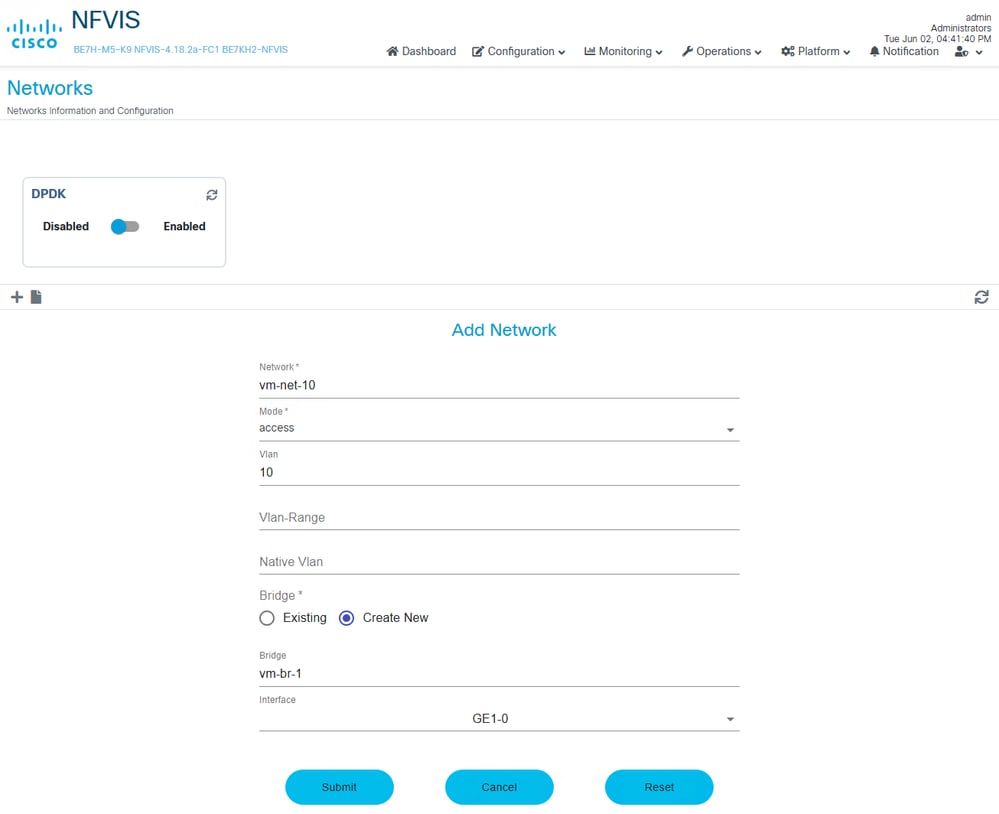
Step 3: Add New network, by clicking the + sign to add network. Enter network details and click Submit once done. Repeat the same step for other VLANs/network. Re-use the same bridge or create a new one based on your design.
- Name: vm-net-10
- Mode: Access
- VLAN: 10
- Bridge: Create New, GE1-0 as interface to use. Recall that GE0-0 is being used for NFVIS-for-UC management.
Step 4. Verify the networks now appear on the Networks page.
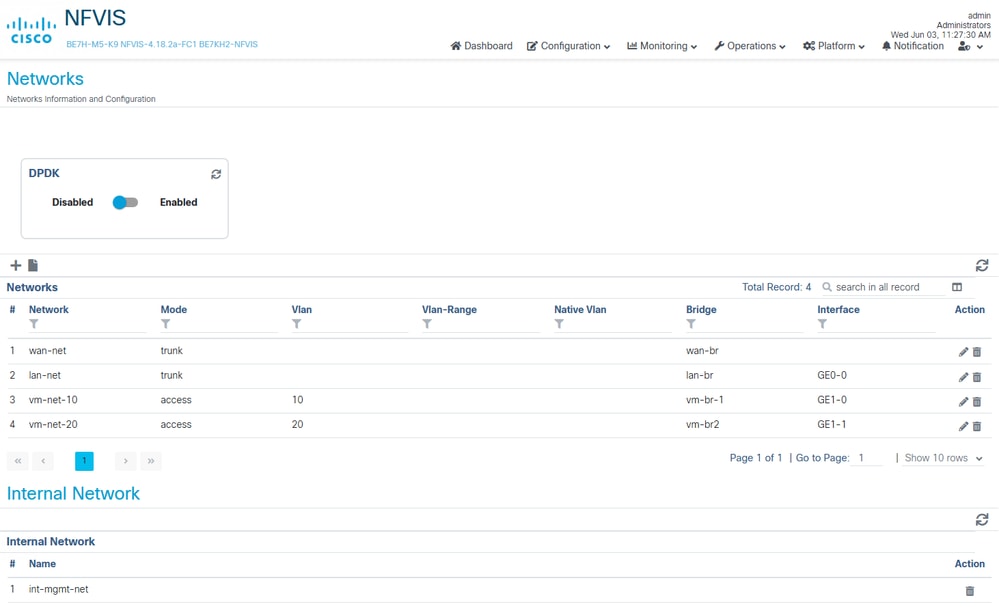
You can also see these networks created from the NFVIS-for-UC CLI.
BE7KH2-NFVIS# show system networks
NETWORK BRIDGE PORTS TYPE VLAN
----------------------------------------------------------
wan-net wan-br N/A openvswitch N/A
lan-net lan-br GE0-0,GE0-0_ll1 openvswitch N/A
GE1-0-SRIOV-1 N/A N/A SRIOV N/A
...omitted default SRIOV networks...
vm-net-10 vm-br1 GE1-0,vnic0 openvswitch 10
vm-net-20 vm-br2 GE1-1,vnic1 openvswitch 20

BE7KH2-NFVIS#
Related Articles and Documentation
- CIsco Virtualization Guide for Cisco On-premises Calling Applications
- Cisco Business Edition 6000/7000 Appliances Installation Guide
- Understanding NFVIS Networking
- NFVIS 4.x Getting Started Guide
- NFVIS 4.x Configuration Guide
Terminology Used
- BE6K/BE7K – Cisco Business Edition 6000/7000 series appliances
- CE1400V – Cisco Expressway appliance
- NFV – Network Function Virtualization, VNF can be considered as an outcome of NFV.
- VNF – Virtualized Network Function (such as virtual router, firewall)
- NFVIS-for-UC – NFV Infrastructure Software for Unified Communications
- pNIC – Physical Network Interface Card, physically installed in the appliance, managed by NFVIS-for-UC.
- vNIC – Virtual Network Interface Card, managed by NFVIS-for-UC, assign vNIC to virtual machines.
- OCP NIC 3.0 – Open Compute Project Network Interface Card 3.0.
- MLoM – Modular LAN on Motherboard
- OVS – Open Virtual Switch
- SR-IOV – Single Root I/O Virtualization, allows the pNIC to present itself to NFVIS-for-UC as multiple physical NICs.
- DPDK – Data Plane Development Kit
Revision History
| Revision | Publish Date | Comments |
|---|---|---|
1.0 |
08-Jul-2026
|
Initial Release |

 Feedback
Contact Cisco
- Open a Support Case

- (Requires a Cisco Service Contract)