Introduction
This document describes the process to install Windows 2025 in a Cisco UCS Server with KVM Console.
Prerequisites
Requirements
Cisco recommends that you have knowledge of these topics:
Components used
- Cisco UCS 6454 Fabric Interconnect
- Cisco UCSX 210 M7
- Windows 2025 ISO file
The information in this document was created from the devices in a specific lab environment. All of the devices used in this document started with a clear (default) configuration. If your network is live, ensure that you understand the potential impact of any command.
Background Information
A bare metal server is a physical server dedicated entirely to a single tenant or customer. Unlike virtual servers, which share resources on a physical machine through virtualization technologies, bare metal servers provide the user with full control over the hardware resources of a server, such as CPU, RAM, storage, and network connectivity.
This means there are no virtualization layers between the operating system and the hardware, allowing for maximum performance and resource utilization.
Bare metal servers provide high performance, security, and customization benefits, making them ideal for businesses with demanding workloads and specific compliance requirements. Running Windows on these servers can further optimize performance for Windows-based applications and enhance security and customization capabilities
Configure
The server must be associated with a Server Profile which contains a Boot Order Policy. This policy specifies how the server boots: it could be local or remote such as Boot from SAN or iSCSI, for instance.
Note: Consider to include the Virtual Media option in the boot order if you mount the ISO image for the installation..
Mount the Installation ISO Image
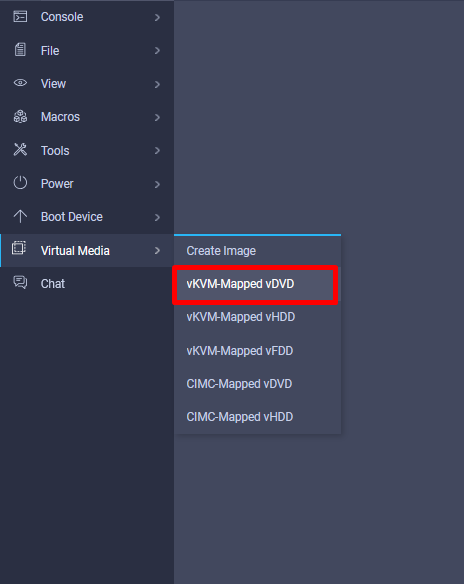
Step 1. Launch the KVM Console. Navigate to Virtual Media tab.
A menu with various options is displayed. Select vKVM-Mapped vDVD.
Step 2. Browse on your local device for the iso file. Once selected, click Map Drive.
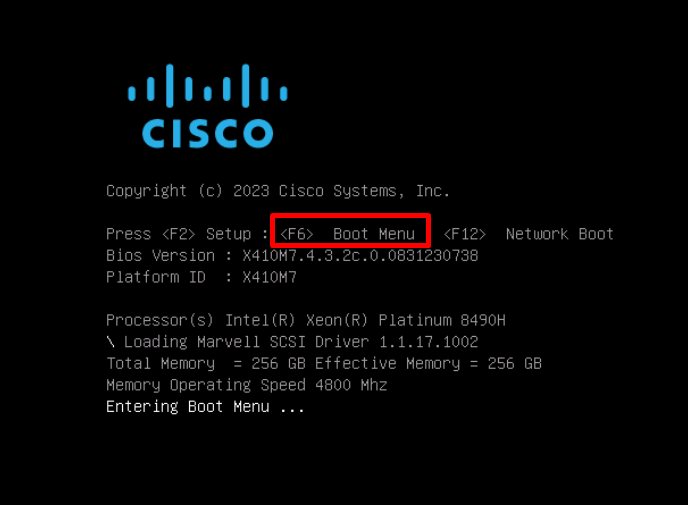
Step 3. Reboot your server and interrupt the boot. Watch the boot messages and press F6 when prompted to enter the Boot Menu.
Step 4. Navigate to Cisco vKVM-Mapped option and press enter.
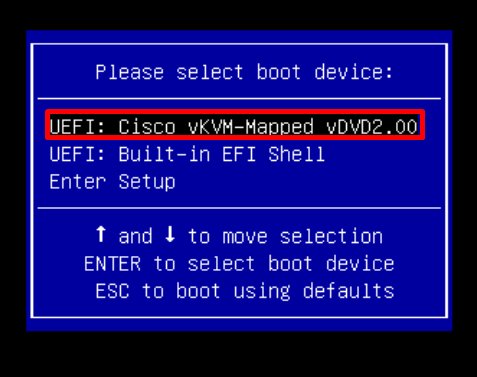
Windows Boot Manager screen appears if the process was successful.
Windows OS Installation
Local
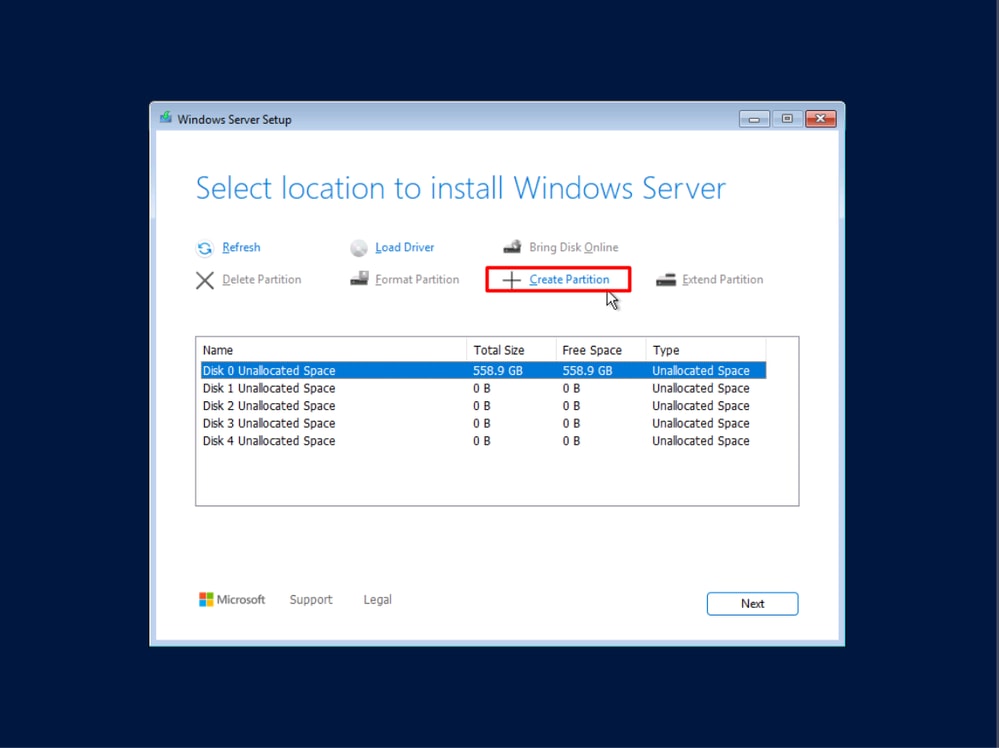
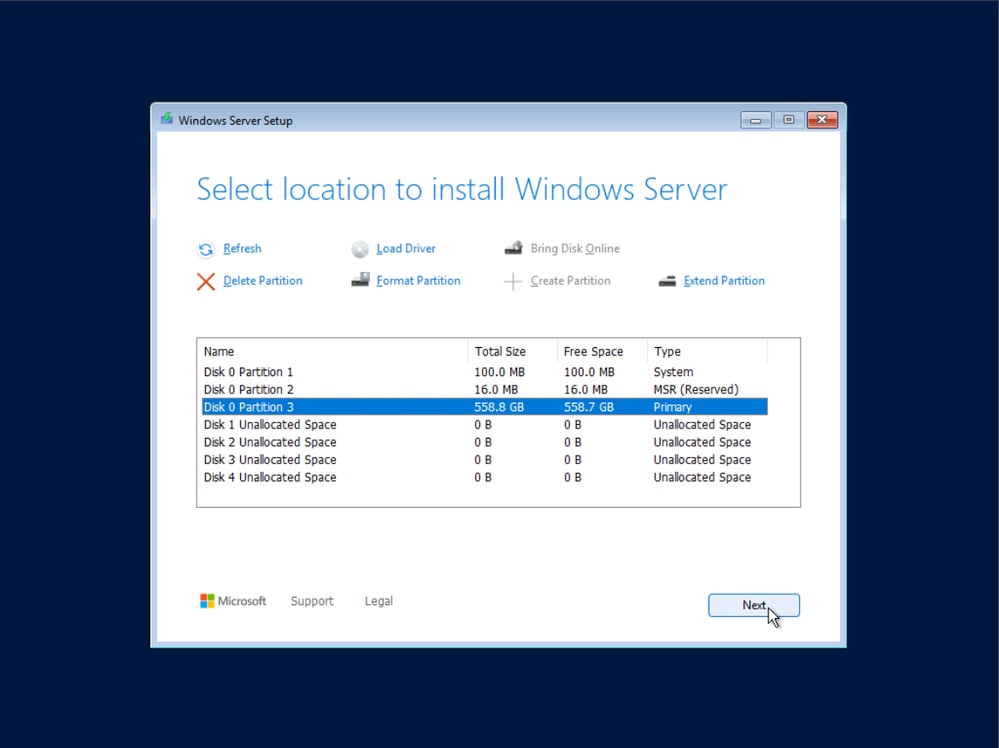
Continue with the installation process until you see the local disks available for installation.
Step 1. (Optional) Delete and extend partitions according to your needs.
Step 2. Select the disk and create a new partition to make it viable for installation. Make sure to choose the right disk.
Two partitions that Windows requires for proper installation are displayed. They are Windows reserved, and you are not be able to modify or delete them.
Step 3. Select your primary partition.
Step 4. Click Next to continue. Complete the installation according to the requirements and standards of your company. Monitor the installation progress and answering prompts as required.
Remote (Boot from SAN)
Prerequisites for successful Boot From SAN:
- Boot policy configured in UCS Manager or Intersight Managed Mode. You can check Configure Boot from SAN in Intersight Managed Mode - Cisco or Configure Boot from SAN in UCS Manager - Cisco for more details.
- Masking configured on SAN arrays.
- Zoning configured (if applicable)
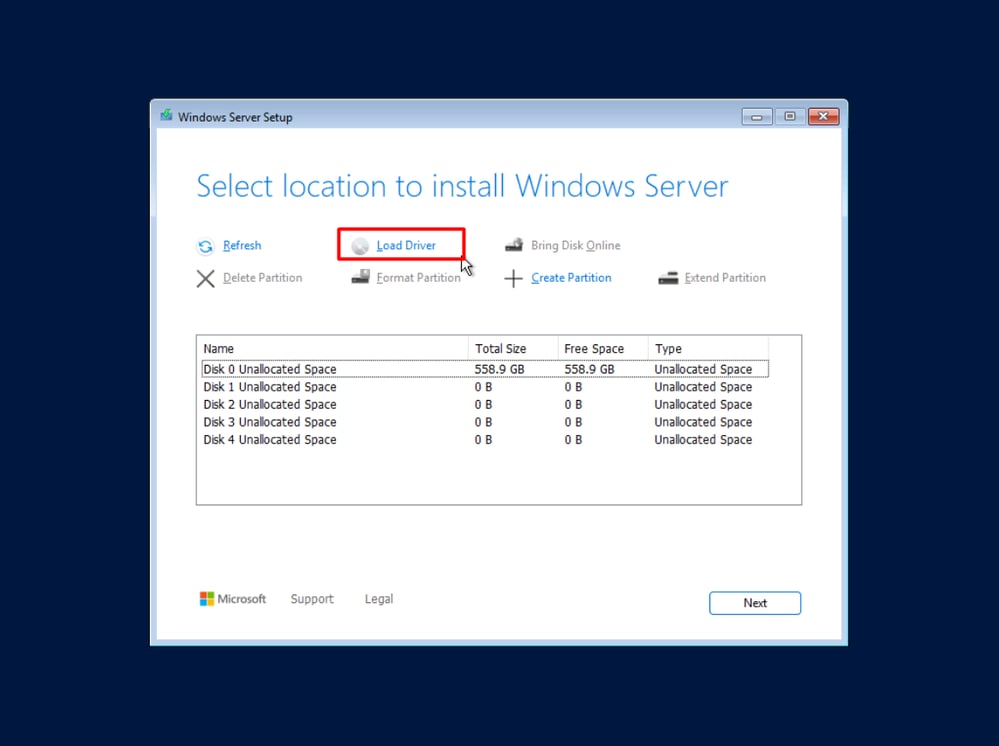
In this scenario, only local disks can be viewed for the installation of Windows. The corresponding drivers are added to be able to view the remote disks.
Step 1. Check the corresponding drivers according to your server model, version, and physical components in UCS Hardware and Software Compatibility
Download the proper ISO bundle at Software Download.
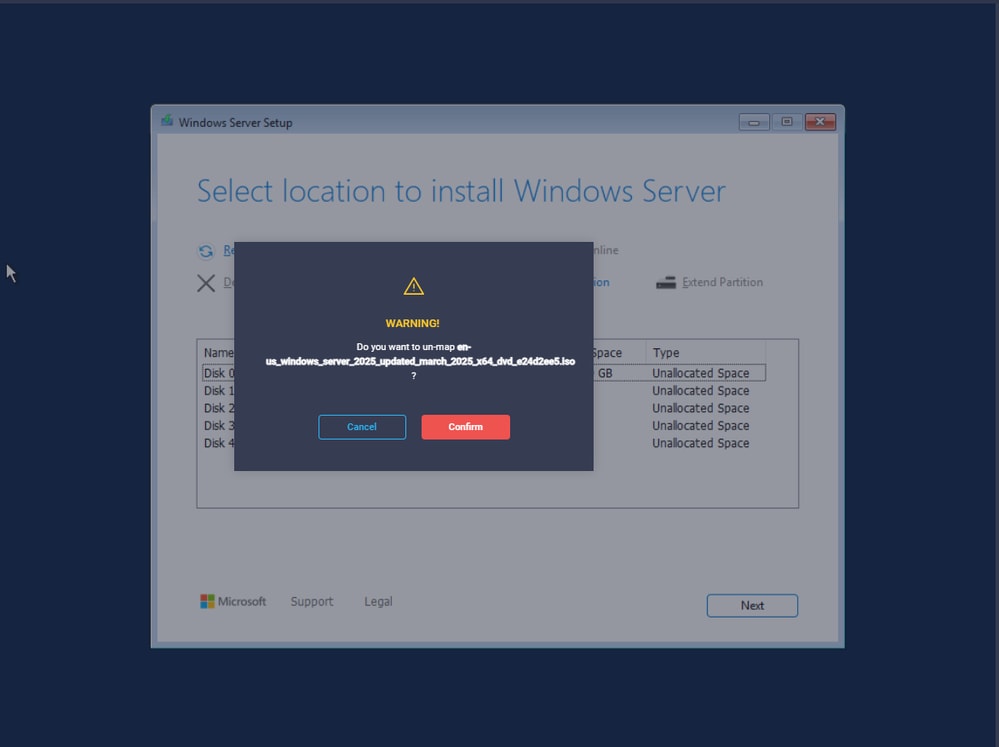
Step 2. Navigate to Virtual Media tab. Un-map the Windows Installation image from the vKVM-Mapped vDVD.
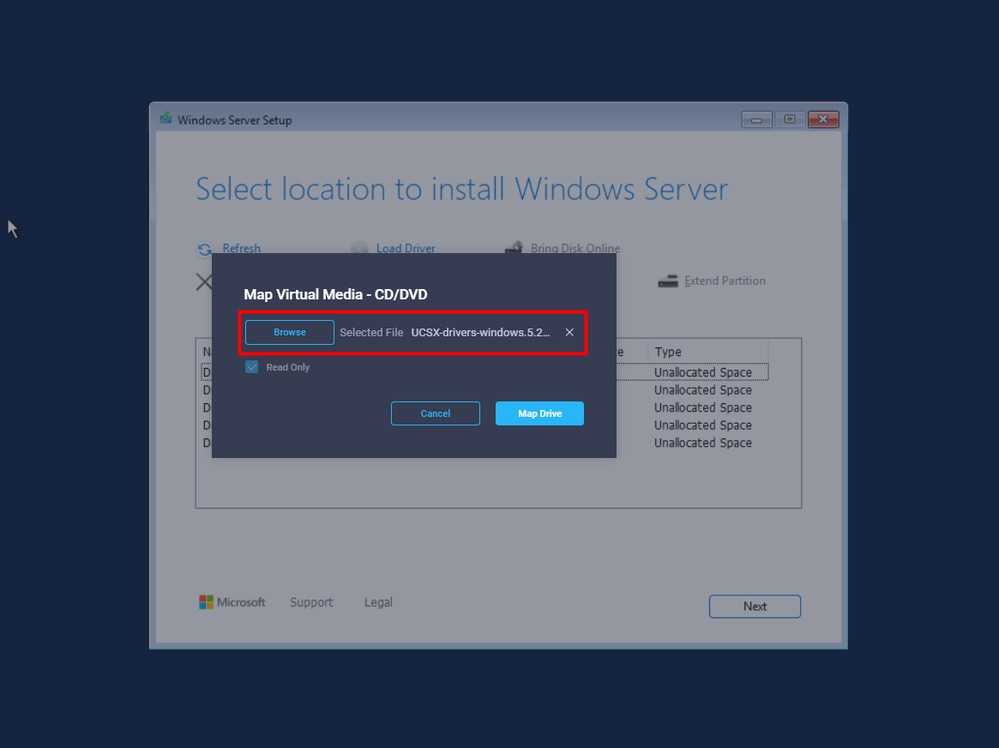
Step 3.Map the drivers bundle.
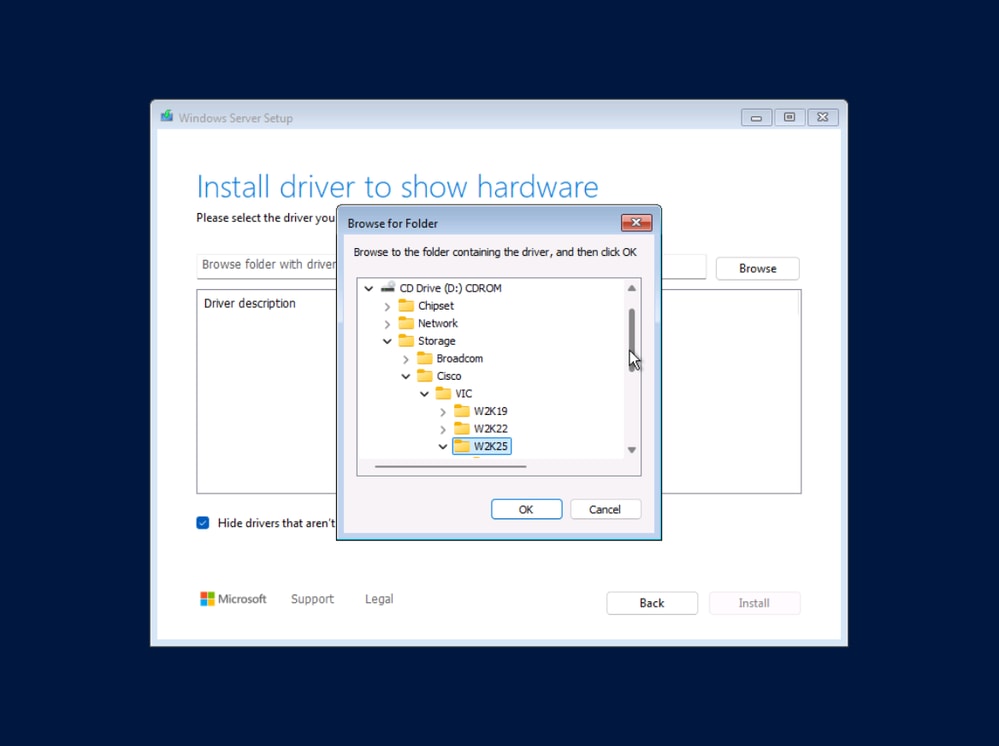
Step 4. Click Load Drive option at the Windows Server Setup.
Step 5. Navigate to Storage > Cisco > VIC > WK25. Select the driver file and click OK.
Verify the driver file path is correct and hit Install.

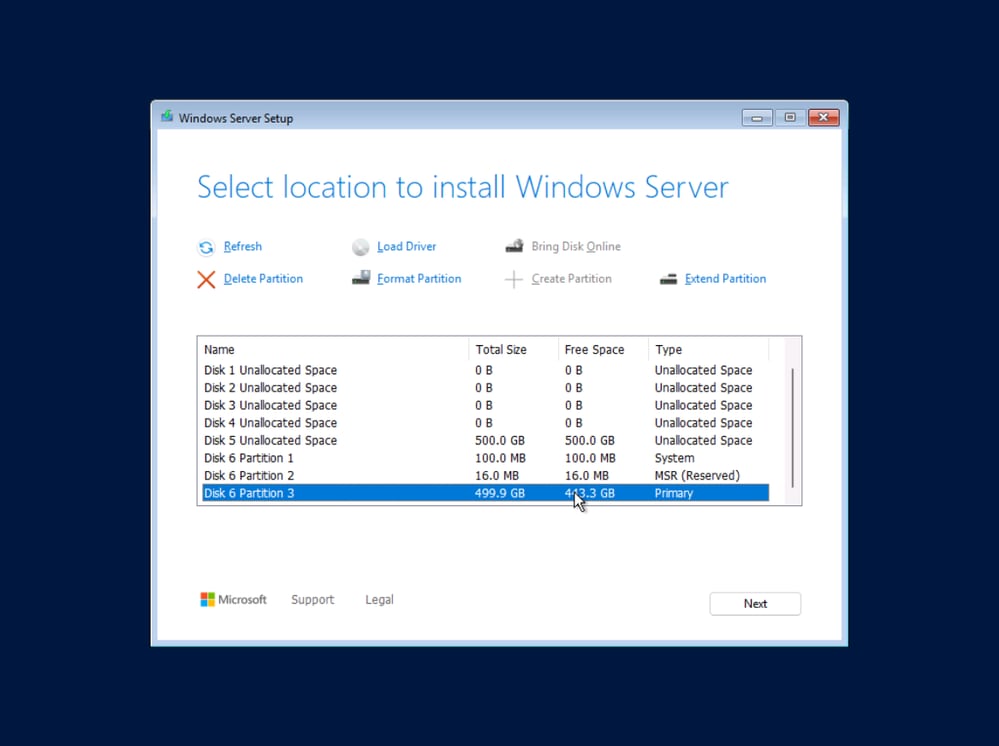
The program begins scanning the disks again. This time, the remote disks that could not be seen before, appear.
Step 6. Select the disk to use for the installation and click Next.
Step 7. Go through the wizard to finish the installation.
Drivers Installation
At this point, Windows still needs device drivers installed for devices such as the server chipset and adapter controllers.
Install the drivers via Device Manager
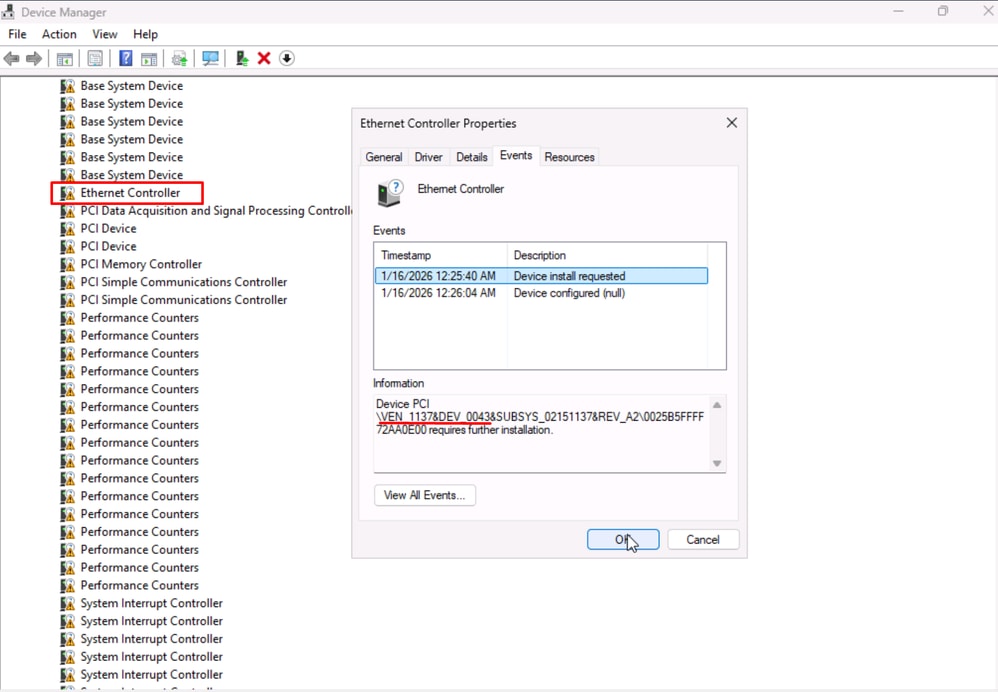
Step 1. Look for any devices that still require driver installation with Device Manager. These devices are marked with yellow warning flags.

Step 2. Check the Properties of an unknown Device. Navigate to Events tab and note the Device PCI information.
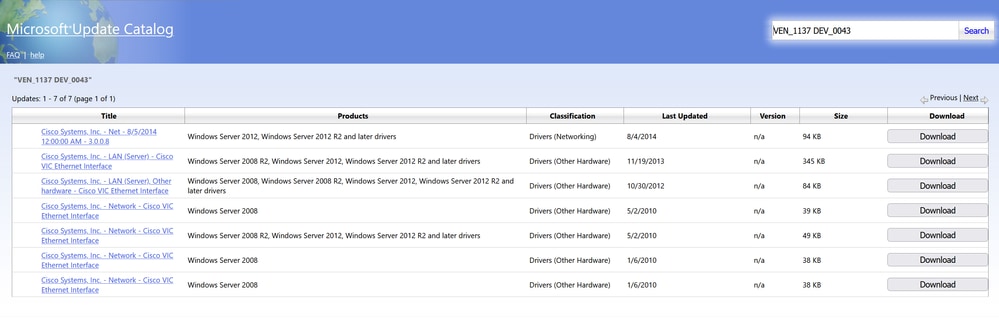
Step 3. Go to Microsoft Update Catalog and search for the Vendor and Device number to know what the device is about. This way you can know which driver needs to be installed.
Step 4. Find the appropriate drivers at Software Download. Mount the ISO in your machine.
Step 5. Right click in the device. Click Update Driver and browse in your computer for the proper file drive. Install the drivers so devices are recognized and function properly.
Install the drivers via CLI
For the purposes of this document, only the network card drivers is installed.
Step 1. There are devices that the machine cannot detect, among them is the network card. Run the command to list unknown devices.
> Get-PnpDevice | Where-Object {$_.Status -eq "Error"}
Run the command Get-PnPDevice -Class ‘Net' to check whether the network adapter is visible or not.
> Get-PnPDevice -Class ‘Net'

Step 2. Mount the ISO file. Navigate to Virtual Media > vKVM-Mapped vDVD. Browse for file of the drivers and map it.
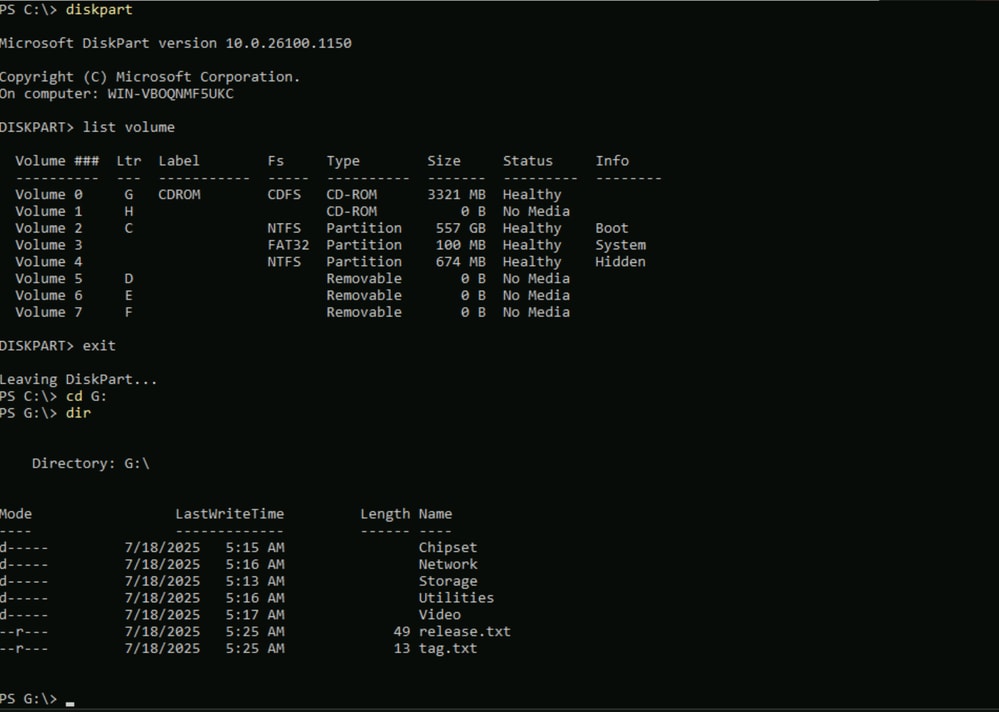
Step 3. With the help of diskpart, locate where the disk with the drivers with list volume command as shown below:
Step 4. Navigate to the file that contains the drivers. In this example, the goal is to install the ethernet network driver known as nenic. Go to Network > Cisco > VIC > W2k25 > nenic.
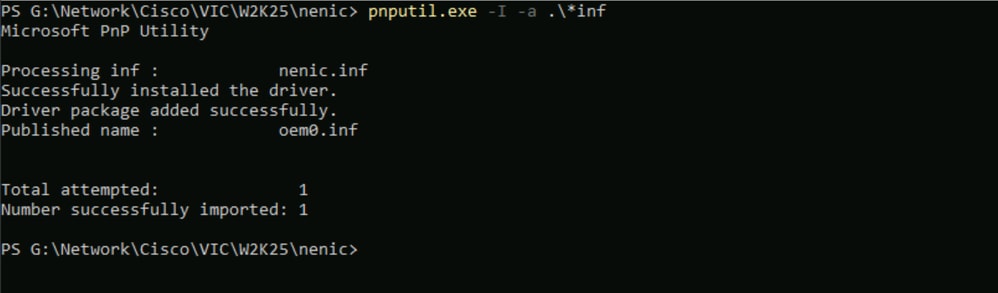
Step 5. Once you are in the proper path, use pnputil.exe command-line tool to install the drivers. Run the command pnputil.exe -I -a .\*inf to install the drivers.
G:\Network\Cisco\VIC\W2k25\nenic> pnputil.exe -I -a .\*inf
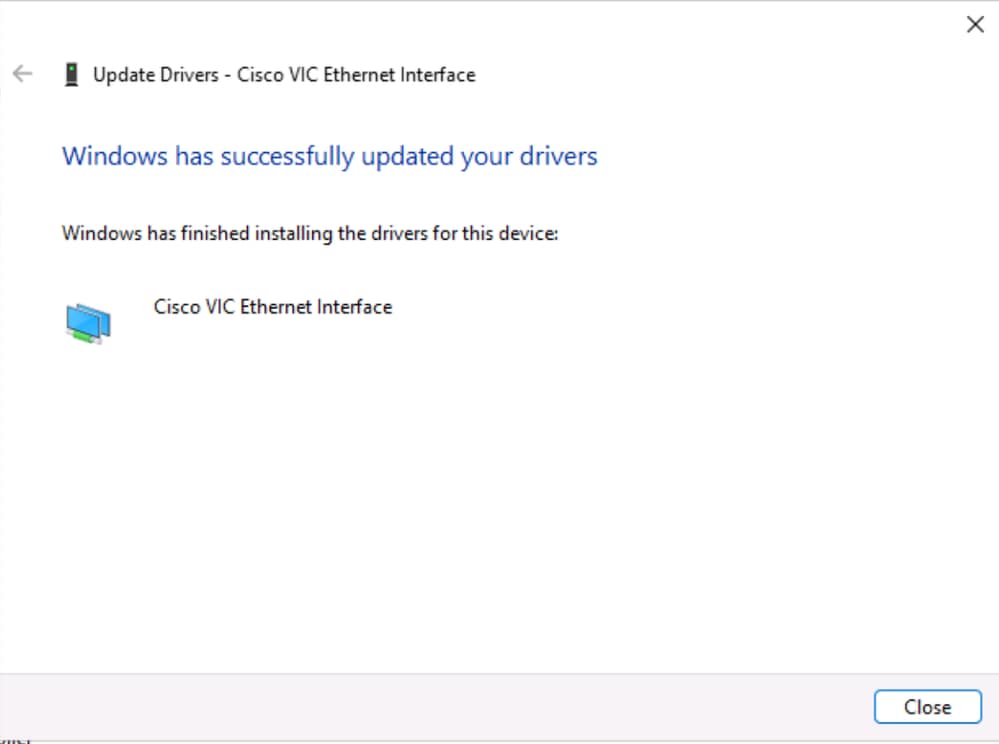
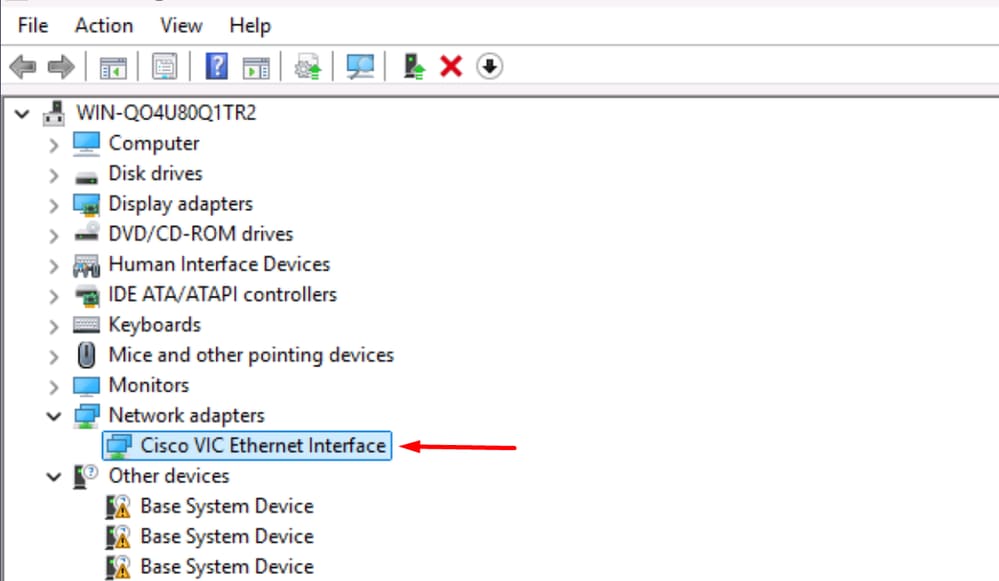
Step 6. Verify that the device is visible. On this occasion, the Cisco VIC Ethernet Interface is displayed.

Troubleshoot
Error while installing Windows in Remote Disks
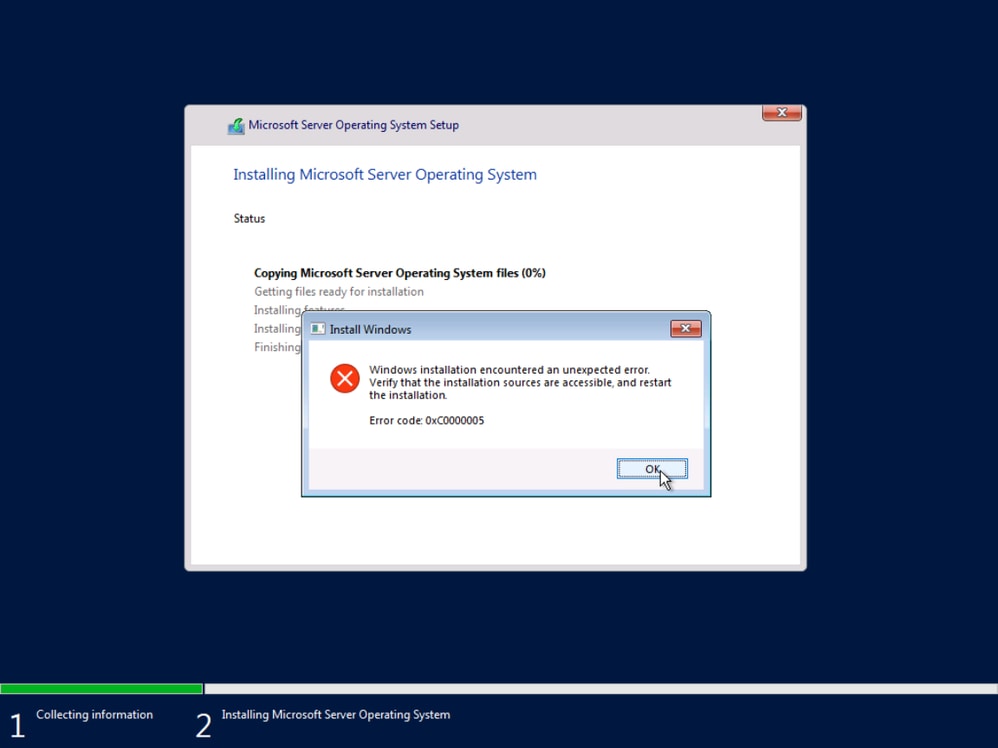
- Disable multipath in your server. Leave only one path to reach the remote storage.
Server goes to Shell after reboot
Specifiy the path and name of the bootable image in the Boot Order policy. For Windows:
- Bootloader Name: BOOTX64.EFI
- Bootloader Path: \EFI\BOOT\

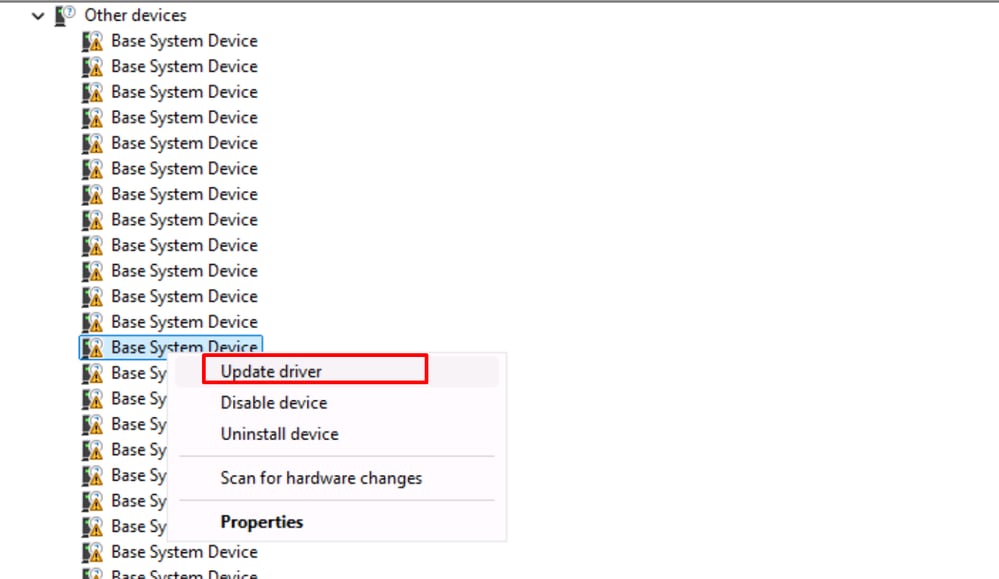
Base System Device
Step 1. Right click in the device, hit Update driver. Browse and install drivers of Chipset in your computer.
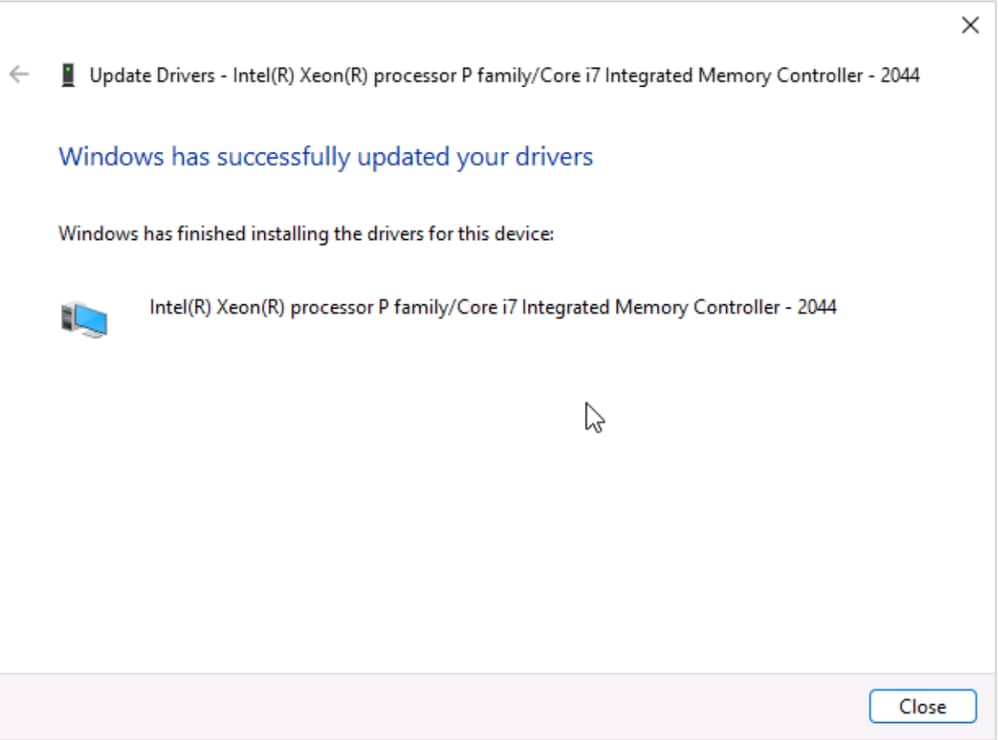
Step 2. Reboot the machine.
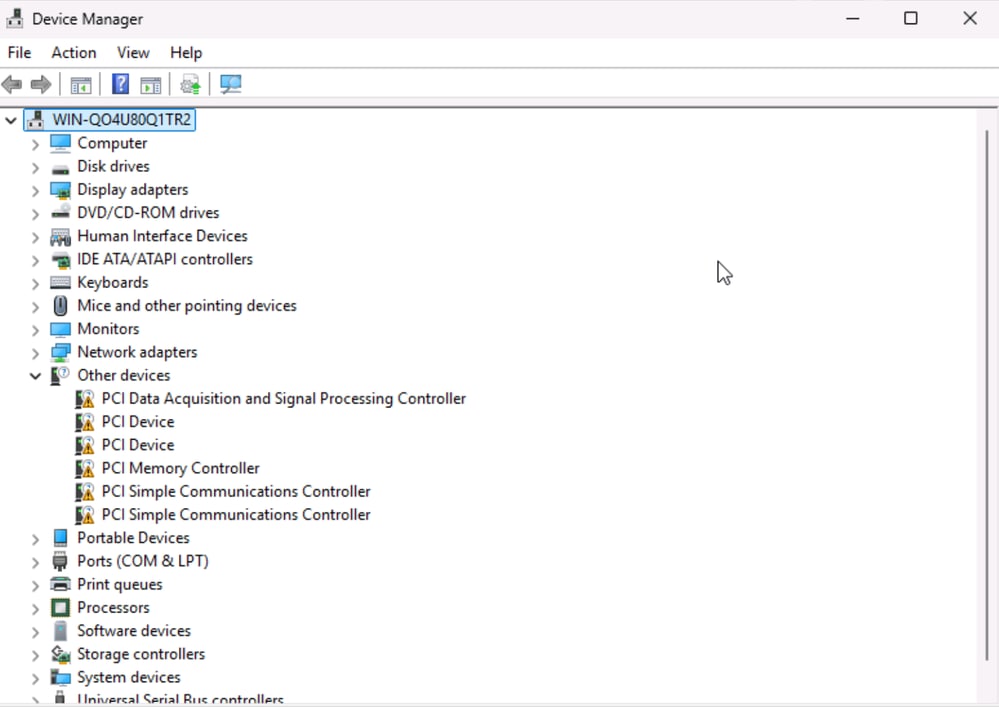
Step 3. Verify in Device Manager that the devices are recognized. Generic devices are listed now.
Related Information
Server Profiles - Cisco Intersight Help Center
Installing the Server OS
Configure Boot from Local Storage in Intersight Manage Mode (IMM)
PnPUtil Command Line Tool for Driver Packages - Windows drivers | Microsoft Learn
Get-PnpDevice (PnpDevice) | Microsoft Learn
 Feedback