Configure IPv6 Enabled RAVPN with AAA Authentication on FTD Managed by FDM
Available Languages
Download Options
Bias-Free Language
The documentation set for this product strives to use bias-free language. For the purposes of this documentation set, bias-free is defined as language that does not imply discrimination based on age, disability, gender, racial identity, ethnic identity, sexual orientation, socioeconomic status, and intersectionality. Exceptions may be present in the documentation due to language that is hardcoded in the user interfaces of the product software, language used based on RFP documentation, or language that is used by a referenced third-party product. Learn more about how Cisco is using Inclusive Language.
Introduction
This document describes the steps for configuring IPv6 enabled remote access VPN with AAA authentication on FTD managed by FDM.
Prerequisites
Requirements
Cisco recommends that you have knowledge of these topics:
- Cisco Secure Firepower Device Manager (FDM) Virtual
- Cisco Secure Firewall Threat Defense (FTD) Virtual
- VPN Authentication Flow
Components Used
The information in this document is based on these software and hardware versions:
- Cisco Secure FDM Virtual 7.6.0
- Cisco Secure FTD Virtual 7.6.0
- Cisco Secure Client 5.1.6.103
The information in this document was created from the devices in a specific lab environment. All of the devices used in this document started with a cleared (default) configuration. If your network is live, ensure that you understand the potential impact of any command.
Background Information
IPv6 remote access VPN (RAVPN) is becoming increasingly important as the world transitions from IPv4 to IPv6 as IPv4 addresses are limited and have been nearly exhausted, while IPv6 offers a virtually limitless address space, accommodating the growing number of internet-connected devices. As more networks and services move to IPv6, having IPv6 capability ensures that your network remains compatible and accessible. IPv6 RAVPN helps organizations prepare for the future of networking, ensuring secure and scalable remote connectivity.
In this example, the client communicates with the VPN gateway using an IPv6 address provided by the service provider but receives both IPv4 and IPv6 addresses from the VPN pools, utilizing the Cisco Identity Service Engine (ISE) as authentication identity source. The ISE is configured with IPv6 address only. The inside server is configured with both IPv4 and IPv6 addresses, representing dual-stack hosts. The client can access internal resources using either the IPv4 or IPv6 VPN address as appropriate.
Configure
Network Diagram
 Topology
Configurations on FDM
Step 1. It is essential to ensure that the preliminary configuration of IPv4 and IPv6 interconnection between nodes has been duly completed. The gateway of Client and FTD is related ISP address. The gateway of server is inside IP of FTD. The ISE is located in DMZ area of FTD.
 FTD_Interface_IP
 FTD_Default_Route
Step 2. Download the Cisco Secure Client package namecisco-secure-client-win-5.1.6.103-webdeploy-k9.pkg from Cisco Software Download and ensure the file is good after download by confirming md5 checksum of the downloaded file is the same as the Cisco Software Download page.
Step 3. Verify that RAVPN related licenses are enabled on FTD.
 FDM_License
Step 4. Create VPN address pool.
Step 4.1. Create IPv6 and IPv4 address pool by creating network objects. Navigate to Objects > Networks and click the + button.
 Create_VPN_Address_Pool_1
Step 4.2. Provide necessary information of each network object. Click theOKbutton.
For IPv4 pool, object type can be chosen with Network or Range. In this example, the object type Network is chosen for demo purposes.
- Name: demo_ipv4pool
- Type: Network
- Network: 10.37.254.16/30
 Create_VPN_Address_Pool_2_IPv4
For IPv6 pool, object type can only be chosen with Network as of now.
- Name: demo_ipv6pool
- Type: Network
- Network: 2001:db8:1234:1234::/124
 Create_VPN_Address_Pool_2_IPv6
Step 5. Create the inside network for NAT exempt.
Step 5.1. Navigate to Objects > Networks and click the + button.
 Create_NAT_Exempt_Network_1
Step 5.2. Provide the necessary information of each network object. Click the OK button.
In this example, both IPv4 and IPv6 networks are configured.
- Name: inside_net_ipv4
- Type: Network
- Network: 192.168.50.0/24
 Create_NAT_Exempt_Network_2_IPv4
- Name: inside_net_ipv6
- Type: Network
- Network: 2001:db8:50::/64
 Create_NAT_Exempt_Network_2_IPv6
Step 6. Create certificate used for RAVPN. You have two options: you can either upload a certificate signed by a third-party Certificate Authority (CA) or generate a new self-signed certificate.
In this example, a new self-signed certificate is used with customized content of certificate for demo purposes.
Step 6.1. Navigate to Objects > Certificates. Click the + button and choose Add Internal Certificate.
 Create_Certificate_1
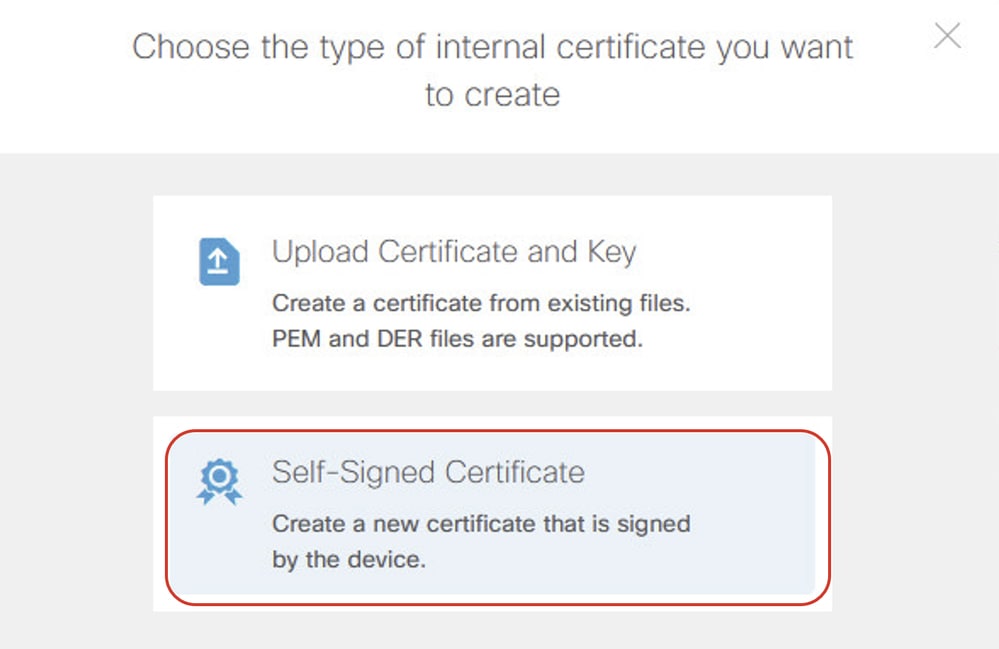
Step 6.2. Click Self-Signed Certificate.
Step 6.3. Click General tab and provide the necessary information.
Name: demovpn
Key Type: RSA
Key Size: 2048
Validity Period: Default
Expiration Date: Default
Validation Usage for Special Services: SSL Server
 Create_Certificate_3
Step 6.4. Click Issuer tab and provide the necessary information.
Country: United States (US)
Common Name: vpn.example.com
 Create_Certificate_4
Step 6.5. Click Subject tab, provide necessary information, and then click SAVE.
Country: United States (US)
Common Name: vpn.example.com
 Create_Certificate_5
Step 7. Create radius server identity source.
Step 7.1. Navigate toObjects > Identity Sources, click + button, and chooseRADIUS Server.
 Create_Radius_Source_1
Step 7.2. Provide necessary information of radius server. Click the OKbutton.
Name: demo_ise
Server Name or IP Address: 2001:db8:2139::240
Authentication port: 1812 (default)
Timeout: 10 (default)
Server Secret Key: cisco
Interface used to connect to Radius server: Manually choose interface. In this example, choose dmz (GigabitEthernet0/8).
 Create_Radius_Source_2
Step 7.3. Navigate toObjects > Identity Sources. Click the + button and choose RADIUS Server Group.
 Create_Radius_Source_3
Step 7.4. Provide necessary information of radius server group. Click the OK button.
Name: demo_ise_group
Dead Time: 10 (default)
Maximum Failed Attempts: 3 (default)
RADIUS Server: Click the + button, select the name created in Step 6.2. In this example it is demo_ise.
 Create_Radius_Source_4
Step 8. Create group policy used for RAVPN. In this example, customized banner and timeout setting are configured for demo purpose. You can modify based on your actual requirement.
Step 8.1. Navigate to Remote Access VPN > View Configuration. Click Group Policies in the left sidebar and then click the + button.
 Create_Group_Policy_1
Step 8.2. ClickGeneral and provide the necessary information.
Name: demo_gp
Banner Text for Authenticated Clients: demo banner
 Create_Group_Policy_2
Step 8.3. Click Secure Client and provide the necessary information.
Check Enable Datagram Transport Layer Security (DTLS).
 Create_Group_Policy_3
Check Keepalive Messages Between Secure Client and VPN Gateway (Default value).
Check DPD on Gateway Side Interval (Default value).
Check DPD on Client Side Interval (Default value).
 Create_Group_Policy_3_Cont
Step 9. Create RAVPN connection profile.
Step 9.1. Navigate toRemote Access VPN > View Configuration. Click Connection Profile from the left sidebar and then click the + button in order to start the wizard.
 Create_RAVPN_Wizard_1
Step 9.2. Provide necessary information in the Connection and Client Configuration section and click the NEXT button.
Connection Profile Name: demo_ravpn
Group Alias: demo_ravpn
 Create_RAVPN_Wizard_2_Conn_Name
Primary Identity Source > Authentication Type: AAA Only
Primary Identity Source > Primary Identity Source: demo_ise_group (the name configured in Step 7.4.)
Fallback Local Identity Source: LocalIdentitySource
Authorization Server: demo_ise_group (the name configured in Step 7.4.)
Accounting Server: demo_ise_group (the name configured in Step 7.4.)
 Create_RAVPN_Wizard_2_Identity_Source
IPv4 Address Pool: demo_ipv4pool (the name configured in Step 4.2.)
IPv6 Address Pool: demo_ipv6pool (the name configured in Step 4.2.)
 Create_RAVPN_Wizard_2_Address_Pool
Step 9.3. Choose the group policy configured in Step 8.2. in Remote User Experience section and click the NEXT button.
 Create_RAVPN_Wizard_3
Step 9.4. Provide necessary information in Global Setting section and click the NEXT button.
Certificate of Device Identity: demovpn (the name configured in Step 6.3.)
Outside interface: outside
 Create_RAVPN_Wizard_4
Access Control for VPN Traffic: Check Bypass Access Control policy for decrypted traffic (sysopt permit-vpn).
 Create_RAVPN_Wizard_4_VPN_ACP
NAT Exempt: Click the slider to the Enabled position
Inside Interfaces: inside
Inside Networks: inside_net_ipv4, inside_net_ipv6 (the name configured in Step 5.2.)
 Create_RAVPN_Wizard_4_VPN_NATExempt
Secure Client Package: Click UPLOAD PACKAGE and upload the package accordingly. In this example, windows package is uploaded.
 Create_RAVPN_Wizard_4_Image
Step 9.5. Review the summary. If anything needs to be modified, click the BACK button. If everything is good, click the FINISH button.
Step 10. Create local user if Fallback Local Identity Source is chosen with LocalIdentitySourcein Step 9.2. The password of the local user needs to be the same as configured on ISE.
 Create_Local_User
Step 11. Deploy the configuration changes.
 Deploy_Changes
Configurations on ISE
Step 12. Create network devices.
Step 12.1. Navigate to Administration > Network Resources > Network Devices, click Add, provide the Name, IP Address and scroll down the page.
 Create_Network_Devices
Step 12.2. Check the checkbox of RADIUS Authentication Settings. Provide the Shared Secret and click Submit.
 Create_Network_Devices_Cont
Step 13. Create network access users. Navigate to Administration > Identity Management > Identities. Click Add in order to create a new user. The password is the same with FDM local user created in Step 10. in order to ensure the fallback works.
 Create_ISE_User
Step 14. (Optional) Create a new policy set with customized authentication rule and authorization rule. In this example, the default policy set is used for demo purposes.
 ISE_Default_Policy_Set
Verify
Use this section in order to confirm that your configuration works properly.
Step 15. Connect the VPN gateway through IPv6 address on the Client. The VPN connection is successful.
 Verify_Connection_Successful
Step 16. Navigate to the CLI of FTD via SSH or console. Run command show vpn-sessiondb detail anyconnect in FTD (Lina) CLI in order to check the VPN session details.
ftdv760# show vpn-sessiondb detail anyconnect

Session Type: AnyConnect Detailed

Username : isetest Index : 2
Assigned IP : 10.37.254.17
Public IP : 2001:db8:10:0:a8a5:6647:b275:acc2
Assigned IPv6: 2001:db8:1234:1234::1
Protocol : AnyConnect-Parent SSL-Tunnel DTLS-Tunnel
License : AnyConnect Premium
Encryption : AnyConnect-Parent: (1)none SSL-Tunnel: (1)AES-GCM-128 DTLS-Tunnel: (1)AES-GCM-256
Hashing : AnyConnect-Parent: (1)none SSL-Tunnel: (1)SHA256 DTLS-Tunnel: (1)SHA384
Bytes Tx : 15402 Bytes Rx : 14883
Pkts Tx : 10 Pkts Rx : 78
Pkts Tx Drop : 0 Pkts Rx Drop : 10
Group Policy : demo_gp Tunnel Group : demo_ravpn
Login Time : 05:22:30 UTC Mon Dec 23 2024
Duration : 0h:05m:05s
Inactivity : 0h:00m:00s
VLAN Mapping : N/A VLAN : none
Audt Sess ID : c0a81e0a000020006768f396
Security Grp : none Tunnel Zone : 0


AnyConnect-Parent Tunnels: 1
SSL-Tunnel Tunnels: 1
DTLS-Tunnel Tunnels: 1

AnyConnect-Parent:
Tunnel ID : 2.1
Public IP : 2001:db8:10:0:a8a5:6647:b275:acc2
Encryption : none Hashing : none
TCP Src Port : 58339 TCP Dst Port : 443
Auth Mode : userPassword
Idle Time Out: 30 Minutes Idle TO Left : 24 Minutes
Client OS : win
Client OS Ver: 10.0.19042
Client Type : AnyConnect
Client Ver : Cisco AnyConnect VPN Agent for Windows 5.1.6.103
Bytes Tx : 7421 Bytes Rx : 0
Pkts Tx : 1 Pkts Rx : 0
Pkts Tx Drop : 0 Pkts Rx Drop : 0

SSL-Tunnel:
Tunnel ID : 2.2
Assigned IP : 10.37.254.17
Public IP : 2001:db8:10:0:a8a5:6647:b275:acc2
Assigned IPv6: 2001:db8:1234:1234::1
Encryption : AES-GCM-128 Hashing : SHA256
Ciphersuite : TLS_AES_128_GCM_SHA256
Encapsulation: TLSv1.3 TCP Src Port : 58352
TCP Dst Port : 443 Auth Mode : userPassword
Idle Time Out: 30 Minutes Idle TO Left : 25 Minutes
Client OS : Windows
Client Type : SSL VPN Client
Client Ver : Cisco AnyConnect VPN Agent for Windows 5.1.6.103
Bytes Tx : 7421 Bytes Rx : 152
Pkts Tx : 1 Pkts Rx : 2
Pkts Tx Drop : 0 Pkts Rx Drop : 0

DTLS-Tunnel:
Tunnel ID : 2.3
Assigned IP : 10.37.254.17
Public IP : 2001:db8:10:0:a8a5:6647:b275:acc2
Assigned IPv6: 2001:db8:1234:1234::1
Encryption : AES-GCM-256 Hashing : SHA384
Ciphersuite : ECDHE-ECDSA-AES256-GCM-SHA384
Encapsulation: DTLSv1.2 UDP Src Port : 58191
UDP Dst Port : 443 Auth Mode : userPassword
Idle Time Out: 30 Minutes Idle TO Left : 29 Minutes
Client OS : Windows
Client Type : DTLS VPN Client
Client Ver : Cisco AnyConnect VPN Agent for Windows 5.1.6.103
Bytes Tx : 560 Bytes Rx : 14731
Pkts Tx : 8 Pkts Rx : 76
Pkts Tx Drop : 0 Pkts Rx Drop : 10
Step 17. Ping test on the Client. In this example, the client successfully pings both the IPv4 and IPv6 addresses of the server.
 Verify_Cisco_Secure_Client_Ping
Step 18. ISE radius live log shows successful authentication.
 ISE_Authentication_Success_Log
Step 19. Test FTD authentication goes to LOCAL when FTD cannot reach ISE.
Step 19.1. When FTD authentication goes to ISE, run the command show aaa-server in FTD (Lina) CLI in order to check the statistics.
In this example, there are no counters for LOCAL, and authentication is directed to the RADIUS server.
ftdv760# show aaa-server

Server Group:    LOCAL
Server Protocol: Local database
Server Address:  None
Server port:     None
Server status:   ACTIVE, Last transaction at 08:18:11 UTC Fri Dec 6 2024
Number of pending requests              0
Average round trip time                 0ms
Number of authentication requests       0
Number of authorization requests        0
Number of accounting requests           0
Number of retransmissions               0
Number of accepts                       0
Number of rejects                       0
Number of challenges                    0
Number of bad authenticators            0
Number of timeouts                      0
Number of unrecognized responses        0
Server Group:    demo_ise_group
Server Protocol: radius

Server Address:  2001:db8:2139::240
Server port:     1812(authentication), 1646(accounting)
Server status:   ACTIVE, Last transaction at 02:56:41 UTC Mon Dec 9 2024
Number of pending requests              0
Average round trip time                 100ms
Number of authentication requests       1  <== Increased
Number of authorization requests        1  <== Increased
Number of accounting requests           1  <== Increased
Number of retransmissions               0
Number of accepts                       2  <== Increased
Number of rejects                       0
Number of challenges                    0
Number of bad authenticators            0
Number of timeouts                      0
Number of unrecognized responses        0
Step 19.2. Shutdown ISE interface to simulate that FTD cannot receive any response from ISE.
ftdv760# ping 2001:db8:2139::240
Type escape sequence to abort.
Sending 5, 100-byte ICMP Echos to 2001:db8:2139::240, timeout is 2 seconds:
???
Success rate is 0 percent (0/3)
Step 19.3. Client initiates the VPN connection and input the same username password created in Step 10, the VPN connection is still successful.
Run command show aaa-server in FTD (Lina) CLI again in order to check the statistic, the authentication, authorization, and accepts counters for LOCAL have now increased. The accepts counter for the RADIUS server has not increased.
ftdv760# show aaa-server
Server Group:    LOCAL
Server Protocol: Local database
Server Address:  None
Server port:     None
Server status:   ACTIVE, Last transaction at 03:36:26 UTC Mon Dec 9 2024
Number of pending requests              0
Average round trip time                 0ms
Number of authentication requests       1  <== Increased
Number of authorization requests        1  <== Increased
Number of accounting requests           0
Number of retransmissions               0
Number of accepts                       2  <== Increased
Number of rejects                       0
Number of challenges                    0
Number of bad authenticators            0
Number of timeouts                      0
Number of unrecognized responses        0
Server Group:    demo_ise_group
Server Protocol: radius

Server Address:  2001:db8:2139::240
Server port:     1812(authentication), 1646(accounting)
Server status:   ACTIVE, Last transaction at 03:36:41 UTC Mon Dec 9 2024
Number of pending requests              0
Average round trip time                 100ms
Number of authentication requests       2
Number of authorization requests        1
Number of accounting requests           6
Number of retransmissions               0
Number of accepts                       2  <== Not increased
Number of rejects                       0
Number of challenges                    0
Number of bad authenticators            0
Number of timeouts                      6
Number of unrecognized responses        0
Troubleshoot
This section provides information you can use in order to troubleshoot your configuration.
You can run these commands on FTD Lina in order to troubleshoot the VPN section.
debug webvpn 255debug webvpn anyconnect 255
You can collect a DART file from the client for VPN troubleshooting in order to determine if the issue is with the Secure Client. For guidance, refer to the relevant CCO document Collect DART Bundle for Secure Client.
You can run these commands on FTD Lina in order to troubleshoot the Radius section.
ftdv760# debug radius ?

all      All debug options
decode   Decode debug option
dynamic-authorization CoA listener debug option
session  Session debug option
user     User debug option
<cr>
ftdv760# debug aaa ?

accounting
authentication
authorization
common
condition
internal
shim
url-redirect
<cr>
You can review these in order to troubleshoot the traffic related problem after VPN connection successfully.
- Capture traffic on FTD Lina in order to see if Lina drops the traffic, refering to this CCO document; Use Firepower Threat Defense Captures and Packet Tracer - Cisco.
- Review the access control policy in order to ensure the related VPN traffic is allowed to pass if Bypass Access Control policy for decrypted traffic is disabled.
- Review the NAT exemption in order to ensure that VPN traffic is excluded from NAT.
Related Information
Revision History
| Revision | Publish Date | Comments |
|---|---|---|
1.0 |
09-Dec-2025
|
Initial Release |
Contributed by Cisco Engineers
- Mark NiCisco Technical Leader
 Feedback
Contact Cisco
- Open a Support Case

- (Requires a Cisco Service Contract)