Cisco Secure Access Integration with ISE for Security Group Tag over Pxgrid Cloud
Available Languages
Contents
Introduction
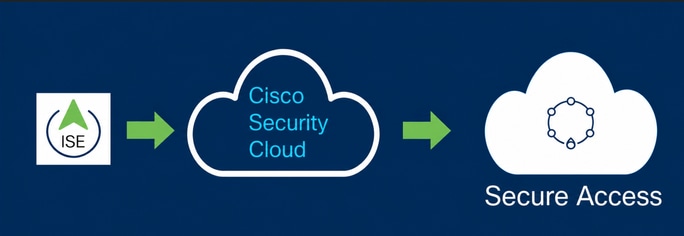
This document describes how to enable context sharing between Cisco Secure Access and Cisco Identity Services Engine
Requirements
Cisco recommends that you know these topics:
- Cisco Secure Access—A cloud-based security service edge (SSE) solution that provides zero-trust network access to allow users to easily connect to the internet and private applications from any device.
- Cisco Identity Service Engine (ISE) Version 3.4 Patch 5.
- Cisco Security Cloud Control—A unified management solution for your Security Cloud products and identity. Security Cloud Control is included with Secure Access.
Background
This integration enables the automated creation of reliable tunnels from Catalyst SD-WAN branches to Cisco Secure Access, facilitating the seamless exchange of VPN-ID/name and SGT context.
Cisco Identity Services Engine (ISE) remains the central authority for SGT configuration and management. Any updates performed in ISE are automatically synchronized with Cisco Secure Access. If an SGT is deleted, existing rules that reference it remain active to ensure that traffic matching continues as expected.
We are currently offering limited availability for SGT mappings, which extends support to include SGT destination objects within your security rules. Additionally, support for building SASE tunnels that carry SGT from Meraki and Cisco Secure Firewall is coming soon
Use Case:
SGT Name Space Based Policy:
As a Security Admin, Kit wants to enforce contiguous micro segmentation using SGT from onprem ISE for SSE Private as well as Internet Bound traffic.Ability to import SGT to apply policies.
Components Used
The information in this document is based on:
- Identity Service Engine (ISE) Version 3.4 Patch 5
- Secure Access
- Cisco Security Cloud
The information in this document was created from the devices in a specific lab environment. All of the devices used in this document started with a cleared (default) configuration. If your network is live, ensure that you understand the potential impact of any command.
Context Sharing Configuration Overview
-
Connect ISE to CIsco Security Cloud
-
Connect Cisco Secure Access to ISE
Configure
This guide breaks up the overall configuration into the these main steps:
- Connect Cisco ISE to Cisco Security Cloud
- Connect Cisco Secure access to Cisco ISE
- Security Group Tags in Cisco Secure Access
Before you begin
- Ensure that you have installed and activated the Advantage license in your Cisco ISE deployment.
- The DNA Cloud agent creates an outbound HTTPS connection to Cisco DNA Cloud. Therefore, you must configure Cisco ISE proxy settings if the your network uses a proxy to reach the internet. To configure proxy settings in Cisco ISE, navigate to
Administration > System > Settings > Proxy - Ensure that port 443 is open for outbound connection from Cisco ISE to Cisco pxGrid Cloud portal. If firewall or proxy settings are configured, ensure that the these URLs are not blocked:
https://security.cisco.com/
Step1:Enable Pxgrid Cloud on ISE
1 Navigate to ISE GUI.
2 Click on Administration - Deployment.
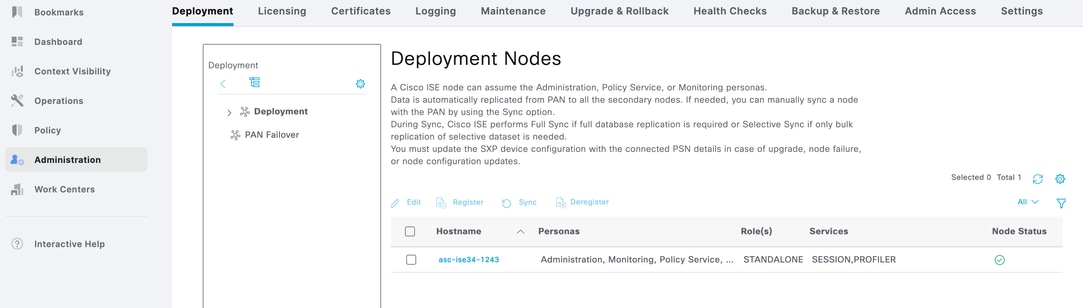
3 Click on the Node and scroll down to the bottom.
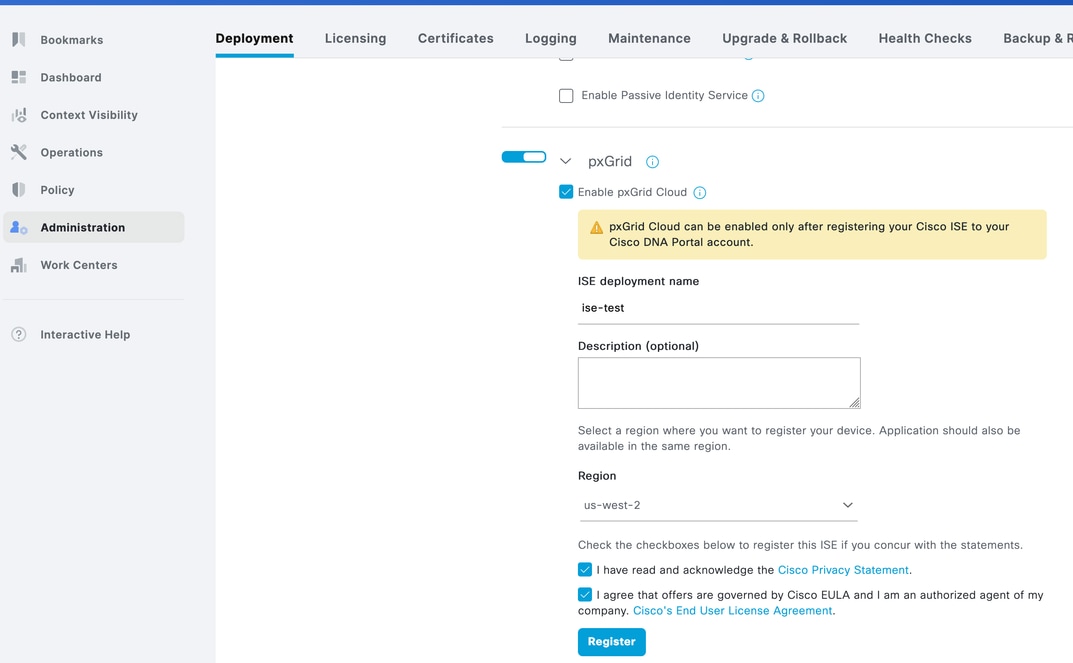
Enter ISE Deployment Name
Select the Region as US West 2 which is the only region supported as of now.
Check both checkboxes and click Register.
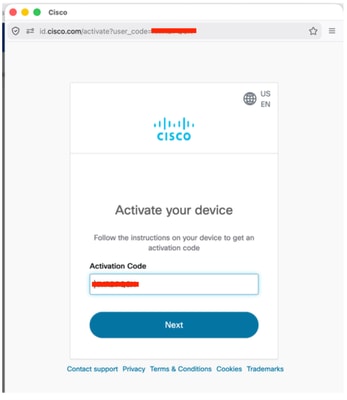
4 You will see a Pop up with Auto filled Activation Code.Click Next,
5 ISE will show connected to Pxgrid Cloud.

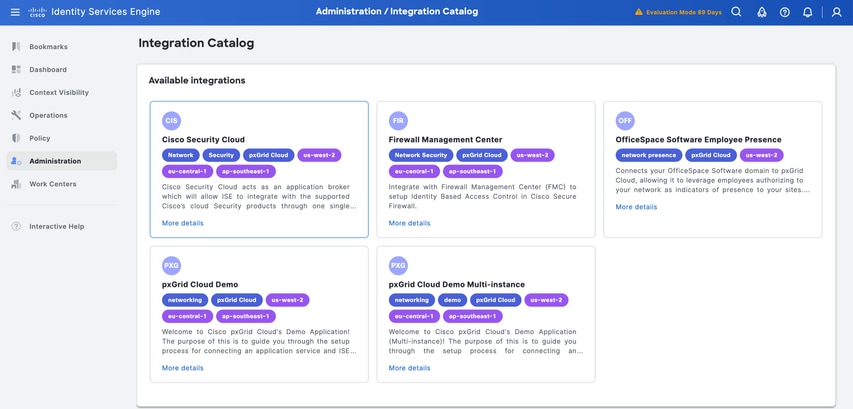
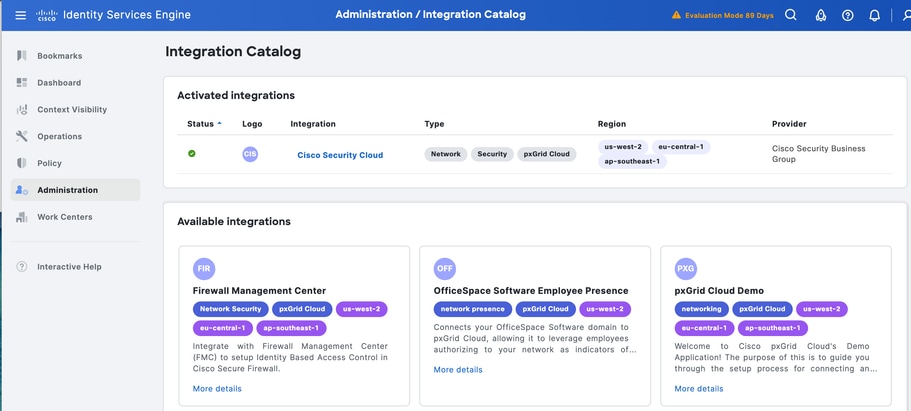
6 Click Integration Catalog link from Step 5.
Under Available Integrations - Click Cisco Security Cloud
.
7 Under App Configuration Click New Instance and click Activate
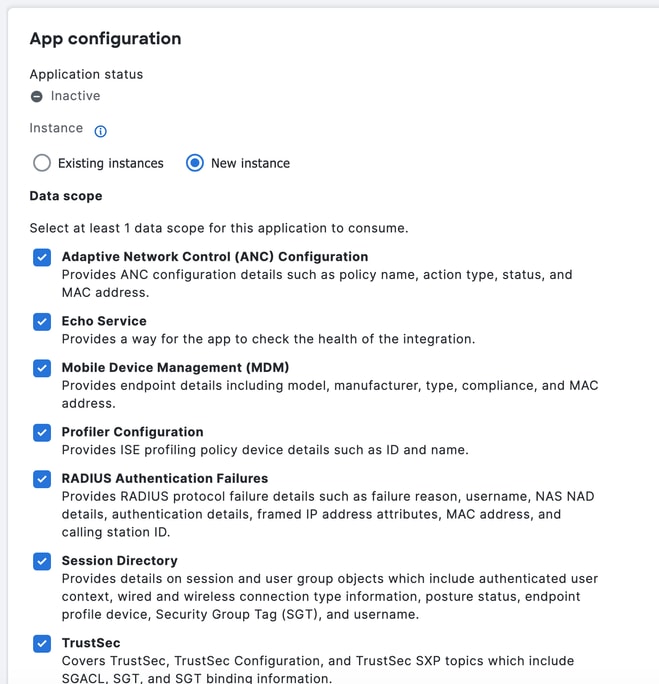
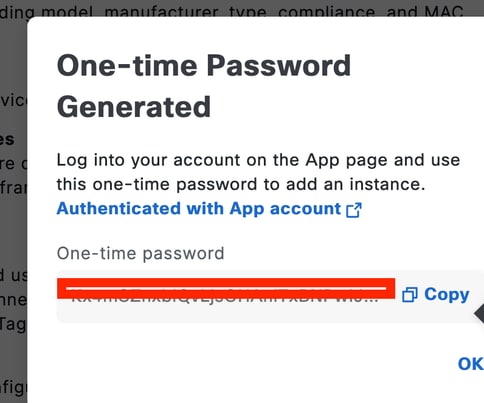
Copy the One-time Password as it will be used on Cisco Secure Access.
Step2: Integrate Cisco Secure Access with ISE
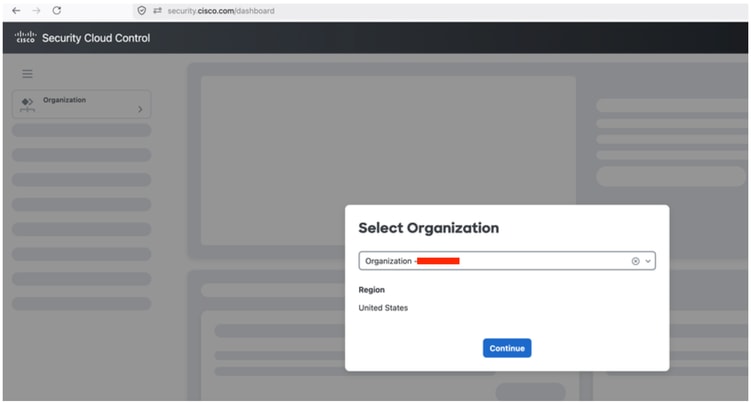
- Login to security.cisco.com.
- Select the Cisco Secure Access ORG
3 Click on Platform Management - Platform Integrations
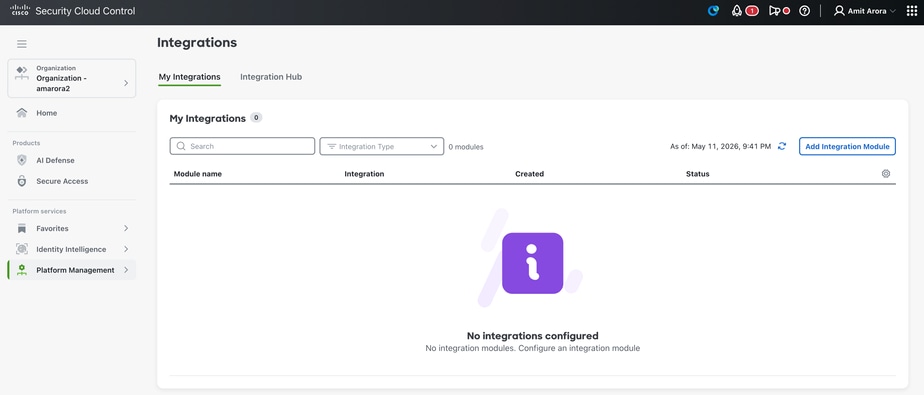
4 Click on Add Integration Module
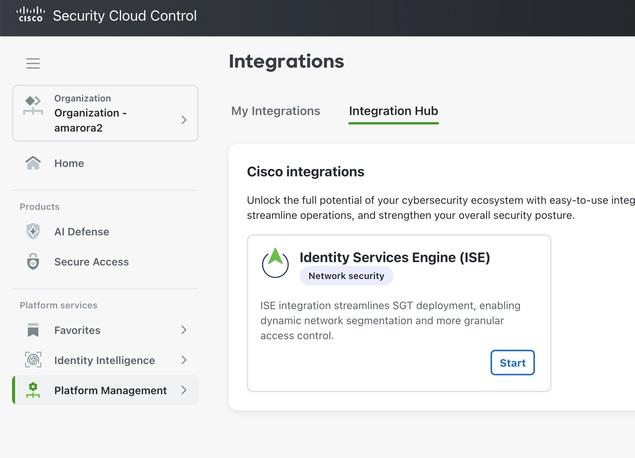
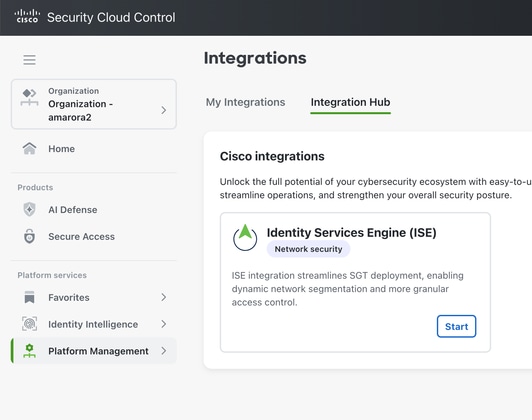
5 Click Start
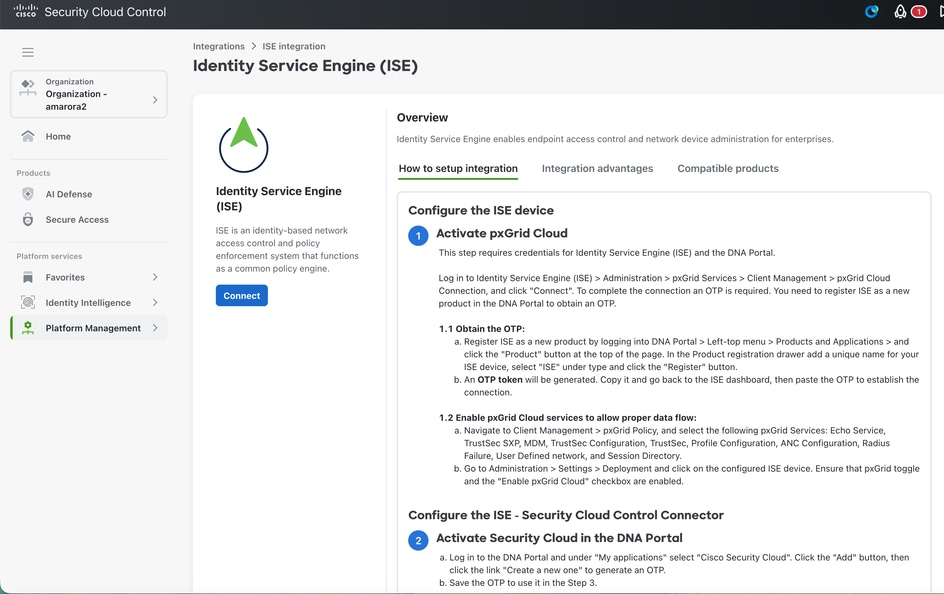
6 Click Connect
7. Enter Integraiton module name and OTP from Cisco ISE and Click Save
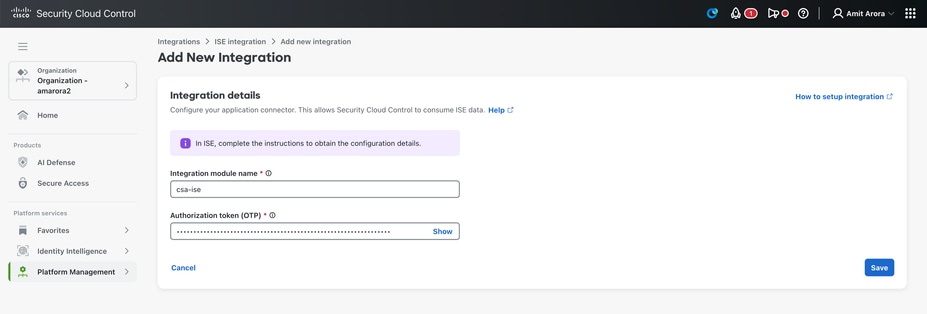
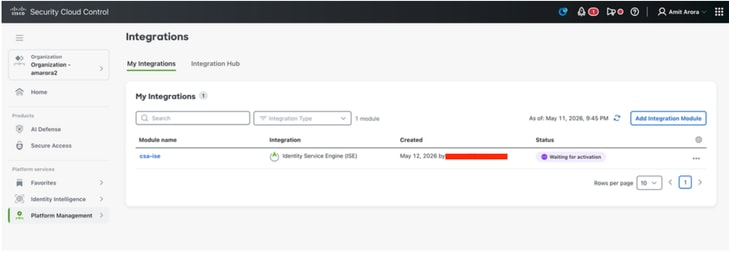
8 Once click Save we will see Waiting for Activation Status.
9 Login to ISE and navigate to Administration - Deployment. Click on the node with pxgrid personna - click on Integration cloud under Pxgrid Connection.
Under App configuration - select the ISE instance created on Security Cloud Control and click Activate
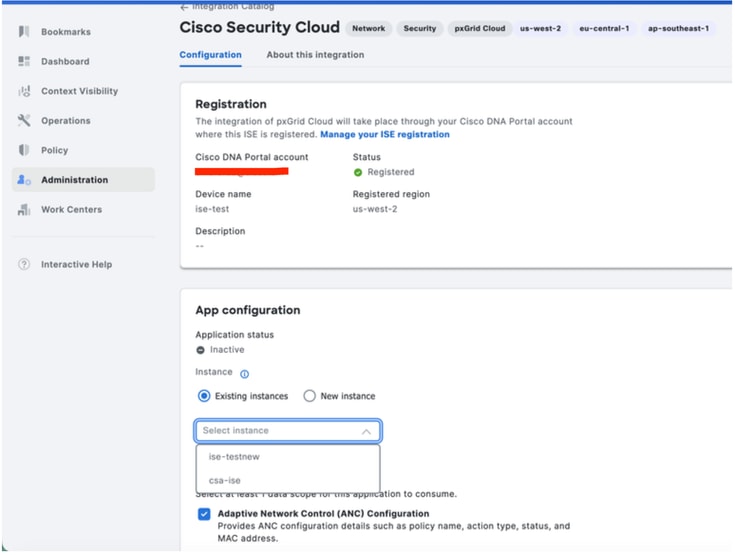
10 Application Status is now connected.

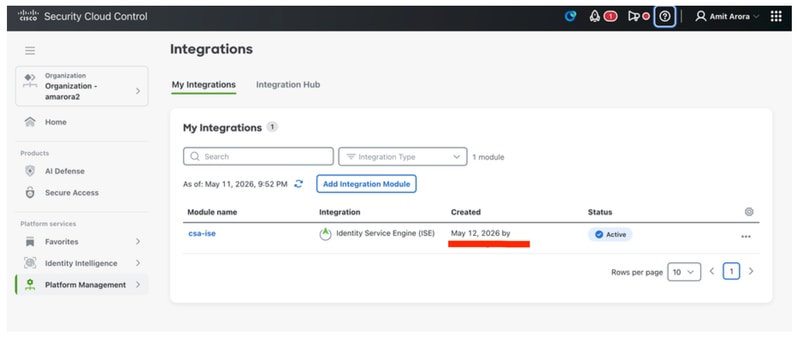
11 Login to Security Cloud control - security.cisco.com
Under Platform Management - Platform Integrations We can see Integration Status as Active
Verify Security Group Tag:
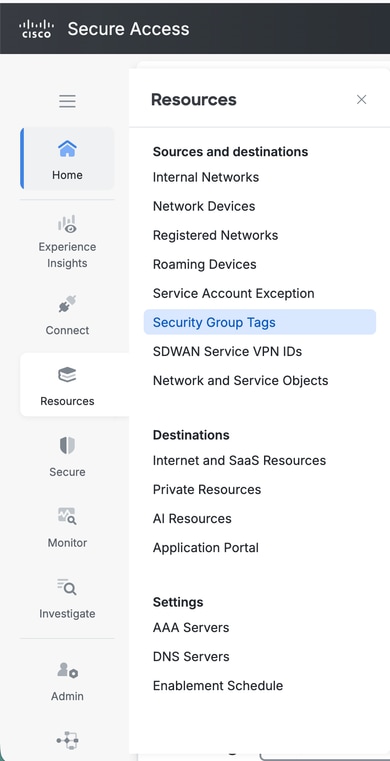
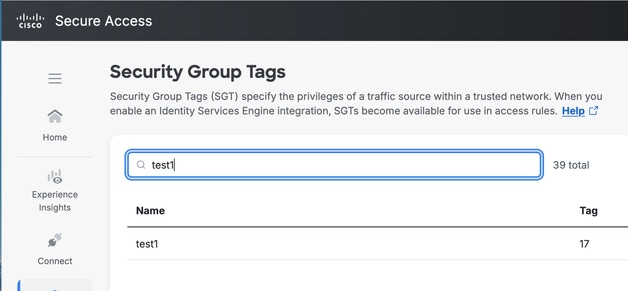
Login to Cisco Secure Access. Navigate to Resources - Security Group Tags.
Information required for Cisco TAC
ISE:
How to Collect ISE Support Bundle with following components set to Debug Level on the ISE Node with Pxgrid Personna :
pxgrid
Infrastructure
ERS
hermes component at debug level.
SCC:
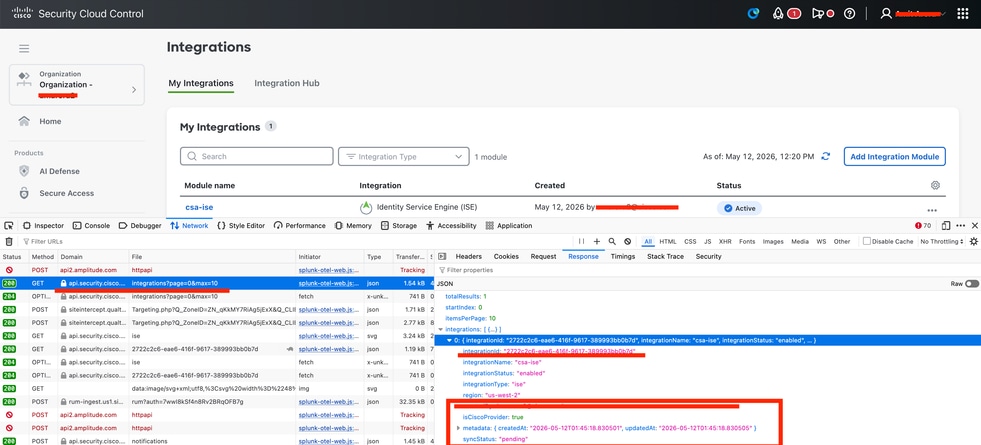
Enterprise ID: in the URL of security.cisco.com

Integration ID.
Start HAR Capture
Login to Security.cisco.com
Navigate to Platform Management - Platform Integrations
Search for integrations?page api call and in response tab you will find an Integrations ID.
Revision History
| Revision | Publish Date | Comments |
|---|---|---|
1.0 |
12-May-2026
|
Initial Release |
 Feedback
Contact Cisco
- Open a Support Case

- (Requires a Cisco Service Contract)