Collect Support Bundle on the Identity Services Engine
Available Languages
Introduction
This document describes how to gather Support Bundle from Cisco ISE 3.x via CLI or GUI, which contains vital data needed for ISE troubleshooting.
Collect Support Bundle on Cisco ISE
Step 1. Enable Debugs for ISE Components
Various issues on ISE require different sets of logs to troubleshoot. A full list of required debugs must be provided by the TAC engineer. However, ISE 3.x has preconfigured categories of debugs you can use to collect initial logos to speed up case resolution.
The list of debugs requested by the TAC engineer must always take priority over this list.
1. To find these preconfigured debugs navigate to Operations > Troubleshoot > Debug Wizard > Debug Profile Configuration.
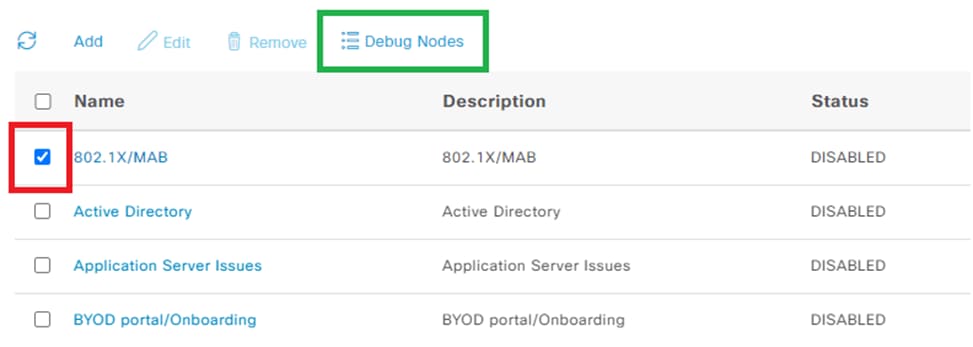
2. Choose the feature the debugs must be enabled for with the selection of the correct checkbox at the beginning of each row. For example, 802.1x (red), and navigate to node selection (green):
3. Then choose nodes for the debugs that must be enabled with the selection of the correct checkbox at the beginning of each row (red). Then, save your changes (green):
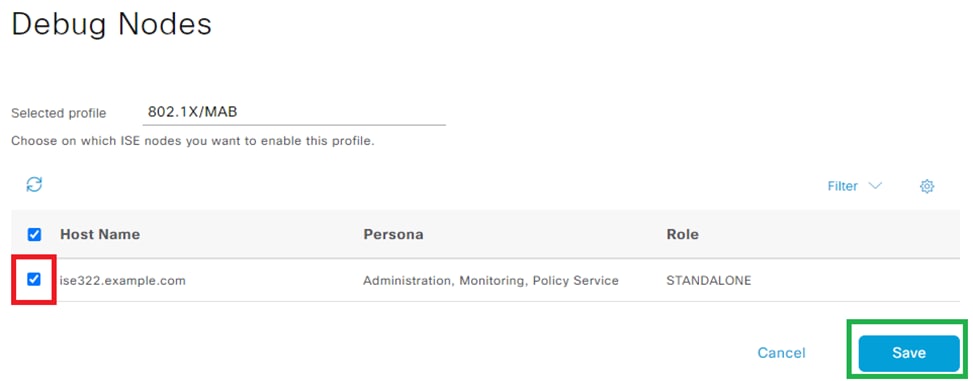
4. The page is moved back to the Debug Profile Configuration and the debug status changes to ENABLED with information about the nodes that run these debugs.

Step 2. Recreate the Issue
1. When all required debugs are enabled, re-create the issue to generate logs.
- If the issue cannot be triggered manually, you must wait for the next occurrence.
- If the issue occurred before debugs were enabled, there is not enough information to troubleshoot.
- Ideally, the support bundle must be collected right after the issue occurred. Note the auxiliary information needed for log analysis:

Note: The auxiliary information required for log analysis:
- Timestamp of recreation.
- Any unique IDs for the event such as MAC address, IP address, username, or session ID (which depends on the circumstances, usually MAC/IP + username.)
Step 3. Disable Debugs
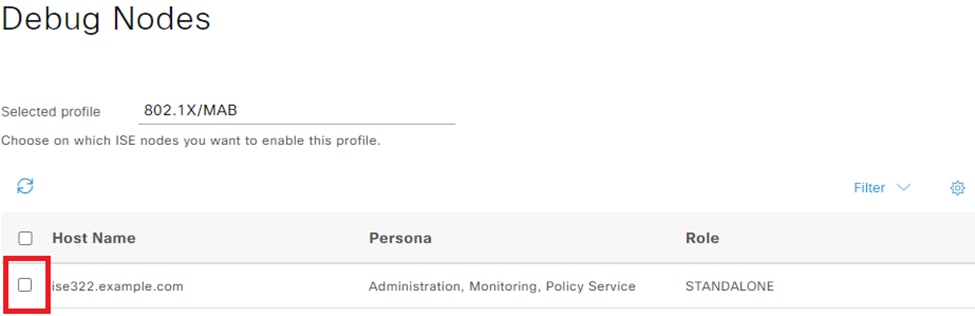
Once the issue is recreated, disable the debugs to prevent the newly generated logs from being overwritten by excessive logging. To do this, repeat actions from Step 1., however, on the node selection page, uncheck the proper checkboxes and save like previously.
Step 4. Collect Support Bundle
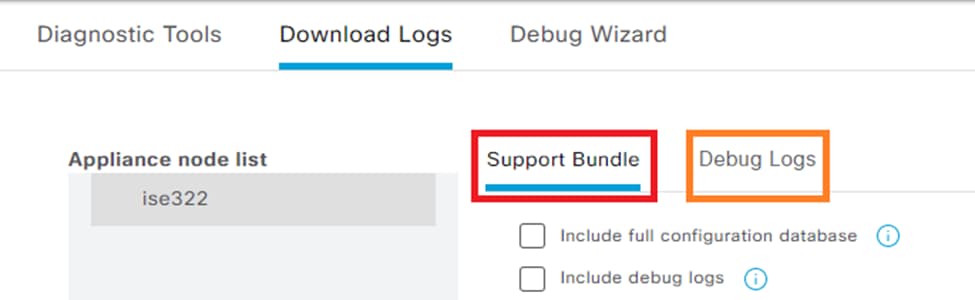
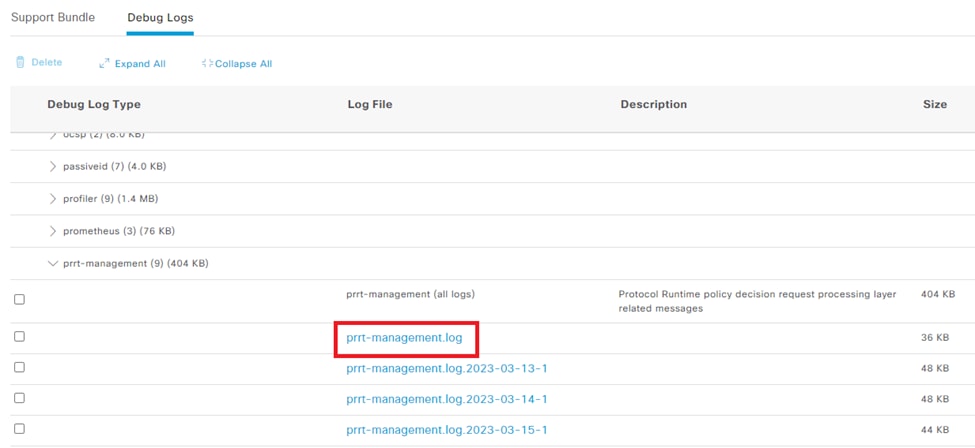
1. Navigate to Operations > Troubleshooting > Download Logs and choose the ISE node (where debugs were enabled). On the tab of each node, there are two options: Collect Support Bundle (red) or download specific log file - Debug Logs (orange).
2. For the Debug Logs, a full list of all available log files is displayed. After you click the name of the file, it is downloaded.
3. The Support Bundle is a package that contains all logs from the selected groups.
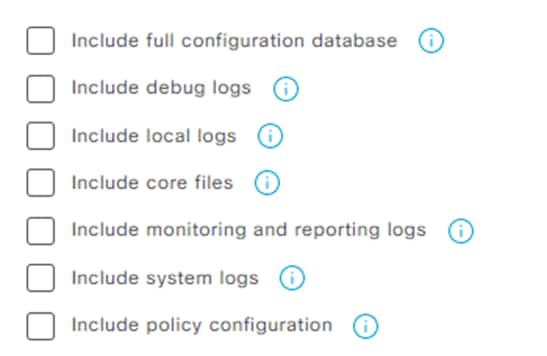
- The full configuration database attaches the full ISE configuration to the Support Bundle.
- Debug logs are most used as they contain all debugs from all ISE components.
- Local logs contain log that shows Radius authentications for this node in the deployment.
- Core files can cause the Support Bundle to grow, however, it is required during crash troubleshooting.
- Monitoring and reporting logs contain operational data.
- System logs contain system-specific logs (for troubleshooting services provided by OS).
- Policy configuration, the xml version of configured policies on ISE.
For most scenarios, the inclusion of debug and local logs is enough. For stability and performance issues, the core and system logs are required. If you choose public-key encryption only, TAC can decrypt this bundle with the use of a Cisco private key. The shared key allows you to set passwords that are required to decrypt the logs. If it is a shared key, ensure the TAC engineer has access so the bundle can be decrypted on the Cisco side.
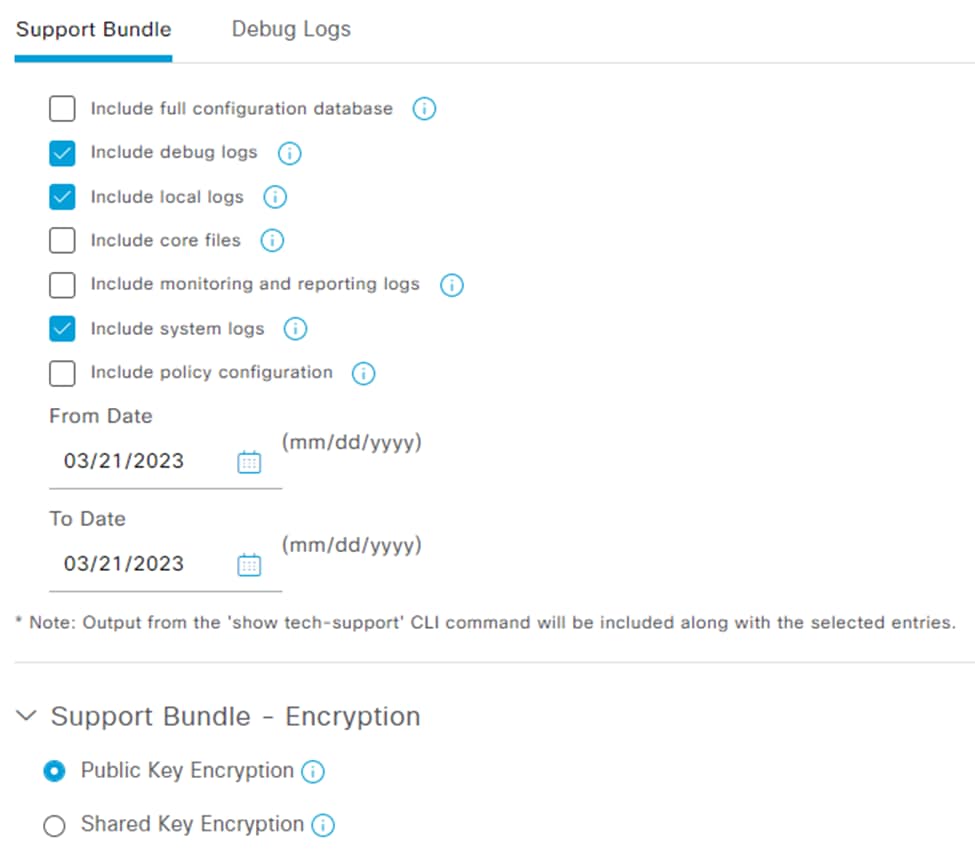
4. When everything is set, click the Create Support Bundle button and wait.
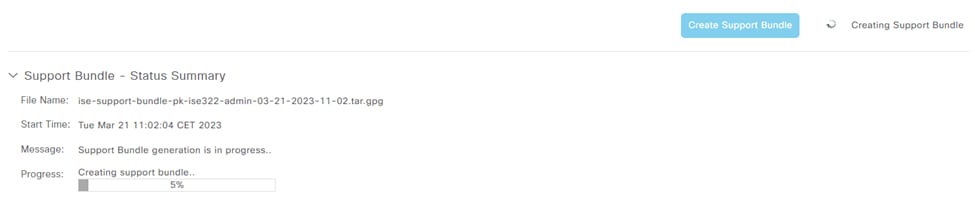
When the process to create the Support Bundle is completed, it is available for download. After you click Download, the Support Bundle is saved on the local disk of your PC and can be uploaded to TAC to troubleshoot.
If the Web interface is not available, you can collect the Support Bundle from CLI. To do this, log in with the use of SSH or console access and run this command:
backup-logs name repository ftp {encryption-key plain key | public-key}
name - The name of your Support Bundle
ftp - The name of the repository configured on ISE
key - This is the key used for encrypting/decrypting the Support Bundle
The official tool to upload the Support Bundle is the Support Case Manager. Do not zip or change the extension of the Support Bundle file. It must be uploaded in the same exact state as it was downloaded from ISE.
Revision History
| Revision | Publish Date | Comments |
|---|---|---|
5.0 |
30-Jul-2026
|
Updated spelling, grammar, inserted horizontal lines to separate sections/readability, added numbering for steps. |
4.0 |
24-May-2024
|
Recertification |
2.0 |
03-May-2023
|
The content and the images were updated. |
1.0 |
05-Mar-2019
|
Initial Release |

 Feedback
Contact Cisco
- Open a Support Case

- (Requires a Cisco Service Contract)