Configure Secure Client VPN Management Tunnel on Secure Firewall
Available Languages
Contents
Introduction
This document describes how to configure a Secure Client VPN Management tunnel on a Secure Firewall Threat Defense managed by the Cisco FMC.
Prerequisites
Requirements
Cisco recommends that you have knowledge of these topics:
- Client Certificate Authentication
- Cisco AnyConnect Profile Editor
- SSL AnyConnect Configuration through Firewall Management Center (FMC)
Components Used
The information in this document is based on these software and hardware versions:
- Cisco FMC Version 6.7.0 (Build 65)
- Cisco Firewall Threat Defense (FTD) version 6.7.0 (Build 65)
- Cisco AnyConnect 4.9.01095 Installed on Windows 10 Machine
The information in this document was created from the devices in a specific lab environment. All of the devices used in this document started with a cleared (default) configuration. If your network is live, ensure that you understand the potential impact of any command.
Background Information
In this example, Secure Sockets Layer (SSL) is used to create a Virtual Private Network (VPN) between FTD and a Windows 10 client.
From release 6.7, Cisco FTD supports configuration of AnyConnect Management tunnels. This fixes previously opened enhancement request Cisco bug ID CSCvs78215.
The AnyConnect Management feature allows you to create a VPN tunnel immediately after the endpoint finishes its startup. There is no need for users to manually launch the AnyConnect app. Once their system is powered up, the AnyConnect VPN agent service detects the Management VPN feature and initiates an AnyConnect session using theHost Entry (defined in the Server List of the AnyConnect Management VPN Profile.)
Limitations
- Only client certificate authentication is supported.
- Only machine certificate store is supported for Windows clients.
- Not supported on Cisco Firepower Device Manager (FDM) Cisco bug ID CSCvx90058.
- Not supported for Linux clients.
Full limitations described in the Cisco Secure Client Administrator Guide, Release 5.
Configure
Configurations
Step 1. Create AnyConnect Management VPN Profile
Open the AnyConnect Profile Editor to create an AnyConnect Management VPN Profile. The Management Profile contains all settings used to establish the VPN tunnel after the endpoint boots up.
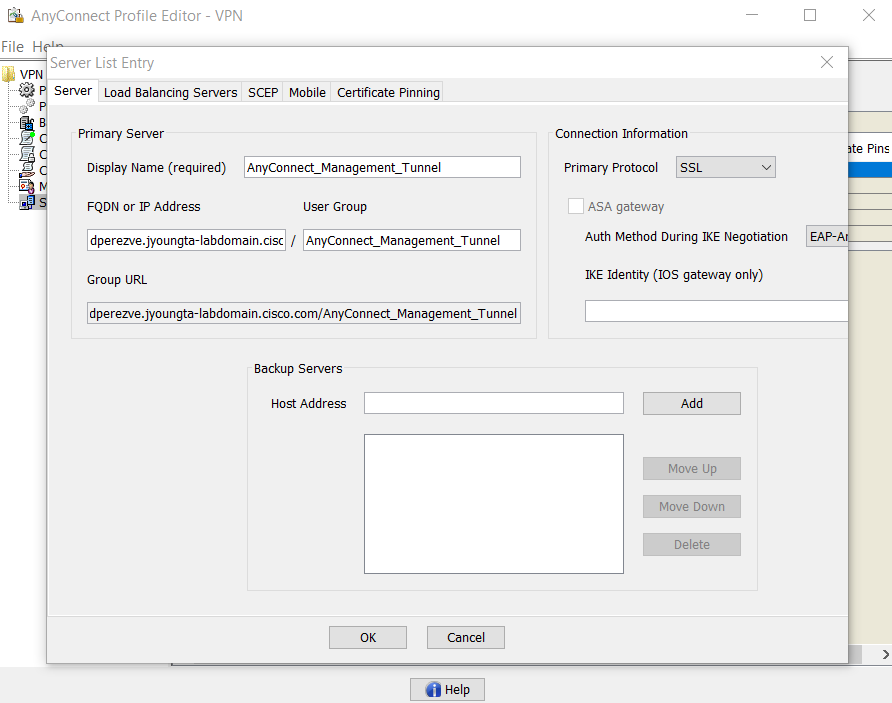
1. In this example, a Server List entry points to Fully Qualified Domain Name (FQDN) dperezve.jyoungta-labdomain.cisco.com is defined, and SSL is selected as the primary protocol. To add a Server List, navigate to Server List and select the Add button. Fill the required fields and save your changes.
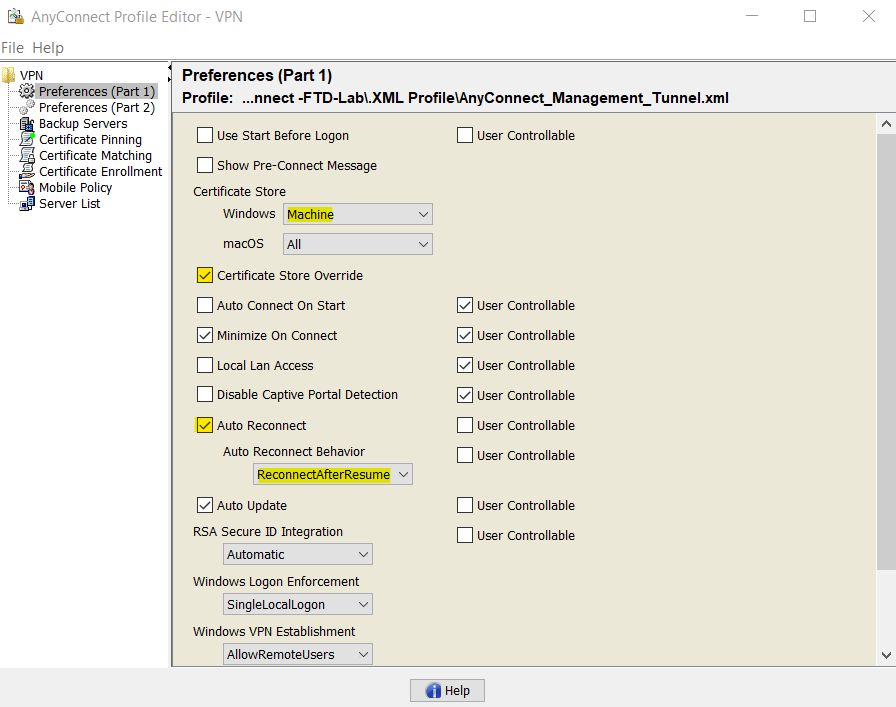
2. Besides the Server List, the Management VPN Profile must contain some mandatory preferences:
- AutomaticCertSelection must be set to true.
- AutoReconnect must be set to true.
- AutoReconnectBehavior must be configured for ReconnectAfterResume.
- AutoUpdate must be set to false.
- BlockUntrustedServers must be set to true.
- CertificateStore must be configured for MachineStore.
- CertificateStoreOverride must be set to true.
- EnableAutomaticServerSelection must be set to false.
- EnableScripting must be set to false.
- RetainVPNOnLogoff must be set to true.
3. In the AnyConnect Profile Editor, navigate to Preferences (Part 1) and adjust the settings as shown in the image:
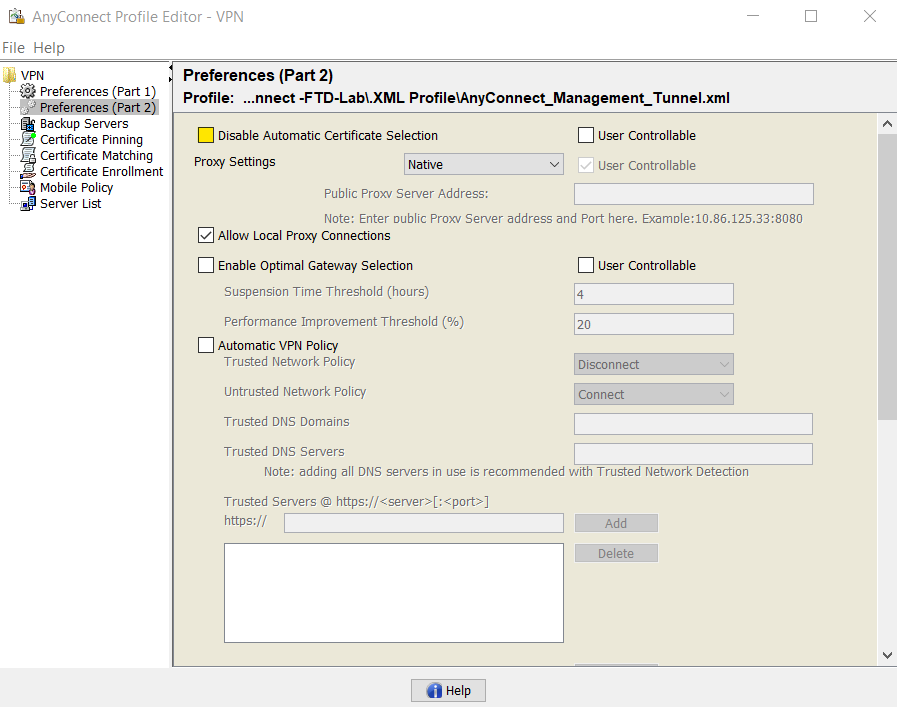
4. Navigate to Preferences (Part 2) and uncheck the Disable Automatic Certificate Selection option.
Step 2. Create AnyConnect VPN Profile
As an addition to the Management VPN Profile, the regular AnyConnect VPN Profile must be configured. The AnyConnect VPN Profile is used in the first connection try. During this session, the Management VPN Profile is downloaded from FTD.
Use the AnyConnect Profile Editor to create the AnyConnect VPN Profile. In this case, both files contain the same settings, so the same procedure can be used.
Step 3. Upload AnyConnect Management VPN Profile and AnyConnect VPN Profile to FMC
1. Once the profiles are created, upload these to FMC as AnyConnect File objects.
2. To upload the new AnyConnect Management VPN Profile to FMC, navigate to Objects > Object Management and choose the VPN option from the table of contents. Select the Add AnyConnect File button.
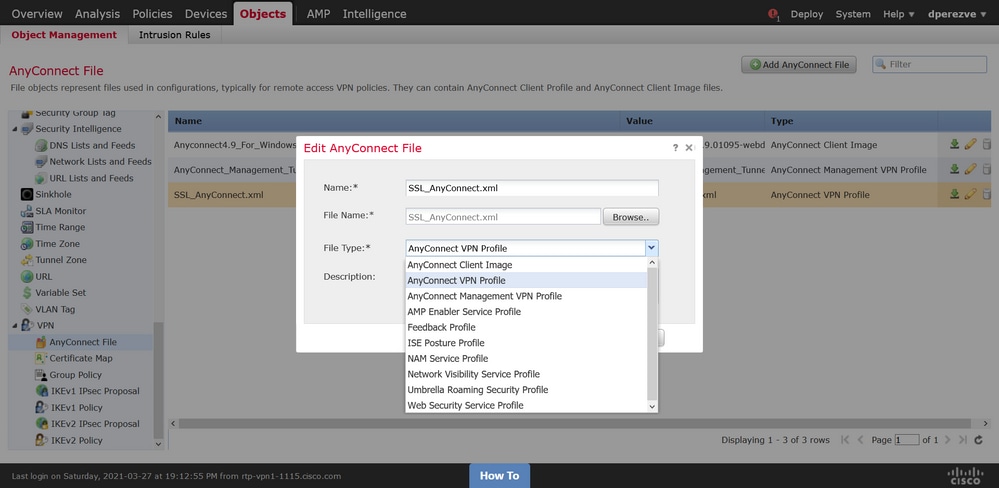
3. Provide a name for the file. Choose AnyConnect Management VPN Profile as the file type and save the object.
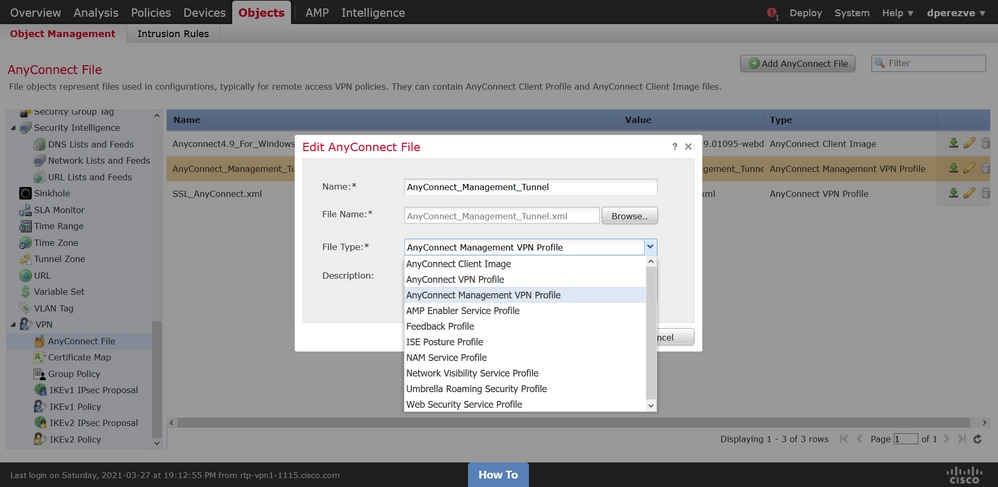
4. To upload the AnyConnect VPN Profile, navigate to Objects > Object Management and choose the VPN option from the table of contents. Select the Add AnyConnect File button.
5. Provide a name for the file and this time, choose the AnyConnect VPN Profile as the file type and save the new object.
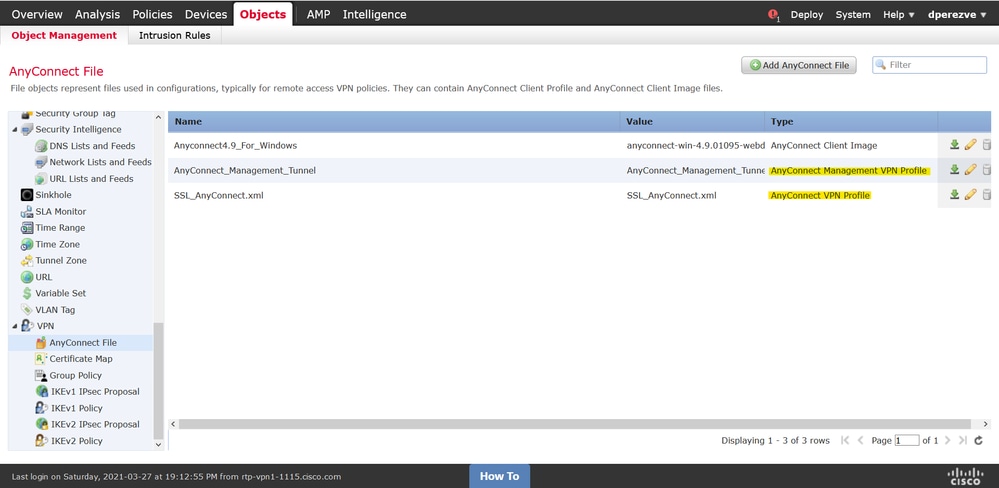
6. Profiles must be added to the object list and marked as AnyConnect Management VPN Profile and AnyConnect VPN Profile respectively.
Step 4. Create Group Policy
1. To create a new Group Policy, navigate to Objects > Object Management and choose the VPN option from the table of contents. Select Group Policy and click on the Add Group Policy button.
2. Once the Add Group Policy window opens, assign a name and define an AnyConnect pool and open the AnyConnect tab.
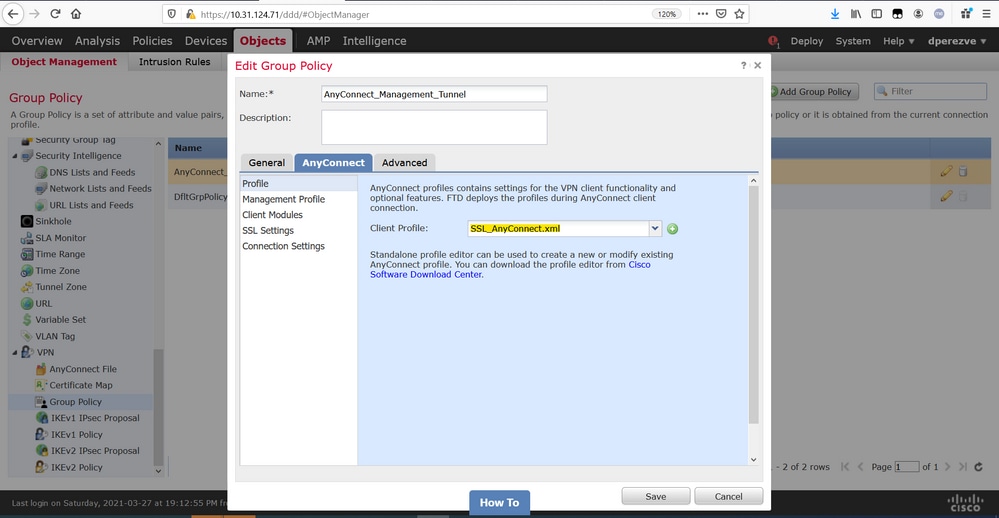
3. Navigate to the Profile and select the object that represents the regular AnyConnect VPN Profile in the Client Profile drop-down menu.
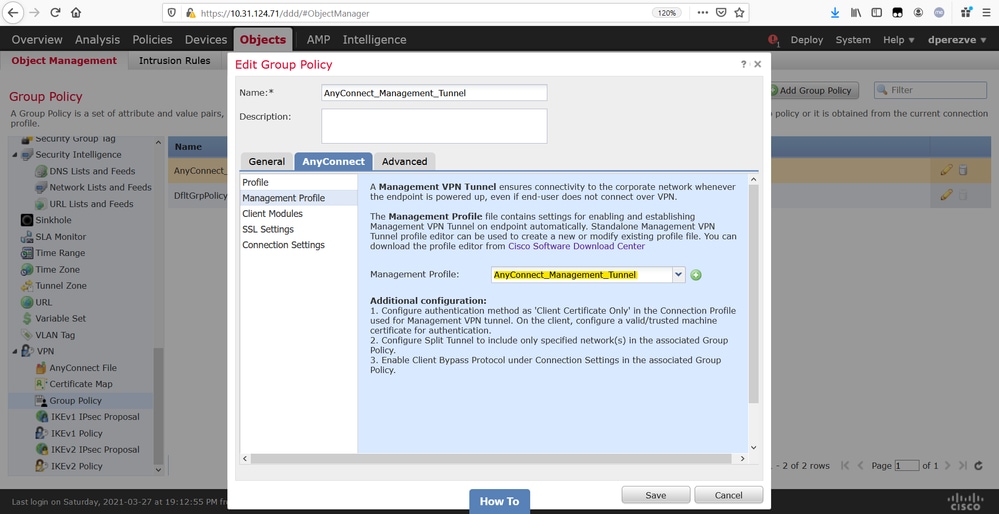
4. Navigate to the Management Profile tab and select the object that contains the Management VPN Profile in the Management Profile drop-down menu.
5. Save your changes to add the new object to the existing Group Policies.
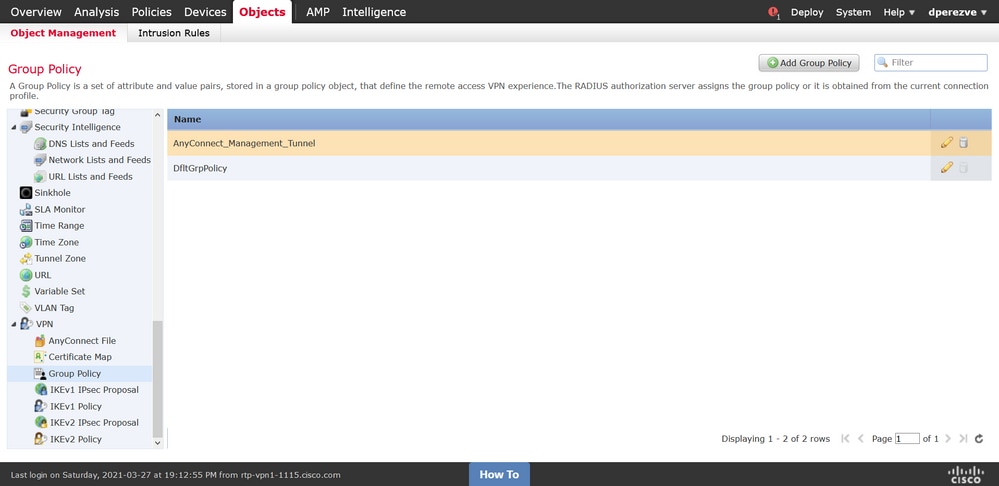
Step 5. Create New AnyConnect Configuration
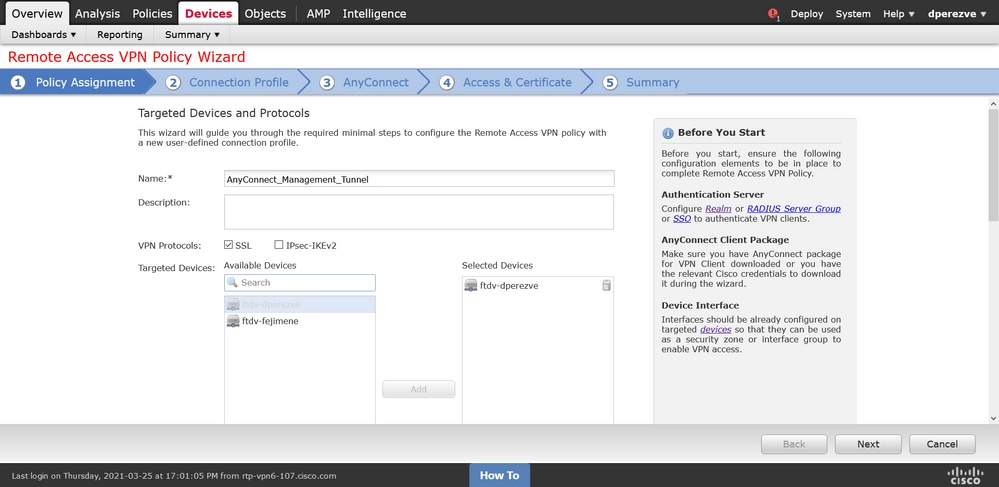
1. The configuration of SSL AnyConnect in FMC is composed of 4 different steps. To configure AnyConnect, navigate to Devices > VPN > Remote Access and select the Add button. This must open the Remote Access VPN Policy Wizard.
2. On the Policy Assignment tab, select the FTD device at hand, define a name for the Connection Profile, and check the SSL checkbox.
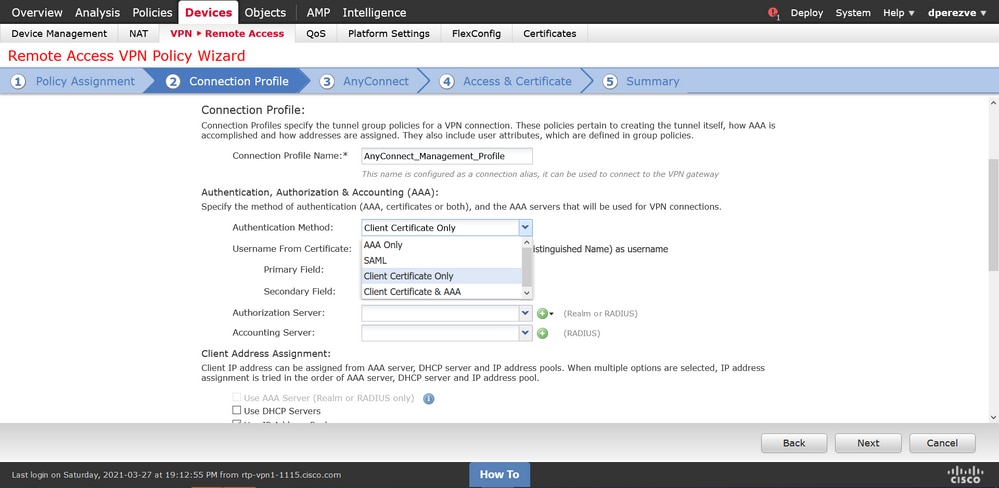
2. On the Connection Profile, select Client Certificate Only, as the authentication method. This is the only authentication supported for the feature.
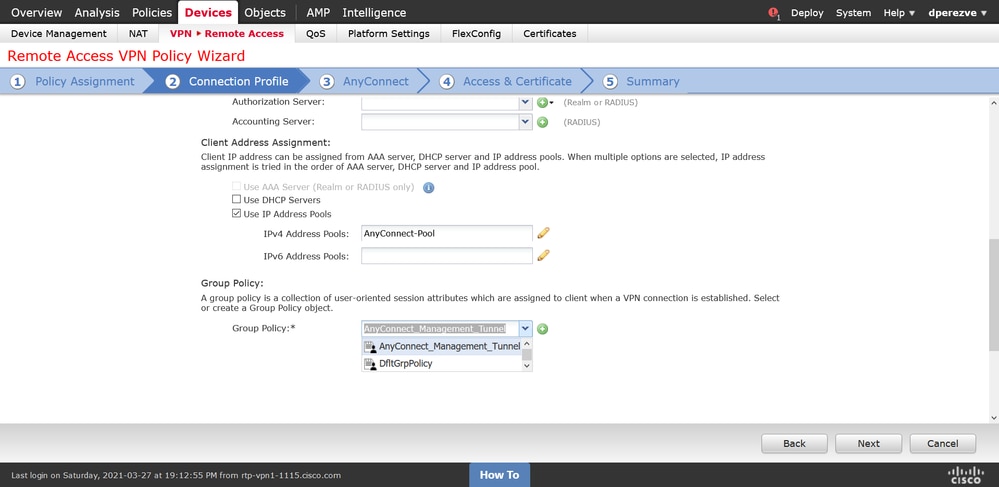
3. Then, select the Group Policy object created in Step 3 in the Group Policy drop-down menu.
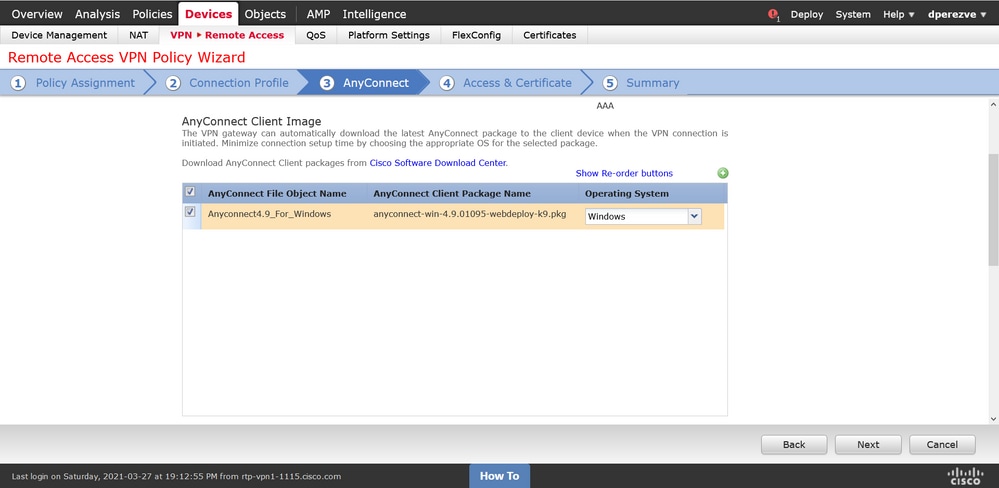
4. On the AnyConnect tab, select the AnyConnect File Object according to the Operating System (OS) on the endpoint.
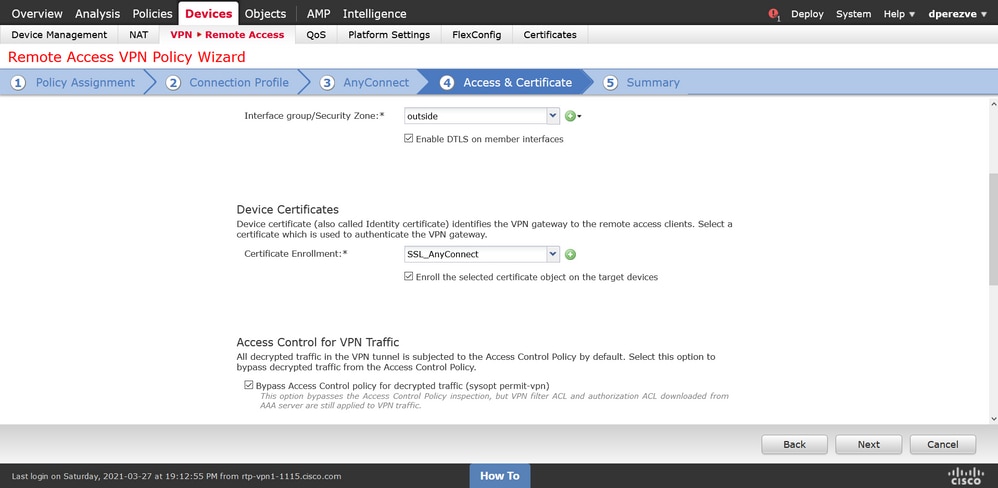
5. On the Access & Certificate, specify the certificate that must be used by the FTD to probe its identity to the Windows client.
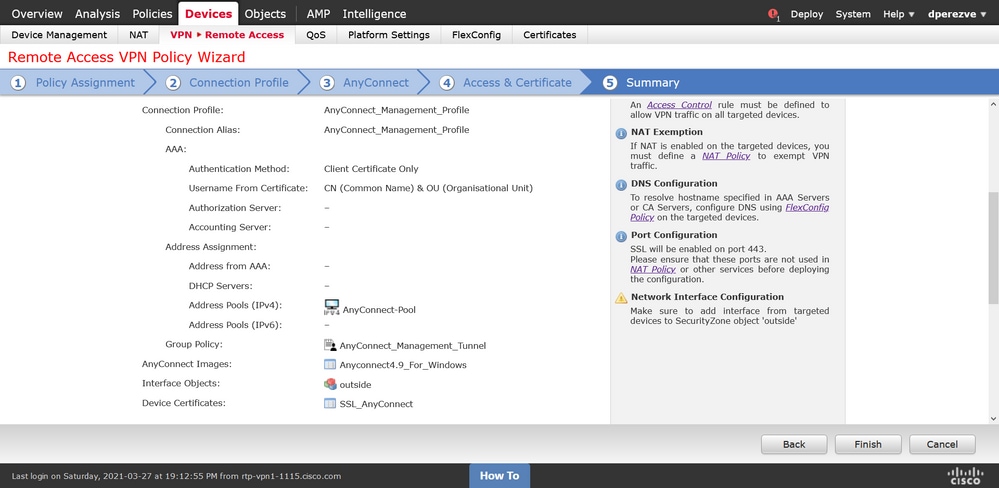
6. Finally, select the Finish button on the Summary tab to add the new AnyConnect configuration.
Step 6. Create URL Object
1. Navigate to Objects > Object Management and select URL from the table of contents. Then, select Add Object in the Add URL drop-down menu.
2. Provide a name for the object and define the URL using the same FQDN/User Group specified in the Management VPN Profile Server List (Step 2). In this example, the URL must be dperezve.jyoungta-labdomain.cisco.com/AnyConnect_Management_Tunnel.
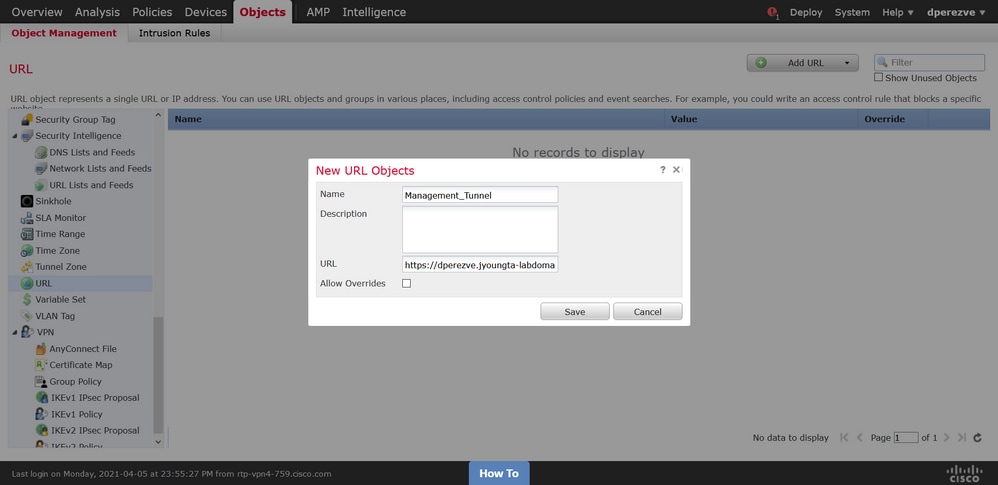
3. Save the changes to add the object to the object list.
Step 7. Define URL Alias
1. To enable the URL Alias in the AnyConnect configuration, navigate to Devices > VPN > Remote Access and click the pencil icon to edit.
2. On the Connection Profile tab, select the configuration at hand, navigate to Aliases, click on Add button. Then, select the URL Object in the URL Alias drop-down menu. Ensure the Enabled checkbox is selected.
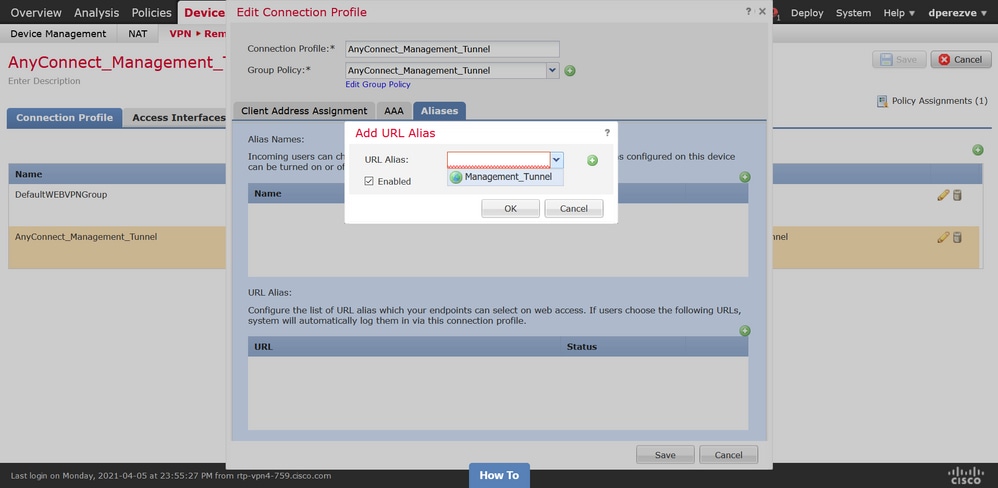
3. Save your changes and deploy the configurations to FTD.
Verify
After the deployment finishes, a first manual AnyConnect connection with the AnyConnect VPN Profile is required. During this connection, the Management VPN Profile is downloaded from FTD and stored in C:\ProgramData\Cisco\Cisco AnyConnect Secure Mobility Client\Profile\MgmtTun. From this point, subsequent connections must be initiated through the Management VPN profile without any user interaction.
Troubleshoot
For certificate validation errors:
- Ensure the root certificate for Certificate Authority (CA) is installed on FTD.
- Ensure an identity certificate signed by the same CA is installed on the Windows Machine Store.
- Ensure the CN field is included in the certificate, and is the same as the FQDN defined in the Server List of the Management VPN Profile and FQDN defined in the URL alias.
For Management tunnel not initiated:
- Ensure the Management VPN Profile has been downloaded and stored in C:\ProgramData\Cisco\Cisco AnyConnect Secure Mobility Client\Profile\MgmtTun.
- Ensure the name for the Management VPN Profile is VpnMgmtTunProfile.xml.
For connectivity problems, collect the DART bundle and contact Cisco TAC for further research.
Revision History
| Revision | Publish Date | Comments |
|---|---|---|
3.0 |
14-Jul-2026
|
Updated Introduction, spelling, spacing, inserted lines to separate sections for readability, and updated alt text. |
2.0 |
17-Jan-2024
|
Updated Machine Translation and Formatting. |
1.0 |
14-Apr-2021
|
Initial Release |

 Feedback
Contact Cisco
- Open a Support Case

- (Requires a Cisco Service Contract)