Introduction
This document describes the step-by-step process to integrate Catalyst SD-WAN with ServiceNow for event-based ticket generation.
Prerequisites
Requirements
Cisco recommends:
- Knowledge of Cisco Catalyst SD-WAN solution.
- An active account in ServiceNow with admin privileges.
- Internet reachability from SD-WAN Manager transport Virtual Private Network (VPN).
- If ServiceNow is hosted on-premises, then ensure connectivity towards it from SD-WAN Manager in VPN 0.
Components Used
The information in this document is based on these software and hardware versions:
- Cisco Catalyst SD-WAN Manager running 20.15.3.1 version.
- C8000v running Cisco IOS® XE Catalyst SD-WAN 17.15.3 version.
The information in this document was created from the devices in a specific lab environment. All of the devices used in this document started with a cleared (default) configuration. If your network is live, ensure that you understand the potential impact of any command.
Network Diagram
 Connectivity diagram
Configurations

Tip: For this integration, we use Webhooks from SD-WAN Manager directly to ServiceNow.
There are two parts to this configuration:
- Configuring ServiceNow API and making it ready to accept and process HTTP POST messages from SD-WAN Manager.
- Configuring SD-WAN Manager Webhook.
ServiceNow Configuration
Create an Instance
- Login to ServiceNow developer portal https://developer.servicenow.com/dev.do using your ServiceNow credentials.
- On Welcome page, click “Request your instance” and chose any release (Zurich, Yokohama or Xanadu).
 Figure-1
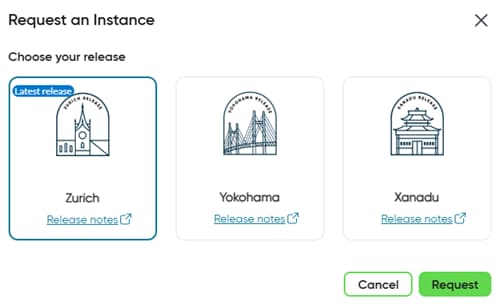 Figure-2
3. Wait for a few minutes while your instance gets ready.
4. Refresh your page after a few minutes and get your Personal Developer Instance (PDI) created.
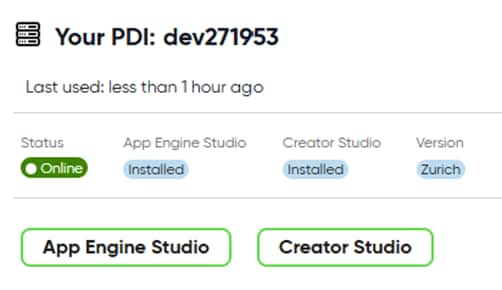 Figure-3
Create an App
5. Click App Engine Studio.
6. Close welcome dialog box.
7. Click Create app.
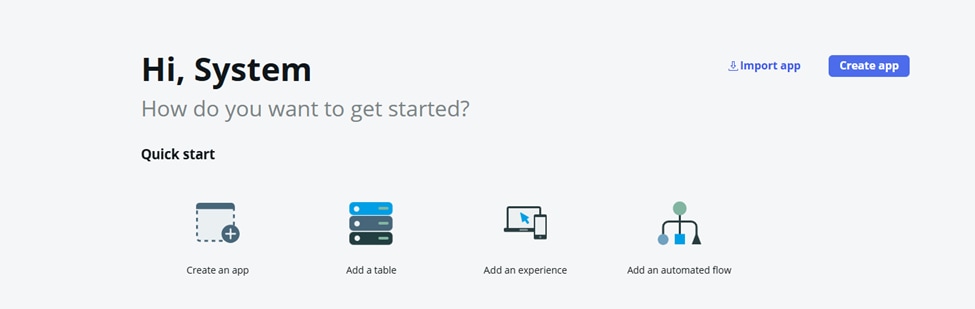 Figure-4
8. Give a name to this app and click Continue.
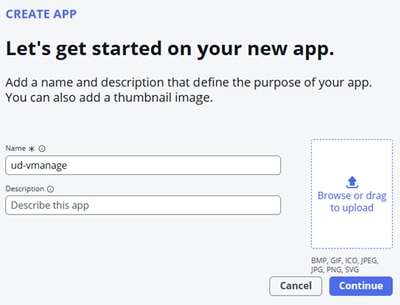 Figure-5
9. Leave roles as default and click Continue.
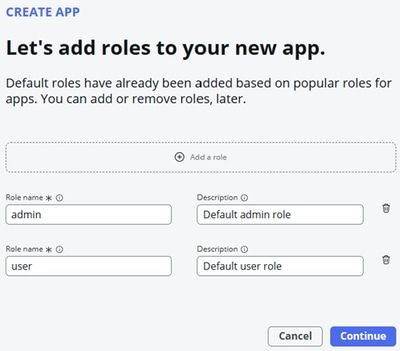 Figure-6
10. Wait for few minutes for this app to be created.
11. Go to app dashboard.
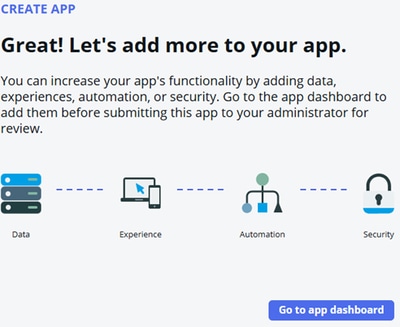 Create APP
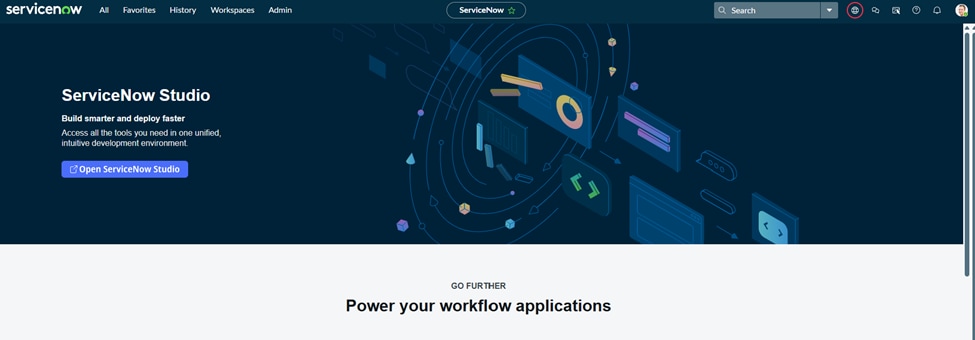
12. From App Home, click “Try it out” to open ServiceNow Studio.
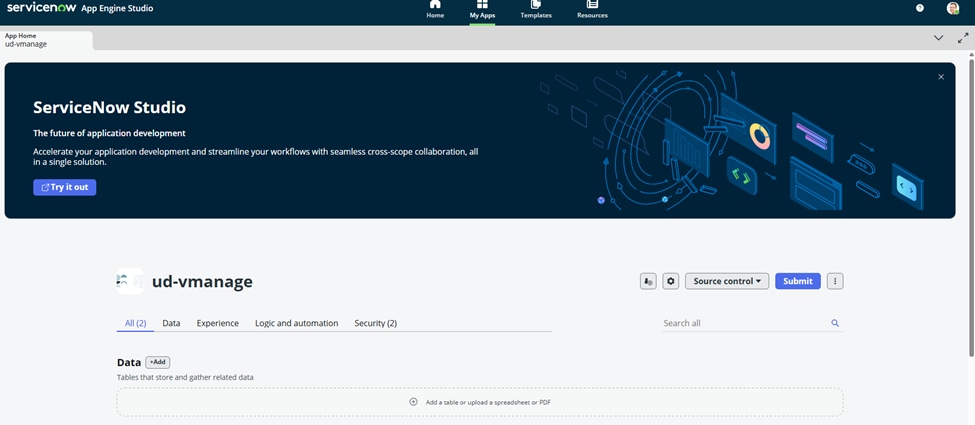 Figure-7
13. Notice the URL. It is something like PDI-ID.service-now.com.
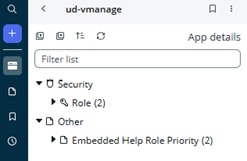
14. In left navigation pane, click the app name. In this case: ud-vmanage.
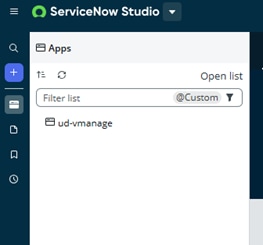 Figure-8
15. Click (+) icon and then click Create File.
 Create file
16. Search and select Scripted REST API.
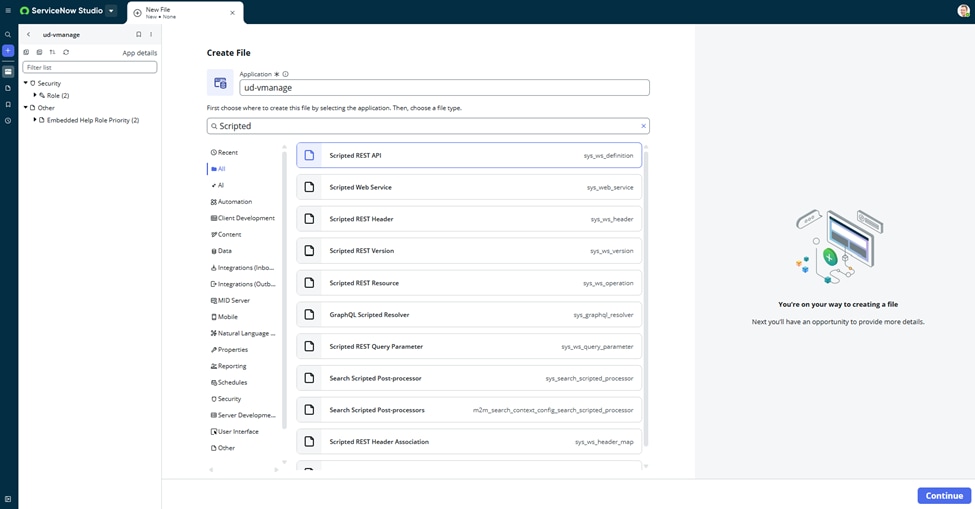 Figure-9
17. Click Continue.
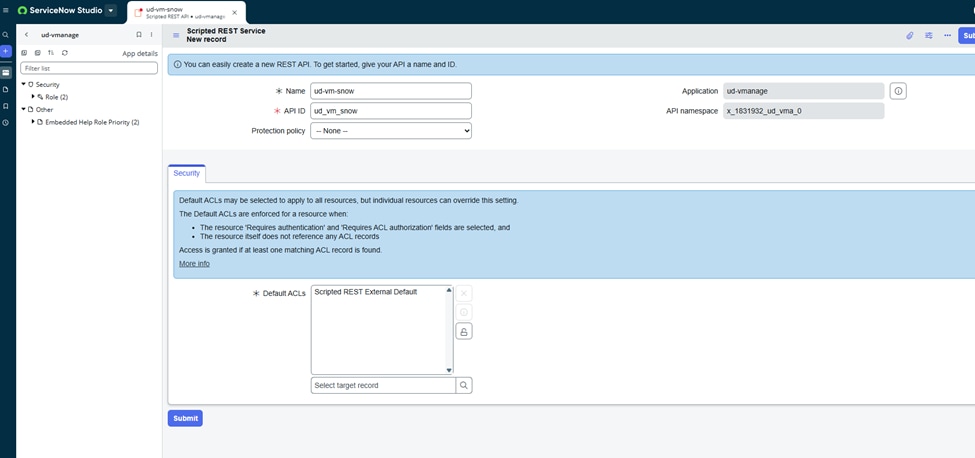
18. Create a new record for Scripted REST Service.
- Enter API Name
- API ID
- Click on Default ACLs lock icon:
- Click on search button to select target record.
- In Access control search, search and click “Scripted REST External Default”.
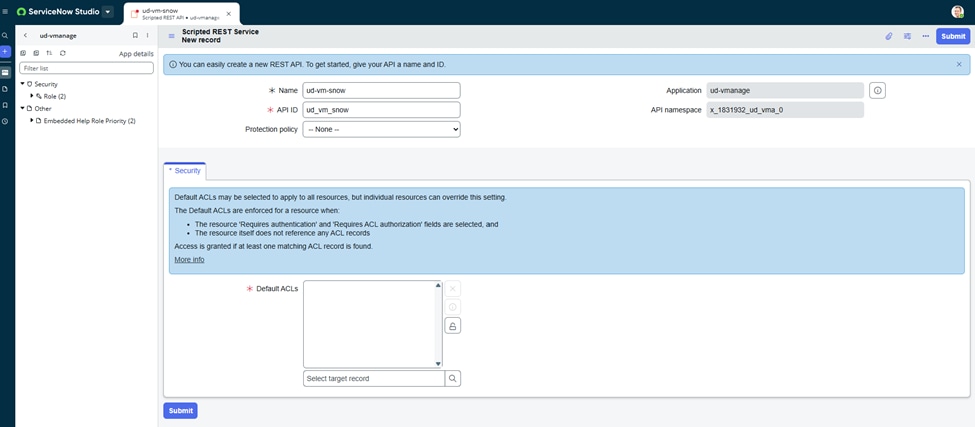 Figure-10
 Figure-11
19. Click Submit.
 Scripted REST Service New Record
20. Create a new resource.
 Figure-12
21. Give the name of this new resource, select HTTP method as POST.
 Figure-13
22. In script section, create a javascript to process the JSON from SD-WAN Manager and create tickets in ServiceNow.
Sample script:
 (function process(request, response) {
    try {
        var payload = request.body.data;

        gs.info("🚨 vManage Webhook Received: " + JSON.stringify(payload));

        var alertMessage = payload.message || 'No message';
        var alertSeverity = payload.severity || 'medium';
        var deviceId = payload.deviceId || 'Unknown device';

        var inc = new GlideRecord('incident');
        inc.initialize();
        inc.short_description = "vManage Alert: " + alertMessage;
        inc.description = "Device ID: " + deviceId + "\nSeverity: " + alertSeverity + "\n\n" + JSON.stringify(payload);
        inc.urgency = (alertSeverity === 'critical') ? 1 : 2;
        inc.impact = 2;
        inc.insert();

        response.setStatus(201);
        response.setBody({ message: "Webhook received and processed." });

    } catch (err) {
        gs.error("❌ vManage Webhook Error: " + err.message);
        response.setStatus(500);
        response.setBody({ error: "Error processing webhook: " + err.message });
    }
})(request, response);

Warning: This is a sample script. Please thoroughly validate the script before use in lab or production environment.
23. Click Submit.
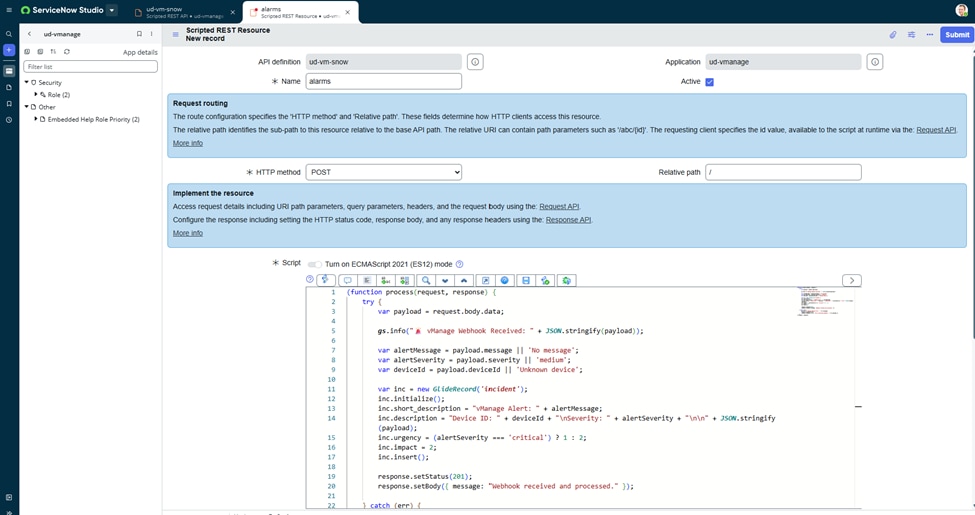 Scripted REST Resource New Record
24. Make a note of the resource path. This is the URL that we need to enter in SD-WAN Manager Webhook configuration.
25. Webhook URL: https://PDI.service-now.com/Resource_path.
Sample URL in this configuration guide: https://dev271953.service-now.com/api/x_1831932_ud_vma_0/ud_vm_snow
SD-WAN Manager Configuration
In this section, we configure SD-WAN Manager Webhook to send the alarms towards ServiceNow API: https://dev271953.service-now.com/api/x_1831932_ud_vma_0/ud_vm_snow
Tip: For a Multi-tenant SD-WAN Manager, apply the respective configuration in tenant view to send Webhook events for that tenant. One can also apply this configuration in Provider view to recieve alarms from Provider domain devices.
SD-WAN Webhook
- Login to SD-WAN Manager and navigate to Monitor > Logs > Alarm Notifications.
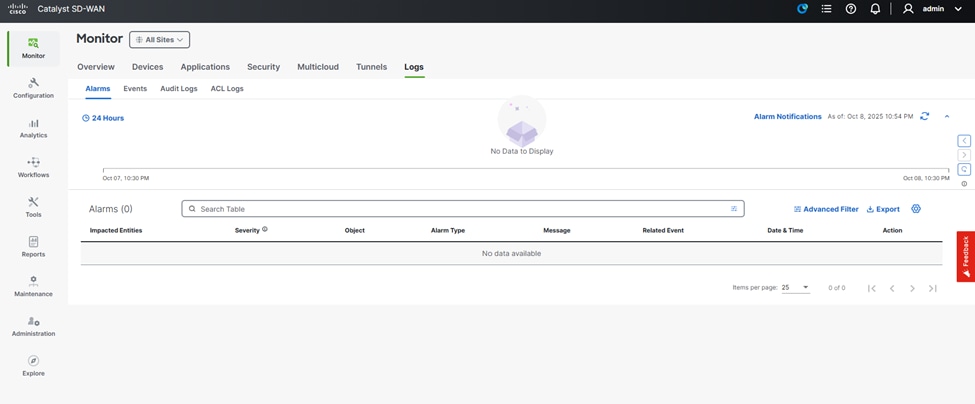 Figure-14
SD-WAN Alarm Notification
2. Click Add Alarm Notifications.
 Figure-15
3. Enter respective fields to setup alarm notification.
- Notification Name
- Alarm Type
- Delivery Method: WebHook
- Choose a Channel for Webhook: Custom
- WebHook URL (API created on step 24 in ServiceNow side configuration): https://dev271953.service-now.com/api/x_1831932_ud_vma_0/ud_vm_snow
- WebHook Threshold: 100
- Leave username and password blank.

Caution: Leaving username and password fields blank in production is a security risk. Move with caution.
4. Click Add Notification.
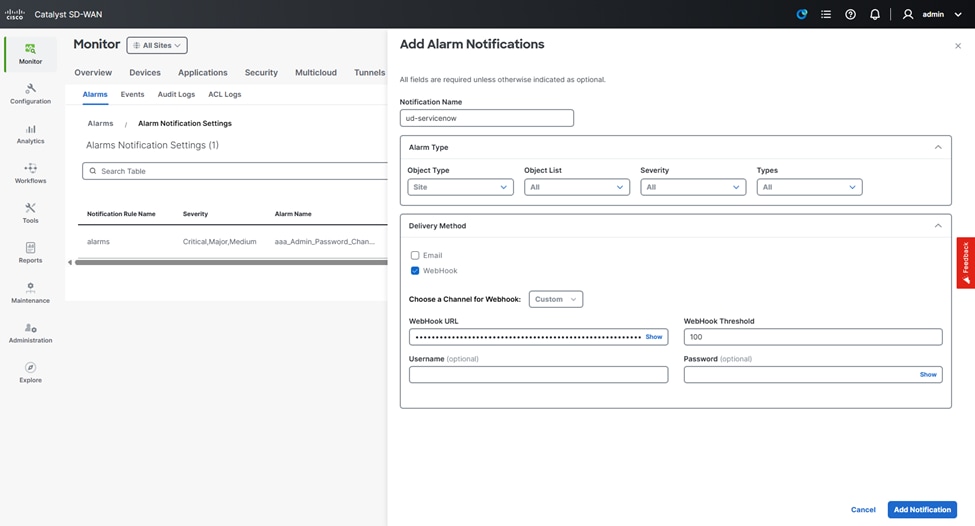 Figure-16
Verify
ServiceNow ticketing page
- Let’s navigate to ServiceNow ticketing page.
- For this, use this URL to access ServiceNow main workspace. It is your PDI.service-now.com/nav_to.do.
- Example: https://dev271953.service-now.com/nav_to.do
 ServiceNow workspace
2. Click All and search & click Incidents.
 Figure-17
3. Incident page opens.
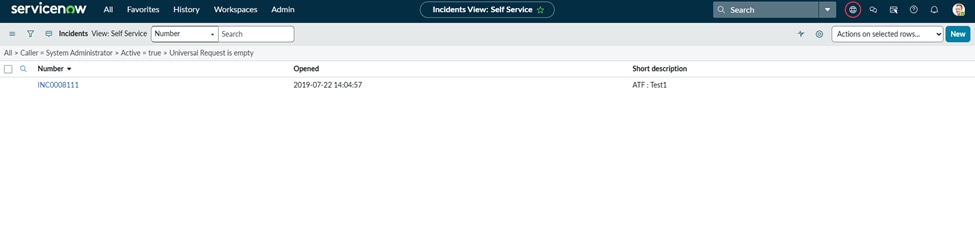 Incident page
4. From SD-WAN Manager CLI vshell, execute the CURL command towards ServiceNow:
curl -X POST “<your_webhook_url_towards_servicenow>”
Success message:
udutt-krk-dmz-vmanage:~$ curl -X POST "https://dev271953.service-now.com/api/x_1831932_ud_vma_0/ud_vm_snow"
{"result":{"message":"Webhook received and processed."}}
5. Notice an incident created on ServiceNow.
 Figure-18
If you notice an authentication error in CURL like below:
udutt-krk-dmz-vmanage:~$ curl -X POST "https://dev271953.service-now.com/api/x_1831932_ud_vma_0/ud_vm_snow"
{"error":{"message":"User is not authenticated","detail":"Required to provide Auth information"},"status":"failure"}
Steps to fix authentication error
- Navigate back to ServiceNow Studio page, access your app (example: ud-vmanage) from left navigation pane and select your Scripted REST API (example ud-vm-snow).
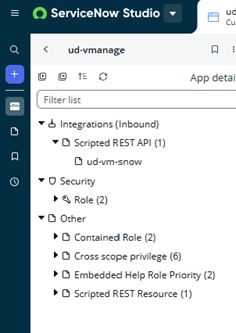 Figure-19
2. Scroll down to Resources and click the resource (example: alarms).
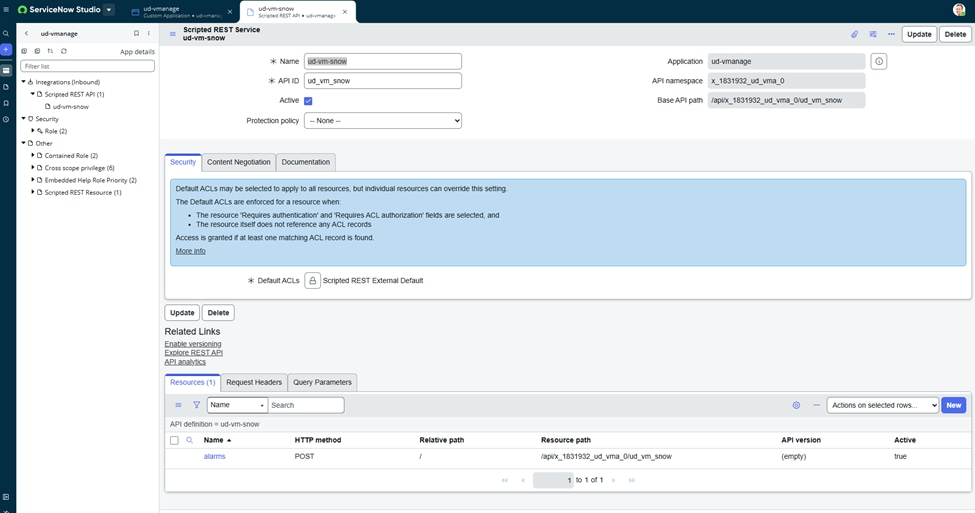 Figure-20
3. Scroll down to Security and uncheck authentication and ACL authorization as shown below.
a. Requires authentication
b. Requires ACL authorization
c. Click Update
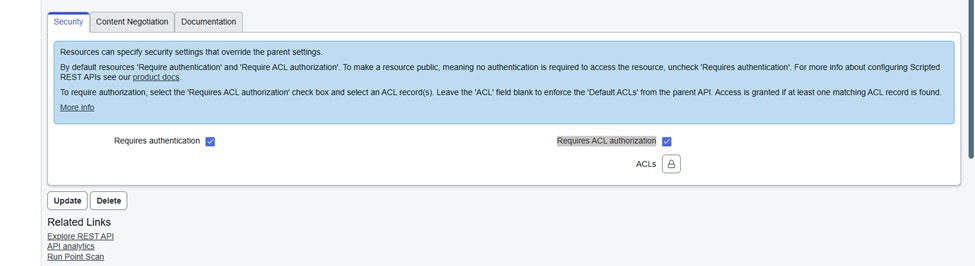 Figure-21
4. Execute CURL command again from SD-WAN Manager vshell which is successful this time.
Generating alarms
5. Now generate an alarm in SD-WAN Manager by, for example:
a. Shutting down an interface of one WAN Edge Router within your SD-WAN overlay.
b. Clearing control connections from any SD-WAN Manager or any WAN Edge Router.
c. Performing a port-hop.

Please check the intended site to generate alarms during Webhook configuration.
6. Notice Incidents created on ServiceNow page.
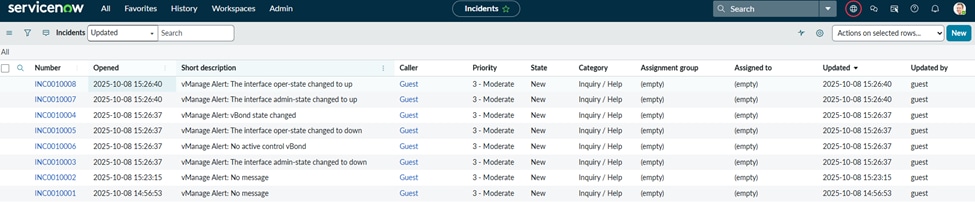 Figure-22
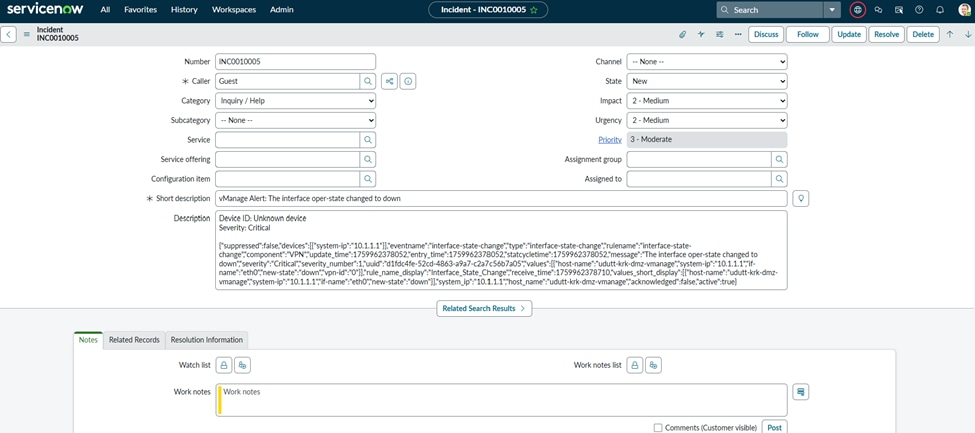 Figure-23
 Figure-24
Troubleshoot
1. From the SD-WAN Manager side, check the content of /var/log/nms/vmanage-server.log for any errors related to HTTP POST messages.
Example of successful Webhook:
03-Oct-2025 12:21:05,394 UTC INFO  [] [udutt-krk-vmanage] [DataCollectionManager] (Thread-157) || ******* Requested device 10.1.1.3, Adding to dataCollectionQueue, Sync type DATA_SYNC.
03-Oct-2025 12:21:05,677 UTC INFO  [] [udutt-krk-vmanage] [EventDataCollector] (device-event-processing-2) || Configuration change event from device. Device IP: [10.1.1.3] Device type: [vsmart] User: [admin]
03-Oct-2025 12:21:05,677 UTC INFO  [] [udutt-krk-vmanage] [DataCollectionManager] (Thread-157) || ******* Requested device 10.1.1.3, Adding to dataCollectionQueue, Sync type DATA_SYNC.
03-Oct-2025 12:21:06,745 UTC INFO  [] [udutt-krk-vmanage] [DeviceHistoryConfigurationDAO] (device-config-0) || saveConfigToElasticDataStore entryTime 1761567666745  personality vsmart
03-Oct-2025 12:21:07,192 UTC INFO  [] [udutt-krk-vmanage] [NotificationsConsumer] (pool-59-thread-9) || Response status code after sending webhook: 201
03-Oct-2025 12:21:07,196 UTC INFO  [] [udutt-krk-vmanage] [NotificationsConsumer] (pool-59-thread-1) || Response status code after sending webhook: 201
Example of unsuccessful Webhook request:
03-Oct-2025 12:24:46,949 UTC INFO  [] [udutt-krk-vmanage] [DataCollectionManager] (Thread-157) || ******* Requested device 10.1.1.3, Adding to dataCollectionQueue, Sync type DATA_SYNC.
03-Oct-2025 12:24:48,065 UTC INFO  [] [udutt-krk-vmanage] [DeviceHistoryConfigurationDAO] (device-config-0) || saveConfigToElasticDataStore entryTime 1761567888065  personality vsmart
03-Oct-2025 12:24:48,305 UTC INFO  [] [udutt-krk-vmanage] [NotificationsConsumer] (pool-59-thread-15) || Response status code after sending webhook: 401
03-Oct-2025 12:24:48,305 UTC INFO  [] [udutt-krk-vmanage] [NotificationsConsumer] (pool-59-thread-14) || Response status code after sending webhook: 401
2. We can also perform packet capture to confirm healthy session between SD-WAN Manager and ServiceNow.
 Packet capture with hidden public IP
Related Information
 Feedback